MQTT
1.MQTT协议概述
MQTT是一种基于发布/订阅模式的轻量级消息传输协议,设计用于低带宽、高延迟或不稳定的网络环境,广泛应用于物联网领域
1.1 MQTT协议的应用场景
1.智能家居、车联网、工业物联网:MQTT可以用于连接各种家电设备和传感器,实现设备之间的通信和控制
2.远程监控和控制 : MQTT可以用于将传感器数据发布到云平台,供其他设备或应用程序订阅和使用
3.消息通知:MQTT可以用于提供实时消息通知功能
4.资源监控与管理:MQTT能够提供对物联网设备的实时监控和管理功能
5.数据采集和分析:MQTT也可以用于数据采集和分析
1.2 MQTT协议优势
1.常见的计算机语言(C/C++、Java、Python、Go...)都有支持MQTT协议的客户端
2.MQTT协议是建立在TCP/IP协议基础之上,所以MQTT协议安全可靠
3.服务质量设置,MQTT协议提供了三种服务质量配置分别为:
Qos 0:消息可能丢失
Qos 1:消息不会丢失,但是可能重复
Qos 2:消息不会丢失也不会重复
4.心跳保活:由于网络问题可能造成连接陷于假死状态,为了判断客户端和代理是否出现异常,MQTT定义自己的心跳机制,定期向代理发送报文,以便于快速识别出异常连接,让客户端快速与代理断开连接
5.持久会话: 代理保留客户端发送过来的消息,以便于消息订阅端上线立刻获取消息
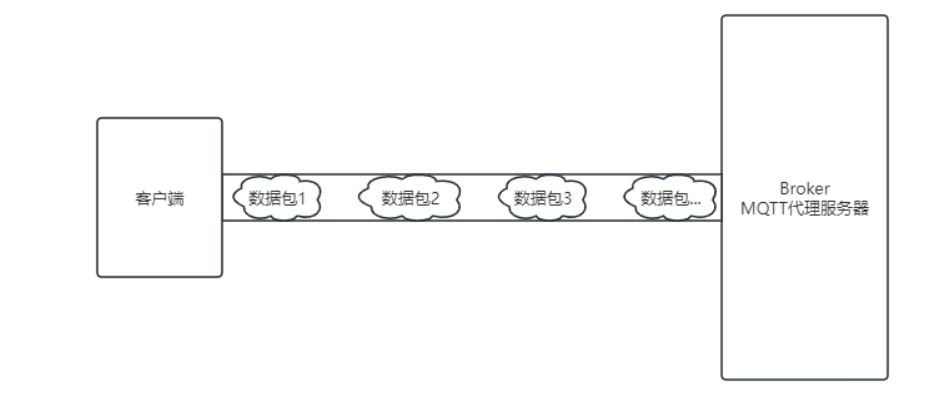
1.3 MQTT协议报文
MQTT报文(数据包)由三部分组成:
1.固定报头(Fixed header):所有数据包中都包含此报头,用来表示数据包的类型,以及数据包的分组累标识
2.可变报头(Variable header):存在于部分MQTT数据包中,数据包类型决定了可变头是否存在及其具体内容
3.有效载荷(Payload):存在于部分MQTT数据包中,表示客户端收到的具体内容
1.4 MQTT协议的工作原理
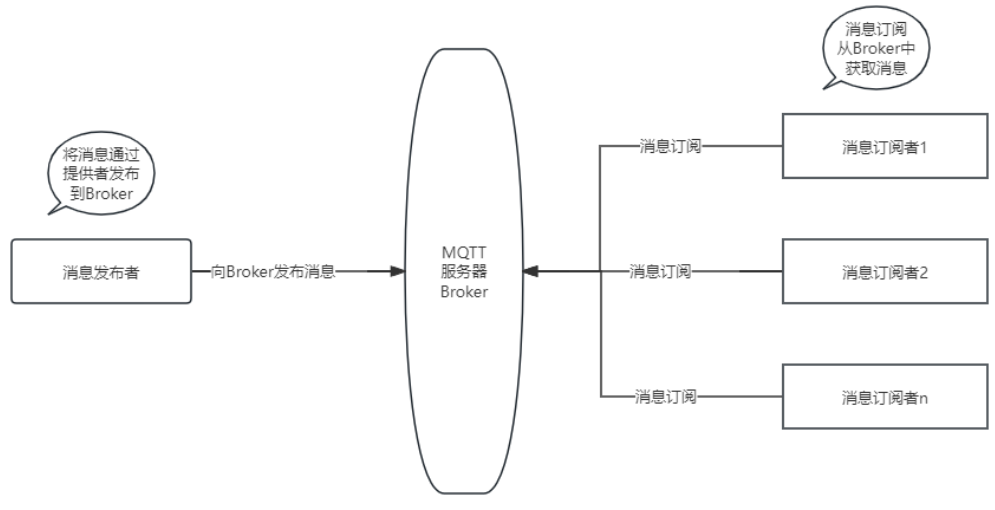
MQTT协议基于TCP/IP协议,TCP/IP协议是一个安全稳定的协议,通信需要服务端和客户端经历三次握手四次挥手,建立一个稳定的通道然后在进行数据传输
MQTT协议建立在TCP/IP协议之上,也是需要编写服务端(上图中的Broker)和客户端(消息发布者和消息订阅者)
2.MQTT代理服务器介绍和搭建
EMQX官网地址: https://www.emqx.io/zh
介绍:
1.开源大规模分布式MQTT代理服务器
2.单台并发连接数可以高达一亿,每秒处理百万级消息
3.安全可靠的消息传递
2.1 EMQX安装: windows
1.下载地址: https://www.emqx.io/zh/get-started
2.安装步骤:
第一步: 下载 emqx-5.3.2-windows-amd64.zip 安装包,版本可能和我这个不同
第二步: 解压
第三步: 打开命令行(以管理员身份运行),切换到解压目录的bin目录下
第四步: 安装,在bin目录下执行EMQX安装命令 emqx.cmd install,完成之后有类似下面的输出,说明安装成功,只需要安装一次(运行命令) D:\app\emqx-5.3.2-windows-amd64\bin>emqx.cmd install
EMQX_NODE__DB_ROLE node.role: core
EMQX_NODE__DB_BACKEND node.db_backend: mnesia
D:\app\emqx-5.3.2-windows-amd64\erts-13.2.2.4\bin\erlsrv.exe: Service emqx_5.3.2 added to system.
SC ChangeServiceConfig 成功
第五步(可选择):如果想将EMQX从windows上卸载,可以执行 emqx.cmd uninstall 命令
第六步:去windows服务列表中找到第四步安装的EMQX的服务,鼠标右键启动
第七步:在命令行输入 emqx.cmd console 命令,查看是否启动成功,如果有类似以下日志启动成功 D:\app\emqx-5.3.2-windows-amd64\bin>emqx.cmd console
EMQX_LOG__CONSOLE_HANDLER__ENABLE log.console.enable: true
EMQX_NODE__DB_ROLE node.role: core
EMQX_NODE__DB_BACKEND node.db_backend: mnesia
D:\app\emqx-5.3.2-windows-amd64>D:\app\emqx-5.3.2-windows-amd64\erts-13.2.2.4\bin\erl.exe -mode embedded -boot "D:\app\emqx-5.3.2-windows-amd64\releases\5.3.2\start" -config "D:\app\emqx-5.3.2-windows-amd64\data\configs\app.2024.05.06.16.38.19.config" -args_file "D:\app\emqx-5.3.2-windows-amd64\data\configs\vm.2024.05.06.16.38.19.args" -mnesia dir 'd:/app/emqx-5.3.2-windows-amd64/data/mnesia/emqx@127.0.0.1'
Listener ssl:default on 0.0.0.0:8883 started.
Listener tcp:default on 0.0.0.0:1883 started.
Listener ws:default on 0.0.0.0:8083 started.
Listener wss:default on 0.0.0.0:8084 started.
Listener http:dashboard on :18083 started.
EMQX 5.3.2 is running now!
Eshell V13.2.2.4 (abort with ^G)
v5.3.2(emqx@127.0.0.1)1>
第八步:通过浏览器访问控制台http://127.0.0.1:18083,默认初始化用户名: admin,默认密码: public,进入之后会让你重新修改密码
注意事项: (第六步+第七步)这种启动方式在开发时使用,如果想正式环境使用请遵循官网命令启动介绍: 正式环境启动在bin目录下直接输入 emqx start进行EMQX启动,这时不需要(第六步和第七步)
官网命令详细使用地址: https://www.emqx.io/docs/zh/latest/admin/cli.html
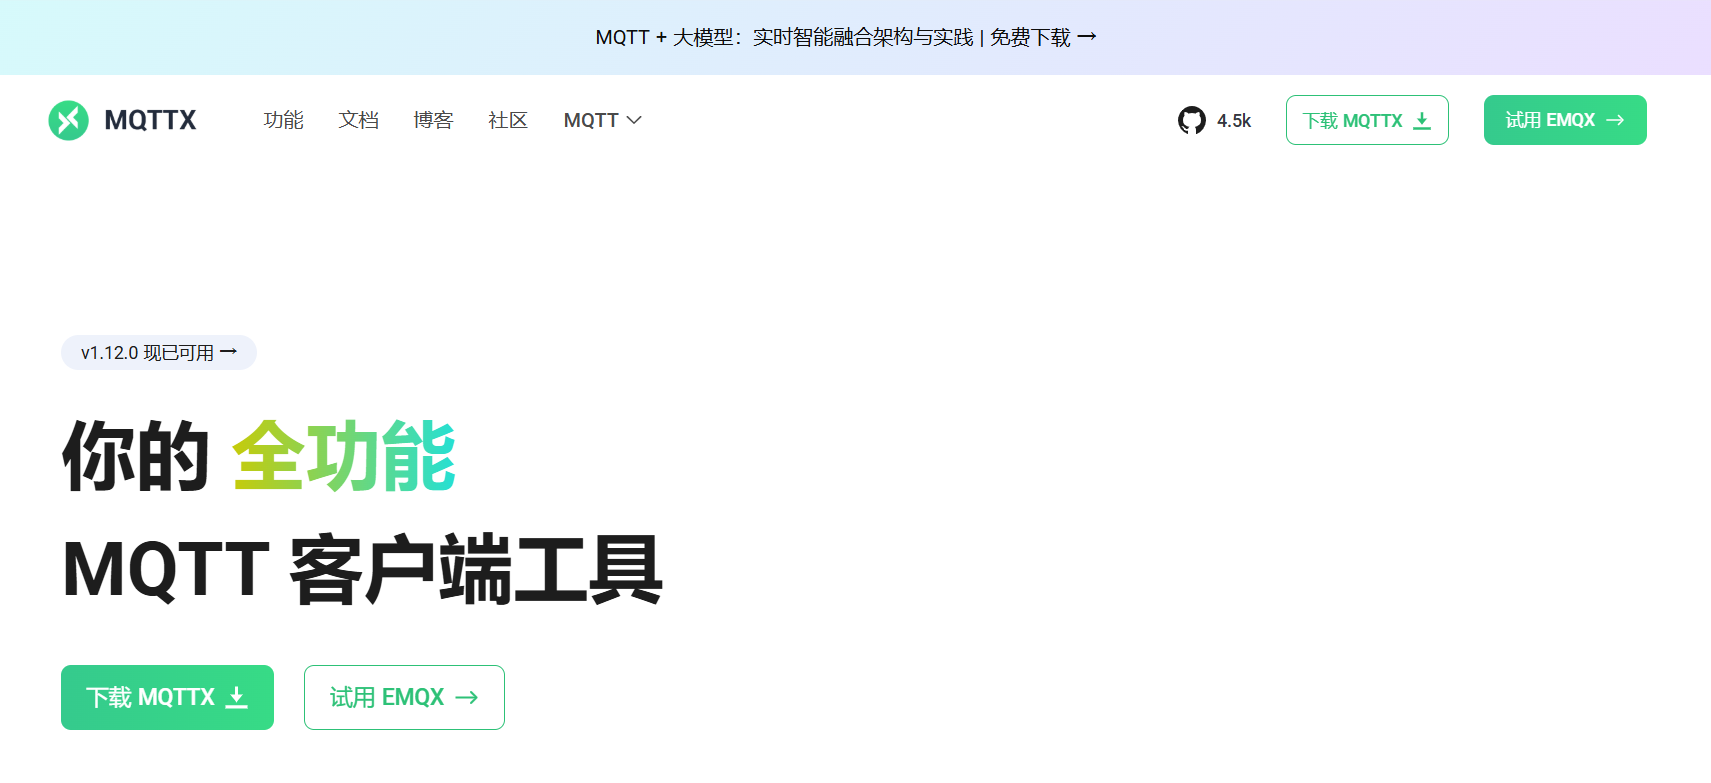
2.2 MQTT客户端工具MQTTX
EMQX官网自带工具MQTTX,官网地址: https://mqttx.app/zh/downloads
傻瓜式安装,无脑下一步
若依框架融合mqtt
仓库地址:https://gitee.com/peng-chuanbin/iot-mqtt.git
实现效果:(初步Demo实现)
点击网页的按钮(发送数据),mqtt能够接收到发送的数据
mqtt发送数据,Java程序能够接收到,并且存储到数据库中
1.下载mqttx
2.运行项目
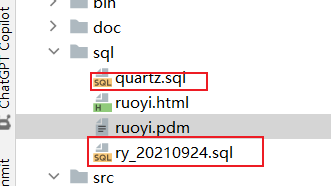
1.新建一个mqtt数据库,然后运行sql文件,修改yaml中的数据库配置
2.pom.xml添加mqtt的依赖
xml
        <!--mqtt-->
        <dependency>
            <groupId>org.springframework.boot</groupId>
            <artifactId>spring-boot-starter-integration</artifactId>
        </dependency>

        <dependency>
            <groupId>org.springframework.integration</groupId>
            <artifactId>spring-integration-stream</artifactId>
        </dependency>

        <dependency>
            <groupId>org.springframework.integration</groupId>
            <artifactId>spring-integration-mqtt</artifactId>
        </dependency>
3.utils包下新建一个mqtt包,添加三个文件
java
package com.ruoyi.common.utils.mqtt;

@Component
@ConfigurationProperties("spring.mqtt")
public class MqttConfig {
    @Autowired
    private MqttPushClient mqttPushClient;

    /**
     * 用户名
     */
    private String username;
    /**
     * 密码
     */
    private String password;
    /**
     * 连接地址
     */
    private String hostUrl;
    /**
     * 客户Id
     */
    private String clientId;
    /**
     * 默认连接话题
     */
    private String defaultTopic;
    /**
     * 超时时间
     */
    private int timeout;
    /**
     * 保持连接数
     */
    private int keepalive;
    /**
     * mqtt功能使能
     */
    private boolean enabled;

    public String getUsername() {
        return username;
    }

    public void setUsername(String username) {
        this.username = username;
    }

    public String getPassword() {
        return password;
    }

    public void setPassword(String password) {
        this.password = password;
    }

    public String getHostUrl() {
        return hostUrl;
    }

    public void setHostUrl(String hostUrl) {
        this.hostUrl = hostUrl;
    }

    public String getClientId() {
        return clientId;
    }

    public void setClientId(String clientId) {
        this.clientId = clientId;
    }

    public String getDefaultTopic() {
        return defaultTopic;
    }

    public void setDefaultTopic(String defaultTopic) {
        this.defaultTopic = defaultTopic;
    }

    public int getTimeout() {
        return timeout;
    }

    public void setTimeout(int timeout) {
        this.timeout = timeout;
    }

    public int getKeepalive() {
        return keepalive;
    }

    public void setKeepalive(int keepalive) {
        this.keepalive = keepalive;
    }

    public boolean isEnabled() {
        return enabled;
    }

    public void setEnabled(boolean enabled) {
        this.enabled = enabled;
    }

    @Bean
    public MqttPushClient getMqttPushClient() {
       if (enabled == true) {
            mqttPushClient.connect(hostUrl, clientId, username, password, timeout, keepalive);
            //订阅java主题   #重要,这里确定主题是哪一个
            mqttPushClient.subscribe("java",0);
        }
        return mqttPushClient;
    }
}
PushCallback
java
package com.ruoyi.common.utils.mqtt;

@Component
public class PushCallback implements MqttCallback {
    private static final Logger logger = LoggerFactory.getLogger(MqttPushClient.class);

    @Autowired
    private MqttConfig mqttConfig;

    private static MqttClient client;

    private static String _topic;
    private static String _qos;
    private static String _msg;

    @Override
    public void connectionLost(Throwable throwable) {
        // 连接丢失后,一般在这里面进行重连
        logger.info("连接断开,可以做重连");
        if (client == null || !client.isConnected()) {
            mqttConfig.getMqttPushClient();
        }
    }

    @Override
    public void messageArrived(String topic, MqttMessage mqttMessage) throws Exception {
        // subscribe后得到的消息会执行到这里面
        logger.info("接收消息主题 : " + topic);
        logger.info("接收消息Qos : " + mqttMessage.getQos());
        logger.info("接收消息内容 : " + new String(mqttMessage.getPayload()));
    }

    @Override
    public void deliveryComplete(IMqttDeliveryToken iMqttDeliveryToken) {
        logger.info("deliveryComplete---------" + iMqttDeliveryToken.isComplete());
    }

}
MqttPushClient
java
package com.ruoyi.common.utils.mqtt;

@Component
public class MqttPushClient {
    private static final Logger logger = LoggerFactory.getLogger(MqttPushClient.class);

    @Autowired
    private PushCallback pushCallback;

    private static MqttClient client;

    private static MqttClient getClient() {
        return client;
    }

    private static void setClient(MqttClient client) {
        MqttPushClient.client = client;
    }

    /**
     * 客户端连接
     *
     * host  ip+端口
     * clientID  客户端Id
     * username  用户名
     * password  密码
     * timeout 超时时间
     * keepalive 保留数
     */
    public void connect(String host, String clientID, String username, String password, int timeout, int keepalive) {
        MqttClient client;
        try {
            client = new MqttClient(host, clientID, new MemoryPersistence());
            MqttConnectOptions options = new MqttConnectOptions();
            options.setCleanSession(true);
            options.setUserName(username);
            options.setPassword(password.toCharArray());
            options.setConnectionTimeout(timeout);
            options.setKeepAliveInterval(keepalive);
            MqttPushClient.setClient(client);
            try {
                client.setCallback(pushCallback);
                client.connect(options);
            } catch (Exception e) {
                e.printStackTrace();
            }
        } catch (Exception e) {
            e.printStackTrace();
        }
    }

    /**
     * 发布
     * qos 连接方式
     * retained 是否保留
     * topic 主题
     * pushMessage 消息体
     */
    public AjaxResult publish(int qos, boolean retained, String topic, String pushMessage) {
        MqttMessage message = new MqttMessage();
        message.setQos(qos);
        message.setRetained(retained);
        message.setPayload(pushMessage.getBytes());
        MqttTopic mTopic = MqttPushClient.getClient().getTopic(topic);
        if (null == mTopic) {
            logger.error("topic not exist");
        }
        MqttDeliveryToken token;
        try {
            token = mTopic.publish(message);
            token.waitForCompletion();
            return success();
        } catch (MqttPersistenceException e) {
            e.printStackTrace();
            return error();
        } catch (MqttException e) {
            e.printStackTrace();
            return error();
        }
    }

    /**
     * 订阅某个主题
     * topic 主题
     * qos 连接方式
     */
    public void subscribe(String topic, int qos) {
        logger.info("开始订阅主题" + topic);
        try {
            MqttPushClient.getClient().subscribe(topic, qos);
        } catch (MqttException e) {
            e.printStackTrace();
        }
    }

}
4.application.yml
如果有服务器了,直接修改broker.emqx.io这个就可以了,其他的都无所谓
broker.emqx.io:官方测试的
yaml
  # mqtt
  mqtt:
    username: pcb # 用户名
    password: 123456 # 密码
    hostUrl: tcp://broker.emqx.io:1883 # tcp://ip:端口   #重要
    clientId: clientIdBamBam # 客户端id
    defaultTopic: topic,topic1 # 订阅主题   #重要
    timeout: 100 # 超时时间 (单位:秒)
    keepalive: 60 # 心跳 (单位:秒)
    enabled: true # 是否使能mqtt功能
5.启动mqttx,运行项目,访问 http://localhost/ruoyi
mqttx发送数据,Java程序接收数据
3.设计前端界面
新建一个WlwController
java
package com.ruoyi.project.system.wlw.controller;
@Controller
@RequestMapping("/system/wlw")
public class WlwController {
private String prefix = "system/wlw";
@GetMapping()
public String wlw()
{
return prefix + "/w";
}
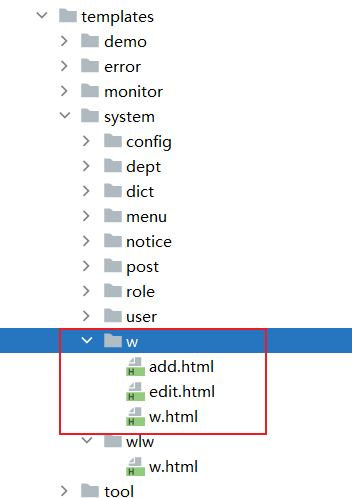
}在resources包下的templates包中system包新建一个w.html界面,用来发送数据和显示数据
html
<!DOCTYPE html>
<html lang="zh" xmlns:th="http://www.thymeleaf.org">
<head>
    <meta charset="UTF-8">
    <title>wlw</title>
</head>
<body>
    1
</body>
</html>
ShiroConfig放开拦截
java
    /**
     * Shiro过滤器配置
     */
    @Bean
    public ShiroFilterFactoryBean shiroFilterFactoryBean(SecurityManager securityManager)
    {
        // Shiro连接约束配置,即过滤链的定义
        LinkedHashMap<String, String> filterChainDefinitionMap = new LinkedHashMap<>();
        // 对静态资源设置匿名访问
        filterChainDefinitionMap.put("/favicon.ico**", "anon");
        filterChainDefinitionMap.put("/ruoyi.png**", "anon");
        filterChainDefinitionMap.put("/html/**", "anon");
        filterChainDefinitionMap.put("/css/**", "anon");
        filterChainDefinitionMap.put("/docs/**", "anon");
        filterChainDefinitionMap.put("/fonts/**", "anon");
        filterChainDefinitionMap.put("/img/**", "anon");
        filterChainDefinitionMap.put("/ajax/**", "anon");
        filterChainDefinitionMap.put("/js/**", "anon");
        filterChainDefinitionMap.put("/ruoyi/**", "anon");
        filterChainDefinitionMap.put("/captcha/captchaImage**", "anon");
        // 退出 logout地址,shiro去清除session
        filterChainDefinitionMap.put("/logout", "logout");
        // 不需要拦截的访问
        filterChainDefinitionMap.put("/login", "anon,captchaValidate");


        // 不需要拦截的访问 wlw   添加这句话
        filterChainDefinitionMap.put("/system/wlw", "anon,captchaValidate");


    }
访问 http:/localhost:80/ruoyi/system/wlw
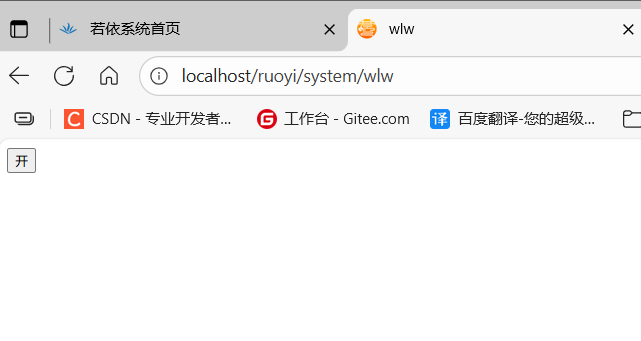
4.设计假数据
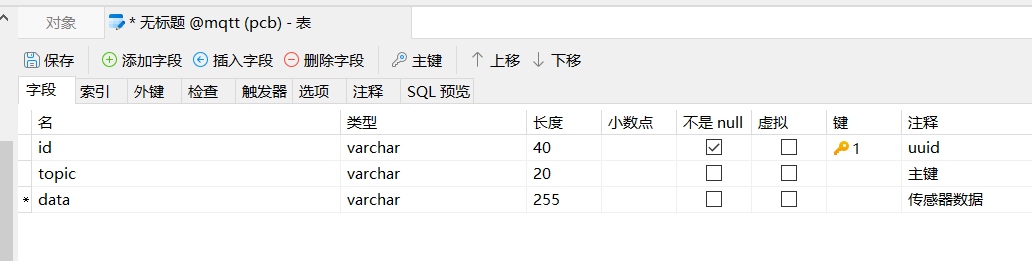
新建数据库表w
使用若依自动生成代码
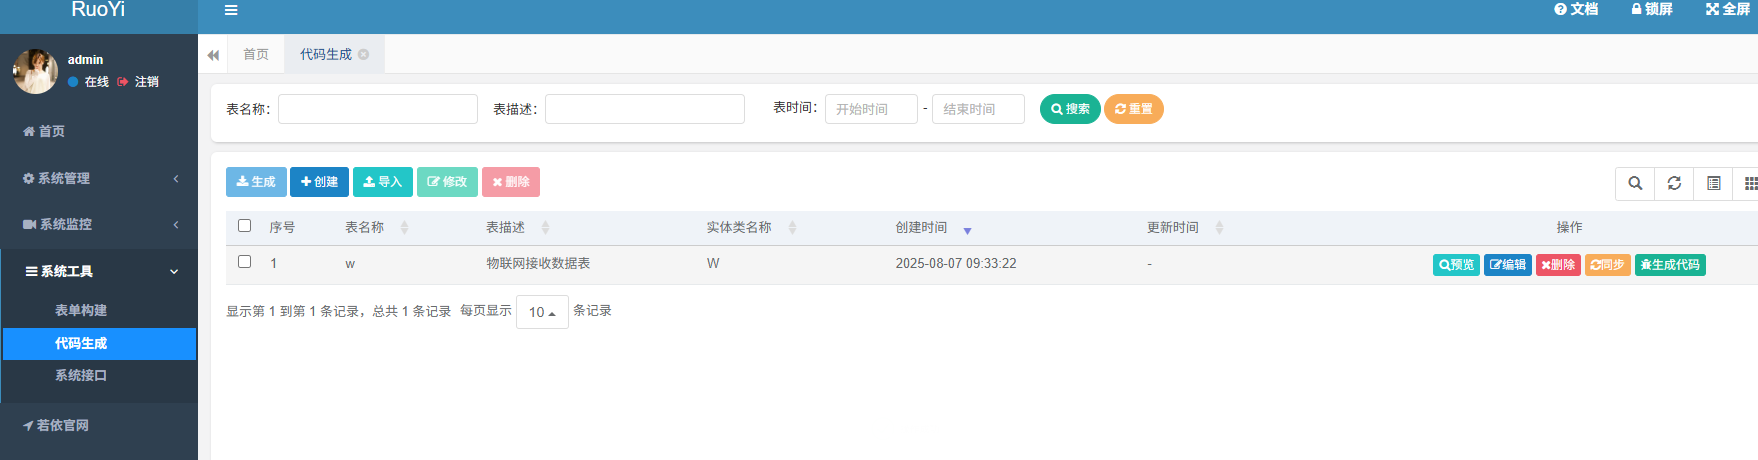
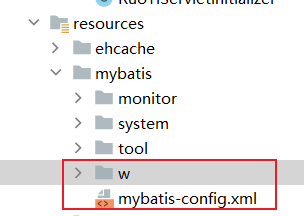
将生成的代码放到指定位置
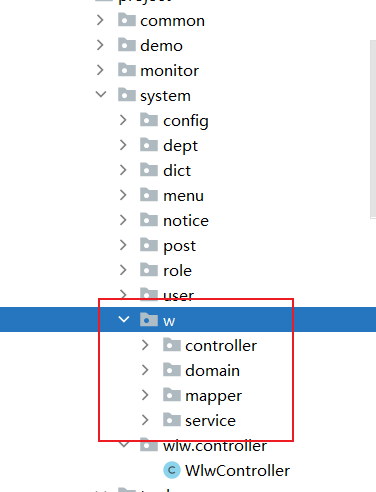
xml文件,并且添加一句话:在执行插入(INSERT)操作之前,先生成一个主键值id,并将其设置到要插入的对象中
xml
<?xml version="1.0" encoding="UTF-8" ?>
<!DOCTYPE mapper
PUBLIC "-//mybatis.org//DTD Mapper 3.0//EN"
"http://mybatis.org/dtd/mybatis-3-mapper.dtd">
<mapper namespace="com.ruoyi.project.system.w.mapper.WMapper">

    <resultMap type="W" id="WResult">
        <result property="id"    column="id"    />
        <result property="topic"    column="topic"    />
        <result property="data"    column="data"    />
    </resultMap>

    <sql id="selectWVo">
        select id, topic, data from w
    </sql>

    <insert id="insertW" parameterType="W">

        //添加这句话
        <selectKey keyProperty="id" resultType="String" order="BEFORE" >
            SELECT REPLACE(UUID(),'-','') from dual
        </selectKey>

        insert into w
        <trim prefix="(" suffix=")" suffixOverrides=",">
            <if test="id != null">id,</if>
            <if test="topic != null">topic,</if>
            <if test="data != null">data,</if>
         </trim>
        <trim prefix="values (" suffix=")" suffixOverrides=",">
            <if test="id != null">#{id},</if>
            <if test="topic != null">#{topic},</if>
            <if test="data != null">#{data},</if>
         </trim>
    </insert>

</mapper>
前端文件
启动项目,新建菜单
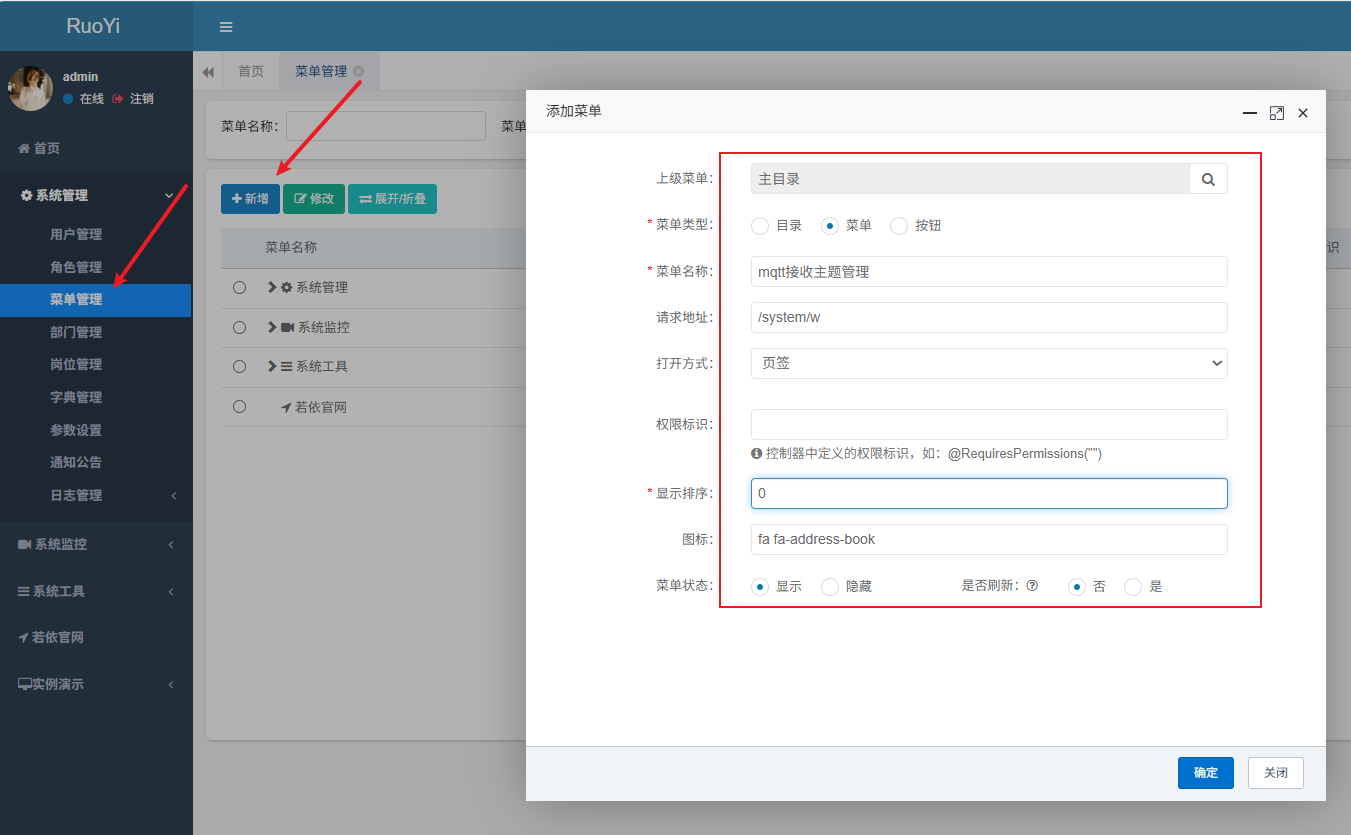
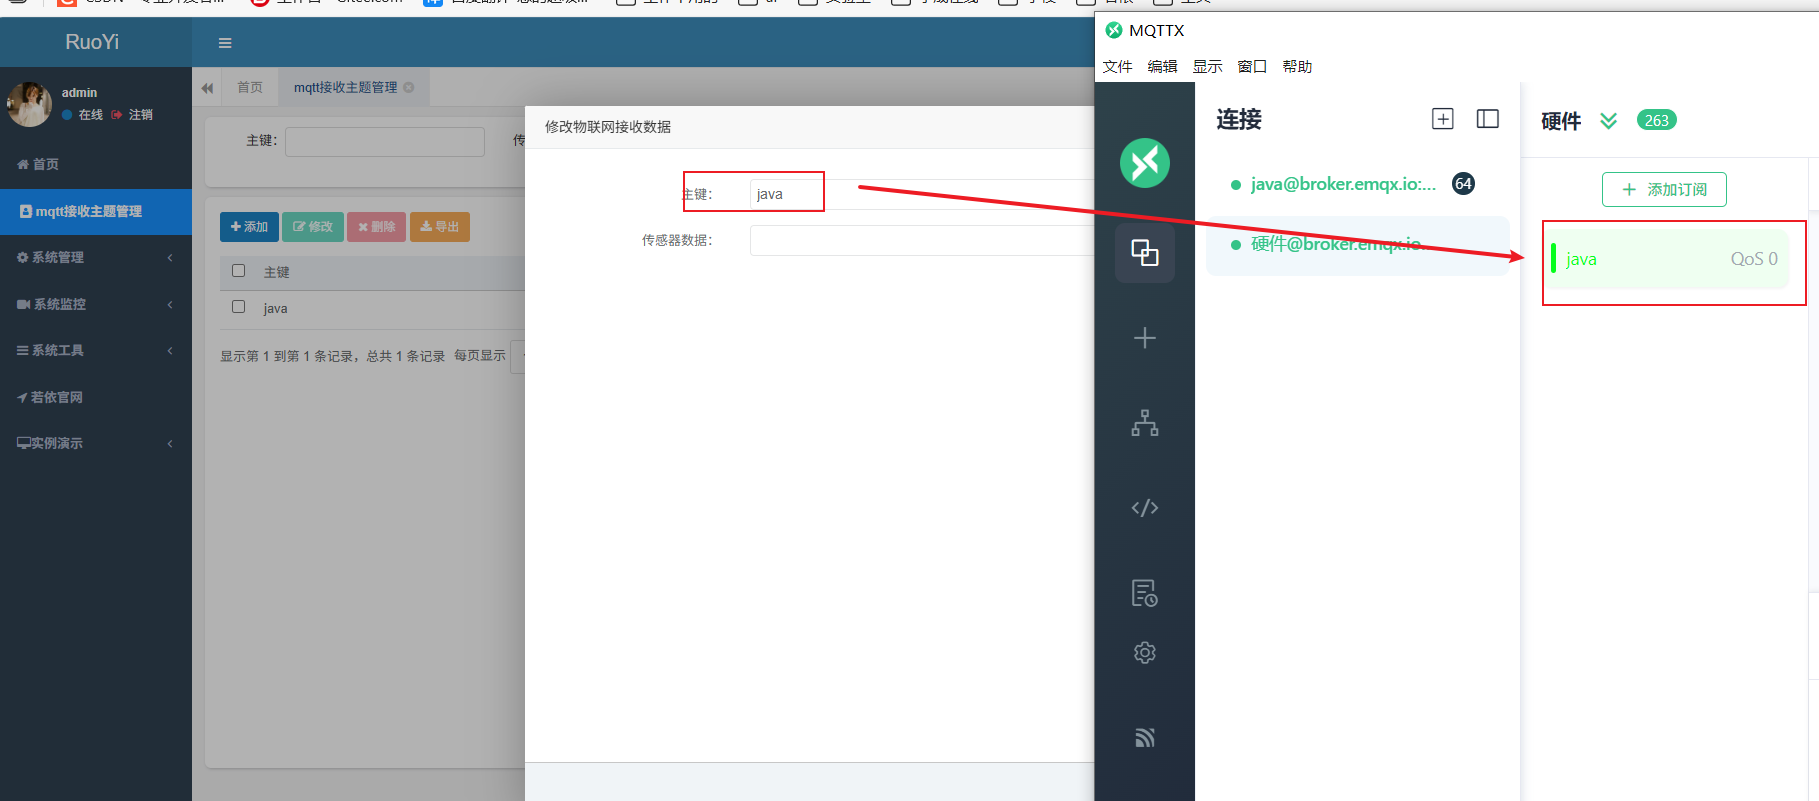
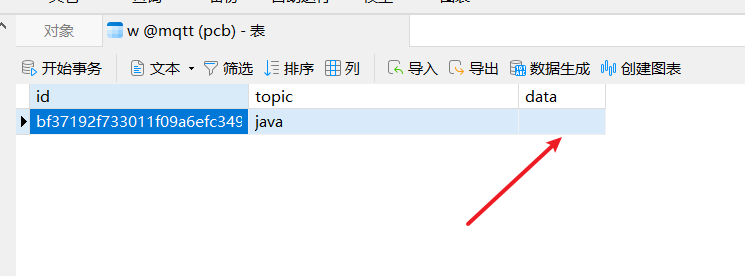
新增加一个Java订阅,新增加了之后数据库就会显示一条数据:id=uuid,dtopic=java,data=null
这里要和MqttConfig中,选择订阅的主题一样
注意:代码写的位置
java
package com.ruoyi.common.utils.mqtt;

@Component
public class PushCallback implements MqttCallback {
    private static final Logger logger = LoggerFactory.getLogger(MqttPushClient.class);

    @Autowired
    private MqttConfig mqttConfig;

    private static MqttClient client;

    private static String _topic;
    private static String _qos;
    private static String _msg;

    @Override
    public void connectionLost(Throwable throwable) {
        // 连接丢失后,一般在这里面进行重连
        logger.info("连接断开,可以做重连");
        if (client == null || !client.isConnected()) {
            mqttConfig.getMqttPushClient();
        }
    }

    @Override
    public void messageArrived(String topic, MqttMessage mqttMessage) throws Exception {
        // subscribe后得到的消息会执行到这里面
        logger.info("接收消息主题 : " + topic);
        logger.info("接收消息Qos : " + mqttMessage.getQos());
        logger.info("接收消息内容 : " + new String(mqttMessage.getPayload()));


        //todo 代码一般写在这里
        ......
    }

    @Override
    public void deliveryComplete(IMqttDeliveryToken iMqttDeliveryToken) {
        logger.info("deliveryComplete---------" + iMqttDeliveryToken.isComplete());

    }

}
注意:在MqttConfig中,选择订阅的主题
java
	@Bean
    public MqttPushClient getMqttPushClient() {
        if (enabled == true) {
            mqttPushClient.connect(hostUrl, clientId, username, password, timeout, keepalive);
            //订阅java主题
            mqttPushClient.subscribe("java",0);
        }
        return mqttPushClient;
    }
5.接收数据
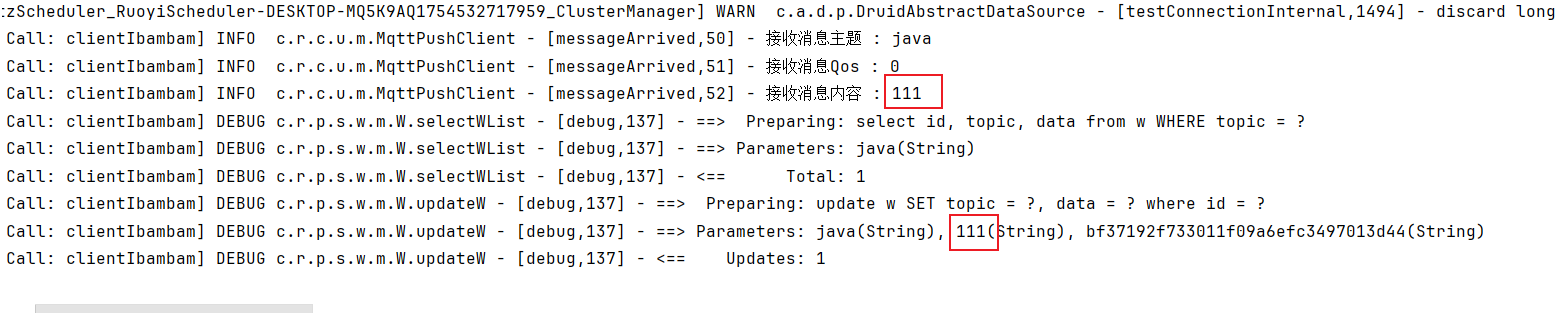
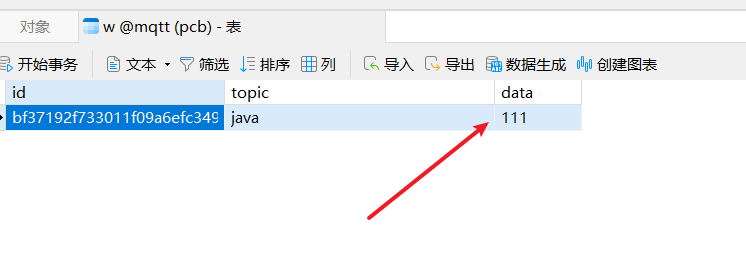
编写代码,硬件传来的数据更新保存在数据库中
先获取topic=Java的数据,然后可存不存在,存在就j更新,将硬件传过来的数据更新到data中
java
package com.ruoyi.common.utils.mqtt;

@Component
public class PushCallback implements MqttCallback {
    private static final Logger logger = LoggerFactory.getLogger(MqttPushClient.class);

    @Autowired
    private MqttConfig mqttConfig;

    @Autowired
    private IWService wService;

    private static MqttClient client;

    private static String _topic;
    private static String _qos;
    private static String _msg;

    @Override
    public void connectionLost(Throwable throwable) {
        // 连接丢失后,一般在这里面进行重连
        logger.info("连接断开,可以做重连");
        if (client == null || !client.isConnected()) {
            mqttConfig.getMqttPushClient();
        }
    }

    @Override
    public void messageArrived(String topic, MqttMessage mqttMessage) throws Exception {
        // subscribe后得到的消息会执行到这里面
        logger.info("接收消息主题 : " + topic);
        logger.info("接收消息Qos : " + mqttMessage.getQos());
        logger.info("接收消息内容 : " + new String(mqttMessage.getPayload()));


        //硬件传来的数据update在数据库中
//        @Log(title = "物联网接收数据", businessType = BusinessType.UPDATE)
//        @PostMapping("/edit")
//        @ResponseBody
//        public AjaxResult editSave (W w){
//            return toAjax(wService.updateW(w));
//        }

        //查询更新操作,查询topic=Java的数据,如果有,就把数据更新到数据库中(data)
        W w = new W();
        w.setTopic("java");
        //查询
        List<W> list = wService.selectWList(w);
        if (list.size() > 0) {
            //根据id去查询
            w.setId(list.get(0).getId());
            w.setTopic(null);
            w.setData(new String(mqttMessage.getPayload()));
            try {
                wService.updateW(w);//alt+ctrl+t:抛异常
            } catch (Exception e) {
                throw new RuntimeException(e);
            }
        }
    }

    @Override
    public void deliveryComplete(IMqttDeliveryToken iMqttDeliveryToken) {
        logger.info("deliveryComplete---------" + iMqttDeliveryToken.isComplete());
    }

}
运行系统,此时数据库的data为空(新增加一个Java订阅的数据)
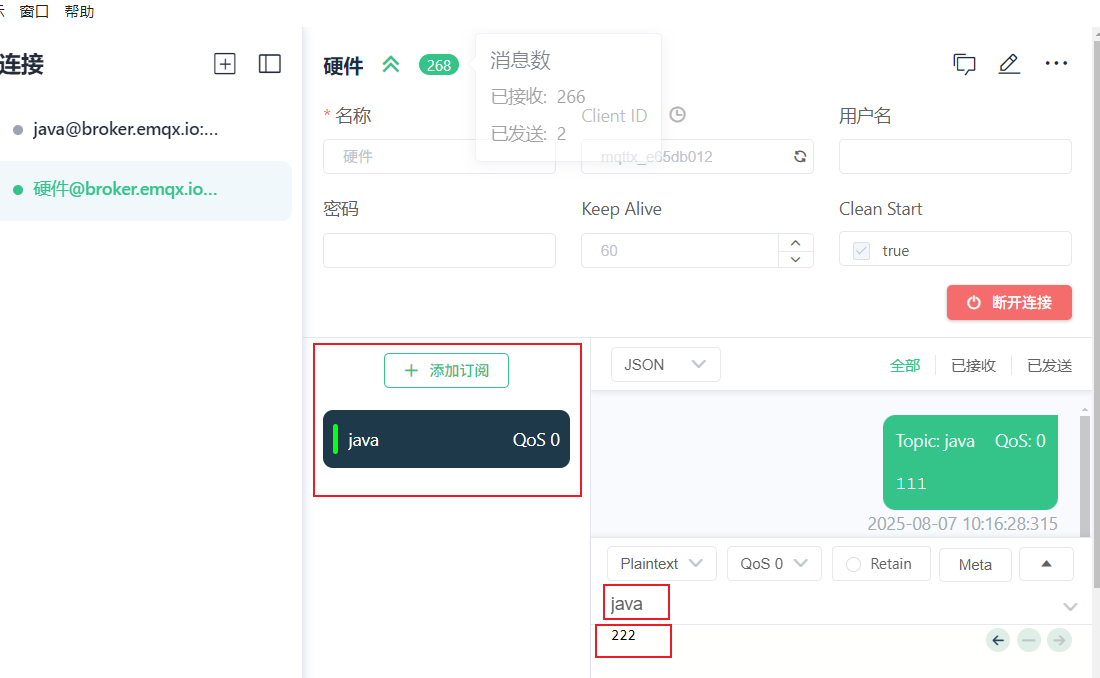
使用mqttx,模拟硬件发Java发消息
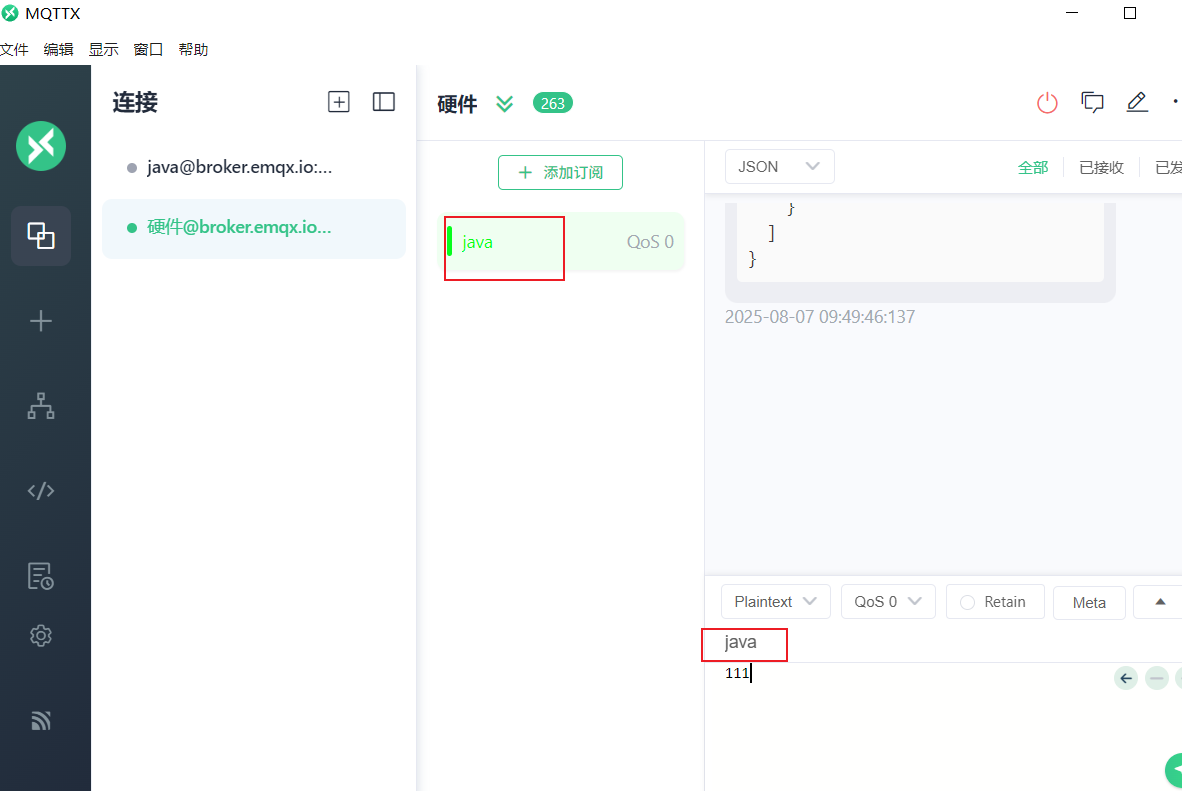
发送111
5.1 前端显示接收的数据
wlw包的w.html编写前端,编写一个定时器localhost/ruoyi/system/wlw
java
<!DOCTYPE html>
<html lang="zh" xmlns:th="http://www.thymeleaf.org">
<head>
    <meta charset="UTF-8">
    <title>wlw</title>
    <script th:src="@{/js/jquery.min.js}"></script>
    <script th:inline="javascript">
        var ctx = [[@{/}]];


        //定时器,每五秒定时接收数据
        setInterval(function(){
            $.ajax({
                type: "post",
                url: ctx + "system/w/list",
                dataType: "json",
                success: function (result) {
                    console.log(result);
                }
            })
        }, 1000);
    </script>
</head>
<body>
    <button>开</button>
</body>
</html>
shiroConfig,放开拦截
java
// 不需要拦截的访问  接收
filterChainDefinitionMap.put("/system/w/list", "anon,captchaValidate");
控制台接收数据
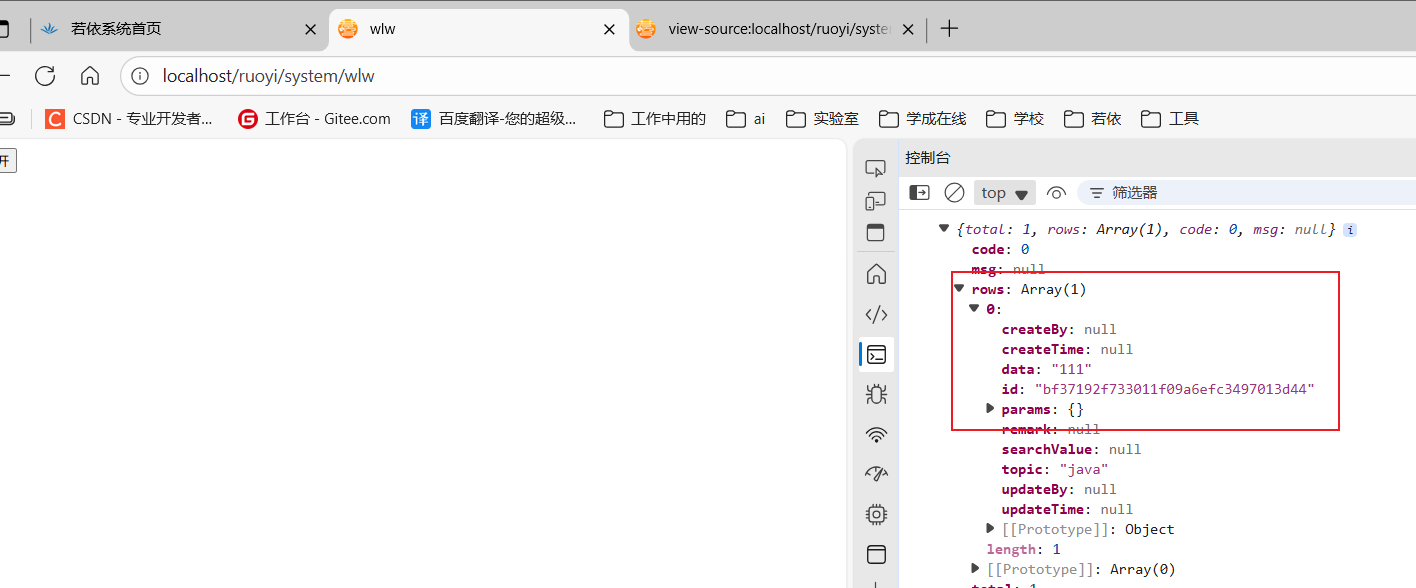
把查询的数据显示到界面上
html
<!DOCTYPE html>
<html lang="zh" xmlns:th="http://www.thymeleaf.org">
<head>
<meta charset="UTF-8">
<title>wlw</title>
<script th:src="@{/js/jquery.min.js}"></script>
<script th:inline="javascript">
var ctx = [[@{/}]];
//定时器,每五秒定时接收数据
setInterval(function () {
$.ajax({
type: "post",
url: ctx + "system/w/list",
data: {//根据topic为Java的查
topic: "java",
},
dataType: "json",
success: function (result) {
if (result.total > 0) {
//显示数据
$("div").text(result.rows[0].data);
}
}
})
}, 1000);
</script>
</head>
<body>
<button>开</button>
<div></div>
</body>
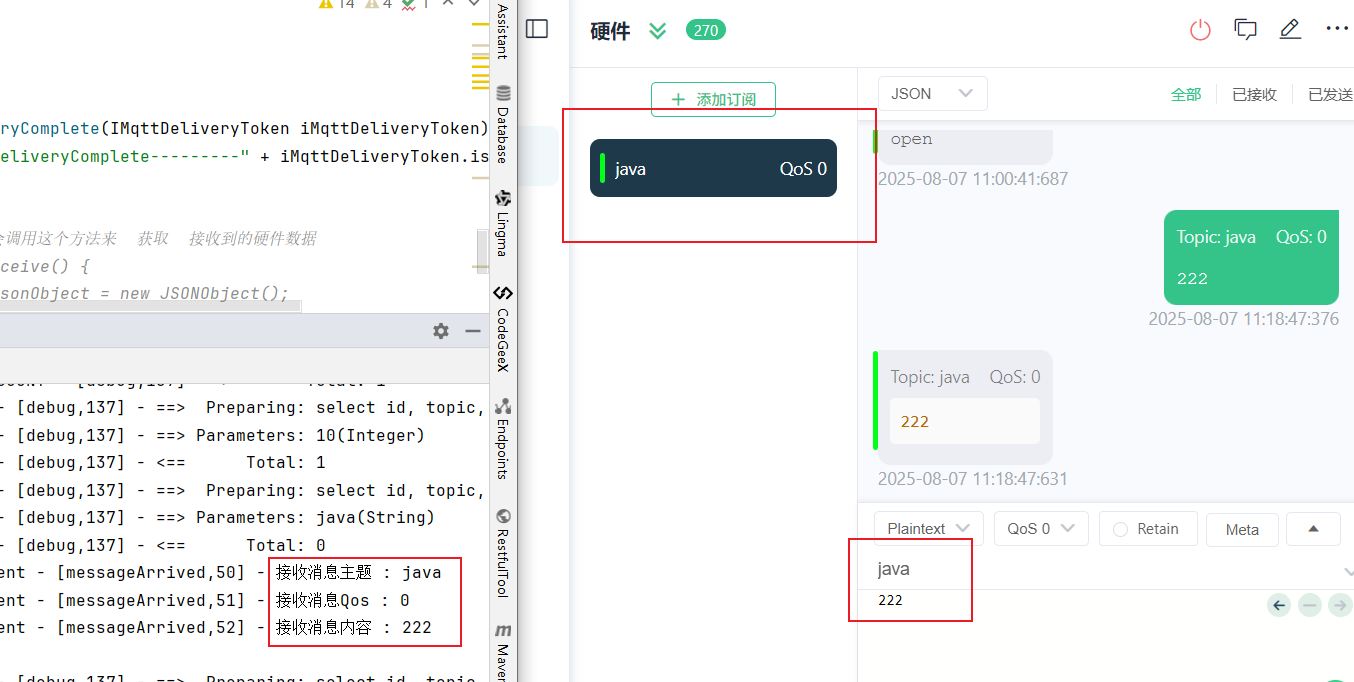
</html>使用mqttx模拟硬件发送数据,Java程序接收并显示在界面上
6.发送消息
修改主题(三个地方)
PushCallback,修改为test
java
       W w = new W();
        w.setTopic("test");  //test
        //查询
        List<W> list = wService.selectWList(w);
        if (list.size() > 0) {
            //根据id去查询
            w.setId(list.get(0).getId());
            w.setTopic(null);
            w.setData(new String(mqttMessage.getPayload()));
            try {
                wService.updateW(w);//alt+ctrl+t:抛异常
            } catch (Exception e) {
                throw new RuntimeException(e);
            }
        }
MqttConfig
java
    @Bean
    public MqttPushClient getMqttPushClient() {
        if (enabled == true) {
            mqttPushClient.connect(hostUrl, clientId, username, password, timeout, keepalive);
            //订阅java主题
            mqttPushClient.subscribe("test",0);
        }
//        if(enabled == true){
//            String mqtt_topic[] = StringUtils.split(defaultTopic, ",");
//            mqttPushClient.connect(hostUrl, clientId, username, password, timeout, keepalive);//连接
//            for(int i=0; i<mqtt_topic.length; i++){
//                mqttPushClient.subscribe(mqtt_topic[i], 0);//订阅主题
//            }
//        }
        return mqttPushClient;
    }
}
数据库中的topic修改为test
前端代码
html
<!DOCTYPE html>
<html lang="zh" xmlns:th="http://www.thymeleaf.org">
<head>
<meta charset="UTF-8">
<title>wlw</title>
<script th:src="@{/js/jquery.min.js}"></script>
<script th:inline="javascript">
var ctx = [[@{/}]];
$(function () {
$("button").click(function () {
$.ajax({
type: "post",
url: ctx + "system/wlw/open",
//添加这里的代码
data: {//向java主题发送open数据
topic: "java",
msg: "open"
},
dataType: "json",
success: function (result) {
console.log(result);
}
// data: {
// topic: "java1",
// msg: "open"
// },
// dataType: "json",
// success: function(result) {
// console.log(result);
// }
})
})
})
</script>
</head>
<body>
<button>开</button>
<div></div>
</body>
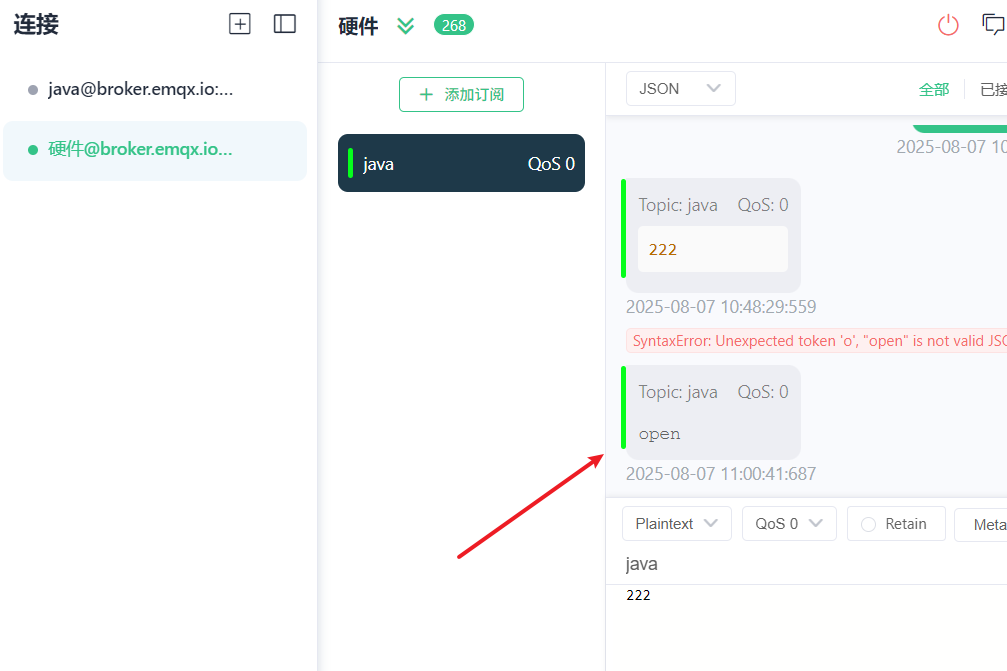
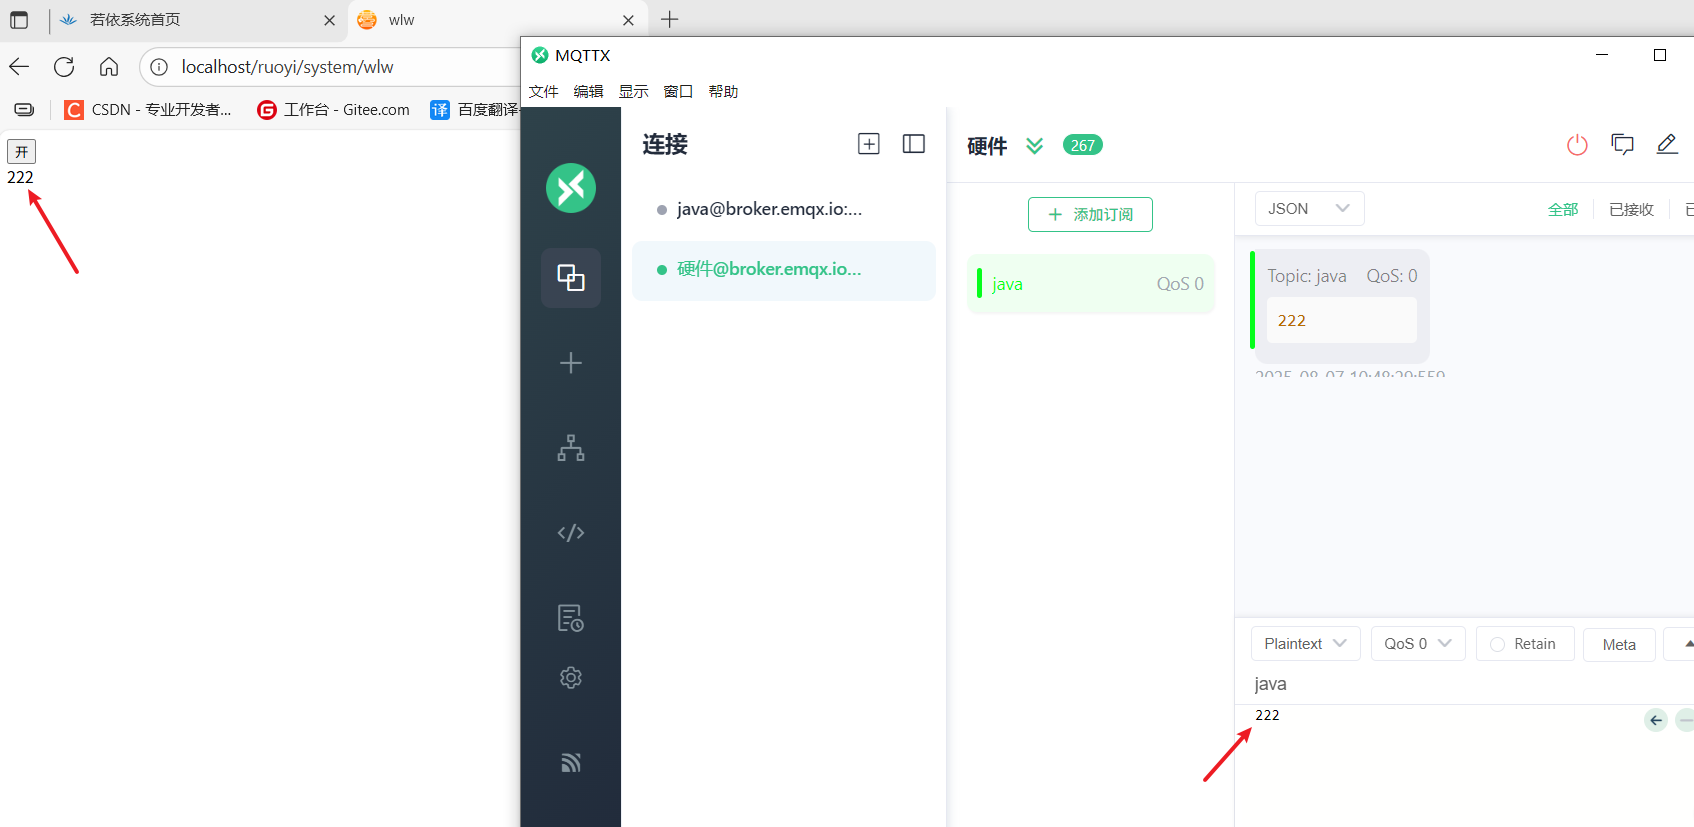
</html>运行项目,点击开按钮,查看mqttx是否接收到了数据
注意:发送的订阅主题不能和接收的主题一样,所以前面我们要修改主题为test