前言
你是否看见过有些网站的背景是动态粒子效果,今天我们就来问问Trae是如何实现这样的效果。
看看Trae理解的动态粒子效果是什么,以及他是如何实现的,下面是Trae的理解。
先来看看最终的效果,非常适合夜店,啊哈哈哈哈 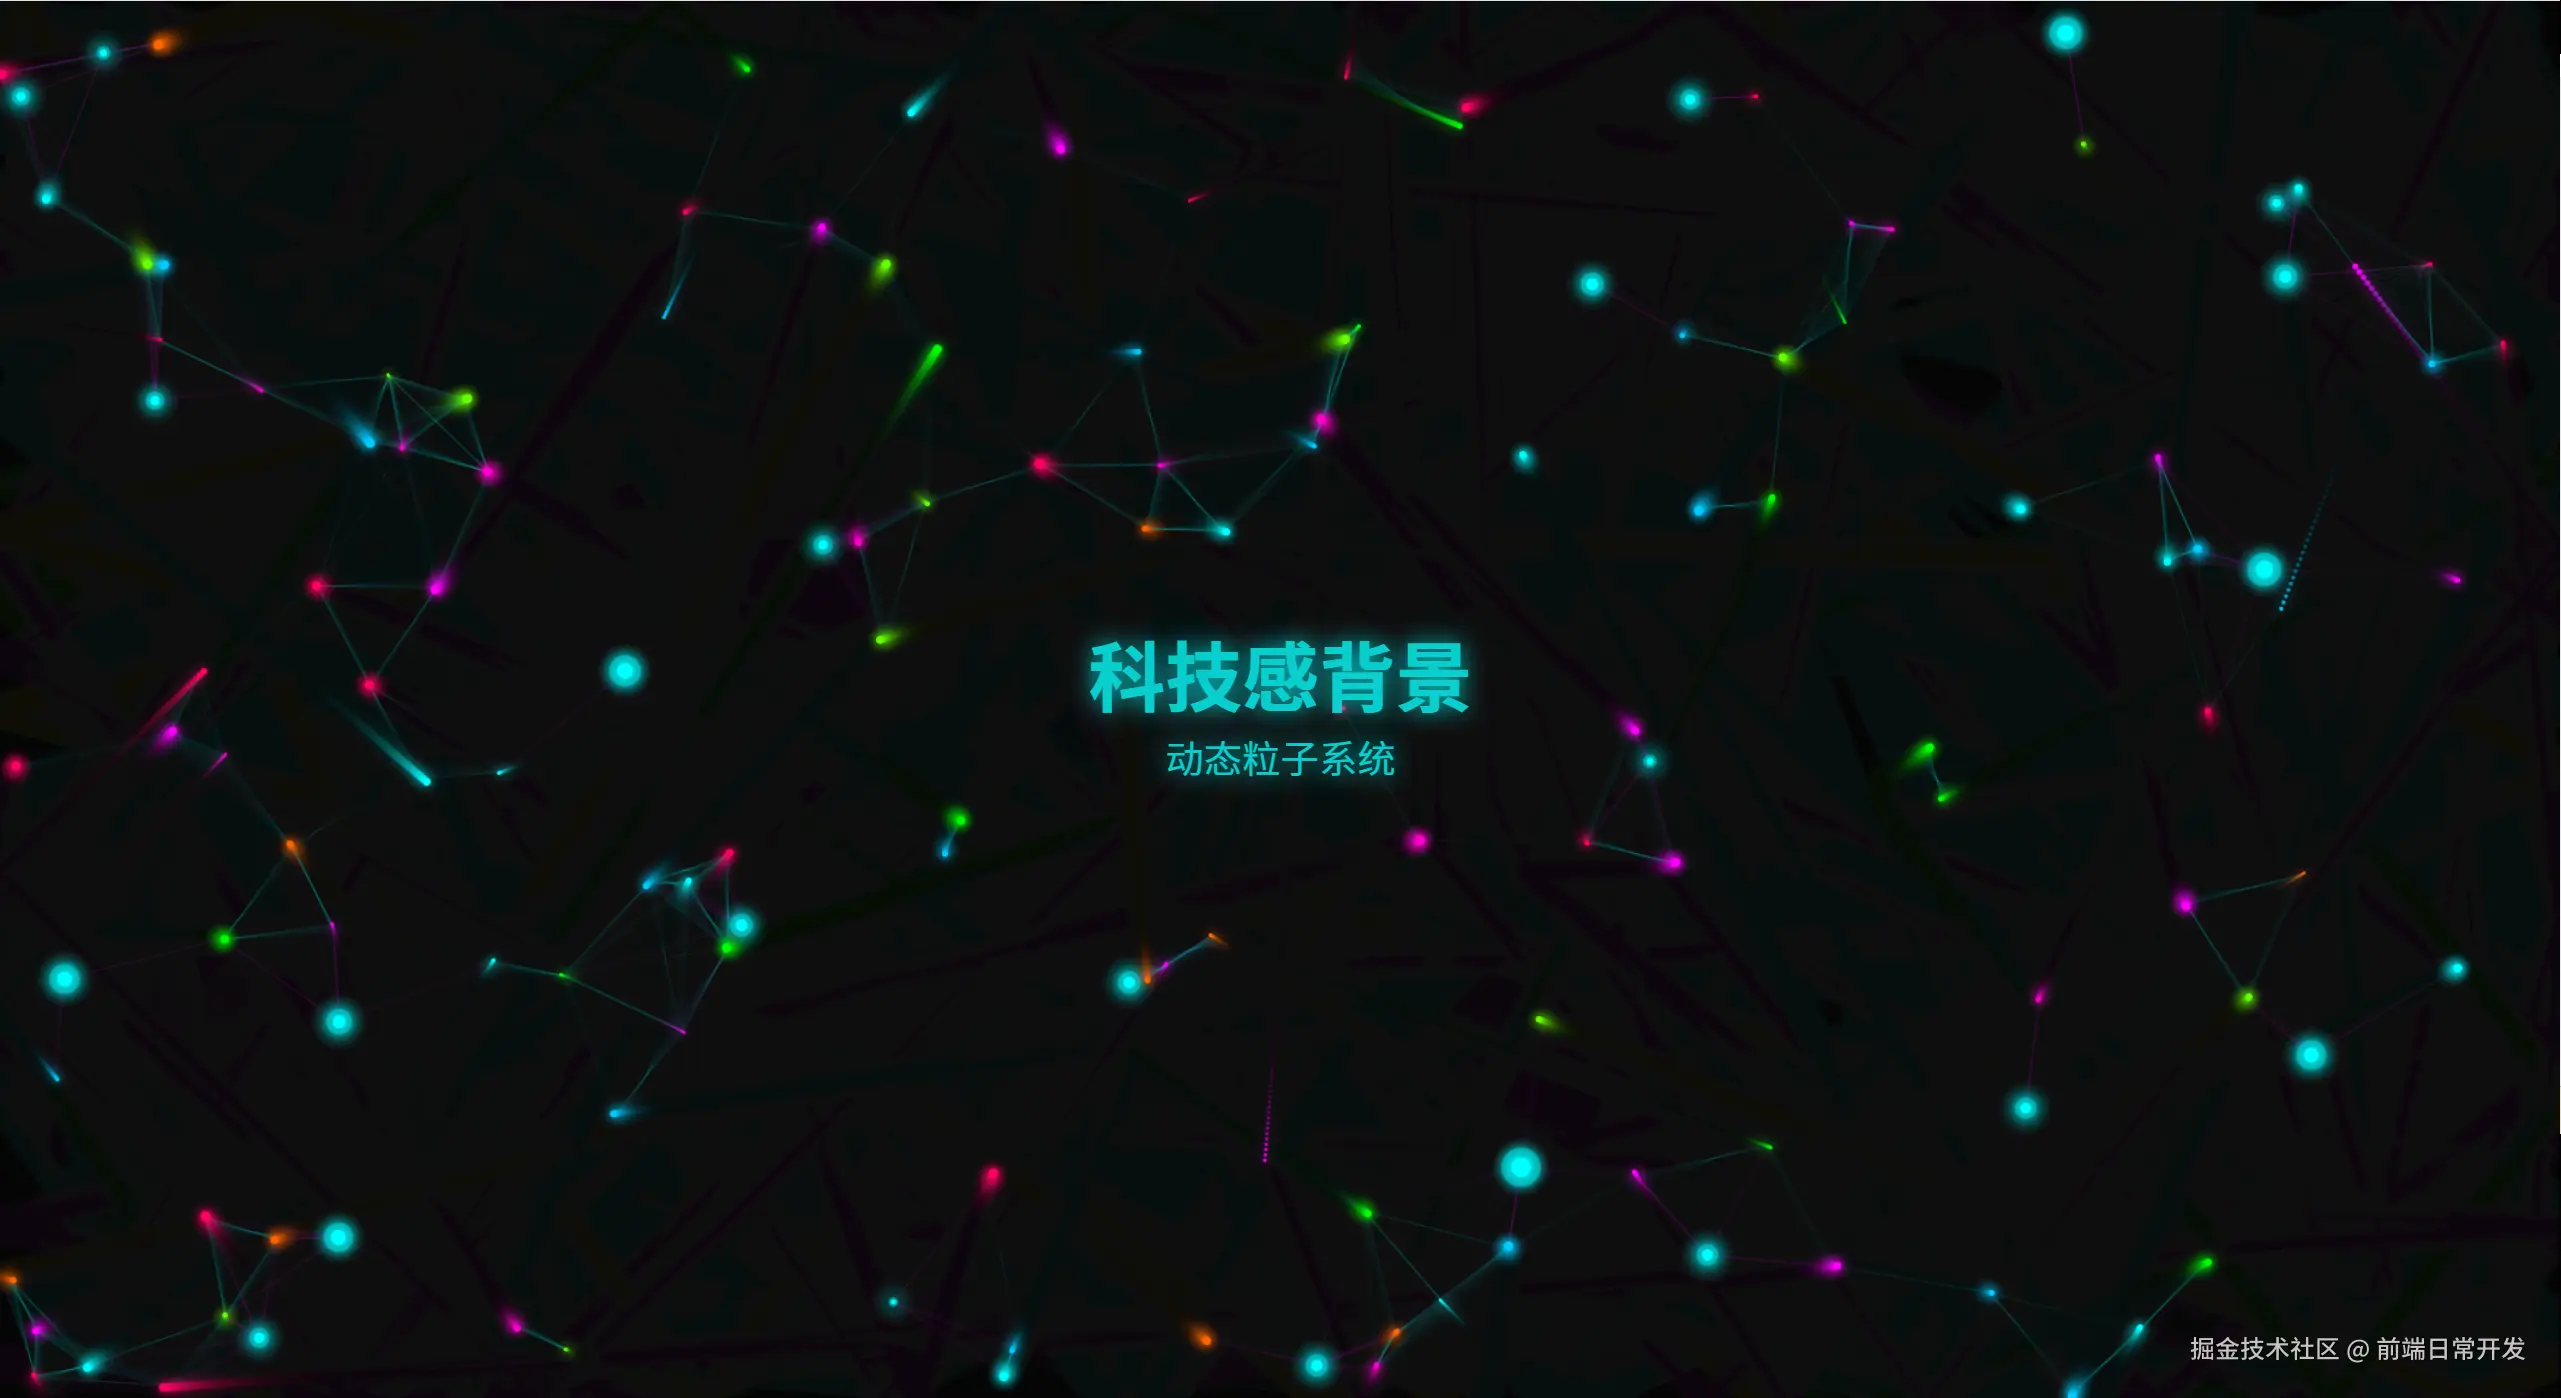
看看Trae是怎么理解科技感的例子背景的
- 采用赛博朋克风格的霓虹色彩:青色、品红、绿色、橙色等,并且是随机变化的发光效果
- 多层次视觉效果,粒子层、节点层、网络层、连线层
- 还有科技元素,模拟数据中心的脉冲节点,非常适合眼前一亮的感觉
代码是怎么实现的
动态粒子效果
动态粒子效果,就是让网页中的元素像粒子一样,在网页中随机运动,形成一种动态的效果。这种效果可以让网页看起来更加生动,增加用户的体验,往往是随机生成的。
Trae的实现思路
实现动态粒子效果,需要以下几个步骤:
- 创建一个包含多个粒子的数组。
- 为每个粒子设置初始位置、速度和颜色。
- 在网页中创建一个画布,用于绘制粒子。
- 使用JavaScript的定时器,每隔一段时间更新粒子的位置,并重新绘制画布。
- 在画布上绘制每个粒子的形状和颜色。
- 为粒子添加运动效果,例如改变位置、速度或颜色。
- 重复步骤4和5,使粒子持续运动。
- 为了增加效果,还可以添加粒子之间的交互效果,例如碰撞检测和 repulsion。
绘制动态例子的方法,包括轨迹、边界相关的反弹
js
drawParticles() {
                this.particles.forEach((particle, index) => {
                    // 更新位置
                    particle.x += particle.vx;
                    particle.y += particle.vy;

                    // 边界反弹
                    if (particle.x <= 0 || particle.x >= this.canvas.width) {
                        particle.vx *= -1;
                    }
                    if (particle.y <= 0 || particle.y >= this.canvas.height) {
                        particle.vy *= -1;
                    }

                    // 鼠标交互
                    const dx = this.mouse.x - particle.x;
                    const dy = this.mouse.y - particle.y;
                    const distance = Math.sqrt(dx * dx + dy * dy);

                    if (distance < 100) {
                        const force = (100 - distance) / 100;
                        particle.vx -= (dx / distance) * force * 0.5;
                        particle.vy -= (dy / distance) * force * 0.5;
                    }

                    // 添加轨迹
                    particle.trail.push({ x: particle.x, y: particle.y, color: particle.color });
                    if (particle.trail.length > particle.maxTrail) {
                        particle.trail.shift();
                    }

                    // 绘制轨迹
                    this.drawTrail(particle);

                    // 绘制粒子
                    this.ctx.beginPath();
                    this.ctx.arc(particle.x, particle.y, particle.size, 0, Math.PI * 2);
                    this.ctx.fillStyle = particle.color;
                    this.ctx.shadowBlur = 10;
                    this.ctx.shadowColor = particle.color;
                    this.ctx.fill();
                    this.ctx.shadowBlur = 0;
                });
            }
绘制节点层,主要是外圈光晕和内圈的节点组合
js
drawNodes() {
                this.nodes.forEach(node => {
                    node.pulse += node.pulseSpeed;
                    const scale = 1 + Math.sin(node.pulse) * 0.3;

                    // 外圈光晕
                    this.ctx.beginPath();
                    this.ctx.arc(node.x, node.y, node.size * scale * 2, 0, Math.PI * 2);
                    this.ctx.fillStyle = `rgba(0, 255, 255, 0.1)`;
                    this.ctx.fill();

                    // 内圈节点
                    this.ctx.beginPath();
                    this.ctx.arc(node.x, node.y, node.size * scale, 0, Math.PI * 2);
                    this.ctx.fillStyle = '#00ffff';
                    this.ctx.shadowBlur = 15;
                    this.ctx.shadowColor = '#00ffff';
                    this.ctx.fill();
                    this.ctx.shadowBlur = 0;
                });
            }
动画函数,每帧调用,确保用户看到动态效果
js
animate() {
                this.ctx.fillStyle = 'rgba(10, 10, 10, 0.1)';
                this.ctx.fillRect(0, 0, this.canvas.width, this.canvas.height);

                this.drawConnections();
                this.drawNodes();
                this.drawParticles();

                requestAnimationFrame(() => this.animate());
            }
总结
动态粒子效果是一种非常有趣的效果,可以让网页看起来更加生动。实现动态粒子效果需要一定的编程技巧,但是通过一些简单的步骤,就可以实现出这种效果。
现在可以借助ai帮你快速实现,但是要实现你要的效果,可能要花点时间去跟Trae沟通,一步步实现。
希望这篇文章能够帮助你理解动态粒子效果,并实现你自己的效果。