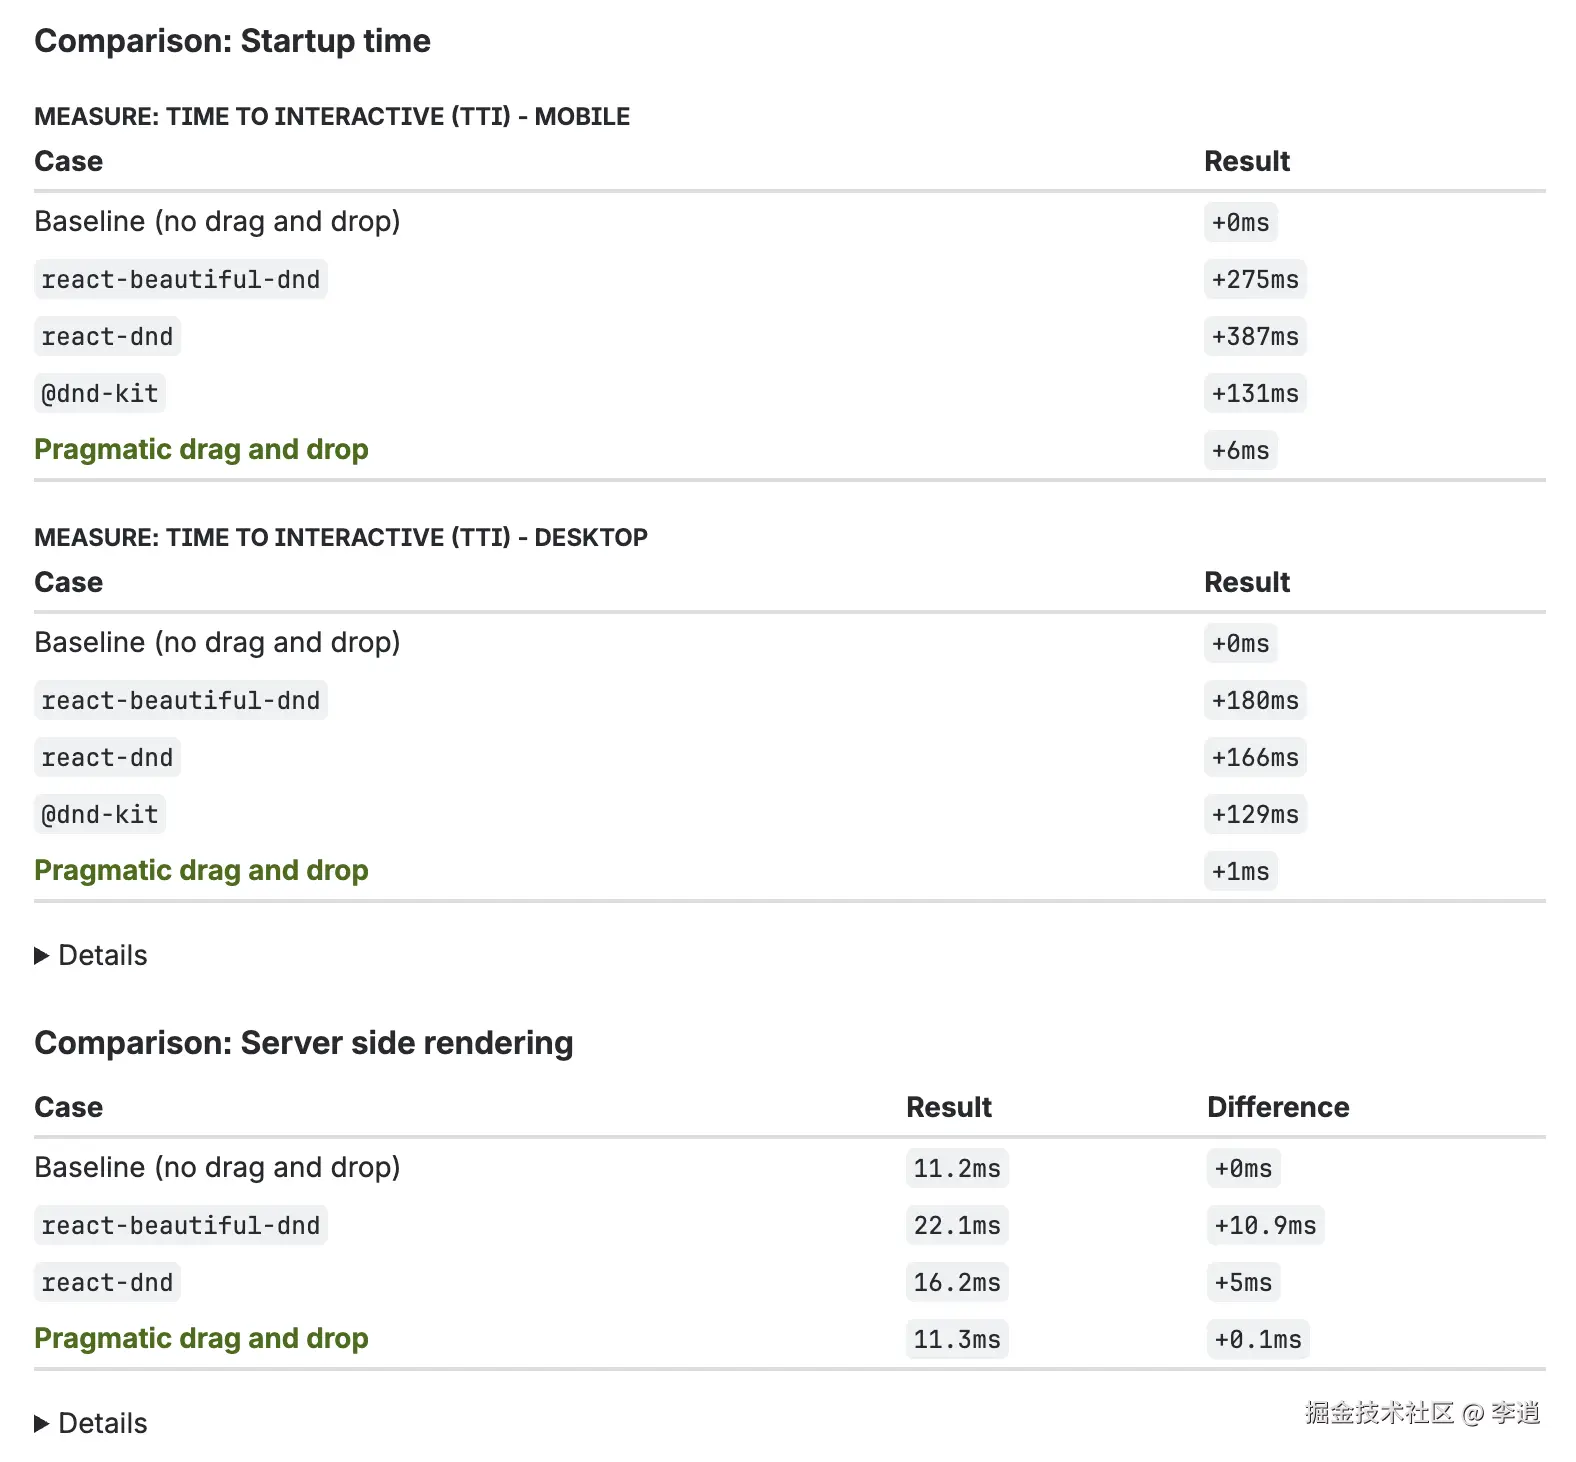
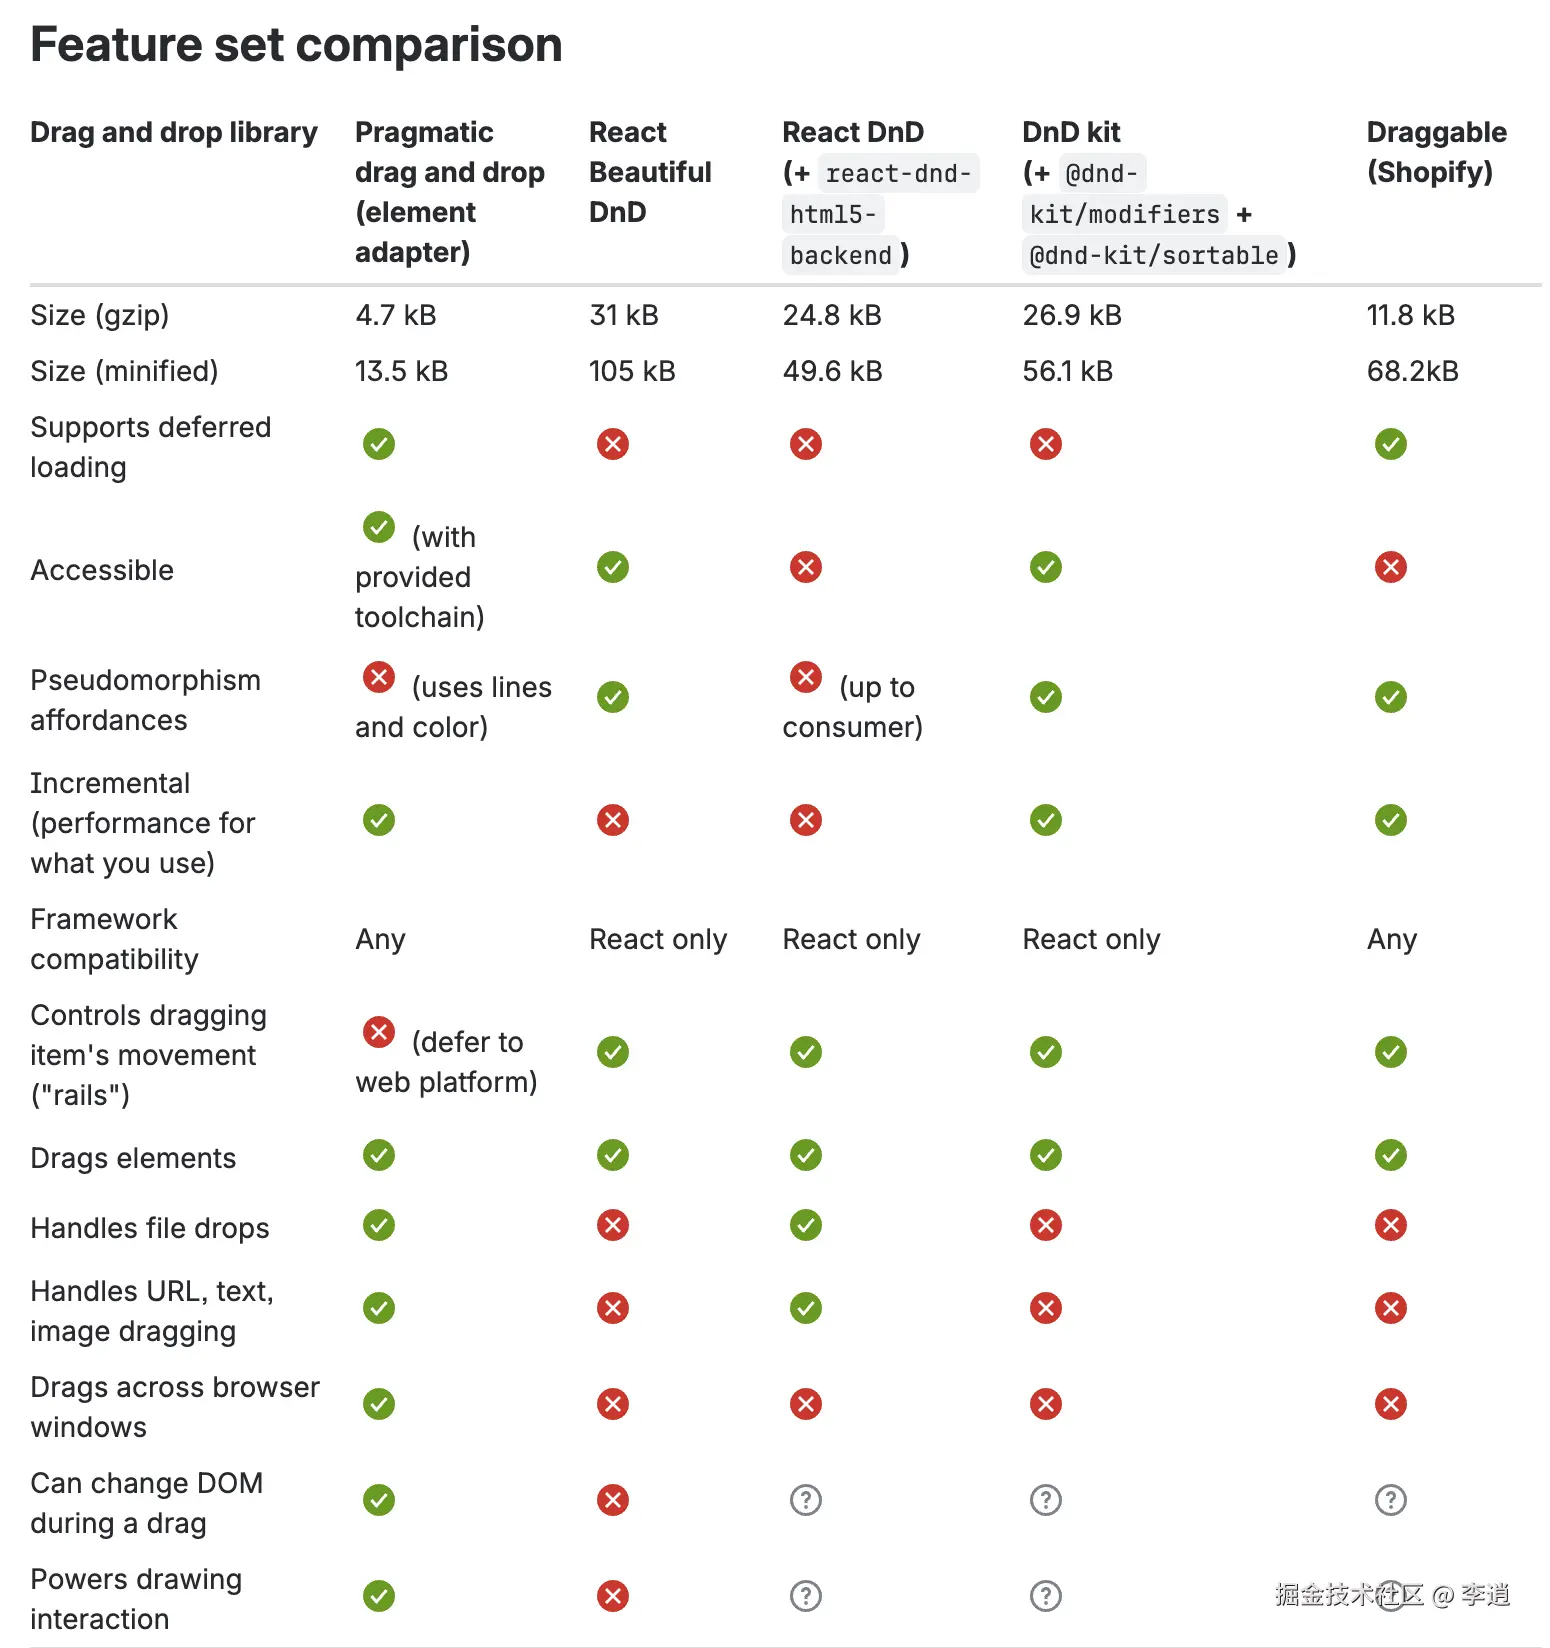
本文主要在 react 项目中简单介绍一下 pragmatic-drag-and-drop 核心 API 的基本使用。关于这个库的介绍和优势,建议阅读官网或者参考一些其他的介绍文章,本文只放两张官网宣传的对比图,不做过多展开~
 |
 |
|---|
前言
拖拽排序对于前端同学来说应该不会陌生,开源市场也有非常多优秀的库提供了这方面的能力,例如大家熟知的:
- react-beautiful-dnd 🌟34k
- sortablejs 🌟30.7k
- react-dnd 🌟21.5k
- dnd-kit 🌟15.6k
- react-sortable-hoc 🌟10.9k
基本上都有以下两个特点:
- 开箱即用
- 实时预览
思考
如果"想"自行实现一个更加贴合业务场景的拖拽排序
有哪些可选方案?
- 鼠标事件:mousedown --> mousemove/mouseenter/mouseleave --> mouseup
- html5 拖拽 API:drag --> drop
有哪些的难点(没有现成的 API)?
- 碰撞计算
- 贴边滚动
pragmatic-drag-and-drop ✨12.1k
atlassian.design/components/...
如 npm 名,主要利用原生的 html5 拖拽 API。
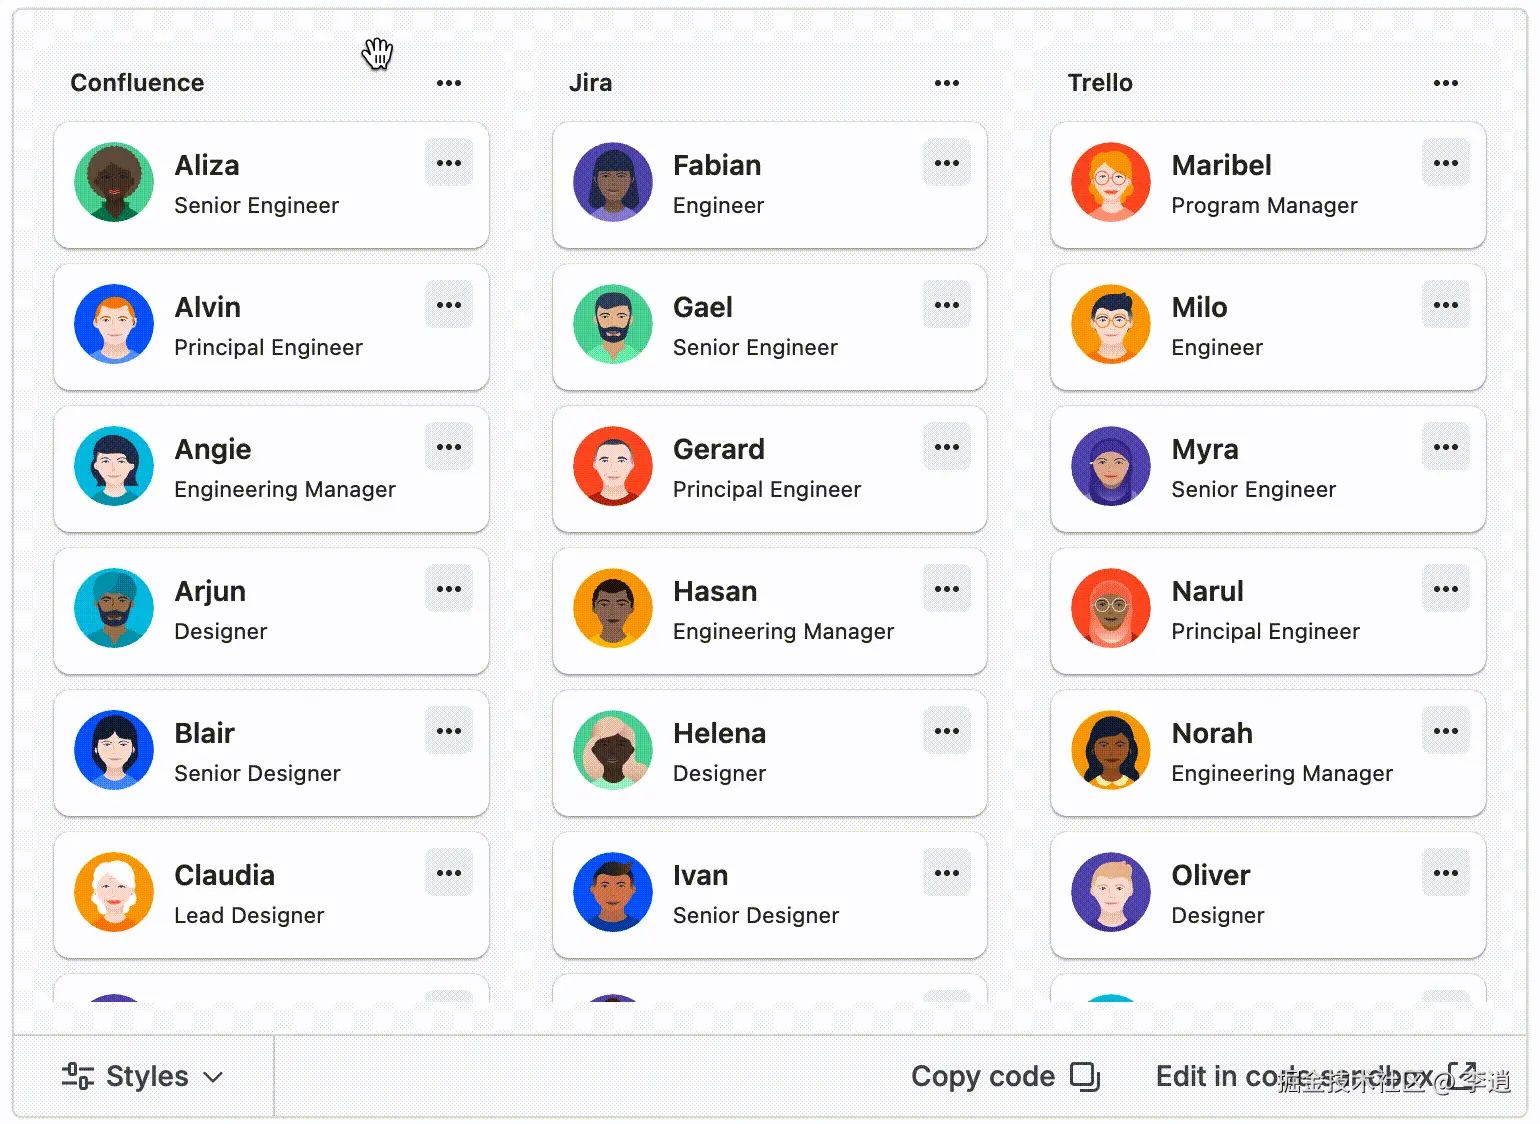
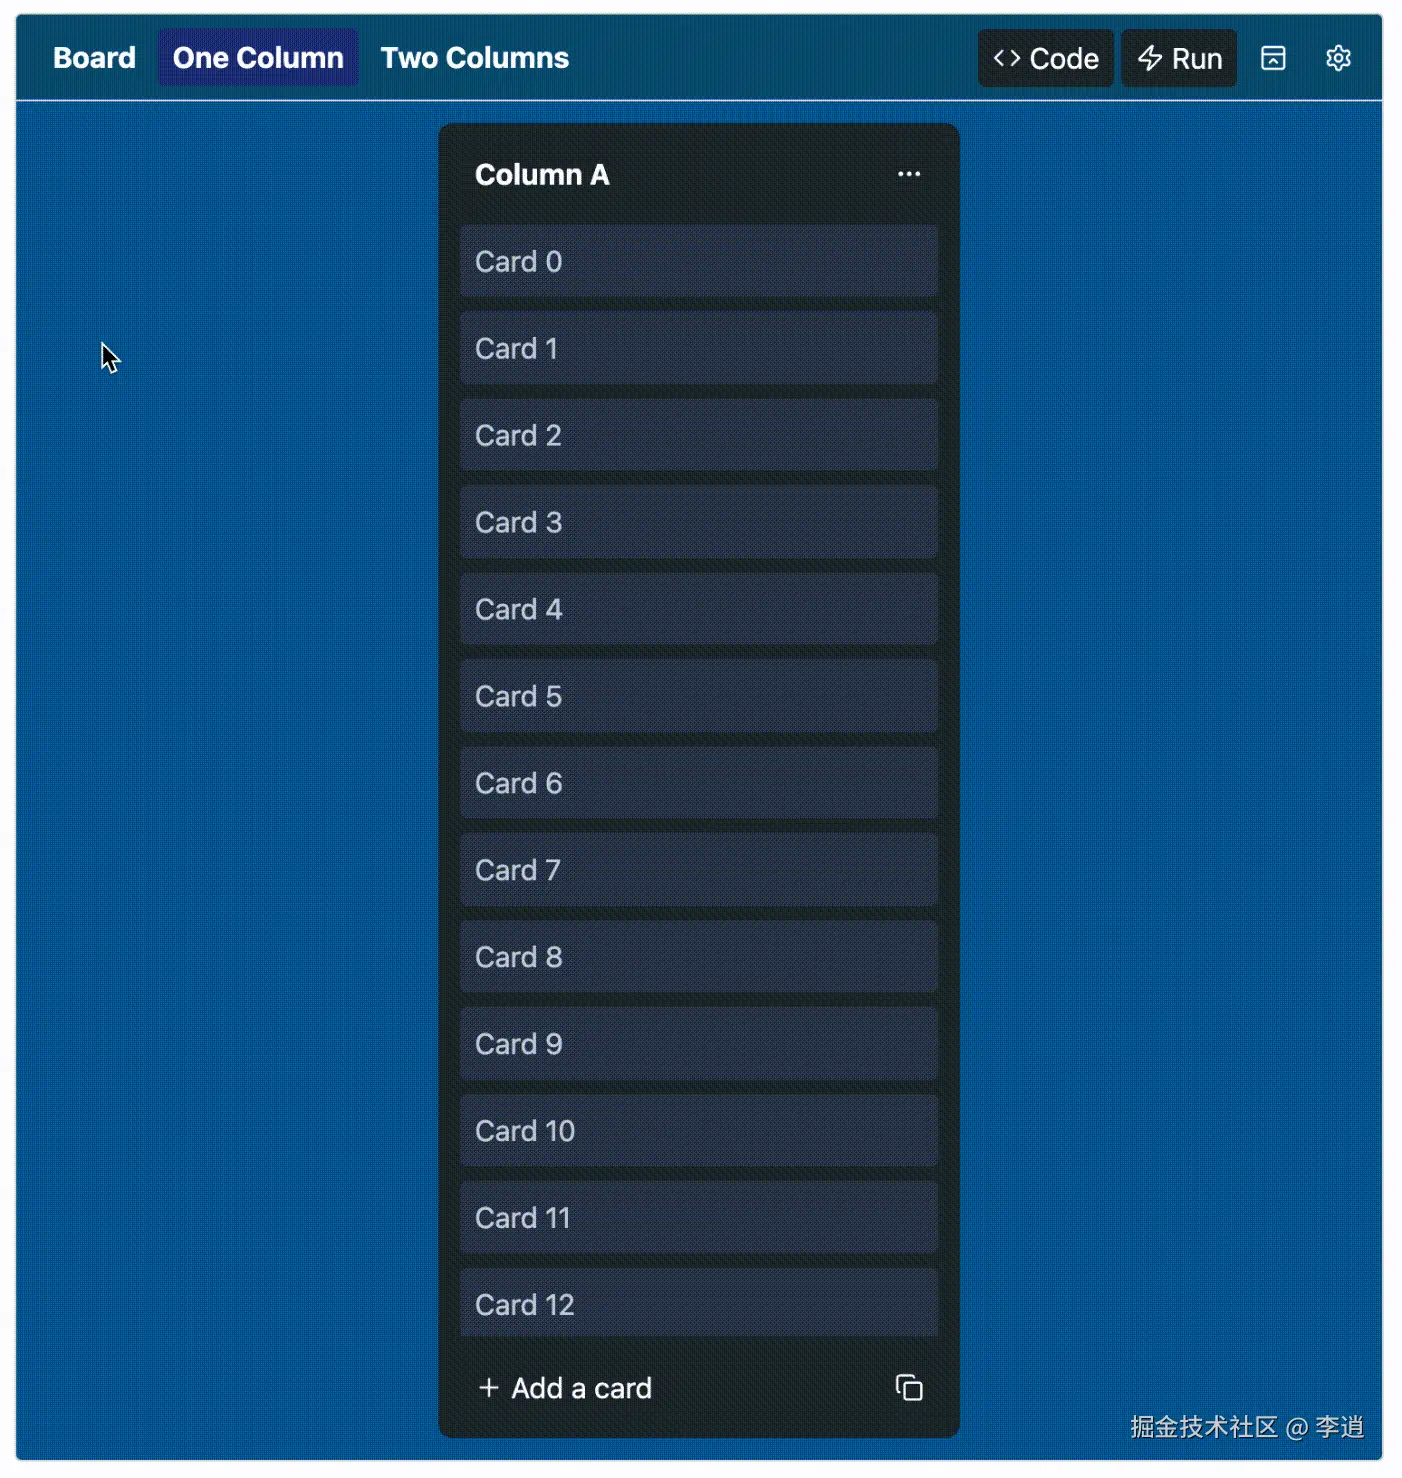
官网的例子也比较多,感兴趣的同学可以完整、仔细的阅读一下官网,和前面提到的那些实时预览的工具不同,pragmatic-drag-and-drop 的官网大部分示例都没有实时预览的效果,而是提供"辅助线"。
 |
 |
|---|
在开箱即用方面,pragmatic-drag-and-drop 其实也不如另外几个工具友好,从第一个示例的代码中可以看到此从 11 个不同的路径引入了一些组件/方法,一眼看上去有些眼花缭乱,容易让人感觉上手难度比较大,不确定哪些是必须的,哪些是可选的~
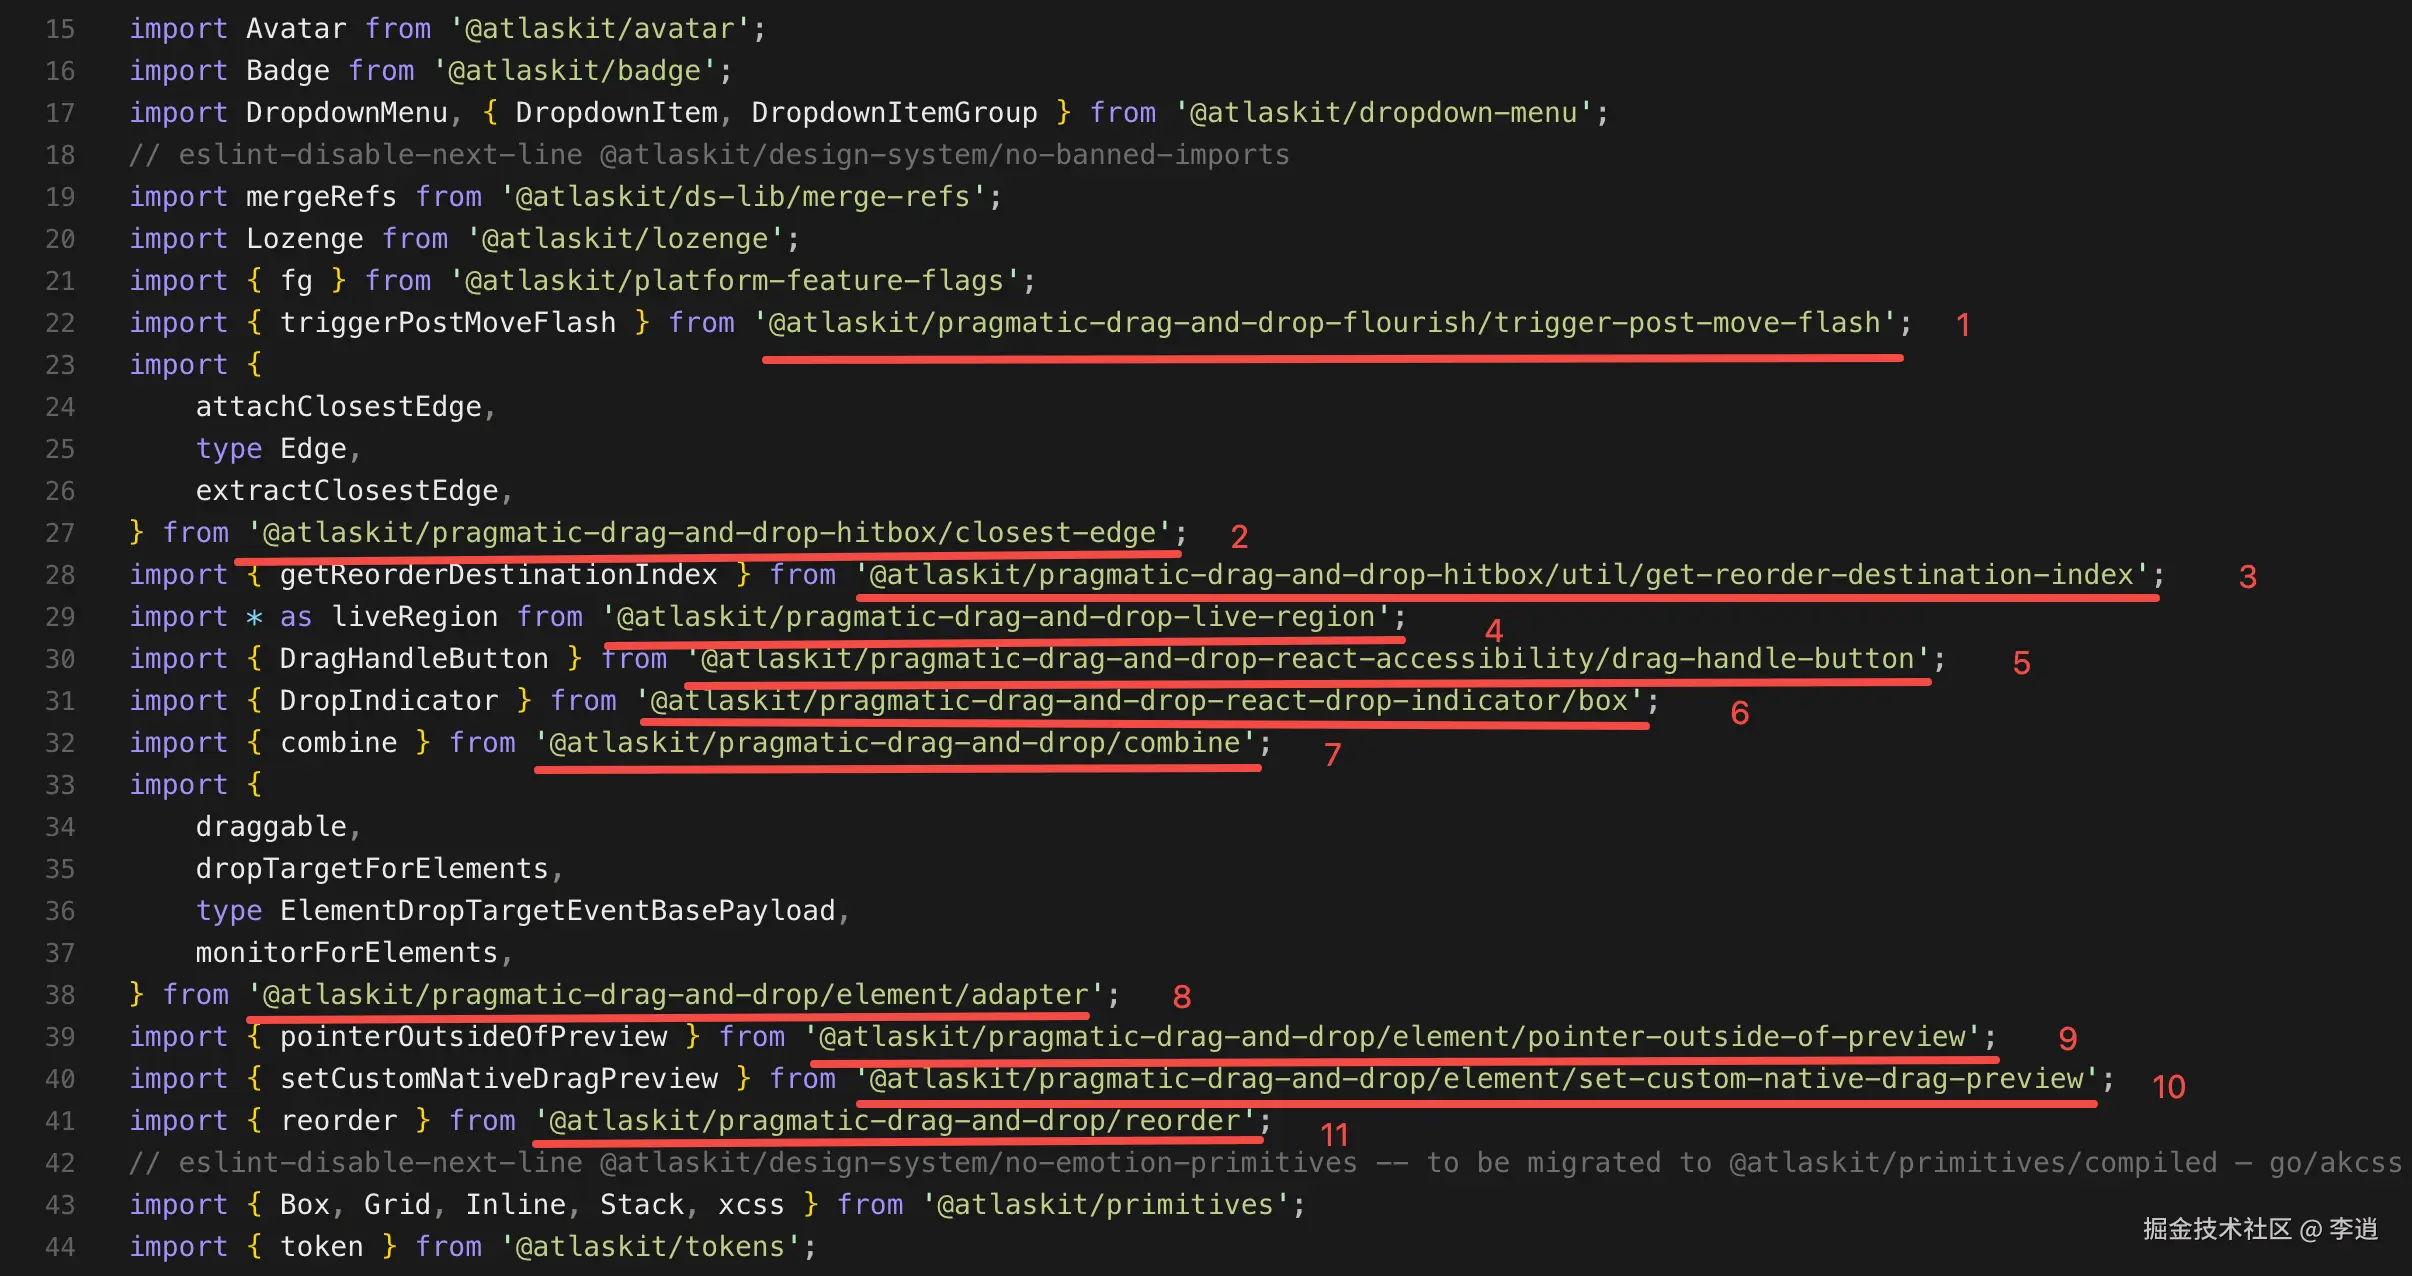
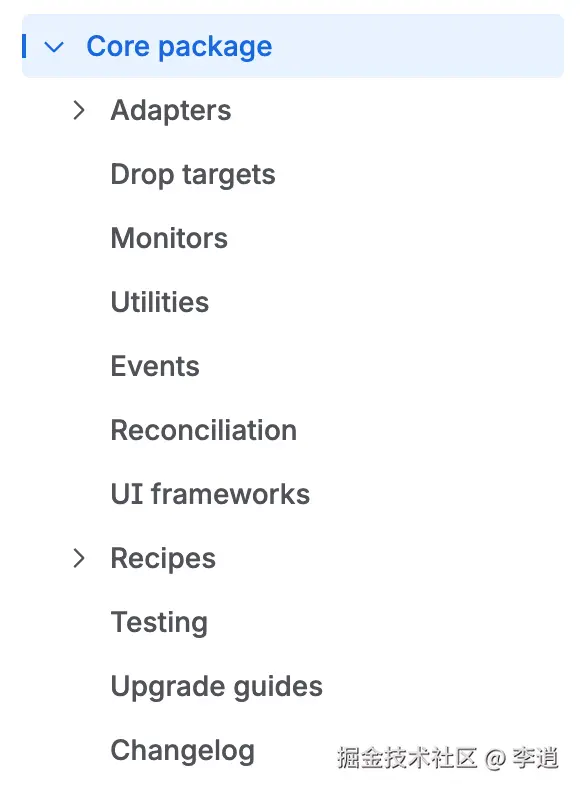
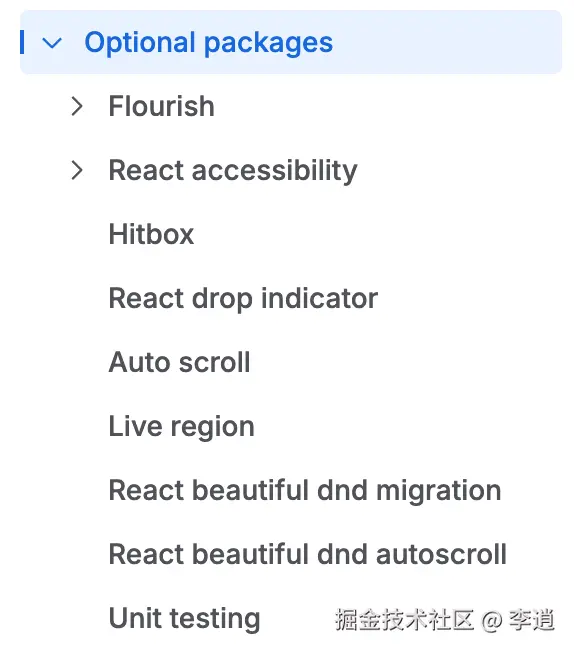
pragmatic-drag-and-drop 提供了许多核心包和可选包,供开发者按需组合~
 |
 |
|---|
上手实践一下
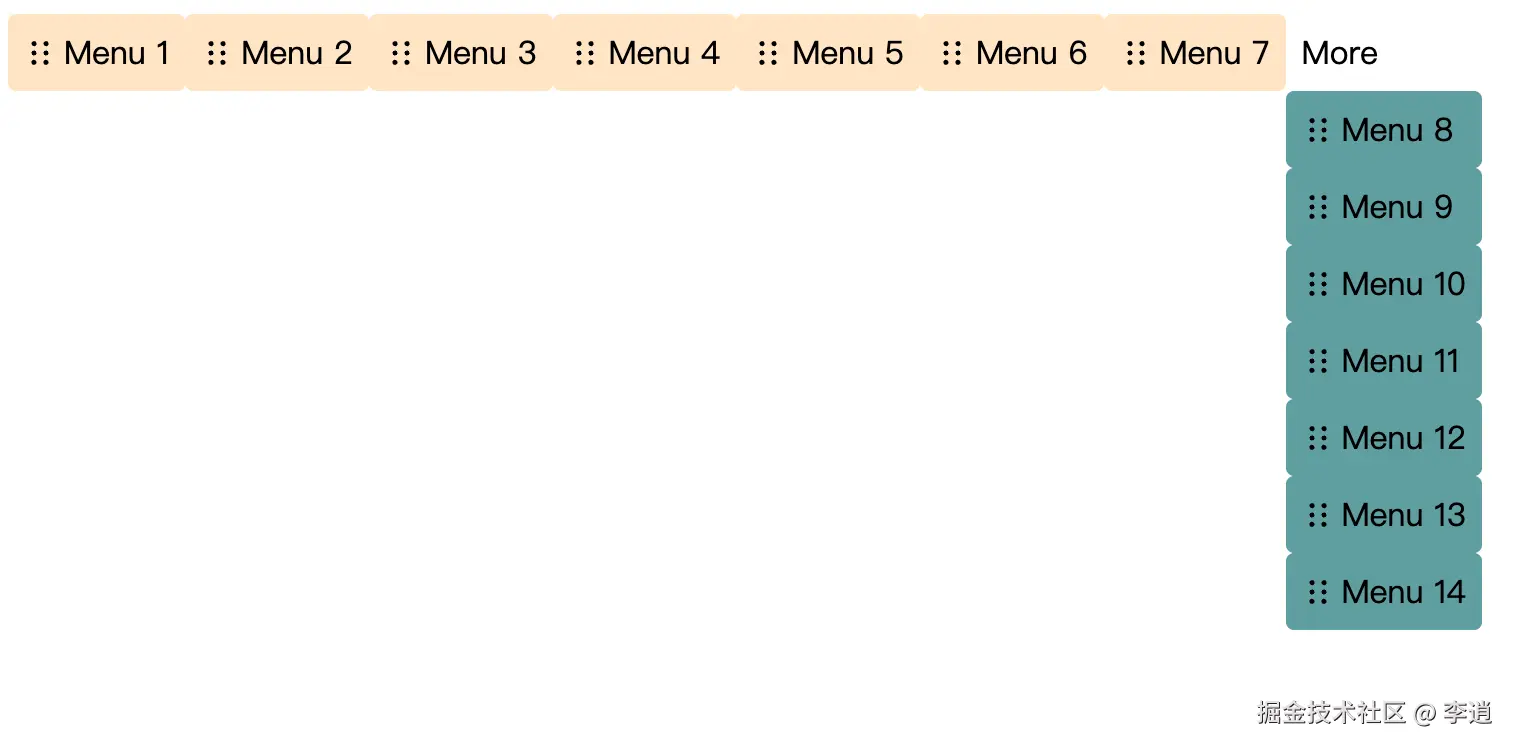
接下来以最常见的菜单排序功能为例(覆盖了水平方向排序、垂直方向排序、水平垂直方向互相排序的场景),一步一步实现拖拽排序,只保留最基本的代码,更容易对 pragmatic-drag-and-drop 这个工具有个初步的理解。
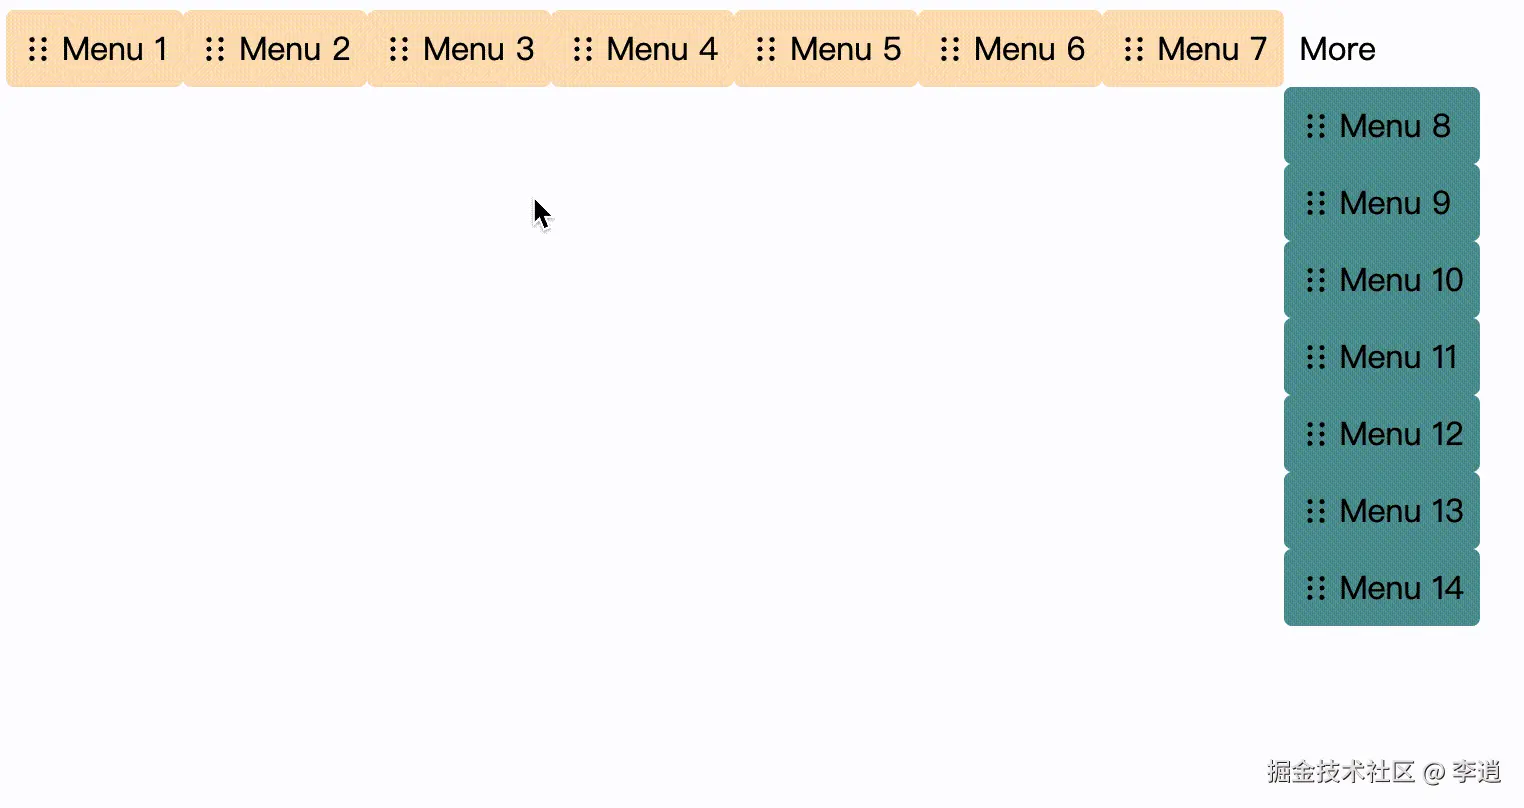
Step0 静态布局
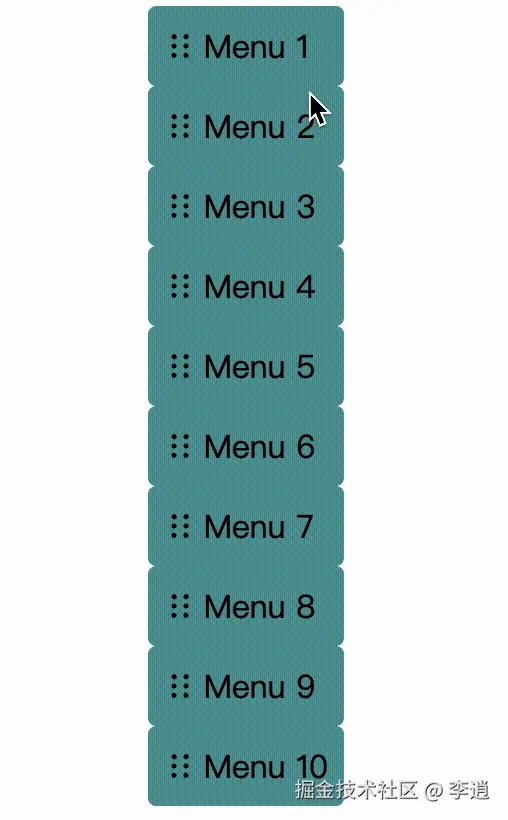
包含的水平和垂直两个方向的菜单:
Step1 让元素可拖动
-
draggable 方法
- element:给元素增加 draggable="true" 属性
- dragHandle:触发拖动的锚点
ts
import { draggable } from '@atlaskit/pragmatic-drag-and-drop/element/adapter';

// Item.tsx
useEffect(() => {
  return draggable({
    element: ref.current,
    dragHandle: dragHandleRef.current,
  });
}, []);
Step2 让元素可放置
-
dropTargetForElements 方法(单个元素)
- element: 可放置的元素
- onDrop: 拖拽完成时触发
-
monitorForElements 方法(全局)
- onDrop: 拖拽完成时触发
-
combine 方法
- 清除多个副作用
ts
import { dropTargetForElements, monitorForElements } from '@atlaskit/pragmatic-drag-and-drop/element/adapter';

// Item.tsx
useEffect(() => {
  return dropTargetForElements({
    element: ref.current,
    onDrop: event => {
      console.log('dropTargetForElements onDrop', event);
    },
  });
}, []);

// App.tsx
useEffect(() => {
  return monitorForElements({
    onDrop: event => {
      console.log('monitorForElements onDrop', event);
    },
  });
}, []);
step3 位置计算(前、后、左、右)
-
attachClosestEdge 和 extractClosestEdge 方法
- 获取与放置元素距离最近的边
ts
import { dropTargetForElements } from '@atlaskit/pragmatic-drag-and-drop/element/adapter';
import { attachClosestEdge, extractClosestEdge } from '@atlaskit/pragmatic-drag-and-drop-hitbox/closest-edge';

// Item.tsx
useEffect(() => {
  return dropTargetForElements({
    getData: ({ input, element }) =>
      attachClosestEdge(
        {},
        {
          input,
          element,
          allowedEdges: ['left', 'right'], // ['top', 'bottom']
        },
      ),
    onDrop: event => {
      const edge = extractClosestEdge(event.self.data);
      console.log('onDrop edge', edge);
    },
  });
}, []);
step4 辅助线
-
- edge: 辅助线显示的位置
ts
import { dropTargetForElements } from '@atlaskit/pragmatic-drag-and-drop/element/adapter';
import { attachClosestEdge, extractClosestEdge } from '@atlaskit/pragmatic-drag-and-drop-hitbox/closest-edge';
import { DropIndicator } from '@atlaskit/pragmatic-drag-and-drop-react-drop-indicator/box';
import type { Edge } from '@atlaskit/pragmatic-drag-and-drop-hitbox/closest-edge';
import type { ElementDropTargetEventBasePayload } from '@atlaskit/pragmatic-drag-and-drop/element/adapter';
// Item.tsx
const [closestEdge, setClosestEdge] = useState<Edge | null>(null);
const handleDragChange = (event: ElementDropTargetEventBasePayload) => {
const position = extractClosestEdge(event.self.data);
setClosestEdge(position);
};
useEffect(() => {
return dropTargetForElements({
getData: ({ input, element }) =>
attachClosestEdge(
{},
{
input,
element,
allowedEdges: ['left', 'right'], // ['top', 'bottom']
},
),
onDrag: handleDragChange,
onDragEnter: handleDragChange,
onDragLeave: () => {
setClosestEdge(null);
},
onDrop: () => {
setClosestEdge(null);
},
});
}, []);
return (
<div style={{ position: 'relative' }}>
<DropIndicator edge={closestEdge} />
</div>
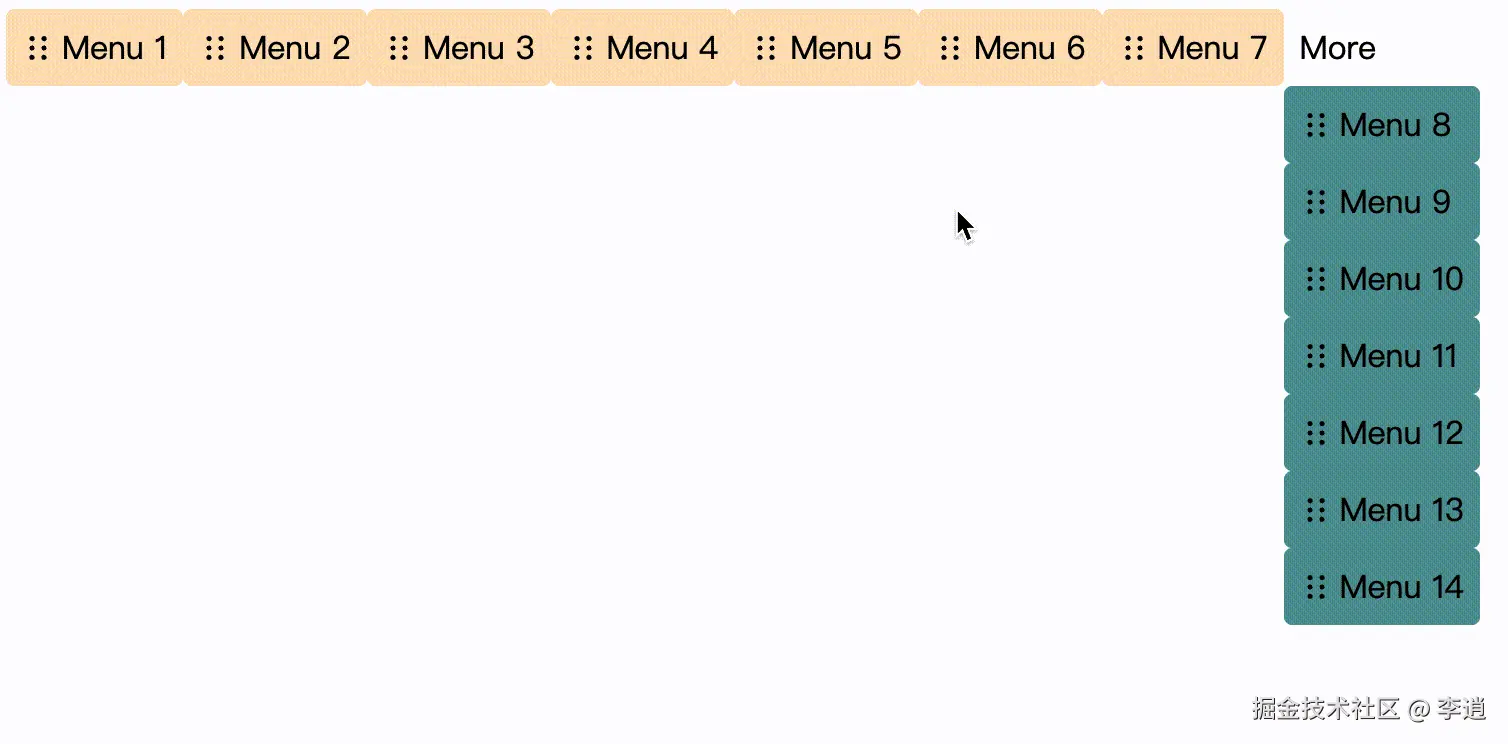
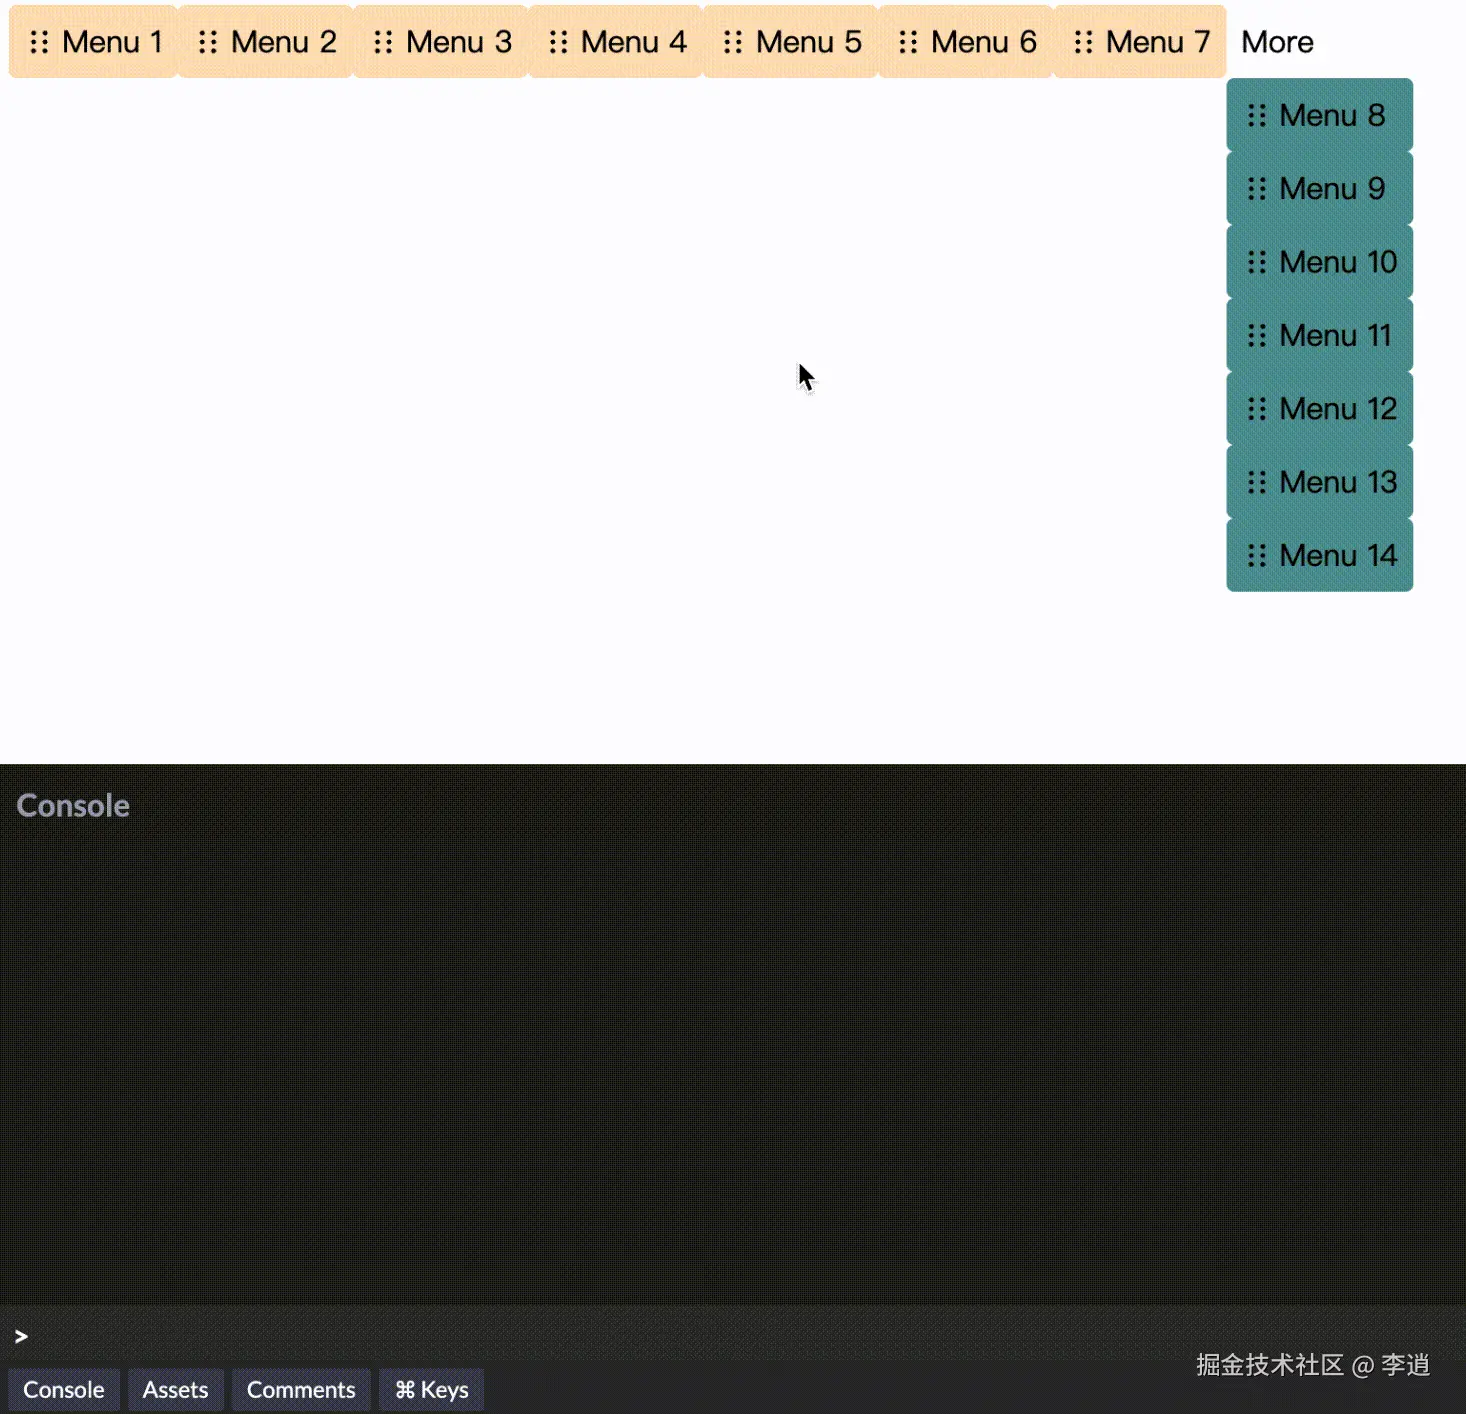
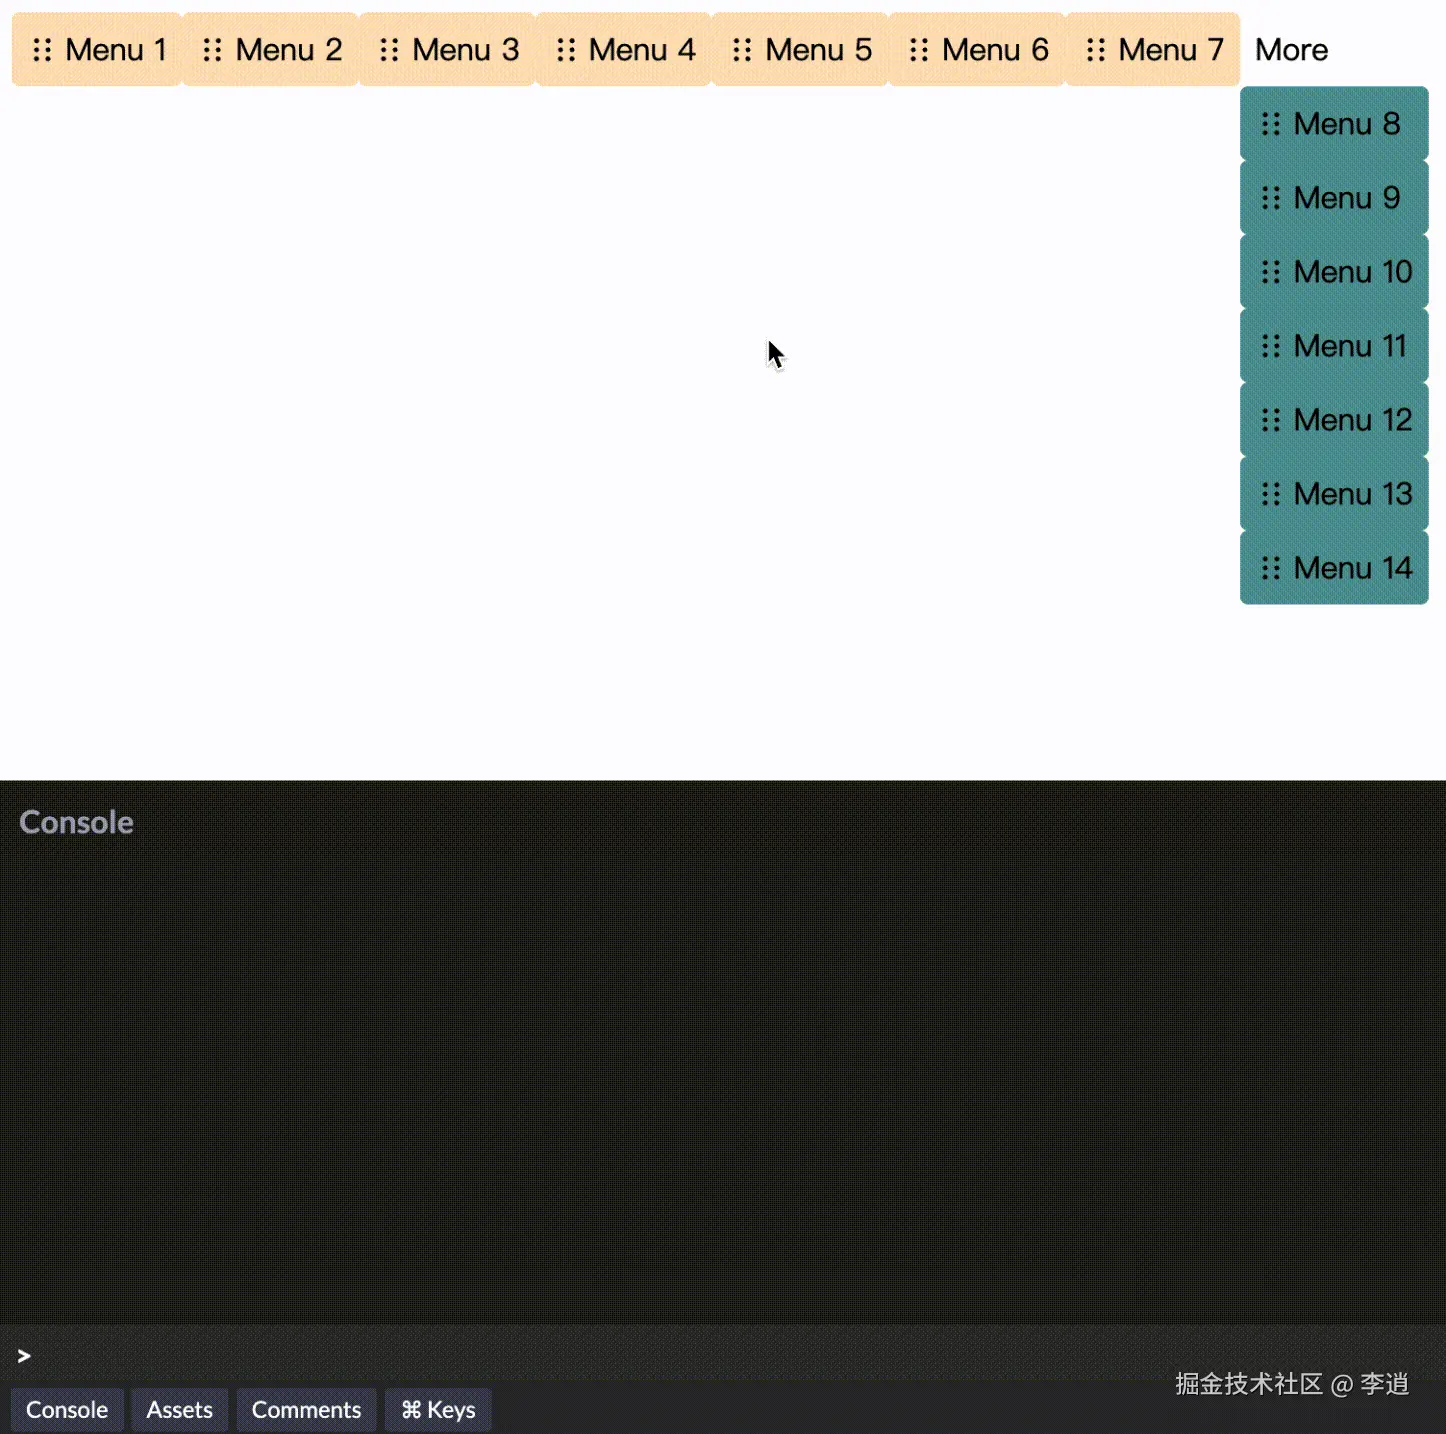
);step5 自动滚动

-
- element: 需要滚动的元素
ts
import { combine } from '@atlaskit/pragmatic-drag-and-drop/combine';
import { autoScrollForElements } from '@atlaskit/pragmatic-drag-and-drop-auto-scroll/element';

// App.tsx
useEffect(() => {
  return combine(
    autoScrollForElements({
      element: horizontalRef.current,
    }),
    autoScrollForElements({
      element: verticalRef.current,
    }),
  );
}, []);

return (
  <div>
    <div ref={horizontalRef}></div>
    <div ref={verticalRef}></div>
  </div>
);
step6 更新状态
前面的步骤基本上已经完成了大部分功能,现在只需要在拖拽完成之后重新 setState

- getReorderDestinationIndex 方法:获取元素拖拽完成之后的 index
- reorder 方法:交换两个 index 得到新数组
- reorderWithEdge 方法:上面两个方法的组合
ts
import { combine } from '@atlaskit/pragmatic-drag-and-drop/combine';
import { draggable, dropTargetForElements, monitorForElements } from '@atlaskit/pragmatic-drag-and-drop/element/adapter';
import { attachClosestEdge, extractClosestEdge } from '@atlaskit/pragmatic-drag-and-drop-hitbox/closest-edge';
import { getReorderDestinationIndex } from '@atlaskit/pragmatic-drag-and-drop-hitbox/util/get-reorder-destination-index';
import { reorder } from '@atlaskit/pragmatic-drag-and-drop/reorder';
import { reorderWithEdge } from '@atlaskit/pragmatic-drag-and-drop-hitbox/util/reorder-with-edge';

// Item.tsx
const { index } = props;

useEffect(() => {
  return combine(
    draggable({
      getInitialData: () => ({
        index,
      }),
    }),
    dropTargetForElements({
      getData: ({ input, element }) =>
        attachClosestEdge(
          { index },
          {
            input,
            element,
            allowedEdges: ['left', 'right'], // ['top', 'bottom']
        },
      ),
    }),
  );
}, [index]);

// App.tsx
const [menus, setMenus] = useState(initMenus);

useEffect(() => {
  return () => monitorForElements({
    onDrop: event => {
      const { source, location } = event;
      const target = location.current.dropTargets[0];
      if (!target) {
        return;
      }

      const startIndex = source.data.index as number;
      const indexOfTarget = target.data.index as number;

      const closestEdgeOfTarget = extractClosestEdge(target.data);

      const finishIndex = getReorderDestinationIndex({
        startIndex,
        indexOfTarget,
        axis: target.data.layout as Layout,
        closestEdgeOfTarget,
      });

      const newMenus = reorder({
        list: menus,
        startIndex,
        finishIndex,
      });

      // const newMenus = reorderWithEdge({
      //   list: menus,
      //   startIndex,
      //   indexOfTarget,
      //   axis: target.data.layout as Layout,
      //   closestEdgeOfTarget,
      // });

      setMenus(newMenus);
    },
  });
}, [menus]);
实时预览
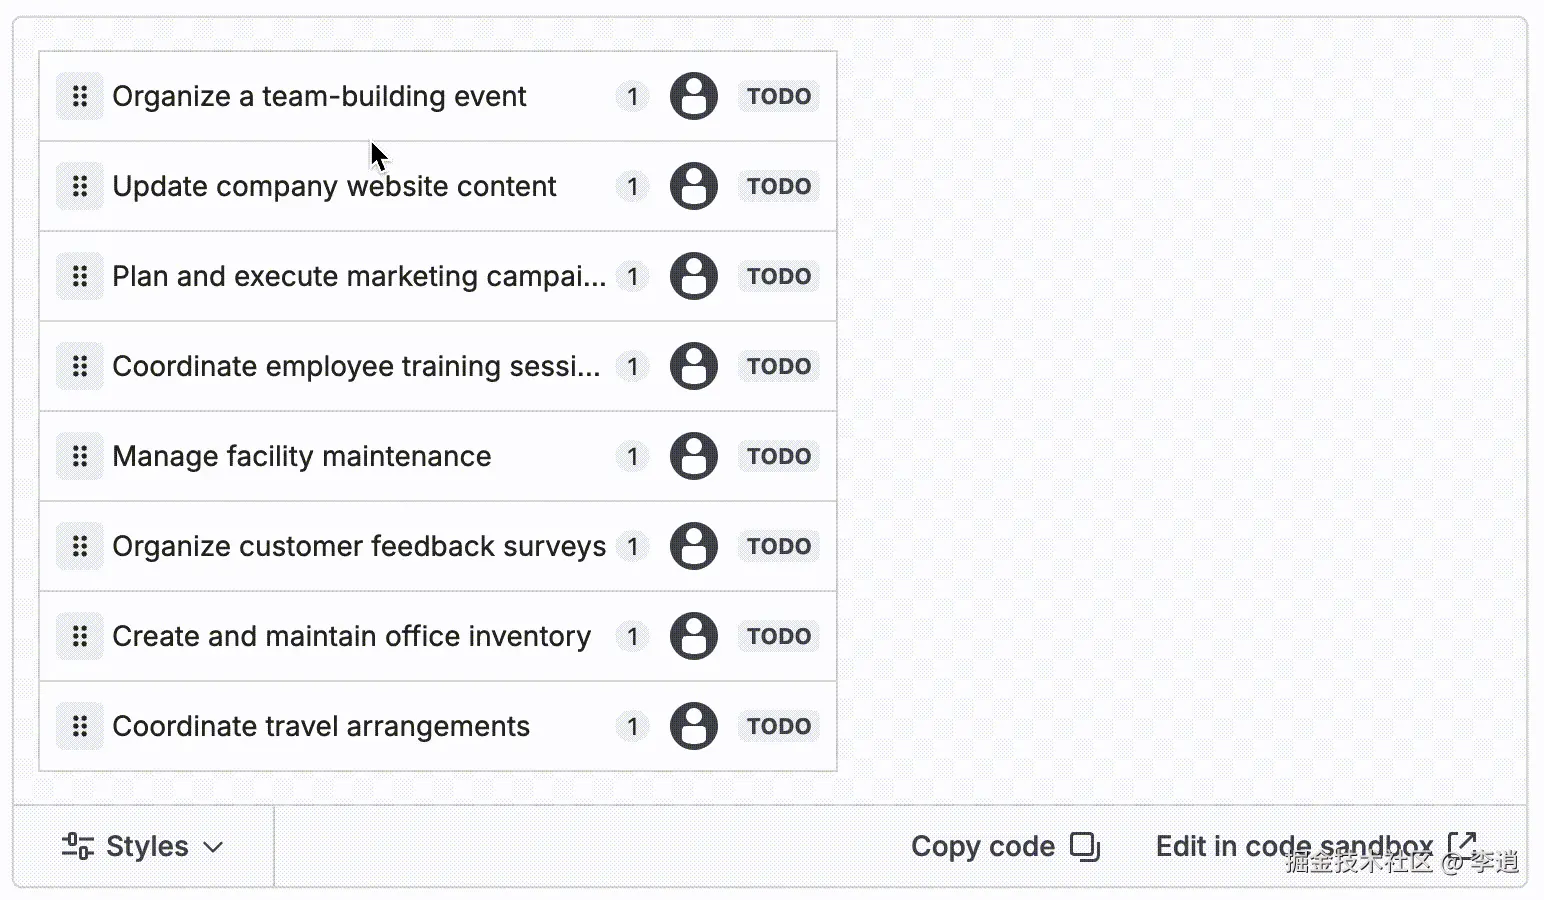
最早提到官网大部分例子都没有实时预览的效果,但还是有这么一个例子是有实时预览的:
又又又仔细看了几遍官网的 API,确实没有找到能够直接实现这种效果的配置,虽然它提供了很多实用的组件和方法。
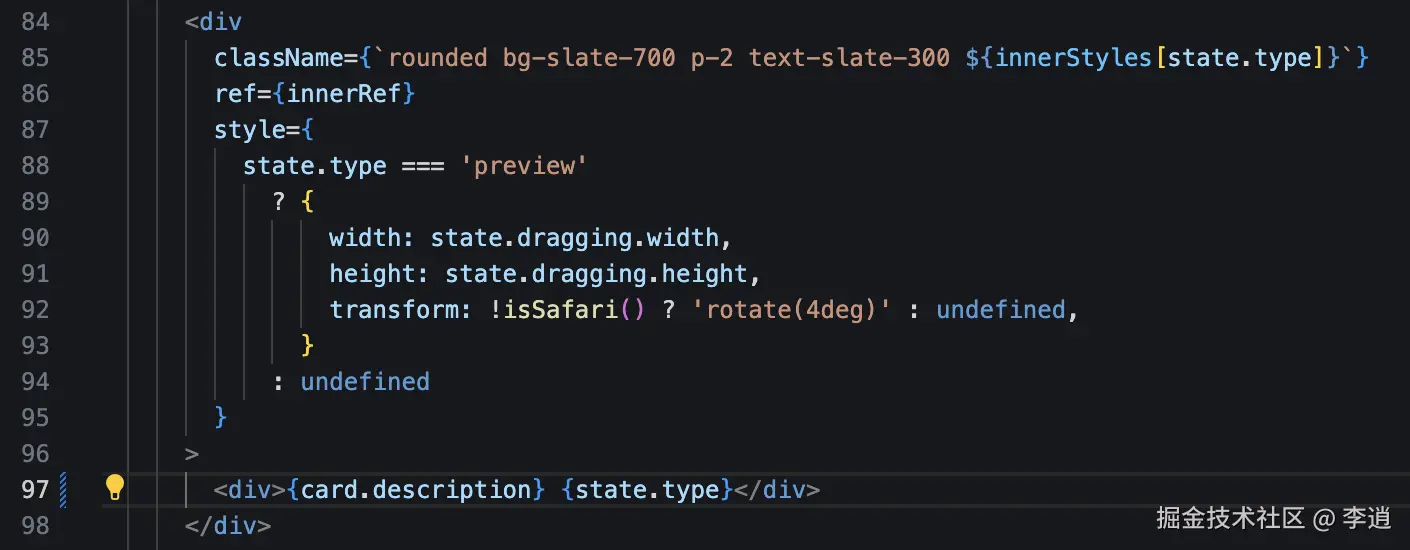
通过对这个 demo 的代码的研究,修改这一行代码之后可以查看 state.type 的值:
 |
 |
|---|
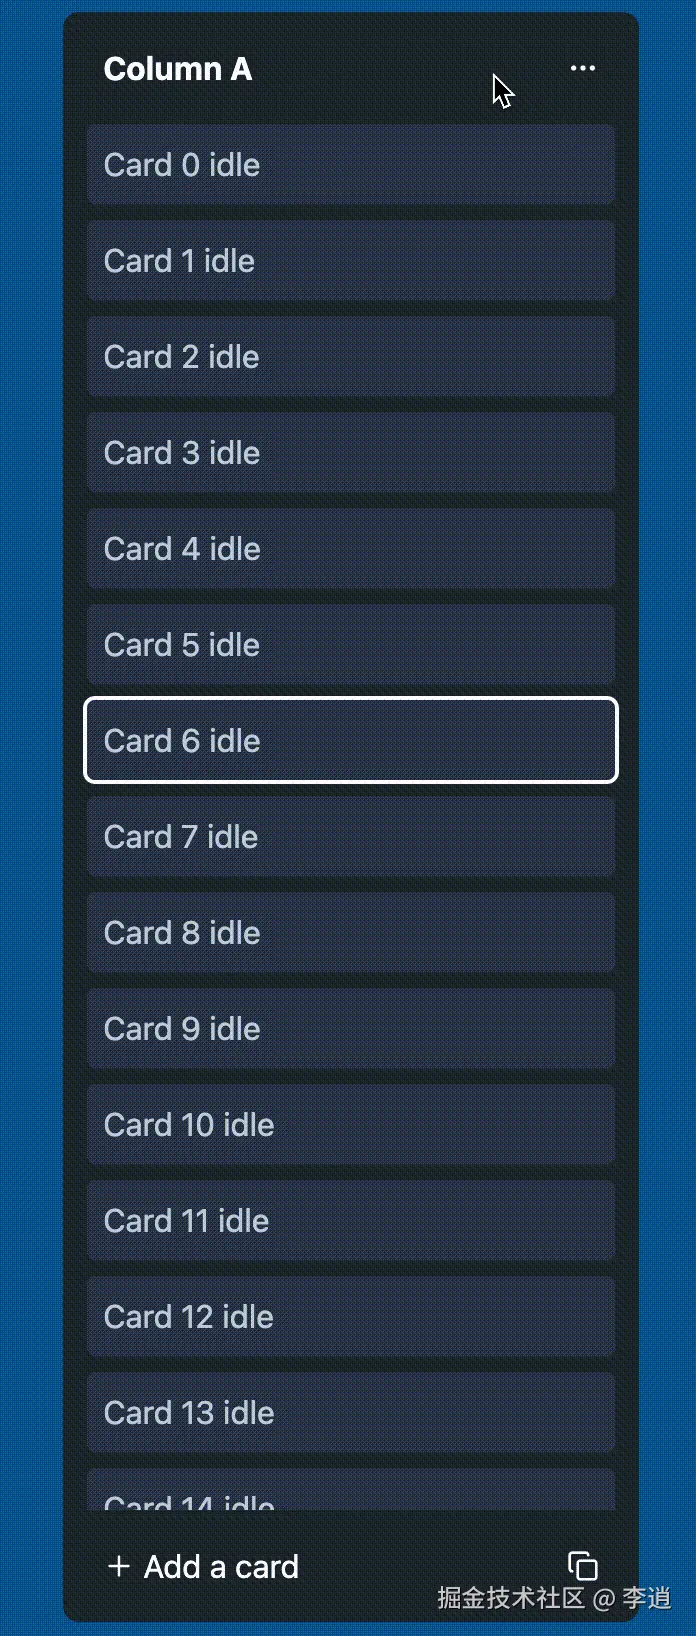
可以发现同一时间只有一个目标元素处于被放置的状态,只需要对 drag enter 的元素设置一个等高的占位元素就能实现"实时预览"的效果。
简单实现
ts
import { dropTargetForElements } from '@atlaskit/pragmatic-drag-and-drop/element/adapter';
import { attachClosestEdge, extractClosestEdge } from '@atlaskit/pragmatic-drag-and-drop-hitbox/closest-edge';
import { DropIndicator } from '@atlaskit/pragmatic-drag-and-drop-react-drop-indicator/box';
import classNames from 'classnames';

import type { Edge } from '@atlaskit/pragmatic-drag-and-drop-hitbox/closest-edge';
import type { ElementDropTargetEventBasePayload } from '@atlaskit/pragmatic-drag-and-drop/element/adapter';

// Item.tsx
const { index } = props;

const [closestEdge, setClosestEdge] = useState<Edge | null>(null);
const [state, setState] = useState('');

useEffect(() => {
  return combine(
    draggable({
      getInitialData: () => ({
        index,
      }),
      onDragStart: () => {
        setState('drag-start');
      },
      onDrop: () => {
        setState('');
      },
    }),
    dropTargetForElements({
      getData: ({ input, element }) =>
        attachClosestEdge(
          { index },
          {
            input,
            element,
            allowedEdges: ['top', 'bottom'], // ['left', 'right']
          },
        ),

      onDrag: (event: ElementDropTargetEventBasePayload) => {
        const position = extractClosestEdge(event.self.data);
        setClosestEdge(position);
      },
      onDragEnter: (event: ElementDropTargetEventBasePayload) => {
        const position = extractClosestEdge(event.self.data);
        setState('drag-enter');
        setClosestEdge(position);
      },
      onDragLeave: event => {
        if (event.source.data.index === event.self.data.index) {
          setState('drag-leave');
        } else {
          setState('');
        }
        setClosestEdge(null);
      },
      onDrop: () => {
        setState('');
        setClosestEdge(null);
      },
    }),
  );
}, [index]);

return (
  <div className={classNames('item-container', {
    [`item-container-${state}`]: state,
    [`item-container-drop-${closestEdge}`]: closestEdge,
  })}>
    <div className="item">
      {state !== 'drag-start' ? (
        <div>Item {index}</div>
      ) : null}
    </div>
    <div className="drop-placeholder" />
  </div>
);
css
.item-container {
  display: flex;
  flex-direction: column;
}

.item-container-drop-top {
  flex-direction: column-reverse;
}

.drop-placeholder {
  display: none;
  height: 40px;
  background-color: rgba(95, 158, 160, 0.3);
  border-radius: 4px;
}

.item-container-drag-start {
  opacity: 0.5;
}

.item-container-drag-leave {
  display: none;
}

.item-container-drag-enter {
  .drop-placeholder {
    display: unset;
  }
}

.item {
  flex: none;
  display: flex;
  align-items: center;
  gap: 4px;
  padding: 8px;
  border-radius: 4px;
  position: relative;
  background-color: cadetblue;
  height: 24px;
}