1.给ai微服务添加到nacos注册中心
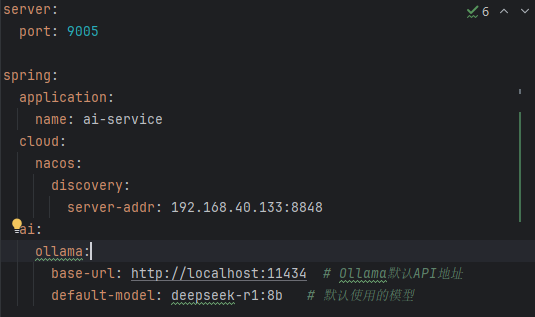
(1)进行服务的配置
首先要开启nacos服务,nacos就是服务的注册与发现。相似的还有zookeeper,eurekar。
在这里添加nacos的配置,我这里的地址是虚拟机里面的地址,我将nacos部署在虚拟机的docker容器里面。
(2)启动类添加注解
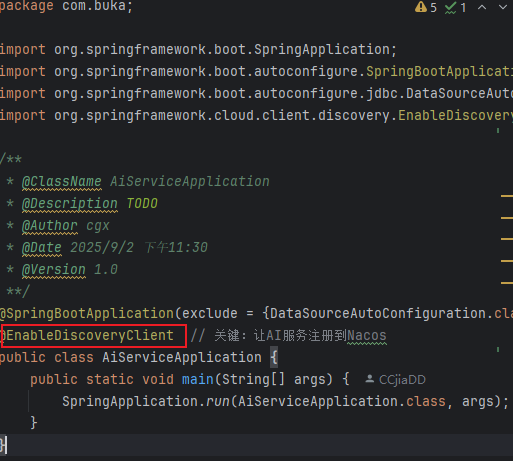
添加这个注解,以便nacos能够发现这个服务。
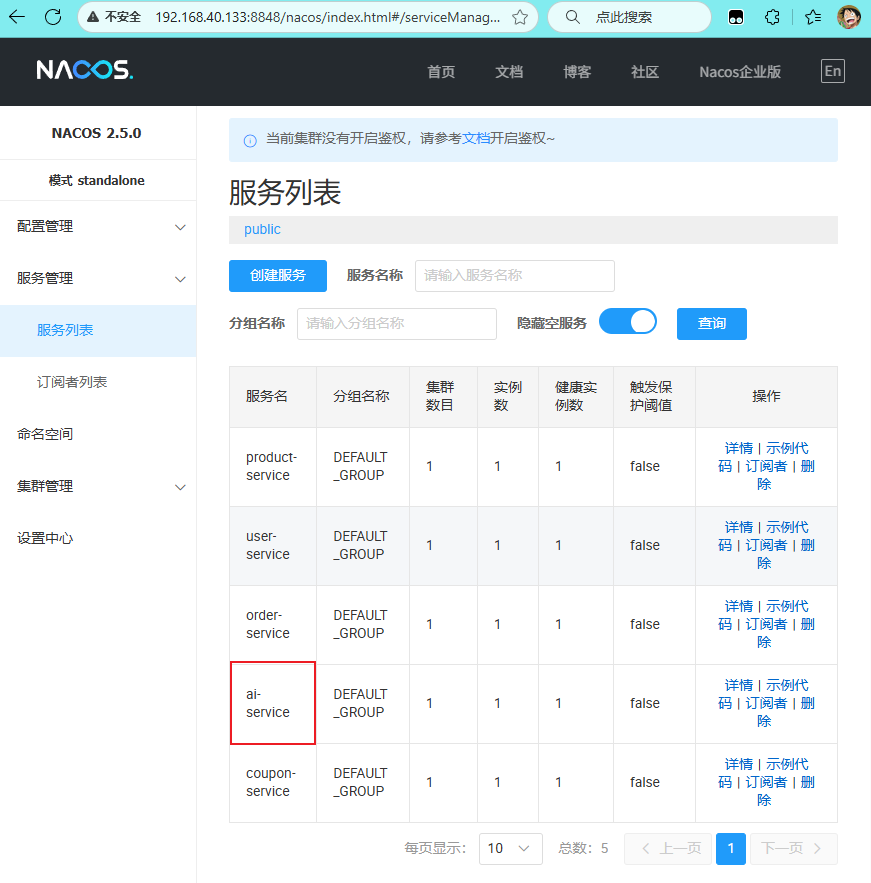
(3)确认注册成功
在第一个图中我的nacos的地址是192.168.40.133:8848。那么进入网站的地址就是http://192.168.40.133:8848/nacos/index.html
在这里我们就能看到名字叫ai-service的服务注册成功。
2.服务间的通信Openfeign
(1)完成服务的注册与发现之后就是进行服务之间的通信了,那么我们这里实现通信使用的是Openfeign。
@FeignClient这个注解里面的name就是你要链接对应微服务的注册名字。里面就可以调用这个对应服务Controller里面的接口了。
java
package com.buka.feign;

import org.springframework.cloud.openfeign.FeignClient;
import org.springframework.web.bind.annotation.PostMapping;
import org.springframework.web.bind.annotation.RequestBody;


@FeignClient(name = "ai-service")
public interface AiFeignService {
    //完全复制AI服务中Controller的接口定义
    @PostMapping("/ai/ollama/generate")
    String generateAi(@RequestBody String prompt);
}
(2)测试连接
其实这些到这里,我们就可以直接注入这个接口并实现调用了。接下来我就贴入我的完整测试代码。
Controller:
java
package com.buka.controller;

import com.buka.service.AiService;
import org.springframework.beans.factory.annotation.Autowired;
import org.springframework.web.bind.annotation.PostMapping;
import org.springframework.web.bind.annotation.RequestMapping;
import org.springframework.web.bind.annotation.RestController;

/**
 * @ClassName UserAiController
 * @Description TODO
 * @Author cgx
 * @Date 2025/9/4 上午12:29
 * @Version 1.0
 **/
@RestController
@RequestMapping("/userAi")
public class UserAiController {
    @Autowired
    private AiService aiService;

    @PostMapping("/test")
    public String test() {
        return aiService.getAnswer();
    }
}
service:
java
package com.buka.service.impl;
import com.buka.feign.AiFeignService;
import com.buka.service.AiService;
import org.springframework.beans.factory.annotation.Autowired;
import org.springframework.stereotype.Service;
/**
* @ClassName AiServiceImpl
* @Description TODO
* @Author cgx
* @Date 2025/9/4 上午12:32
* @Version 1.0
**/
@Service
public class AiServiceImpl implements AiService {
@Autowired
private AiFeignService aiFeignService;
@Override
public String getAnswer() {
return aiFeignService.generateAi("你好,不用进行深度思考");
}
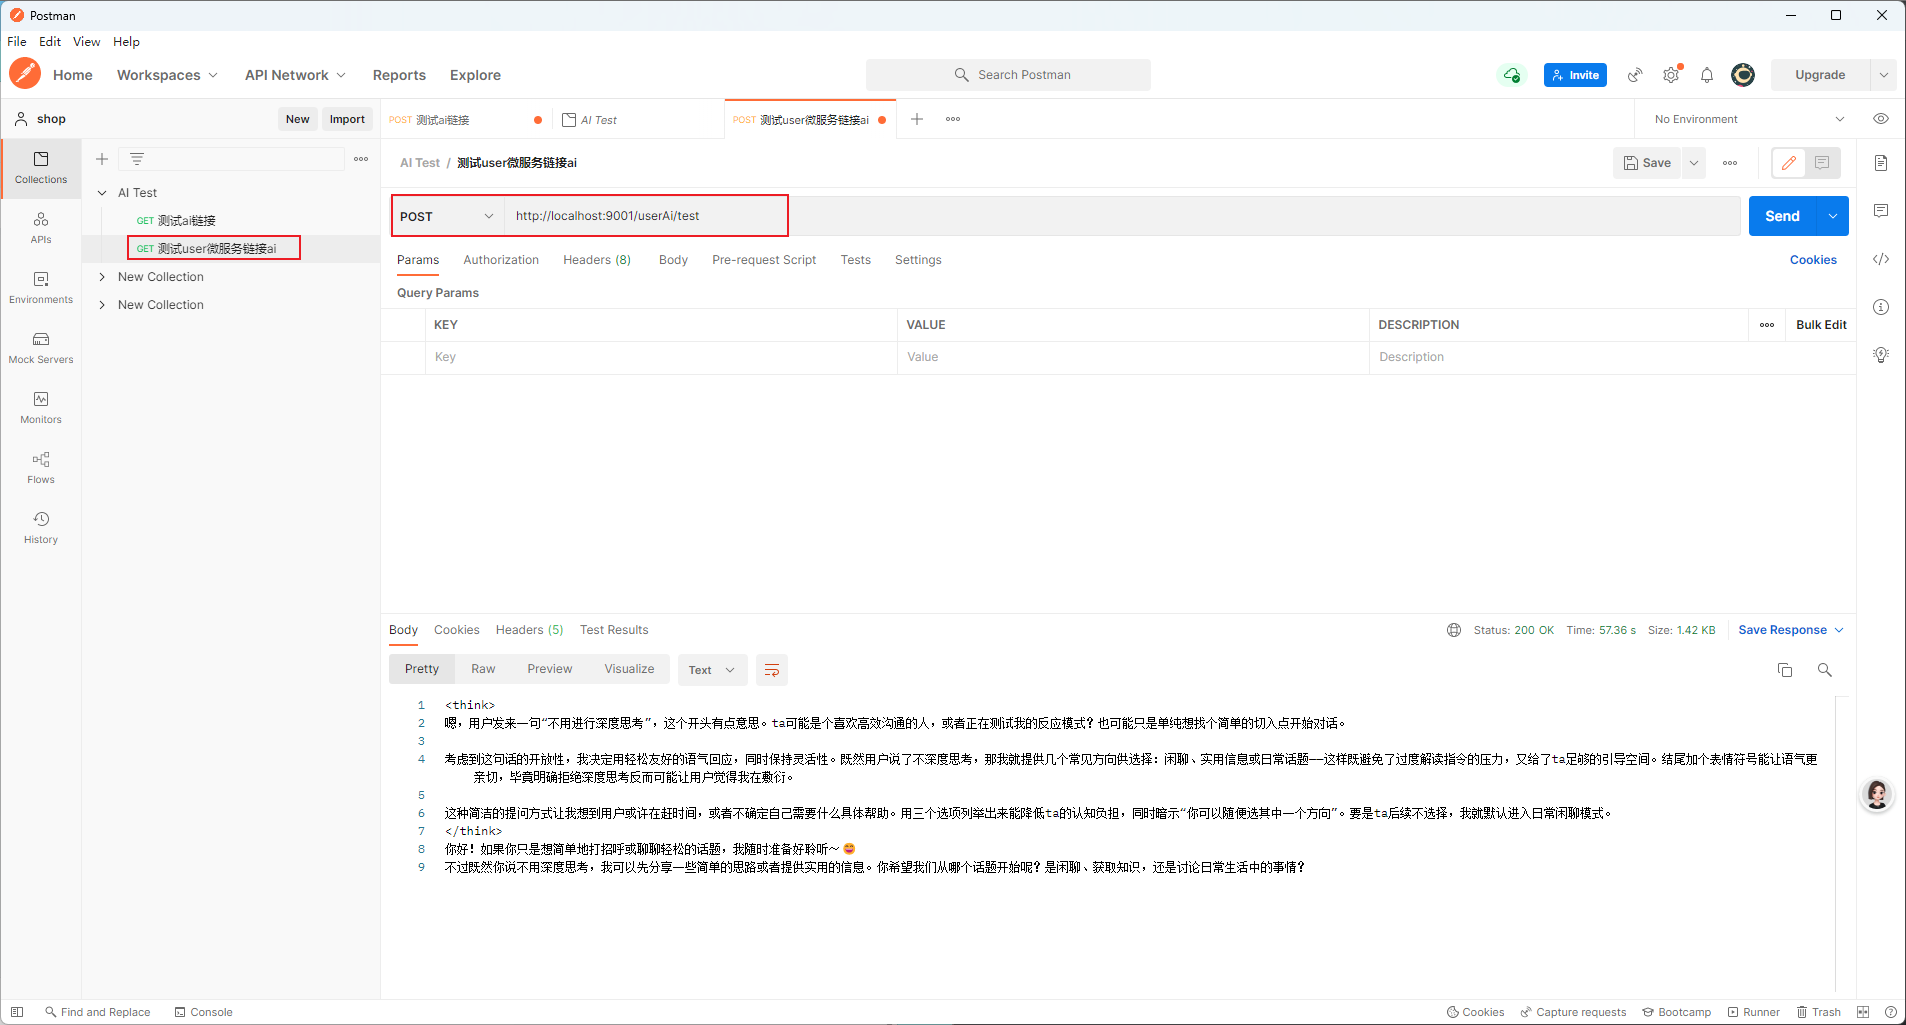
}最后还是使用postman进行测试
3.备注
在使用调用ai微服务的时候会出现run time out的情况,这是由于调用ai的时候本地模型比较慢,会超时。解决方案有很多,比如更换小的模型,增加响应的时间。我们这里只进行测试学习,所以就增加响应时间。
这里更改ribbon的配置来实现
java
ai-service:
  ribbon:
    # 连接超时(毫秒)
    ConnectTimeout: 5000
    # 读取超时(毫秒,根据实际需求调整,如120000=2分钟)
    ReadTimeout: 120000
    # 关闭所有操作的重试
    OkToRetryOnAllOperations: false
    # 同一服务的最大重试次数
    MaxAutoRetries: 0
    # 切换服务的最大重试次数
    MaxAutoRetriesNextServer: 0