目录
[1.push & pop 方法](#1.push & pop 方法)
[push 方法](#push 方法)
[pop 方法](#pop 方法)
[2.present & dismiss 方法](#2.present & dismiss 方法)
[present 方法](#present 方法)
[dismiss 方法](#dismiss 方法)
[present 和 dismiss 的多级方法](#present 和 dismiss 的多级方法)
前言
push 和 present 分别是 ios 中的两种推出方法。下面我会结合实例来去介绍一下这两个方法。
1.push & pop 方法
push 方法
objectivec
ViewControllerB* vcB = [[ViewControllerB alloc] init];
    [self.navigationController pushViewController:vcB animated:YES];
pop 方法
objectivec
//返回上一个
[self.navigationController popViewControllerAnimated:YES];

//返回指定的
NSArray *viewControllers = self.navigationController.viewControllers;
UIViewController *targetVC = viewControllers[0]; // 第一个控制器
[self.navigationController popToViewController:targetVC animated:YES];

//返回指定的
[self.navigationController popToRootViewControllerAnimated:YES];
2.present & dismiss 方法
present 方法
objectivec
ViewControllerB* vcB = [[ViewControllerB alloc] init];
    UINavigationController* nav = [[UINavigationController alloc] initWithRootViewController:vcB];
    [self presentViewController:nav animated:YES completion:nil];
dismiss 方法
dissmiss 这里比较复杂一点他不能直接向 pop 一样返回指定的层数和根视图
这里会去介绍一个多级视图的方法
objectivec
[self dismissViewControllerAnimated:YES completion:nil];present 和 dismiss 的多级方法
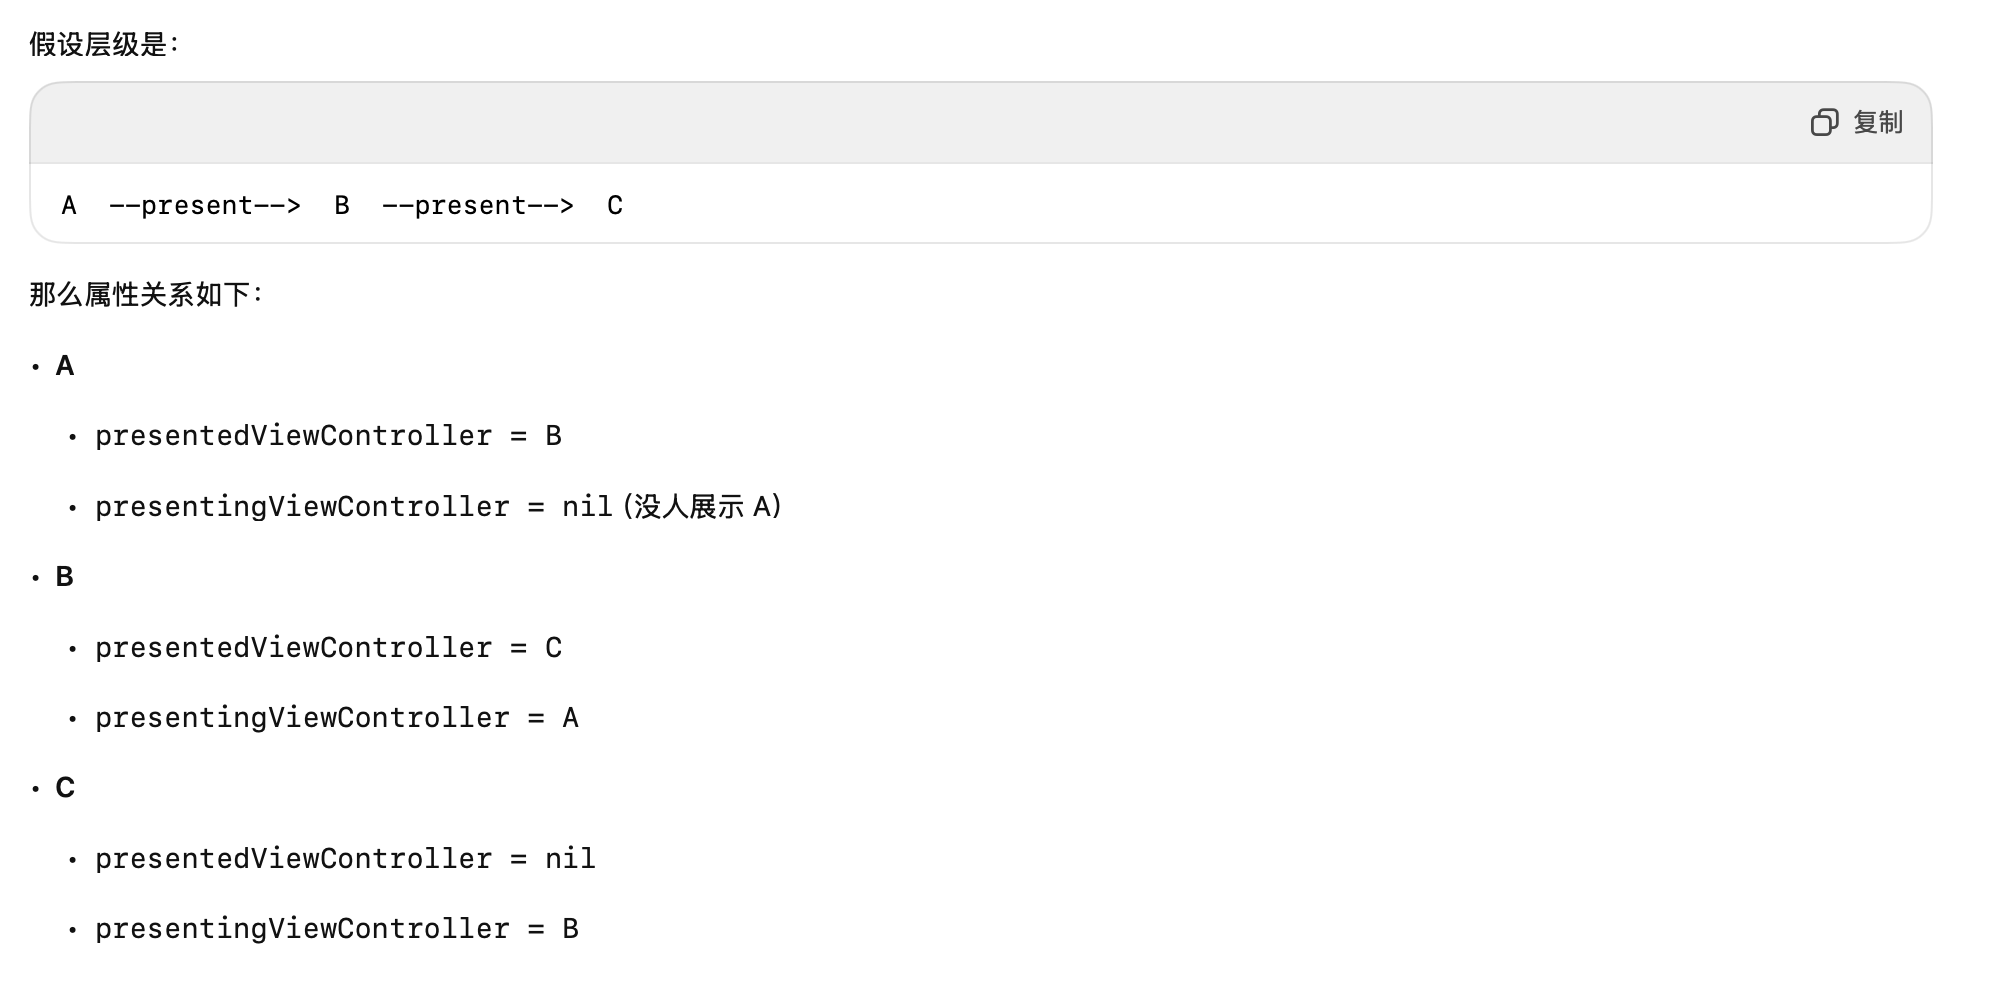
在 iOS 中,每个控制器都有两个属性:
presentedViewController
• 含义:当前控制器 展示的(被我 present 出去的)控制器。
• 如果我没有弹出任何控制器,这个属性就是 nil。
presentingViewController
• 含义:展示我的 控制器。
• 如果我是被别人 present 出来的,这个属性就是我的"上一级";否则就是 nil。
这里引用一张图

那这里我们再结合 dissmiss
objectivec
[self.presentingViewController.presentingViewController dismissViewControllerAnimated:YES completion:nil];这个就可以实现从 c 到 a,越过两级视图。
objectivec
UIViewController *rootVC = self;
while (rootVC.presentingViewController) {
    rootVC = rootVC.presentingViewController;
}
[rootVC dismissViewControllerAnimated:YES completion:nil];
这段代码就能实现追溯到根视图。
这一切的一切都和 presenting 和 presented 这两个方法有关。
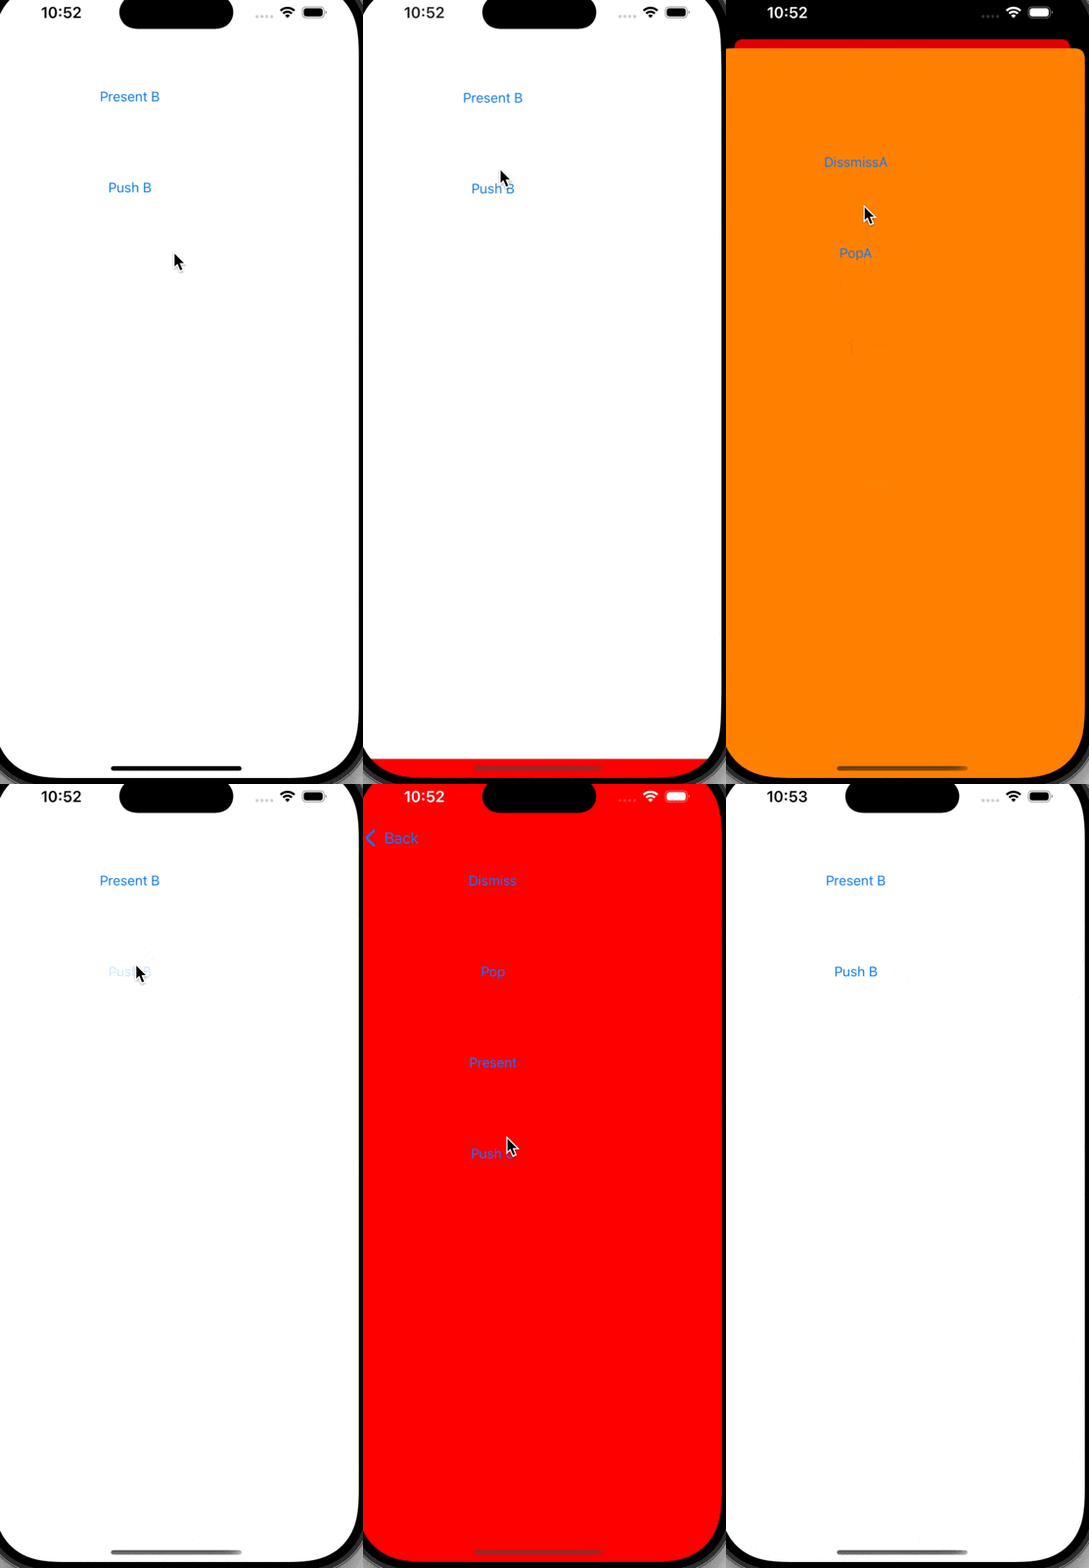
下面我给一个演示的实例
