在我之前的文章 "将 agents 连接到 Elasticsearch 使用模型上下文协议 - docker",我展示了如何使用 Claude Desktop 来连接到 Elasticsearch MCP 并进行自然语言查询。由于一些原因,Claude Desktop 对中国的很多的开发者并不可用。我在另外的一篇文章 "如何在 vscode 里配置 MCP 并连接到 Elasticsearch" 里详述了如上在 vscode 里配置并连接到 Elasticsearch MCP 服务器。在今天的文章中,我讲使用一个自建的客户端来连接到 Elasticsearch MCP 服务器。Simple MCP client 是我们将要使用的客户端。
安装
我们首先参考文章 "将 agents 连接到 Elasticsearch 使用模型上下文协议 - docker" 来安装好自己的 Elasticsearch 及 Elasticsearch MCP 服务器。
部署 Simple MCP Client
我们首先使用如下的命令来下载代码:
bash
`git clone https://github.com/jeffvestal/simple-mcp-client`AI写代码我们进入到项目的根目录,然后运行如下的脚本来创建虚拟环境:
arduino
`./setup.sh` AI写代码
markdown
`
1. $ ./setup.sh
2. 🤖 Simple MCP Client Setup
3. ==========================
4. Detected OS: macos
6. 📋 Checking prerequisites...
7. ✅ Python 3.11.8 found
8. ✅ Node.js v22.14.0 found
9. ✅ npm 10.9.2 found
11. 🐍 Setting up Backend...
12. ------------------------
13. Creating Python virtual environment...
14. ✅ Virtual environment created
15. Activating project virtual environment...
16. ✅ Virtual environment activated
17. Upgrading pip...
18. Requirement already satisfied: pip in ./venv/lib/python3.11/site-packages (24.0)
19. Collecting pip
20. Using cached pip-25.2-py3-none-any.whl.metadata (4.7 kB)
21. Using cached pip-25.2-py3-none-any.whl (1.8 MB)
22. Installing collected packages: pip
23. Attempting uninstall: pip
24. Found existing installation: pip 24.0
25. Uninstalling pip-24.0:
26. Successfully uninstalled pip-24.0
27. Successfully installed pip-25.2
28. ✅ pip upgraded
29. ...
`AI写代码然后安装一个 js 包:
sql
`
1. sudo npm install vite
2. sudo npm install @vitejs/plugin-react
3. sudo npm install react@latest react-dom@latest
4. sudo npm install lucide-react
5. sudo npm install react-markdown
6. sudo npm install zustand
7. sudo npm install @radix-ui/react-toast @radix-ui/react-dialog @radix-ui/react-dropdown-menu @radix-ui/react-label @radix-ui/react-popover @radix-ui/react-scroll-area @radix-ui/react-select @radix-ui/react-slot @radix-ui/react-tabs @radix-ui/react-tooltip
8. sudo npm install react react-dom typescript vite @vitejs/plugin-react \
9. tailwindcss postcss autoprefixer class-variance-authority clsx \
10. lucide-react zustand \
11. @radix-ui/react-toast @radix-ui/react-dialog @radix-ui/react-dropdown-menu \
12. @radix-ui/react-label @radix-ui/react-popover @radix-ui/react-scroll-area \
13. @radix-ui/react-select @radix-ui/react-slot @radix-ui/react-tabs @radix-ui/react-tooltip \
14. @radix-ui/react-separator
15. sudo npm install -D @tailwindcss/postcss
`AI写代码然后运行如下的脚步:
bash
`./start-dev.sh`AI写代码
markdown
`
1. $ ./start-dev.sh local
2. Simple MCP Chat Client - Development Environment
3. =============================================
4. Mode: local
6. Managing Python virtual environment...
7. Activating project virtual environment...
8. ✅ Project virtual environment activated
10. Starting backend server...
11. Backend server started (PID: 86058)
12. URL: http://localhost:8002
13. Logs: logs/backend.log
14. Starting frontend server...
15. Frontend server started (PID: 86096)
16. URL: http://localhost:5173 (or next available port)
17. API: http://localhost:8002/api
18. Logs: logs/frontend.log
20. Both servers are running in local mode!
21. Press Ctrl+C to stop both servers
23. Logs are being written to:
24. Backend: logs/backend.log
25. Frontend: logs/frontend.log
27. You can monitor logs in real-time with:
28. tail -f logs/backend.log
29. tail -f logs/frontend.log
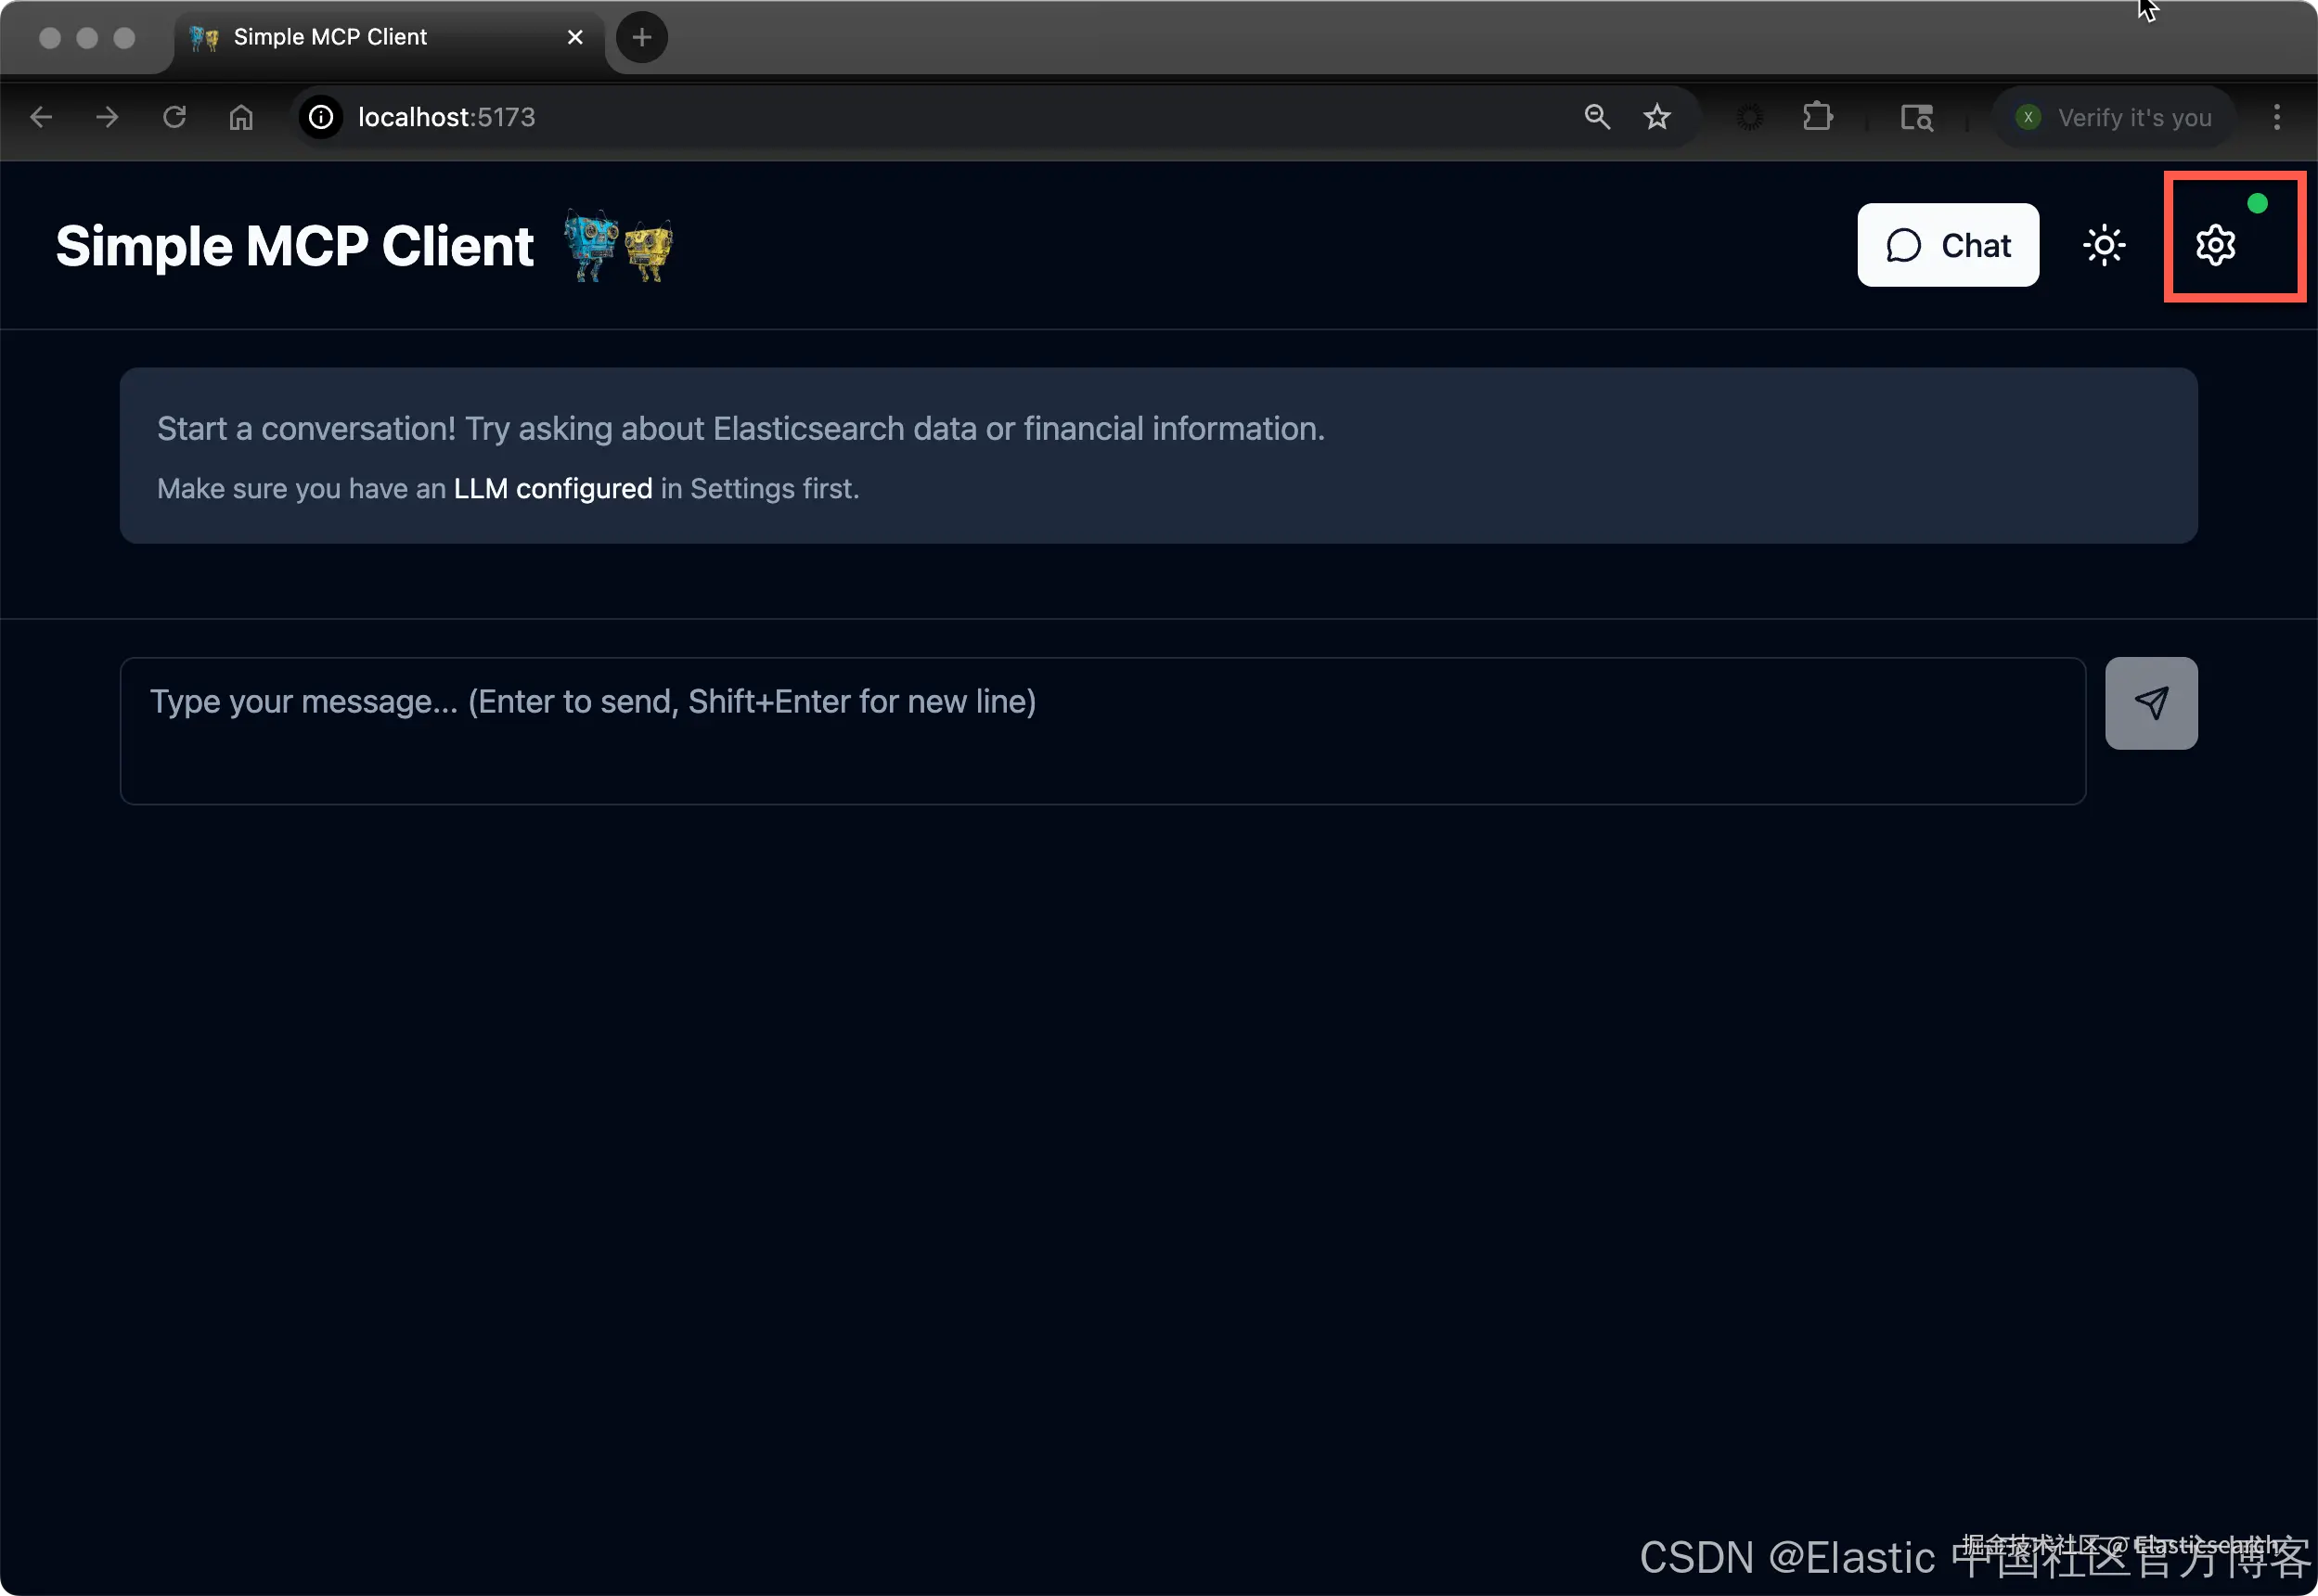
`AI写代码我们成功地启动后,在浏览器地址栏输入 http://localhost:5173/,可以看到如下的界面:
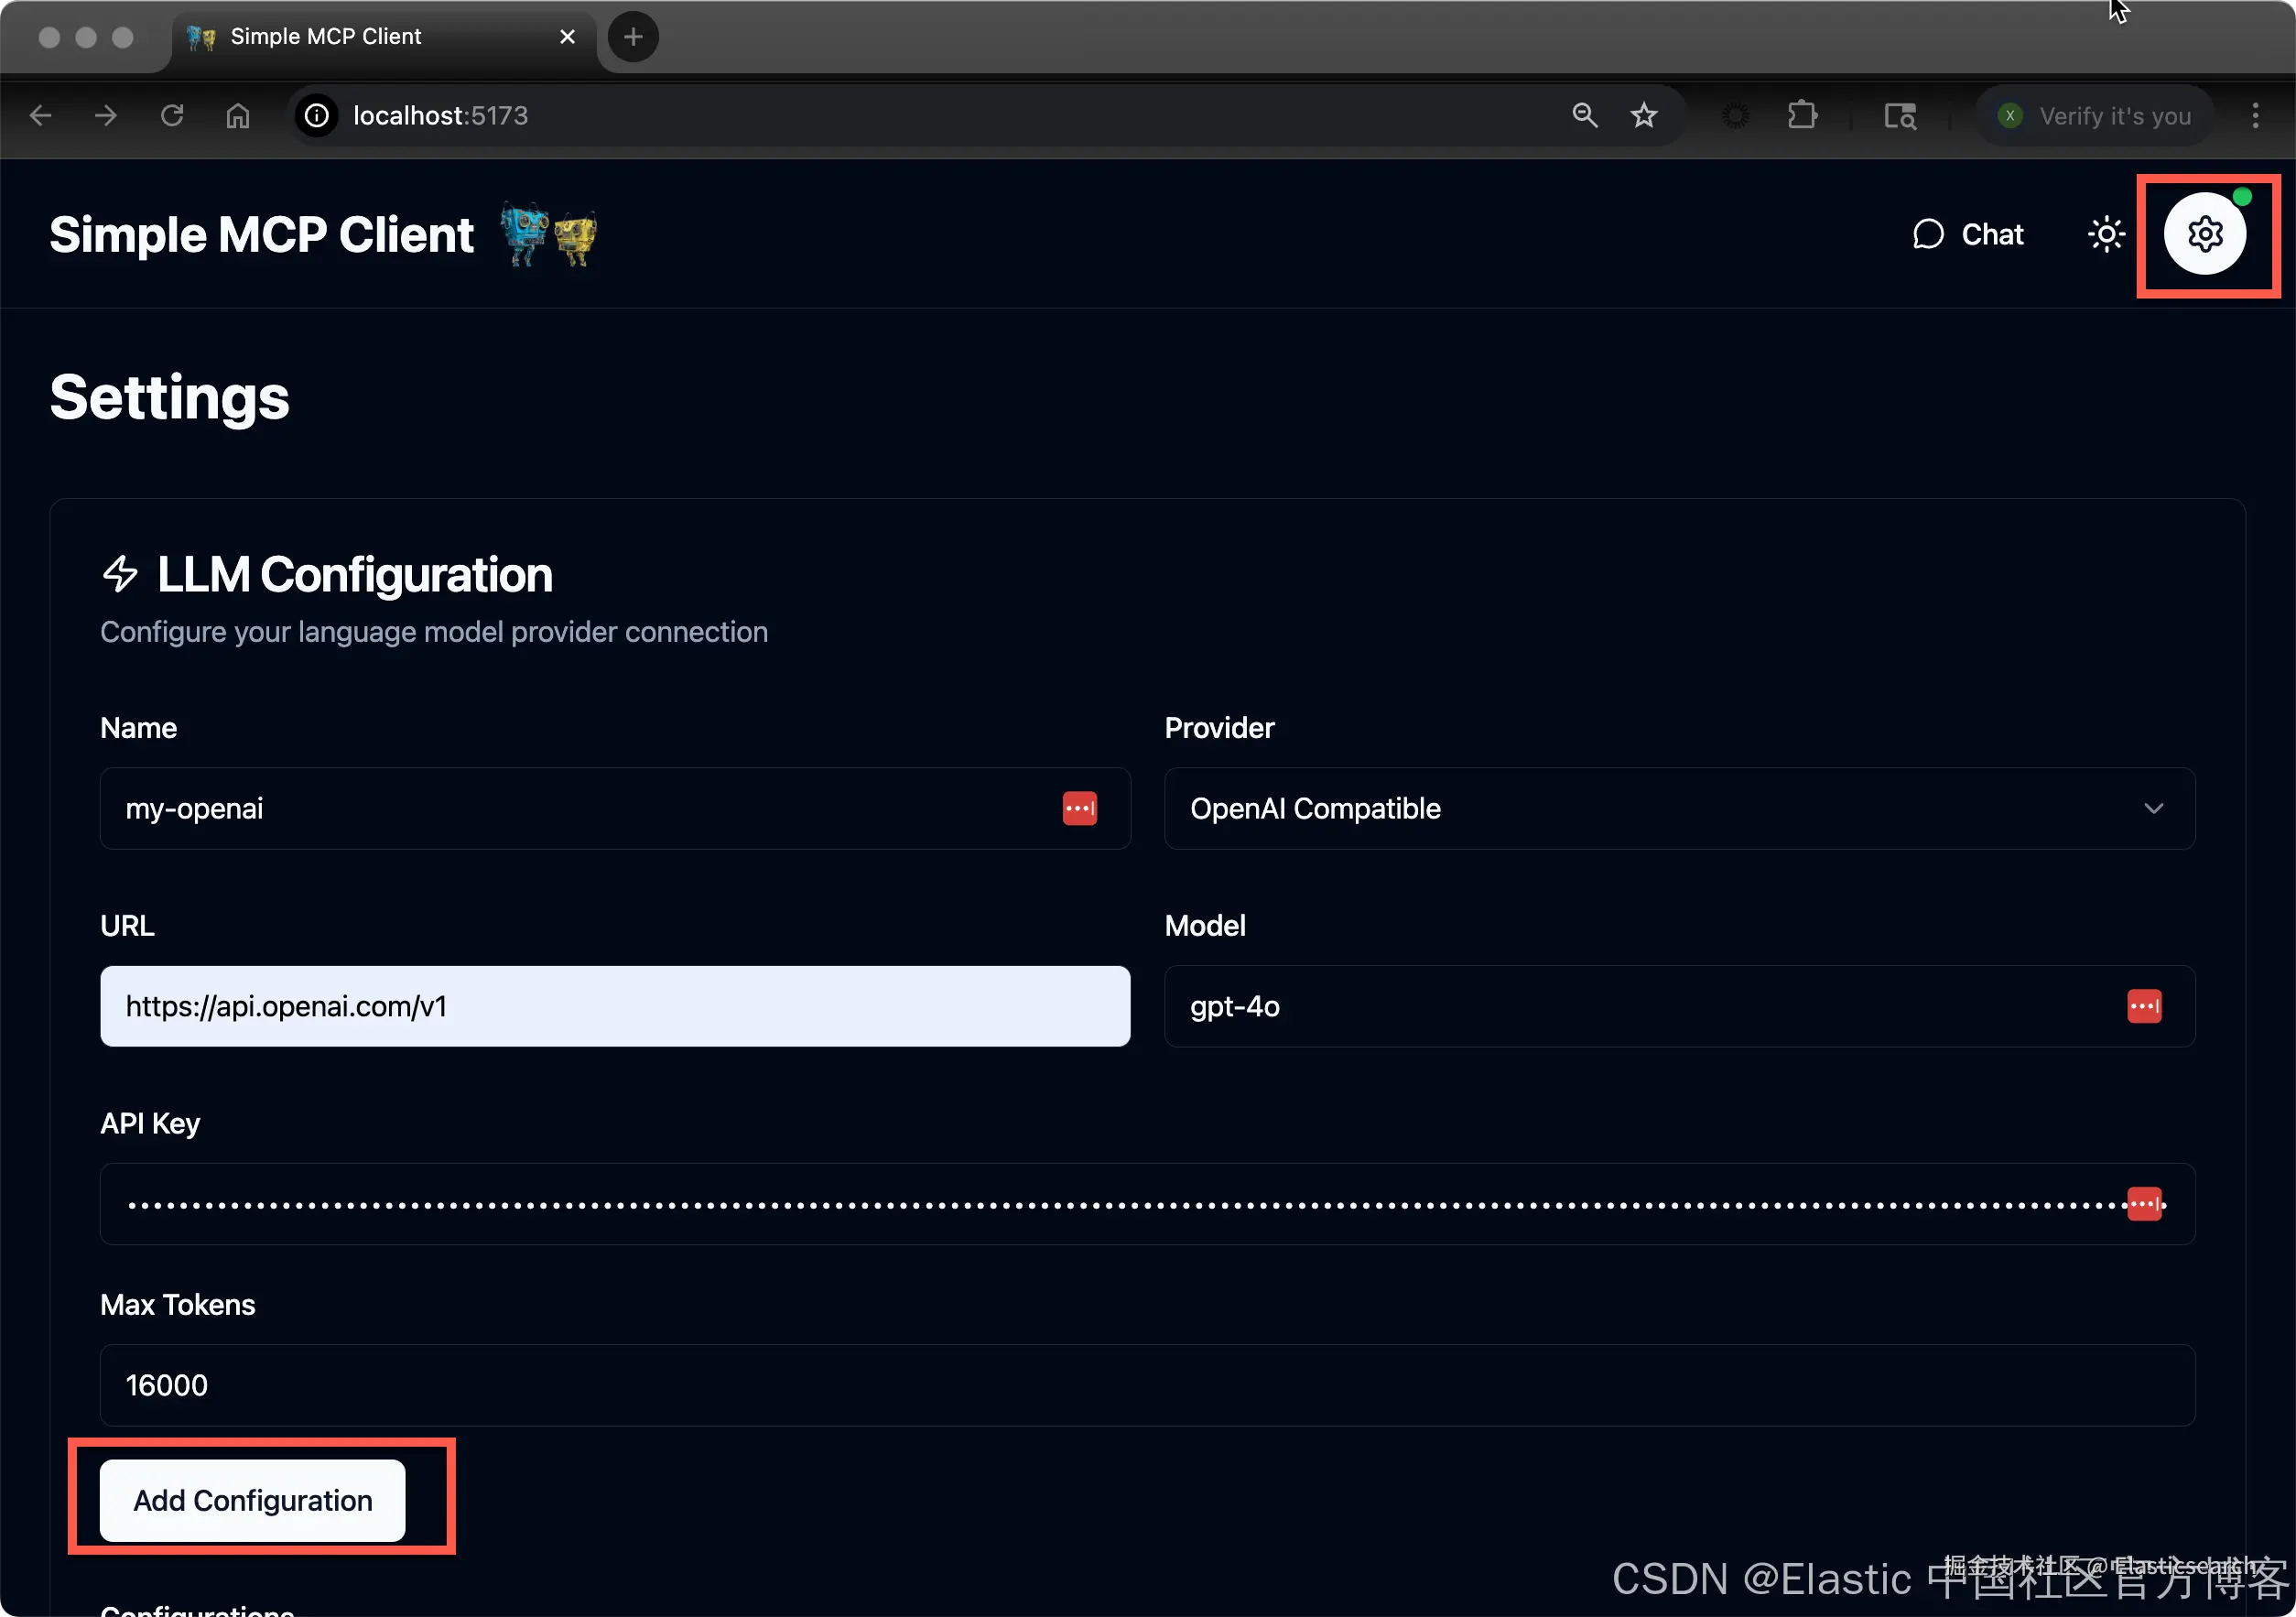
点击上面的 Add Configuration,我们可以看到添加的 LLM。我们可以尝试 DeepSeek。
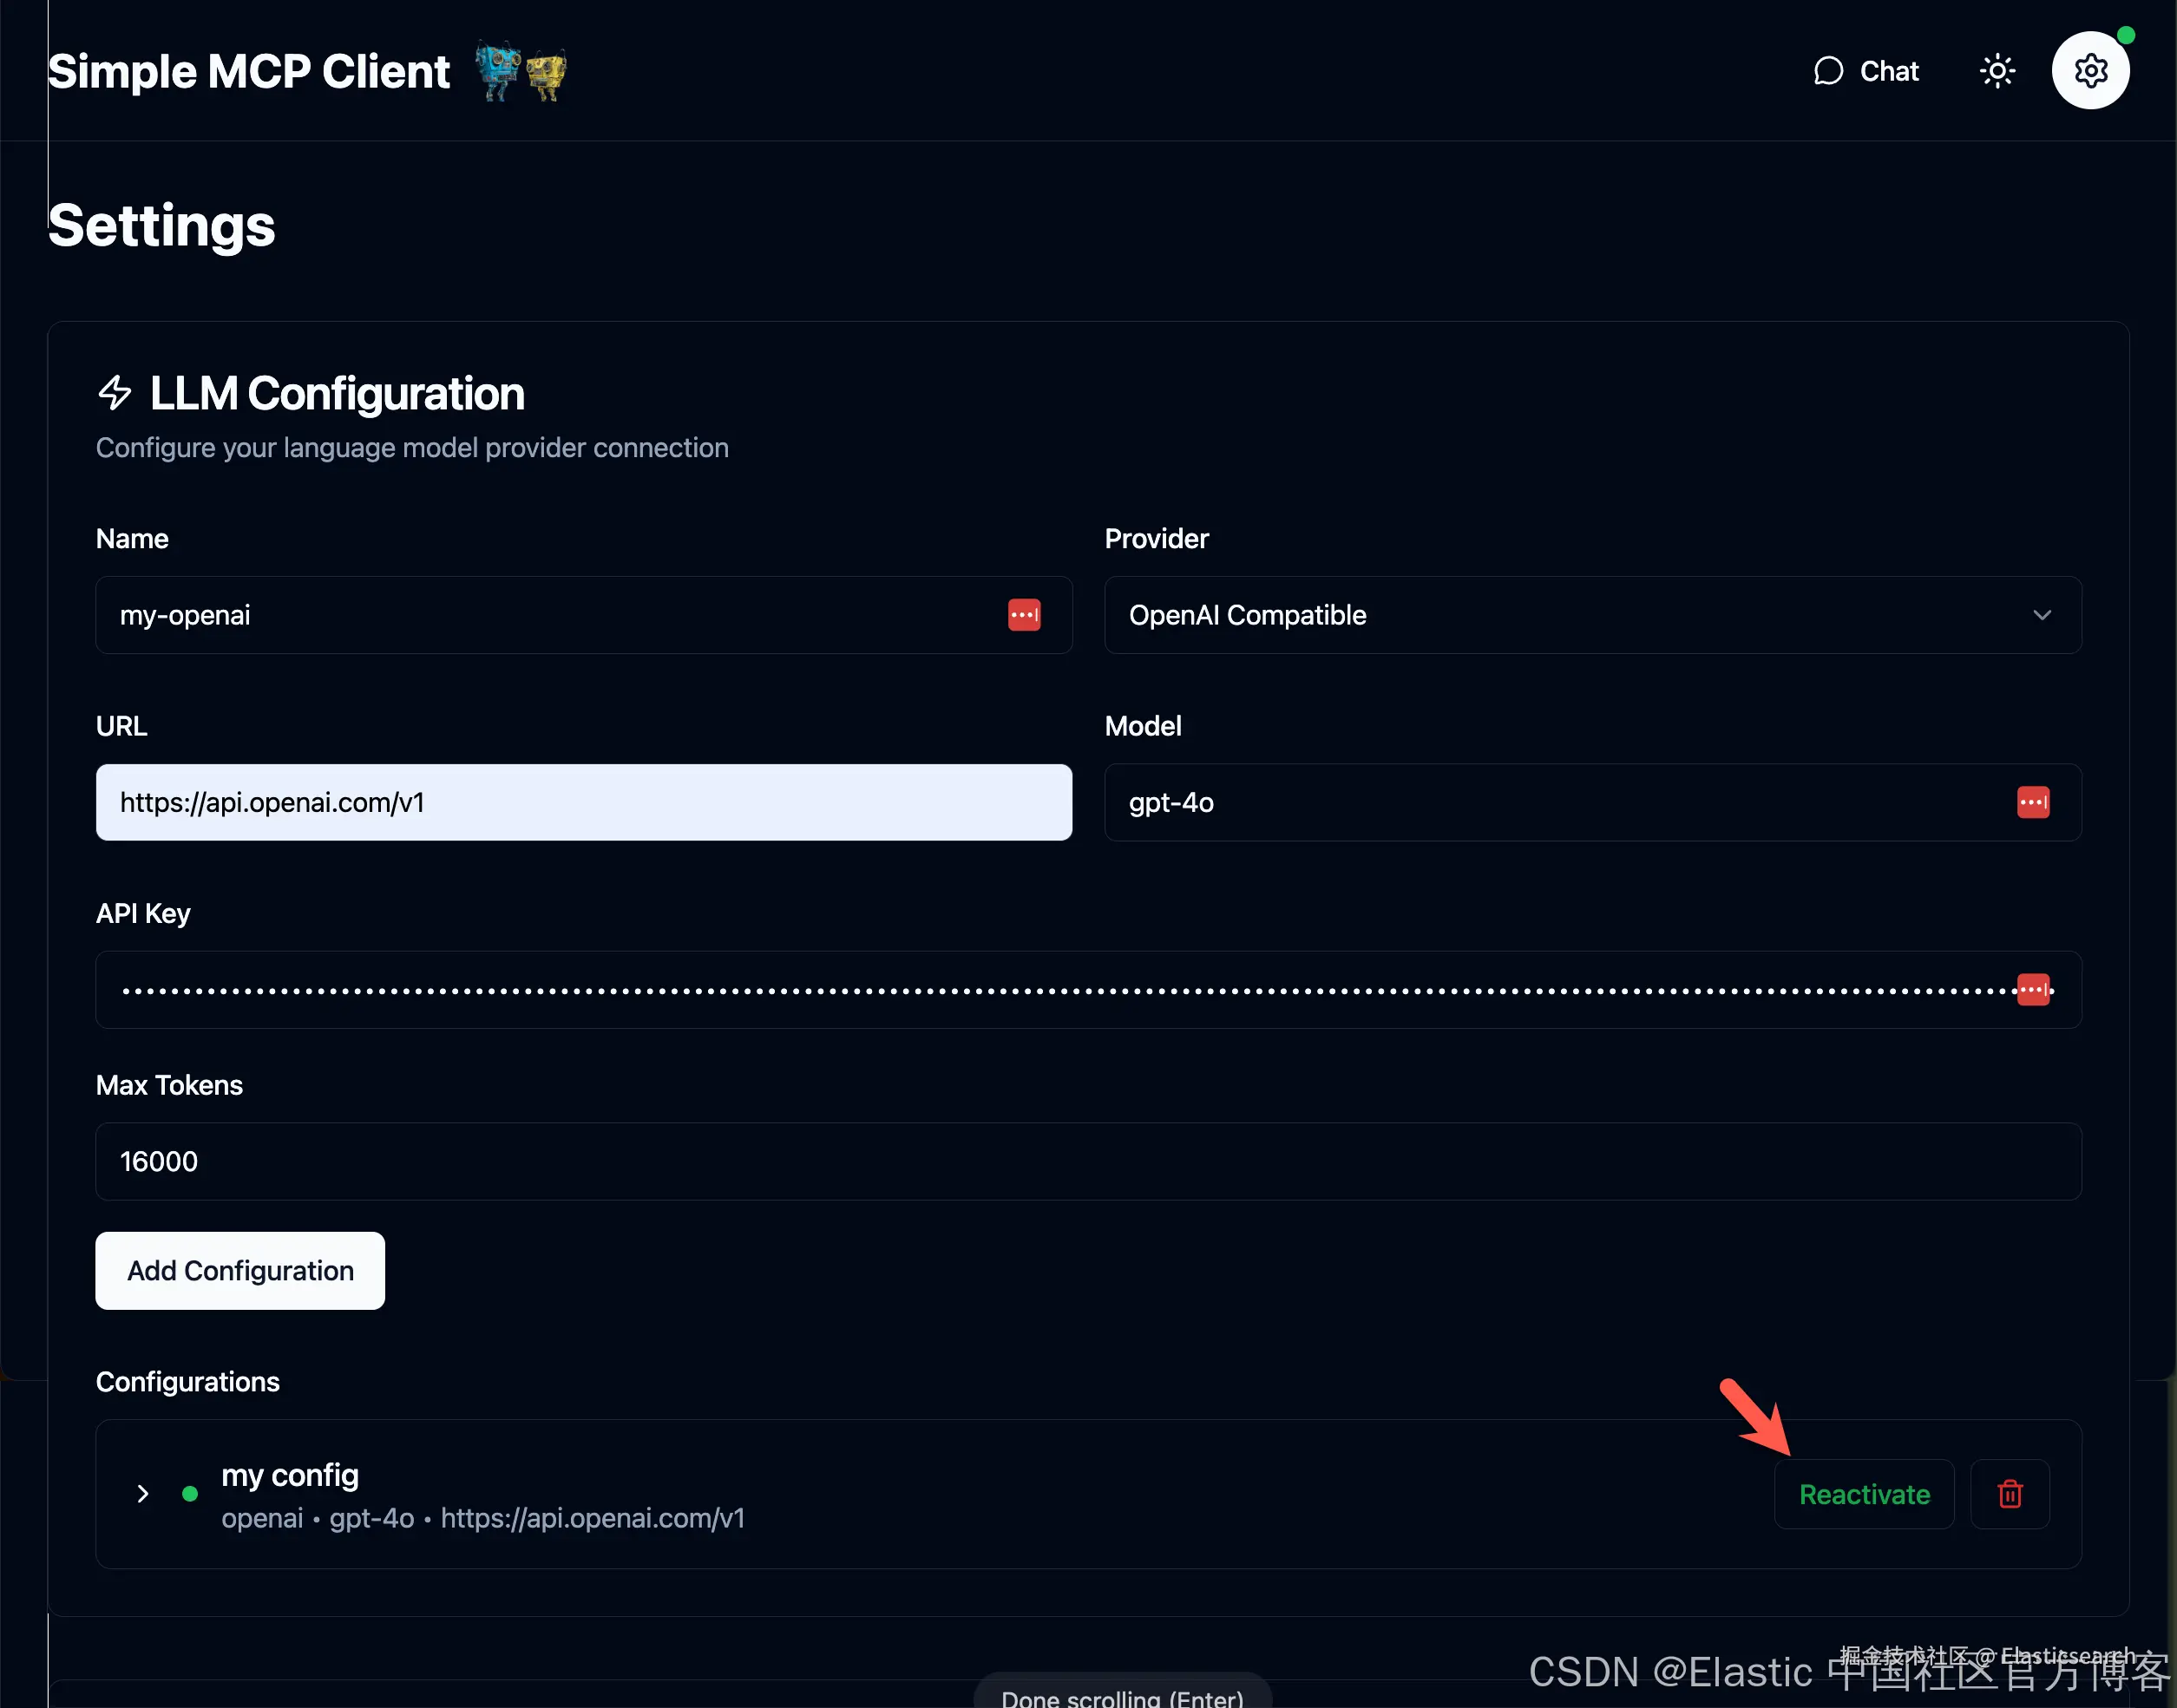
我们可以看到 my config 已经被成功地连接上了。在上面,我使用 OpenAI 来进行的尝试。
接下来,我们来配置 Elasticsearch MCP server。我们可以参考之前的文章 "将 agents 连接到 Elasticsearch 使用模型上下文协议 - docker"。做如下的配置:
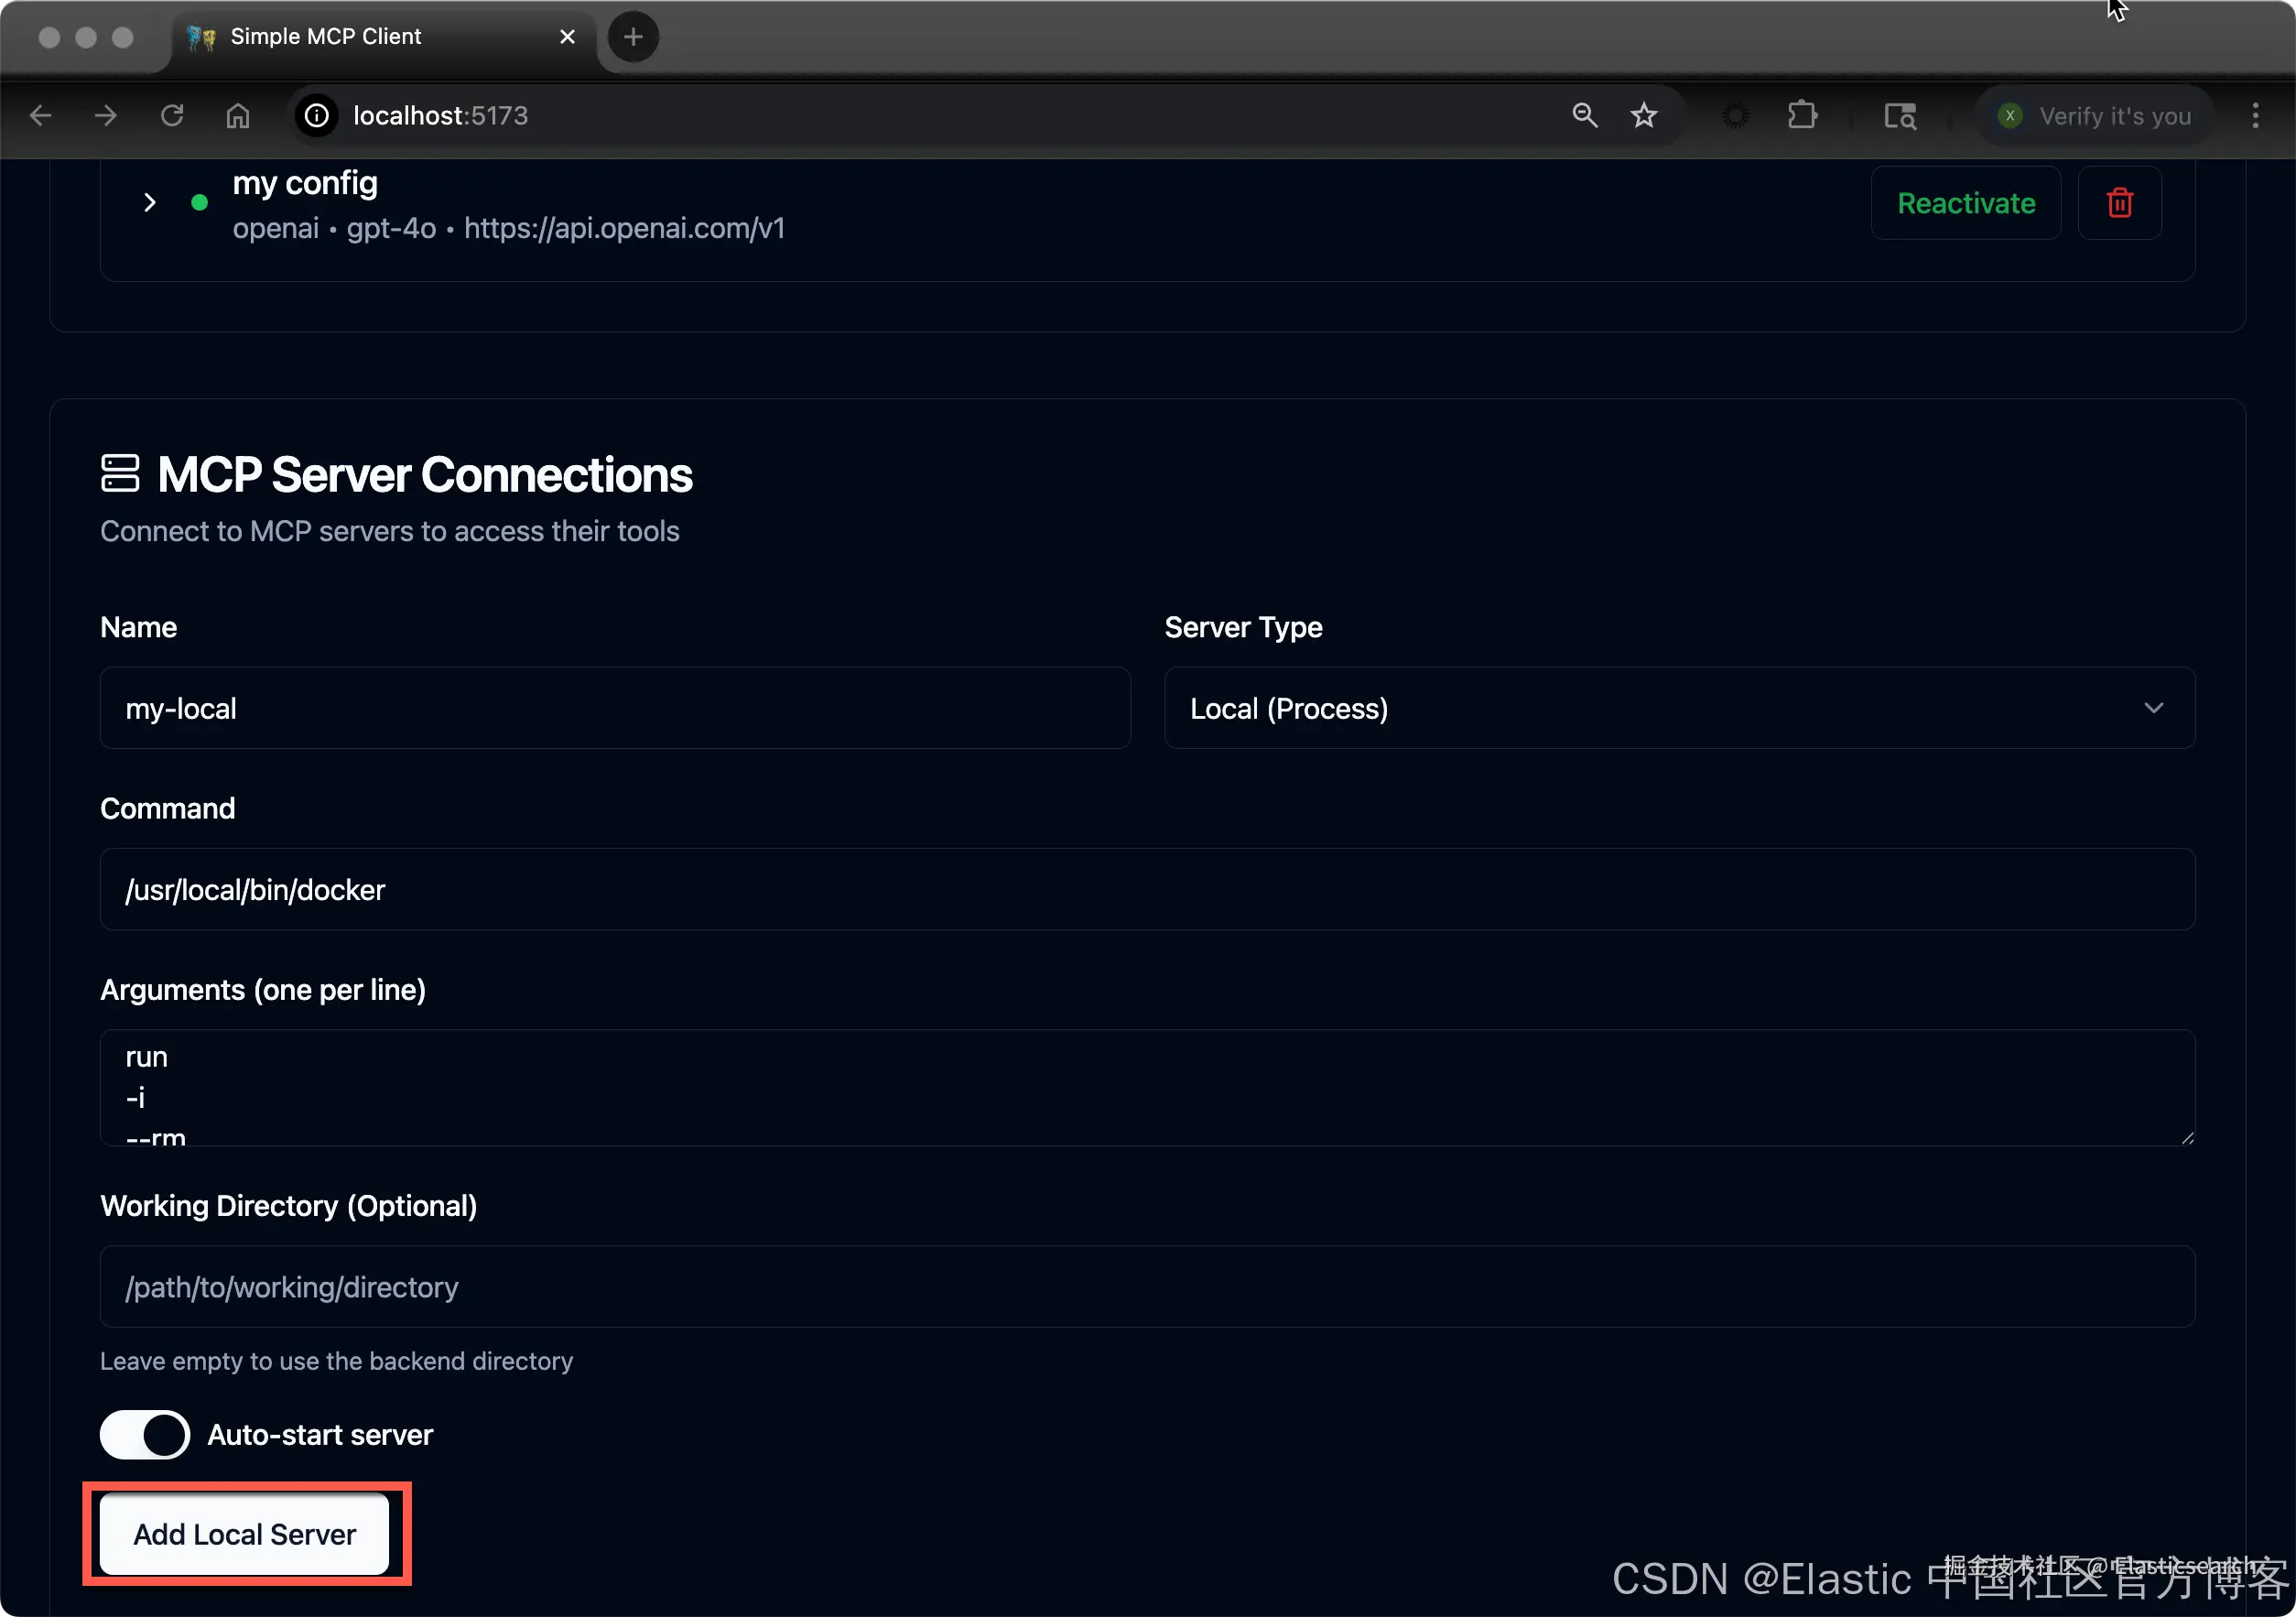
注意:在上面的 Arguments (one per line) 里,我们填入如下的信息。在每一行的输入中,我们的每行结尾不能含有空格。你需要根据自己的配置进行相应的修改。
ini
`
1. run
2. -i
3. --rm
4. -e
5. ES_URL=https://host.docker.internal:9200
6. -e
7. ES_API_KEY=cE81UzFwa0JsMDB0UUE5N3lNTzY6ZUt4ZmFrSVY5ZC1YUDg5WXc3RV9hUQ==
8. -e
9. ES_SSL_SKIP_VERIFY=true
10. docker.elastic.co/mcp/elasticsearch
11. stdio
`AI写代码点击上面的 Add Local Server,我们可以看到如下的界面:
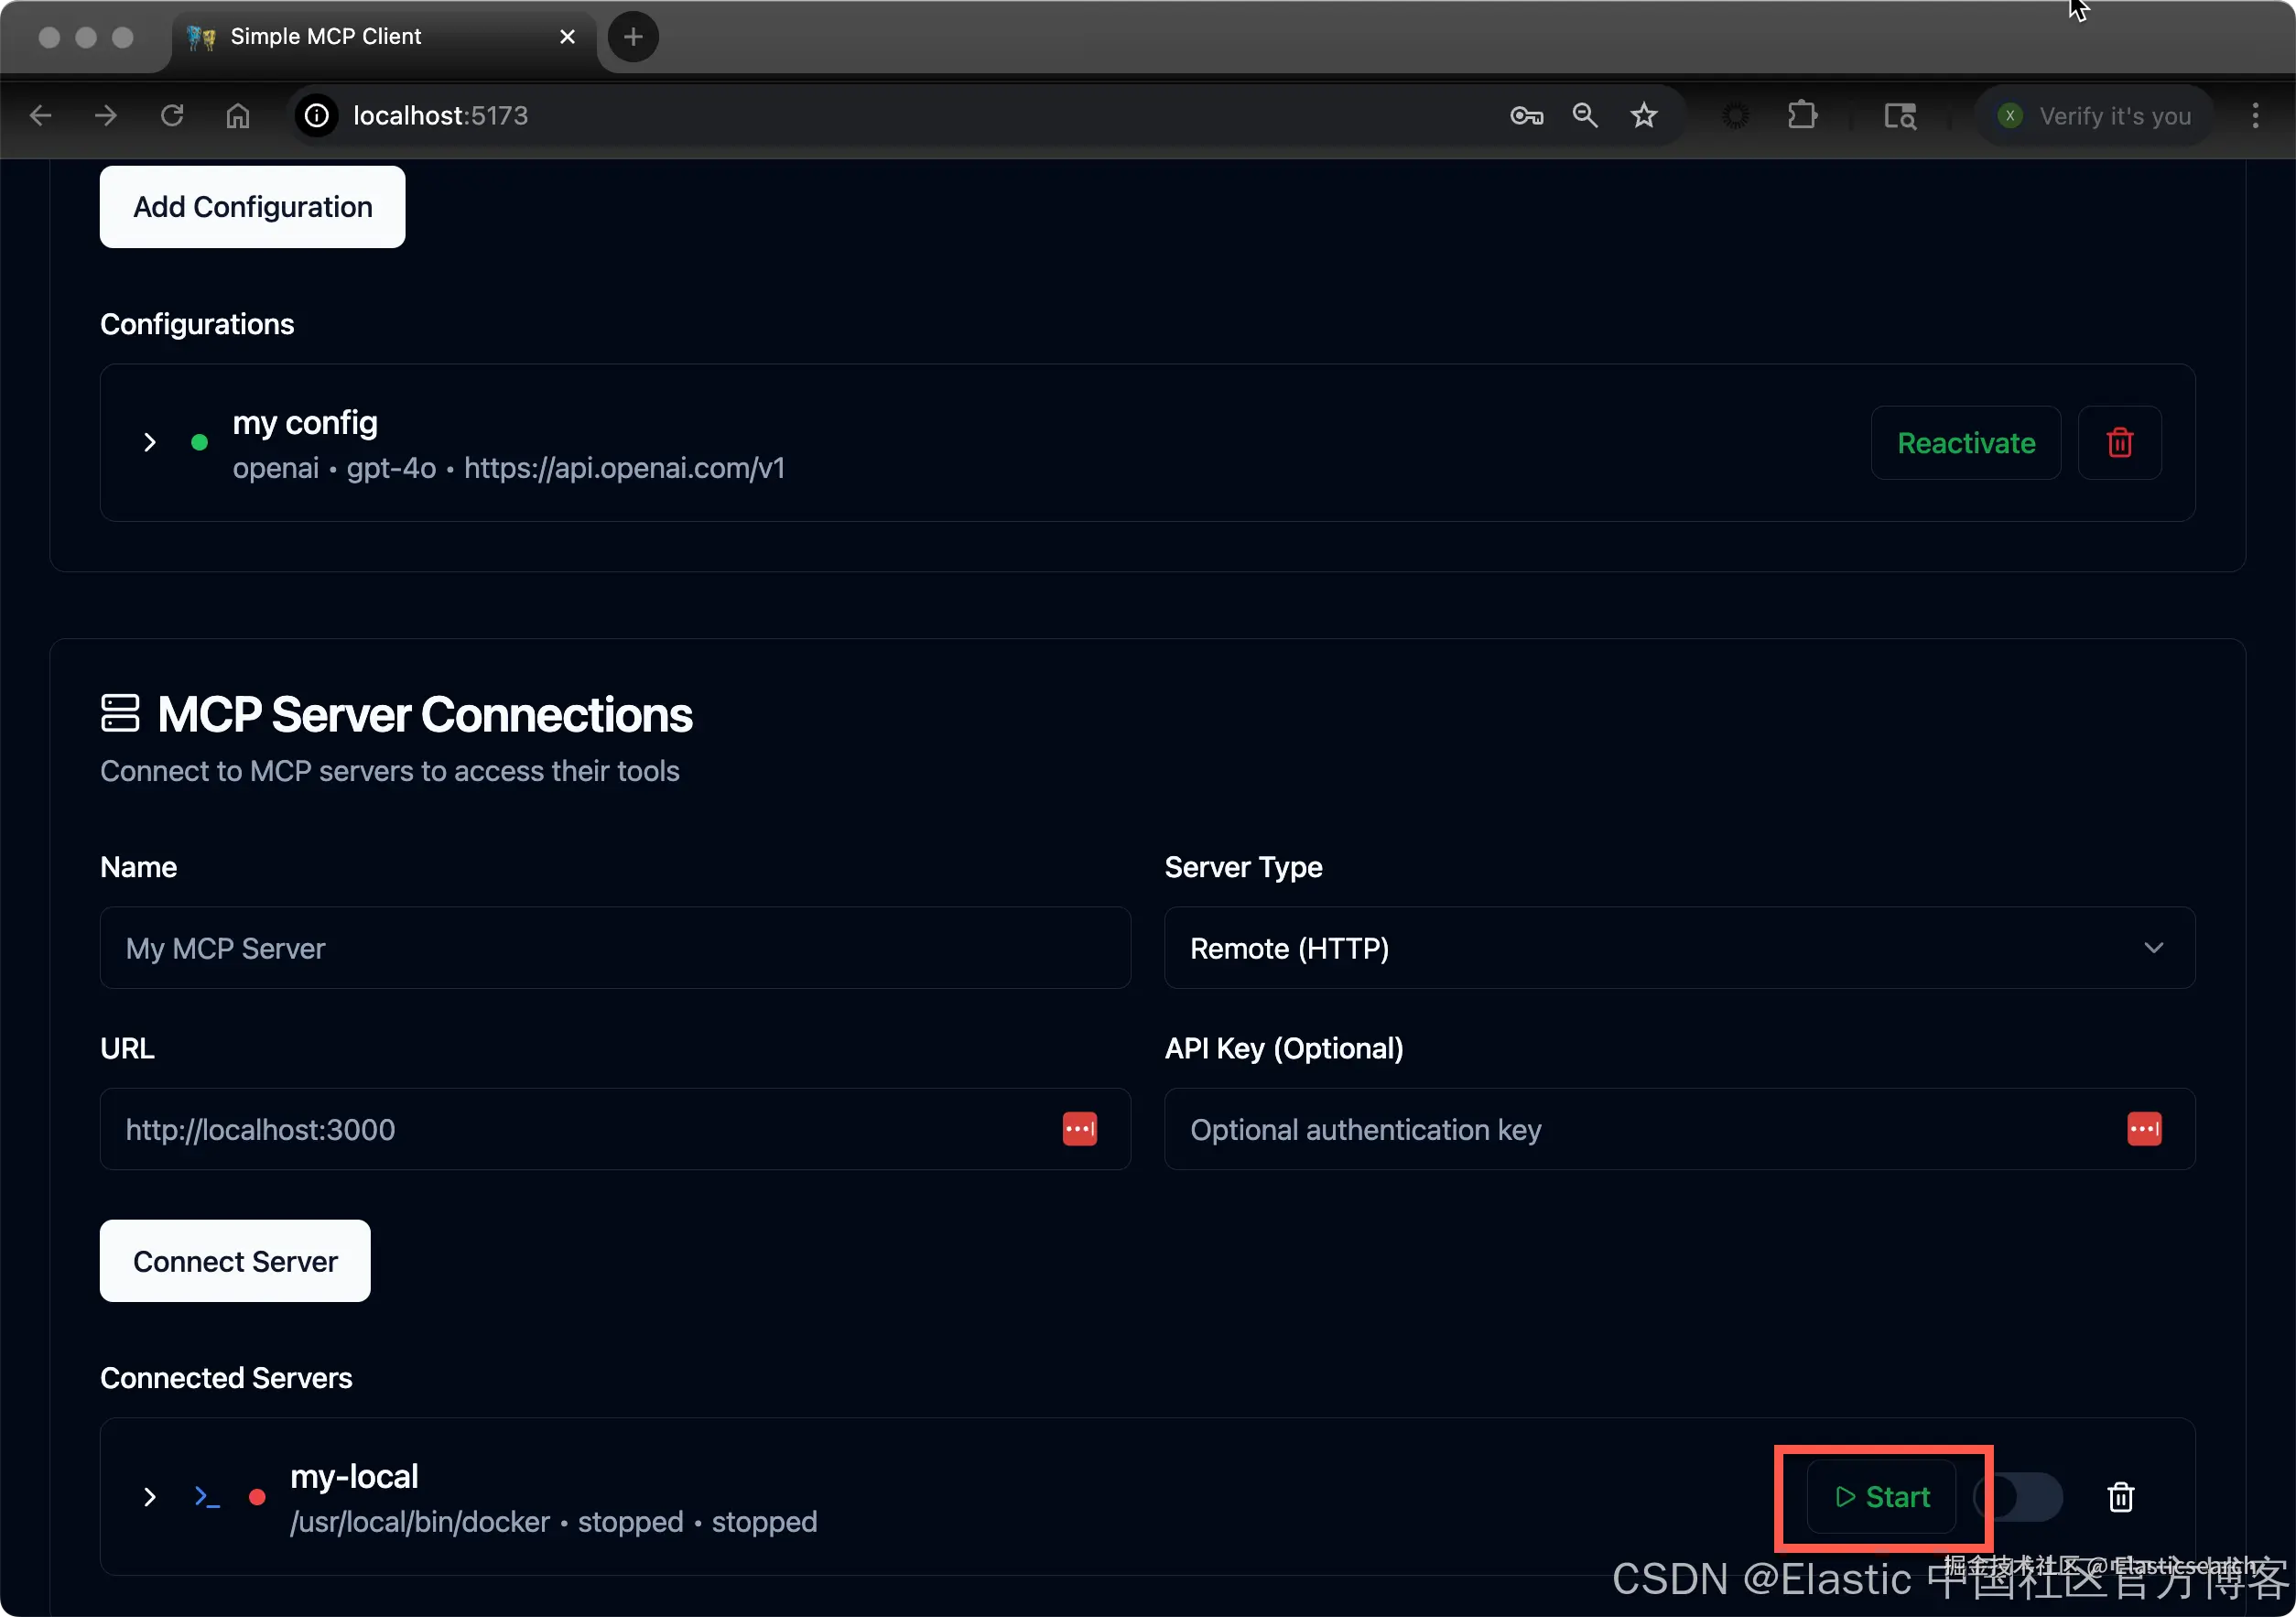
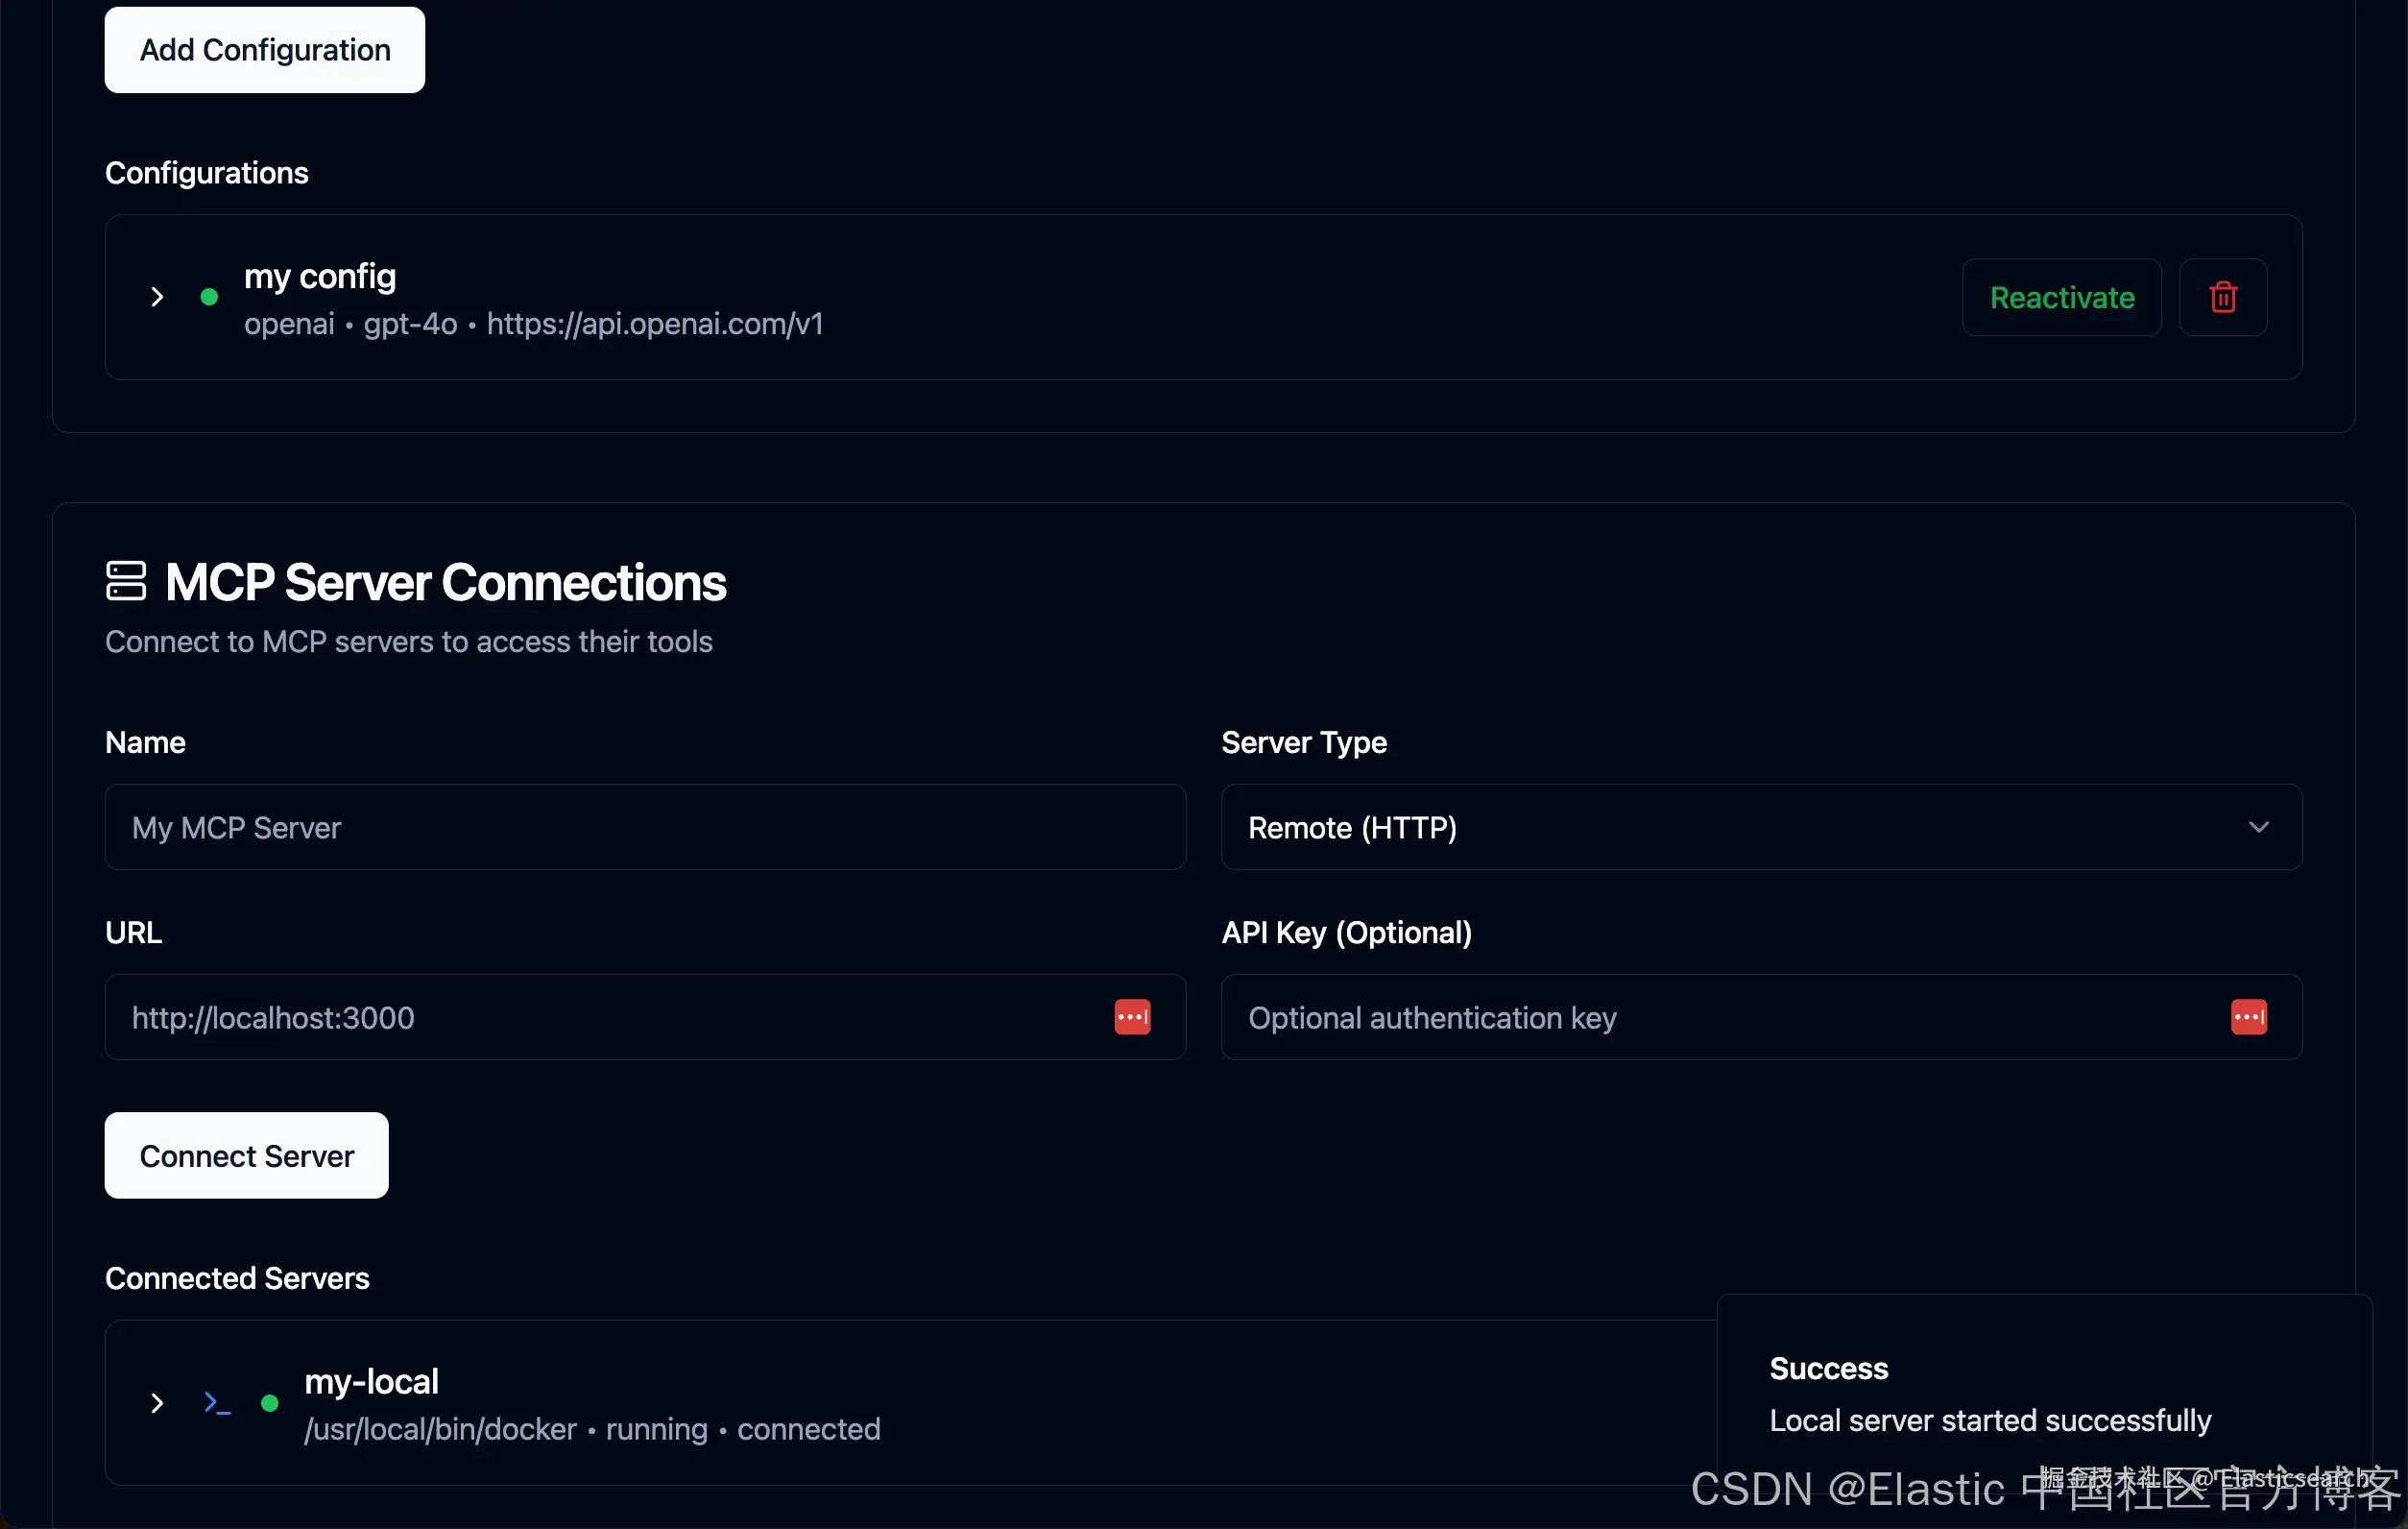
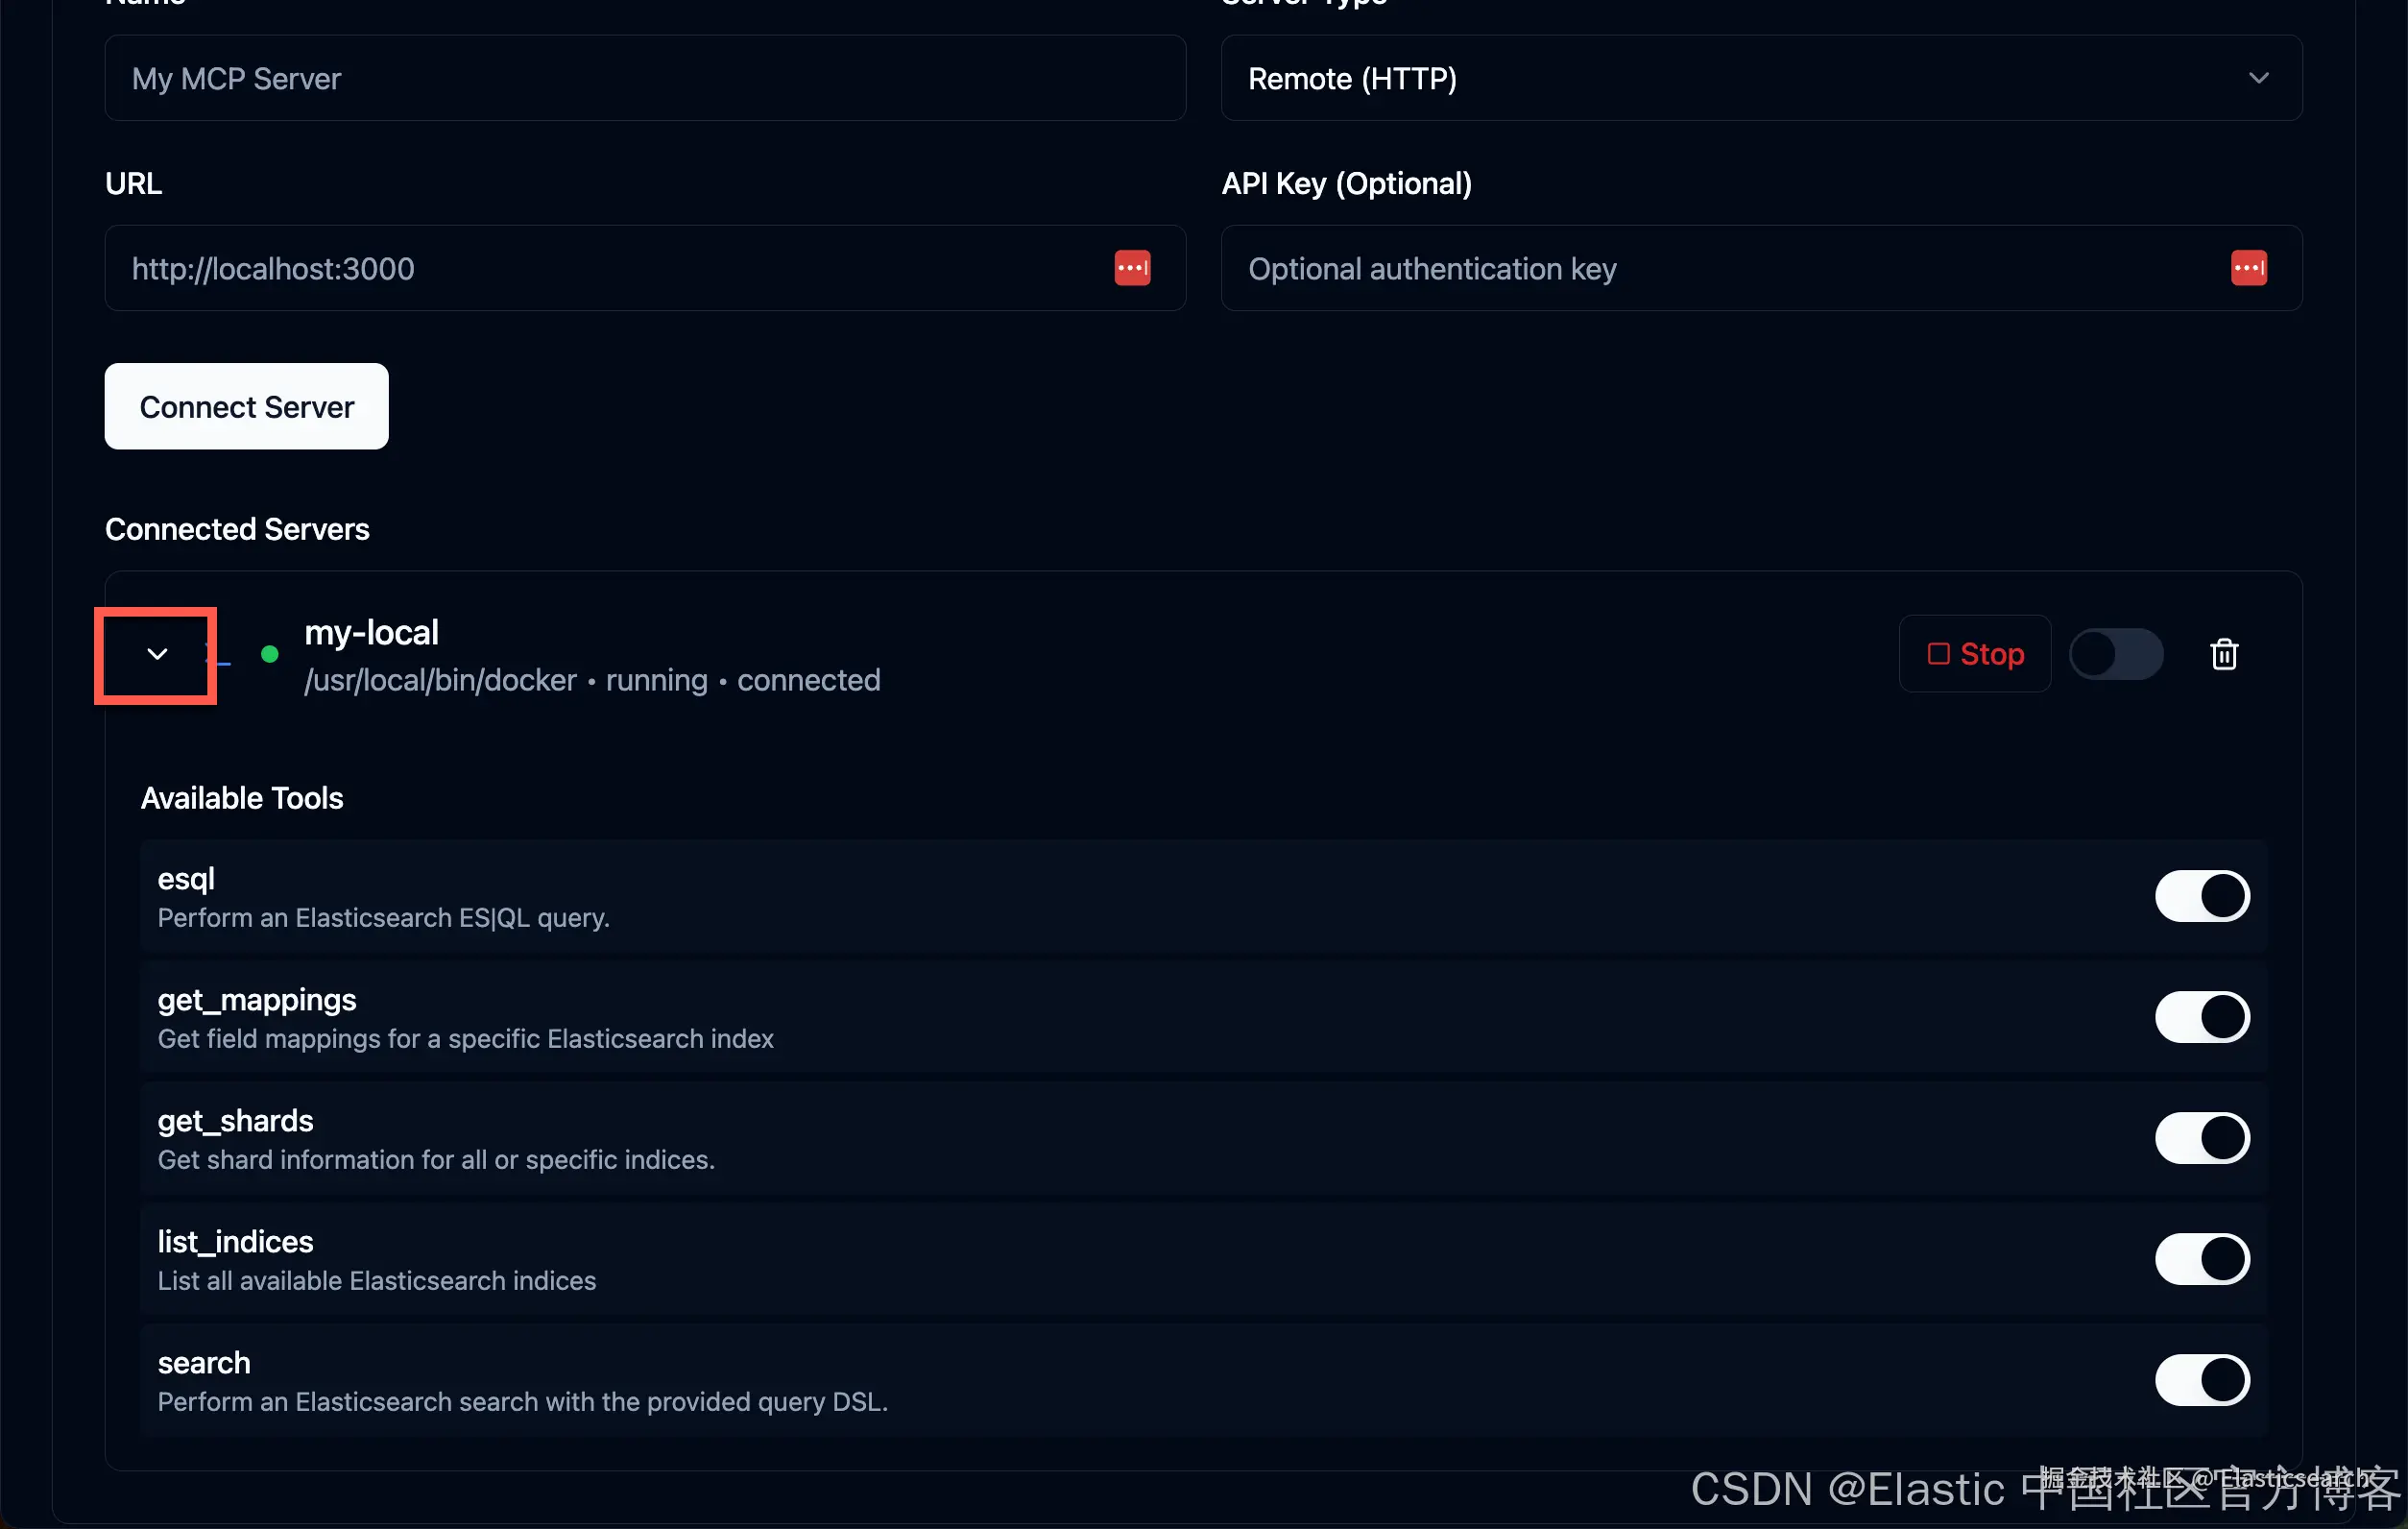
我们可以点击 Start 按钮来启动 Elasticsearch MCP server:
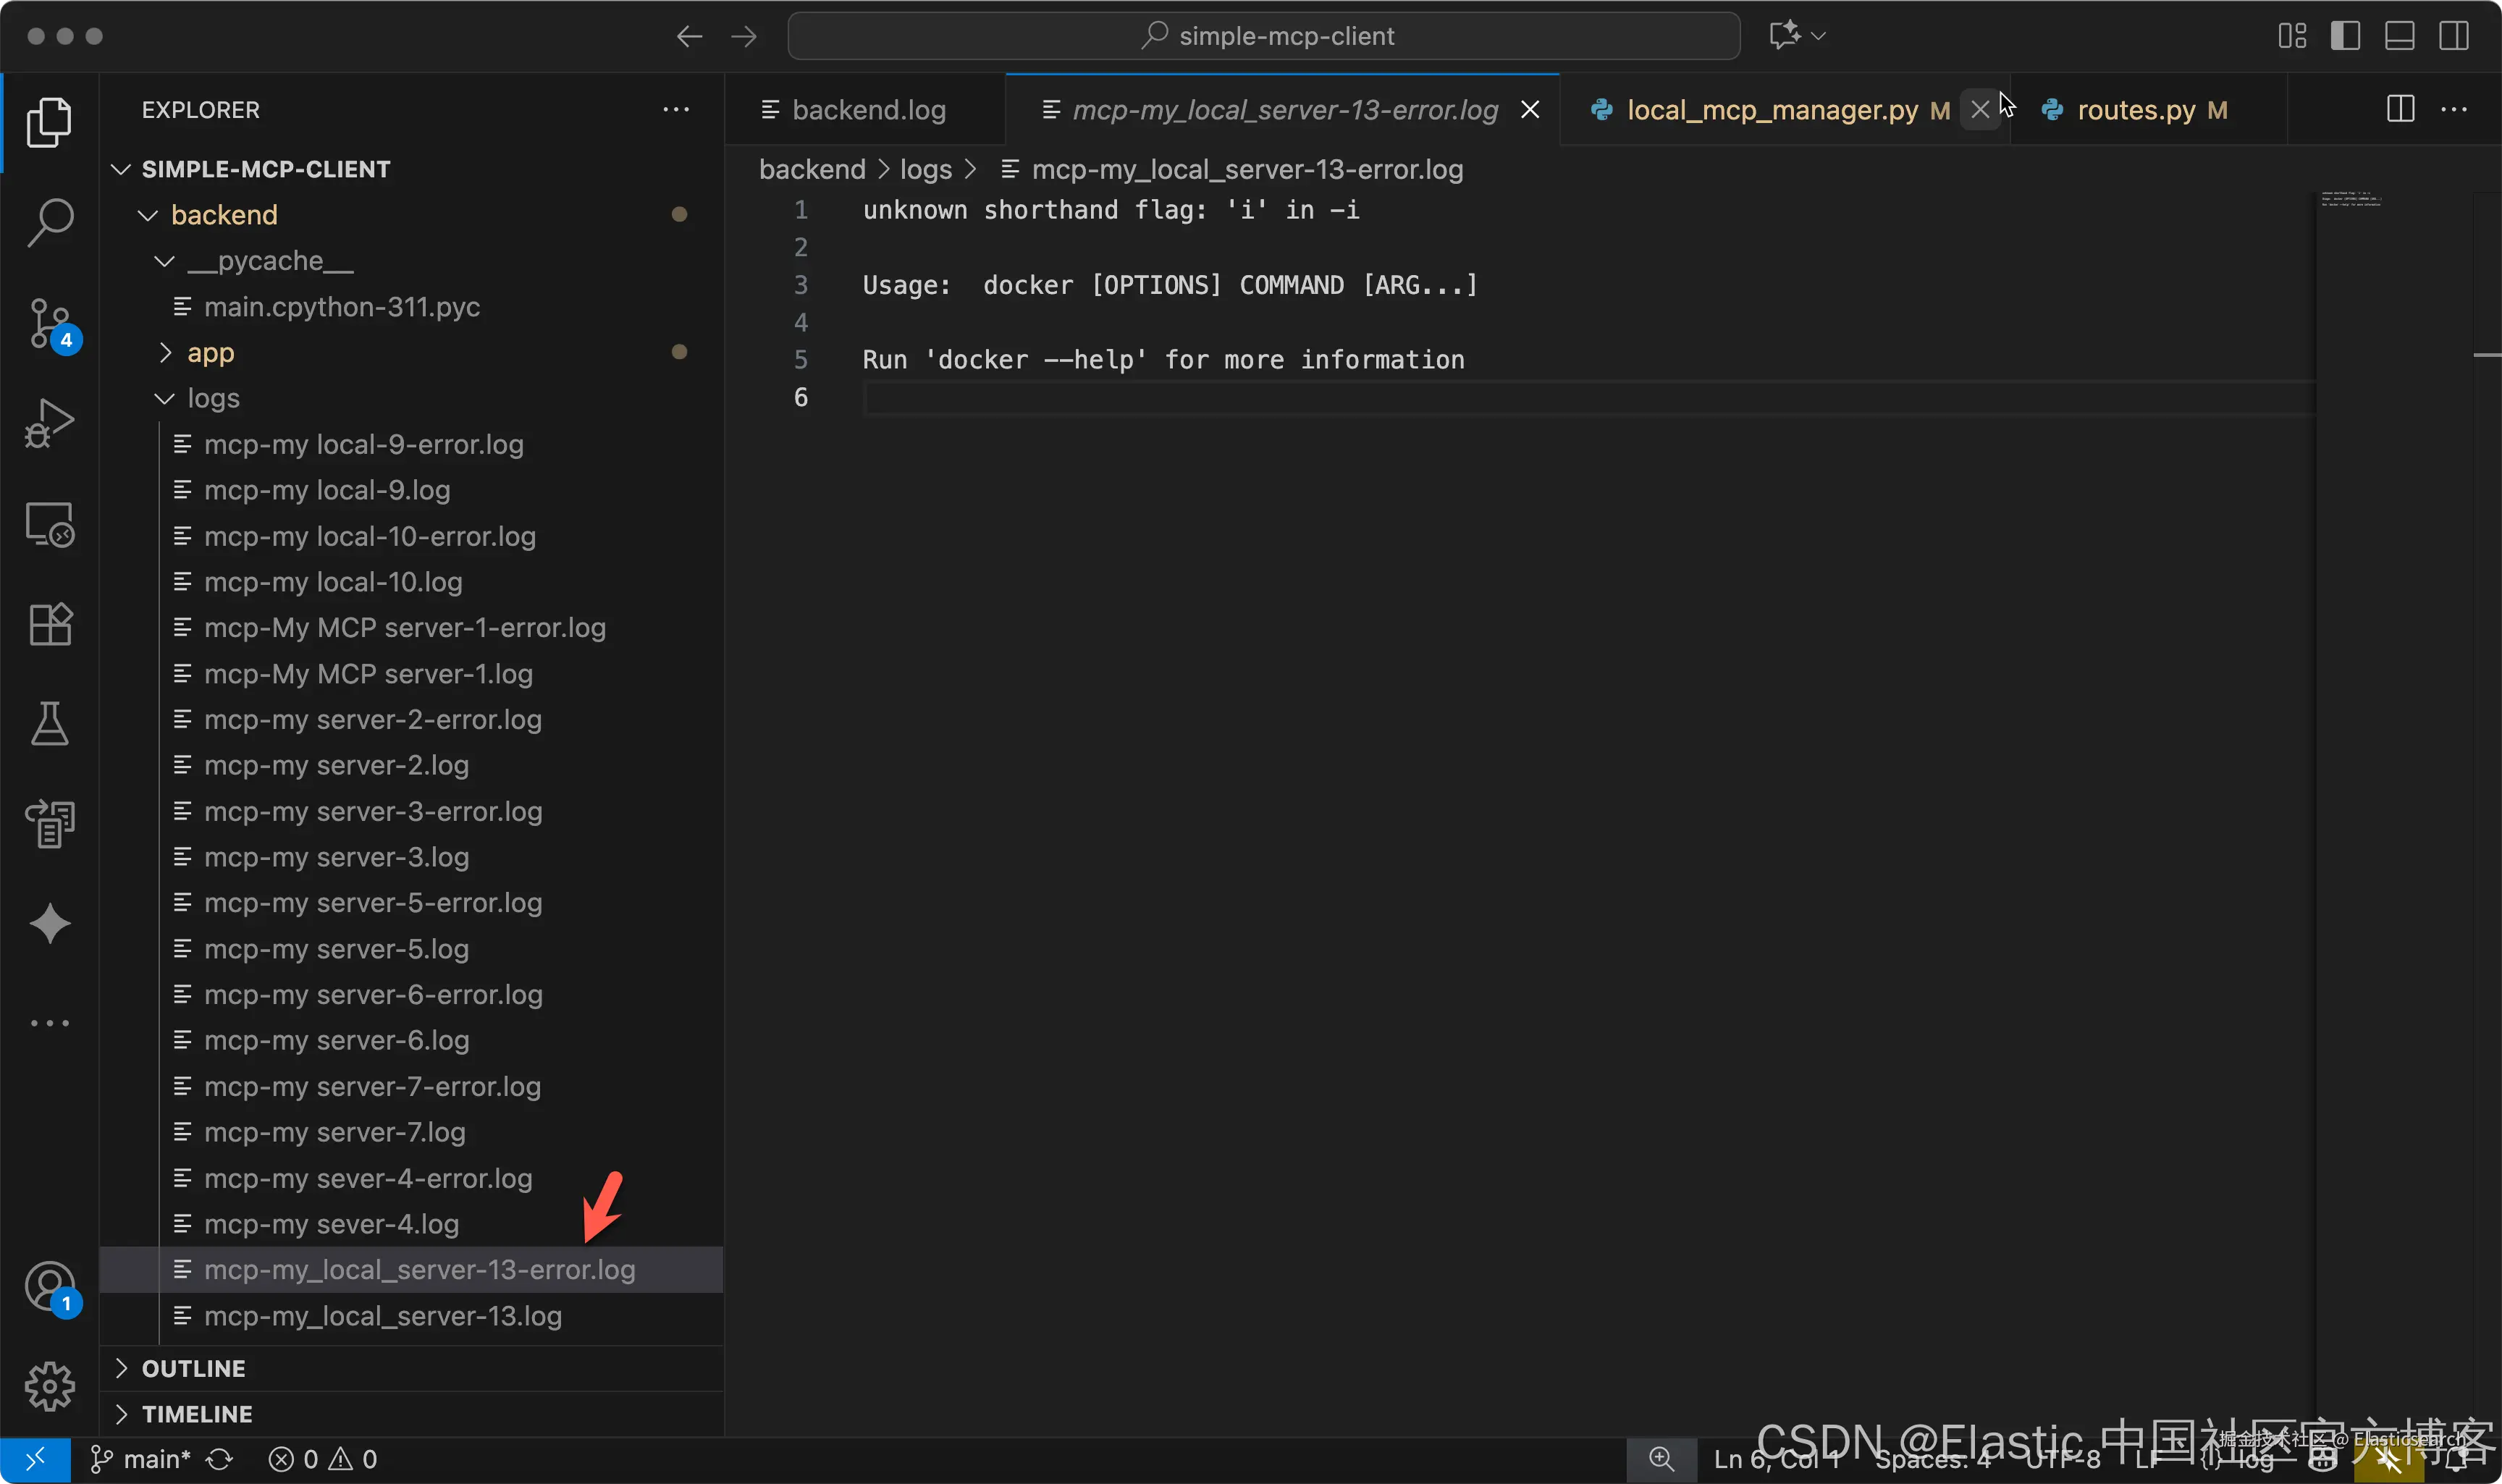
在配置的过程中,如果我们遇到错误信息,我们可以查看如下的 log 文件:
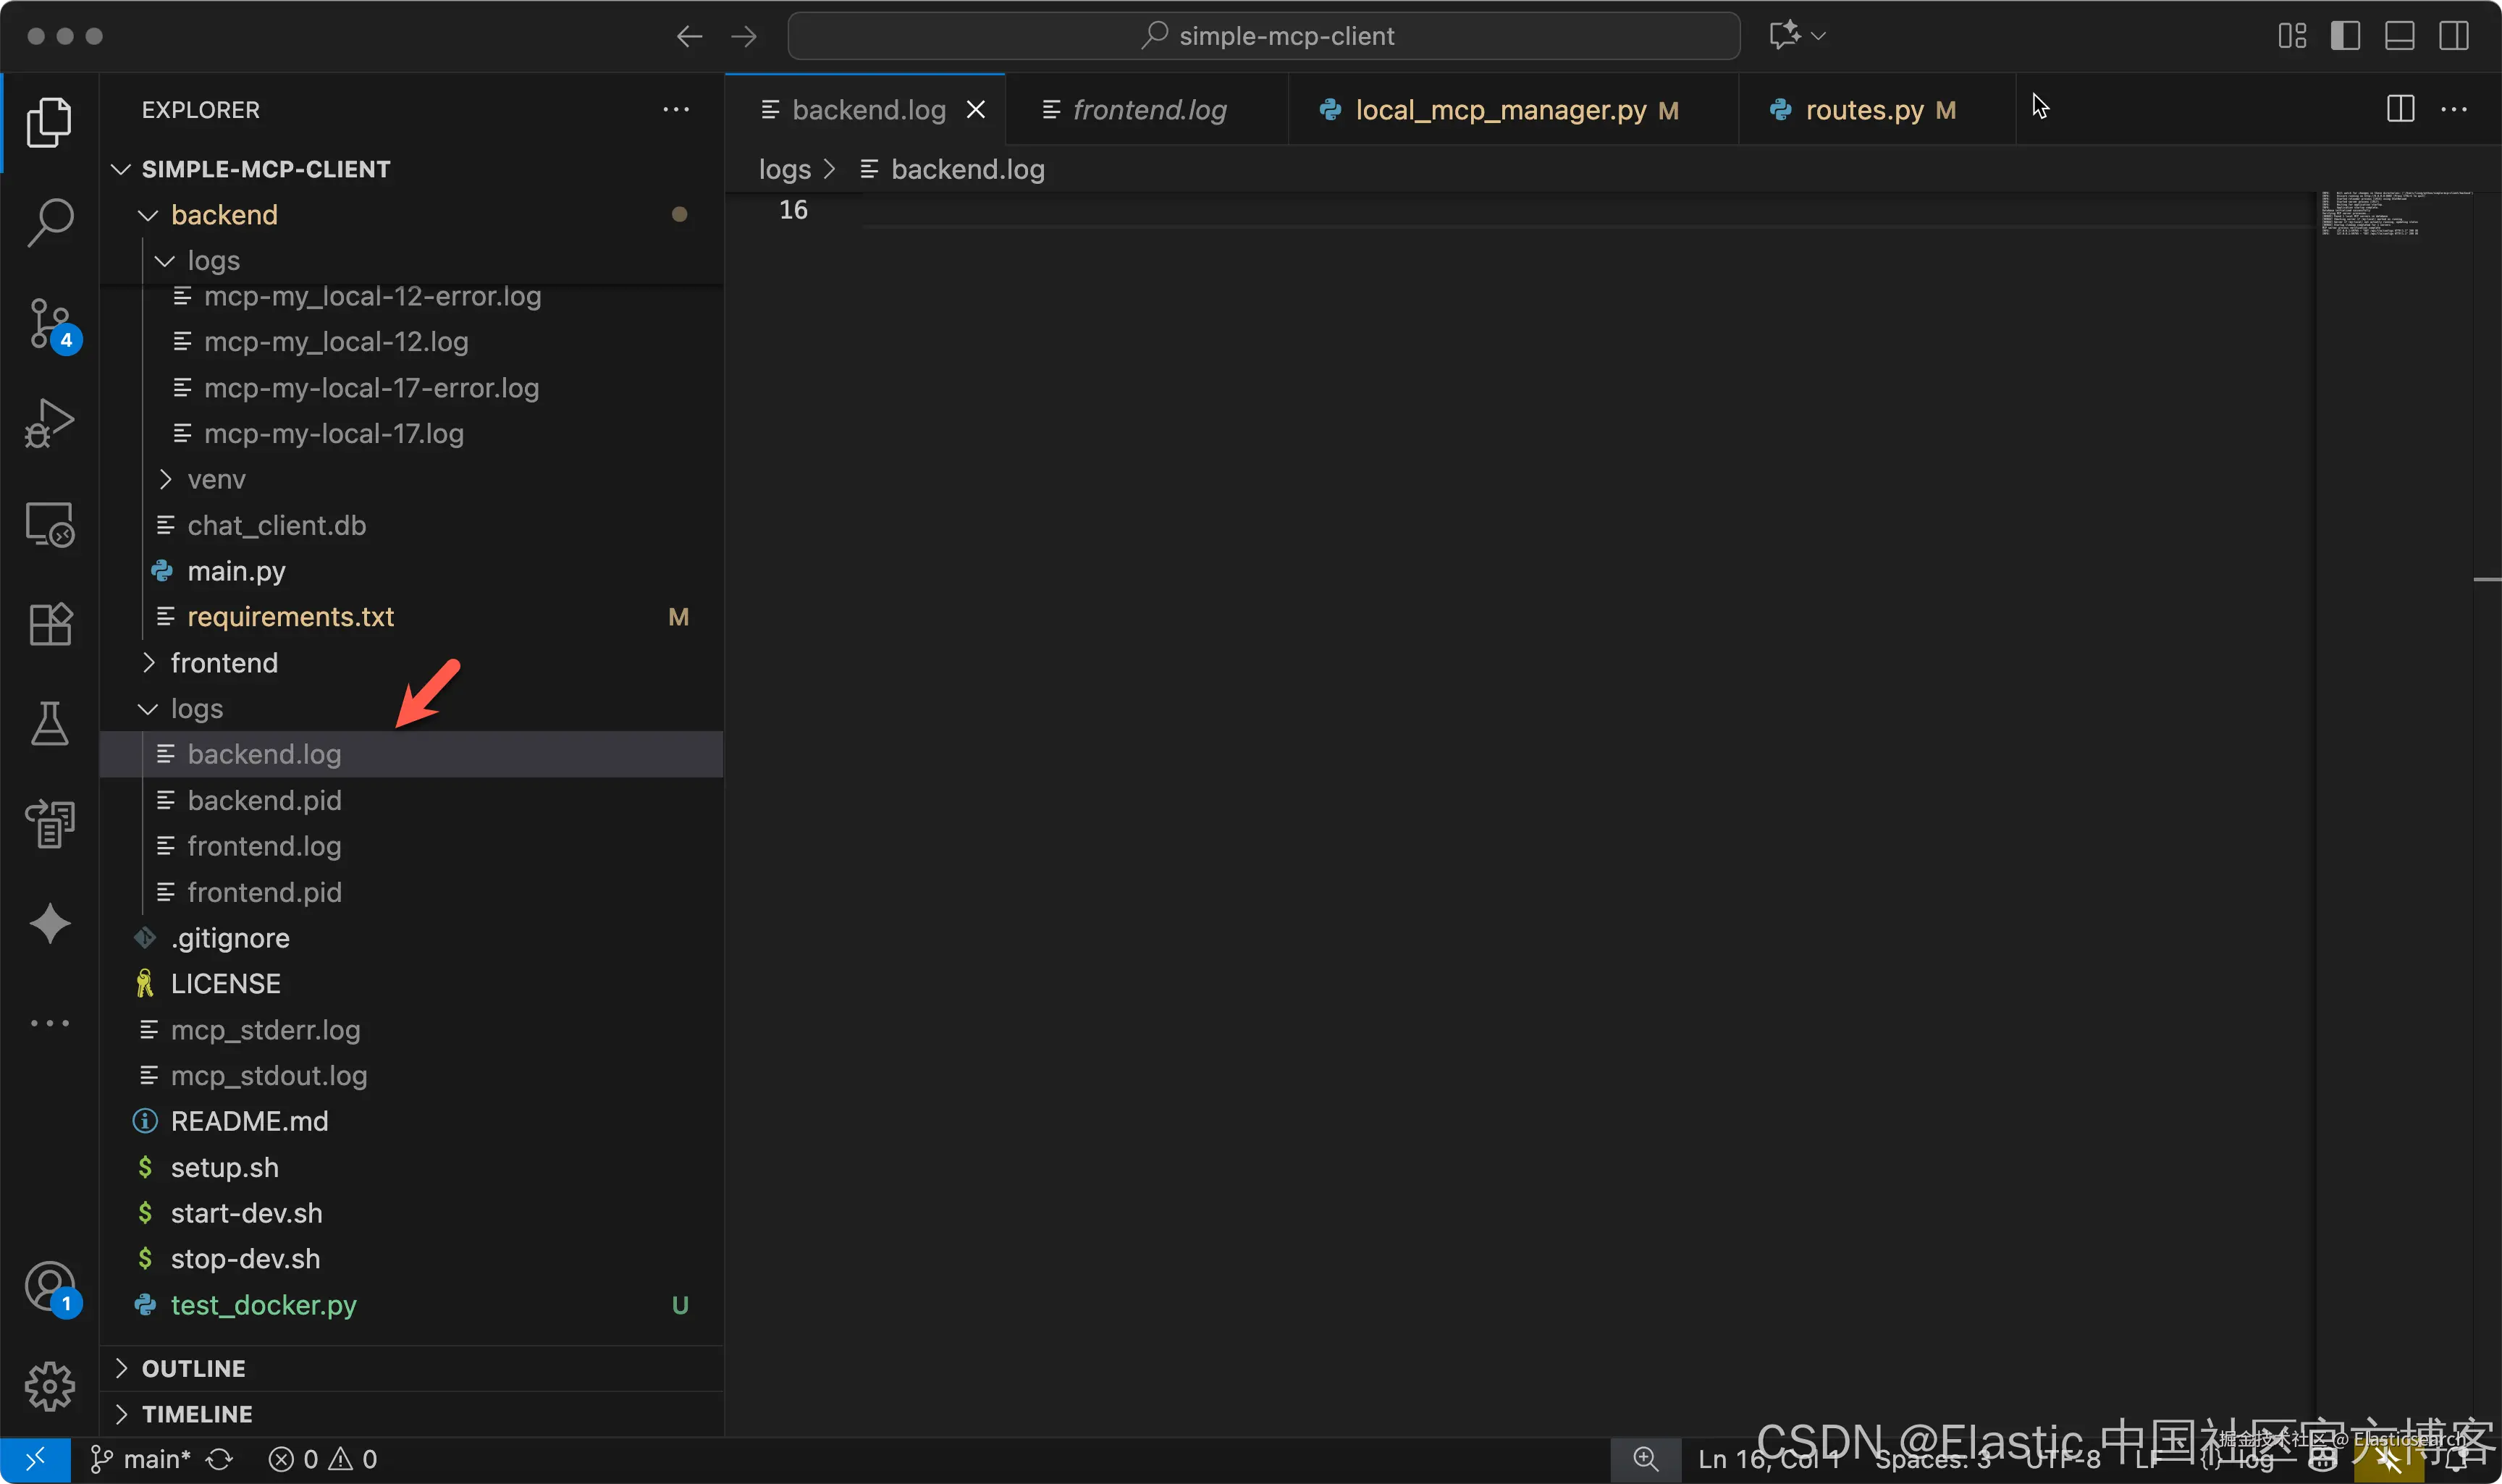
在上述文件中,它会指出在 backend 里发生错误的文件:
一旦配置完整后,我们需要重新启动:
bash
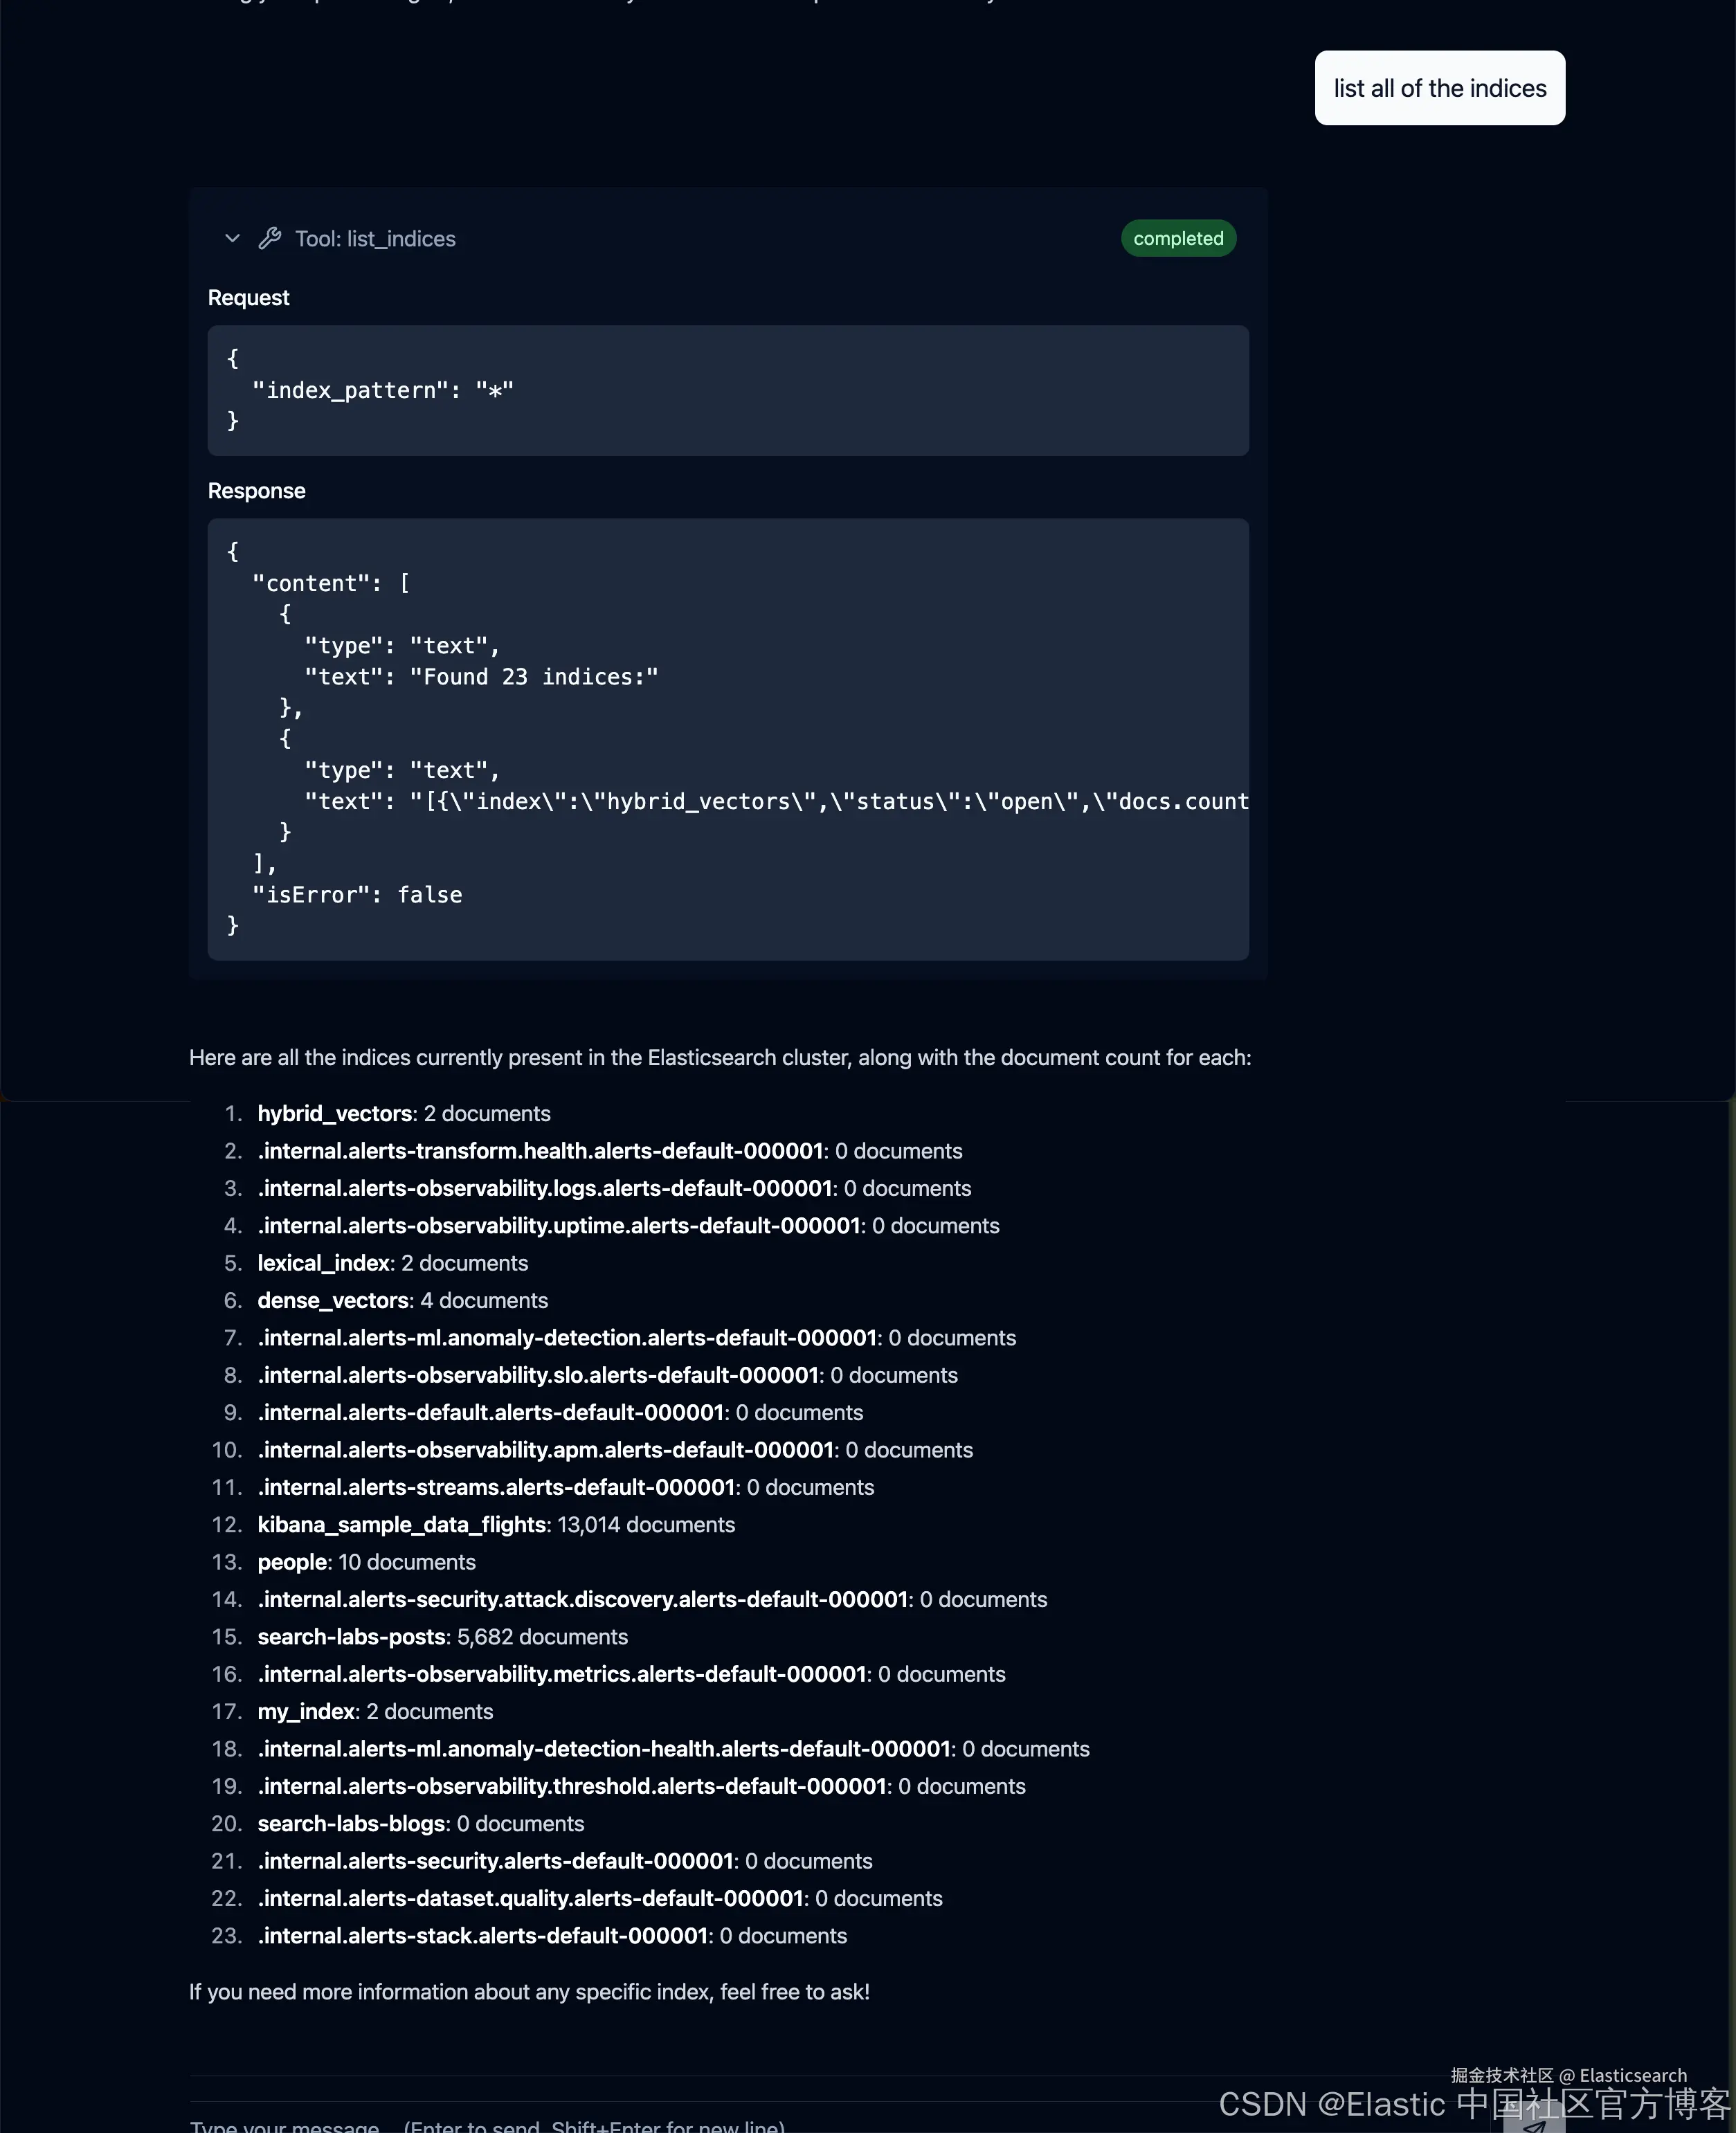
`./start-dev.sh`AI写代码我们做如下的查询:
css
`list all of the indices` AI写代码注意:由于一些原因,有时会遇到错误信息。
go
`How many documents are there in index people?`AI写代码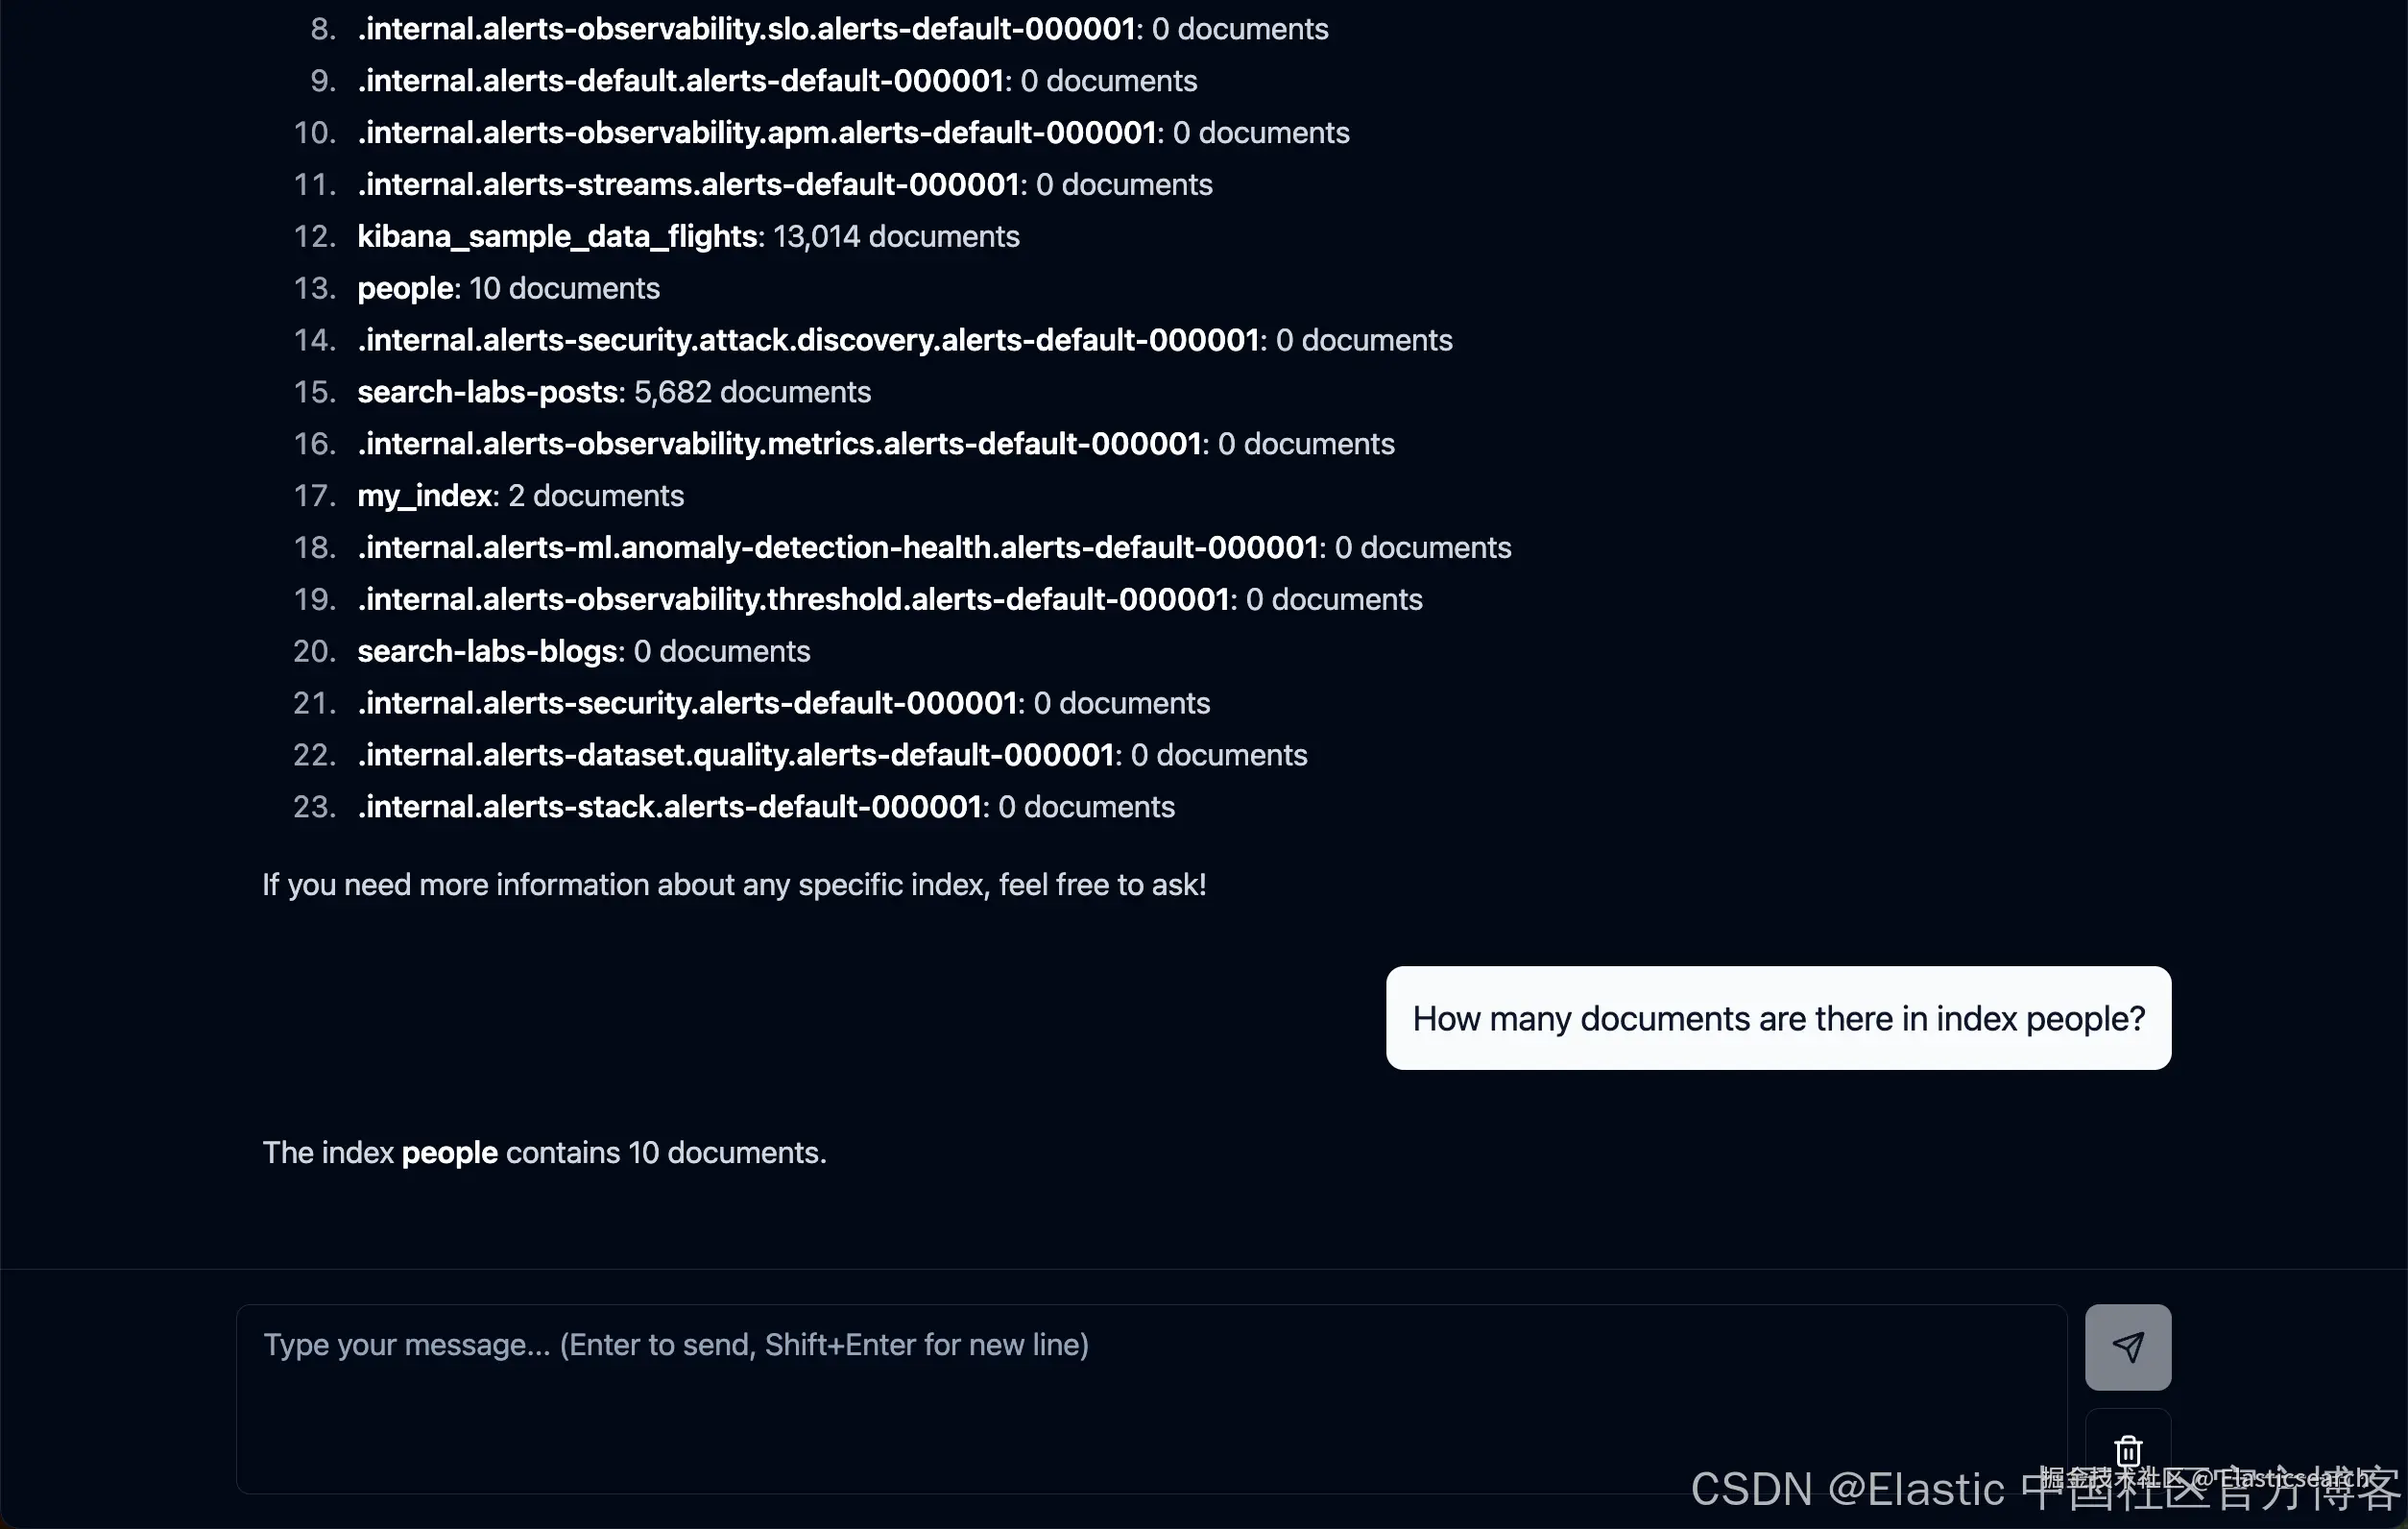
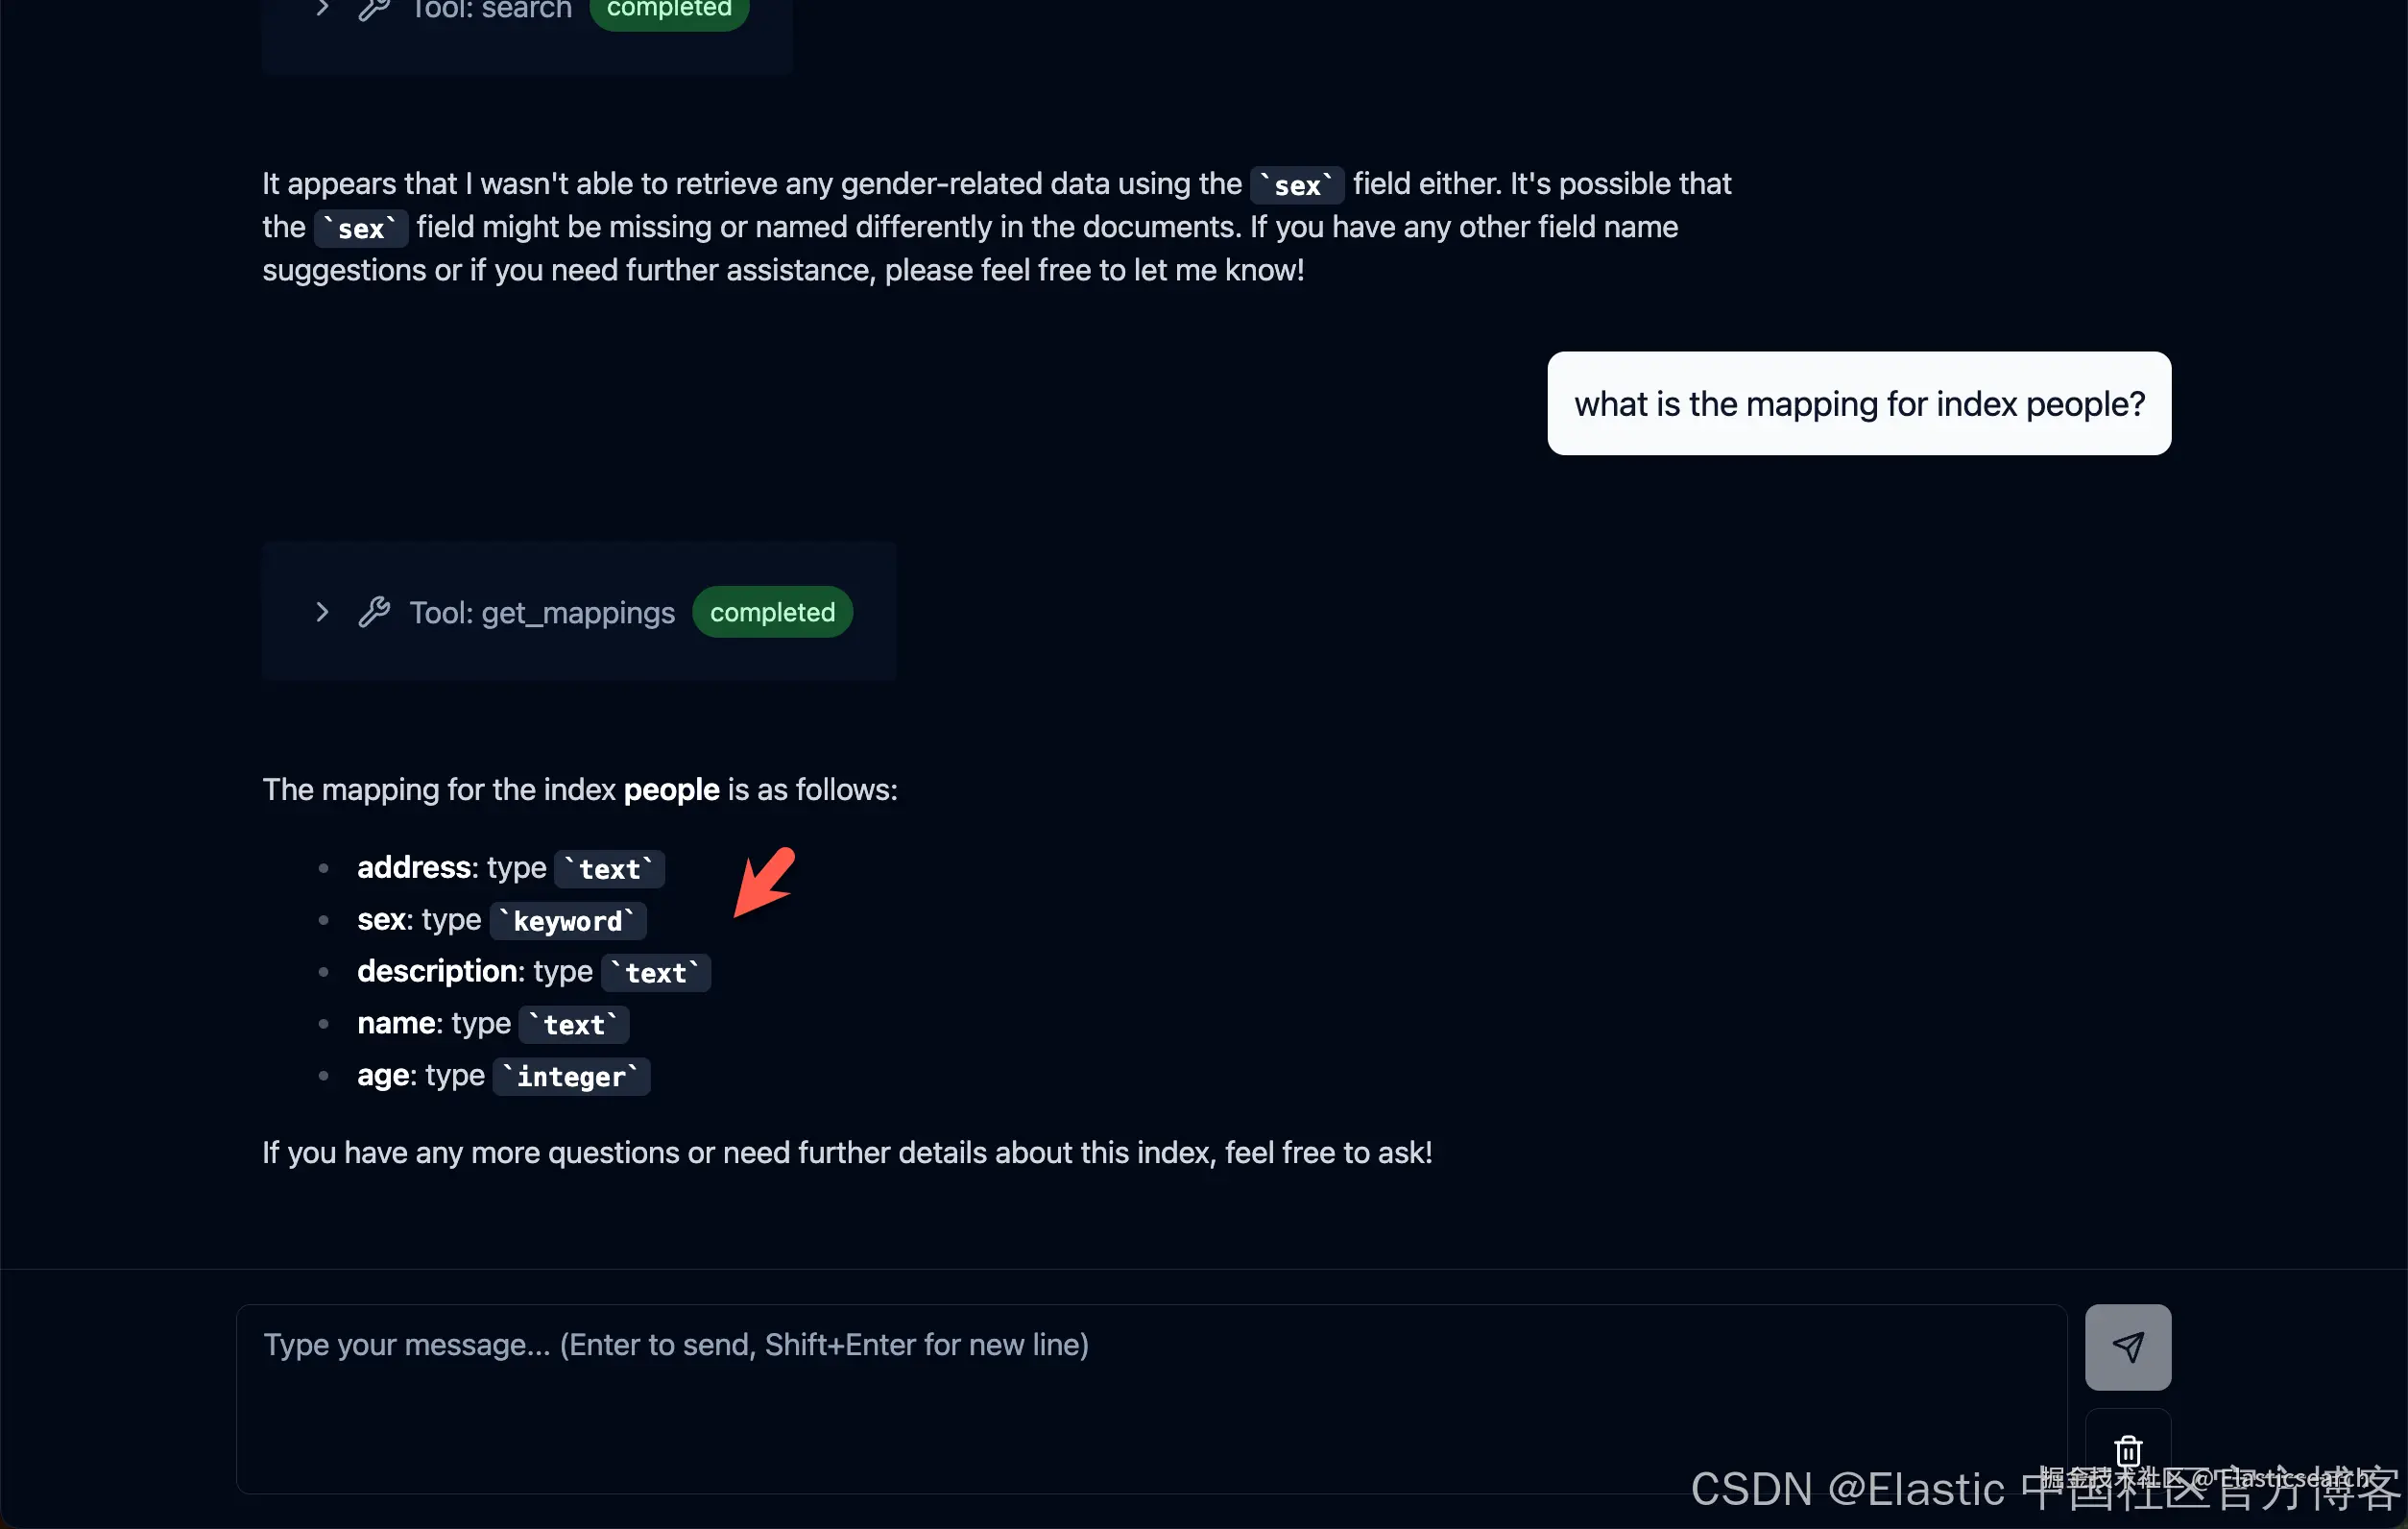
在上面,我们使用如下的索引 people:
markdown
`
1. PUT /people
2. {
3. "mappings": {
4. "properties": {
5. "name": {
6. "type": "text"
7. },
8. "description": {
9. "type": "text"
10. },
11. "sex": {
12. "type": "keyword"
13. },
14. "age": {
15. "type": "integer"
16. },
17. "address": {
18. "type": "text"
19. }
20. }
21. }
22. }
`AI写代码
bash
`
1. POST /_bulk
2. { "index" : { "_index" : "people", "_id" : "1" } }
3. { "name" : "John Doe", "description" : "A software developer", "sex" : "Male", "age" : 30, "address" : "123 Elm Street, Springfield" }
4. { "index" : { "_index" : "people", "_id" : "2" } }
5. { "name" : "Jane Smith", "description" : "A project manager", "sex" : "Female", "age" : 28, "address" : "456 Maple Avenue, Anytown" }
6. { "index" : { "_index" : "people", "_id" : "3" } }
7. { "name" : "Alice Johnson", "description" : "A graphic designer", "sex" : "Female", "age" : 26, "address" : "789 Oak Lane, Metropolis" }
8. { "index" : { "_index" : "people", "_id" : "4" } }
9. { "name" : "Bob Brown", "description" : "A marketing specialist", "sex" : "Male", "age" : 32, "address" : "321 Pine Street, Gotham" }
10. { "index" : { "_index" : "people", "_id" : "5" } }
11. { "name" : "Charlie Davis", "description" : "An IT analyst", "sex" : "Male", "age" : 29, "address" : "654 Cedar Blvd, Star City" }
12. { "index" : { "_index" : "people", "_id" : "6" } }
13. { "name" : "Diana Prince", "description" : "A diplomat", "sex" : "Female", "age" : 35, "address" : "987 Birch Road, Themyscira" }
14. { "index" : { "_index" : "people", "_id" : "7" } }
15. { "name" : "Evan Wright", "description" : "A journalist", "sex" : "Male", "age" : 27, "address" : "213 Willow Lane, Central City" }
16. { "index" : { "_index" : "people", "_id" : "8" } }
17. { "name" : "Fiona Gallagher", "description" : "A nurse", "sex" : "Female", "age" : 31, "address" : "546 Spruce Street, South Side" }
18. { "index" : { "_index" : "people", "_id" : "9" } }
19. { "name" : "George King", "description" : "A teacher", "sex" : "Male", "age" : 34, "address" : "879 Elm St, Smallville" }
20. { "index" : { "_index" : "people", "_id" : "10" } }
21. { "name" : "Helen Parr", "description" : "A full-time superhero", "sex" : "Female", "age" : 37, "address" : "123 Metro Avenue, Metroville" }
`AI写代码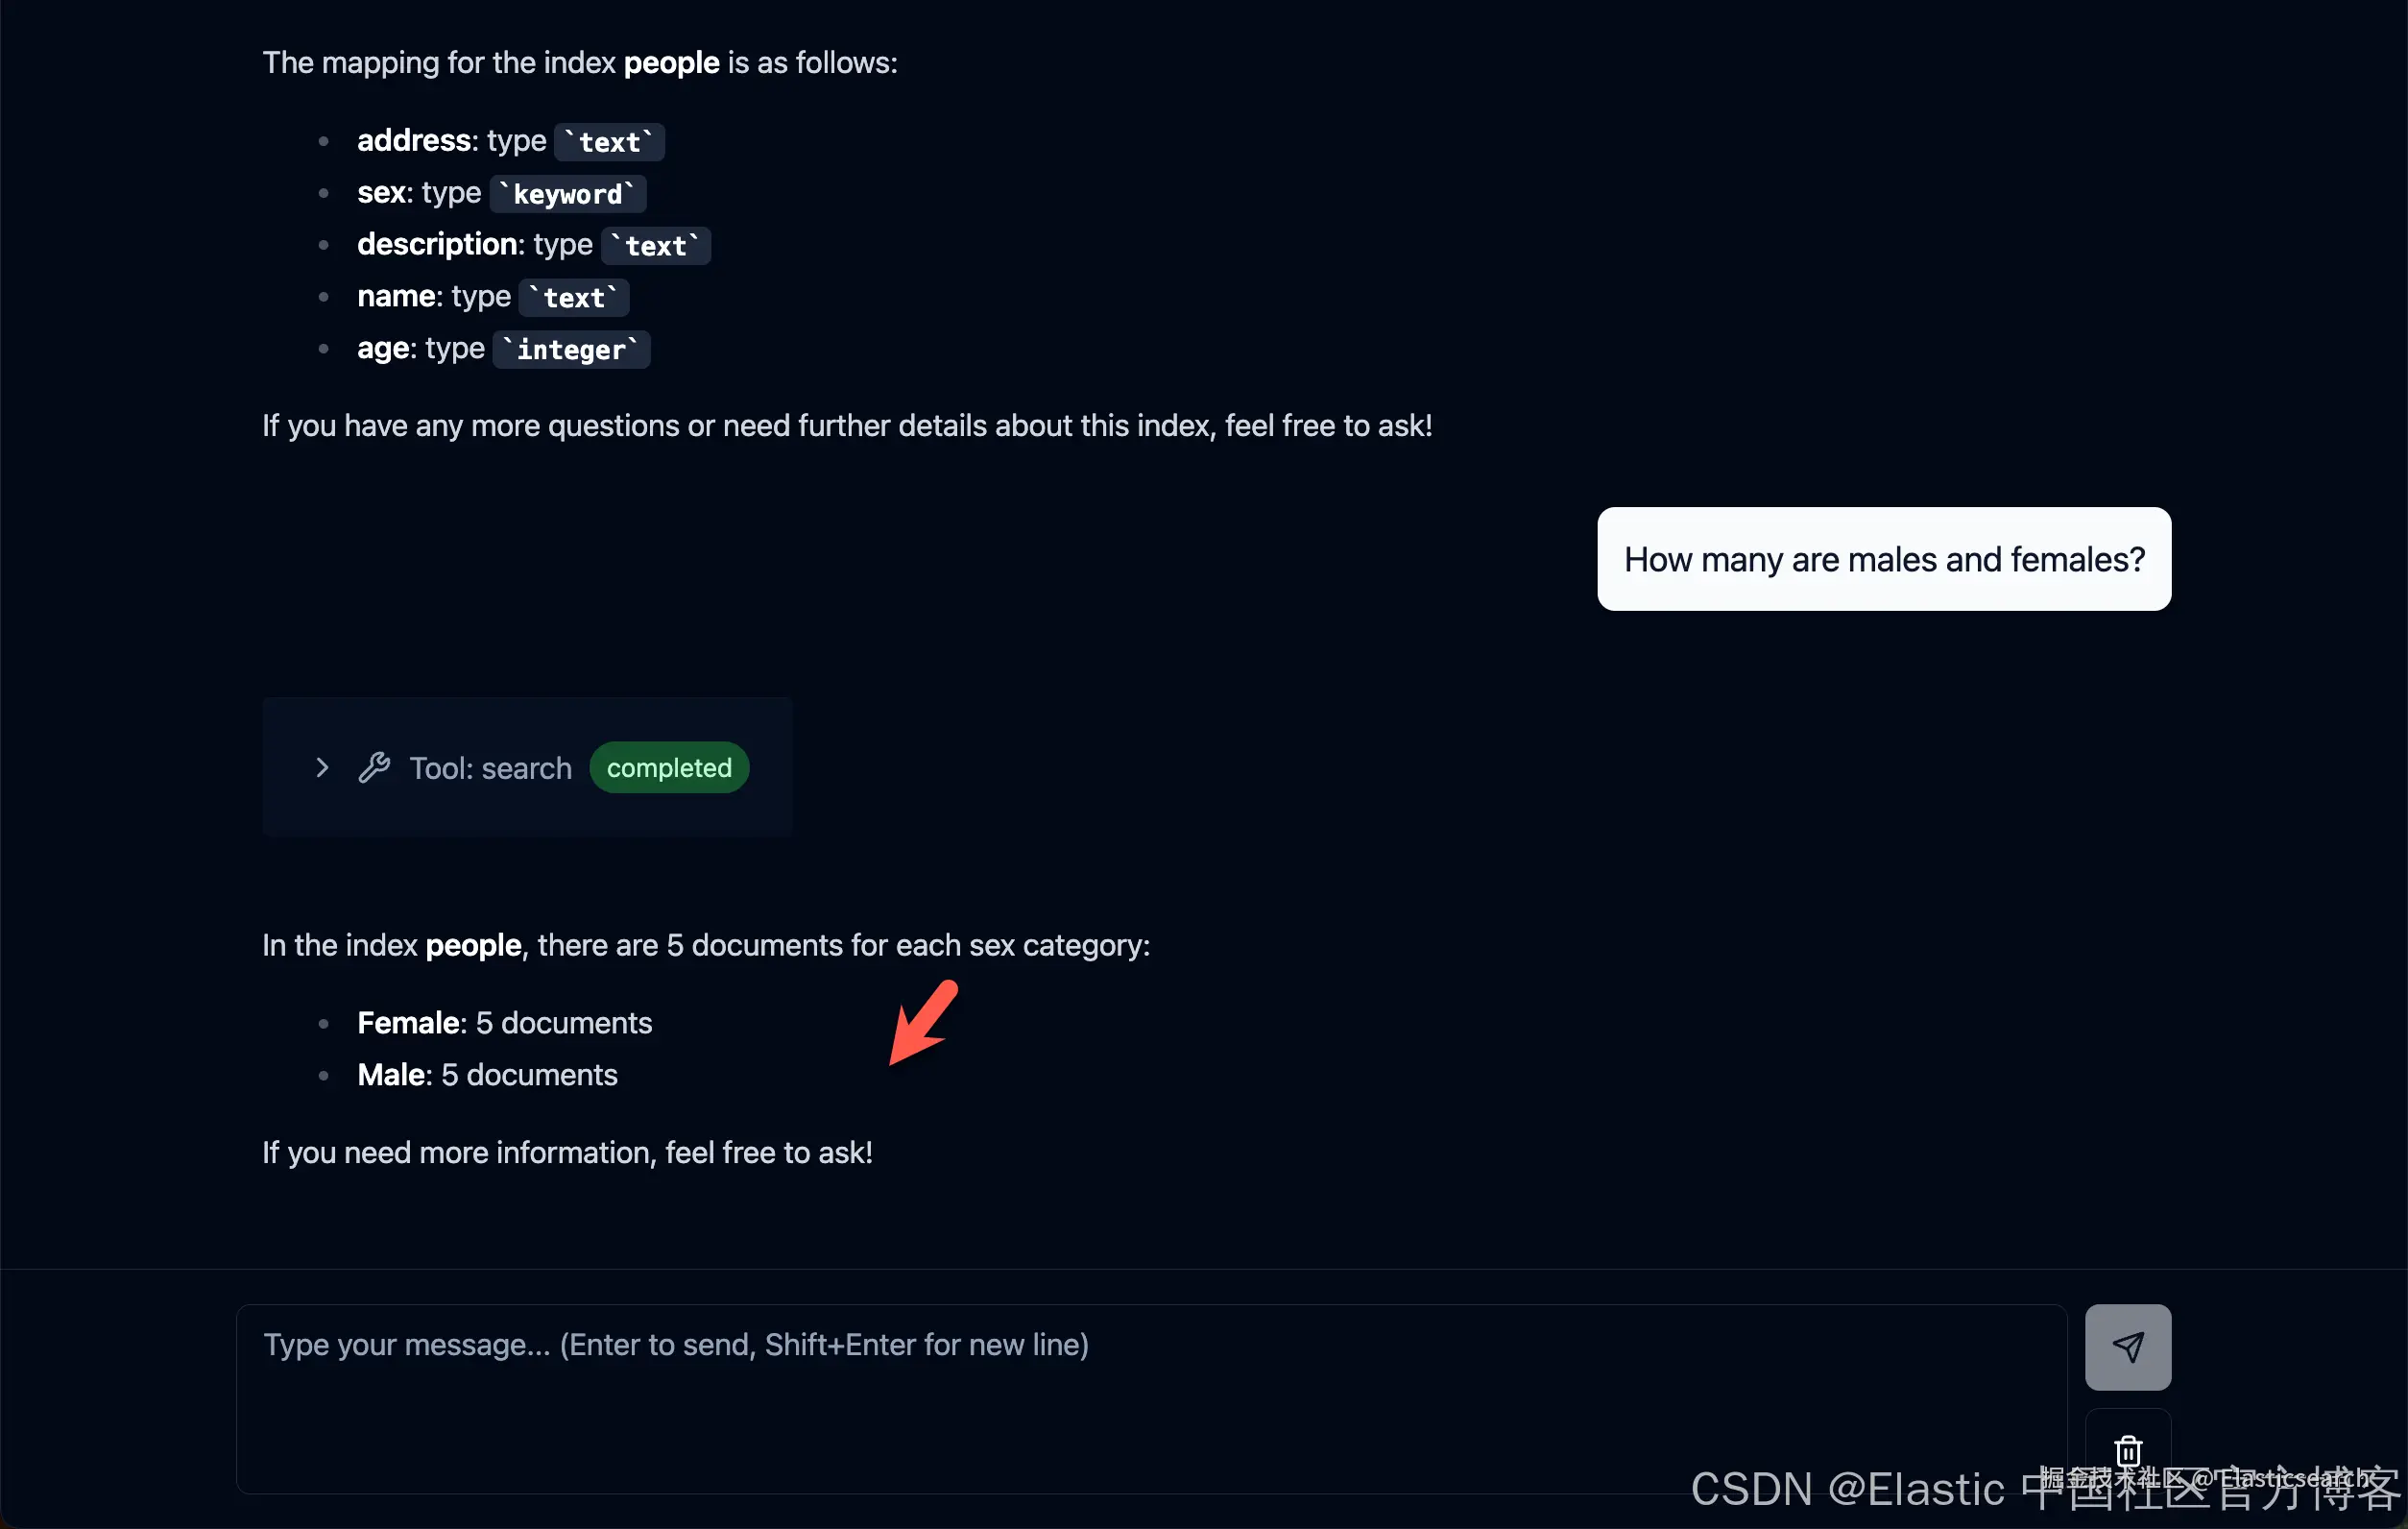
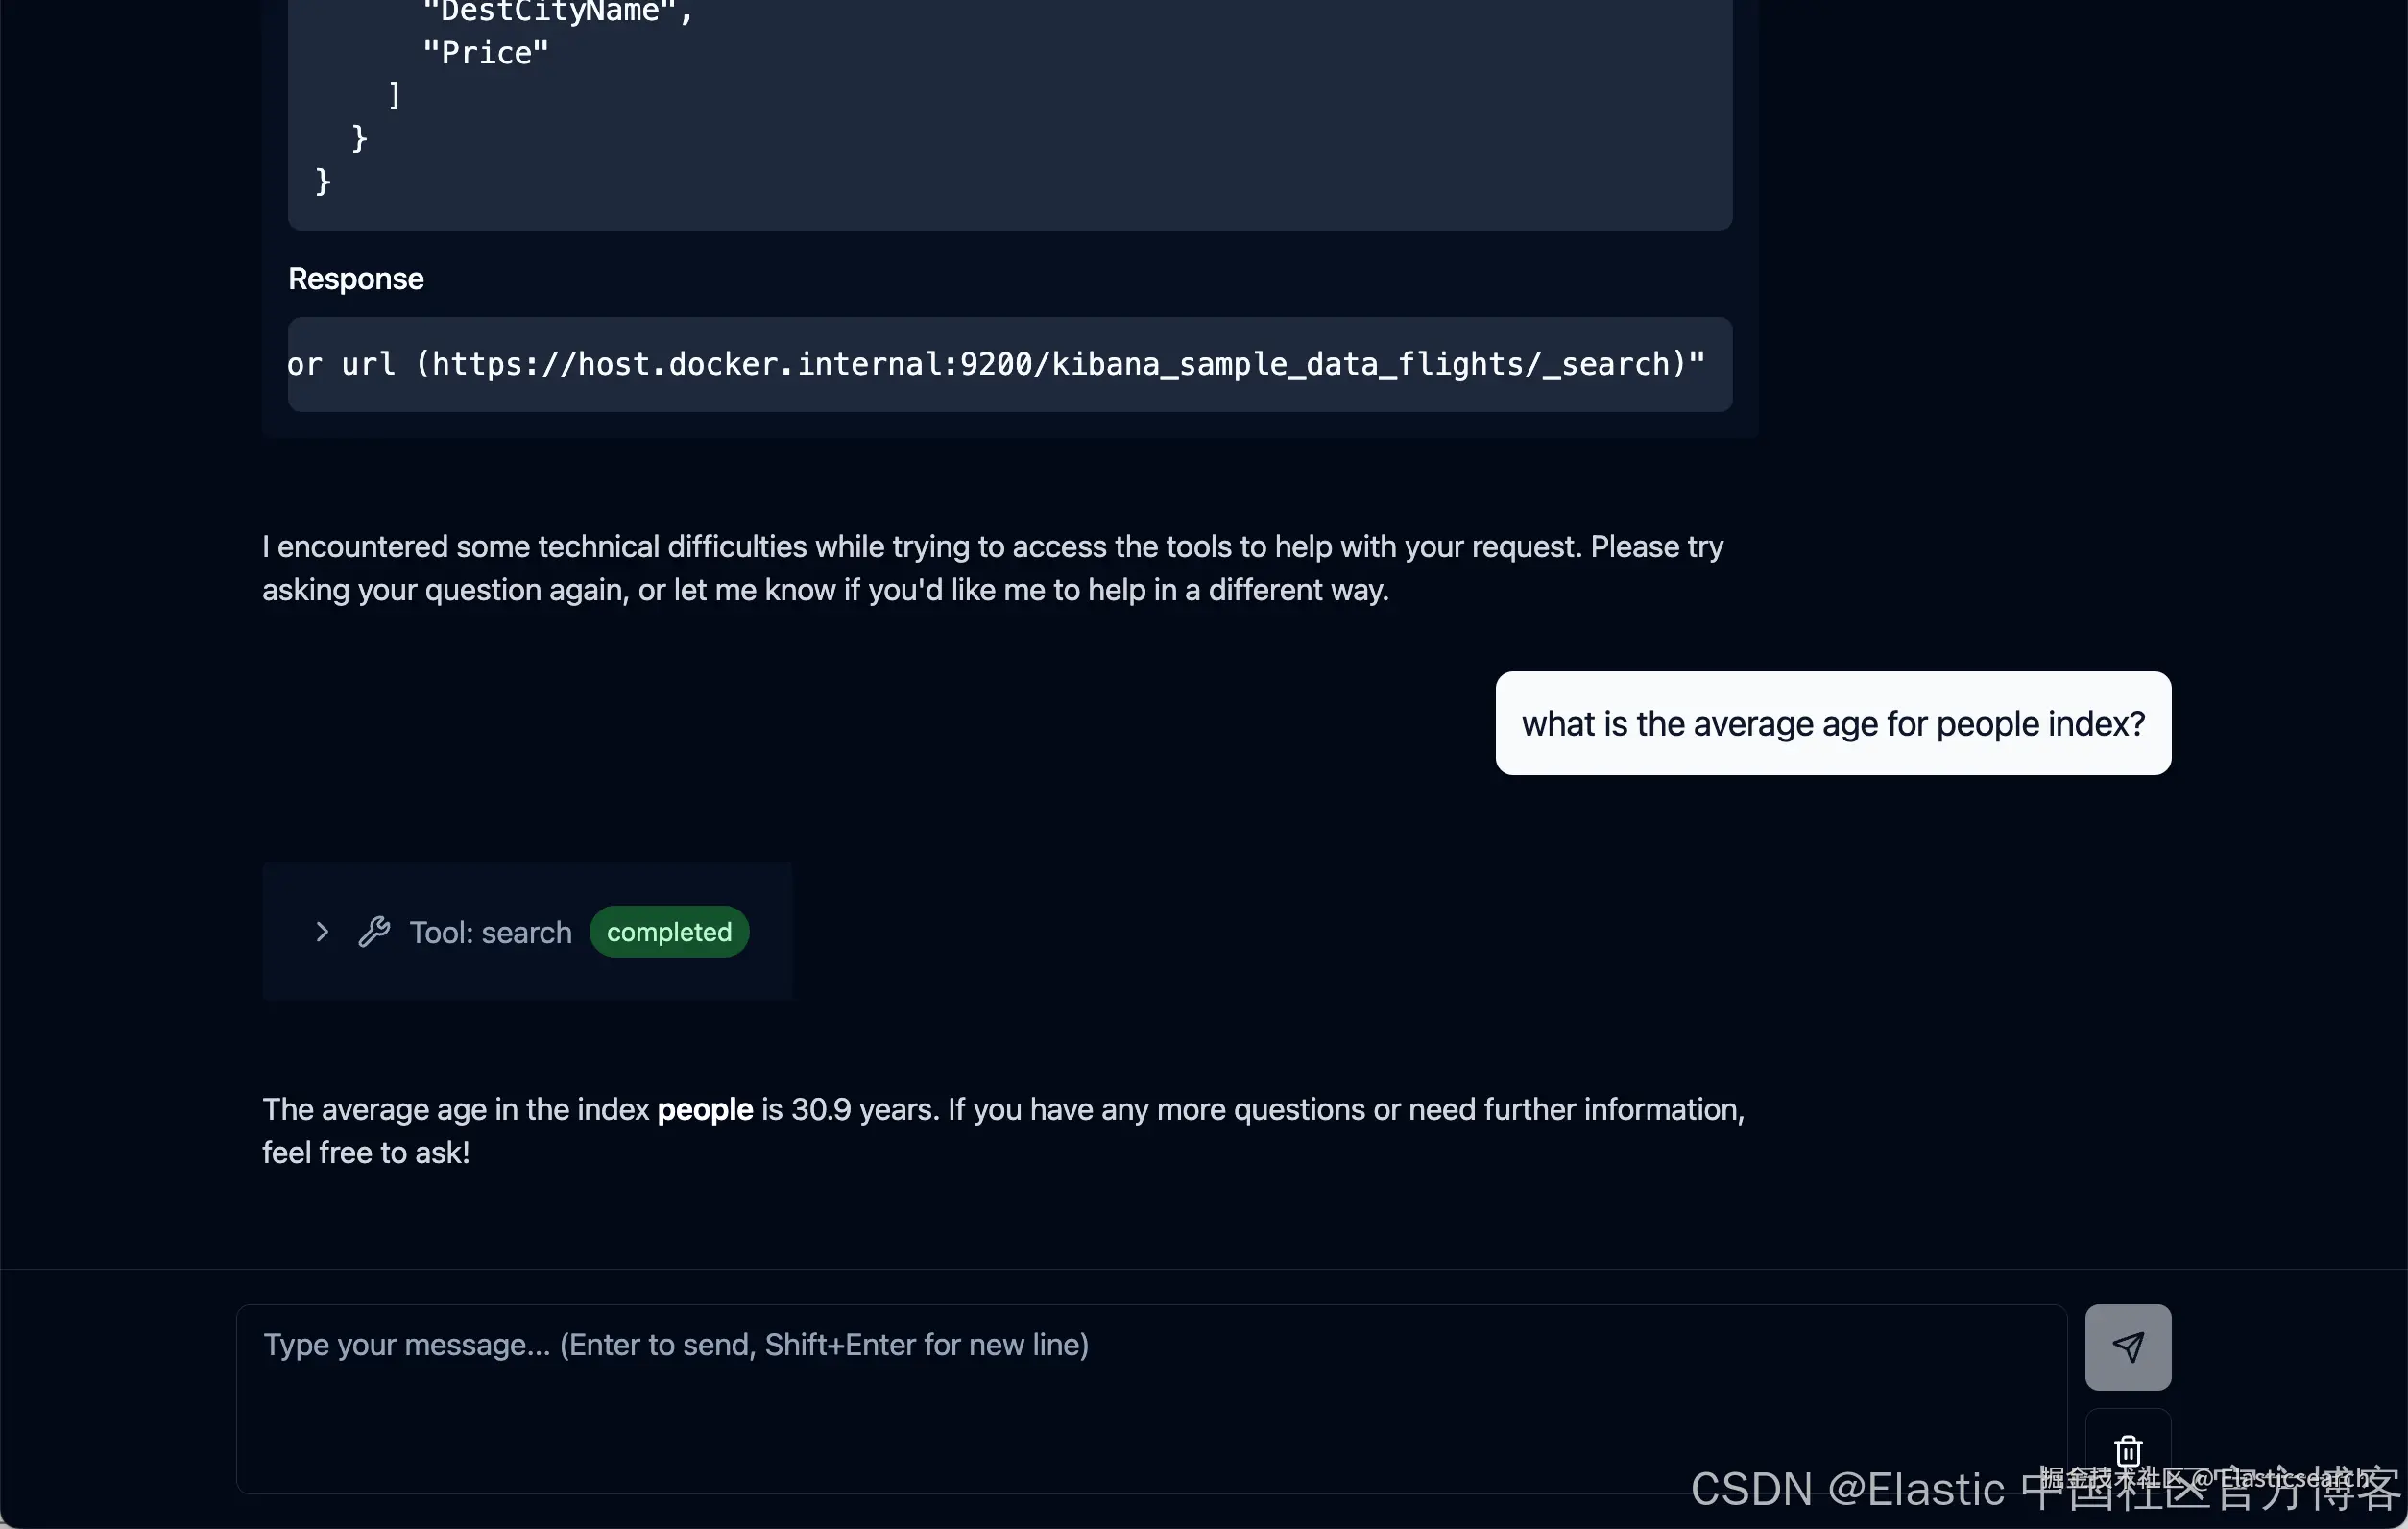
我们仿照之前的文章 "将 agents 连接到 Elasticsearch 使用模型上下文协议 - docker" 导入 kibana_sample_data_flights,我们做如下查询:
我们也可以配置 Elastic Serverless。我们可以仿照之前的文章 "Elastic AI agent builder 介绍" 创建 Elastic serverless。这个 Agents 将会在未来的 9.2.0 里提供。我们拷贝它的 MCP server。
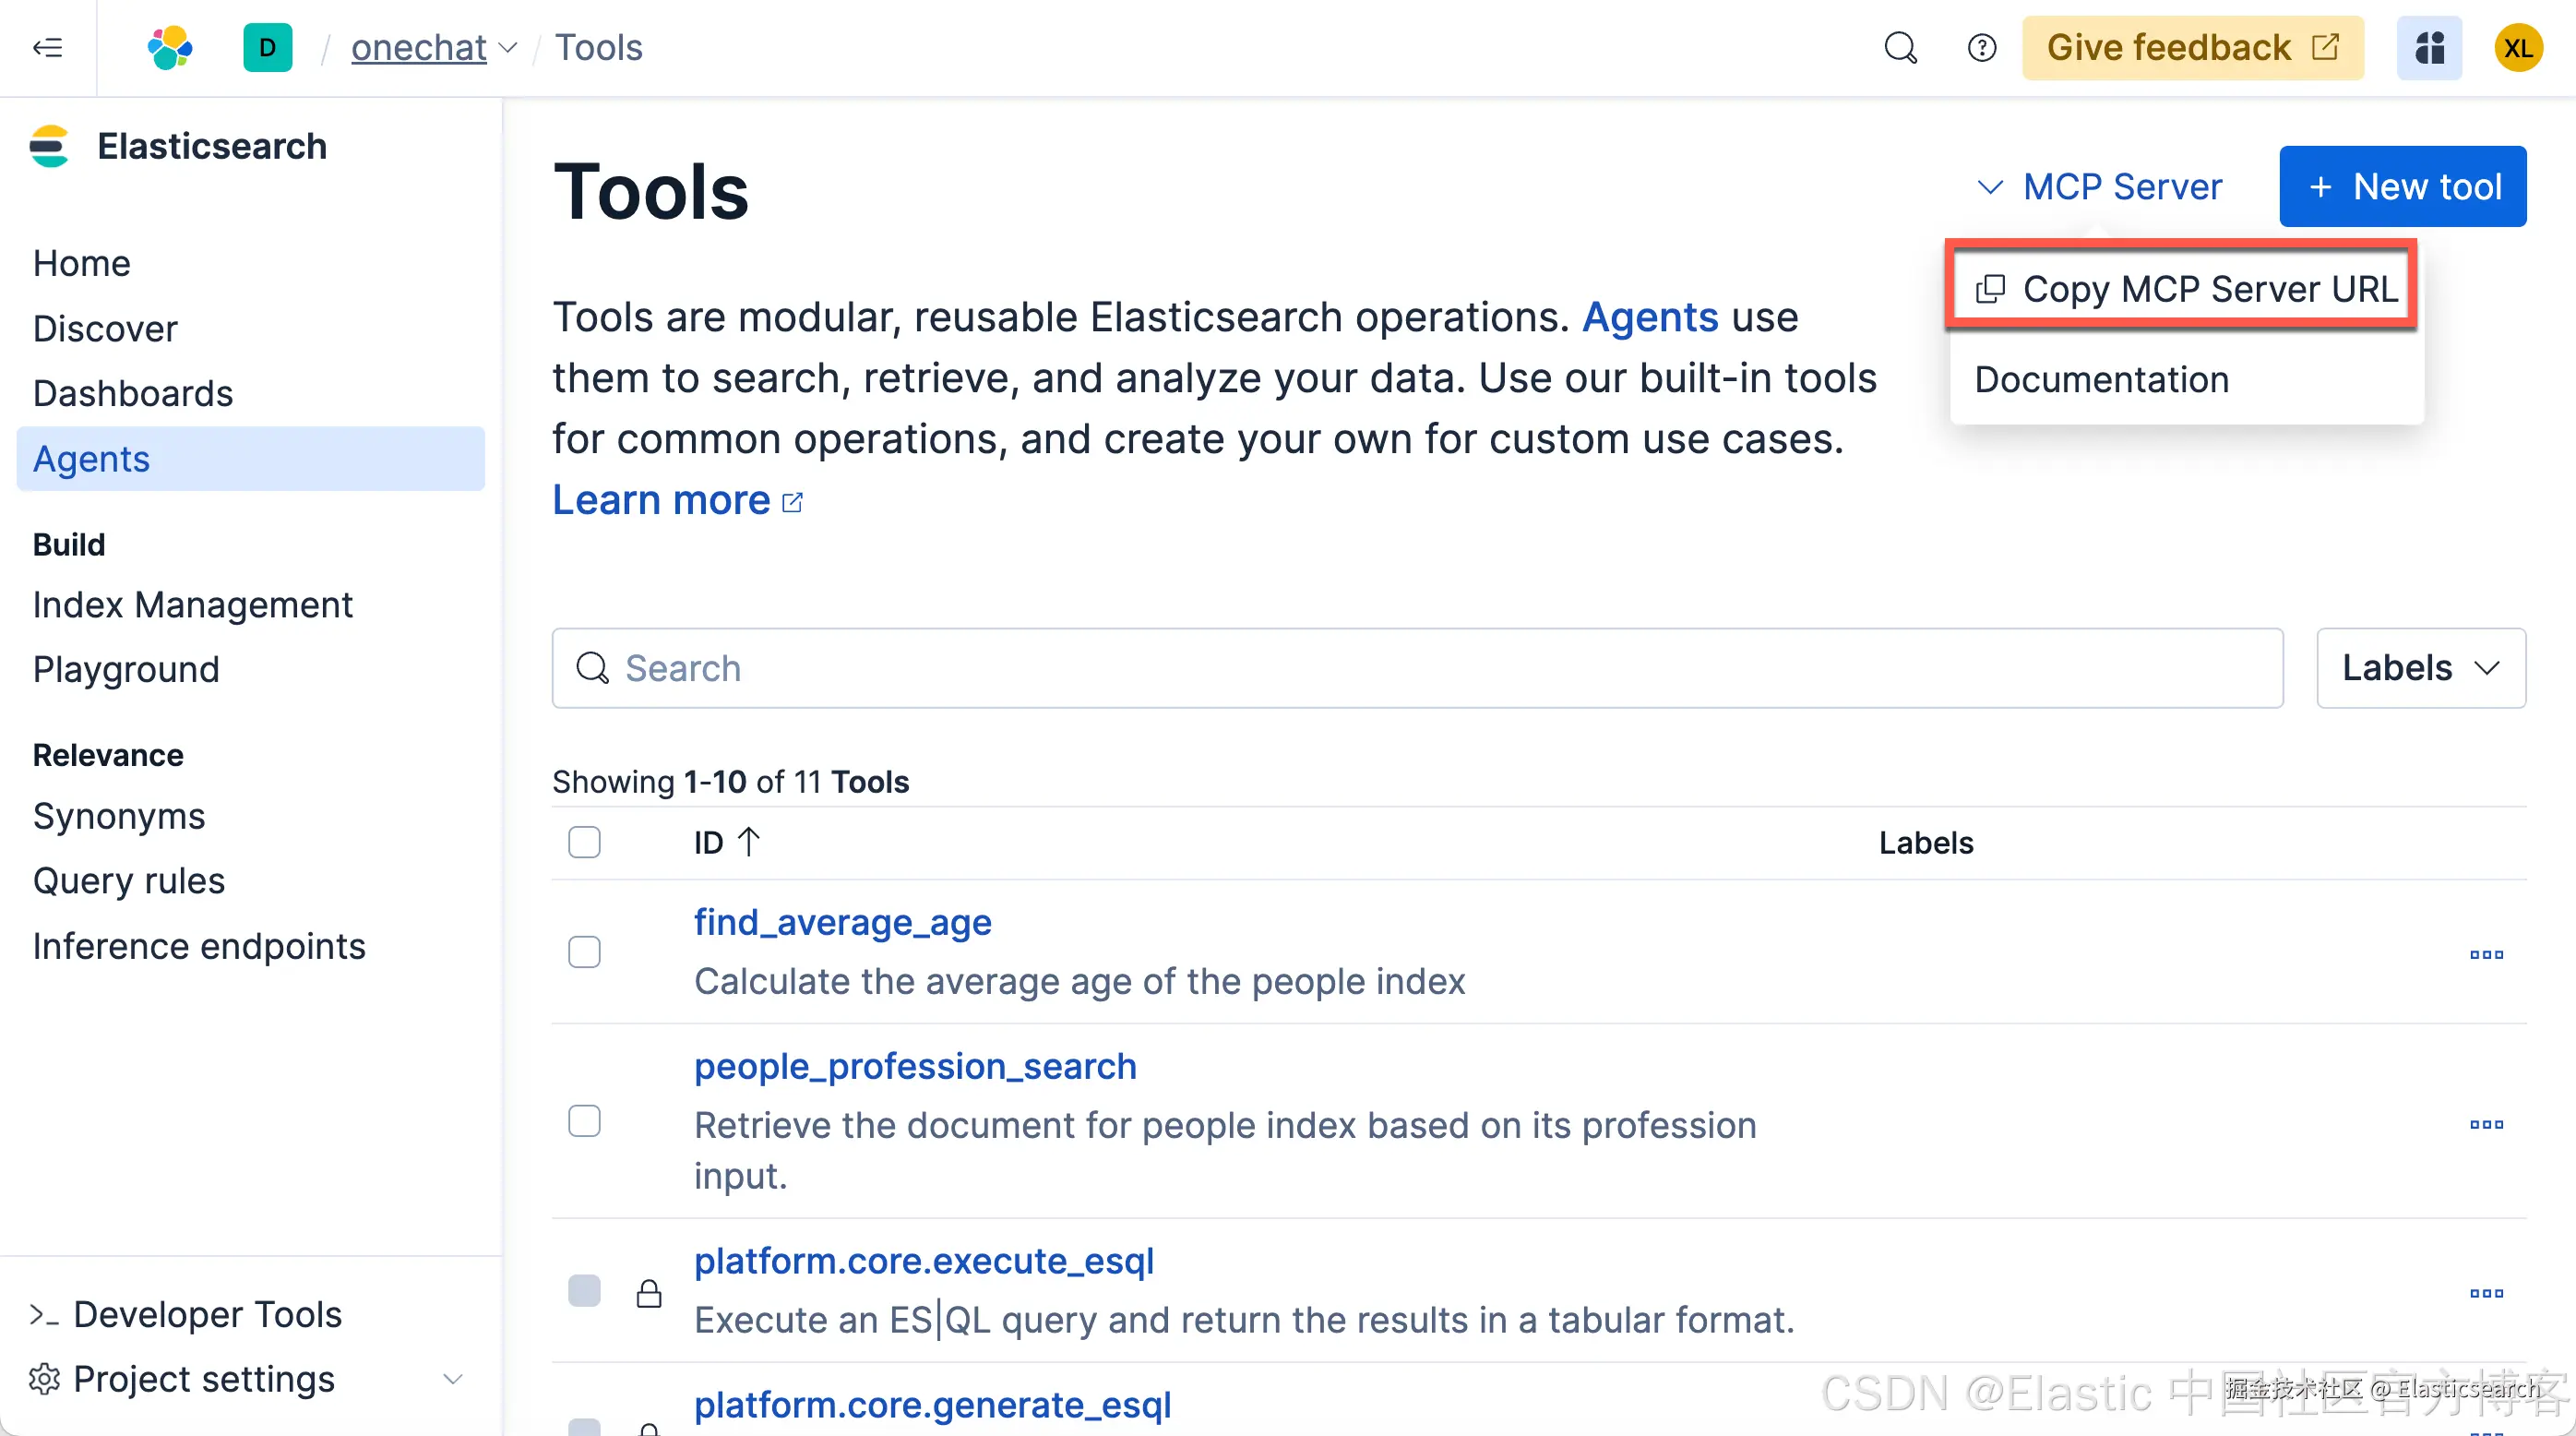
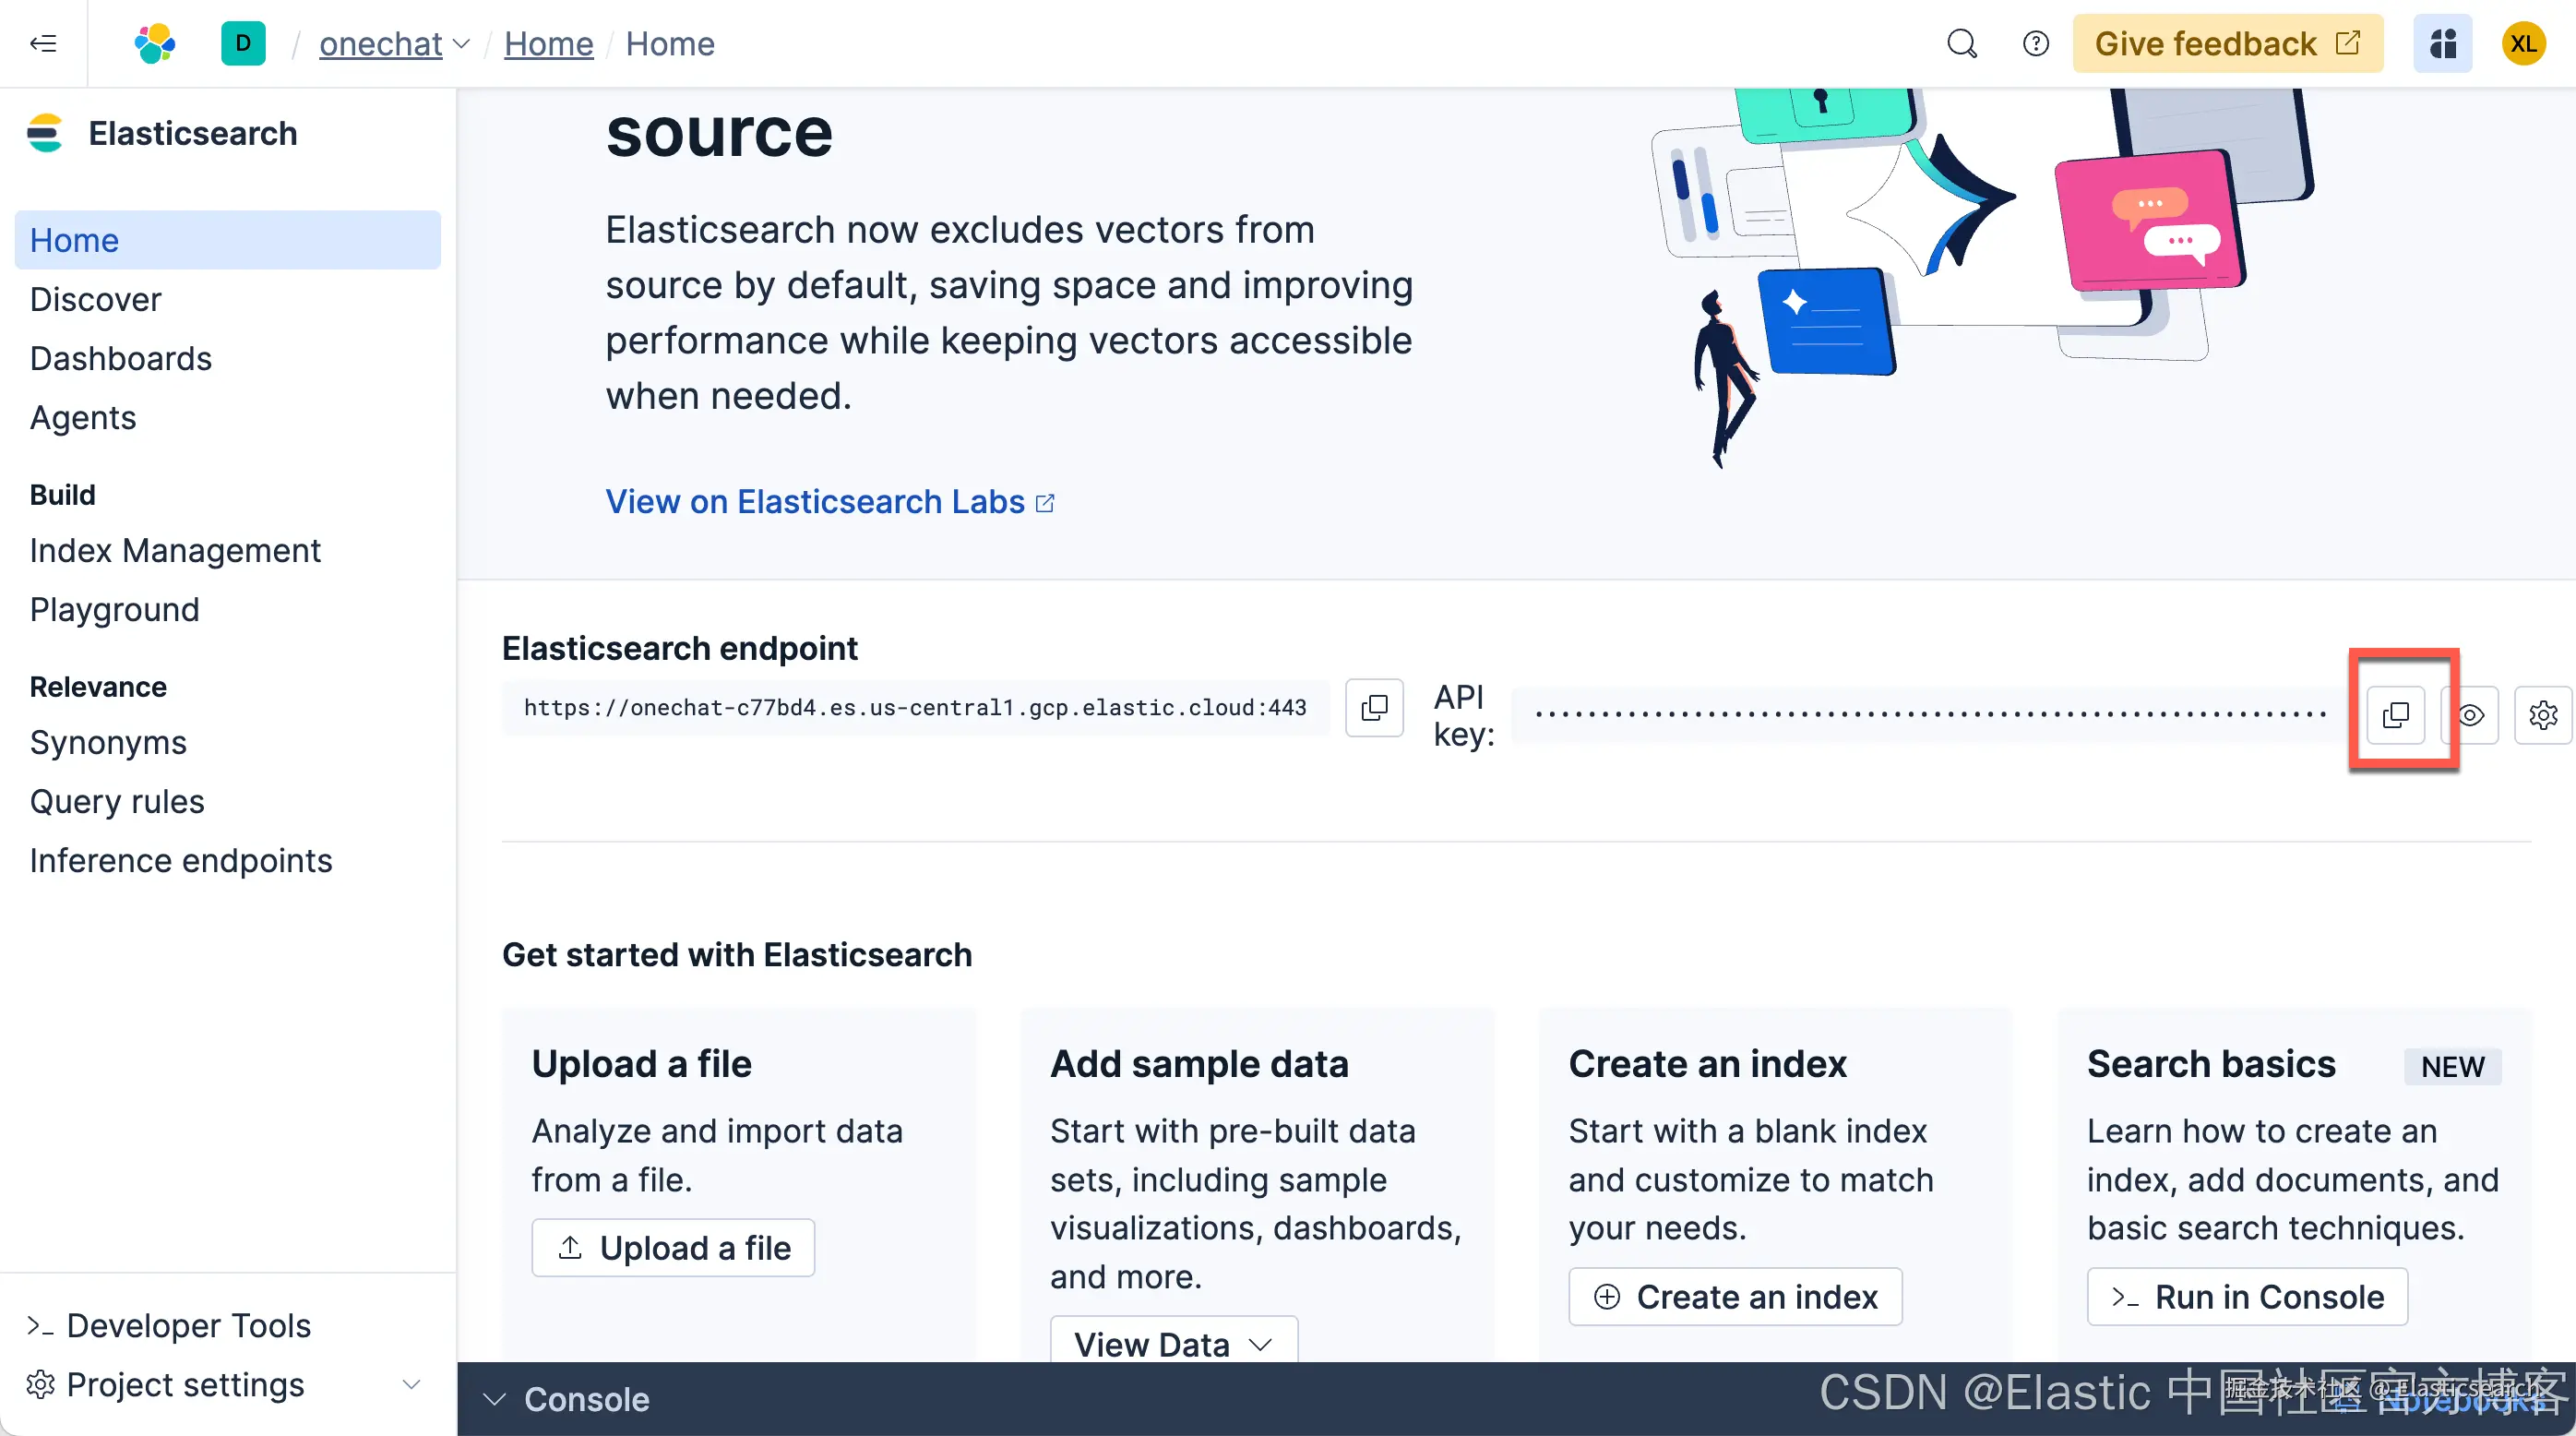
我们把上面的 MCP Server URL 拷贝下来。也把如下的 API key 拷贝下来:
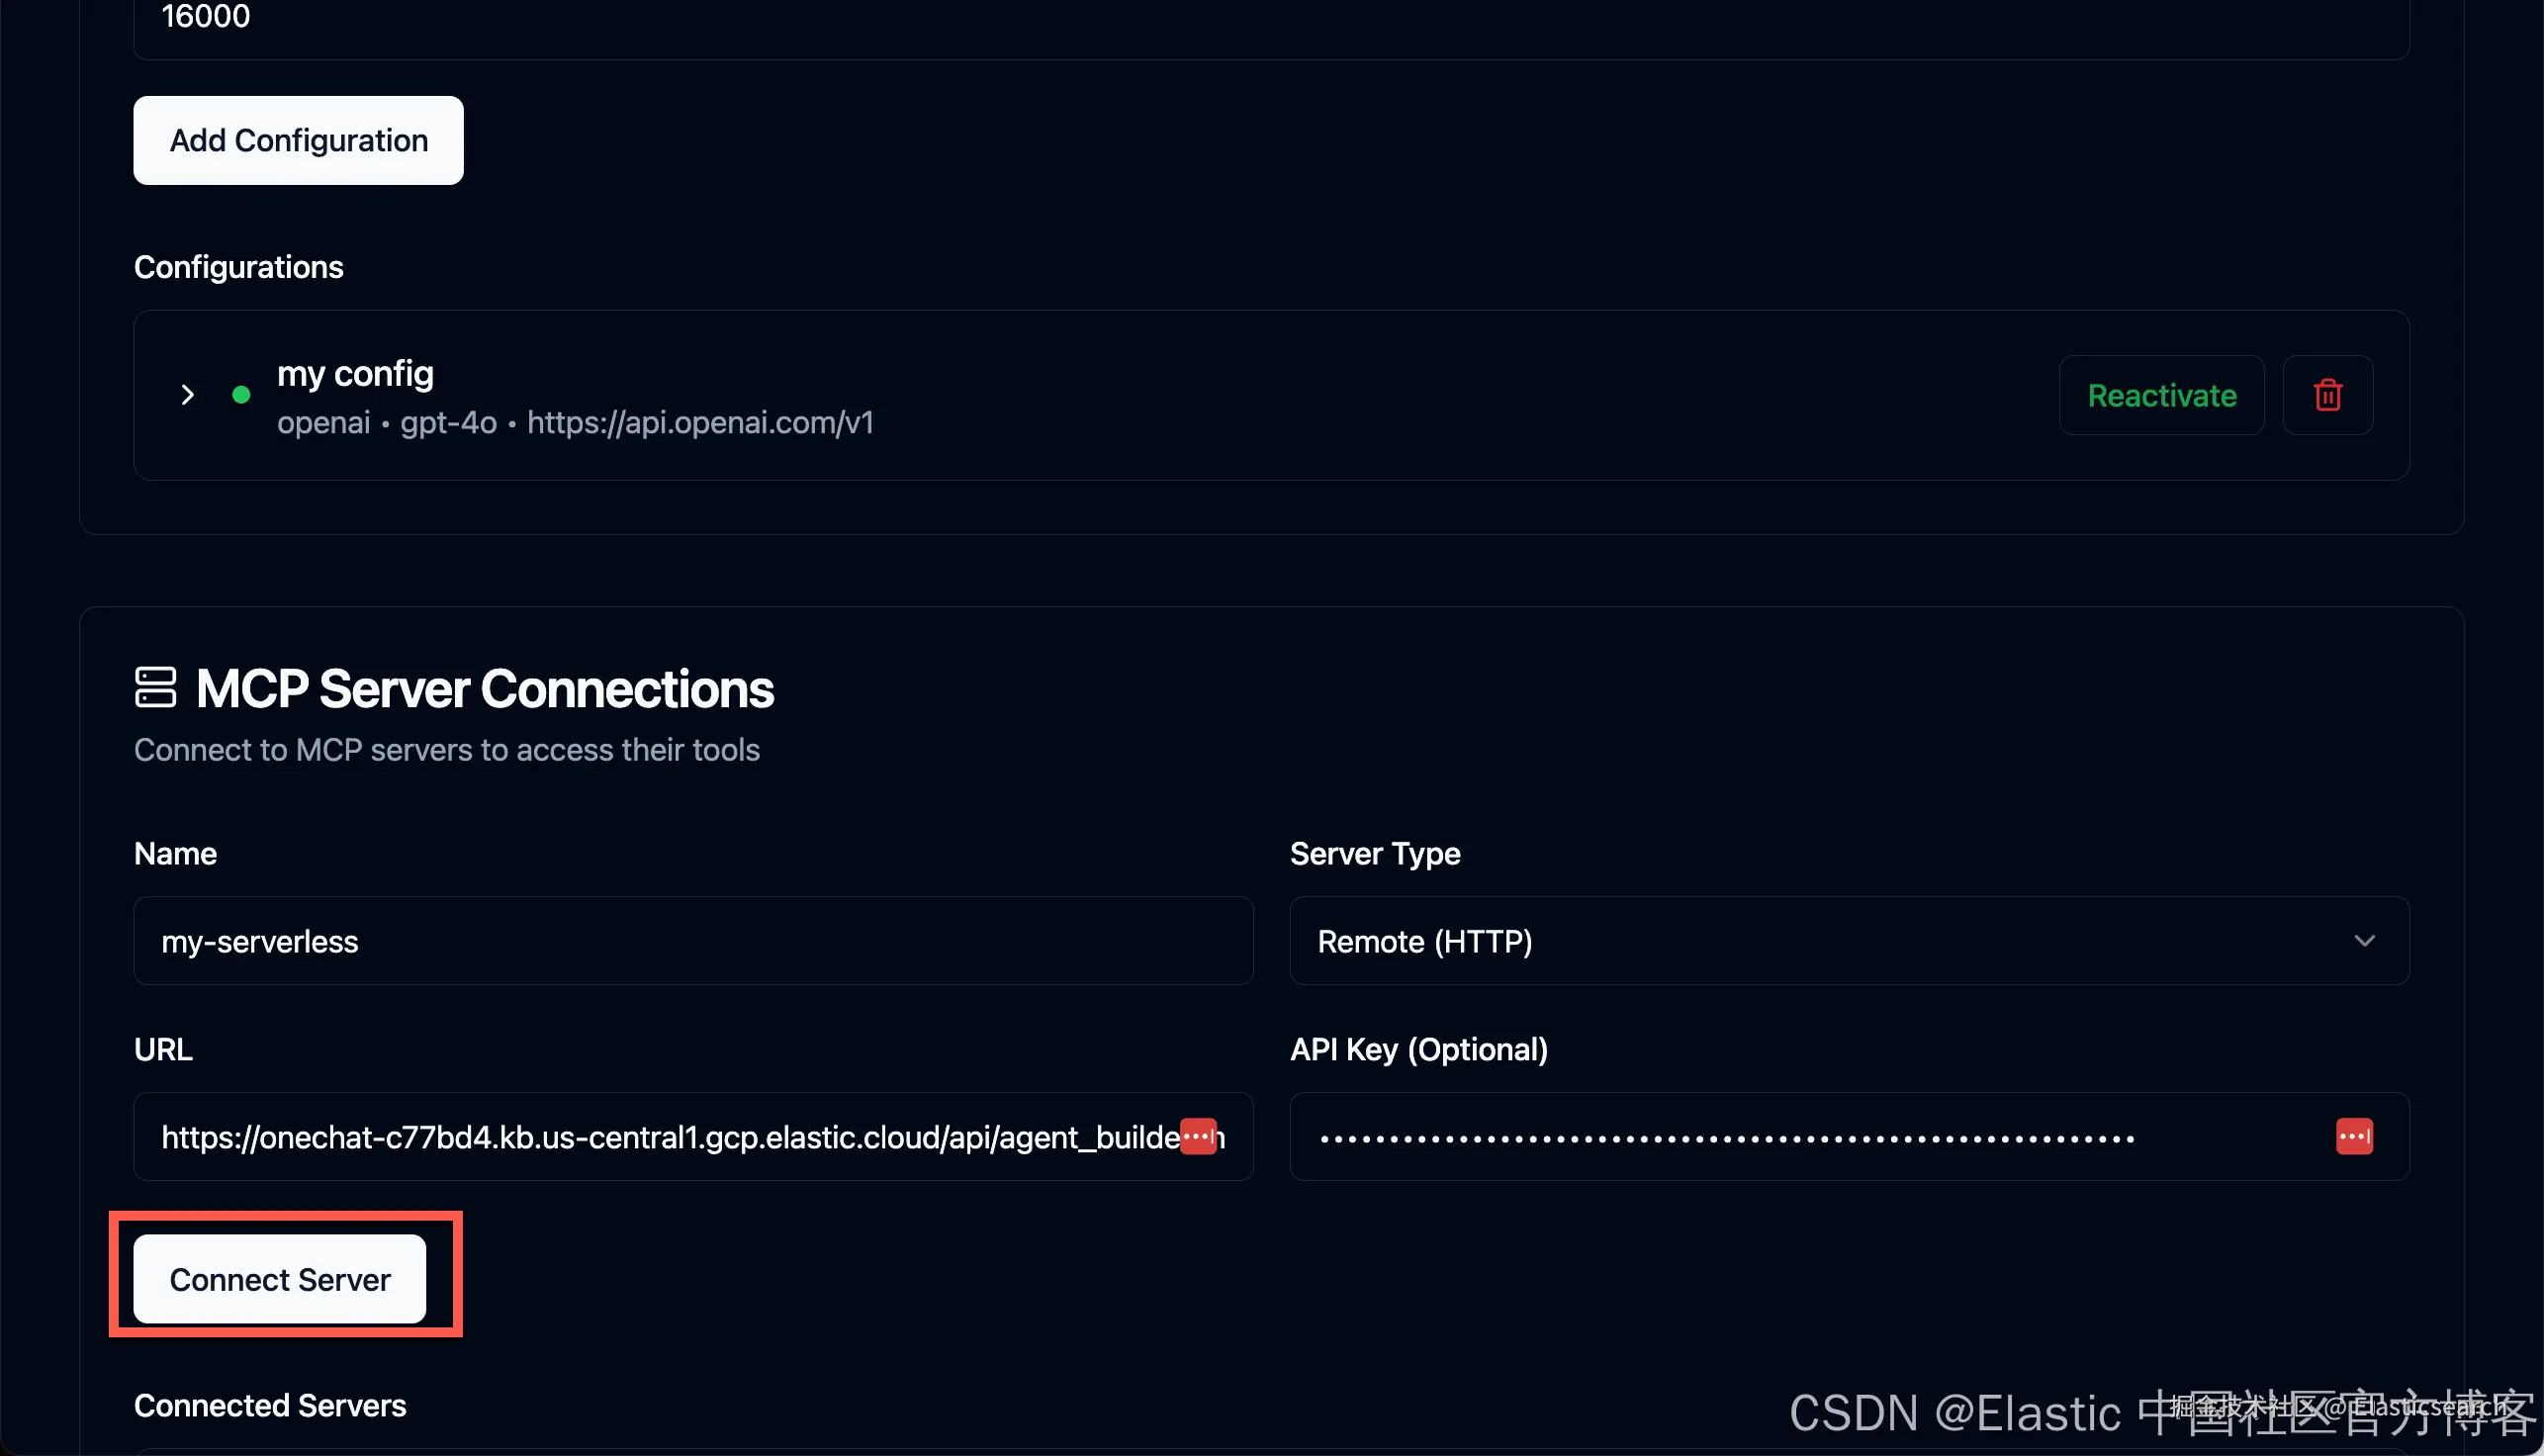
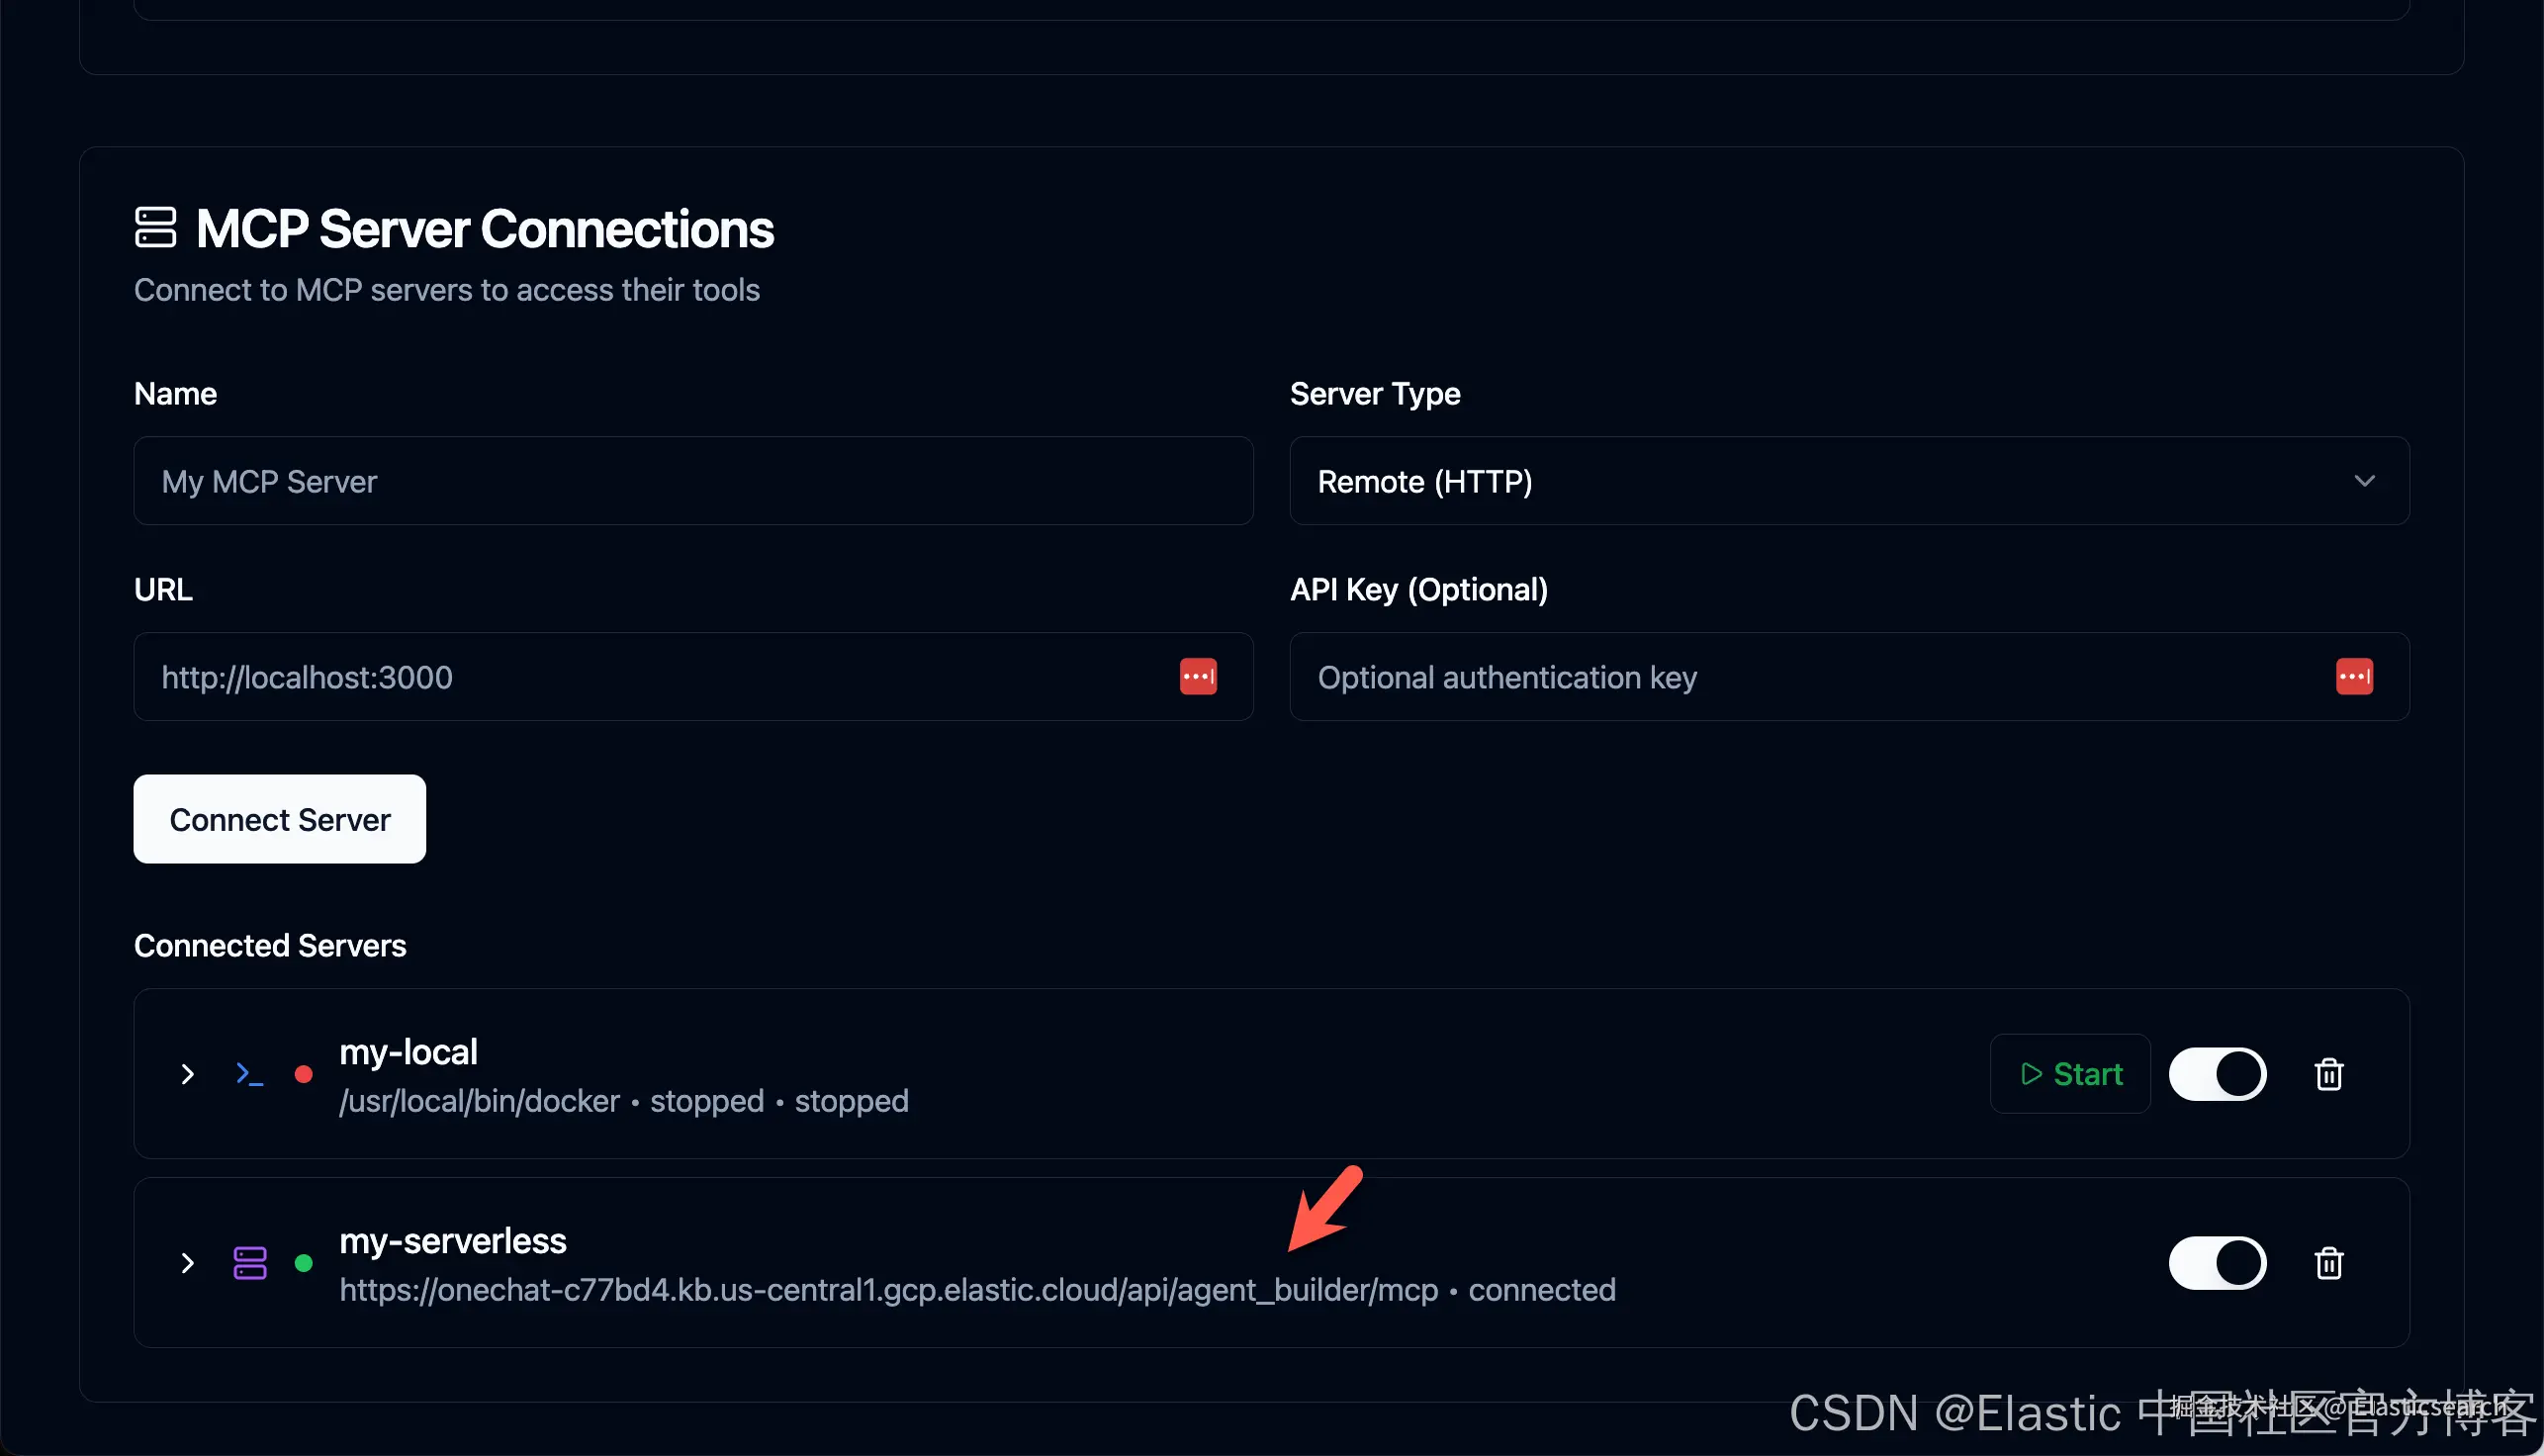
点击上面的 Connect Server,我们可以为 Serverless 来配置 MCP Server。请注意:在 Elastic Stack 里,Kibana 创建了一个 MCP server。我们无需再创建一个单独的 Elasticsearch MCP server。
我们再次聊天:
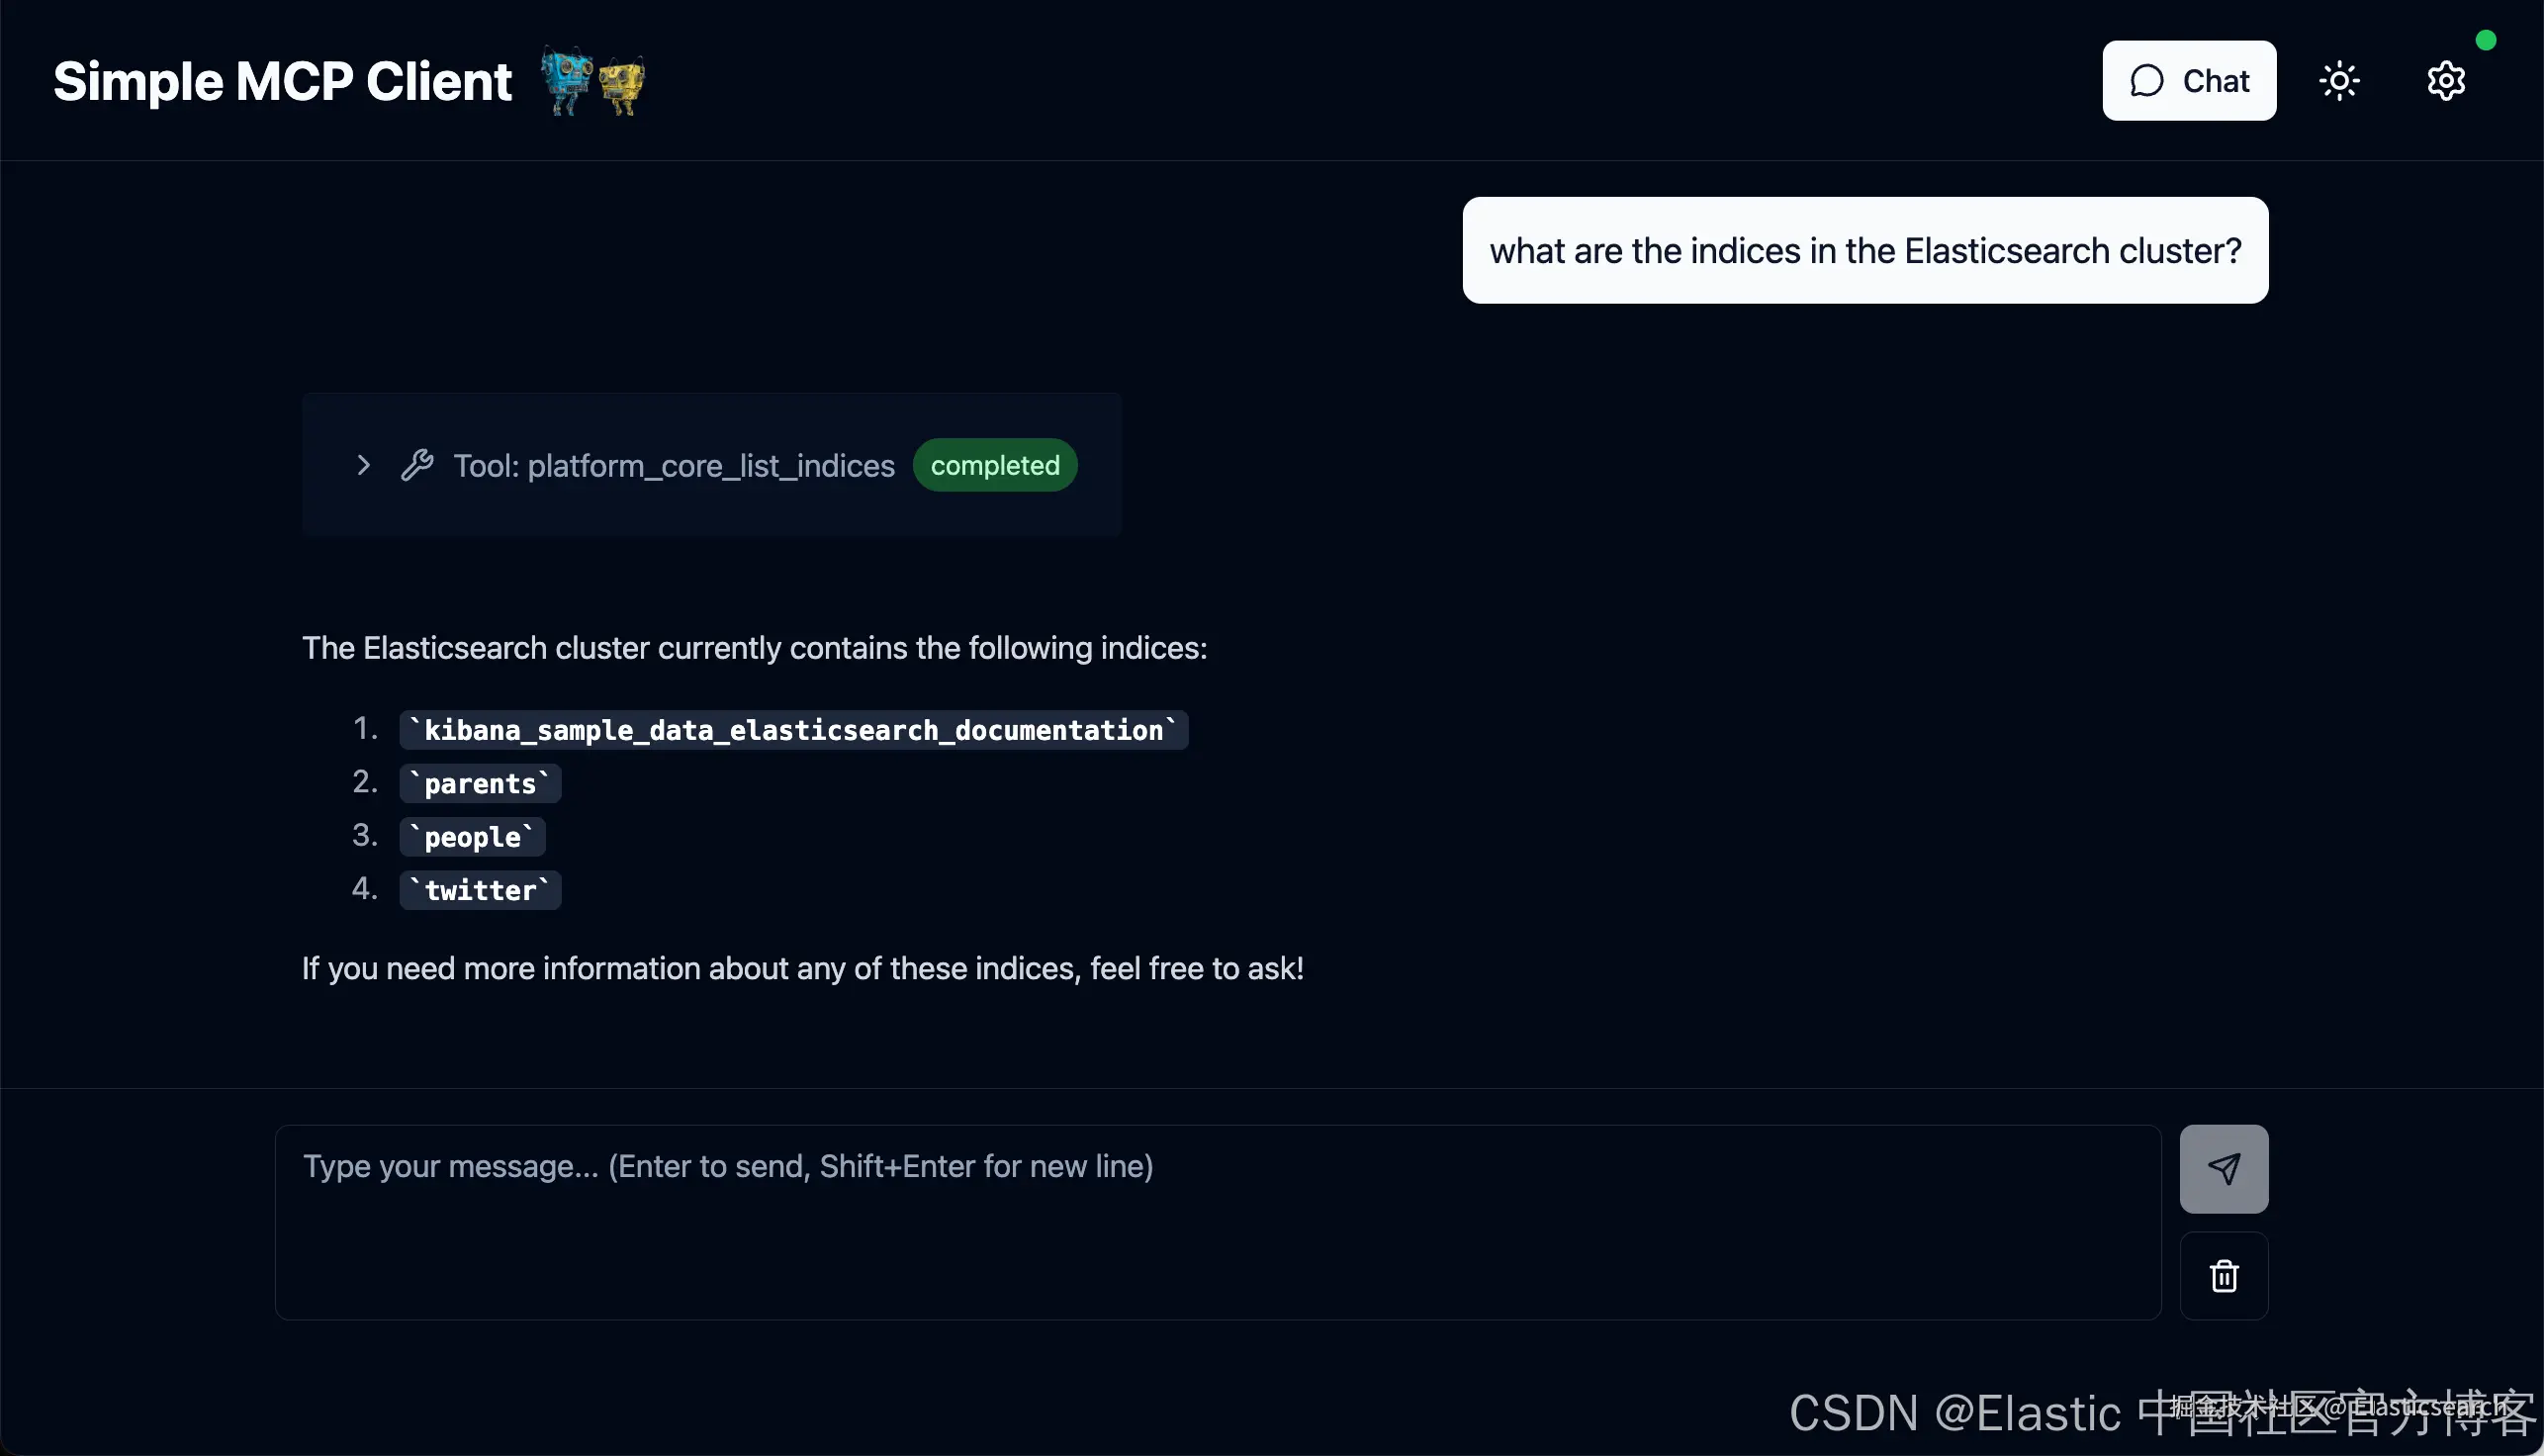
你们也可以配置一下自己的 DeepSeek 试试。我这里就不一一赘述!