整合第三方技术
缓存
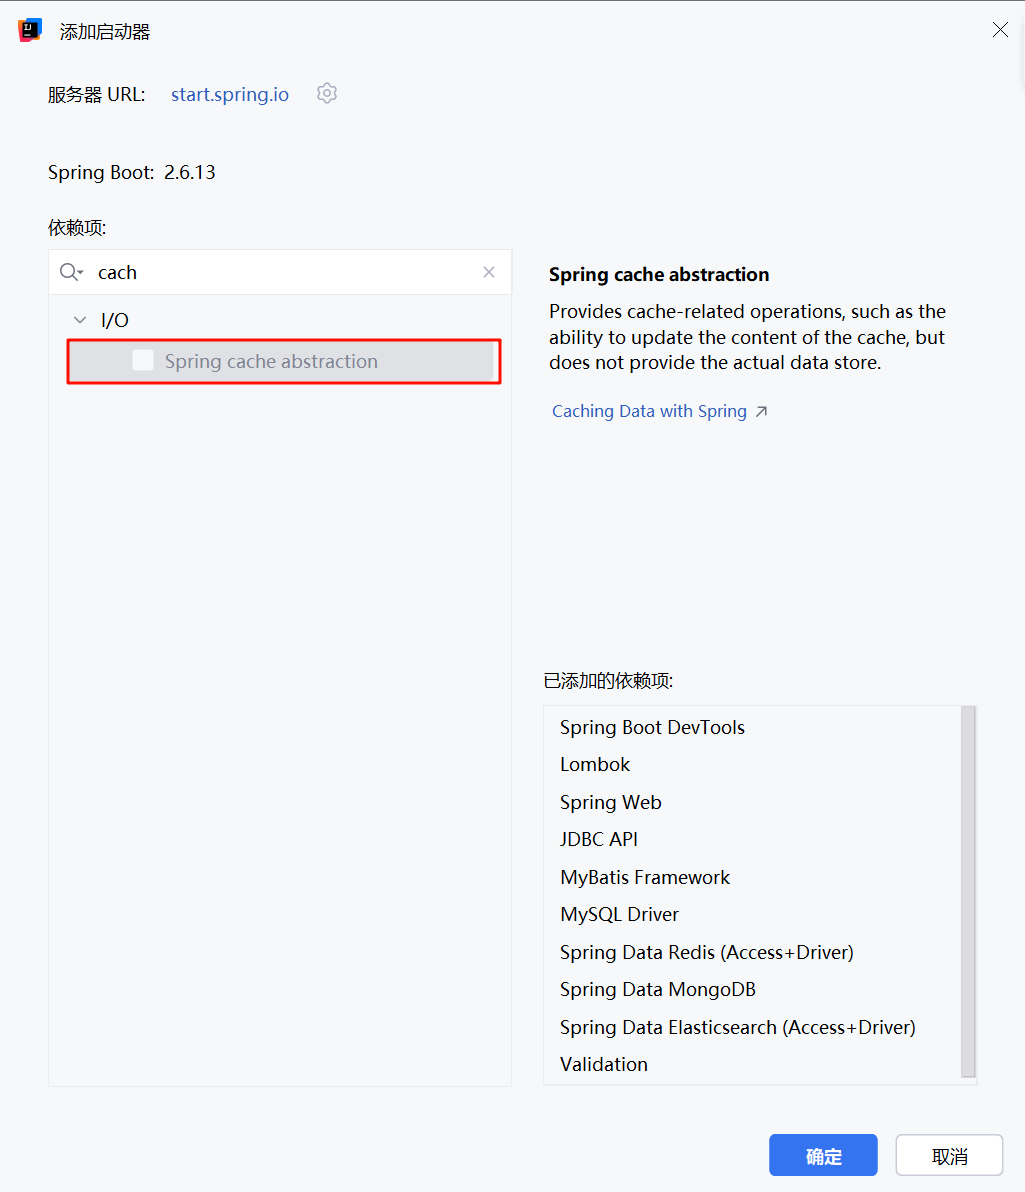
SpringBoot内置缓存解决方案
spring Boot 提供了多种内置缓存解决方案,通过简单的配置即可快速为应用程序添加缓存功能。
1. Spring Cache 抽象层
Spring Boot 提供了一个统一的缓存抽象层 spring-context 中的 Cache 和 CacheManager,它不提供具体的缓存实现,而是定义了一套缓存操作的规范。
主要特性
- 声明式缓存:通过注解方式使用缓存
- 支持多种缓存提供商
- 提供缓存操作的统一 API
步骤①:添加必要的依赖
<!-- pom.xml -->
<dependencies>
    <!-- Spring Boot Starter Web -->
    <dependency>
        <groupId>org.springframework.boot</groupId>
        <artifactId>spring-boot-starter-web</artifactId>
    </dependency>

    <!-- Spring Boot Starter Cache -->
    <dependency>
        <groupId>org.springframework.boot</groupId>
        <artifactId>spring-boot-starter-cache</artifactId>
    </dependency>

    <!-- 使用 Caffeine 作为缓存实现 -->
    <dependency>
        <groupId>com.github.ben-manes.caffeine</groupId>
        <artifactId>caffeine</artifactId>
        <version>3.1.8</version>
    </dependency>

    <!-- Lombok 简化代码 -->
    <dependency>
        <groupId>org.projectlombok</groupId>
        <artifactId>lombok</artifactId>
        <optional>true</optional>
    </dependency>
</dependencies>
or
步骤②:启用缓存,在应用程序的主类上添加 @EnableCaching 注解来启用缓存功能
// Application.java
@SpringBootApplication
@EnableCaching
public class Application {
    public static void main(String[] args) {
        SpringApplication.run(Application.class, args);
    }

}步骤③:设置操作的数据是否使用缓存
@Service
public class BookServiceImpl implements BookService {
    @Autowired
    private BookDao bookDao;

    @Cacheable(value="cacheSpace",key="#id")
    public Book getById(Integer id) {
        return bookDao.selectById(id);
    }
}
2. 内置缓存实现
Spring Boot 自动配置了多种缓存实现,只需添加相应的依赖即可启用:
2.1 Simple Cache
Spring Boot 默认提供的简单内存缓存实现,基于 ConcurrentHashMap。
特点:
- 轻量级,无需额外依赖
- 适合开发和测试环境
- 不适合生产环境,因为重启应用会丢失所有缓存数据
2.2 EhCache
EhCache 是一个功能强大、高性能的 Java 缓存框架。
特点:
- 支持内存和磁盘存储
- 支持缓存数据的持久化
- 适合生产环境使用
步骤①:添加必要的依赖
<!-- pom.xml -->
<dependencies>
    <!-- Spring Boot Starter Web -->
    <dependency>
        <groupId>org.springframework.boot</groupId>
        <artifactId>spring-boot-starter-web</artifactId>
    </dependency>

    <!-- Spring Boot Starter Cache -->
    <dependency>
        <groupId>org.springframework.boot</groupId>
        <artifactId>spring-boot-starter-cache</artifactId>
    </dependency>

    <!-- Ehcache 依赖 -->
    <dependency>
        <groupId>org.ehcache</groupId>
        <artifactId>ehcache</artifactId>
        <version>3.10.8</version>
    </dependency>

    <!-- Lombok 简化代码 -->
    <dependency>
        <groupId>org.projectlombok</groupId>
        <artifactId>lombok</artifactId>
        <optional>true</optional>
    </dependency>
</dependencies>
步骤②:配置缓存技术实现使用Ehcache
# src/main/resources/application.yml
server:
  port: 8080

spring:
  cache:
    type: ehcache
    ehcache:
      config: classpath:ehcache.xml
步骤③:指定ehcache的配置文件
在 src/main/resources 目录下创建 ehcache.xml 文件:
<!-- src/main/resources/ehcache.xml -->
<config xmlns:xsi="http://www.w3.org/2001/XMLSchema-instance"
        xmlns="http://www.ehcache.org/v3"
        xsi:schemaLocation="http://www.ehcache.org/v3 http://www.ehcache.org/v3/ehcache.xsd">

    <!-- 默认缓存配置 -->
    <cache alias="default">
        <expiry>
            <ttl unit="minutes">30</ttl>
        </expiry>
        <heap unit="entries">2000</heap>
    </cache>

    <!-- 用户缓存配置 -->
    <cache alias="users">
        <expiry>
            <ttl unit="minutes">10</ttl>
        </expiry>
        <heap unit="entries">500</heap>
        <disk unit="gb">1</disk>
        <offheap unit="mb">100</offheap>
    </cache>

    <!-- 产品缓存配置 -->
    <cache alias="products">
        <expiry>
            <ttl unit="minutes">20</ttl>
        </expiry>
        <heap unit="entries">1000</heap>
        <disk unit="gb">5</disk>
        <offheap unit="mb">200</offheap>
    </cache>

    <!-- 短期缓存配置 -->
    <cache alias="shortTerm">
        <expiry>
            <ttl unit="seconds">60</ttl>
        </expiry>
        <heap unit="entries">100</heap>
    </cache>
</config>
2.3 Caffeine
Caffeine 是一个高性能的 Java 缓存库,被认为是 Guava Cache 的改进版本。
特点:
- 高性能
- 自动加载
- 基于时间的失效策略
- 支持异步刷新
2.4 Redis Cache
Redis 是一个开源的内存数据结构存储系统,常用作数据库、缓存和消息代理。
特点:
- 高性能
- 支持多种数据结构
- 持久化支持
- 分布式缓存
2.5 Hazelcast
Hazelcast 是一个开源的内存数据网格,提供分布式数据结构和计算功能。
特点:
- 分布式缓存
- 高可用性
- 自动集群发现
- 支持数据分区和复制
3.Spring Boot 整合 Memcached 缓存
步骤①:添加必要的依赖
<!-- pom.xml -->
<dependencies>
    <!-- Spring Boot Starter Web -->
    <dependency>
        <groupId>org.springframework.boot</groupId>
        <artifactId>spring-boot-starter-web</artifactId>
    </dependency>

    <!-- Spring Boot Starter Cache -->
    <dependency>
        <groupId>org.springframework.boot</groupId>
        <artifactId>spring-boot-starter-cache</artifactId>
    </dependency>

    <!-- Spring Boot Data Redis (用于连接 Memcached) -->
    <dependency>
        <groupId>org.springframework.boot</groupId>
        <artifactId>spring-boot-starter-data-redis</artifactId>
    </dependency>

    <!-- Xmemcached 客户端 -->
    <dependency>
        <groupId>com.googlecode.xmemcached</groupId>
        <artifactId>xmemcached</artifactId>
        <version>2.4.7</version>
    </dependency>

    <!-- Lombok 简化代码 -->
    <dependency>
        <groupId>org.projectlombok</groupId>
        <artifactId>lombok</artifactId>
        <optional>true</optional>
    </dependency>
</dependencies>
步骤②:安装和启动 Memcached 服务器
安装 Memcached
Windows 系统:
-
下载 Memcached for Windows: https://memcached.org/downloads
-
解压下载的文件
-
打开命令提示符,导航到解压目录
-
运行
memcached.exe -d install安装为服务 -
运行
memcached.exe -d start启动服务
配置 Memcached
Windows: 编辑 memcached.ini 文件
例如,修改监听地址和端口:
-l 127.0.0.1
-p 11211
步骤③:配置 Spring Boot 连接 Memcached
# src/main/resources/application.yml
server:
  port: 8080

spring:
  cache:
    type: simple
    cache-names: users,products,shortTerm

# Memcached 配置
memcached:
  # Memcached 服务器地址
  servers: 127.0.0.1:11211
  # 连接池大小
  connectionPoolSize: 10
  # 操作超时时间(毫秒)
  opTimeout: 3000
  # 连接超时时间(毫秒)
  connectTimeout: 3000
  # 获取连接超时时间(毫秒)
  timeoutExceptionThreshold: 2000
  # 是否使用二进制协议
  binaryProtocol: true
  # 哈希算法
  hashAlgorithm: KETAMA_HASH
  # 默认过期时间(秒)
  defaultExpiration: 3600
  # 是否使用朴素编码器
  primitiveAsString: false
步骤④:创建自定义的 Memcached 缓存管理器
步骤⑤:启用缓存功能 @EnableCaching
步骤⑥:使用 @Cacheable、@CachePut、@CacheEvict 等注解进行缓存操作
步骤⑦:实现缓存监控以了解缓存性能
4.SpringBoot整合jetcache缓存
JetCache 是一个优秀的开源缓存框架,由阿里巴巴开发并开源,它提供了统一的缓存 API,支持本地缓存和分布式缓存,并且具有丰富的功能如二级缓存、缓存自动刷新等。
目前jetcache支持的缓存方案本地缓存支持两种,远程缓存支持两种,分别如下:
- 本地缓存(Local)
- LinkedHashMap
- Caffeine
- 远程缓存(Remote)
- Redis
- Tair
LinkedHashMap+Redis的方案:
步骤①:添加必要的依赖
<!-- pom.xml -->
<dependencies>
    <!-- Spring Boot Starter Web -->
    <dependency>
        <groupId>org.springframework.boot</groupId>
        <artifactId>spring-boot-starter-web</artifactId>
    </dependency>

    <!-- Spring Boot Starter Cache -->
    <dependency>
        <groupId>org.springframework.boot</groupId>
        <artifactId>spring-boot-starter-cache</artifactId>
    </dependency>

    <!-- JetCache 依赖 -->
    <dependency>
        <groupId>com.alicp.jetcache</groupId>
        <artifactId>jetcache-starter-redis</artifactId>
        <version>2.6.2</version>
    </dependency>

    <!-- Redis 依赖 -->
    <dependency>
        <groupId>org.springframework.boot</groupId>
        <artifactId>spring-boot-starter-data-redis</artifactId>
    </dependency>

    <!-- Lombok 简化代码 -->
    <dependency>
        <groupId>org.projectlombok</groupId>
        <artifactId>lombok</artifactId>
        <optional>true</optional>
    </dependency>
</dependencies>
步骤②:配置 Redis 和 JetCache
# src/main/resources/application.yml
server:
  port: 8080

spring:
  cache:
    type: none  # 禁用 Spring 原生的缓存,使用 JetCache

  # Redis 配置
  redis:
    host: 127.0.0.1
    port: 6379
    password:
    database: 0
    lettuce:
      pool:
        max-active: 100
        max-idle: 10
        min-idle: 2
        max-wait: 1000

# JetCache 配置
jetcache:
  # 默认配置
  default:
    # 缓存类型:Redis
    type: redis
    # Redis 配置
    host: 127.0.0.1
    port: 6379
    password:
    database: 0
    # 本地缓存配置
    local:
      # 本地缓存类型:LinkedHashMap
      type: linkedhashmap
      # 本地缓存过期时间,单位秒
      expireAfterWrite: 300
      # 本地缓存最大条目数
      limit: 100
    # 远程缓存过期时间,单位秒
    expireAfterWrite: 3600
    # 远程缓存最大条目数
    limit: 1000
    # 缓存 key 的前缀
    keyPrefix: jetcache_
    # 是否缓存 null 值
    cacheNullValue: true
    # 是否启用统计
    areaInCacheName: false
  # 自定义缓存区域
  areas:
    # 用户缓存区域
    userCache:
      type: redis
      local:
        type: linkedhashmap
        expireAfterWrite: 300
        limit: 100
      expireAfterWrite: 1800
      limit: 500
      keyPrefix: user_cache_
    # 产品缓存区域
    productCache:
      type: redis
      local:
        type: linkedhashmap
        expireAfterWrite: 600
        limit: 200
      expireAfterWrite: 3600
      limit: 1000
      keyPrefix: product_cache_
步骤③: 创建 JetCache 配置类
启用缓存,在引导类上方标注注解@EnableCreateCacheAnnotation配置springboot程序中可以使用注解的形式创建缓存
步骤④:创建服务类
创建缓存对象Cache,并使用注解@CreateCache标记当前缓存的信息,然后使用Cache对象的API操作缓存,put写缓存,get读缓存。
jetcache提供了方法缓存方案,只不过名称变更了而已。在对应的操作接口上方使用注解@Cached即可
 /**
     * 使用 @Cached 注解缓存方法结果
     * 首次调用时执行方法体并将结果缓存,后续调用直接从缓存获取
     */
    @Cached(expire = 3600, cacheType = CacheType.BOTH)
    public User getUserById(Long id) {
        System.out.println("从数据库获取用户: " + id);
        // 模拟数据库查询延迟
        try {
            Thread.sleep(1000);
        } catch (InterruptedException e) {
            e.printStackTrace();
        }
        return userDatabase.get(id);
    }

    /**
     * 使用 @Cached 注解,并指定缓存区域
     */
    @Cached(expire = 1800, cacheType = CacheType.BOTH, area = "userCache")
    public User getUserByIdWithArea(Long id) {
        System.out.println("从数据库获取用户(指定缓存区域): " + id);
        return userDatabase.get(id);
    }

  /**
     * 使用 @CacheUpdate 注解更新缓存
     * 每次调用都会执行方法体并更新缓存
     */
    @CacheUpdate(expire = 3600, cacheType = CacheType.BOTH)
    public User updateUser(User user) {
        System.out.println("更新用户: " + user.getId());
        userDatabase.put(user.getId(), user);
        return user;
    }

    /**
     * 使用 @CacheUpdate 注解,并指定缓存区域
     */
    @CacheUpdate(expire = 1800, cacheType = CacheType.BOTH, area = "userCache")
    public User updateUserWithArea(User user) {
        System.out.println("更新用户(指定缓存区域): " + user.getId());
        userDatabase.put(user.getId(), user);
        return user;
    }

    /**
     * 使用 @CacheInvalidate 注解移除缓存
     * 方法执行后移除指定缓存
     */
    @CacheInvalidate
    public void deleteUser(Long id) {
        System.out.println("删除用户: " + id);
        userDatabase.remove(id);
    }

    /**
     * 使用 @CacheInvalidate 注解,并指定缓存区域
     */
    @CacheInvalidate(area = "userCache")
    public void deleteUserWithArea(Long id) {
        System.out.println("删除用户(指定缓存区域): " + id);
        userDatabase.remove(id);
    }

    /**
     * 使用 @CacheInvalidate 注解移除所有缓存
     * keyPattern 使用通配符匹配多个 key
     */
    @CacheInvalidate(keyPattern = "user_*")
    public void clearAllUsers() {
        System.out.println("清除所有用户缓存");
    }

    /**
     * 使用 @CachePenetrate 注解处理缓存穿透
     * 当缓存和数据库都不存在值时,返回默认值而不是 null
     */
    @CachePenetrate(expire = 3600, cacheType = CacheType.BOTH, defaultValue = "default_user")
    public User getUserWithPenetration(Long id) {
        System.out.println("从数据库获取用户(处理穿透): " + id);
        return userDatabase.get(id);
    }
步骤⑤:
5.SpringBoot整合j2cache缓存
步骤①:添加必要的依赖
<!-- pom.xml -->
<dependencies>
    <!-- Spring Boot Starter Web -->
    <dependency>
        <groupId>org.springframework.boot</groupId>
        <artifactId>spring-boot-starter-web</artifactId>
    </dependency>

    <!-- Spring Boot Starter Cache -->
    <dependency>
        <groupId>org.springframework.boot</groupId>
        <artifactId>spring-boot-starter-cache</artifactId>
    </dependency>

    <!-- J2Cache 依赖 -->
    <dependency>
        <groupId>net.oschina.j2cache</groupId>
        <artifactId>j2cache-core</artifactId>
        <version>2.8.4-release</version>
    </dependency>

    <!-- Ehcache 依赖 -->
    <dependency>
        <groupId>org.ehcache</groupId>
        <artifactId>ehcache</artifactId>
        <version>3.9.7</version>
    </dependency>

    <!-- Redis 依赖 -->
    <dependency>
        <groupId>org.springframework.boot</groupId>
        <artifactId>spring-boot-starter-data-redis</artifactId>
    </dependency>

    <!-- Lombok 简化代码 -->
    <dependency>
        <groupId>org.projectlombok</groupId>
        <artifactId>lombok</artifactId>
        <optional>true</optional>
    </dependency>
</dependencies>
步骤②: 配置 Redis 和 J2Cache
创建 J2Cache 配置文件
配置一级与二级缓存,并配置一二级缓存间数据传递方式,在 src/main/resources 目录下创建 j2cache.properties 文件:
# src/main/resources/j2cache.properties
# 缓存提供者配置 1: ehcache, 2: redis, 3: caffeine, 4: none
j2cache.L1_provider_class=net.oschina.j2cache.cache.support.ehcache.EhcacheCacheProvider
j2cache.L2_provider_class=net.oschina.j2cache.cache.support.redis.RedisCacheProvider
j2cache.default_cache_region=__default_region__
j2cache.default_serialization=fastjson
j2cache.autoRefreshCache=false
j2cache.openCacheStatistics=true
j2cache.timeToLiveSeconds=3600
j2cache.timeToIdleSeconds=600
j2cache.cache_event_listener_channel=j2cache_chan

# Redis 配置
redis.host=127.0.0.1
redis.port=6379
redis.password=
redis.database=0
redis.timeout=3000
redis.maxActive=1000
redis.maxIdle=100
redis.minIdle=10
redis.testOnBorrow=true

# Ehcache 配置
ehcache.configXml=ehcache.xml
步骤③:
任务
Quartz
Quartz 任务调度框架介绍
Quartz 是一个功能强大、开源的作业调度库,可以与几乎任何 Java 应用程序集成,从最小的独立应用到最大的电子商务系统。Quartz 完全由 Java 编写,具有丰富的功能集,支持集群和事务。
Spring Boot 整合 Quartz
步骤①:添加必要的依赖
<!-- pom.xml -->
<dependency>
    <groupId>org.springframework.boot</groupId>
    <artifactId>spring-boot-starter-quartz</artifactId>
</dependency>
步骤②:创建任务类并继承QuartzJobBean
import org.quartz.JobExecutionContext;
import org.quartz.JobExecutionException;
import org.springframework.scheduling.quartz.QuartzJobBean;
import org.springframework.stereotype.Component;

@Component
public class MyQuartzJob extends QuartzJobBean {

    // 可以注入其他 Spring Bean
    @Autowired
    private SomeService someService;

    // 可选:初始化方法
    @Override
    protected void executeInternal(JobExecutionContext context) throws JobExecutionException {
        // 获取 JobDataMap 中的数据
        JobDataMap jobDataMap = context.getMergedJobDataMap();
        String message = jobDataMap.getString("message");

        // 执行任务逻辑
        System.out.println("执行任务: " + new Date());
        System.out.println("消息: " + message);

        // 调用注入的 Service
        someService.doSomething();
    }
}
步骤③:在 Spring 配置中定义 JobDetail 和 Trigger
import org.quartz.*;
import org.springframework.context.annotation.Bean;
import org.springframework.context.annotation.Configuration;
import org.springframework.scheduling.quartz.JobDetailFactoryBean;
import org.springframework.scheduling.quartz.SchedulerFactoryBean;
import org.springframework.scheduling.quartz.SimpleTriggerFactoryBean;

@Configuration
public class QuartzConfig {

    /**
     * 配置 JobDetail
     */
    @Bean
    public JobDetailFactoryBean myJobDetail() {
        JobDetailFactoryBean jobDetailFactoryBean = new JobDetailFactoryBean();
        jobDetailFactoryBean.setJobClass(MyQuartzJob.class);
        jobDetailFactoryBean.setJobDataMap(new JobDataMap());

        // 设置任务数据
        jobDetailFactoryBean.getJobDataMap().put("message", "Hello Quartz!");

        // 设置任务名称和组
        jobDetailFactoryBean.setName("myJob");
        jobDetailFactoryBean.setGroup("myGroup");

        // 设置持久化
        jobDetailFactoryBean.setDurability(true);

        return jobDetailFactoryBean;
    }

    /**
     * 配置 SimpleTrigger
     */
    @Bean
    public SimpleTriggerFactoryBean myJobTrigger() {
        SimpleTriggerFactoryBean triggerFactoryBean = new SimpleTriggerFactoryBean();
        triggerFactoryBean.setJobDetail(myJobDetail().getObject());
        triggerFactoryBean.setStartTime(new Date());
        triggerFactoryBean.setRepeatInterval(3000); // 3秒执行一次
        triggerFactoryBean.setRepeatCount(SimpleTrigger.REPEAT_INDEFINITELY);
        triggerFactoryBean.setName("myJobTrigger");
        return triggerFactoryBean;
    }

    /**
     * 配置 CronTrigger
     */
    @Bean
    public CronTriggerFactoryBean myCronJobTrigger() {
        CronTriggerFactoryBean triggerFactoryBean = new CronTriggerFactoryBean();
        triggerFactoryBean.setJobDetail(myJobDetail().getObject());
        triggerFactoryBean.setCronExpression("0/5 * * * * ?"); // 每5秒执行一次
        triggerFactoryBean.setName("myCronJobTrigger");
        return triggerFactoryBean;
    }

    /**
     * 配置调度器
     */
    @Bean
    public SchedulerFactoryBean schedulerFactoryBean() {
        SchedulerFactoryBean schedulerFactoryBean = new SchedulerFactoryBean();
        schedulerFactoryBean.setJobDetails(myJobDetail().getObject());

        // 可以配置多个触发器
        schedulerFactoryBean.setTriggers(
            myJobTrigger().getObject(),
            myCronJobTrigger().getObject()
        );

        // 自动启动调度器
        schedulerFactoryBean.setAutoStartup(true);

        return schedulerFactoryBean;
    }
}
Task
Spring Task 介绍
Spring Task 是 Spring 框架提供的一个轻量级任务调度工具,它允许你在 Spring 应用中执行定时任务。Spring Task 基于 Java 的 java.util.concurrent.ScheduledExecutorService 实现,提供了简单易用的注解和配置方式来创建和管理定时任务。
Spring Task 是 Spring 框架的一部分,无需额外依赖即可使用。它提供了以下功能:
-
基于注解的定时任务定义
-
基于配置文件的定时任务定义
-
支持多种任务调度方式(固定延迟、固定频率、Cron 表达式)
-
支持异步任务执行
-
支持任务参数传递
-
支持任务执行状态监控
基本使用
步骤①:需要在 Spring Boot 应用中启用任务调度功能
import org.springframework.scheduling.annotation.EnableScheduling;
import org.springframework.stereotype.Component;

@SpringBootApplication
@EnableScheduling  // 启用任务调度
public class Application {
    public static void main(String[] args) {
        SpringApplication.run(Application.class, args);
    }
}
步骤②:创建定时任务
使用 @Scheduled 注解创建定时任务:
import org.springframework.scheduling.annotation.Scheduled;
import org.springframework.stereotype.Component;
import java.util.Date;

@Component
public class ScheduledTasks {

    /**
     * 固定延迟执行:每次任务执行完成后,等待固定时间再执行下一次
     * 单位:毫秒
     */
    @Scheduled(fixedDelay = 5000)
    public void taskWithFixedDelay() {
        System.out.println("固定延迟任务执行时间: " + new Date());
    }

    /**
     * 固定频率执行:每隔固定时间执行一次,不管任务执行耗时多久
     * 单位:毫秒
     */
    @Scheduled(fixedRate = 3000)
    public void taskWithFixedRate() {
        System.out.println("固定频率任务执行时间: " + new Date());
        // 模拟任务耗时
        try {
            Thread.sleep(1000);
        } catch (InterruptedException e) {
            e.printStackTrace();
        }
    }

    /**
     * 初始延迟执行:应用启动后等待一段时间再开始执行
     */
    @Scheduled(initialDelay = 2000, fixedRate = 5000)
    public void taskWithInitialDelay() {
        System.out.println("初始延迟任务执行时间: " + new Date());
    }

    /**
     * Cron 表达式执行:使用 Cron 表达式定义复杂的执行时间
     */
    @Scheduled(cron = "0/10 * * * * ?")
    public void taskWithCron() {
        System.out.println("Cron 任务执行时间: " + new Date());
    }
}
步骤③:配置选项
spring:
  task:
    scheduling:
      enabled: true
      pool:
        size: 10
      thread-name-prefix: scheduling-
      shutdown:
        await-termination: true
        await-termination-period: 60
邮件
springboot整合javamail
JavaMail 是 Java 平台用于处理电子邮件的标准 API,而 Spring Boot 通过 spring-boot-starter-mail 提供了对 JavaMail 的简化支持。
步骤①: 添加依赖
<!-- pom.xml -->
<dependencies>
    <!-- Spring Boot Starter Web -->
    <dependency>
        <groupId>org.springframework.boot</groupId>
        <artifactId>spring-boot-starter-web</artifactId>
    </dependency>

    <!-- Spring Boot Starter Mail -->
    <dependency>
        <groupId>org.springframework.boot</groupId>
        <artifactId>spring-boot-starter-mail</artifactId>
    </dependency>

    <!-- Lombok 简化代码 -->
    <dependency>
        <groupId>org.projectlombok</groupId>
        <artifactId>lombok</artifactId>
        <optional>true</optional>
    </dependency>
</dependencies>
步骤②:配置邮件服务器
spring:
  mail:
    host: smtp.example.com
    port: 587
    username: your-email@example.com
    password: your-password
    protocol: smtp
    properties:
      mail:
        smtp:
          auth: true
          starttls:
            enable: true
        connectiontimeout: 5000
        timeout: 5000
        writetimeout: 5000
    default-from: your-email@example.com
步骤③:使用JavaMailSender接口发送邮件
import org.springframework.beans.factory.annotation.Autowired;
import org.springframework.mail.SimpleMailMessage;
import org.springframework.mail.javamail.JavaMailSender;
import org.springframework.stereotype.Service;

@Service
public class SendMailServiceImpl implements SendMailService {

    @Autowired
    private JavaMailSender javaMailSender;

    // 发送人
    private String from = "test@qq.com";
    // 接收人
    private String to = "test@126.com";
    // 标题
    private String subject = "测试邮件";
    // 正文
    private String context = "测试邮件正文内容";

    @Override
    public void sendMail() {
        // 创建邮件消息对象
        SimpleMailMessage message = new SimpleMailMessage();

        // 设置发件人,可以添加发件人名称
        message.setFrom(from + "(小甜甜)");

        // 设置收件人
        message.setTo(to);

        // 设置邮件标题
        message.setSubject(subject);

        // 设置邮件内容
        message.setText(context);

        // 发送邮件
        javaMailSender.send(message);
    }
}
消息
Java提供了多种处理消息的标准规范和API,涵盖了不同类型的消息处理需求,如消息队列、企业消息传递、即时消息等。以下是Java中处理消息的主要标准规范:
-
JMS
-
AMQP
-
MQTT
JMS
1.1 概述
Java Message Service (JMS) 是 Java 平台上用于企业级消息传递的 API 规范,它提供了一种标准的、与厂商无关的方式来创建、发送、接收和读取消息。JMS 是 Java EE 规范的一部分,但也可以在 Java SE 环境中使用。
1.2 核心概念
-
消息生产者 (Message Producer):创建并发送消息的客户端
-
消息消费者 (Message Consumer):接收并处理消息的客户端
-
消息 (Message):在系统间传递的数据对象
-
目的地 (Destination):消息被发送或接收的地方,可以是队列或主题
-
连接工厂 (Connection Factory):用于创建连接的工厂
-
连接 (Connection):客户端与消息提供者的通信链路
-
会话 (Session):单线程上下文,用于生产者和消费者创建消息和接收消息
1.3 消息模式
JMS 支持两种消息模式:
-
点对点模式 (P2P):
-
每个消息只有一个消费者
-
消费者确认消息后,消息从队列中删除
-
常用队列 (Queue) 作为目的地
-
-
发布/订阅模式 (Pub/Sub):
-
每个消息可以有多个消费者
-
消息不会被删除,除非设置了过期时间
-
常用主题 (Topic) 作为目的地
-
1.4 消息类型
JMS 支持多种类型的消息:
-
TextMessage:文本消息
-
MapMessage:键值对集合
-
ObjectMessage:序列化对象
-
BytesMessage:二进制数据
-
StreamMessage:原始值流
AMQP
2.1 概述
AMQP (Advanced Message Queuing Protocol) 是一个开放标准的、面向消息的中间件协议,它提供了一种可靠、高效的消息传递机制。AMQP 协议设计之初就考虑了企业级应用的需求,具有消息路由、队列、可靠性、安全性和事务支持等特性。
2.2 核心概念
-
消息 (Message):应用程序间传递的数据单元
-
生产者 (Producer):创建并发送消息的客户端
-
消费者 (Consumer):接收并处理消息的客户端
-
代理 (Broker):消息中间件服务器,负责消息的路由和存储
-
队列 (Queue):消息的容器,消息被发送到队列并被消费者消费
-
交换器 (Exchange):接收生产者的消息并将其路由到一个或多个队列
-
绑定 (Binding):交换器和队列之间的规则,定义消息如何路由
-
路由键 (Routing Key):用于决定消息如何路由的键值
2.3 AMQP 模型
AMQP 主要包含以下组件:
-
连接 (Connection):客户端与代理之间的 TCP 连接
-
通道 (Channel):连接内的虚拟通道,允许多个线程共享一个连接
-
交换器 (Exchange):消息的接收者,根据绑定规则将消息路由到队列
-
队列 (Queue):消息的存储容器
-
消费者 (Consumer):从队列中获取消息的客户端
2.4 交换器类型
AMQP 支持多种交换器类型:
-
直接交换器 (Direct Exchange):根据路由键精确匹配
-
主题交换器 (Topic Exchange):根据通配符匹配路由键
-
扇出交换器 (Fanout Exchange):广播消息到所有绑定的队列
-
头交换器 (Headers Exchange):根据消息头属性匹配
MQTT
3.1 概述
MQTT (Message Queuing Telemetry Transport) 是一种轻量级的发布/订阅消息传输协议,专为低带宽、高延迟或不稳定的网络环境设计。MQTT 协议最初由 IBM 开发,现在由 OASIS 标准组织维护,是物联网 (IoT) 领域最常用的消息协议之一。
3.2 核心概念
- 发布者 (Publisher):发布消息的客户端
- 订阅者 (Subscriber):接收消息的客户端
- 代理 (Broker):消息服务器,负责接收和转发消息
- 主题 (Topic):消息的分类标识,用于路由消息
- 服务质量 (QoS):消息传递的可靠性级别
- 客户端 ID (Client ID):唯一标识客户端的字符串
3.3 MQTT 模型
MQTT 采用发布/订阅模型,主要组件包括:
- 发布者 (Publisher):将消息发布到特定主题
- 订阅者 (Subscriber):订阅特定主题并接收消息
- 代理 (Broker):接收发布者的消息并将其转发给订阅者
- 主题 (Topic):层次化的主题名称,用于消息路由
3.4 服务质量 (QoS) 级别
MQTT 定义了三个服务质量级别:
- QoS 0:最多一次 (At most once) - 消息最多传递一次,可能丢失
- QoS 1:至少一次 (At least once) - 消息至少传递一次,可能重复
- QoS 2:恰好一次 (Exactly once) - 消息恰好传递一次,不丢失不重复
SpringBoot整合ActiveMQ
ActiveMQ 是 Apache 软件基金会开发的开源消息中间件,实现了 JMS (Java Message Service) 规范。Spring Boot 提供了便捷的方式来整合 ActiveMQ,使得在 Spring Boot 应用中发送和接收消息变得非常简单。
步骤①:添加依赖
<dependencies>
    <!-- Spring Boot Starter Web -->
    <dependency>
        <groupId>org.springframework.boot</groupId>
        <artifactId>spring-boot-starter-web</artifactId>
    </dependency>

    <!-- Spring Boot Starter ActiveMQ -->
    <dependency>
        <groupId>org.springframework.boot</groupId>
        <artifactId>spring-boot-starter-activemq</artifactId>
    </dependency>

    <!-- Lombok 简化代码 -->
    <dependency>
        <groupId>org.projectlombok</groupId>
        <artifactId>lombok</artifactId>
        <optional>true</optional>
    </dependency>
</dependencies>
步骤②:配置 ActiveMQ
spring:
  activemq:
    broker-url: tcp://localhost:61616
    user: admin
    password: admin
    packages:
      trust-all: true
    pool:
      enabled: true
      max-connections: 10
  jms:
    pub-sub-domain: queue
步骤③:使用JmsMessagingTemplate操作ActiveMQ
import org.springframework.beans.factory.annotation.Autowired;
import org.springframework.jms.core.JmsTemplate;
import org.springframework.stereotype.Service;

import javax.jms.Queue;
import javax.jms.Topic;

@Service
public class MessageSender {

    @Autowired
    private JmsTemplate jmsTemplate;

    @Autowired
    private Queue queue;

    @Autowired
    private Topic topic;

    /**
     * 发送队列消息
     */
    public void sendQueueMessage(String message) {
        jmsTemplate.convertAndSend(queue, message);
        System.out.println("发送队列消息: " + message);
    }

    /**
     * 发送主题消息
     */
    public void sendTopicMessage(String message) {
        jmsTemplate.convertAndSend(topic, message);
        System.out.println("发送主题消息: " + message);
    }

    /**
     * 延迟发送队列消息
     */
    public void sendDelayQueueMessage(String message, long delay) {
        jmsTemplate.convertAndSend(queue, message, msg -> {
            msg.setJMSType(String.class.getName());
            msg.setLongProperty("JMSTimestamp", System.currentTimeMillis() + delay);
            return msg;
        });
        System.out.println("发送延迟队列消息: " + message + ", 延迟时间: " + delay + "毫秒");
    }
}
步骤④:创建消息接收服务
创建一个服务类用于接收消息:
import org.springframework.jms.annotation.JmsListener;
import org.springframework.stereotype.Service;

import javax.jms.JMSException;
import javax.jms.Message;
import javax.jms.MessageListener;
import javax.jms.TextMessage;

@Service
public class MessageReceiver {

    /**
     * 接收队列消息
     */
    @JmsListener(destination = "springboot.queue", containerFactory = "queueListenerFactory")
    public void receiveQueueMessage(String message) {
        System.out.println("接收到队列消息: " + message);
    }

    /**
     * 接收主题消息
     */
    @JmsListener(destination = "springboot.topic", containerFactory = "topicListenerFactory")
    public void receiveTopicMessage(String message) {
        System.out.println("接收到主题消息: " + message);
    }

    /**
     * 接收消息并处理消息头
     */
    @JmsListener(destination = "springboot.queue", containerFactory = "queueListenerFactory")
    public void receiveMessageWithHeader(Message message) throws JMSException {
        TextMessage textMessage = (TextMessage) message;
        String messageContent = textMessage.getText();
        long timestamp = message.getLongProperty("JMSTimestamp");

        System.out.println("接收到消息: " + messageContent);
        System.out.println("消息时间戳: " + timestamp);
    }
}
SpringBoot整合RabbitMQ
步骤①:添加依赖
<dependencies>
    <!-- Spring Boot Starter Web -->
    <dependency>
        <groupId>org.springframework.boot</groupId>
        <artifactId>spring-boot-starter-web</artifactId>
    </dependency>

    <!-- Spring Boot Starter AMQP -->
    <dependency>
        <groupId>org.springframework.boot</groupId>
        <artifactId>spring-boot-starter-amqp</artifactId>
    </dependency>

    <!-- Lombok 简化代码 -->
    <dependency>
        <groupId>org.projectlombok</groupId>
        <artifactId>lombok</artifactId>
        <optional>true</optional>
    </dependency>
</dependencies>
步骤②:配置 RabbitMQ
spring:
  rabbitmq:
    host: localhost
    port: 5672
    username: guest
    password: guest
    virtual-host: /
    connection-timeout: 15000
    publisher-confirms: true
    publisher-returns: true
    template:
      mandatory: true
      receive-timeout: 5000
    listener:
      simple:
        acknowledge-mode: manual
        concurrency: 3
        max-concurrency: 10
        prefetch: 5
步骤③:配置 RabbitMQ 连接工厂和模板
创建一个配置类来设置 RabbitMQ 相关的 Bean:
import org.springframework.amqp.core.*;
import org.springframework.amqp.rabbit.connection.ConnectionFactory;
import org.springframework.amqp.rabbit.core.RabbitTemplate;
import org.springframework.amqp.support.converter.Jackson2JsonMessageConverter;
import org.springframework.context.annotation.Bean;
import org.springframework.context.annotation.Configuration;

@Configuration
public class RabbitMQConfig {

    /**
     * 定义队列
     */
    @Bean
    public Queue springBootQueue() {
        return new Queue("springboot.queue", true);
    }

    /**
     * 定义主题交换器
     */
    @Bean
    public TopicExchange springBootExchange() {
        return new TopicExchange("springboot.exchange");
    }

    /**
     * 定义绑定关系
     */
    @Bean
    public Binding binding() {
        return BindingBuilder.bind(springBootQueue())
                .to(springBootExchange())
                .with("springboot.routing.key");
    }

    /**
     * 配置 RabbitTemplate
     */
    @Bean
    public RabbitTemplate rabbitTemplate(ConnectionFactory connectionFactory) {
        RabbitTemplate rabbitTemplate = new RabbitTemplate(connectionFactory);

        // 消息转换器
        rabbitTemplate.setMessageConverter(new Jackson2JsonMessageConverter());

        // 消息发送确认
        rabbitTemplate.setConfirmCallback((correlationData, ack, cause) -> {
            if (ack) {
                System.out.println("消息发送成功: " + correlationData.getId());
            } else {
                System.out.println("消息发送失败: " + correlationData.getId() + ", 原因: " + cause);
            }
        });

        // 消息退回回调
        rabbitTemplate.setReturnsCallback(returned -> {
            System.out.println("消息被退回: " + returned.getMessage());
            System.out.println("应答码: " + returned.getReplyCode());
            System.out.println("应答文本: " + returned.getReplyText());
            System.out.println("交换器: " + returned.getExchange());
            System.out.println("路由键: " + returned.getRoutingKey());
        });

        return rabbitTemplate;
    }
}
步骤④:创建消息发送服务
创建一个服务类用于发送消息:
import org.springframework.amqp.AmqpException;
import org.springframework.amqp.core.Message;
import org.springframework.amqp.core.MessagePostProcessor;
import org.springframework.amqp.core.MessageProperties;
import org.springframework.amqp.rabbit.core.RabbitTemplate;
import org.springframework.beans.factory.annotation.Autowired;
import org.springframework.stereotype.Service;

import java.util.Date;
import java.util.Map;

@Service
public class RabbitMQSender {

    @Autowired
    private RabbitTemplate rabbitTemplate;

    /**
     * 发送简单消息
     */
    public void send(String message) {
        System.out.println("发送时间: " + new Date() + ",消息内容: " + message);
        rabbitTemplate.convertAndSend("springboot.queue", message);
    }

    /**
     * 发送带过期时间的消息
     */
    public void sendWithTTL(String message, long ttl) {
        rabbitTemplate.convertAndSend("springboot.queue", message, new MessagePostProcessor() {
            @Override
            public Message postProcessMessage(Message message, MessageProperties messageProperties) throws AmqpException {
                messageProperties.setExpiration(String.valueOf(ttl));
                return message;
            }
        });
    }

    /**
     * 发送延迟消息(通过死信队列实现)
     */
    public void sendDelayMessage(String message, long delay) {
        rabbitTemplate.convertAndSend("springboot.delay.exchange", "springboot.delay.routing.key",
            msg -> {
                msg.getMessageProperties().setHeader("x-delay", delay);
                return msg;
            });
        System.out.println("发送延迟消息: " + message + ", 延迟时间: " + delay + "毫秒");
    }

    /**
     * 发送对象消息
     */
    public void sendObject(User user) {
        rabbitTemplate.convertAndSend("springboot.queue", user);
        System.out.println("发送对象消息: " + user);
    }

    /**
     * 发送带header的消息
     */
    public void sendWithHeader(String message, Map<String, Object> headers) {
        MessageProperties messageProperties = new MessageProperties();
        headers.forEach(messageProperties::setHeader);
        Message msg = new Message(message.getBytes(), messageProperties);
        rabbitTemplate.send("springboot.queue", msg);
    }
}
步骤⑤:创建消息接收服务
创建一个服务类用于接收消息:
import com.fasterxml.jackson.databind.ObjectMapper;
import org.springframework.amqp.core.Message;
import org.springframework.amqp.rabbit.annotation.RabbitListener;
import org.springframework.amqp.rabbit.core.RabbitTemplate;
import org.springframework.beans.factory.annotation.Autowired;
import org.springframework.stereotype.Service;

import java.io.IOException;
import java.util.Date;
import java.util.Map;

@Service
public class RabbitMQReceiver {

    @Autowired
    private RabbitTemplate rabbitTemplate;

    /**
     * 接收简单消息
     */
    @RabbitListener(queues = "springboot.queue")
    public void receive(String message) {
        System.out.println("接收时间: " + new Date() + ",消息内容: " + message);
    }

    /**
     * 接收消息并手动确认
     */
    @RabbitListener(queues = "springboot.queue")
    public void receiveWithAck(Message message) {
        try {
            String msg = new String(message.getBody());
            System.out.println("接收时间: " + new Date() + ",消息内容: " + msg);

            // 手动确认消息
            rabbitTemplate.execute(channel -> {
                channel.basicAck(message.getMessageProperties().getDeliveryTag(), false);
                return null;
            });
        } catch (Exception e) {
            e.printStackTrace();
            // 拒绝消息,不重新入队
            rabbitTemplate.execute(channel -> {
                try {
                    channel.basicNack(message.getMessageProperties().getDeliveryTag(), false, false);
                } catch (IOException ex) {
                    ex.printStackTrace();
                }
                return null;
            });
        }
    }

    /**
     * 接收对象消息
     */
    @RabbitListener(queues = "springboot.queue")
    public void receiveObject(User user) {
        System.out.println("接收对象消息: " + user);
    }

    /**
     * 接带header的消息
     */
    @RabbitListener(queues = "springboot.queue")
    public void receiveWithHeader(Message message) {
        try {
            String msg = new String(message.getBody());
            Map<String, Object> headers = message.getMessageProperties().getHeaders();

            System.out.println("接收时间: " + new Date() + ",消息内容: " + msg);
            System.out.println("消息头: " + headers);

            // 手动确认消息
            rabbitTemplate.execute(channel -> {
                channel.basicAck(message.getMessageProperties().getDeliveryTag(), false);
                return null;
            });
        } catch (Exception e) {
            e.printStackTrace();
        }
    }
}
SpringBoot整合RocketMQ
步骤①:添加依赖
<dependencies>
    <!-- Spring Boot Starter Web -->
    <dependency>
        <groupId>org.springframework.boot</groupId>
        <artifactId>spring-boot-starter-web</artifactId>
    </dependency>

    <!-- Spring Boot Starter RocketMQ -->
    <dependency>
        <groupId>org.apache.rocketmq</groupId>
        <artifactId>rocketmq-spring-boot-starter</artifactId>
        <version>2.2.3</version>
    </dependency>

    <!-- Lombok 简化代码 -->
    <dependency>
        <groupId>org.projectlombok</groupId>
        <artifactId>lombok</artifactId>
        <optional>true</optional>
    </dependency>
</dependencies>
步骤②:配置 RocketMQ
rocketmq:
  name-server: localhost:9876
  producer:
    group: springboot-producer
    send-message-timeout: 3000
    compress-message-body-threshold: 4096
    max-message-size: 4194304
    retry-times-when-send-failed: 3
    retry-times-when-send-async-failed: 3
  consumer:
    group: springboot-consumer
    consume-message-max-retries: 3
    consume-thread-min: 5
    consume-thread-max: 20
步骤③:使用RocketMQTemplate操作RocketMQ创建消息发送服务
import org.apache.rocketmq.client.producer.SendResult;
import org.apache.rocketmq.spring.core.RocketMQTemplate;
import org.apache.rocketmq.spring.support.RocketMQHeaders;
import org.springframework.beans.factory.annotation.Autowired;
import org.springframework.messaging.Message;
import org.springframework.messaging.support.MessageBuilder;
import org.springframework.stereotype.Service;

import java.util.HashMap;
import java.util.Map;

@Service
public class RocketMQProducer {

    @Autowired
    private RocketMQTemplate rocketMQTemplate;

    /**
     * 发送同步消息
     */
    public void sendSyncMessage(String topic, String message) {
        SendResult sendResult = rocketMQTemplate.syncSend(topic, message);
        System.out.println("同步消息发送结果: " + sendResult);
    }

    /**
     * 发送异步消息
     */
    public void sendAsyncMessage(String topic, String message) {
        rocketMQTemplate.asyncSend(topic, message, sendResult -> {
            System.out.println("异步消息发送结果: " + sendResult);
        });
    }

    /**
     * 发送单向消息
     */
    public void sendOneWayMessage(String topic, String message) {
        rocketMQTemplate.sendOneWay(topic, message);
        System.out.println("单向消息已发送");
    }

    /**
     * 发送带标签的消息
     */
    public void sendWithTagMessage(String topic, String tag, String message) {
        String destination = topic + ":" + tag;
        SendResult sendResult = rocketMQTemplate.syncSend(destination, message);
        System.out.println("带标签的消息发送结果: " + sendResult);
    }

    /**
     * 发送延迟消息
     */
    public void sendDelayMessage(String topic, String message, int delayLevel) {
        Message<String> msg = MessageBuilder.withPayload(message)
                .build();
        SendResult sendResult = rocketMQTemplate.syncSend(topic, msg, 3000, delayLevel);
        System.out.println("延迟消息发送结果: " + sendResult);
    }

    /**
     * 发送顺序消息
     */
    public void sendOrderlyMessage(String topic, String message, int hashKey) {
        SendResult sendResult = rocketMQTemplate.syncSendOrderly(topic, message, "orderly", hashKey);
        System.out.println("顺序消息发送结果: " + sendResult);
    }

    /**
     * 发送事务消息
     */
    public void sendTransactionMessage(String topic, String message) {
        Message<String> msg = MessageBuilder.withPayload(message)
                .setHeader(RocketMQHeaders.TRANSACTION_ID, "tx-123")
                .build();
        rocketMQTemplate.sendMessageInTransaction(topic, msg, null);
    }

    /**
     * 发送对象消息
     */
    public void sendObjectMessage(String topic, User user) {
        SendResult sendResult = rocketMQTemplate.syncSend(topic, user);
        System.out.println("对象消息发送结果: " + sendResult);
    }

    /**
     * 发送带header的消息
     */
    public void sendWithHeaderMessage(String topic, String message) {
        Map<String, Object> headers = new HashMap<>();
        headers.put("message-type", "test");
        headers.put("sender", "system");
        headers.put("timestamp", System.currentTimeMillis());

        Message<String> msg = MessageBuilder.withPayload(message)
                .copyHeaders(headers)
                .build();

        SendResult sendResult = rocketMQTemplate.syncSend(topic, msg);
        System.out.println("带header的消息发送结果: " + sendResult);
    }
}
步骤④: 创建消息接收服务
import org.apache.rocketmq.common.message.MessageExt;
import org.apache.rocketmq.spring.annotation.RocketMQMessageListener;
import org.apache.rocketmq.spring.core.RocketMQListener;
import org.springframework.stereotype.Service;

import java.io.UnsupportedEncodingException;

@Service
public class RocketMQConsumer {

    /**
     * 接收普通消息
     */
    @RocketMQMessageListener(topic = "springboot-topic", consumerGroup = "springboot-consumer")
    public class StringConsumer implements RocketMQListener<String> {
        @Override
        public void onMessage(String message) {
            System.out.println("接收到普通消息: " + message);
        }
    }

    /**
     * 接带标签的消息
     */
    @RocketMQMessageListener(
            topic = "springboot-topic",
            consumerGroup = "springboot-consumer-tag",
        selectorExpression = "tagA || tagB"
    )
    public class TagConsumer implements RocketMQListener<String> {
        @Override
        public void onMessage(String message) {
            System.out.println("接收到带标签的消息: " + message);
        }
    }

    /**
     * 接收顺序消息
     */
    @RocketMQMessageListener(
            topic = "springboot-topic",
            consumerGroup = "springboot-consumer-orderly",
        consumeMode = org.apache.rocketmq.spring.annotation.ConsumeMode.ORDERLY
    )
    public class OrderlyConsumer implements RocketMQListener<String> {
        @Override
        public void onMessage(String message) {
            System.out.println("接收到顺序消息: " + message);
        }
    }

    /**
     * 接收对象消息
     */
    @RocketMQMessageListener(
            topic = "springboot-topic",
            consumerGroup = "springboot-consumer-object"
    )
    public class ObjectConsumer implements RocketMQListener<User> {
        @Override
        public void onMessage(User user) {
            System.out.println("接收到对象消息: " + user);
        }
    }

    /**
     * 接收原始消息(MessageExt)
     */
    @RocketMQMessageListener(
            topic = "springboot-topic",
            consumerGroup = "springboot-consumer-raw"
    )
    public class RawMessageConsumer implements RocketMQListener<MessageExt> {
        @Override
        public void onMessage(MessageExt messageExt) {
            try {
                String message = new String(messageExt.getBody(), "UTF-8");
                System.out.println("接收到原始消息: " + message);
                System.out.println("消息标签: " + messageExt.getTags());
                System.out.println("消息keys: " + messageExt.getKeys());
                System.out.println("消息延迟级别: " + messageExt.getDelayTimeLevel());
                System.out.println("消息重试次数: " + messageExt.getReconsumeTimes());

                // 手理确认消息
                // 如果不处理,默认会自动确认
            } catch (UnsupportedEncodingException e) {
                e.printStackTrace();
            }
        }
    }
}
springboot整合Kafka
步骤①:添加依赖
<dependencies>
    <!-- Spring Boot Starter Web -->
    <dependency>
        <groupId>org.springframework.boot</groupId>
        <artifactId>spring-boot-starter-web</artifactId>
    </dependency>

    <!-- Spring Kafka -->
    <dependency>
        <groupId>org.springframework.kafka</groupId>
        <artifactId>spring-kafka</artifactId>
    </dependency>

    <!-- Lombok 简化代码 -->
    <dependency>
        <groupId>org.projectlombok</groupId>
        <artifactId>lombok</artifactId>
        <optional>true</optional>
    </dependency>
</dependencies>
步骤②:配置 Kafka
spring:
  kafka:
    bootstrap-servers: localhost:9092
    listener:
      concurrency: 3
      poll-timeout: 3000
    producer:
      key-serializer: org.apache.kafka.common.serialization.StringSerializer
      value-serializer: org.apache.kafka.common.serialization.StringSerializer
    consumer:
      key-deserializer: org.apache.kafka.common.serialization.StringDeserializer
      value-deserializer: org.apache.kafka.common.serialization.StringDeserializer
      auto-offset-reset: earliest
      group-id: springboot-group
      enable-auto-commit: true
      auto-commit-interval: 1000
    properties:
      spring:
        json:
          trusted:
            packages: "*"
步骤③:创建 Kafka 配置类
创建一个配置类来设置 Kafka 相关的 Bean:
import org.apache.kafka.clients.consumer.ConsumerConfig;
import org.apache.kafka.clients.producer.ProducerConfig;
import org.apache.kafka.common.serialization.StringDeserializer;
import org.apache.kafka.common.serialization.StringSerializer;
import org.springframework.beans.factory.annotation.Value;
import org.springframework.context.annotation.Bean;
import org.springframework.context.annotation.Configuration;
import org.springframework.kafka.annotation.EnableKafka;
import org.springframework.kafka.config.ConcurrentKafkaListenerContainerFactory;
import org.springframework.kafka.core.*;
import org.springframework.kafka.listener.ContainerProperties;
import org.springframework.kafka.transaction.KafkaTransactionManager;

import java.util.HashMap;
import java.util.Map;

@Configuration
@EnableKafka
public class KafkaConfig {

    @Value("${spring.kafka.bootstrap-servers}")
    private String bootstrapServers;

    /**
     * 生产者配置
     */
    @Bean
    public ProducerFactory<String, String> producerFactory() {
        Map<String, Object> props = new HashMap<>();
        props.put(ProducerConfig.BOOTSTRAP_SERVERS_CONFIG, bootstrapServers);
        props.put(ProducerConfig.KEY_SERIALIZER_CLASS_CONFIG, StringSerializer.class);
        props.put(ProducerConfig.VALUE_SERIALIZER_CLASS_CONFIG, StringSerializer.class);
        props.put(ProducerConfig.ACKS_CONFIG, "all");
        props.put(ProducerConfig.RETRIES_CONFIG, 3);
        props.put(ProducerConfig.BATCH_SIZE_CONFIG, 16384);
        props.put(ProducerConfig.LINGER_MS_CONFIG, 1);
        props.put(ProducerConfig.BUFFER_MEMORY_CONFIG, 33554432);
        return new DefaultKafkaProducerFactory<>(props);
    }

    /**
     * Kafka 模板
     */
    @Bean
    public KafkaTemplate<String, String> kafkaTemplate() {
        return new KafkaTemplate<>(producerFactory());
    }

    /**
     * 消费者配置
     */
    @Bean
    public ConsumerFactory<String, String> consumerFactory() {
        Map<String, Object> props = new HashMap<>();
        props.put(ConsumerConfig.BOOTSTRAP_SERVERS_CONFIG, bootstrapServers);
        props.put(ConsumerConfig.GROUP_ID_CONFIG, "springboot-group");
        props.put(ConsumerConfig.KEY_DESERIALIZER_CLASS_CONFIG, StringDeserializer.class);
        props.put(ConsumerConfig.VALUE_DESERIALIZER_CLASS_CONFIG, StringDeserializer.class);
        props.put(ConsumerConfig.AUTO_OFFSET_RESET_CONFIG, "earliest");
        props.put(ConsumerConfig.ENABLE_AUTO_COMMIT_CONFIG, true);
        props.put(ConsumerConfig.AUTO_COMMIT_INTERVAL_MS_CONFIG, 1000);
        return new DefaultKafkaConsumerFactory<>(props);
    }

    /**
     * 监听器容器工厂
     */
    @Bean
    public ConcurrentKafkaListenerContainerFactory<String, String> kafkaListenerContainerFactory() {
        ConcurrentKafkaListenerContainerFactory<String, String> factory =
            new ConcurrentKafkaListenerContainerFactory<>();
        factory.setConsumerFactory(consumerFactory());
        factory.getContainerProperties().setPollTimeout(3000);
        factory.setConcurrency(3);
        return factory;
    }

    /**
     * 事务管理器
     */
    @Bean
    public KafkaTransactionManager<String, String> kafkaTransactionManager() {
        return new KafkaTransactionManager<>(producerFactory());
    }
}
步骤④: 创建 Kafka 生产者服务
创建一个服务类用于发送消息:
import org.springframework.beans.factory.annotation.Autowired;
import org.springframework.kafka.core.KafkaTemplate;
import org.springframework.kafka.support.SendResult;
import org.springframework.stereotype.Service;
import org.springframework.util.concurrent.ListenableFuture;
import org.springframework.util.concurrent.ListenableFutureCallback;

import java.util.concurrent.ExecutionException;

@Service
public class KafkaProducer {

    @Autowired
    private KafkaTemplate<String, String> kafkaTemplate;

    /**
     * 发送简单消息
     */
    public void send(String topic, String message) {
        kafkaTemplate.send(topic, message);
        System.out.println("发送消息: " + message);
    }

    /**
     * 发送消息并获取发送结果
     */
    public void sendWithCallback(String topic, String message) {
        ListenableFuture<SendResult<String, String>> future = kafkaTemplate.send(topic, message);

        future.addCallback(new ListenableFutureCallback<SendResult<String, String>>() {
            @Override
            public void onSuccess(SendResult<String, String> result) {
                System.out.println("发送成功: " + message + ", offset: " + result.getRecordMetadata().offset());
            }

            @Override
            public void onFailure(Throwable ex) {
                System.out.println("发送失败: " + message + ", 原因: " + ex.getMessage());
            }
        });
    }

    /**
     * 发送带key的消息
     */
    public void sendWithKey(String topic, String key, String message) {
        kafkaTemplate.send(topic, key, message);
        System.out.println("发送带key的消息: " + key + ", " + message);
    }

    /**
     * 发送消息并等待结果
     */
    public void sendAndWait(String topic, String message) throws ExecutionException, InterruptedException {
        SendResult<String, String> result = kafkaTemplate.send(topic, message).get();
        System.out.println("发送消息: " + message + ", offset: " + result.getRecordMetadata().offset());
    }

    /**
     * 发送事务消息
     */
    @org.springframework.transaction.annotation.Transactional
    public void sendInTransaction(String topic, String message) {
        kafkaTemplate.executeInTransaction(template -> {
            template.send(topic, message);
            System.out.println("发送事务消息: " + message);
            return true;
        });
    }
}
步骤⑤:创建 Kafka 消费者服务
创建一个服务类用于接收消息:
import org.springframework.kafka.annotation.KafkaListener;
import org.springframework.kafka.annotation.KafkaListeners;
import org.springframework.kafka.annotation.TopicPartition;
import org.springframework.kafka.support.KafkaHeaders;
import org.springframework.messaging.handler.annotation.Header;
import org.springframework.messaging.handler.annotation.Payload;
import org.springframework.stereotype.Service;

@Service
public class KafkaConsumer {

    /**
     * 监听单个主题
     */
    @KafkaListener(topics = "springboot-topic")
    public void listen(String message) {
        System.out.println("接收到消息: " + message);
    }

    /**
     * 监听多个主题
     */
    @KafkaListeners({
        @KafkaListener(topics = "topic1"),
        @KafkaListener(topics = "topic2")
    })
    public void listenMultipleTopics(String message) {
        System.out.println("接收到消息: " + message);
    }

    /**
     * 监听特定分区的消息
     */
    @KafkaListener(topicPartitions = @TopicPartition(
        topic = "springboot-topic",
        partitions = "0"
    ))
    public void listenPartition(String message) {
        System.out.println("接收到分区0的消息: " + message);
    }

    /**
     * 监听多个分区
     */
    @KafkaListener(topicPartitions = @TopicPartition(
        topic = "springboot-topic",
        partitions = {"0", "1"}
    ))
    public void listenMultiplePartitions(String message) {
        System.out.println("接收到分区消息: " + message);
    }

    /**
     * 获取消息元数据
     */
    @KafkaListener(topics = "springboot-topic")
    public void listenWithHeaders(
        @Payload String message,
        @Header(KafkaHeaders.RECEIVED_TOPIC) String topic,
        @Header(KafkaHeaders.RECEIVED_PARTITION_ID) int partition,
        @Header(KafkaHeaders.OFFSET) long offset,
        @Header(KafkaHeaders.RECEIVED_TIMESTAMP) long timestamp
    ) {
        System.out.println("接收到消息: " + message);
        System.out.println("主题: " + topic);
        System.out.println("分区: " + partition);
        System.out.println("偏移量: " + offset);
        System.out.println("时间戳: " + timestamp);
    }

    /**
     * 手动提交偏移量
     */
    @KafkaListener(
        topics = "springboot-topic",
        containerFactory = "kafkaManualAckListenerContainerFactory"
    )
    public void listenManualAck(String message) {
        System.out.println("接收到消息: " + message);

        // 处理消息后手动提交偏移量
        // 需要配置监听器容器工厂为手动提交模式
    }
}
监控
Spring Boot Admin
介绍
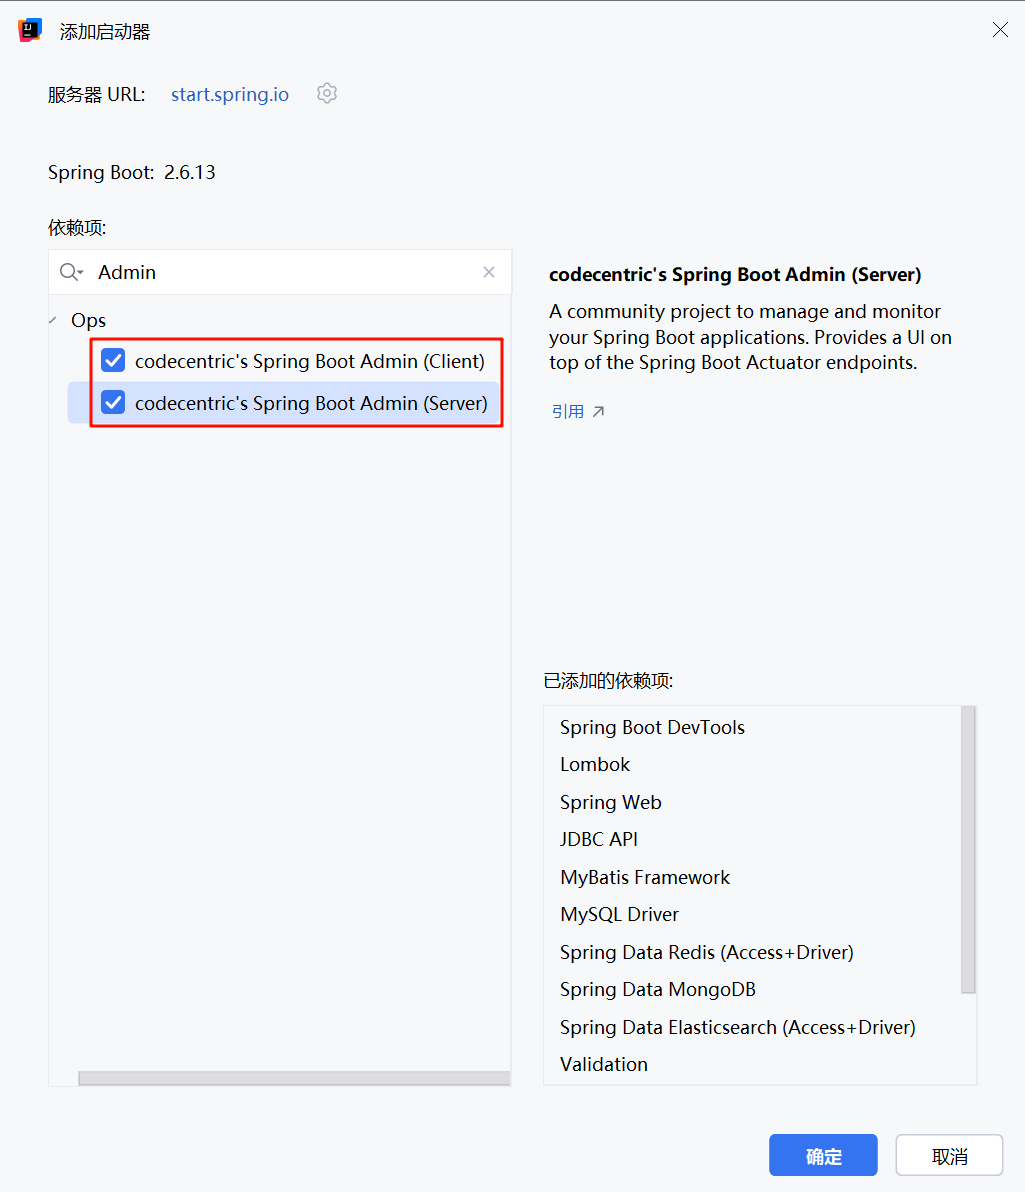
SpringBootAdmin是一个管理和监控SpringBoot应用程序的开源项目。它提供了一个美观的WebUI,用于管理和监控SpringBoot应用程序的各种运行状态指标,如健康状态、内存使用、JVM线程、环境变量、配置属性等。
架构
Spring Boot Admin 采用客户端-服务器架构:
-
Spring Boot Admin Server:中央服务器,负责收集和展示所有客户端应用的信息
-
Spring Boot Admin Client:需要监控的应用程序,通过 HTTP 向服务器注册自己
部署 Spring Boot Admin Server
步骤①:添加依赖
<dependencies>
    <!-- Spring Boot Admin Server -->
    <dependency>
        <groupId>de.codecentric</groupId>
        <artifactId>spring-boot-admin-starter-server</artifactId>
        <version>2.6.6</version>
    </dependency>

    <!-- Spring Boot Web -->
    <dependency>
        <groupId>org.springframework.boot</groupId>
        <artifactId>spring-boot-starter-web</artifactId>
    </dependency>

    <!-- Spring Boot Security (可选,用于认证) -->
    <dependency>
        <groupId>org.springframework.boot</groupId>
        <artifactId>spring-boot-starter-security</artifactId>
    </dependency>
</dependencies>
or
步骤②: 启用 Spring Boot Admin Server
import de.codecentric.boot.admin.server.config.EnableAdminServer;
import org.springframework.boot.SpringApplication;
import org.springframework.boot.autoconfigure.SpringBootApplication;

@SpringBootApplication
@EnableAdminServer
public class AdminServerApplication {
    public static void main(String[] args) {
        SpringApplication.run(AdminServerApplication.class, args);
    }
}
步骤③: 配置 Spring Boot Admin Server
在 application.yml 或 application.properties 文件中配置 Spring Boot Admin Server:
server:
  port: 8080

spring:
  boot:
    admin:
      ui:
        title: "Spring Boot Admin"
      discovery:
        enabled: true
      context-path: /admin
启动应用后,访问 http://localhost:8080/admin 即可看到 Spring Boot Admin Server 的界面。
部署 Spring Boot Admin Client
步骤①:添加依赖
<dependencies>
    <!-- Spring Boot Admin Client -->
    <dependency>
        <groupId>de.codecentric</groupId>
        <artifactId>spring-boot-admin-starter-client</artifactId>
        <version>2.6.6</version>
    </dependency>

    <!-- Spring Boot Actuator -->
    <dependency>
        <groupId>org.springframework.boot</groupId>
        <artifactId>spring-boot-starter-actuator</artifactId>
    </dependency>
</dependencies>
步骤②: 配置 Spring Boot Admin Client
在 application.yml 或 application.properties 文件中配置 Spring Boot Admin Client:
spring:
  boot:
    admin:
      client:
        url: http://localhost:8080/admin
        instance:
          name: my-application
          prefer-ip: true
  application:
    name: my-application

management:
  endpoints:
    web:
      exposure:
        include: "*"
  endpoint:
    health:
      show-details: always
启动应用
启动应用后,Spring Boot Admin Client 会自动向 Spring Boot Admin Server 注册自己。在 Admin Server 的界面上,可以看到该应用程序的状态和各项指标。
监控原理
Spring Boot Admin 依赖于 Spring Boot Actuator 来收集和展示应用程序的各种指标和状态信息。Actuator 是 Spring Boot 的一个子项目,它提供了生产级别的监控和管理功能。Spring Boot Admin 通过与 Actuator 集成,将这些监控信息以可视化的方式展示在 Web UI 上。