多媒体操作![]() https://blog.csdn.net/qq_38060125/article/details/149580313
https://blog.csdn.net/qq_38060125/article/details/149580313
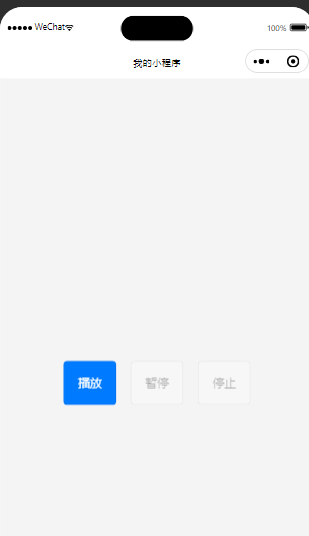
实现一个简单的语音播放器,支持播放、暂停、停止功能
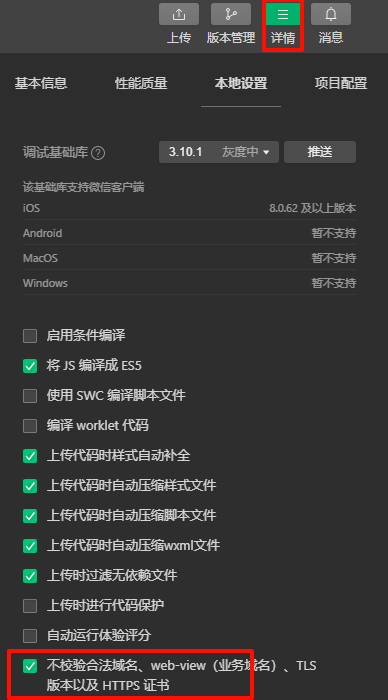
直接上代码,记得勾选
JS
javascript
Page({
  data: {
    audioPlaying: false, // 音频是否在播放状态
    audioPaused: false   // 音频是否暂停状态
  },

  onLoad() {
    // 创建音频上下文
    this.audioContext = wx.createInnerAudioContext();
    this.audioContext.src = 'https://www.learningcontainer.com/wp-content/uploads/2020/02/Kalimba.mp3'; // 替换成真实的音频地址

    // 音频播放事件监听
    this.audioContext.onPlay(() => {
      console.log('正在播放');
      this.setData({
        audioPlaying: true,
        audioPaused: false
      });
    });

    // 音频暂停事件监听
    this.audioContext.onPause(() => {
      console.log('播放已暂停');
      this.setData({ audioPaused: true });
    });

    // 音频停止事件监听
    this.audioContext.onStop(() => {
      console.log('播放已停止');
      this.setData({
        audioPlaying: false,
        audioPaused: false
      });
    });

    // 音频自然播放结束监听
    this.audioContext.onEnded(() => {
      console.log('播放完成');
      this.setData({
        audioPlaying: false,
        audioPaused: false
      });
    });

    // 音频播放错误事件监听
    this.audioContext.onError((err) => {
      console.error('播放出错:', err);
      wx.showToast({
        title: '音频播放失败',
        icon: 'none'
      });
    });
  },

  // 播放音频
  playAudio() {
    this.audioContext.play();
  },

  // 暂停音频
  pauseAudio() {
    this.audioContext.pause();
  },

  // 停止音频
  stopAudio() {
    this.audioContext.stop();
  },

  onUnload() {
    // 页面卸载时销毁音频实例
    this.audioContext.destroy();
  }
});
WXML
html
<view class="container">
  <view class="player-controls">
    <!-- 播放按钮 -->
    <button bindtap="playAudio" class="play-btn">播放</button>

    <!-- 暂停按钮 -->
    <button bindtap="pauseAudio" class="pause-btn" disabled="{{!audioPlaying}}">暂停</button>

    <!-- 停止按钮 -->
    <button bindtap="stopAudio" class="stop-btn" disabled="{{!audioPlaying && !audioPaused}}">停止</button>
  </view>
</view>
WXSS
css
/* 设置播放器容器样式 */
.container {
  display: flex;
  flex-direction: column;
  justify-content: center;
  align-items: center;
  height: 100vh;
  background-color: #f4f4f4;
}

.player-controls {
  display: flex;
  justify-content: space-between;
  align-items: center;
  gap: 20px;
}

button {
  padding: 10px 20px;
  font-size: 16px;
  border: none;
  border-radius: 5px;
  background-color: #007aff;
  color: white;
}

button:disabled {
  background-color: #ccc;
  color: #666;
}
效果
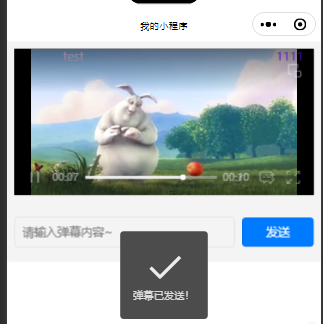
创建一个视频播放页面,支持全屏播放和弹幕功能
JS
javascript
Page({
  data: {
    danmuText: "", // 弹幕输入框的内容
    danmuList: [], // 弹幕的内容列表
  },

  // 监听页面加载
  onLoad: function () {
    this.videoContext = wx.createVideoContext("myVideo"); // 创建视频上下文,绑定视频组件id
  },

  // 视频播放时触发
  onVideoPlay() {
    console.log("视频播放中...");
  },

  // 全屏切换时触发
  onFullscreenChange(event) {
    if (event.detail.fullScreen) {
      console.log("进入全屏模式");
    } else {
      console.log("退出全屏模式");
    }
  },

  // 监听弹幕输入框
  onInput(event) {
    this.setData({
      danmuText: event.detail.value, // 更新输入的弹幕文字
    });
  },

  // 发送弹幕
  sendDanmu() {
    // 获取用户输入的弹幕内容
    const text = this.data.danmuText;

    if (!text.trim()) {
      // 如果内容为空,提示用户
      wx.showToast({
        title: "弹幕内容不能为空!",
        icon: "none",
      });
      return;
    }

    // 生成弹幕(增强随机性,控制时间、颜色等)
    const danmu = {
      text,
      color: this.getRandomColor(),         // 随机弹幕颜色
      time: this.getRandomTime(),          // 随机弹幕展示时间
    };

    // 显示弹幕到视频中
    this.videoContext.sendDanmu(danmu);

    // 将弹幕添加到 `danmuList` 中
    this.setData({
      danmuList: [...this.data.danmuList, danmu], // 累加弹幕到列表
      danmuText: "", // 清空输入框
    });

    wx.showToast({
      title: "弹幕已发送!",
      icon: "success",
    });
  },

  // 获取随机颜色
  getRandomColor() {
    const random = () => Math.floor(Math.random() * 256);
    return `rgb(${random()}, ${random()}, ${random()})`;
  },

  // 获取随机弹幕时间(1 秒到 10 秒)
  getRandomTime() {
    return Math.floor(Math.random() * 10) + 1;
  },
});
WXML
html
<view class="container">
  <!-- 视频播放器 -->
  <video
    id="myVideo"
    src="https://www.w3schools.com/html/mov_bbb.mp4"
    danmu-btn          <!-- 弹幕按钮 -->
    enable-danmu       <!-- 启用弹幕 -->
    danmu-list="{{danmuList}}" <!-- 传递弹幕列表 -->
    autoplay="{{false}}"   <!-- 不自动播放 -->
    class="video"
    show-fullscreen-btn   <!-- 显示全屏按钮 -->
    show-play-btn         <!-- 显示播放暂停按钮 -->
    show-center-play-btn  <!-- 显示中间播放按钮 -->
    object-fit="contain"  <!-- 视频内容适应模式 -->
    bindplay="onVideoPlay"
    bindfullscreenchange="onFullscreenChange"
  ></video>

  <!-- 弹幕输入容器 -->
  <view class="danmu-container">
    <input
      placeholder="请输入弹幕内容~"
      class="danmu-input"
      value="{{danmuText}}"
      bindinput="onInput"
    ></input>
    <button class="send-btn" bindtap="sendDanmu">发送</button>
  </view>
</view>
WXSS
css
/* 页面整体容器 */
.container {
  display: flex;
  flex-direction: column;
  align-items: center;
  padding: 10px;
  background-color: #f4f4f4;
}

/* 视频播放器样式 */
.video {
  width: 100%;  /* 全宽 */
  height: 200px; /* 高度自定义 */
  background-color: black;
  margin-bottom: 20px;
}

/* 弹幕输入区域样式 */
.danmu-container {
  display: flex;
  justify-content: center;
  align-items: center;
  padding: 10px;
  width: 100%;
}

.danmu-input {
  flex: 4;
  height: 40px;
  padding: 0 10px;
  font-size: 16px;
  border: 1px solid #ddd;
  border-radius: 5px;
  margin-right: 10px;
}

.send-btn {
  flex: 1;
  height: 40px;
  background-color: #007aff;
  color: white;
  border: none;
  border-radius: 5px;
  font-size: 16px;
  text-align: center;
}
效果
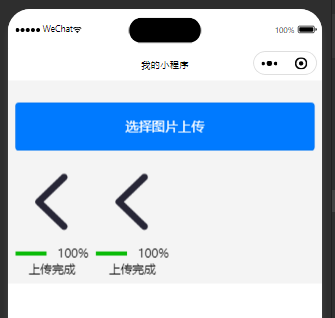
实现图片多选上传功能,并显示上传进度
JS
javascript
Page({
  data: {
    images: [] // 存储图片列表,包括路径和进度
  },

  // 用户选择图片
  chooseImages() {
    wx.chooseImage({
      count: 9, // 用户最多可以选择的图片数量
      sizeType: ['original', 'compressed'], // 支持选择原图或压缩图
      sourceType: ['album', 'camera'], // 用户可以选择从相册或拍照获取图片
      success: (res) => {
        // 初始化图片列表,设置初始进度为 0
        const selectedImages = res.tempFiles.map((file) => ({
          path: file.path,     // 图片路径
          progress: 0          // 上传进度
        }));

        this.setData({
          images: [...this.data.images, ...selectedImages] // 累加选择的图片
        });

        // 执行上传操作
        this.uploadImages();
      }
    });
  },

  // 上传图片
  uploadImages() {
    const url = 'https://example.com/upload'; // 替换为你的实际上传服务器地址
    const images = this.data.images;

    // 遍历图片逐个上传
    images.forEach((image, index) => {
      // 开始上传每张图片
      const uploadTask = wx.uploadFile({
        url, // 上传地址
        filePath: image.path, // 上传的文件路径
        name: 'file', // 后端接收的文件字段名
        formData: {}, // 可选的额外参数,后端需要时添加

        // 上传结果处理
        success: (res) => {
          console.log('上传成功:', res);
        },
        fail: (err) => {
          console.error('上传失败:', err);
          wx.showToast({
            title: `图片上传失败`,
            icon: 'none'
          });
        }
      });

      // 监听上传进度
      uploadTask.onProgressUpdate((progressEvent) => {
        const currentProgress = progressEvent.progress; // 当前的上传百分比
        images[index].progress = currentProgress; // 更新对应图片的上传进度
        this.setData({ images }); // 更新页面数据
      });
    });
  }
});
WXML
html
<view class="container">
  <!-- 图片选择按钮 -->
  <button bindtap="chooseImages" class="choose-btn">选择图片上传</button>

  <!-- 图片上传列表 -->
  <view class="upload-list">
    <block wx:for="{{images}}" wx:key="index">
      <view class="image-item">
        <image class="image-preview" src="{{item.path}}" mode="aspectFill"></image>

        <!-- 显示进度条 -->
        <view class="progress-container">
          <progress percent="{{item.progress}}" show-info="{{true}}" />
          <text wx:if="{{item.progress === 100}}">上传完成</text>
        </view>
      </view>
    </block>
  </view>
</view>
WXSS
css
/* 整体容器样式 */
.container {
  padding: 10px;
  background-color: #f4f4f4;
}

/* 选择图片按钮样式 */
.choose-btn {
  display: block;
  margin: 20px auto;
  padding: 10px 20px;
  background-color: #007aff;
  color: #ffffff;
  text-align: center;
  border: none;
  border-radius: 5px;
}

/* 图片上传列表样式 */
.upload-list {
  display: flex;
  flex-wrap: wrap;
  gap: 10px;
}

/* 单张图片项样式 */
.image-item {
  width: 100px;
  display: flex;
  flex-direction: column;
  align-items: center;
}

.image-preview {
  width: 100px;
  height: 100px;
  border-radius: 5px;
  object-fit: cover;
  margin-bottom: 10px;
}

.progress-container {
  width: 100%;
  text-align: center;
}
效果
云服务部分暂且留到后边再看