一. list的基本使用
在我们学习了vector和string之后,学习list就相对没有那么困难,反而会更加得心应手,但是仍然有不同之处,今天我们就具体来详细学习一下list的基本使用以及后续的模拟实现。
1.1 了解基本数据类型的初始化方法
cpp
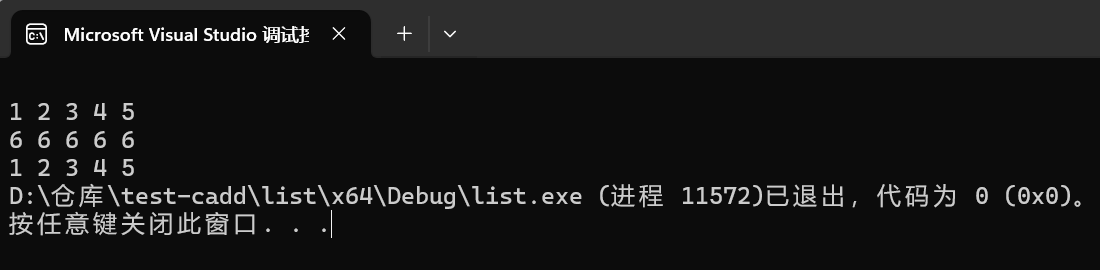
//普通int类型链表  初始化构造的几种方法
void test1()
{
	//构建一个空的链表
	list<int> l1;
	for (auto e : l1)
	{
		cout << e << " ";
	}
	cout << endl;

    //直接初始化
	list<int> l2 = { 1,2,3,4,5 };
	for (auto e : l2)
	{
		cout << e << " ";
	}
	cout << endl;

    //初始化5个值为6的数据
	list<int> l3(5, 6);
	for (auto e : l3)
	{
		cout << e << " ";
	}
	cout << endl;

	//使用迭代器进行初始化
	list<int> l4(l2.begin(), l2.end());
	//使用迭代器进行遍历
	list<int>::iterator it1 = l4.begin();
	while (it1 != l4.end())
	{
		cout<<*it1<<" ";
		++it1;
	}

}
上面有直接初始化,或者初始化n个固定的数值以及使用迭代器初始化和遍历,这些其实和vector中的初始化和遍历很相似,所以就不再过多介绍。
1.2 list中的一些基本函数使用
(1)基本的插入删除
cpp
//一些基本函数的使用
void test3()
{
	list<int> l4 = { 3,4,5,6,7,8,9 };
	l4.push_back(10); //尾插
	l4.push_back(10);
	Printf(l4);

	l4.pop_back();   //尾删
	Printf(l4);

	l4.push_front(88);  //头插
	Printf(l4);

	l4.pop_front();  //头删
	Printf(l4);

	//在某一位置插入数据
	list<int>::iterator it3 = l4.begin();
	advance(it3, 2);
	l4.insert(it3, 888);
	Printf(l4);

	//清空某一链表(这里会重新插入全新的数据方便观察)
	l4.clear();
	l4.push_back(99);
	l4.push_back(99);
	l4.push_back(99);
	Printf(l4);

}
(2)删除某一位置的数据(迭代器失效问题)
cpp
//删除某一位置的数据
list<int> l5 = { 2,3,4,5,6,7 };
Printf(l5);
list<int>::iterator it1, it2;
it1 = it2 = l5.begin();
advance(it1, 3);
it1 = l5.erase(it1);
it2 = l5.erase(it2);
Printf(l5);
//查看迭代器是否失效(it1)
cout << *it1 << endl;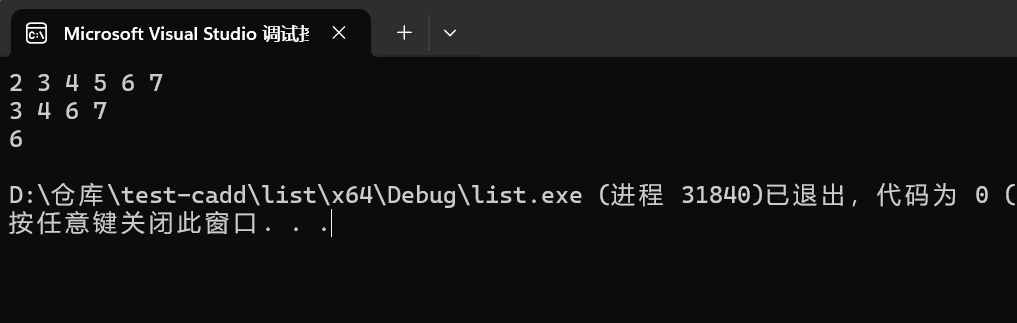
注意上面这个删除某一位置的数据使用的erase接口,要注意一定要先初始化迭代器,另外需要注意的是list的erase操作会使迭代器失效,所以我们要给it1重新赋值,比如it1 = l5.erase(it1);最后返回的就是被删除迭代器的下一个未失效迭代器。
(3)list中一些特殊的接口
cpp
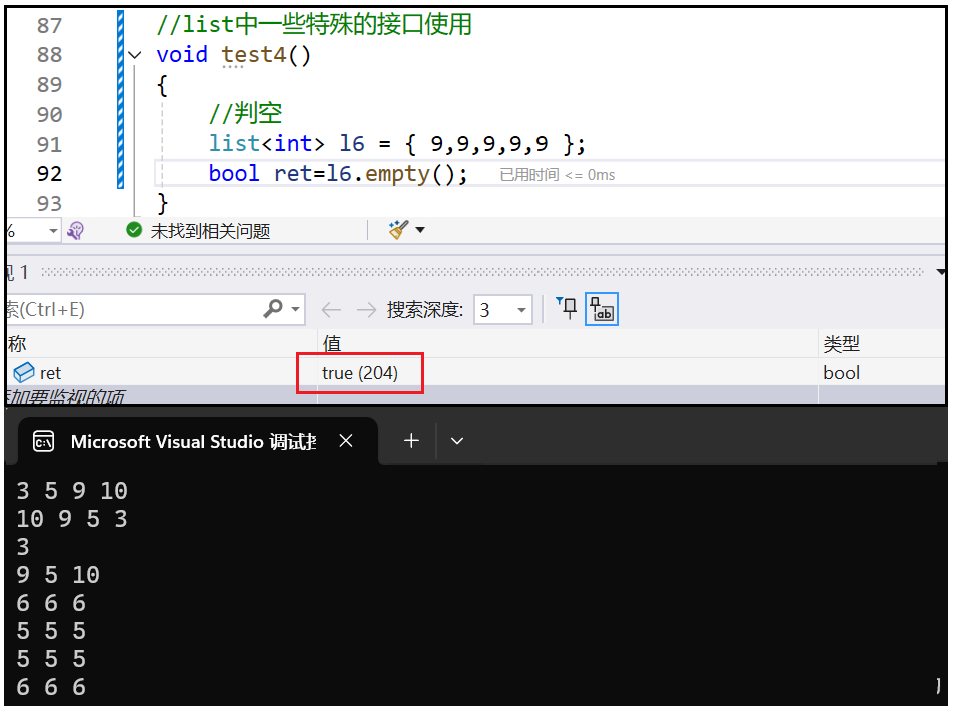
void test4()
{
	//判空
	list<int> l6 = { 9,5,3,10};
	bool ret=l6.empty();

	//list排序(默认都是升序)
	l6.sort();
	Printf(l6);
	//如果要实现降序,借助greater(因为它底层是return x>y)
	greater<int> g1;
	l6.sort(g1);
	Printf(l6);

	//查找链表中某一个元素
	list<int> l5 = { 9,5,3,10 };
	int x;
	cin >> x;
	auto it = find(l5.begin(), l5.end(), x);
	if (it != l5.end())
    {
		l5.erase(it);
	}
	Printf(l5);

	//交换两个链表
	list<int> l7 = { 6,6,6 };
	list<int> l8 = { 5,5,5 };
	Printf(l7);
	Printf(l8);
	swap(l7, l8);
	Printf(l7);
	Printf(l8);

}
(4)list中接口要注意的问题
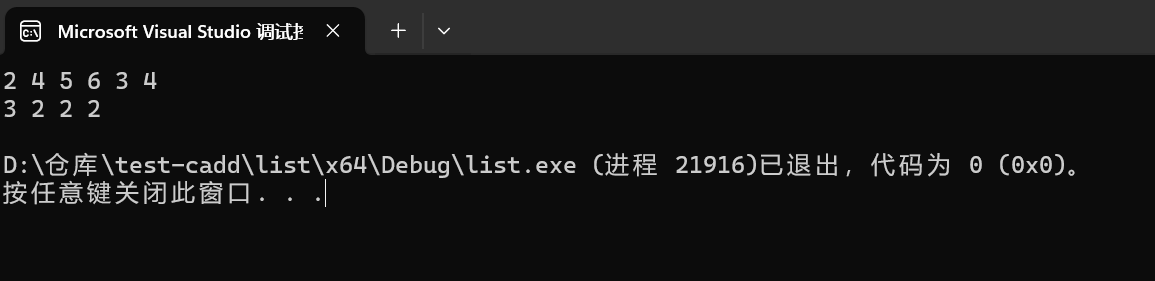
(4.1)经过上面一些接口的展示,其实相信大家都已经感觉出来list和vector还有string有很大的相似之处,比如增删查改等一些基本的接口,思路上面大多都是一致的,只是我们要根据实际情况去改变底层的想象。下面给大家再讲解一个接口splice(该接口是list中的一个非常有特色的成员函数,它用于转移两个链表中元素的位置,又或者在同一个链表将元素移动到其他位置):
cpp
//特殊成员函数splice
void test5()
{
	list<int> l1 = { 2,3,4 };
	list<int> l2 = { 4,5,6 };
	list<int>::iterator it1, it2;
	it1 = l1.begin();
	it1++;
	l1.splice(it1, l2);  //把l2中的全部元素转移到l1中it1之后
	Printf(l1);

	list<int> l3 = { 2,2,2 };
	list<int> l4 = { 3,3,3 };
	list<int>::iterator it3, it4;
	it3 = l3.begin();
	it4 = l4.begin();
	l3.splice(it3, l4, it4);  //仅仅转移一个元素
	Printf(l3);
}
(4.2)最后一个要我们注意的点就是push_back和emplace_back的区别和相同点,细心的小伙伴肯定都发现了在list中有两个尾插,我现在就可以告诉大家的是对于内置类型这两个函数是没有什么区别的,作用都是尾插,但是对于比较复杂的自定义类型,可能会大有不同,下面我给大家举出一个实例来说明清楚:
cpp
//这里给出一个自定义类型
//特殊数据使用list链表 (eg:表示列col和行row)
class graph
{
public:
	graph(int row=0,int col=0)   //构造函数
		:_row(row)
		,_col(col)
	{
		cout << "构造函数" << endl;
	}

	graph(const graph& g1)  //拷贝构造
		:_row(g1._row)
		,_col(g1._col)
	{
		cout << "拷贝构造" << endl;
	}

	int _row;
	int _col;
};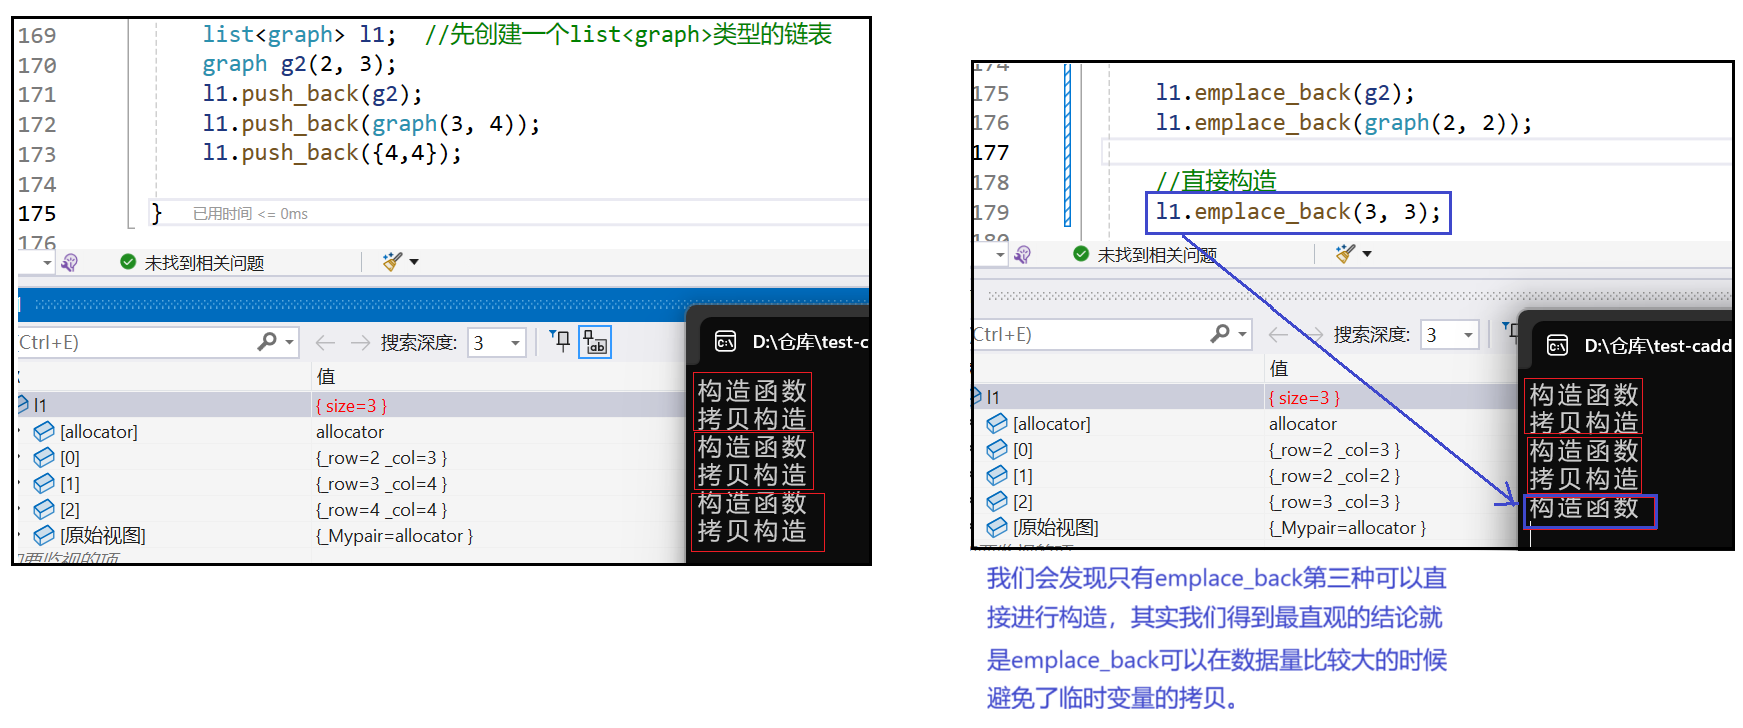
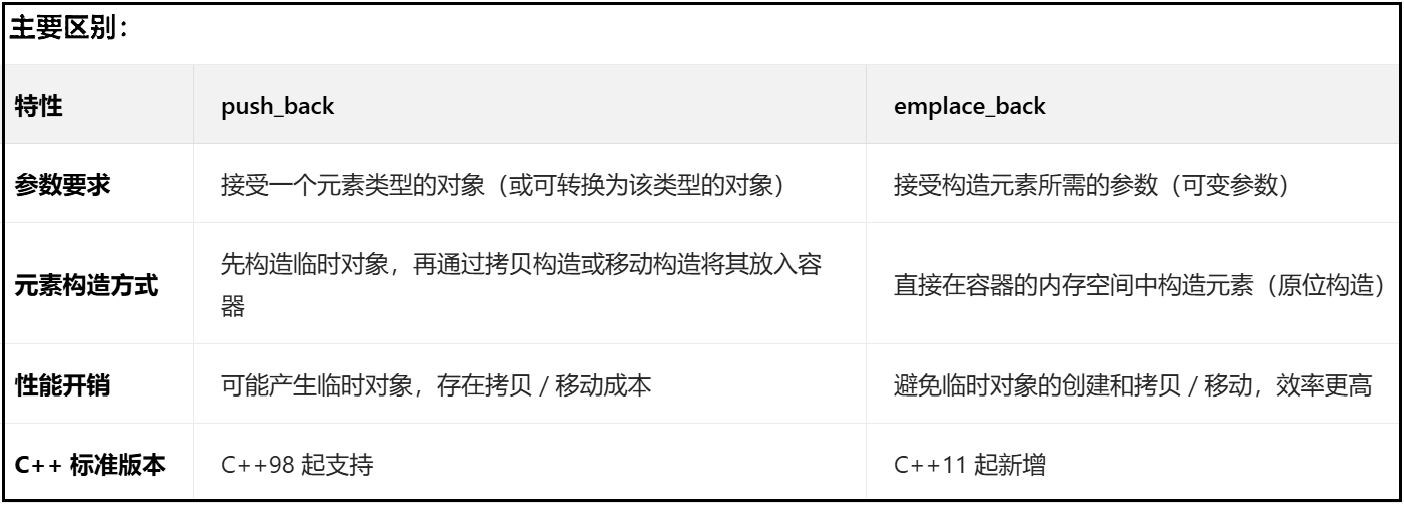
所以现在我可以给大家总结性的说一下对于内置类型,两者并没有特别大的区别,但是对于自定义类型或者是比较复杂的、成本较高的自定义类型,用emplace_back就会避免多余的拷贝,效率更高。另外就是对于已有明确对象的(比如上面例子中举出的g2就是一个对象),可以直接使用push_back直接传入,但是没有明确对象但是有对应的构造函数的时候,使用emplace_back可以直接在容器中传入数据,这个时候使用emplace_back就是一个不错的选择。
二. list的模拟实现
2.1 list框架的基本搭建
首先list链表的结构我们已经初步了解,所以我们可以从以下4点来搭建框架:
(1)先创建节点,可以使用struct。
(2)创建简单的迭代器来模拟指针。
(3)搭建list链表结构,补充我们所需要的函数。
cpp
#include <assert.h>
namespace zheng
{
	//全部都是公有的时候就用struct
	template<class T>
	struct list_node
	{
		T _data;
		list_node<T>*  _next;
		list_node<T>*  _prev;

		list_node(const T& x=T())  //使用匿名对象
			:_data(x)
			, _next(nullptr)
			, _prev(nullptr)
		{ }
	};

	//模拟迭代器(代替指针)
	template<class T>
	struct list_iterator
	{
		typedef list_node<T> Node;
		typedef list_iterator<T> iterator;
		Node* _node;   //创建一个头节点

		list_iterator(Node* node)
			:_node(node)
		{ }

		//开始重载迭代器的方法
		T& operator*()
		{
			return _node->_data;
		}

		T* operator->()
		{
			return &(_node->_data);  //返回的是指针的地址
		}

		iterator& operator++()  //注意引用  (前置++)
		{
			_node = _node->_next;
			return *this;
		}

		iterator& operator--()
		{
			_node = _node->_prev;
			return *this;
		}

		iterator operator++(int)  //后置++,用参数int区分重载
		{
			iterator tmp(*this);
			_node = _node->_next;
			return tmp;
		}

		iterator operator--(int)
		{
			iterator tmp(*this);
			_node = _node->_prev;
			return tmp;
		}

		bool operator!=(const iterator& s)
		{
			return _node != s._node;
		}

	};

	template<class T>
	class list
	{
	public:
		typedef list_node<T> Node;
		typedef list_iterator<T> iterator;
		iterator begin()
		{
			return iterator(_head->_next);
		}

		iterator end()
		{
			return (_head);
		}

		void empty_init()
		{
			_head = new Node();
			_head->_next = _head;
			_head->_prev = _head;
		}
		list()
		{
			empty_init();
		}
		void push_back(const T& x) //(尾插)
		{
			Node* newnode = new Node(x);
			Node* tail = _head->_prev;
			tail->_next = newnode;
			newnode->_prev = tail;
			newnode->_next = _head;
			_head->_prev = newnode;

		}
	private:
		Node* _head;
	};
}
测试:
cpp
#include "list.h"
int main()
{
	zheng::list<int> l1;
	l1.push_back(1);
	l1.push_back(1);
	l1.push_back(1);
	l1.push_back(1);
	//使用迭代器遍历
	zheng::list<int>::iterator it1 = l1.begin();
	while (it1 != l1.end())
	{
		*it1 = 2;  //可以试着更改迭代器指向的数据
		cout << *it1 << " ";
		++it1;
	}
	cout << endl;

	zheng::list<graph> l2;
	graph g1(6, 6);
	l2.push_back(g1);
	l2.push_back(graph(8, 8));
	l2.push_back({ 9,9 });
	zheng::list<graph>::iterator it2 = l2.begin();
	while (it2 != l2.end())
	{
		cout << it2->_row <<"," <<it2->_col << endl;
		++it2;
	}

	return 0;
}
2.2 迭代器的模拟实现
我们经过学习会发现,任何一个容器都离不开迭代器,那么迭代器的实现也变得尤为重要,出现一点差错就有可能会导致整个程序崩溃,下面我就讲一下list中的普通迭代器和const迭代器如何实现。
知识点补充:
const int* p1;(const修饰的是p1指向的内容不能改变)
int* const p2;(const修饰的是迭代器本身p2不能改变)
那么大家思考一下在list中const迭代器是要达到哪种效果呢?
是的!要达到p1的效果!
这个时候就有同学说了,这有什么难的?我们直接在普通迭代器上面加上const不就行了?可是事实真的如此吗,现在我们就来验证一下: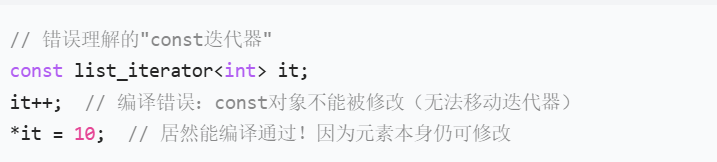
所以如果仅仅是在前面加上const的话,迭代器指向的内容还是可以改变,但是迭代器本身却不能改变了,这就违背了const迭代器本身的设计,所以我们还是要重新来单独设计一个迭代器,但其实const迭代器只需要把opertaor获取元素的前面加上const,其余的大多数还是保持一致,所以这个时候就用到了我们比较熟悉的模板,使用模板参数把函数区分开来:
cpp
//只展示部分代码
//typedef list_iterator<class T, T&, T*) iterator;
//typedef const_list_iterator<class T, const T&, const T*) const_iterator;

template<class T,class Ref,class Ptr >
struct list_iterator
{
	typedef list_node<T> Node;
	typedef list_iterator<T,Ref,Ptr> iterator;
	Node* _node;   //创建一个头节点

	list_iterator(Node* node)
		:_node(node)
	{ }

	//开始重载迭代器的方法
	Ref& operator*()
	{
		return _node->_data;
	}

	Ptr* operator->()
	{
		return &(_node->_data);
	}
};

//然后再list中重载两个模板参数
class list
{
public:
	typedef list_node<T> Node;

	typedef list_iterator<T, T&, T*> iterator;
	typedef list_iterator<T, const T&, const T*> const_iterator;
};
2.3 其余函数的补充
这部分我就不详细再讲解了,其实原理大多数与前面的容器都有所相似,这里我直接把代码展示给大家:
cpp
list()
{
	empty_init();
}

list(size_t n, const T& val = T())
{
	empty_init();
	for (size_t i = 0; i < n; i++)
	{
		push_back(val);
	}
}
//l1(l2)
list(const list<T>& lt)
{
	empty_init();

	for (auto& e : lt)
	{
		push_back(e);
	}
}
//l1=l2
list<T>& operator=(list<T> lt)
{
	swap(lt);
	return *this;
}

~list()
{
	clear();

	delete _head;
	_head = nullptr;
}
void swap(list<T>& tmp)
{
	std::swap(_head, tmp._head);
	std::swap(_size, tmp._size);
}

void clear()
{
	auto it = begin();
	while (it != end())
	{
		it = erase(it);
	}
}

void push_back(const T& x) //(尾插)
{
	/*Node* newnode = new Node(x);
	Node* tail = _head->_prev;
	tail->_next = newnode;
	newnode->_prev = tail;
	newnode->_next = _head;
	_head->_prev = newnode;*/
	insert(end(),x);

}
void push_front(const T& x)
{
	insert(begin(), x);
}

void pop_front()
{
	erase(begin());
}

void pop_back()
{
	erase(--end());
}

iterator insert(iterator pos, const T& val)
{
	Node* cur = pos._node;
	Node* newnode = new Node(val);
	Node* prev = cur->_prev;
	prev->_next = newnode;
	newnode->_prev = prev;
	newnode->_next = cur;
	cur->_prev = newnode;
	++_size;
	return iterator(newnode);
}
iterator erase(iterator pos)
{
	assert(pos != end());
	Node* del = pos._node;
	Node* prev = del->_prev;
	Node* next = del->_next;
	prev->_next = next;
	next->_prev = prev;
	delete del;
	--_size;
	return iterator(next);
}