基于 6.13.0 版本
上一期内容
前言
- 官网原文:
amis的渲染过程是将json转成对应的 React 组件。先通过json的 type 找到对应的Component,然后把其他属性作为props传递过去完成渲染 - 想搞清楚这一句话还真得花点时间
从文档示例入手
路由入口
- 本地起项目,找个示例页面入口例如
http://localhost:8888/examples/index - 可定位到
examples/components/Example.jsx路由文件,可以看到页面组件是由makeSchemaRenderer函数返回的,而入参IndexPageSchema就是用户配置的json
javascript
// examples/components/Example.jsx
export const examples = [
  {
    label: '示例',
    children: [
      {
        label: '页面',
        icon: 'fa fa-th',
        badge: 3,
        badgeClassName: 'bg-info',
        children: [
          {
            label: '简单页面',
            path: '/examples/index',
            component: makeSchemaRenderer(IndexPageSchema)
          },
          ...
        ]
      },
      ...
    ]
  }
];
makeSchemaRenderer方法
examples/components/SchemaRender.jsx文件暴露出了该函数,返回了一个withRouter(react-router-dom高阶组件,用于注入路由相关参数的)包裹的类组件finalShowCode字段是控制右侧抽屉展示json配置的,依赖monaco-editor富文本编辑器,不深入- 主要还是看
renderSchema方法,最终是调用了amis-core里暴露出的render方法,这就是正式开始渲染的入口了(如果想在已存在的项目中引入amis库,也是直接调用该方法即可通过编写json生成页面了) - ps:在集成
amis的项目中想单独渲染schema也是通过render方法
javascript
// examples/components/SchemaRender.jsx
import {render} from 'amis';

export default function (schema, schemaProps, showCode, envOverrides) {
  return withRouter(
    class extends React.Component {
      renderSchema() {
        const { location, theme, locale } = this.props;

				// 渲染入口
        return render(
          schema,
          {
            ...(isPlainObject(schemaProps) ? schemaProps : {}),
            context: {
              // 上下文信息,无论那层可以获取到这个
              amisUser: {
                id: 1,
                name: "AMIS User",
              },
            },
            location,
            theme,
            locale,
          },
          this.env
        );
      }

      render() {
        const ns = this.props.classPrefix;
        const finalShowCode = this.props.showCode ?? showCode;
        return (
          <>
            <div className="schema-wrapper">
              {finalShowCode !== false ? (
                <Drawer
                  classPrefix={ns}
                  size="lg"
                  onHide={this.close}
                  show={this.state.open}
                  // overlay={false}
                  closeOnOutside={true}
                  position="right"
                >
                  {this.state.open ? this.renderCode() : null}
                </Drawer>
              ) : null}
              {this.renderSchema()}
            </div>
          </>
        );
      }
    }
  );
}
渲染器(amis-core)
render方法
render方法只是把AMISRenderer组件包了一层AMISRenderer组件,加了层EnvContext,注入了环境变量env,返回ScopedRootRenderer组
javascript
// packages/amis-core/src/index.tsx

export function render(
  schema: Schema,
  { key, ...props }: RootRenderProps = {},
  options: RenderOptions = {},
  pathPrefix: string = ""
): JSX.Element {
  return (
    <AMISRenderer
      {...props}
      key={key}
~~~~      schema={schema}
      pathPrefix={pathPrefix}
      options={options}
    />
  );
}

function AMISRenderer({
  schema,
  options,
  pathPrefix,
  ...props
}: RootRenderProps & {
  schema: Schema,
  options: RenderOptions,
  pathPrefix: string,
}) {
	...

  return (
    <EnvContext.Provider value={env}>
      <ScopedRootRenderer
        {...props}
        schema={schema}
        pathPrefix={pathPrefix}
        rootStore={store}
        env={env}
        theme={theme}
        locale={locale}
        translate={translate}
      />
    </EnvContext.Provider>
  );
}
ScopedRootRenderer组件
- 调用链路较长,可以挑着看
入口
- 包装了两层高阶组件
javascript
// packages/amis-core/src/Root.tsx

export default StatusScoped(Scoped(Root));
第一个高阶:StatusScoped
- 在
StatusScopedWrapper组件中依据statusStore创建状态实例,然后往子组件中注入状态实例
javascript
// packages/amis-core/src/StatusScoped.tsx
import {IStatusStore, StatusStore} from './store/status';

export function StatusScopedWrapper({children}: StatusScopedWrapperProps) {
	// 创建状态
  const store = React.useMemo(() => StatusStore.create({}), []);
  React.useEffect(() => {
    return () => {
      destroy(store);
    };
  }, []);

  return children({statusStore: store});
}

export function StatusScoped<
  T extends React.ComponentType<React.ComponentProps<T> & StatusScopedProps>
>(ComposedComponent: T) {
  const wrapped = (
    props: JSX.LibraryManagedAttributes<
      T,
      Omit<React.ComponentProps<T>, keyof StatusScopedProps>
    > & {},
    ref: any
  ) => {
    return (
      <StatusScopedWrapper>
        {({statusStore}) => (
          <ComposedComponent
            {...(props as any)}
            statusStore={statusStore}
            ref={ref}
          />
        )}
      </StatusScopedWrapper>
    );
  };

  return React.forwardRef(wrapped as any) as typeof wrapped;
}
statusStore状态
- 基于
mobx-state-tree状态管理库实现 - 此处是定义状态的数据结构(比如
visibleState)、调用方法(比如setVisible),主要用于管理组件的显隐、禁用、静态
javascript
import {Instance, types} from 'mobx-state-tree';
import {StoreNode} from './node';

export const StatusStore = types
  .model('StatusStore', {
    visibleState: types.optional(types.frozen(), {}), // 显隐
    disableState: types.optional(types.frozen(), {}), // 禁用
    staticState: types.optional(types.frozen(), {}) // 静态
  })

  .actions(self => ({
    setVisible(key: string, value?: boolean) {
      ...
    },
    setDisable(key: string, value?: boolean) {
      ...
    },
    setStatic(key: string, value?: boolean) {
      ...
    },

    resetAll() {
      self.visibleState = {};
      self.disableState = {};
      self.staticState = {};
    }
  }));

export type IStatusStore = Instance<typeof StatusStore>;- 举例:在动作中消费这个状态,通过
actionType为show、hidden、visibility,来控制组件的显隐
javascript
// packages/amis-core/src/actions/StatusAction.ts

export class StatusAction implements RendererAction {
  async run(
    action: IStatusAction,
    renderer: ListenerContext,
    event: RendererEvent<any>
  ) {
    /**
     * 根据唯一ID查找指定组件
     * 触发组件未指定id或未指定响应组件componentId,则使用触发组件响应
     */
    const key = action.componentId || action.componentName;

    // 显隐&状态控制
    if (['show', 'hidden', 'visibility'].includes(action.actionType)) {
      let visibility =
        action.actionType === 'visibility'
          ? action.args?.value
          : action.actionType === 'show';
      // 设置 visibleState 的状态
      return renderer.props.statusStore.setVisible(key!, visibility as any);
    }
    ...
  }
}
第二个高阶:Scoped
- 核心是定义了一个
scoped属性,通过createScopedTools生成了一些用于组件间通信的方法 amis内部组件会用到;而集成amis的项目中通常在自定义组件时使用
javascript
// packages/amis-core/src/Scoped.tsx
/**
 * @file 用来创建一个域,在这个域里面会把里面的运行时实例注册进来,方便组件之间的通信。
 * @author fex
 */

export function HocScoped<
  T extends {
    $path?: string;
    env: RendererEnv;
  }
>(
  ComposedComponent: React.ComponentType<T>,
  rendererType?: string
): React.ComponentType<
  T & {
    scopeRef?: (ref: any) => void;
  }
> & {
  ComposedComponent: React.ComponentType<T>;
} {
  class ScopedComponent extends React.Component<ScopedProps> {
    static contextType = ScopedContext;
    static ComposedComponent = ComposedComponent;
    ref: any;
    scoped?: IScopedContext;

    constructor(props: ScopedProps, context: IScopedContext) {
      super(props);

      this.scoped = createScopedTools(
        this.props.$path,
        context,
        this.props.env,
        rendererType
      );

      const scopeRef = props.scopeRef;
      scopeRef && scopeRef(this.scoped);
    }

    render() {
      const {scopeRef, ...rest} = this.props;

      return (
        <ScopedContext.Provider value={this.scoped!}>
          <ComposedComponent
            {
              ...(rest as any) /* todo */
            }
            ref={this.childRef}
          />
        </ScopedContext.Provider>
      );
    }
  }

	// 高阶组件包装React组件时,静态方法不会自动继承,需要额外复制
  hoistNonReactStatic(ScopedComponent, ComposedComponent);
  return ScopedComponent;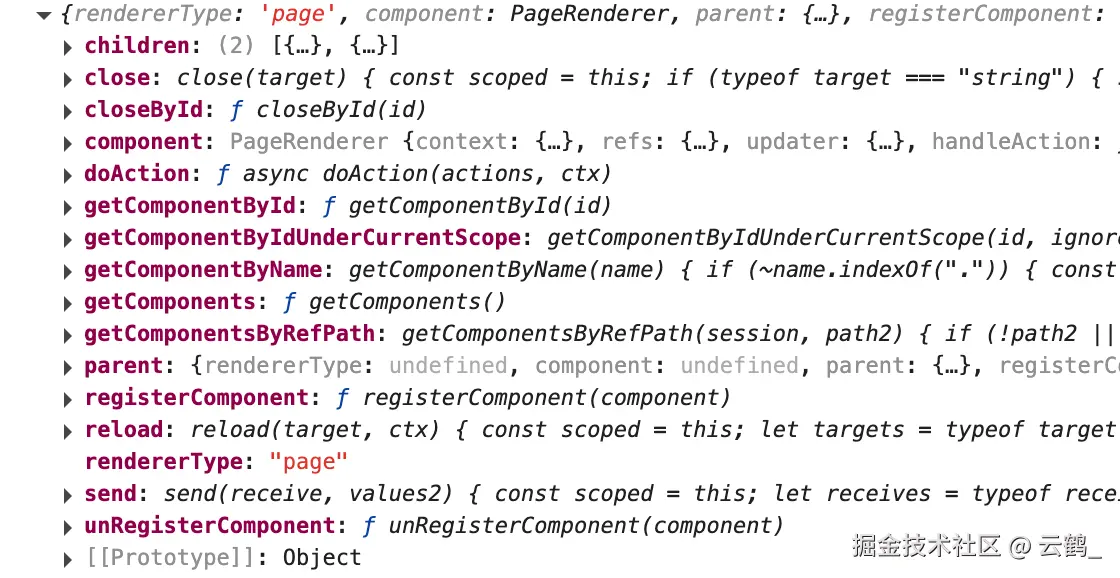
}- 在任意组件内部打印如下图,比如
getComponentByName方法可以获取到任意组件实例,在自定义组件中可以触发其他组件的方法、获取属性等
Root组件
- 包裹的高阶介绍完了,终于来到了
Root组件,就是包装了下RootRenderer组件,同时注入了一些context和属性 schema参数还是用户配置的json,renderChild方法就是核心方法了
javascript
// packages/amis-core/src/Root.tsx

export class Root extends React.Component<RootProps> {
	...

  render() {

    return (
      <RootStoreContext.Provider value={rootStore}>
        <ThemeContext.Provider value={themeName}>
          <LocaleContext.Provider value={this.props.locale!}>
            {
              rootWrappers.reduce(
                (props: RootWrapperProps, wrapper) => {
                  return {
                    ...props,
                    children: wrapper(props)
                  };
                },
                {
	                ...
                  schema: isPlainObject(schema)
                    ? {
                        type: 'page',
                        ...(schema as any)
                      }
                    : schema,
                  children: (
                    <RootRenderer
                      pathPrefix={pathPrefix || ''}
                      schema={
                        isPlainObject(schema)
                          ? {
                              type: 'page',
                              ...(schema as any)
                            }
                          : schema
                      }
                      {...rest}
                      render={renderChild}
                      rootStore={rootStore}
                      resolveDefinitions={this.resolveDefinitions}
                      location={location}
                      data={data}
                      context={context}
                      env={env}
                      classnames={theme.classnames}
                      classPrefix={theme.classPrefix}
                      locale={locale}
                      translate={translate}
                    />
                  )
                } as RootWrapperProps
              ).children
            }
          </LocaleContext.Provider>
        </ThemeContext.Provider>
      </RootStoreContext.Provider>
    );
  }
}
RootRenderer组件
- 先看下
RootRenderer组件做了什么。其实很简单,就是调用了传入的render方法(renderChild),然后把schema作为入参丢进去
javascript
// packages/amis-core/src/RootRenderer.tsx

export class RootRenderer extends React.Component<RootRendererProps> {

  render() {
    ...

    return (
      <>
        {
          render(pathPrefix!, schema, {
            ...rest,
            topStore: this.store,
            data: this.store.downStream,
            context: store.context,
            onAction: this.handleAction,
            dispatchEvent: this.dispatchEvent
          }) as JSX.Element
        }
        ...
      </>
    );
  }
}
renderChild方法
- 再看回
renderChild方法 - 首先判断
schema是不是个数组,是的话通过renderChildren遍历循环调用renderChild(把所有子组件遍历渲染一遍) - 不是数组则通过
schema匹配组件,这就是组件渲染的入口了
javascript
// packages/amis-core/src/Root.tsx
import {SchemaRenderer} from './SchemaRenderer';

export function renderChildren(
  prefix: string,
  node: SchemaNode,
  props: renderChildProps
): ReactElement {
  if (Array.isArray(node)) {
    var elemKey = props.key || props.propKey || props.id || '';

    return node.map((node, index) =>
      renderChild(`${prefix}/${index}`, node, {
        ...props,
        key: `${elemKey ? `${elemKey}-` : ''}${index}`
      })
    );
  }

  return renderChild(prefix, node, props);
}

export function renderChild(
  prefix: string,
  node: SchemaNode,
  props: renderChildProps
): ReactElement {
  if (Array.isArray(node)) {
    return renderChildren(prefix, node, props);
  }

  const typeofnode = typeof node;
  ...

  let schema: Schema =
    typeofnode === 'string' || typeofnode === 'number'
      ? {type: 'tpl', tpl: String(node)}
      : (node as Schema);

	// 匹配组件的入口
  const Comp = props.env.SchemaRenderer || SchemaRenderer;

  ...

  return (
    <Comp
      render={renderChild as any}
      {...props}
      key={props.key ?? schema.key}
      schema={schema}
      propKey={schema.key}
      $path={`${prefix ? `${prefix}/` : ''}${(schema && schema.type) || ''}`}
    />
  );
}
SchemaRenderer组件
- 用于判断
schema对应的渲染组件,又是个费脑子的组件,整理个表格可对照着看:
| 条件(为真) | 组件 | 说明 |
|---|---|---|
| schema.children | 自定义组件 | 支持在json配置的children中写react代码 |
| schema.component && isValidElementType(schema.component) | schema中用户传入的组件 | 支持往component字段传入react组件,这样可以写入hook等 |
| Object.keys(schema).length === 0 | 空组件 | |
| !this.renderer | 异步加载组件 | 可能是组件未定义或需要异步加载 |
| getComponent && !component | 异步加载组件 | |
| 其他(renderer.component) | 已注册组件 | 初始化时已同步加载的组件 |
如果对于组件是如何加载有兴趣的话可以参考上一篇文章
javascript
// packages/amis-core/src/SchemaRenderer.tsx

render(): JSX.Element | null {
		...

    if (schema.children) {
      return rest.invisible
        ? null
        : React.isValidElement(schema.children)
        ? schema.children
        : typeof schema.children !== 'function'
        ? null
        : (schema.children as Function)({
            ...rest,
            ...exprProps,
            $path: $path,
            $schema: schema,
            render: this.renderChild,
            forwardedRef: this.refFn,
            rootStore,
            statusStore,
            dispatchEvent: this.dispatchEvent
          });
    } else if (schema.component && isValidElementType(schema.component)) {
      const isSFC = !(schema.component.prototype instanceof React.Component);
      const {
        data: defaultData,
        value: defaultValue, // render时的value改放defaultValue中
        activeKey: defaultActiveKey,
        key: propKey,
        ...restSchema
      } = schema;
      return rest.invisible
        ? null
        : React.createElement(schema.component as any, {
            ...rest,
            ...restSchema,
            ...exprProps,
            // value: defaultValue, // 备注: 此处并没有将value传递给渲染器
            defaultData,
            defaultValue,
            defaultActiveKey,
            propKey,
            $path: $path,
            $schema: schema,
            ref: isSFC ? undefined : this.refFn,
            forwardedRef: isSFC ? this.refFn : undefined,
            render: this.renderChild,
            rootStore,
            statusStore,
            dispatchEvent: this.dispatchEvent
          });
    } else if (Object.keys(schema).length === 0) {
      return null;
    } else if (!this.renderer) {
      return rest.invisible ? null : (
        <LazyComponent
          defaultVisible={true}
          getComponent={async () => {
            const result = await rest.env.loadRenderer(
              schema,
              $path,
              this.reRender
            );
            if (result && typeof result === 'function') {
              return result;
            } else if (result && React.isValidElement(result)) {
              return () => result;
            }

            this.reRender();
            return () => loadRendererError(schema, $path);
          }}
        />
      );
    } else if (this.renderer.getComponent && !this.renderer.component) {
      // 处理异步渲染器
      return rest.invisible ? null : (
        <LazyComponent
          defaultVisible={true}
          getComponent={async () => {
            await loadAsyncRenderer(this.renderer as RendererConfig);
            this.reRender();
            return () => null;
          }}
        />
      );
    }

		...

		// 读取已注册的组件
    const Component = renderer.component!;
    ...

    let component = supportRef ? (
      <Component {...props} ref={this.childRef} storeRef={this.storeRef} />
    ) : (
      <Component
        {...props}
        forwardedRef={this.childRef}
        storeRef={this.storeRef}
      />
    );

		// 设置了动画属性的,加一层动画组件,依赖 react-transition-group 动画库
    if (schema.animations) {
      component = (
        <Animations
          schema={schema}
          component={component}
          show={animationShow}
        />
      );
    }

    return this.props.env.enableAMISDebug ? (
      <DebugWrapper renderer={renderer}>{component}</DebugWrapper>
    ) : (
      component
    );
  }
总结
- 渲染的逻辑可以简单抽象为:
javascript
// 组件注册
const map = {
	tpl: TplCompnonet
}

// schema
{
	type: 'tpl'
}

// 渲染组件(子组件同理)
if (map[schema.type]) {
	return <TplCompnonet />
}- 逻辑梳理完毕后发现
json转成react组件的核心思路并不复杂,复杂的是过程中加入了很多特性、兼容了很多场景