04_es原理&filebeat使用
倒排 索引技术
-
源数据
1001 My name is Jason Yin, I love linux, .... 10w+
1002 My name is oldboy, I love sixiangke, .... 20w+
1003 I love kafka, .... 30w+ -
倒排索引技术
倒排索引技术:(倒排表)
My:
- 1001 20 count : 8分
- 1002 300 count : 100分
...
name
- 1001
- 1002
..
is
Jason
Yin
I
love
linux
问题:分片底层是如何工作的
分片底层对应的是一个Lucene库,而Lucene库底层使用的是倒排索引技术
常用的角色说明:
data node:
指的是存储数据的节点。
node.data: true
master node:
    控制ES集群,并维护集群的状态(cluster state,包括节点信息,索引信息等,ES集群每个节点都有一份)。
    node.master: true

coordinating:
    协调节点可以处理请求的节点,ES集群所有的节点均为协调节点,该角色无法取消。
master角色和data角色分离实战
-
停止所有节点的es服务,清空文件数据
systemctl stop
[root@localhost ~]# rm -rf /var/log/elasticsearch/*
[root@localhost ~]# rm -rf /var/lib/elasticsearch/* -
修改配置文件
[root@elk101.oldboyedu.com ~]# yy /oldboyedu/softwares/es7/elasticsearch-7.17.5/config/elasticsearch.yml
...
cluster.initial_master_nodes: ["elk103.oldboyedu.com"]
node.data: true
node.master: false
[root@elk101.oldboyedu.com ~]#[root@elk102.oldboyedu.com ~]# yy /oldboyedu/softwares/es7/elasticsearch-7.17.5/config/elasticsearch.yml
...
cluster.initial_master_nodes: ["elk103.oldboyedu.com"]
node.data: true
node.master: false
[root@elk102.oldboyedu.com ~]#[root@elk103.oldboyedu.com ~]# yy /oldboyedu/softwares/es7/elasticsearch-7.17.5/config/elasticsearch.yml
...
cluster.initial_master_nodes: ["elk103.oldboyedu.com"]
node.data: false
node.master: true
[root@elk103.oldboyedu.com ~]# -
启动集群
systemctl start elasticsearch
-
验证
[root@localhost elasticsearch]# curl 10.0.0.101:9200/_cat/nodes
10.0.0.103 20 96 1 0.02 0.13 0.12 ilmr * node-103
10.0.0.101 14 95 1 0.09 0.17 0.13 cdfhilrstw - node-101
10.0.0.102 35 96 1 0.18 0.19 0.14 cdfhilrstw - node-102 -
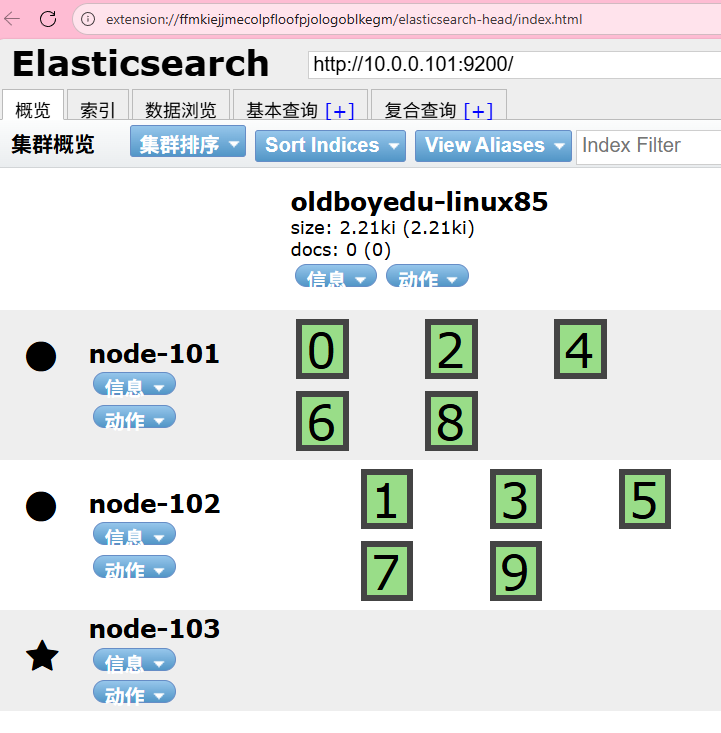
创建索引,观察elk103是否能过存储分片
PUT 10.0.0.101:9200/oldboyedu-linux85
{
"settings":{
"number_of_shards": 10,
"number_of_replicas":0
}
}
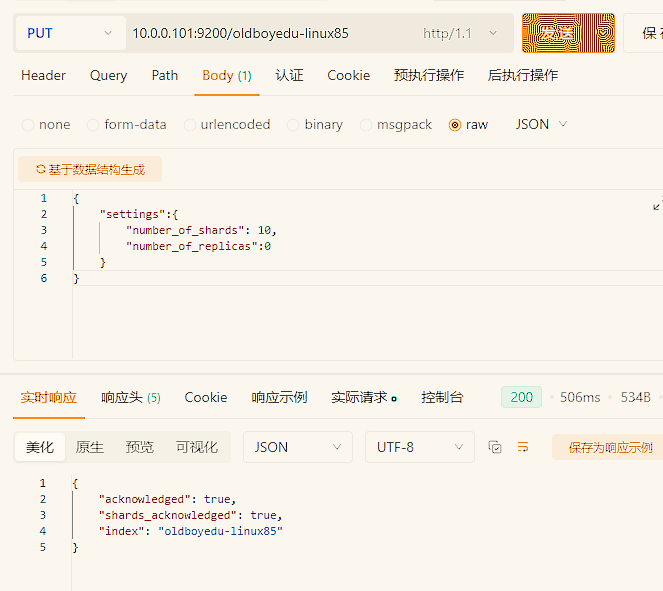
分片数量不要设置过道
官方建议
1G->20个分片,求实怎么用是自己的事
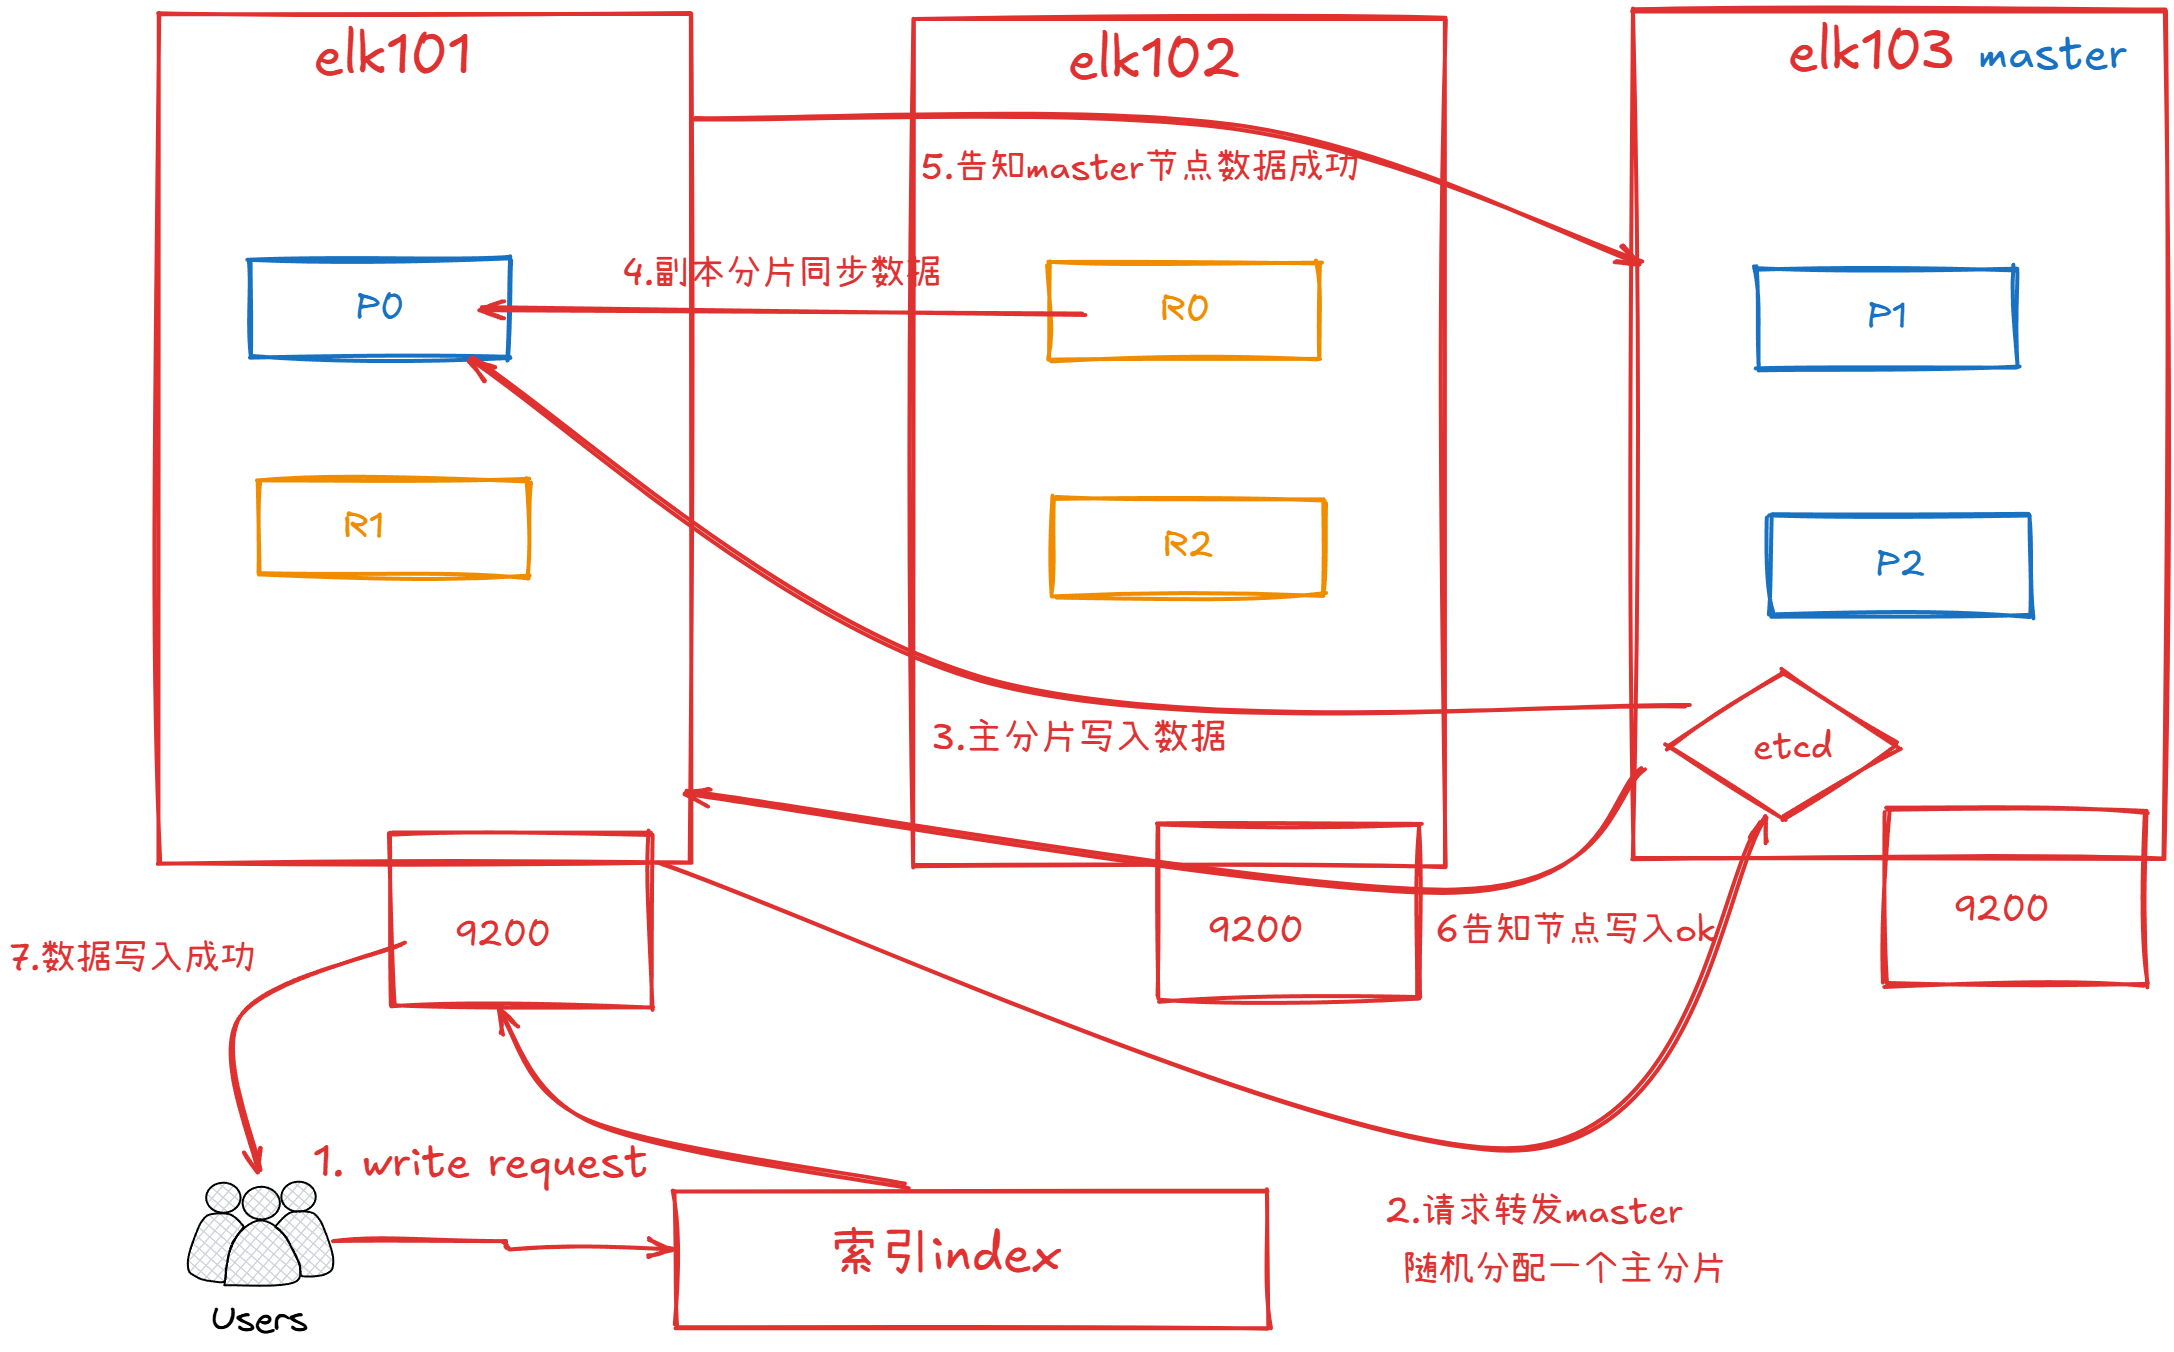
es文档写入流程
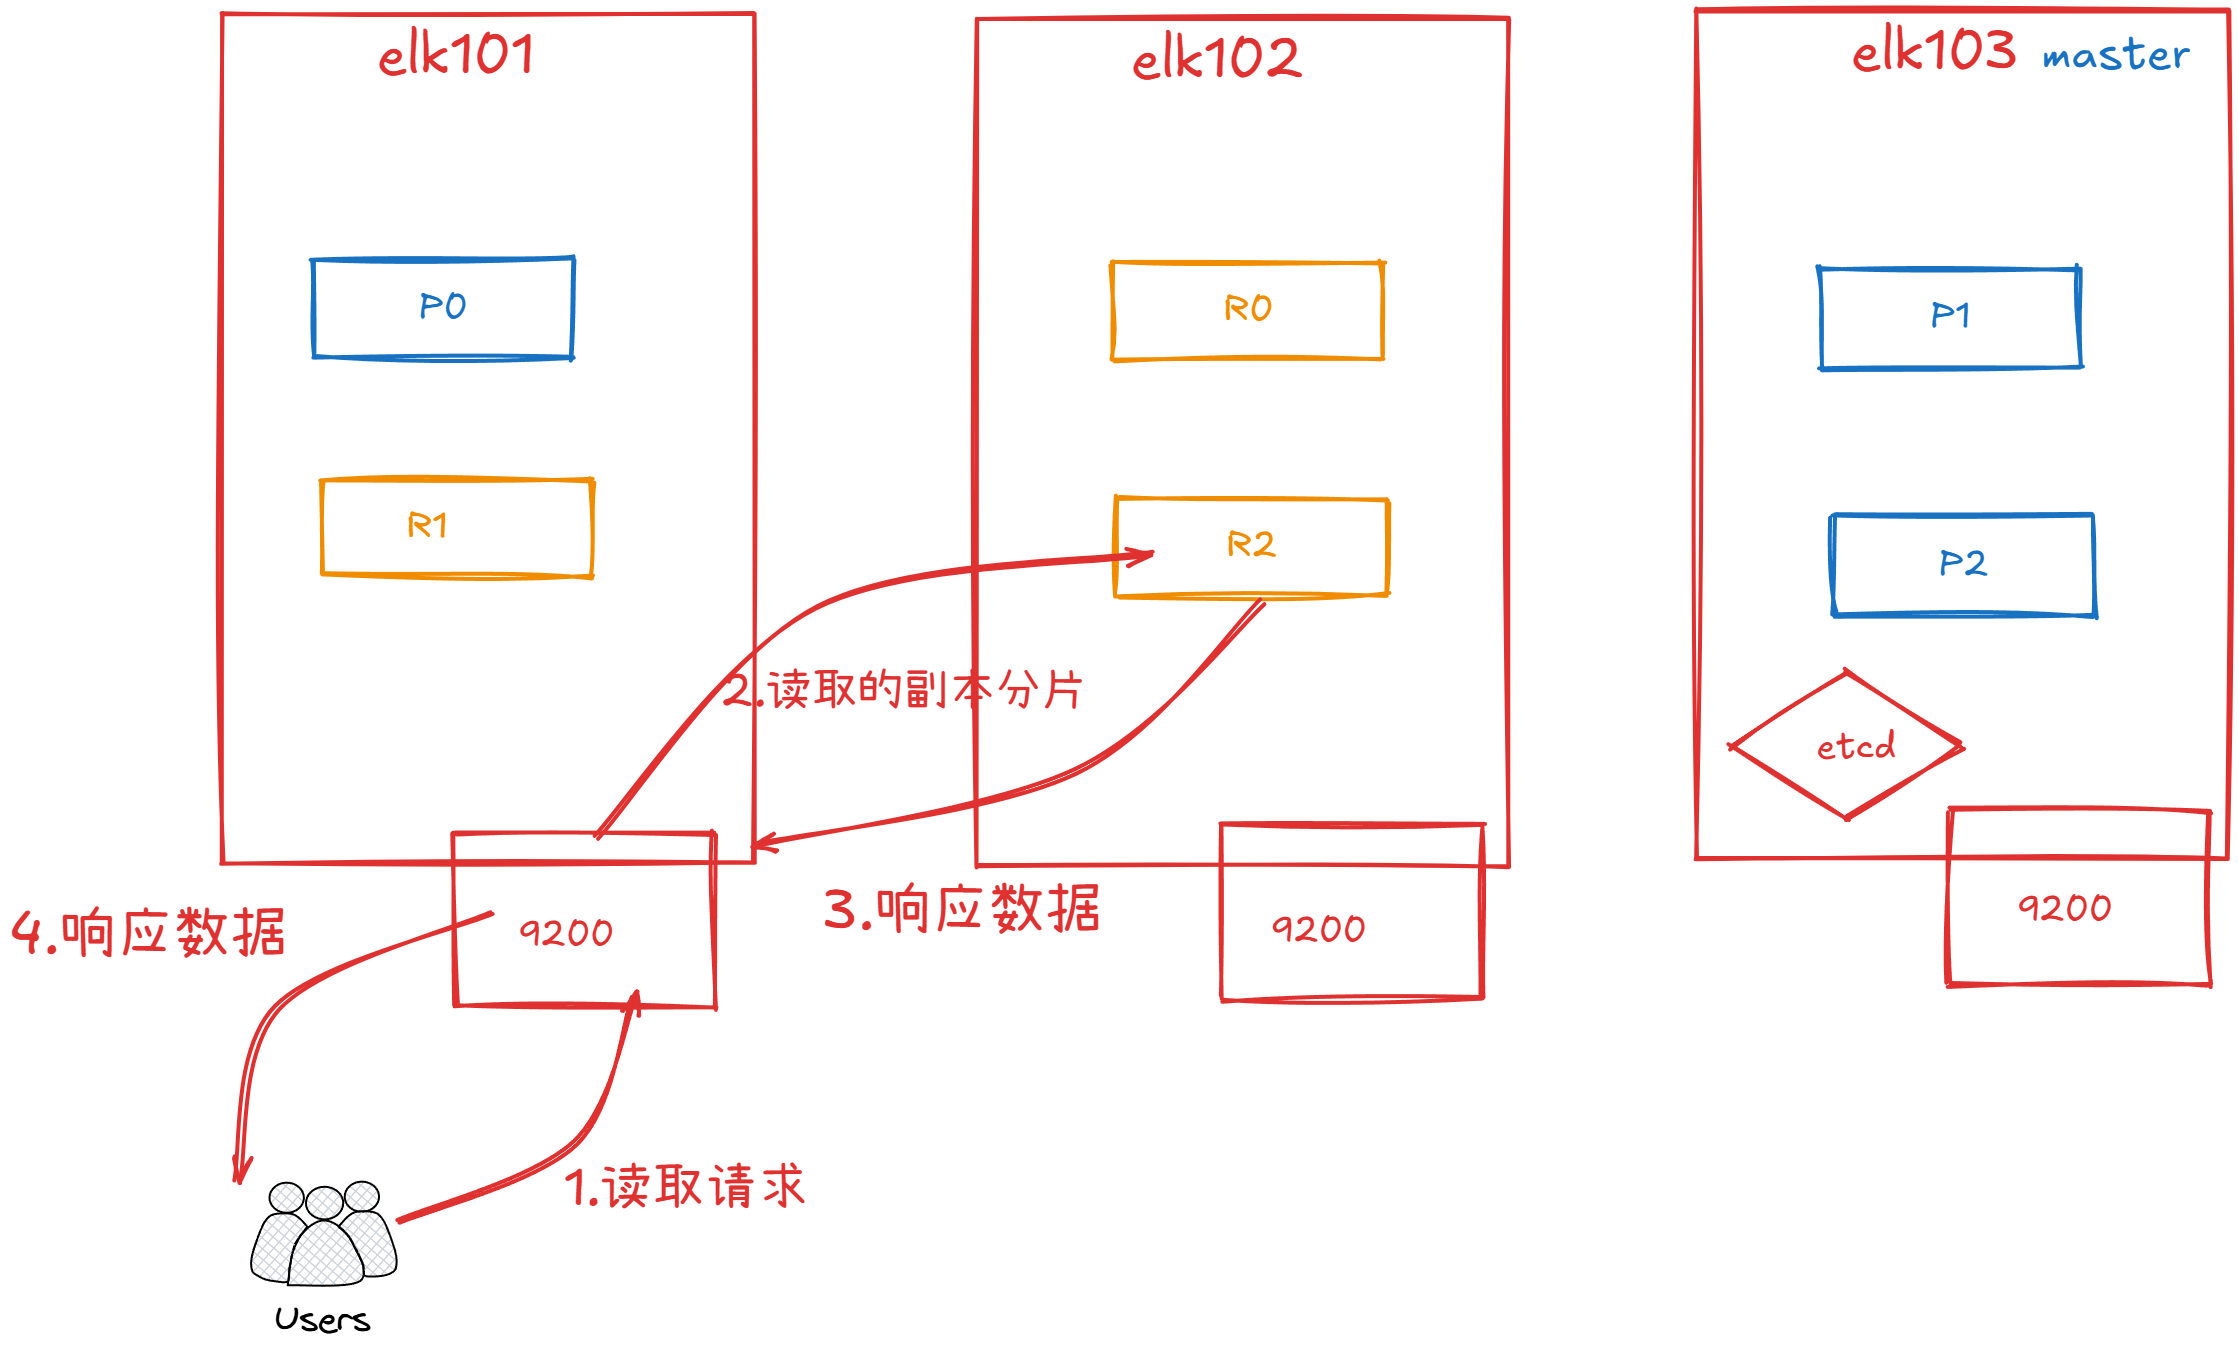
文档的读取流程
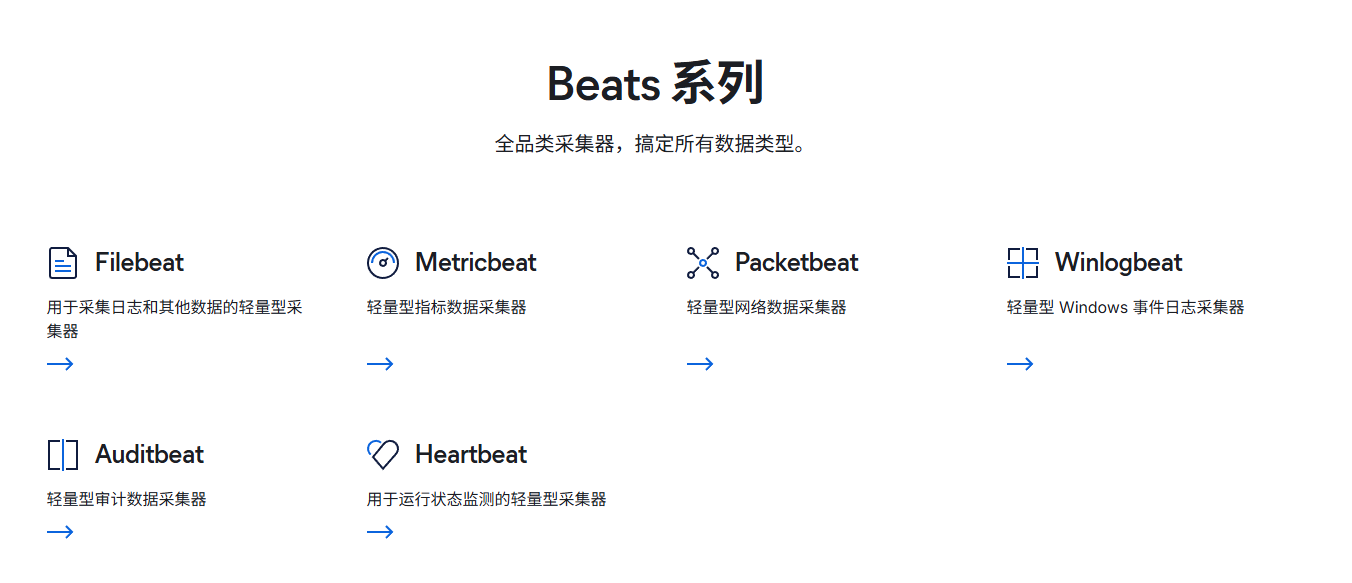
filebeat(数据采集)
下载
基于二进制安装filebeat
	(1)下载filebeat软件包
wget http://192.168.15.253/ElasticStack/day04-/filebeat-7.17.5-linux-x86_64.tar.gz

	(2)解压软件包
tar xf filebeat-7.17.5-linux-x86_64.tar.gz -C /oldboyedu/softwares/

	(3)验证filebeat安装是否成功
cd /oldboyedu/softwares/filebeat-7.17.5-linux-x86_64/
ln -svf `pwd`/filebeat /usr/local/sbin/
filebeat -h

(1)创建工作目录
cd /oldboyedu/softwares/filebeat-7.17.5-linux-x86_64
mkdir config


	(2)编写配置文件
[root@elk103.oldboyedu.com filebeat-7.17.5-linux-x86_64]# cat config/01-stdin-to-console.yaml
# 配置filebeat的输入端
filebeat.inputs:
  # 指定输入端的类型为标准输入
- type: stdin


# 指定filebeat的输出端为console
output.console:
  # 表示输出的内容以漂亮的格式显示
  pretty: true
[root@elk103.oldboyedu.com filebeat-7.17.5-linux-x86_64]#


	(3)启动filebeat的实例
filebeat -e -c config/01-stdin-to-console.yaml - 查看filebeat 的查看帮助信息 filebeat -h
使用filebeat
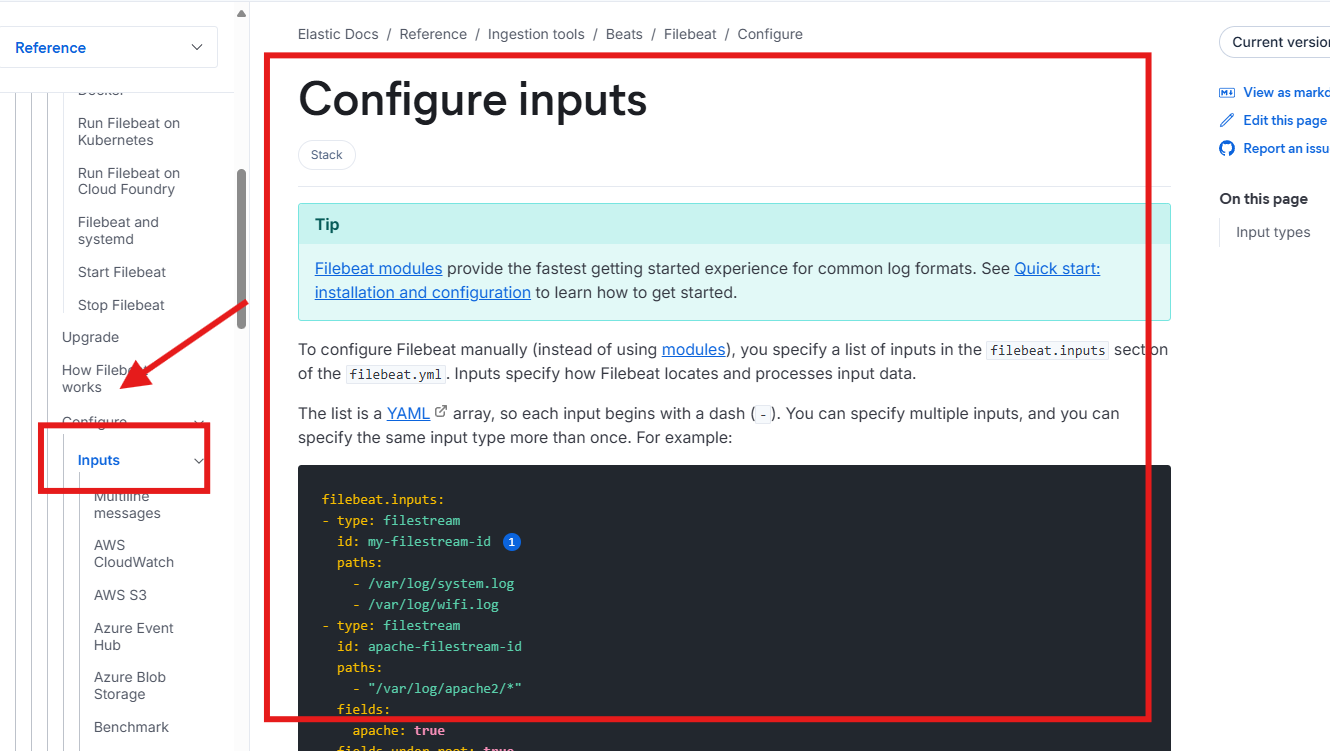
input-输入
-c 指定文件
-e 以当前终端输出
(3)启动filebeat的实例
filebeat -e -c config/01-stdin-to-console.yaml
input插件
**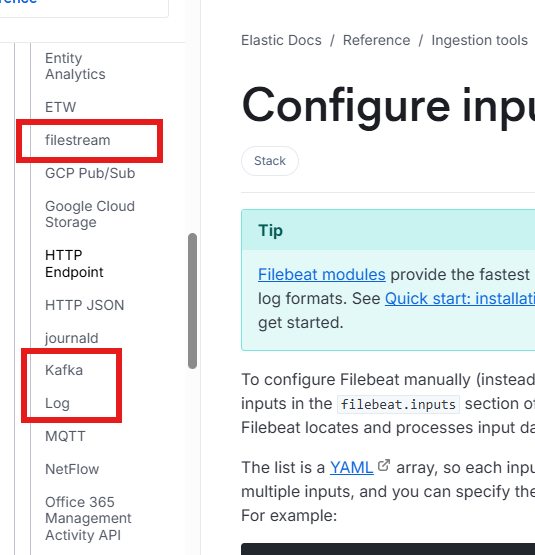
log-input
	(1)编写配置文件
[root@elk103.oldboyedu.com filebeat-7.17.5-linux-x86_64]# cat config/03-log-to-console.yaml
filebeat.inputs:
  # 指定输入类型是log
- type: log
  # 指定文件路径
  paths:
    - /tmp/oldboyedu-linux85/*.log
    - /tmp/oldboyedu-linux85/*/*.json
    # 注意,两个*可以递归匹配
    - /tmp/oldboyedu-linux85/**/*.exe

# 指定filebeat的输出端为console
output.console:
  # 表示输出的内容以漂亮的格式显示
pretty: true-
运行这个文件
[root@localhost filebeat-7.17.5-linux-x86_64]# filebeat -e -c config/03-log-to-console.yaml
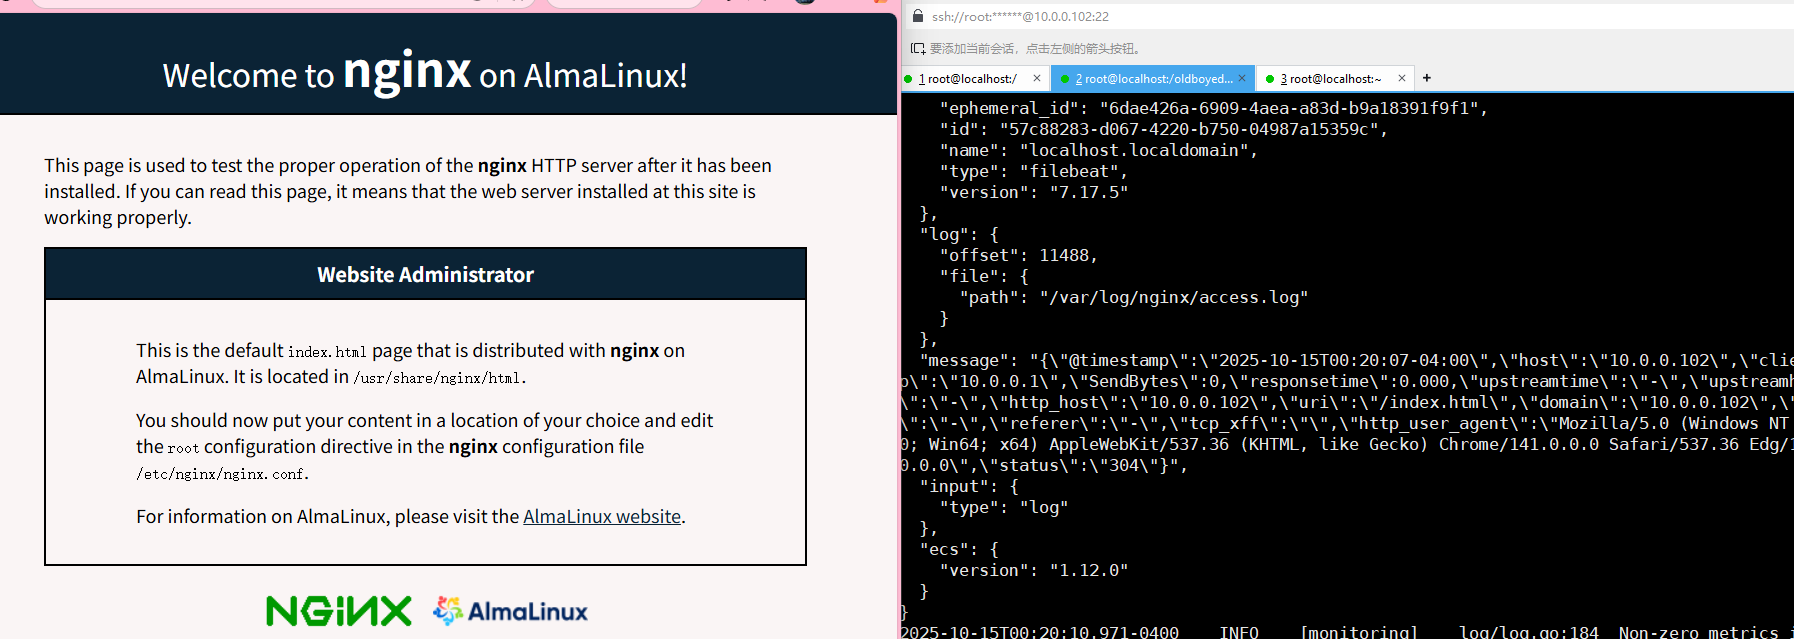
使用filebeat采集nginx日志
-
安装nginx(这里大家都会我这里就不写了)
-
配置filebeat采集nginx的日志文件
-
这里使用的是log的input插件
-
详细写法
filebeat.inputs:
- type: log
paths:指定文件的存放路径
- /var/log/nginx/access.log
输出输出在终端
output.console:
pretty: true - type: log
-
启动filebeat
filebeat -e -c config/04-nginx-to-console.yaml
小结
-
多看官方文档
https://www.elastic.co/docs/reference/beats/filebeat/console-output
-
一般都是filebeat只是采集数据,数据的处理,过滤都是用logstash