更改YUM 源为阿里云镜像
bash
1 备份repo仓库

[root@test02 ~]# mv /etc/yum.repos.d/CentOS-Base.repo /etc/yum.repos.d/CentOS-Base.repo.bak

2 下载阿里云CentOS7源配置

[root@test02 ~]# wget -O /etc/yum.repos.d/CentOS-Base.repo https://mirrors.aliyun.com/repo/Centos-7.repo

3 清理并生成新缓存

[root@test02 ~]# yum clean
[root@test02 ~]# yum makecache

4查看仓库

[root@test02 ~]# yum repolist
lnmp架构部署
介绍
在当今的 网站开发与部署 中,性能优越、成本低廉且扩展性强的解决方案备受关注,而 LNMP 架构(Linux + Nginx + MySQL + PHP )作为一套经典的轻量级技术栈,已成为广大开发者的首选。无论是 动态网站、企业级应用,还是 高并发环境 ,LNMP 都以其高效性和稳定性脱颖而出。

简单描述lnmp工作流程:
1 用户向nginx服务器发送请求
2nginx服务器进行匹配,如果是静态网页直接返回,如果是动态网页则把请求转发给php
3php收到请求后,开始处理并调用mysql数据库
4mysql返回数据,php脚本生成动态内容
5nginx响应用户
nginx安装部署
bash
1配置nginx仓库
[root@test02 yum.repos.d]# vim nginx.repo
[nginx-stable]
name=nginx stable repo
baseurl=http://nginx.org/packages/centos/$releasever/$basearch/
gpgcheck=1
enabled=1
gpgkey=https://nginx.org/keys/nginx_signing.key
module_hotfixes=true

2安装nginx
[root@test02 yum.repos.d]# yum -y install nginx

3配置nginx主文件:
[root@test02 yum.repos.d]# vim /etc/nginx/nginx.conf

4检查配置并开启nginx
[root@test02 yum.repos.d]# systemctl start nginx
[root@test02 yum.repos.d]# systemctl enable nginx
[root@iZbp190inalld5uyomtxbhZ yum.repos.d]# netstat -tnulp|grep nginx
tcp        0      0 0.0.0.0:80              0.0.0.0:*               LISTEN      2068/nginx: master
安装php服务
bash
1上传php包并安装
[root@test02 ~]# ls php71.tar.gz
php71.tar.gz

[root@test02 ~]# tar xf php71.tar.gz

[root@test02 ~]# yum -y install *.rpm

[root@test02 ~]# rpm -qa|grep php|wc -l
19

2启动php服务
[root@test02 ~]# systemctl start php-fpm
[root@test02 ~]# systemctl enable php-fpm

3查看端口
[root@test02 ~]# netstat -tnulp|grep php
tcp        0      0 127.0.0.1:9000          0.0.0.0:*               LISTEN      13286/php-fpm: mast
安装mysql数据库
bash
1安装Mariadb数据库 mysql--->Mariadb
[root@test02 ~]# yum -y install mariadb-server

2启动mariadb数据库
[root@test02 ~]# systemctl start mariadb
[root@test02 ~]# systemctl enable mariadb

3查看mysqld端口
[root@test02 ~]# netstat -tnulp|grep mysqld
tcp        0      0 0.0.0.0:3306            0.0.0.0:*               LISTEN      13715/mysqld

4修改root用户密码并登录
[root@test02 ~]# mysqladmin password '123456'
[root@test02 ~]# mysql -uroot -p123456
打通nginx与php的连接
bash
1配置php的conf文件
[root@test02 conf.d]#vim php.conf
server{
  listen 80;
  server_name php.com;
  root /php;

  location / {
    index index.php index.html;
}
#这是处理 PHP 请求的 "标准模板",核心部分固定,细节可按需优化。
  location ~ \.php$ {
     fastcgi_pass 127.0.0.1:9000;
     fastcgi_param SCRIPT_FILENAME $document_root$fastcgi_script_name;
     include fastcgi_params;
}
}

2创建网站根目录
[root@test02 conf.d]# mkdir /php
[root@test02 php]# vim index.php

3写入测试代码
[root@test02 conf.d]#cat /php/index.php
<?php
phpinfo();
?>

4hosts做域名解析,访问php.com显示介绍页面
打通php与mysql的连接
bash
[root@test02 php]# cat mysql.php
<?php
   $servername = "localhost";
   $username = "root";
   $password = "123456";
   // 创建连接
   $conn = mysqli_connect($servername, $username, $password);
   // 检测连接
   if (!$conn) {
   die("Connection failed: " . mysqli_connect_error());
}
   echo "php可以连接MySQL...";
?>

测试,连接成功
[root@test02 etc]# curl php.com/mysql.php
php可以连接MySQL...
统一服务启动用户
bash
1创建统一用户和组

[root@test02 wp]# groupadd -g 666 www
[root@test02 wp]# useradd -u 666 -g 666 www
[root@test02 wp]# id www
uid=666(www) gid=666(www) groups=666(www)

2修改nginx启动用户
[root@test02 wp]# vim /etc/nginx/nginx.conf

user  www;  #修改www为启动用户
worker_processes  auto;

[root@test02 wp]# systemctl restart nginx
[root@test02 wp]# # 验证 Nginx 进程用户:输出 "www" 即成功
[root@test02 wp]# ps aux | grep nginx | grep -v grep | awk '{print $1}'
root
www
www

3修改php启动用户
[root@test02 wp]# vim /etc/php-fpm.d/www.conf
user = www
group = www

[root@test02 wp]# systemctl restart php-fpm
[root@test02 wp]# # 验证 PHP-FPM 进程用户:输出 "www" 即成功
[root@test02 wp]# ps aux | grep php-fpm | grep -v grep | awk '{print $1}' | head -3
root
www
www

4统一网站目录权限
[root@test02 wp]# chown -R www.www /code/wp
[root@test02 wp]# chmod -R 755 /code/wp
到此为止,我们的lnmp架构就部署好了
安装部署wordpress
bash
1配置wordpress的conf文件
[root@test02 conf.d]#cat wp.conf
server {
listen 80;
server_name www.wp.com;
root /code/wordpress;
location / {
index index.php index.html;
}
location ~ \.php$ {
fastcgi_pass 127.0.0.1:9000;
fastcgi_param SCRIPT_FILENAME $document_root$fastcgi_script_name;
include fastcgi_params;
}
}
2语法检测
[root@wtest02 conf.d]#nginx -t
nginx: the configuration file /etc/nginx/nginx.conf syntax is ok
nginx: configuration file /etc/nginx/nginx.conf test is successful
3重启
[root@web01 conf.d]#systemctl restart nginx
4下载安装wordpress
[root@test02 conf.d]# mkdir -p /code/wp
[root@test02 conf.d]# cd /code/
[root@test02 code]# cd wp
[root@test02 wp]# wget https://cn.wordpress.org/wordpress-5.8.7-zh_CN.tar.gz
[root@test02 wp]# ls
wordpress-5.8.7-zh_CN.tar.gz
[root@test02 wp]# tar xf wordpress-5.8.7-zh_CN.tar.gz
[root@test02 wp]# ls
wordpress wordpress-5.8.7-zh_CN.tar.gz
[root@test02 wp]# mv wordpress/* .
[root@test02 wp]# ls
index.php wordpress-5.8.7-zh_CN.tar.gz wp-comments-post.php wp-includes wp-mail.php xmlrpc.php
license.txt wp-activate.php wp-config-sample.php wp-links-opml.php wp-settings.php
readme.html wp-admin wp-content wp-load.php wp-signup.php
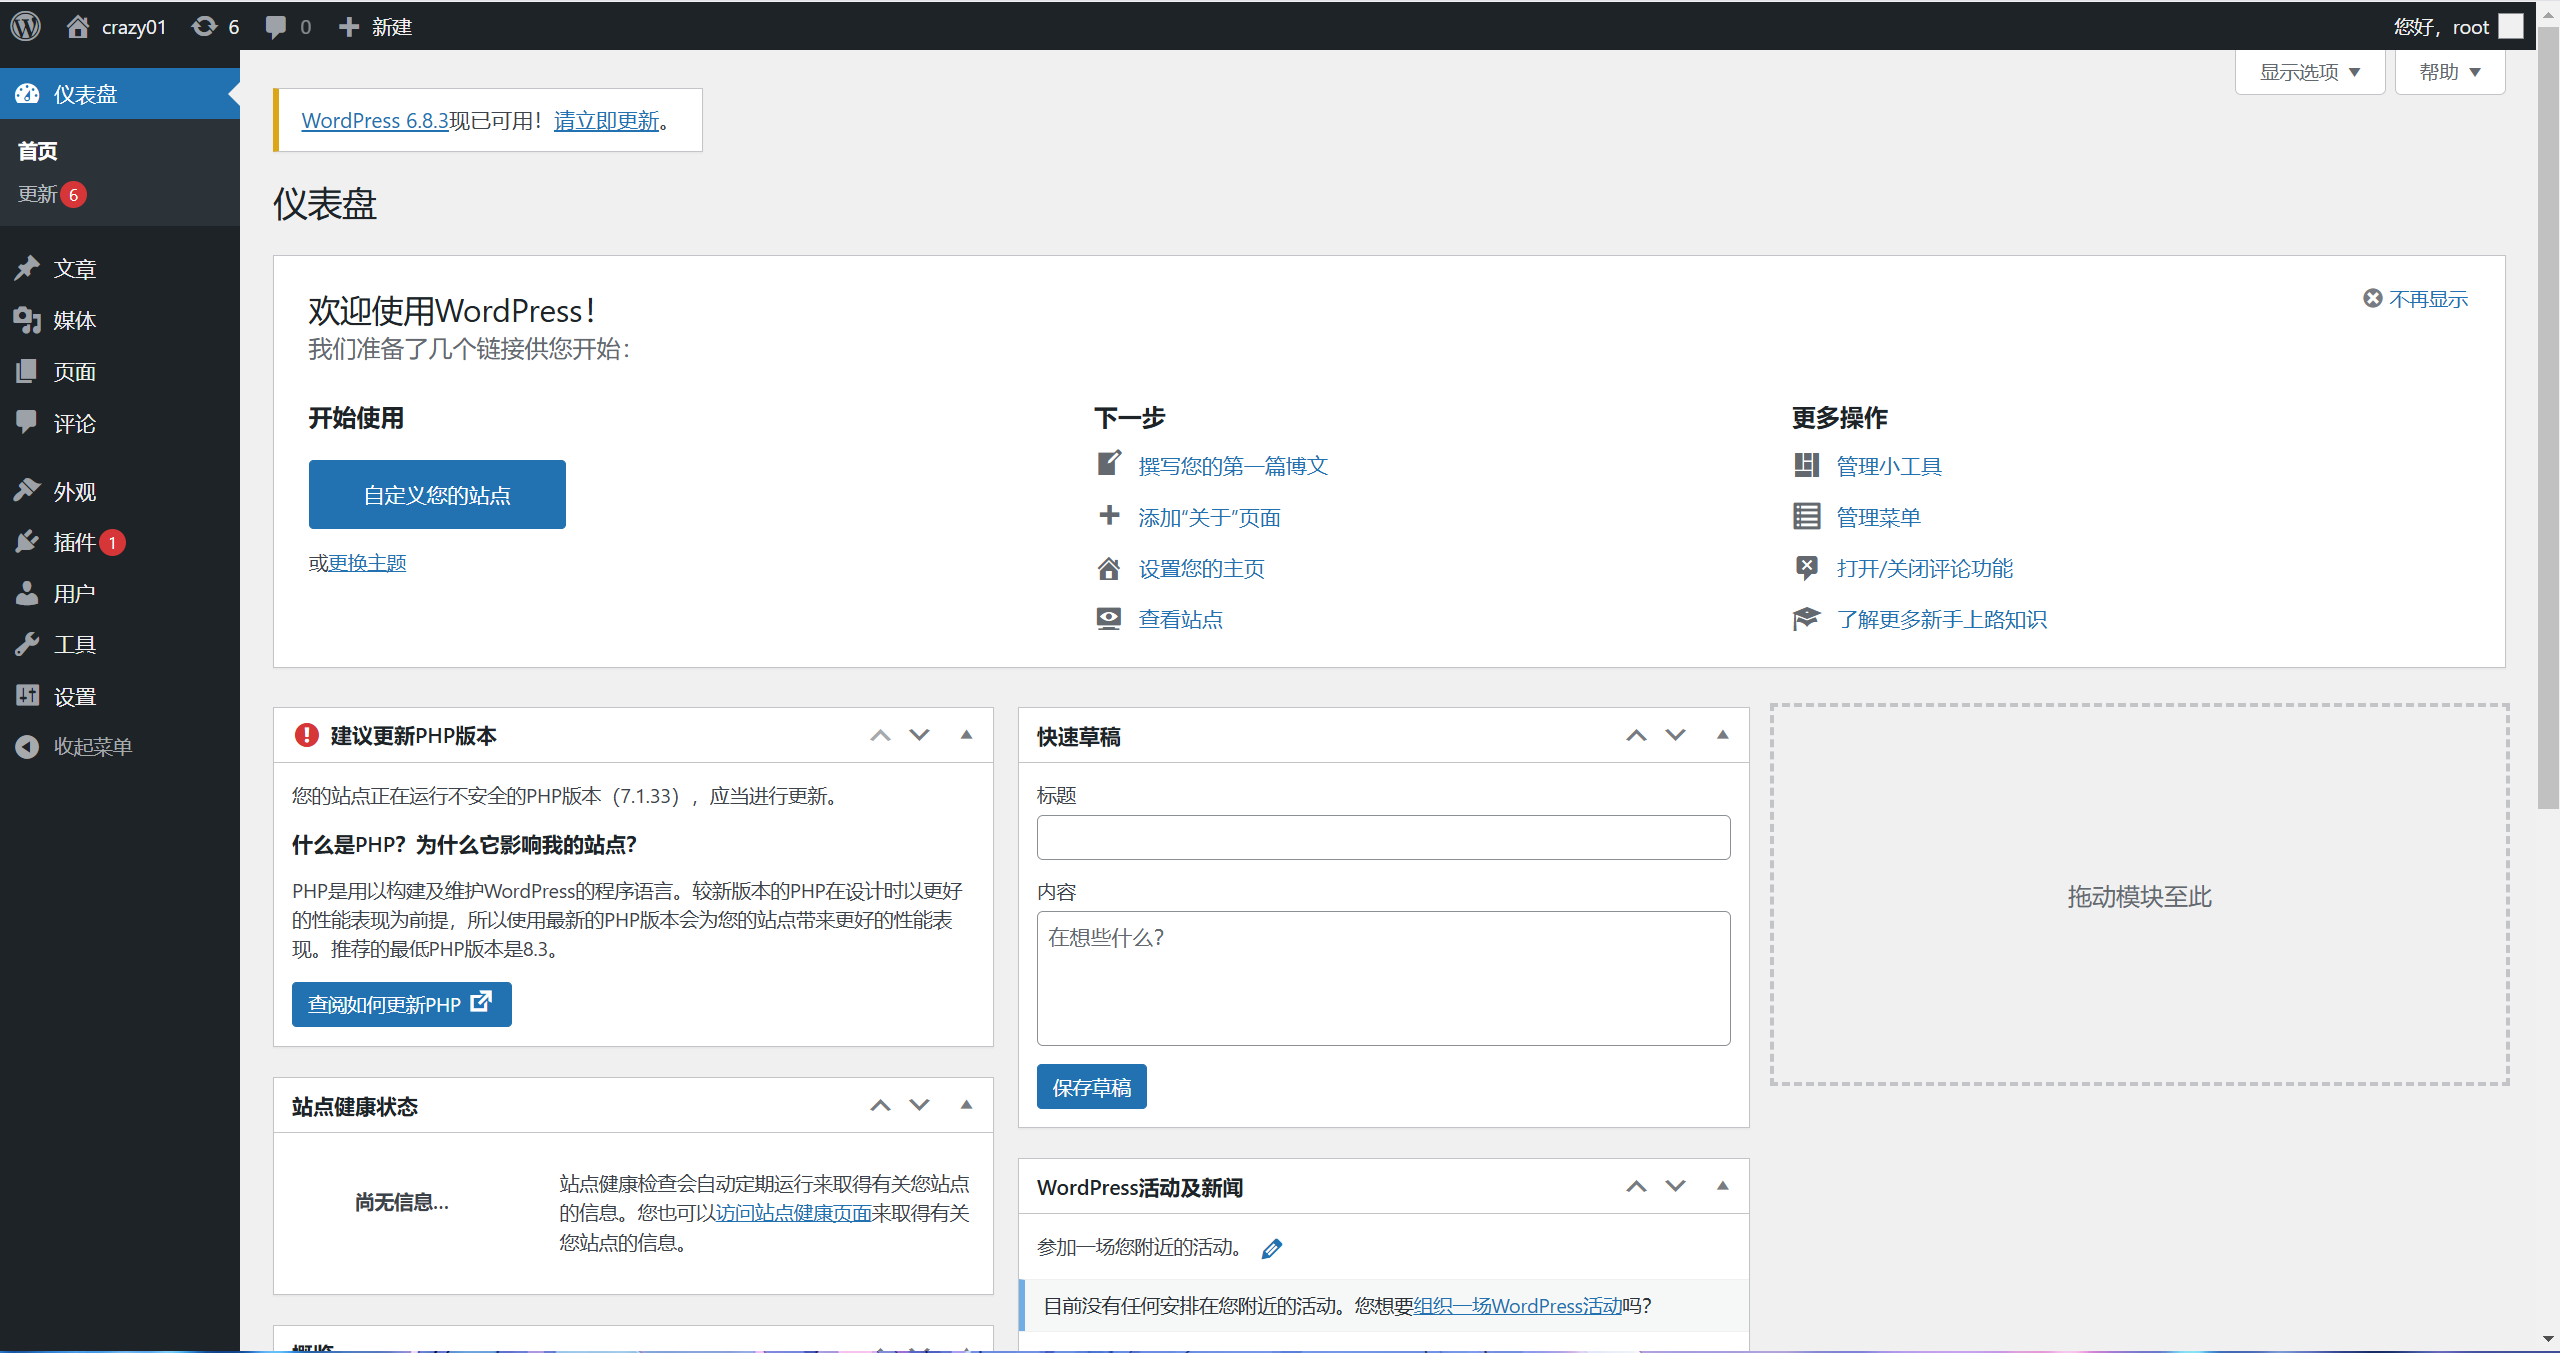
wordpress wp-blog-header.php wp-cron.php wp-login.php wp-trackback.phpwp做解析后,可以访问网页
连接数据库创建wordpress库
bash
[root@test02 wp]# mysql -uroot -p123456
Welcome to the MariaDB monitor.  Commands end with ; or \g.
Your MariaDB connection id is 14
Server version: 5.5.68-MariaDB MariaDB Server

Copyright (c) 2000, 2018, Oracle, MariaDB Corporation Ab and others.

Type 'help;' or '\h' for help. Type '\c' to clear the current input statement.

MariaDB [(none)]> create database wordpress;
Query OK, 1 row affected (0.00 sec)
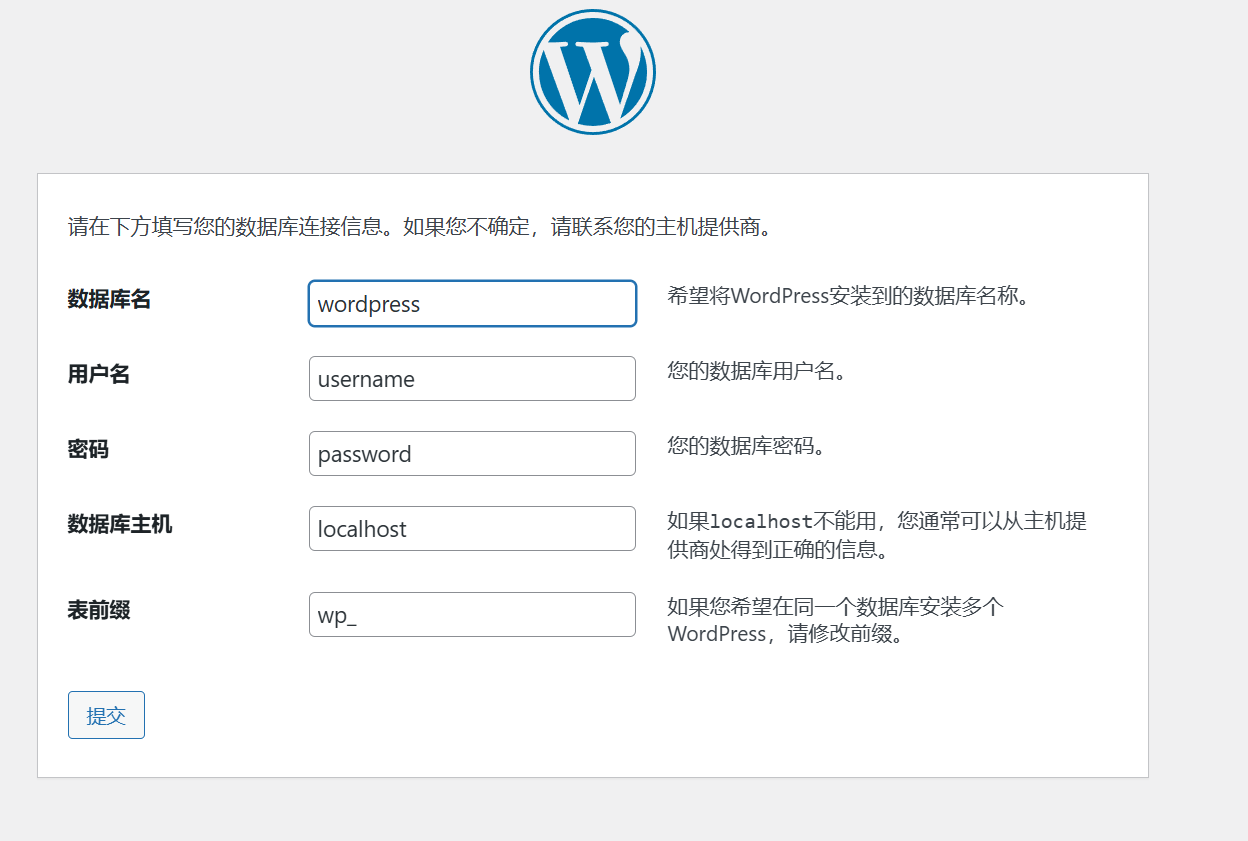
MariaDB [(none)]> 填写账号密码后配置wp-config.php文件
bash
[root@test02 wp]#vim wp-config-sample.php

// ** MySQL settings - You can get this info from your web host ** //
/** The name of the database for WordPress */
define( 'DB_NAME', 'wordpress' );

/** MySQL database username */
define( 'DB_USER', 'root' );

/** MySQL database password */
define( 'DB_PASSWORD', '123456' );

/** MySQL hostname */
define( 'DB_HOST', 'localhost' );

/** Database charset to use in creating database tables. */
define( 'DB_CHARSET', 'utf8' );

/** The database collate type. Don't change this if in doubt. */
define( 'DB_COLLATE', '' );


[root@test02 wp]# mv wp-config-sample.php wp-config.php
然后安装注册登录,布置完成