这是 OpenAI 文档中流式响应的代码 platform.openai.com/docs/guides...
jsx
import { OpenAI } from "openai";
const client = new OpenAI();

const stream = await client.responses.create({
    model: "gpt-5",
    input: [
        {
            role: "user",
            content: "Say 'double bubble bath' ten times fast.",
        },
    ],
    stream: true,
});

for await (const event of stream)
    console.log(event);
}
在我第一次看到这段代码时,有无数的疑惑出现在了我的大脑中:
stream是什么?- 为什么可以通过
for await of来遍历? - 这和异步有什么关系吗?
- 服务端要如何将
stream一点点返回给前端? - 前端要如何接收数据?
- ......
如果你也有类似的疑问,请耐心阅读本文,相信你一定能找到答案。
本文的代码在这里 github.com/wangkaiwd/a...
Iterable protocol 和 Iterator protocol
支持 for...of 循环的变量,一定要符合 Iterable protocol 和 Iterator protocol
Iterable protocol :
- 变量是一个对象
- 对象必须实现
[Symbol.iterator]方法 [Symbol.iterator]方法必须返回遵循Iterator protocol约定的对象
Iterator protocol :
- 变量是一个对象
- 对象必须实现
next方法 next方法要返回一个对象{ done: boolean, value: any }done表示迭代是否结束value表示迭代器的返回值
下面是一个示例:
jsx
function makeIterableObj (array: any[]) {
  return {
    [Symbol.iterator] () {
      let nextIndex = 0
      return {
        next () {
          if (nextIndex < array.length) {
            const result = { value: array[nextIndex], done: false }
            nextIndex++
            return result
          }
          return { done: true, value: undefined }
        },
      }
    },
  }
}

const iterableObj = makeIterableObj(['one', 'two'])
可以手动循环 iterableObj
jsx
const iterator = iterableObj[Symbol.iterator]()
while (true) {
  const { value, done } = iterator.next()
  if (done) {
    break
  }
  console.log('value', value)
}

// 输出结果
// value one
// value two
也可以通过 for...of 来循环 iterableObj :
jsx
// 这里的 item 就是 next 方法执行后得到的 value
for (const item of iterableObj) {
  console.log('item', item)
}

// 输出结果
// item one
// item two
Async iterable protocol 和 Async iterator protocol
理解了 iterable protocol 和 iterator protocol 再来理解 async iterable protocol 和 async iterator protocol 就会容易很多。
异步相比于同步,有以下区别:
- 对象必须有
[Symbol.asyncIterator]()方法 [Symbol.asyncIterator]()返回async iteratorasync iterator的next方法返回Promise,Promise成功时的值为{ value: any, done: boolean }
同样的示例改为异步版本:
jsx
const sleep = (result: IResult) => {
  return new Promise<IResult>((resolve) => {
    setTimeout(() => {
      resolve(result)
    }, 1000)
  })
}

function makeIterableObj (array: any[]) {
  return {
    [Symbol.asyncIterator] () {
      let nextIndex = 0
      return {
        next () {
          if (nextIndex < array.length) {
            const promise = sleep({ value: array[nextIndex], done: false })
            nextIndex++
            return promise
          }
          return sleep({ done: true, value: undefined })
        },
      }
    },
  }
}
手动循环:
jsx
const asyncIterableObj = makeIterableObj(['one', 'two'])
const iterator = asyncIterableObj[Symbol.asyncIterator]()
while (true) {
  const { value, done } = await iterator.next()
  if (done) {
    break
  }
  console.log('value', value)
}
使用 for await ... of 循环
jsx
for await (const item of makeIterableObj(['one', 'two'])) {
  console.log('item', item)
}
此时再回到开篇的示例:
jsx
const stream = await client.responses.create()stream 其实就是一个遵循 async iterable protocol 的对象
可读流 ReadableStream
下面是一个 ReadableStream 的示例:每隔 1s 向流中写入4个字符,直到字符完全写入到流中
jsx
let mockData = `This is a sample string that will be streamed in chunks.`

let timer: any = null
const step = 4

const stream = new ReadableStream({
  start (controller) {
    timer = setInterval(() => {
      const chunk = mockData.slice(0, step)
      // 删除已经写入的字符
      mockData = mockData.slice(step)
      if (!mockData) {
        // 字符处理完成后,停止写入
        controller.close()
        if (timer) {
          clearInterval(timer)
          timer = null
        }
      }
      // 添加字符到 stream
      controller.enqueue(chunk)
    }, 1000)
  },
  cancel () {
    clearInterval(timer)
  },
})
ReadableStream 默认实现了 Symbol.asyncIterator ,所以它是一个异步可迭代对象,可以使用 for await ... of 来循环
jsx
for await (const chunk of stream) {
  console.log('chunk', chunk)
}
ReadableStream 自己也提供了 getReader 方法来读取流:
jsx
const stream = createStream()
const reader = stream.getReader()
// 循环直到 done 为 true 时结束
while (true) {
  const { done, value } = await reader.read()
  if (done) {
    break
  }
  console.log('value', value)
}
这是 mdn 官方仓库中的一个示例,也可以结合一起学习:github.com/mdn/dom-exa...
服务端 SSE
目前的 AI 应用服务端流式响应使用 Server-Sent Events 来实现,简称 SSE 。下面是 ChatGPT 网页版的响应内容:
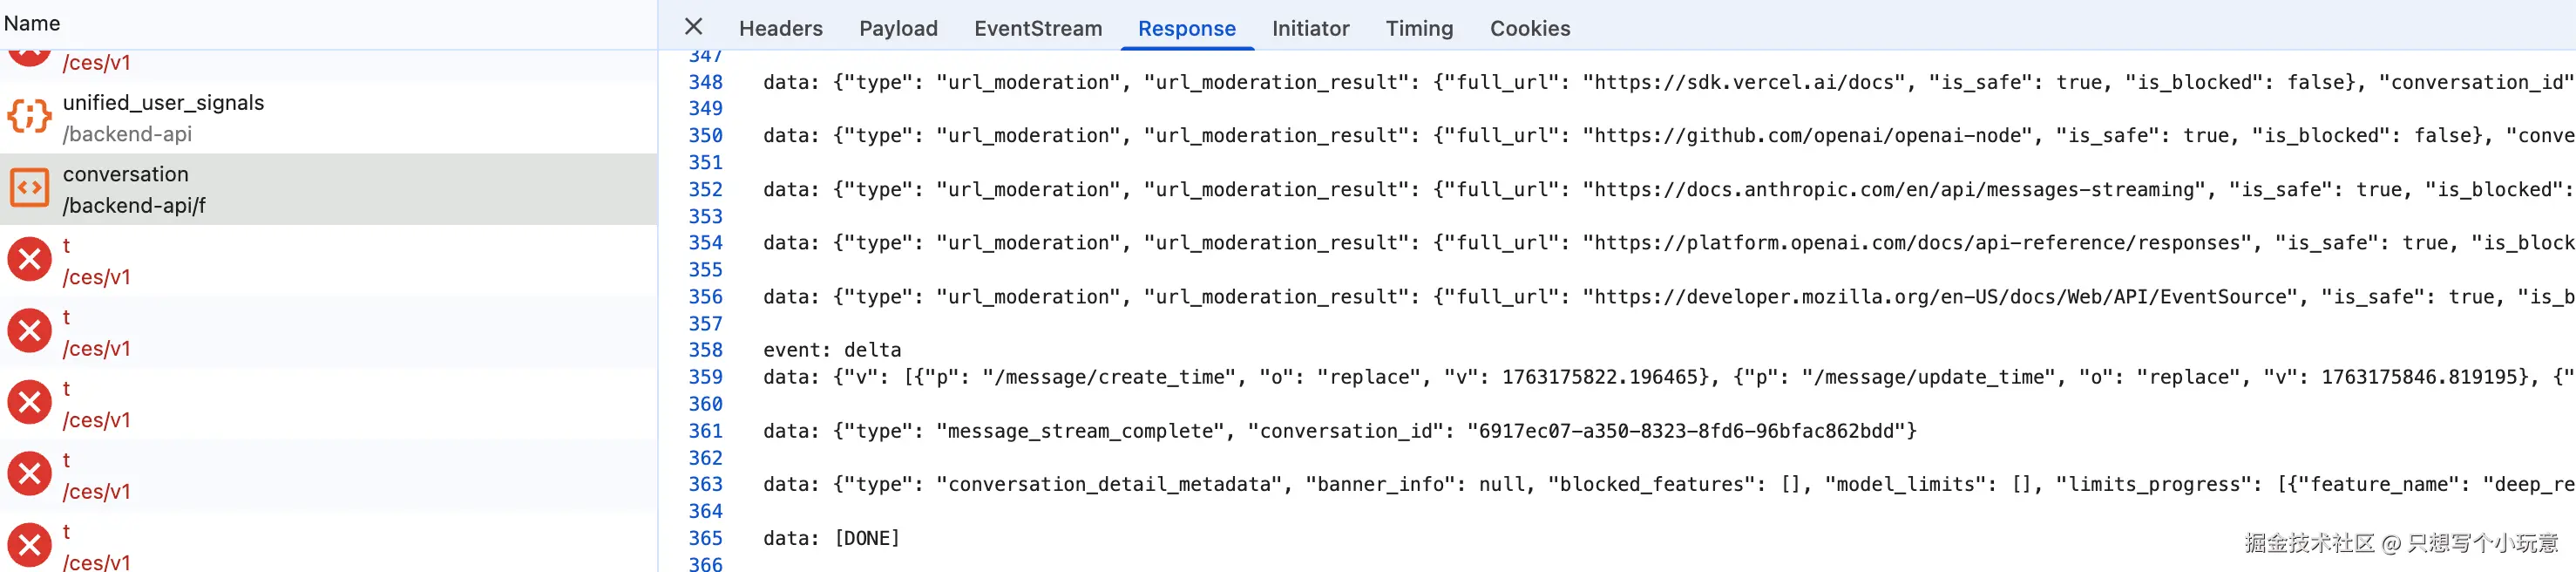
mdn 的相关介绍在这里:developer.mozilla.org/en-US/docs/...
sse 示例
MDN 的示例是使用 PHP 实现的,代码比较难懂,我也没有找到一个可以直接运行的案例。为了方便理解,我参考 stackoverflow.com/questions/3... ,使用 express 实现了流式响应:
jsx
import express from 'express'

const app = express()
app.use(express.static('public'))

app.get('/countdown', function (req, res) {
  // sse 响应头设置
  res.writeHead(200, {
    'Content-Type': 'text/event-stream',
    'Cache-Control': 'no-cache',
    'Connection': 'keep-alive',
  })
  let timer: NodeJS.Timeout | null = null
  let count = 10
  timer = setInterval(() => {
    if (count >= 0) {
      // 返回内容必须严格遵守格式
      res.write('data: ' + count + '\n\n')
      count--
      return
    }
    // count 小于0时,停止响应
    if (timer) {
      clearInterval(timer)
      timer = null
    }
    res.end()
  }, 1000)
})

app.listen(3000, () => console.log('SSE app listening on port 3000'))
这段代码会每隔 1s 在响应中写入 count ,直到 count < 0 时结束响应。
代码中以下内容需要注意:
-
响应头设置:
'Content-Type': 'text/event-stream' -
返回内容必须严格遵守格式:
data:+ 空格 + 字符串 + 两个换行符 (\n\n)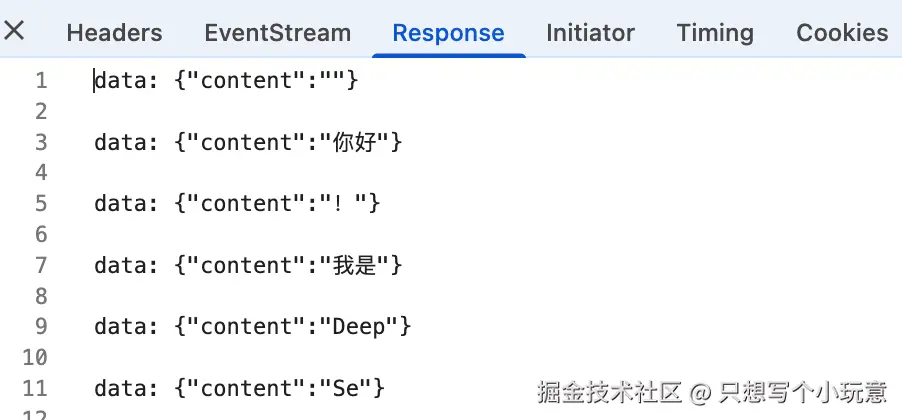
AI 流式响应
上面我们先实现了一个简单的流式响应,现在我们把 AI 结合进来
jsx
const client = new OpenAI({
  apiKey: process.env.OPENAI_API_KEY,
  baseURL: 'https://api.deepseek.com',
})

const app = express()
app.use(express.static('public'))

app.get('/chat', async function (req, res) {
  res.writeHead(200, {
    'Content-Type': 'text/event-stream',
    'Cache-Control': 'no-cache',
    'Connection': 'keep-alive',
  })
  const stream = await client.chat.completions.create({
    model: 'deepseek-chat',
    messages: [{ role: 'user', content: '你是谁?' }],
    stream: true,
  })
  for await (const chunk of stream) {
    const content = chunk.choices[0].delta.content
    // 注意:这里通过 JSON.stringify 来返回 JSON 字符串,更加灵活
    res.write(`data: ${JSON.stringify({ content })}\n\n`)
  }
  res.write(`data: [DONE]\n\n`)
  res.end()
})

app.listen(3000, () => console.log(`
SSE app listening on port 3000
Open http://localhost:3000/sse-ai.html in your browser to access page.
`))
有以下几点需要注意:
-
如果使用的是
OpenAI兼容的api,例如我在当前示例中使用的deepseek,要使用之前的OpenAI请求标准:github.com/openai/open... 用法和传参都不一样,需要特别留意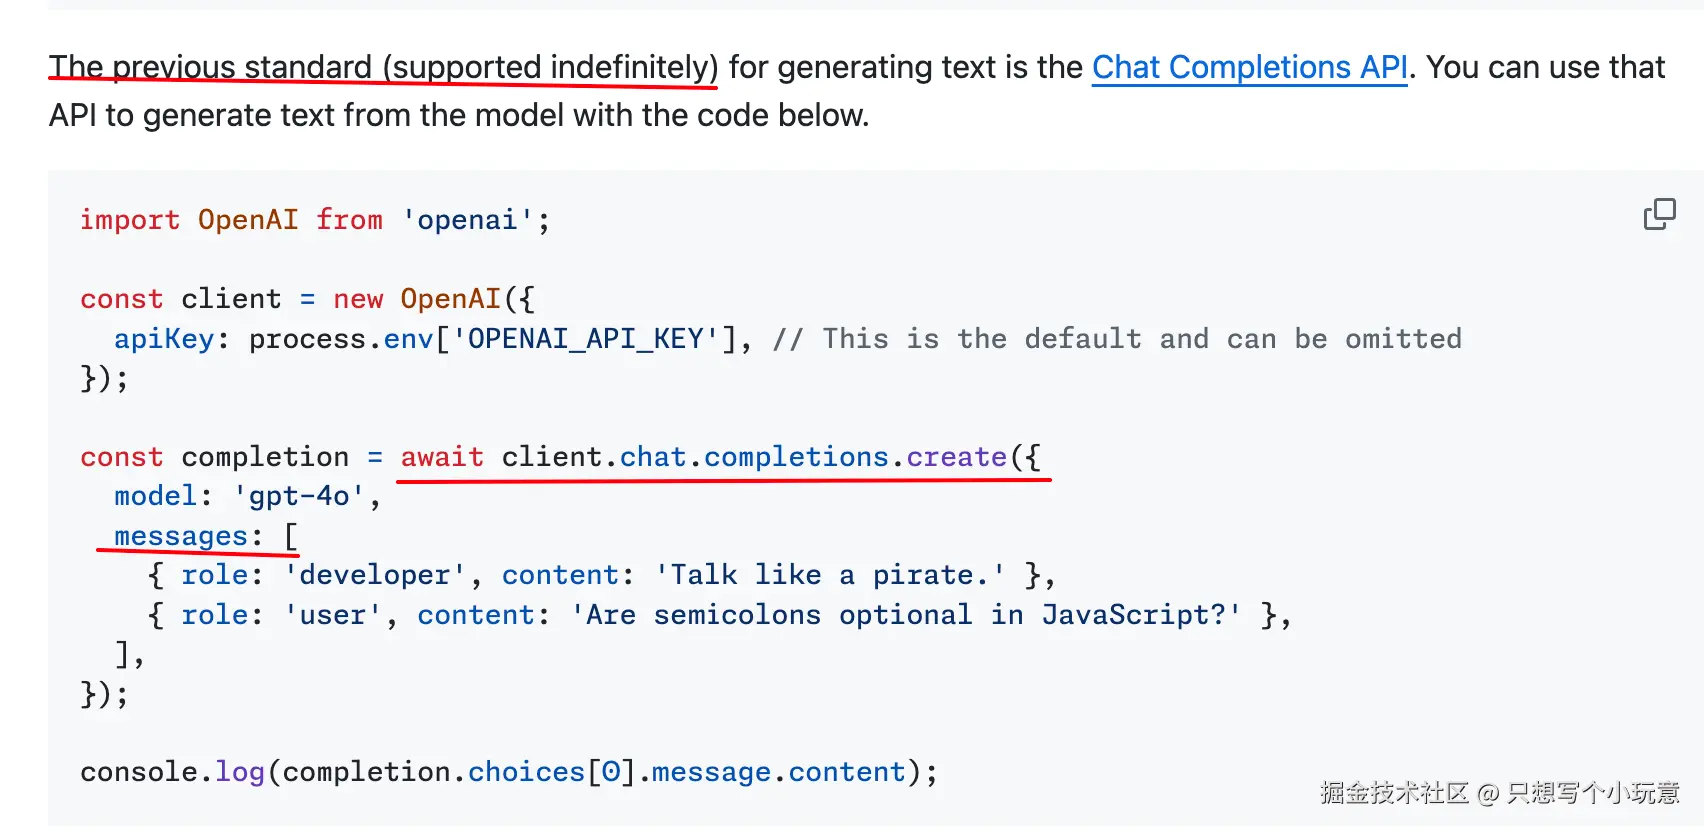
-
返回内容要通过
JSON.stringify来处理,方便我们给前端返回更多字段 -
结束时返回
res.write(data: DONE\n\n),方便前端使用EventSource时终止请求
前端处理流式响应
EventSource
前端可以使用 EventSource 来处理 sse 响应的内容,代码如下:
jsx
const stop = document.getElementById('stop')
const start = document.getElementById('start')
let eventSource = null
start.addEventListener('click', () => {
  const eventSource = new EventSource('/chat')
  eventSource.onmessage = function (event) {
    // 要手动关闭,否则会一直请求服务器
    if (event.data === '[DONE]') {
      eventSource.close()
      return
    }
    const json = JSON.parse(event.data)
    document.getElementById('log').innerHTML += json.content
  }
})
stop.addEventListener('click', function () {
  eventSource.close()
})完整代码:github.com/wangkaiwd/a...
EventSource 有一个细节需要注意:
如果没有调用 eventSource.close() 方法,那么请求会一直不停的发起 。所以我在服务端特意在响应结束时返回 data: [DONE]\n\n 来让前端知道什么时候关闭 eventSource
fetch
前面我们介绍了通过 EventSource 来处理服务端的流式响应,但其实它存在很多问题:
- 只能发起
get请求 - 请求参数只能在
url中传递,但是一般要传入给AI的提示词长度可能较大,容易超过url长度的最大限制 - 无法自定义请求头来设置
Authorization,给服务端传递用户token
基于上述的这些原因,我们通常会使用 fetch 方法来处理服务端的流式响应。github.com/Azure/fetch... 就是基于 fetch 实现的用来发起 EventSource 请求的开源库,下面是它的使用示例:
jsx
<script type="module">
  import { fetchEventSource } from "https://esm.sh/@microsoft/fetch-event-source";

  const stop = document.getElementById("stop");
  const start = document.getElementById("start");
  const controller = new AbortController();
  start.addEventListener("click", () => {
    // 发起post请求
    fetchEventSource("/chat", {
      signal: controller.signal,
      method: "POST",
      // 一点点处理服务端响应
      onmessage: (event) => {
        const data = event.data;
        if (data === "[DONE]") {
          console.log("done");
          return;
        }
        const json = JSON.parse(data);
        document.getElementById("log").innerHTML += json.content;
      },
    });
  });
  stop.addEventListener("click", function () {
    controller.abort();
  });
</script>完整代码:github.com/wangkaiwd/a...
这里使用的 POST 请求,我把服务端的示例改为了 all 方法来接收请求,可以同时处理 GET 和 POST 请求
我们也可以自己通过 fetch 请求来看看具体的响应内容
jsx
const response = await fetch("/chat", {
  signal: controller.signal,
  method: "POST",
});
这里的 response.body 就是一个 ReadableStream (ps: 前面的章节有介绍过ReadableStream ,忘记的同学可以再回去看一下 ),所以我们可以通过 for await ... of 或者 getReader 方法来拿到 ReadableStream 中的数据:
jsx
const textDecoder = new TextDecoder();
// response.body 是可读流
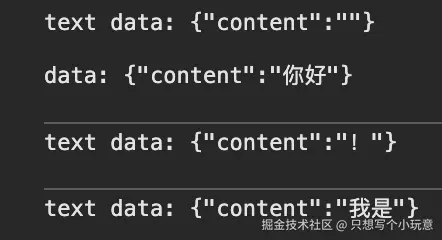
for await (const chunk of response.body) {
// chunk 是 Uint8Array ,通过 TextDecoder 转换为字符串
console.log('chunk', chunk)
const text = textDecoder.decode(chunk);
if (text === "[DONE]") {
console.log("done");
return;
}
console.log('text', text)
}
// 使用 getReader 方法获取数据
// const reader = response.body.getReader();
// while (true) {
// const { done, value } = await reader.read();
// if (done) {
// break;
// }
// const text = textDecoder.decode(value);
// if (text === "[DONE]") {
// console.log("done");
// return;
// }
// console.log('text', text)
// }最终结果如下:
我们拿到的是服务端返回符合 SSE 规范的字符串,将字符根据规则解析后,就能拿到最终的结果了。这其实就是 fetch-event-source 帮我们实现的逻辑
踩坑
我在使用 fetch-event-source 的过程中发现了如下问题:
如果服务端返回的内容只包含 \n ,那么前端接收到的内容为空字符。在 markdown 渲染的场景下,会导致格式完全错乱。 下面是伪代码,方便理解
jsx
// 服务端如果返回的内容如果只包含 \n
res.write('data: ' + '\n\n' + '\n\n')

// 前端拿到的内容为空字符串
onmessage: (event) => {
  const data = event.data;
  // true
  console.log(data === '')
}
官方也有相关的 issue 一直没有修复:github.com/Azure/fetch...
所以在使用 fetch-event-source 时可以通过 JSON.stringify 来传入 json 字符串,防止前端接收到空字符串
jsx
const content = chunk.choices[0].delta.content
// JSON.stringify 避免了返回内容只有 `\n` 的情况
res.write(`data: ${JSON.stringify({ content })}\n\n`)
结语
在 AI 出现之前,这些知识很少有使用场景。但随着 AI 的快速发展,这些代码不断地出现在我眼前,也让我有了更多实践的机会。这篇文章是我在实践中的一些沉淀和总结,希望能帮到你。