如果跟着我完成了前面的一些学习,相信你也对ai有一定程度的了解了,话不多说我们下一步继续学手搓一个简单的ReAct Agent,如果你不了解什么是ReAct的话可以百度或者问一下AI,相信AI可以给你很详细的解答。
起步
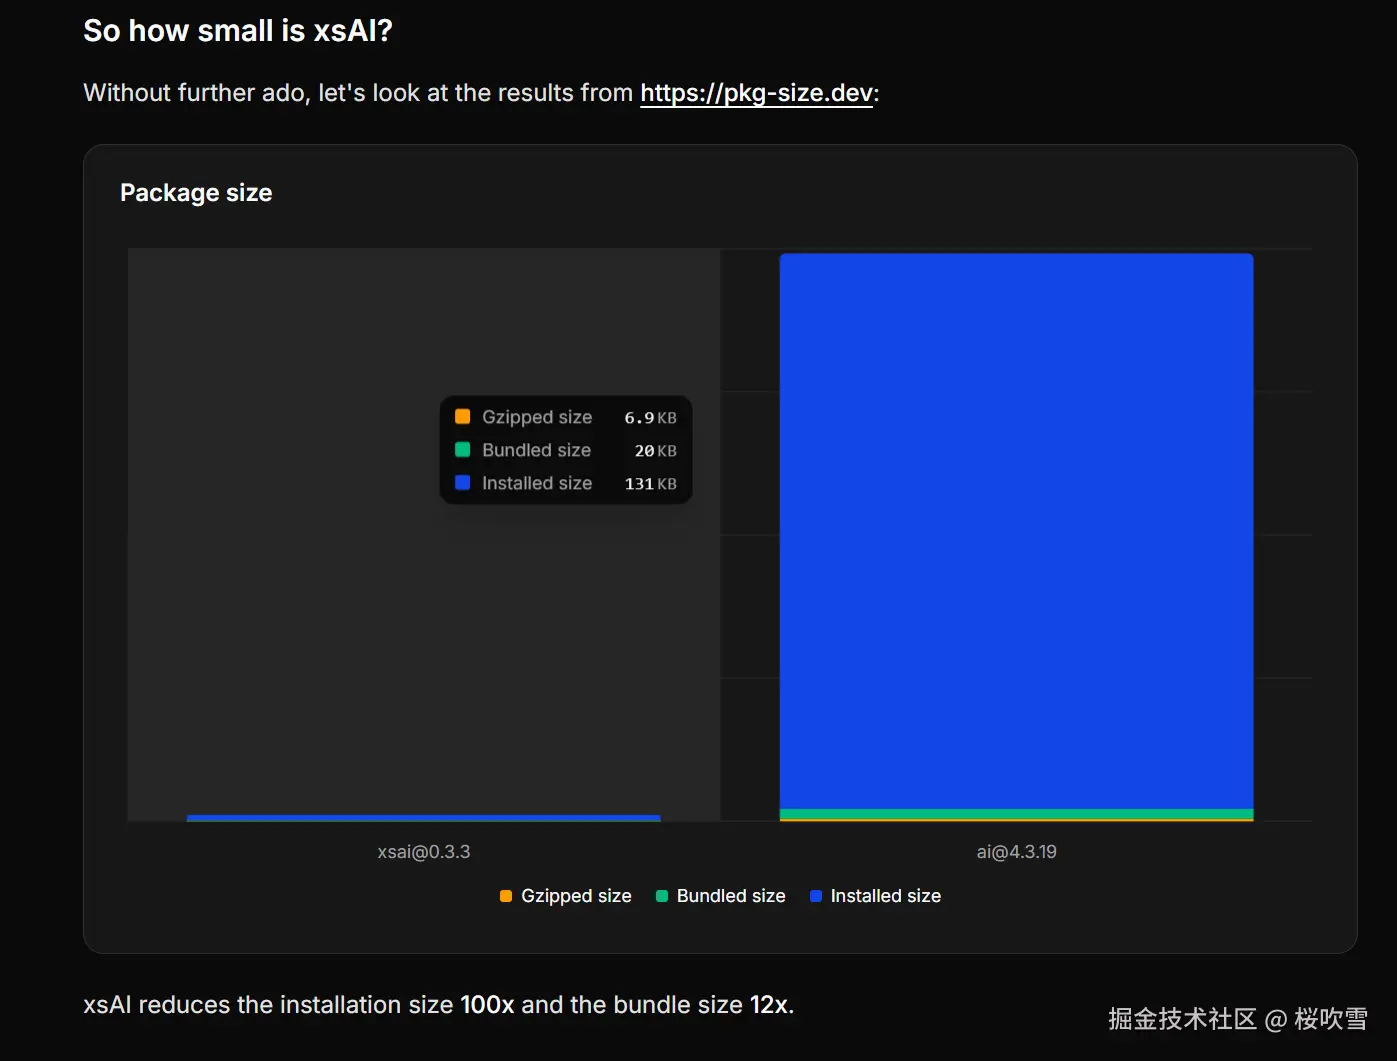
既然是手搓的话,咱们就先不用前面用到的Langchain.js了(手搓完再展示Langchain.js v1.0的createAgent),这里使用一个非常轻便的库:xsai,相对于Langchain.js动不动几十MB的安装依赖,xsai就要小很多了
然后js运行时咱们选非常好用的Bun,因为内置了很多好用的工具,比如Monorepo、env管理等等
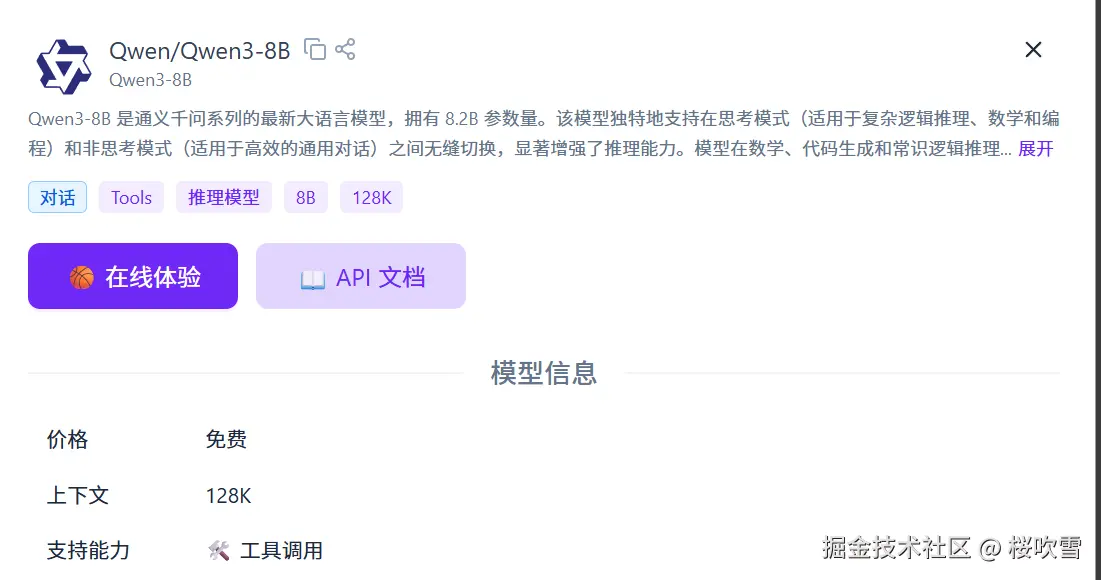
然后模型选择,既然叫ReAct,那么我们需要一个能够推理思考的模型,当然你也可以写提示词让非推理模型生成推理链,不过现在是5202年末,各大厂商都有推出非常牛逼的推理模型,那么咱们简单点选个推理模型就好了,这里我选择了Qwen3-8B,使用ollama本地运行(其实是最近换了新显卡发现本地跑小模型也挺快的),当然也可以选择一些云计算平台,比如火山、百炼等等,都有几十上百万的免费token,要是用完了想白嫖也可以选择硅基流动的免费模型!
除此之外也没啥多余的东西了,那么开始操作吧
sh
bun init

✓ Select a project template: Blank

 + .gitignore
 + index.ts
 + tsconfig.json (for editor autocomplete)
 + README.md

To get started, run:

    bun run index.ts
sh
bun add @xsai/shared-chat @xsai/tool @xsai/utils-chat zod编写代码
为了方便演示,代码就不拆分文件了,直接写到底,并用简单说明一下:
ts
import {
  chat,
  type AssistantMessage,
  type FinishReason,
  type Message,
  type Tool,
  type Usage,
} from "@xsai/shared-chat";
import { tool } from "@xsai/tool";
import { message } from "@xsai/utils-chat";
import * as z from "zod";

//#region openai 返回结构
export interface Choice {
  finish_reason: FinishReason;
  index: number;
  message: AssistantMessage;
}

export interface ChatCompletionsResponse {
  choices: Choice[];
  created: number;
  id: string;
  model: string;
  object: "chat.completion";
  system_fingerprint: string;
  usage: Usage;
}
//#endregion

// 方便生成message
export const assistant = message.assistant;
export const system = message.system;
export const user = message.user;

// 用来创建agent
export function createAgent(options: {
  provider: {
    baseURL: string;
    apiKey: string;
    model: string;
  };
  tools?: Tool[];
}) {
  // call:让agent开始工作
  async function call(
    messages: Message[],
    callOptions: { maxRoundTrip: number } = { maxRoundTrip: 10 }
  ) {
    let count = 0;
    // 限制一下agent最大运行步数
    while (count < callOptions.maxRoundTrip) {
      const res = await chat({
        ...options.provider,
        baseURL: options.provider.baseURL,
        model: options.provider.model,
        messages,
        tools: options.tools,
      });
      const cmplResp = (await res.json()) as ChatCompletionsResponse;
      console.log(JSON.stringify(cmplResp.choices[0], null, 2));
      const toolCalls = cmplResp.choices[0]?.message.tool_calls;
      // 判断是否函数调用,如果没有函数调用说明结束工作,已经得到结果
      if (!toolCalls?.length) {
        return cmplResp;
      }
      // 将tool_calls加入到messages上下文中,方便ai判读已经调用过说明函数
      messages.push(assistant(toolCalls[0]));
      for (const choice of cmplResp.choices) {
        if (!choice.message.tool_calls) {
          continue;
        }
        for (const toolCall of choice.message.tool_calls) {
          // 找到tool
          const foundTool = options.tools?.find(
            (tool) => tool.function.name === toolCall.function.name
          );
          if (!foundTool) {
            continue;
          }
          // 调用tool拿到结果
          const invokeResult = await foundTool.execute(
            JSON.parse(toolCall.function.arguments || "{}"),
            {
              messages,
              toolCallId: toolCall.id,
            }
          );
          // 将结果加入到上下文中
          messages.push({
            role: "tool",
            content:
              invokeResult === "string"
                ? invokeResult
                : JSON.stringify(invokeResult),
            tool_call_id: toolCall.id,
          });
        }
      }
      // 完成一次函数调用
      count++;
    }
  }
  return { call };
}

async function main() {
  // 创建工具
  const getCity = await tool({
    name: "getCity",
    description: "Get the user's city",
    execute: () => "广州",
    parameters: z.object({}),
  });
  const getCityCode = await tool({
    name: "getCityCode",
    description: "Get the user's city code with search",
    execute: () => "Guangzhou",
    parameters: z.object({
      location: z
        .string()
        .min(1)
        .describe("Get the user's city code with search"),
    }),
  });
  const getWeather = await tool({
    name: "getWeather",
    description: "Get the city code weather",
    execute: ({ cityCode }) => ({
      city: `广州`,
      cityCode,
      weather: "sunny",
      degreesCelsius: 26,
    }),
    parameters: z.object({
      cityCode: z.string().min(1).describe("Get the city code weather"),
    }),
  });
  // 创建agent
  const { call } = createAgent({
    provider: {
      baseURL: "http://localhost:11434/v1",
      apiKey: "unused",
      model: "qwen3:8b",
    },
    tools: [getCity, getCityCode, getWeather],
  });
  // 运行
  const res = await call([
    system(
      "我是一名乐于助人的助手,负责为用户提供所需信息。用户可能提出任何问题,请识别用户的需求,并选用合适的工具来获取必要信息。"
    ),
    user("今天天气怎么样?"),
  ]);
  // 观察执行结果
  console.log(res?.choices[0]?.message.content);
}

main();
执行一下,查看结果:
sh
bun index.ts

今天广州的天气是晴天,气温28摄氏度。
是不是很简单通俗易懂。
邪修(bushi)快捷办法
当然你可以参考上面的办法简单封装一下,或者,也不是不可以用别人写好的办法,比如langchain.js的办法
sh
bun add langchain @langchain/openai编写代码!
ts
import { ChatOpenAI } from "@langchain/openai";
import { createAgent, tool } from "langchain";
import * as z from "zod";

const getCity = tool(() => "广州", {
  name: "getCity",
  description: "Get the user's city",
  schema: z.object({}),
});

const getCityCode = tool(() => "Guangzhou", {
  name: "getCityCode",
  description: "Get the user's city code with search",
  schema: z.object({
    location: z
      .string()
      .min(1)
      .describe("Get the user's city code with search"),
  }),
});
const getWeather = tool(
  ({ cityCode }) => ({
    city: `广州`,
    cityCode,
    weather: "sunny",
    degreesCelsius: 28,
  }),
  {
    name: "getWeather",
    description: "Get the city code weather",
    schema: z.object({
      cityCode: z.string().min(1).describe("Get the city code weather"),
    }),
  }
);

const agent = createAgent({
  model: new ChatOpenAI({
    configuration: {
      baseURL: "http://localhost:11434/v1",
    },
    apiKey: "unused",
    model: "qwen3:8b",
  }),
  tools: [getCity, getCityCode, getWeather],
  systemPrompt: "You are a helpful assistant.",
});

const result = await agent.invoke({
  messages: [{ role: "user", content: "今天天气怎么样" }],
});

console.log(result.messages.at(-1)?.content);
sh
bun langchain-agent.ts
今天广州的天气晴朗,气温28摄氏度。
嗯,很简单粗暴,很邪修(
你学废了吗!