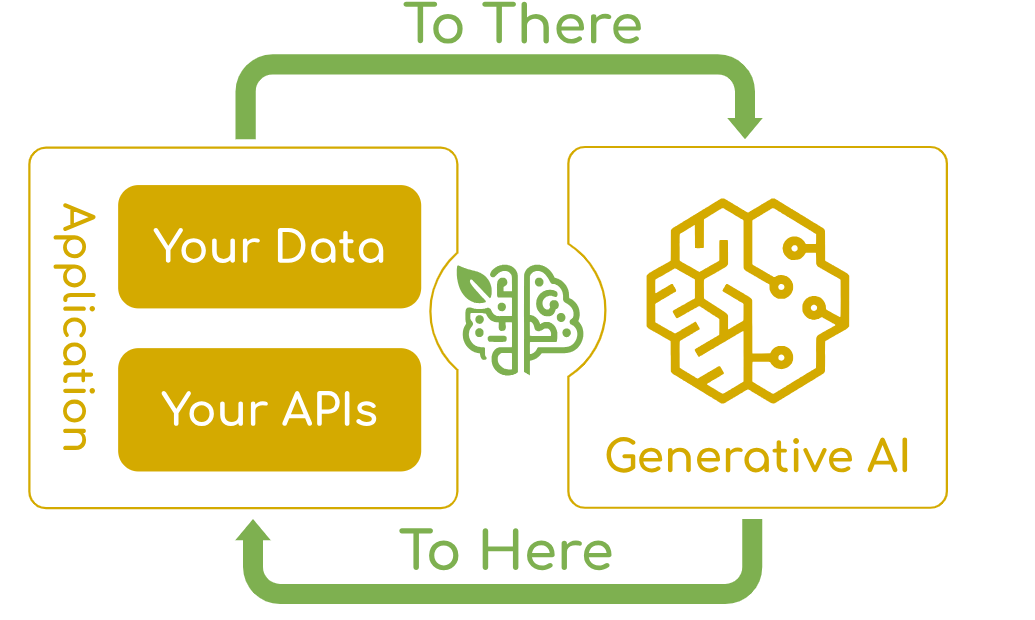
本文带你体验 Spring AI 这一革命性框架,只需简单几步即可为 Spring Boot 应用注入 AI 能力。
什么是 Spring AI?
Spring AI 是 Spring 官方社区推出的开源框架,致力于简化 Java AI 应用程序开发。它的核心目标是将 Spring 生态中成熟的设计原则应用到 AI 领域,让开发者能够以熟悉的 Spring 方式来构建智能应用。
核心价值
- 统一 API:通过便携的 API 集成多种 AI 模型(OpenAI、Anthropic、Google、阿里云通义等)
- 企业级功能:内置函数调用、结构化输出、可观测性等生产级特性
- 简化开发:延续 Spring "简化开发"的哲学,大幅降低 AI 集成复杂度
环境准备
在开始之前,请确保你的开发环境满足以下要求:
- JDK 17 或更高版本(Spring AI 强制要求)
- Maven 3.6+ 或 Gradle
- Spring Boot 3.x
- 可用的 OpenAI API 密钥
项目搭建
1. 创建 Spring Boot 项目
通过 Spring Initializr 创建新项目,选择:
- Spring Boot 3.3+
- JDK 17
- 依赖项:Spring Web
2. 添加 Spring AI 依赖
在 pom.xml 中添加以下配置:
<?xml version="1.0" encoding="UTF-8"?>
<project xmlns="http://maven.apache.org/POM/4.0.0">
    <!-- 其他基础配置 -->

    <dependencies>
        <dependency>
            <groupId>org.springframework.boot</groupId>
            <artifactId>spring-boot-starter-web</artifactId>
        </dependency>
        <!-- Spring AI OpenAI Starter -->
        <dependency>
            <groupId>org.springframework.ai</groupId>
            <artifactId>spring-ai-openai-spring-boot-starter</artifactId>
        </dependency>
    </dependencies>
    <!-- 添加 Spring AI BOM -->
    <dependencyManagement>
        <dependencies>
            <dependency>
                <groupId>org.springframework.ai</groupId>
                <artifactId>spring-ai-bom</artifactId>
                <version>0.8.1</version>
                <type>pom</type>
                <scope>import</scope>
            </dependency>
        </dependencies>
    </dependencyManagement>
    <!-- 添加 Spring Snapshots 仓库 -->
    <repositories>
        <repository>
            <id>spring-snapshots</id>
            <url>https://repo.spring.io/snapshot</url>
            <snapshots>
                <enabled>true</enabled>
            </snapshots>
        </repository>
    </repositories>
</project>注意:由于 Spring AI 尚未发布到中央仓库,需要添加 Spring Snapshots 仓库。
应用配置
配置文件
在 application.properties 中配置 OpenAI:
# OpenAI 配置
spring.ai.openai.api-key=${OPENAI_API_KEY:你的OpenAI-API密钥}
spring.ai.openai.chat.options.model=gpt-3.5-turbo
spring.ai.openai.chat.options.temperature=0.7
或者使用 YAML 格式的 application.yml:
spring:
  ai:
    openai:
      api-key: ${OPENAI_API_KEY:你的OpenAI-API密钥}
      chat:
        options:
          model: gpt-3.5-turbo
temperature: 0.7安全提示:建议通过环境变量设置 API 密钥:
export OPENAI_API_KEY='你的实际API密钥'核心代码实现
主应用类
创建应用启动类 SpringAiDemoApplication.java:
package com.example.springaidemo;

import org.springframework.boot.SpringApplication;
import org.springframework.boot.autoconfigure.SpringBootApplication;

@SpringBootApplication
public class SpringAiDemoApplication {

    public static void main(String[] args) {
        SpringApplication.run(SpringAiDemoApplication.class, args);
        System.out.println("🎯 Spring AI Demo 应用启动成功!");
        System.out.println("📍 访问 http://localhost:8080/ai/chat?message=你好 测试AI功能");
    }
}
AI 控制器
创建 AiController.java,提供多种 AI 交互接口:
package com.example.springaidemo.controller;

import org.springframework.ai.chat.ChatClient;
import org.springframework.ai.chat.ChatResponse;
import org.springframework.ai.openai.OpenAiChatOptions;
import org.springframework.beans.factory.annotation.Autowired;
import org.springframework.web.bind.annotation.*;

@RestController
@RequestMapping("/ai")
public class AiController {

    private final ChatClient chatClient;

    @Autowired
    public AiController(ChatClient chatClient) {
        this.chatClient = chatClient;
    }

    /**
     * 基础聊天接口
     * 示例: GET /ai/chat?message=你好
     */
    @GetMapping("/chat")
    public String chat(@RequestParam String message) {
        return chatClient.call(message);
    }

    /**
     * 详细响应接口 - 返回完整的响应信息
     * 示例: POST /ai/chat/detailed {"message": "介绍Spring AI"}
     */
    @PostMapping("/chat/detailed")
    public ChatResponse detailedChat(@RequestBody ChatRequest request) {
        return chatClient.call(request.toPrompt());
    }

    /**
     * 高级聊天接口 - 支持自定义参数
     * 示例: GET /ai/chat/advanced?message=用100字介绍Java
     */
    @GetMapping("/chat/advanced")
    public String advancedChat(@RequestParam String message) {
        OpenAiChatOptions options = OpenAiChatOptions.builder()
                .withModel("gpt-3.5-turbo")
                .withTemperature(0.4F)  // 控制创造性,越低越确定
                .withMaxTokens(500)     // 限制响应长度
                .build();

        return chatClient.call(message, options);
    }

    /**
     * 健康检查接口
     */
    @GetMapping("/health")
    public String health() {
        return "✅ Spring AI Demo 应用运行正常!";
    }

    /**
     * 聊天请求 DTO
     */
    public static class ChatRequest {
        private String message;
        private String model;

        // Getter 和 Setter
        public String getMessage() { return message; }
        public void setMessage(String message) { this.message = message; }
        public String getModel() { return model; }
        public void setModel(String model) { this.model = model; }

        public org.springframework.ai.prompt.Prompt toPrompt() {
            return new org.springframework.ai.prompt.Prompt(this.message);
        }
    }
}
运行和测试
启动应用
使用 Maven 启动应用:
mvn spring-boot:run看到以下输出表示启动成功:
🎯 Spring AI Demo 应用启动成功!
📍 访问 http://localhost:8080/ai/chat?message=你好 测试AI功能
API 测试
1. 基础聊天测试
curl "http://localhost:8080/ai/chat?message=给我讲一个编程相关的笑话"2. 带详细响应测试
curl -X POST "http://localhost:8080/ai/chat/detailed" \
  -H "Content-Type: application/json" \
  -d '{"message": "用三句话介绍微服务架构"}'
3. 高级参数测试
curl "http://localhost:8080/ai/chat/advanced?message=用简洁的语言解释设计模式"4. 健康检查
curl "http://localhost:8080/ai/health"5. 浏览器测试
直接在浏览器访问:
http://localhost:8080/ai/chat?message=你好,请介绍一下Spring框架的优势进阶:集成阿里云通义千问
如果你希望使用国产模型,Spring AI 同样支持阿里云的通义千问:
1. 修改依赖
<dependency>
    <groupId>com.alibaba.cloud</groupId>
    <artifactId>spring-ai-alibaba-starter</artifactId>
    <version>2023.0.1.0</version>
</dependency>
2. 配置通义千问
# 阿里云通义千问配置
spring.ai.dashscope.api-key=你的阿里云API-KEY
spring.ai.dashscope.chat.options.model=qwen-turbo
项目结构说明
完成后的项目结构如下:
spring-ai-demo/
├── src/
│   └── main/
│       ├── java/
│       │   └── com/example/springaidemo/
│       │       ├── controller/
│       │       │   └── AiController.java          # AI 控制器
│       │       └── SpringAiDemoApplication.java   # 主应用类
│       └── resources/
│           ├── application.properties             # 应用配置
│           └── static/                            # 静态资源(可选)
├── pom.xml                                        # Maven 依赖配置
└── README.md
生产环境注意事项
- API 密钥管理
-
- 使用环境变量或配置中心管理敏感信息
- 不要将密钥硬编码在代码中
- 错误处理
-
- 添加全局异常处理
- 实现重试机制应对 API 限流
- 性能优化
-
- 合理设置超时时间
- 使用连接池管理 API 连接
- 监控观测
-
- 集成 Spring Boot Actuator 进行健康检查
- 添加日志记录和性能指标
扩展应用场景
基于这个基础 Demo,你可以进一步扩展实现:
- 🤖 智能客服系统:结合 RAG 模式接入企业知识库
- 📝 内容生成工具:自动生成产品描述、邮件模板等
- 🔍 智能搜索引擎:基于语义理解的文档检索
- 💡 代码助手:企业内部代码生成和审查工具
总结
Spring AI 极大地降低了在 Java 应用中集成 AI 能力的门槛。通过本文的实战演示,你可以看到:
- ✅ 快速集成:只需少量配置即可接入主流 AI 模型
- ✅ 统一抽象:相同的代码可适配不同 AI 提供商
- ✅ 生产就绪:内置企业级功能和安全考量
- ✅ 生态完善:与 Spring 生态无缝集成
Spring AI 目前仍处于快速发展阶段,但已经展现出强大的潜力和实用性。无论是构建简单的聊天机器人,还是复杂的企业级 AI 应用,Spring AI 都提供了优雅的解决方案。
