1.每日复盘与今日内容
1.1复盘
- 持续集成/持续交付的服务器准备
- git的使用🍟🍟🍟🍟🍟(基本语法、版本回滚、标签、分支)
- gitlab的安装
1.2今日内容
- gitlab的两种代码上传方式
- gitlab合并请求
- Jenkins的安装部署
- Jenkins自动拉取代码更新
- SonarQube代码自动检测
2.gitlab
第一种方式
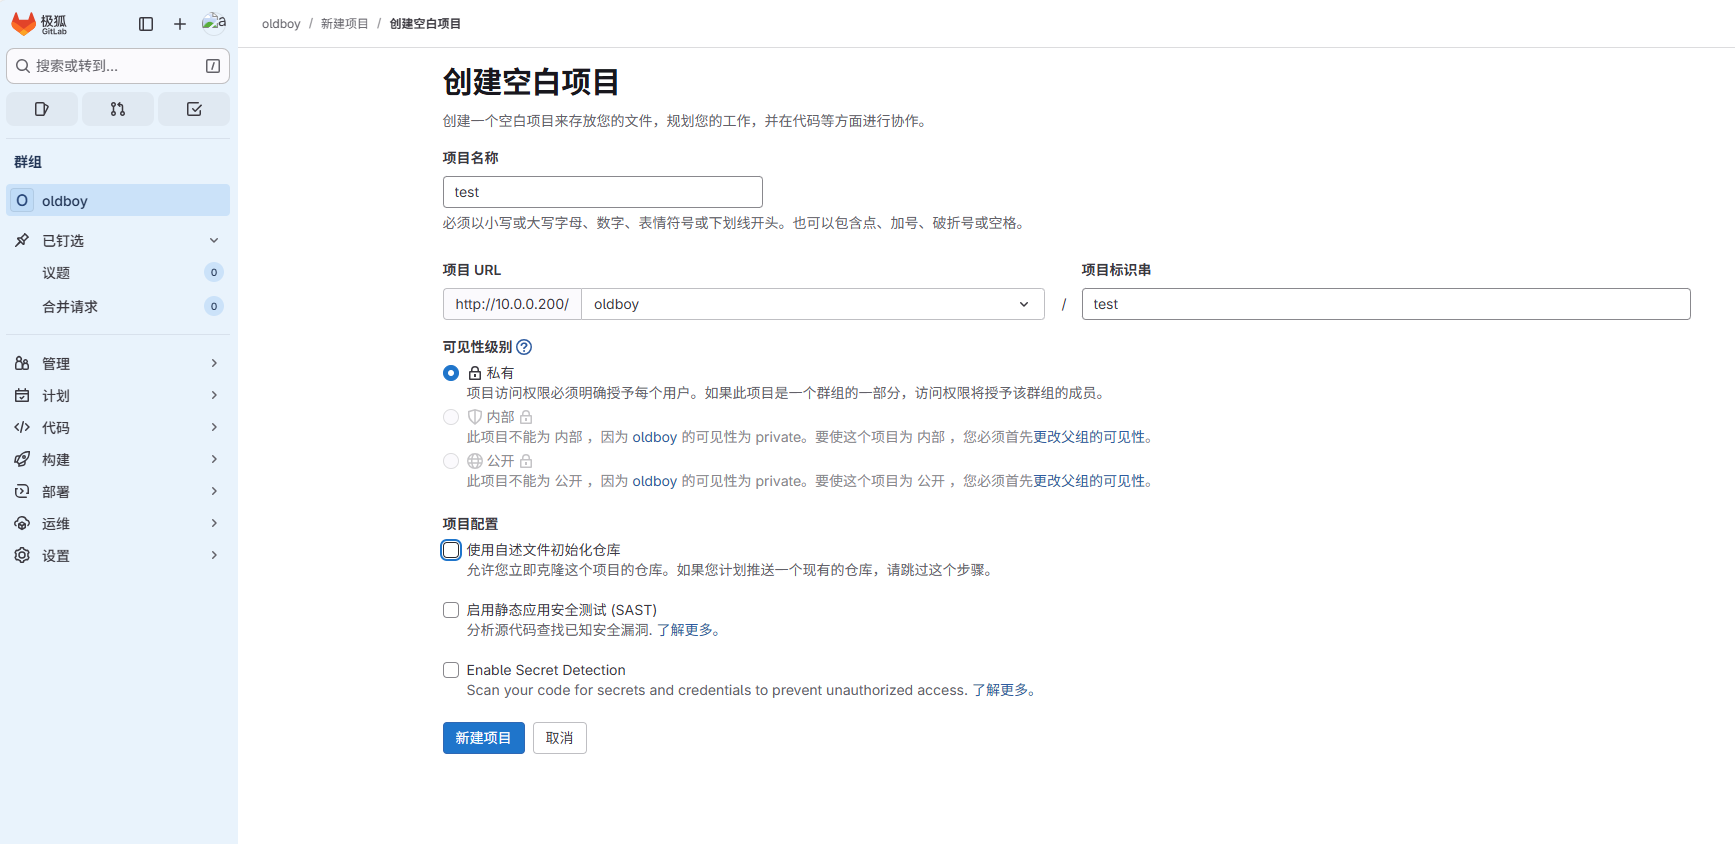
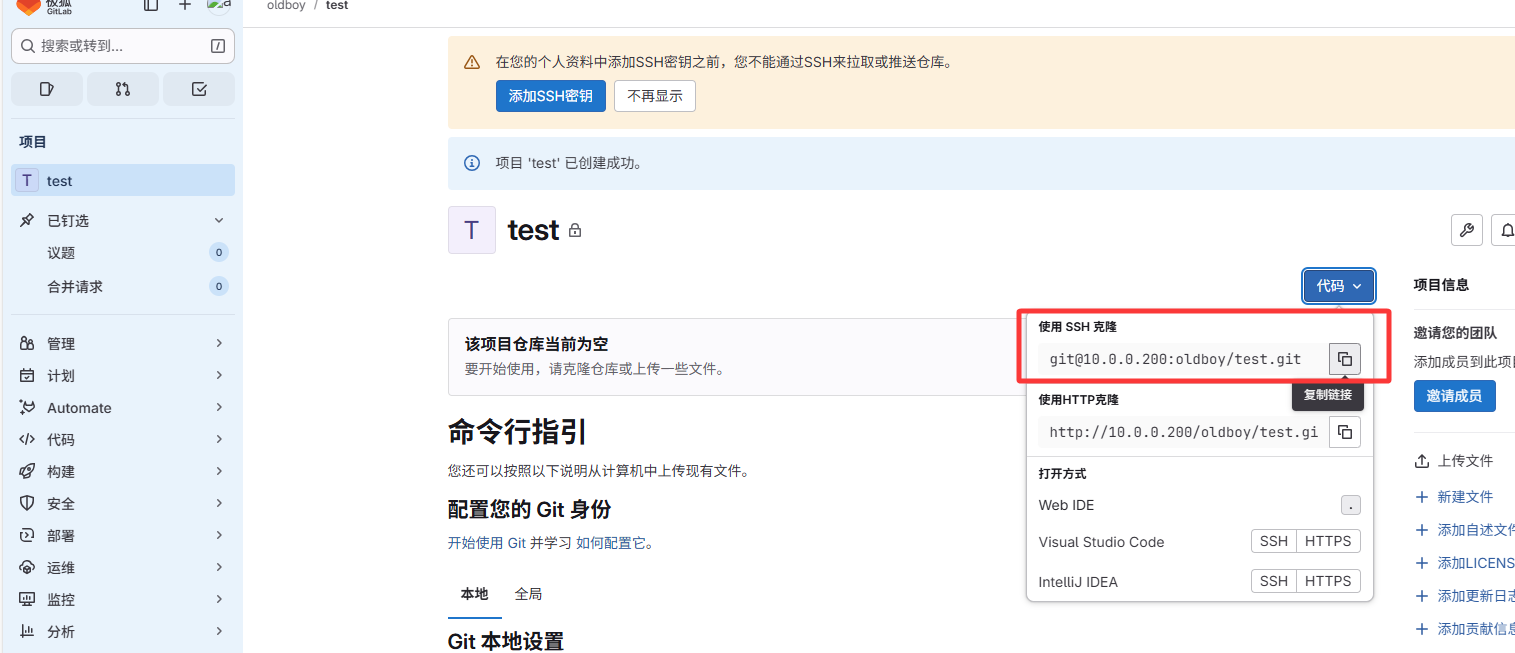
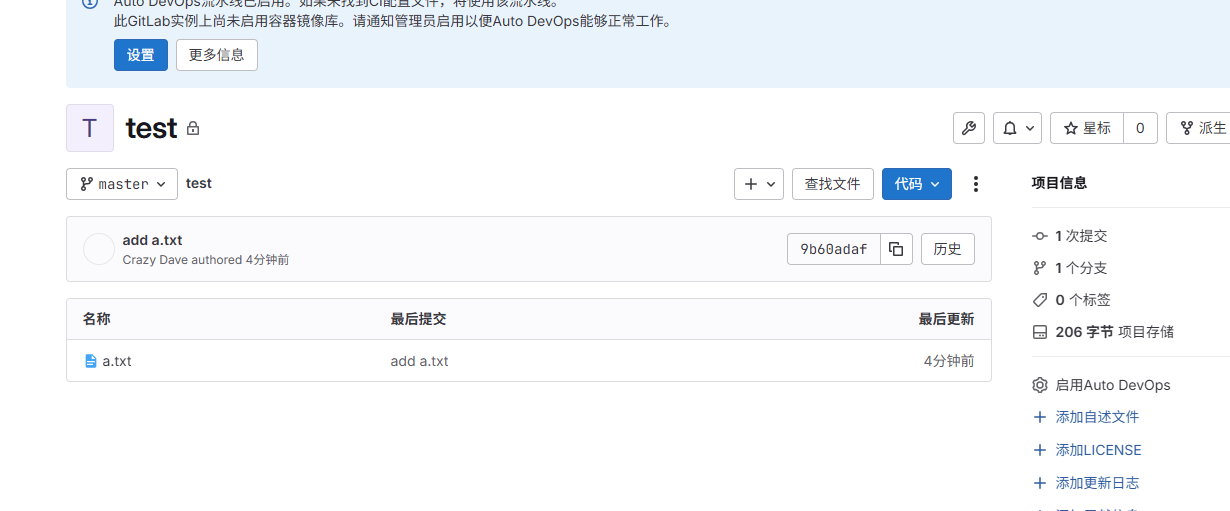
接day61后,创建空白项目
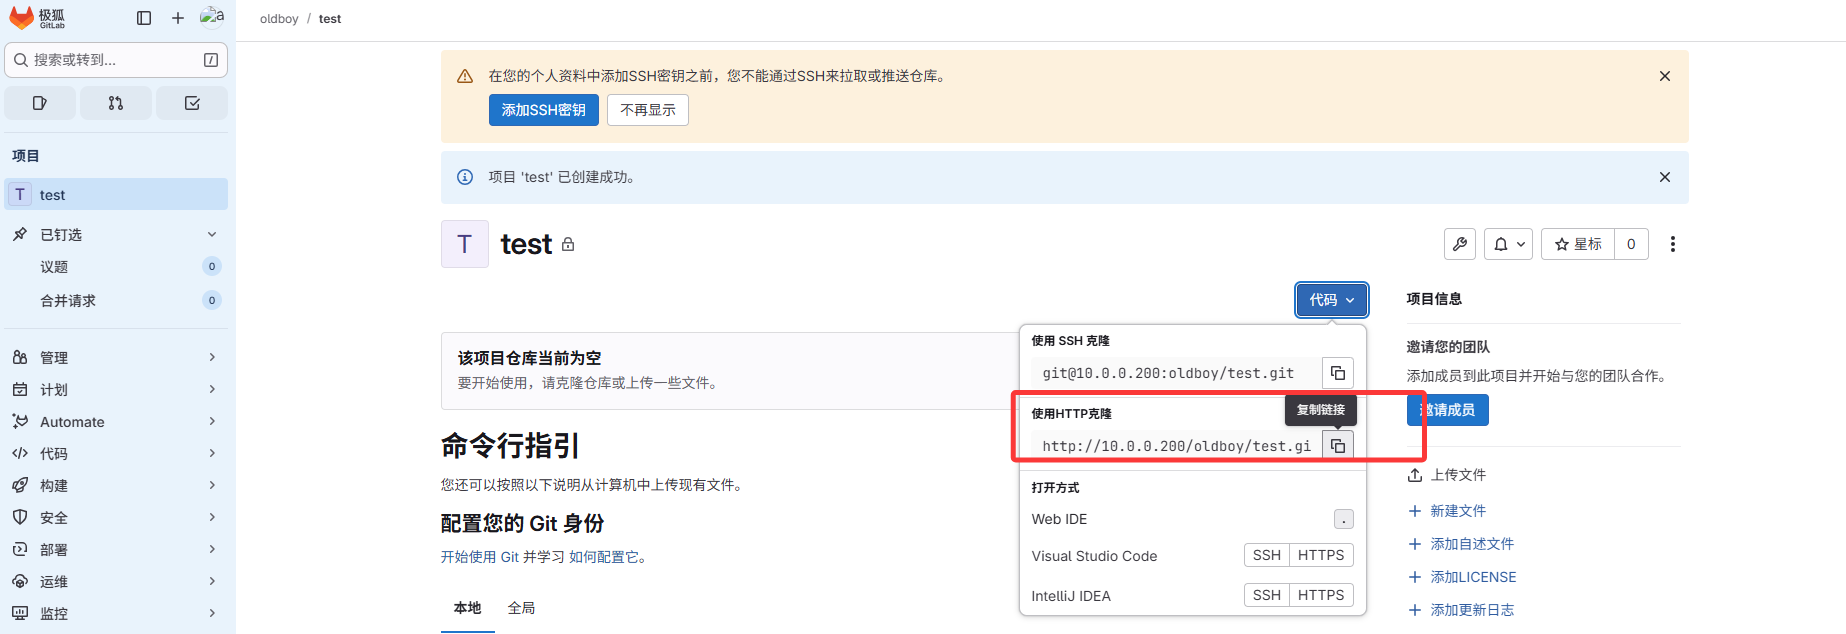
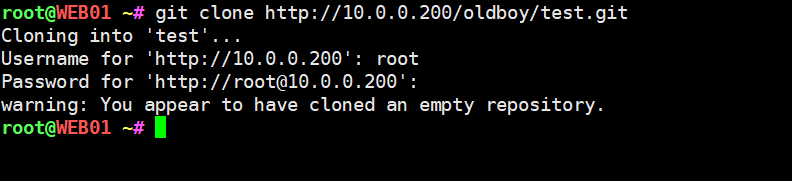
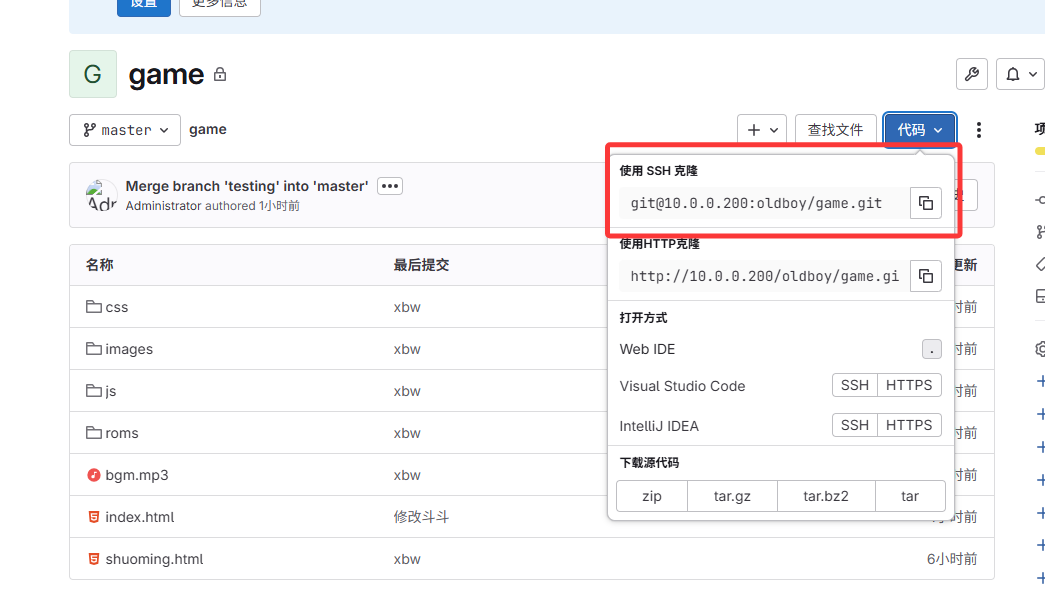
远程仓库:复制链接
此为你创建gitlab的账号和密码
可以查看远程仓库的地址

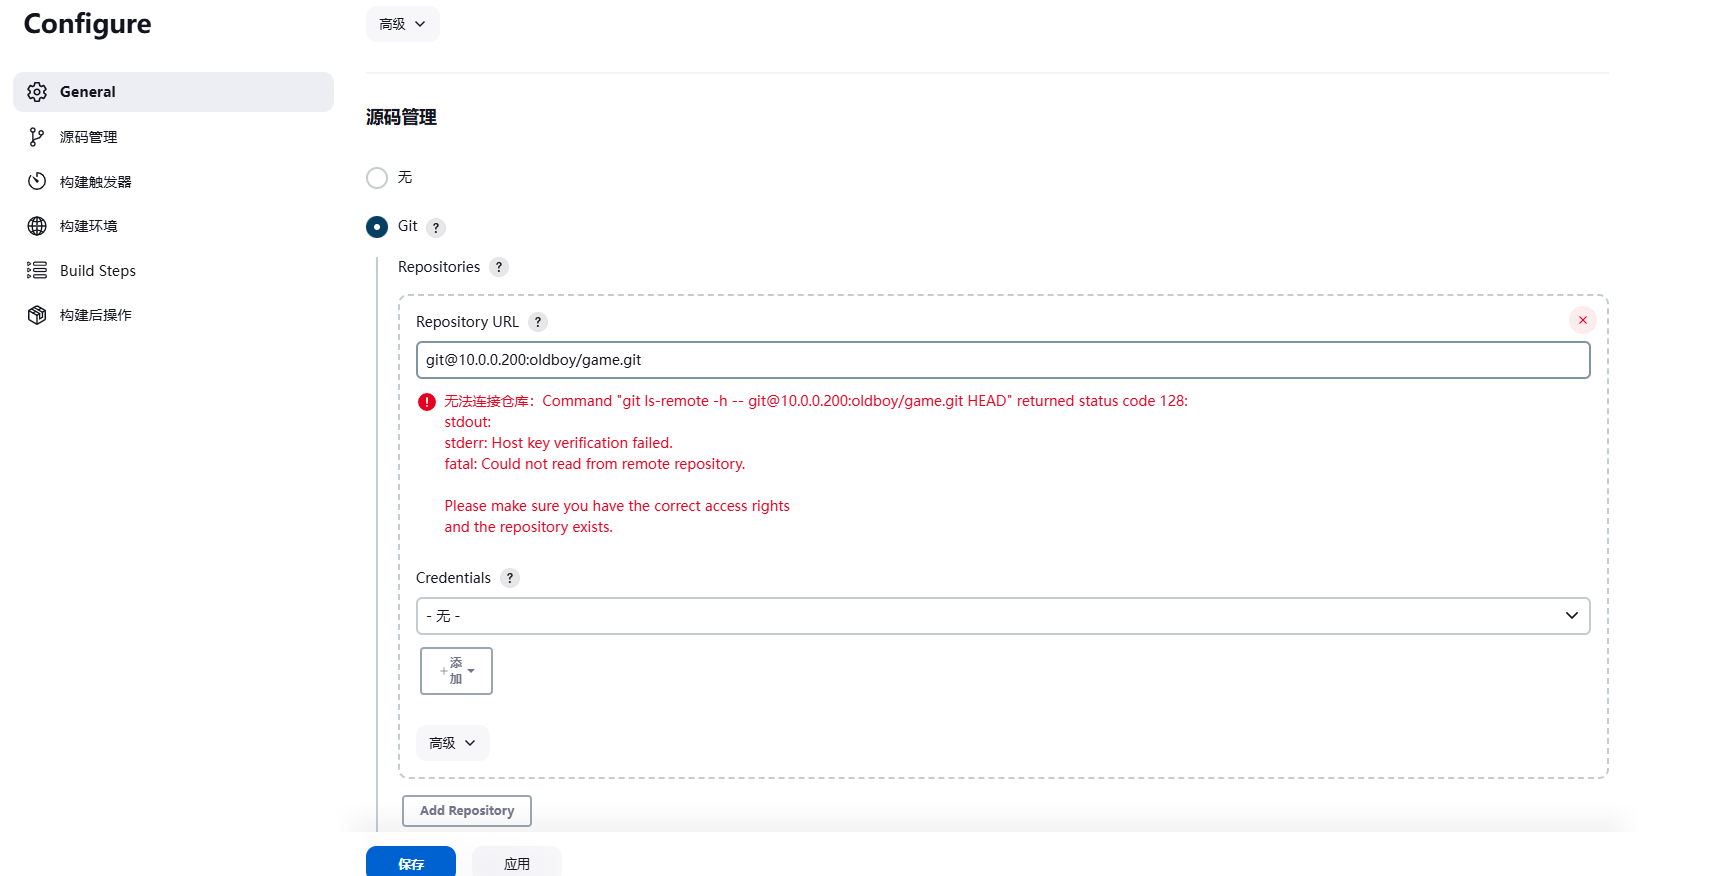
打通底层
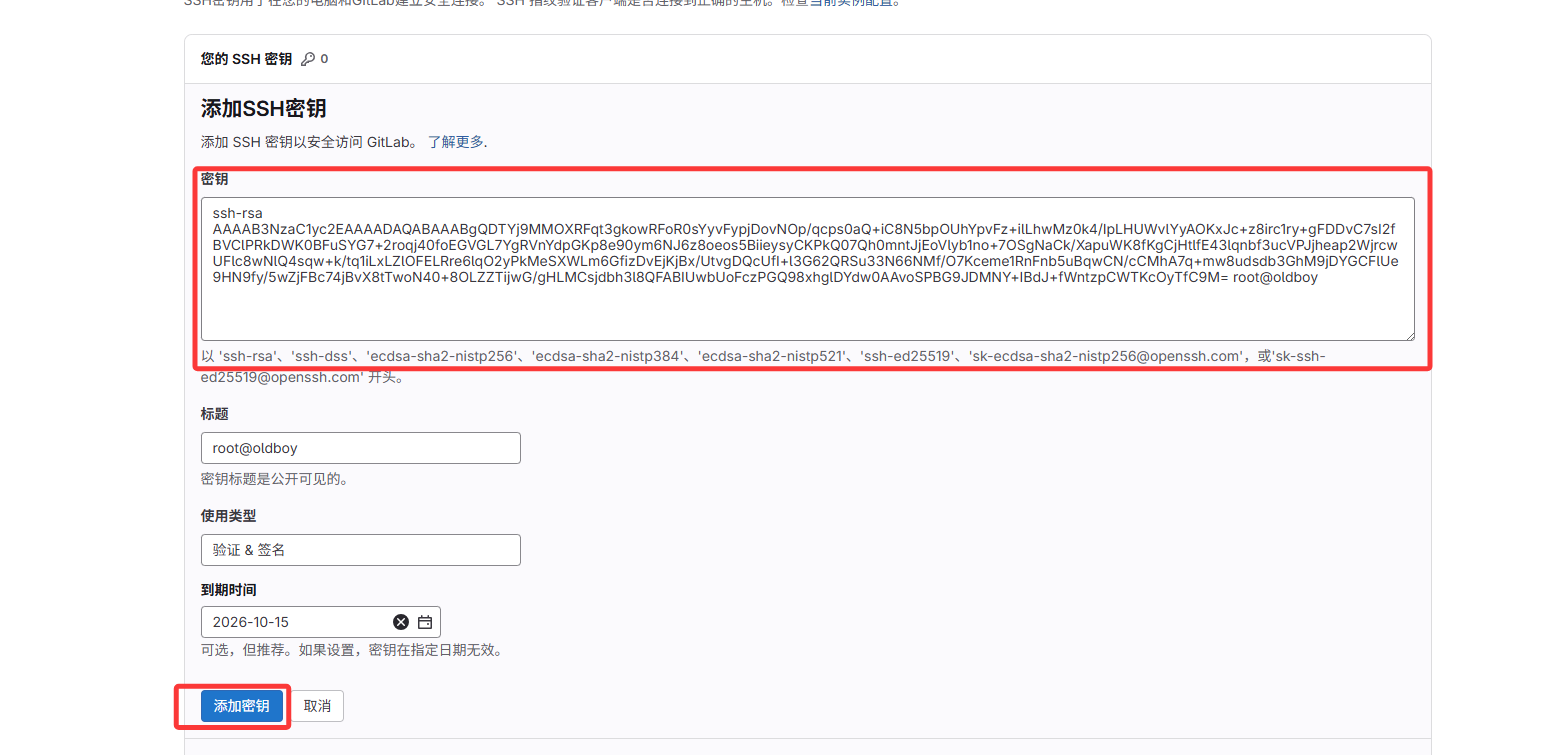
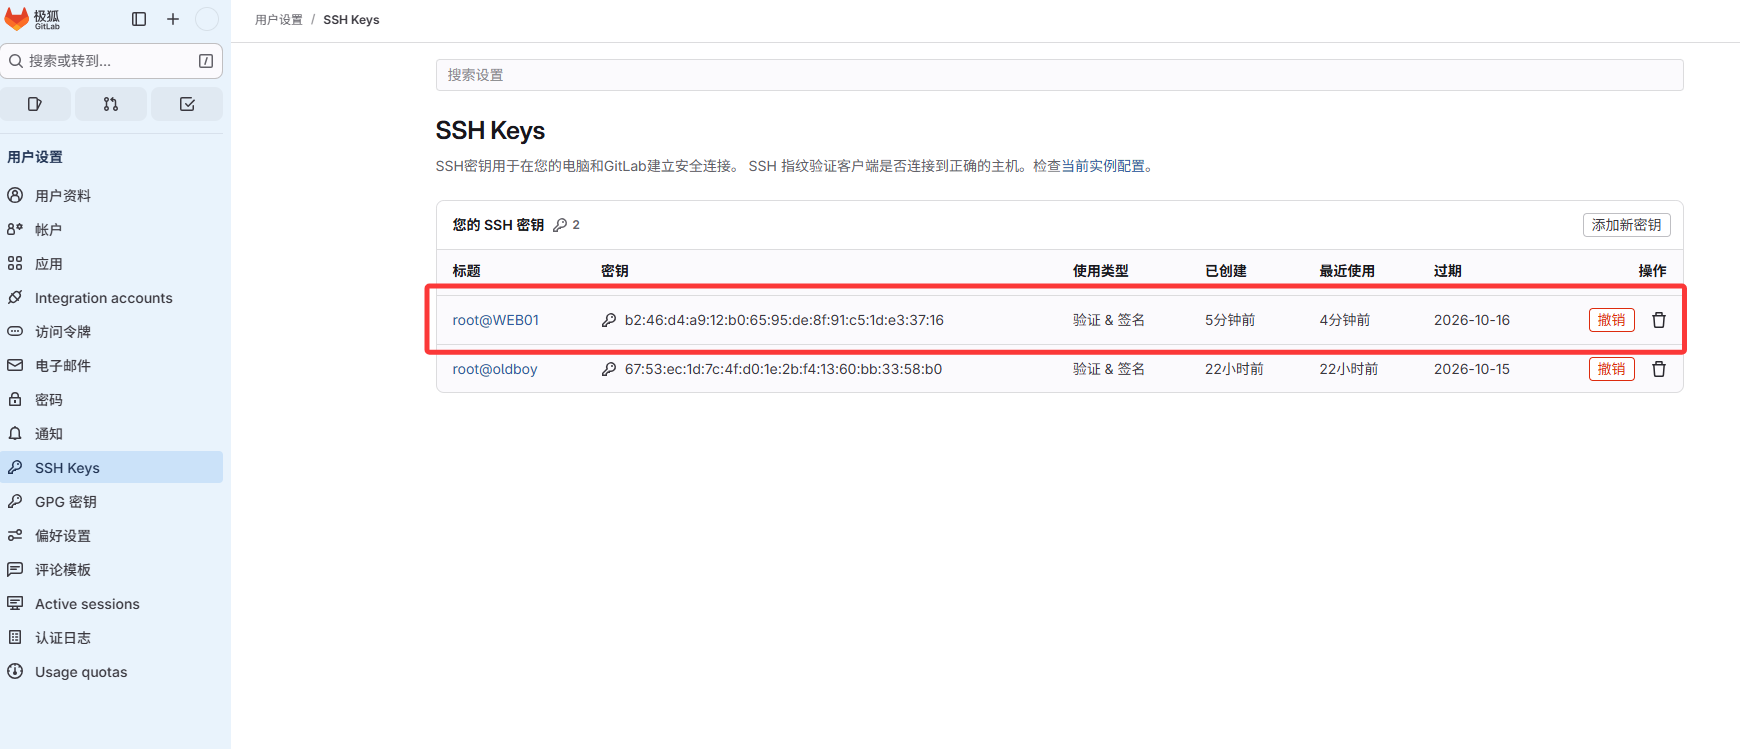
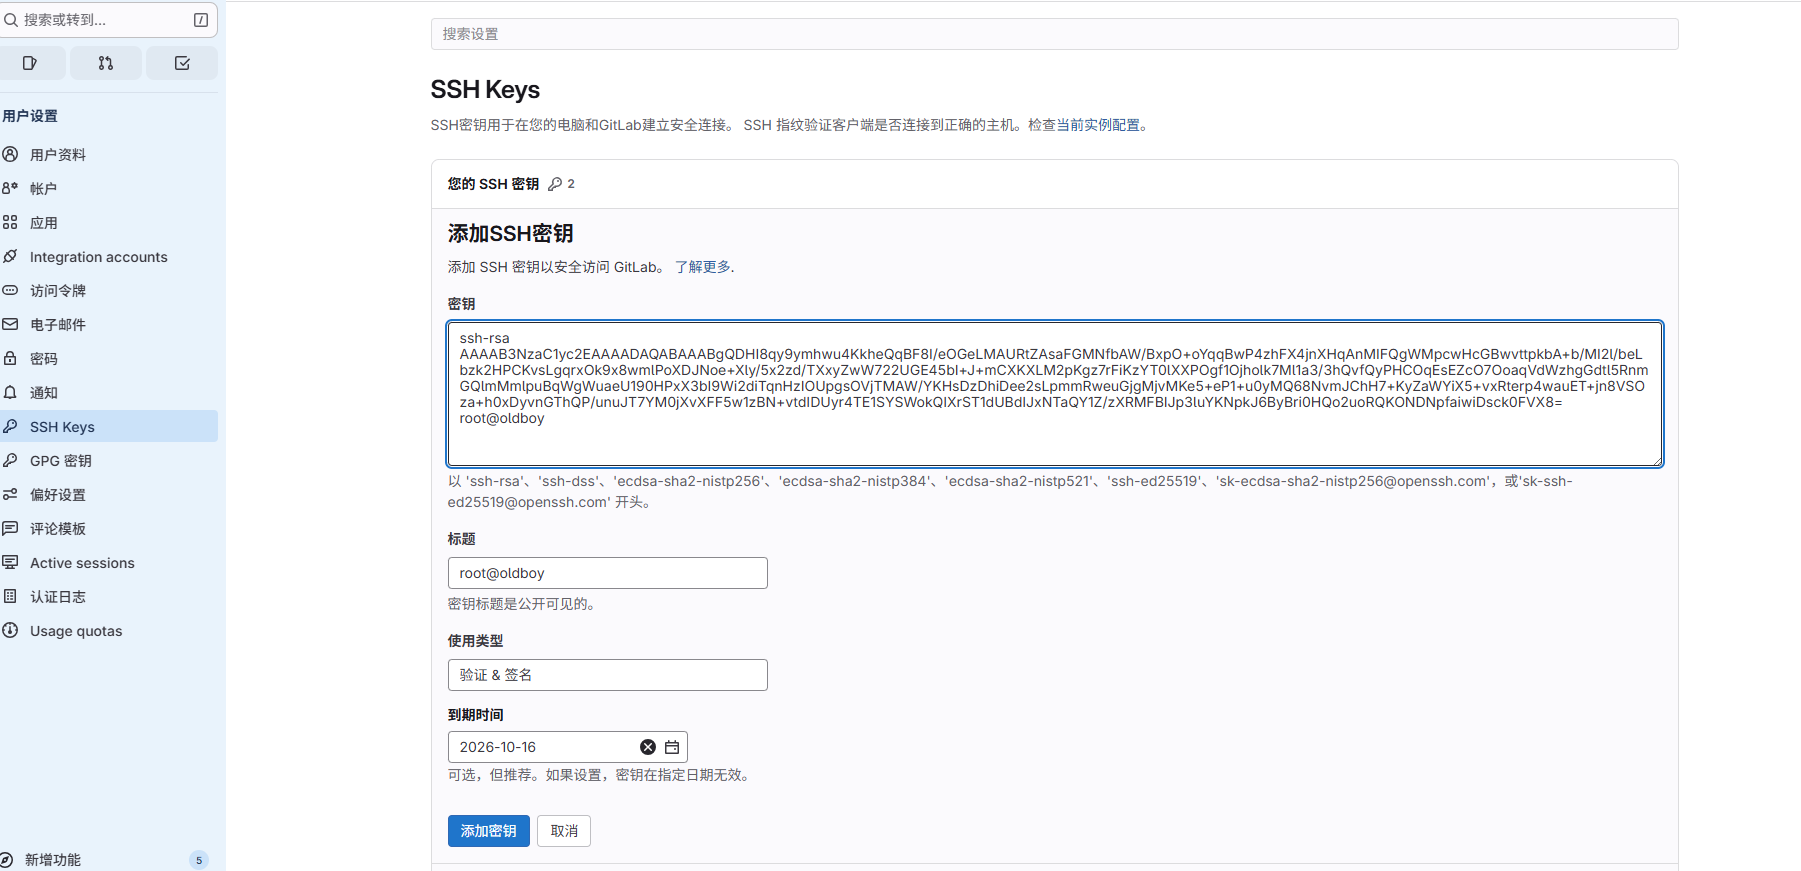
先添加ssh密钥
生成密钥
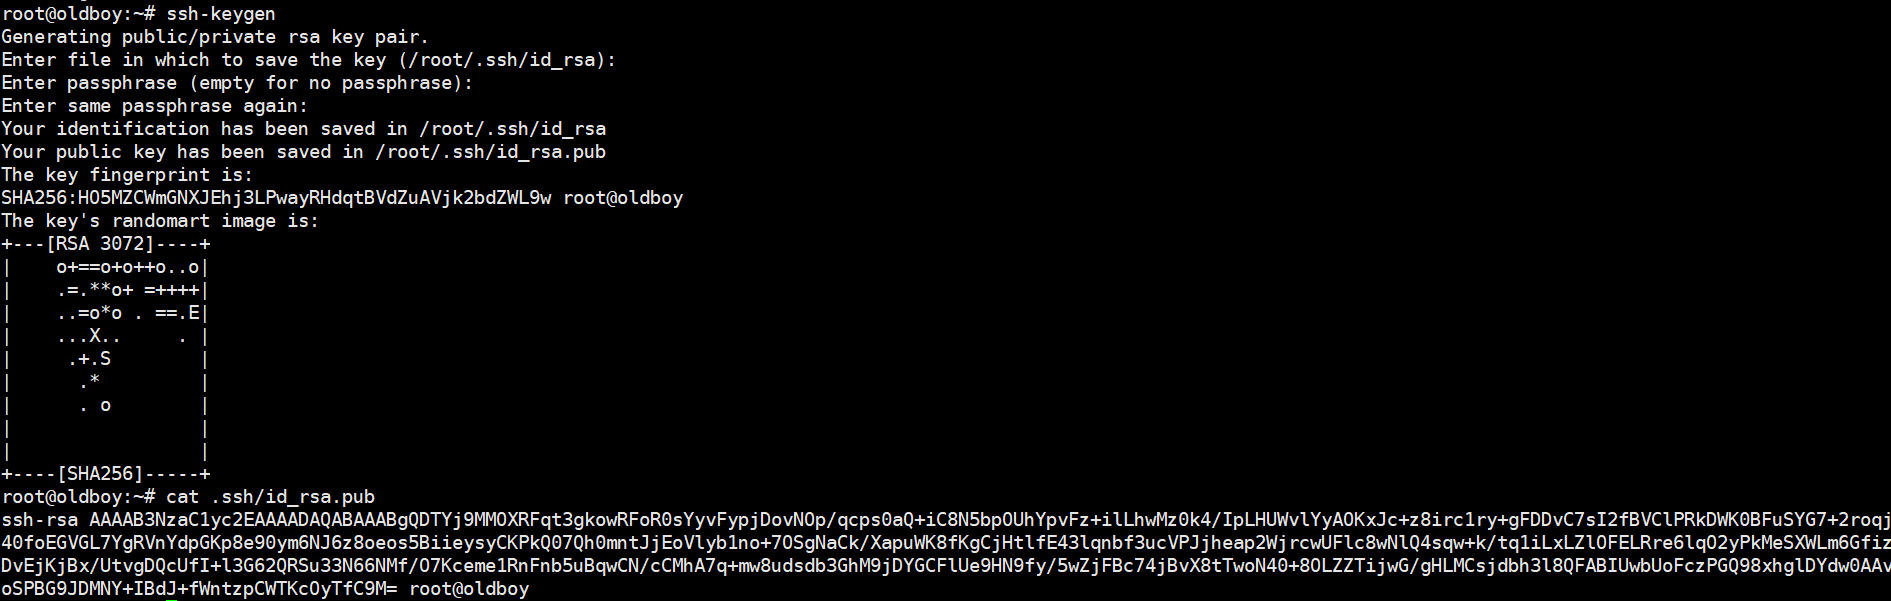
将生成的密钥复制下来
复制链接
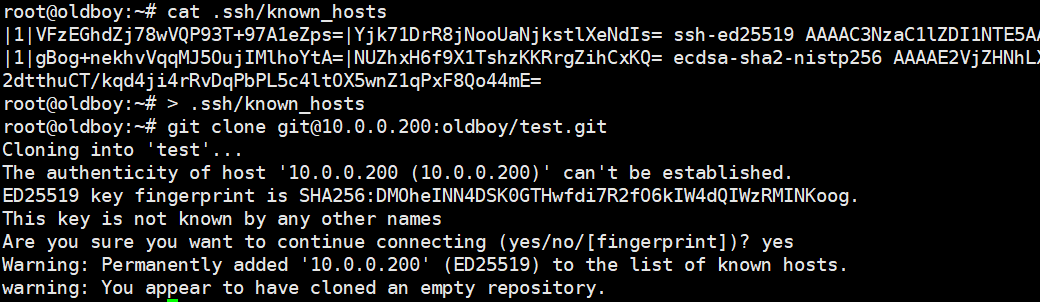
先清空远程链接文件
提交时还要写好账号(随便写)
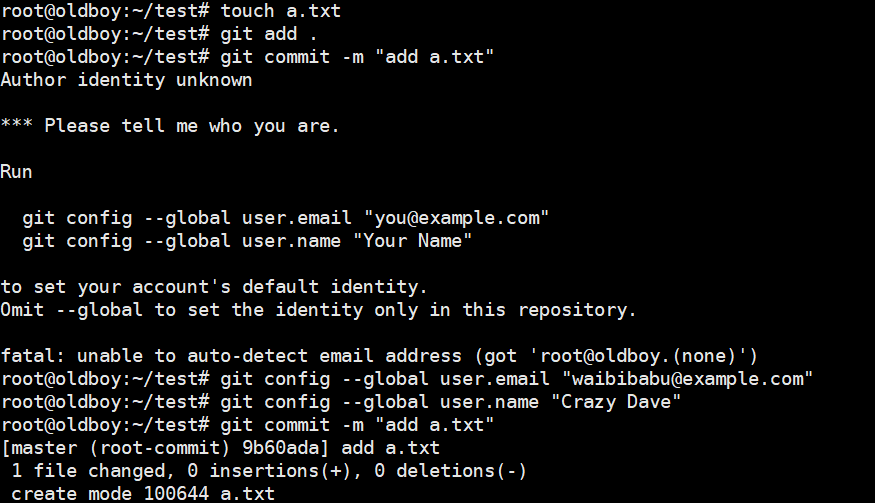
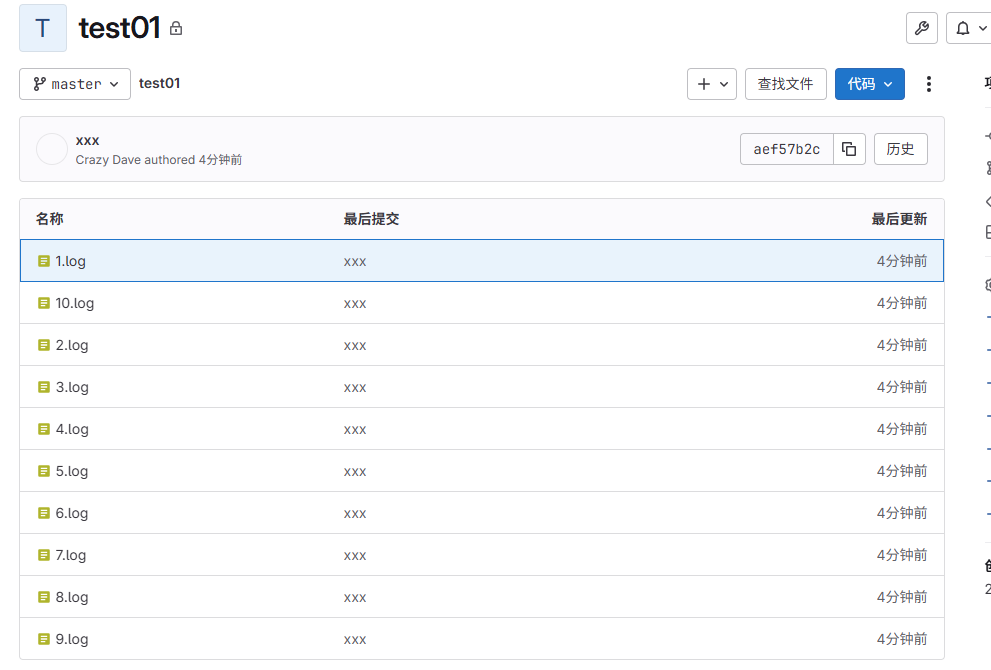
将代码提交
提交成功
第二种方式
代码上传流程
代码已经存在本地
1.本地仓库已经初始化
2.本地代码已经存在
有本地仓库但没有远程仓库
添加远程仓库

(ps:仓库为空,不然建议使用第一种方法:先把远程仓库的东西下载下来再操作)
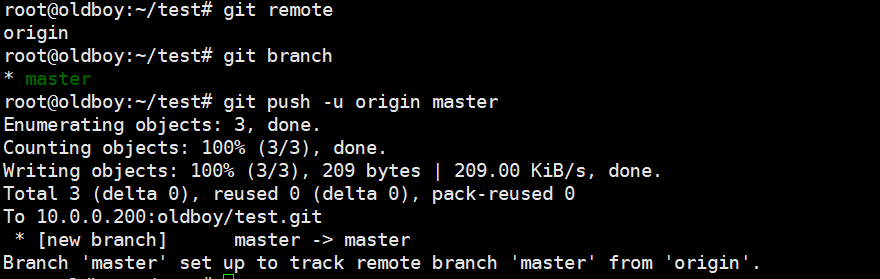
直接推
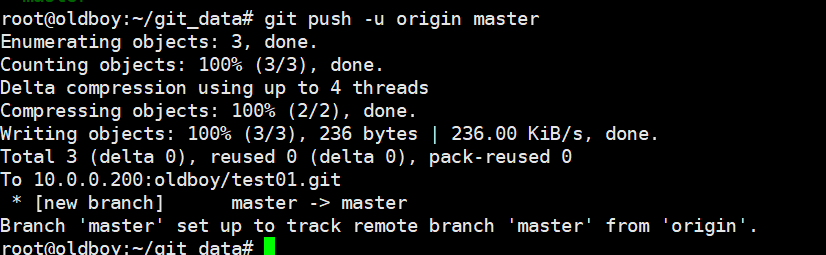
成功
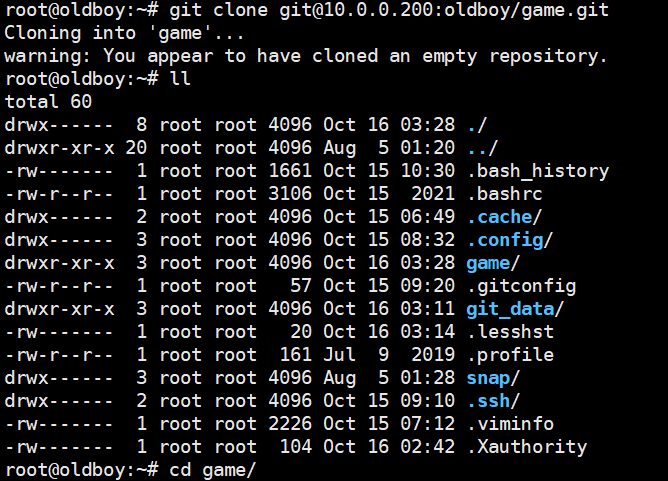
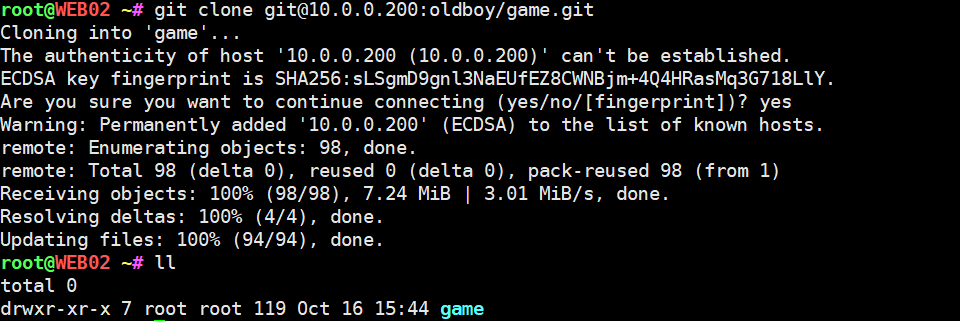
5.推送game游戏代码到远程的game项目中
创建一个空的项目并克隆
通过网盘分享的文件:xbw.zip
链接: https://pan.baidu.com/s/1KLiy0bp2WIEPXUGYnkx7fA?pwd=1234 提取码: 1234
--来自百度网盘超级会员v5的分享
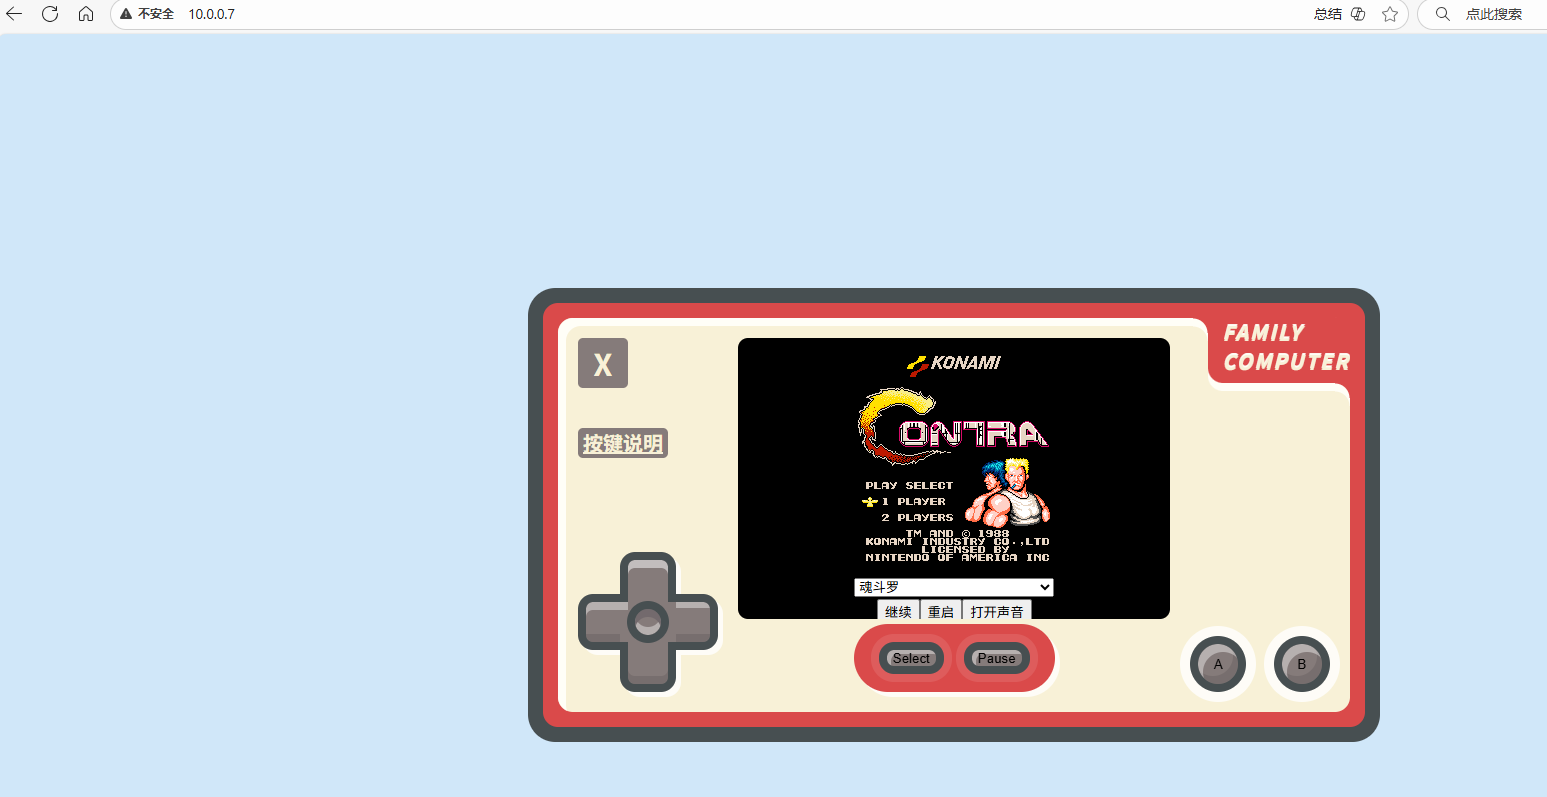
#将小霸王放到其中模拟开发写完的代码
#将安装包解压到git仓库
root@oldboy:~/game# unzip xbw.zip
#上传代码
root@oldboy:~/game# git add .
root@oldboy:~/game# git commit -m "xbw"
root@oldboy:~/game# git push -u origin master
再到web01中,提前准备好nginx、以及对应的文件目录存放代码,
先打通

将密钥放入gitlab中
新建,将上面的密钥复制
在web01中,克隆代码,注意路径和你规定的路径一样

成功打开
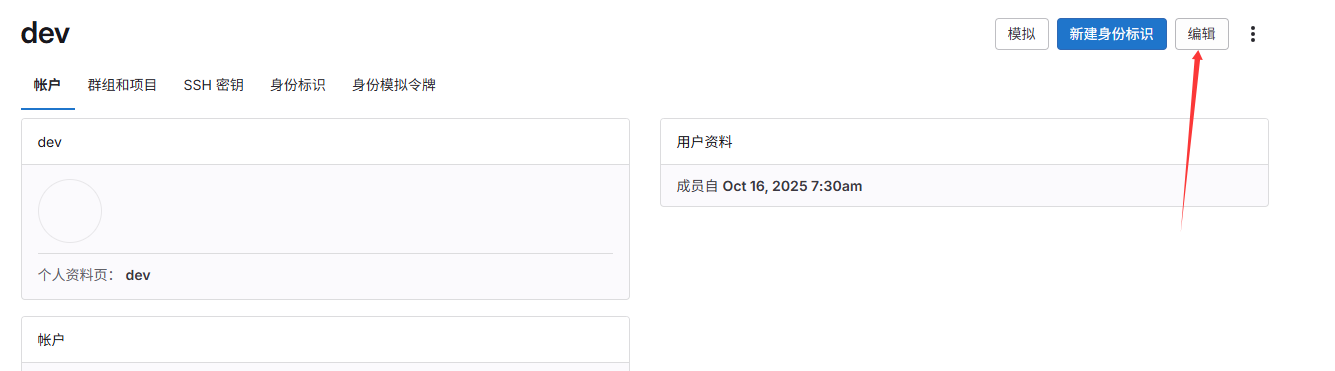
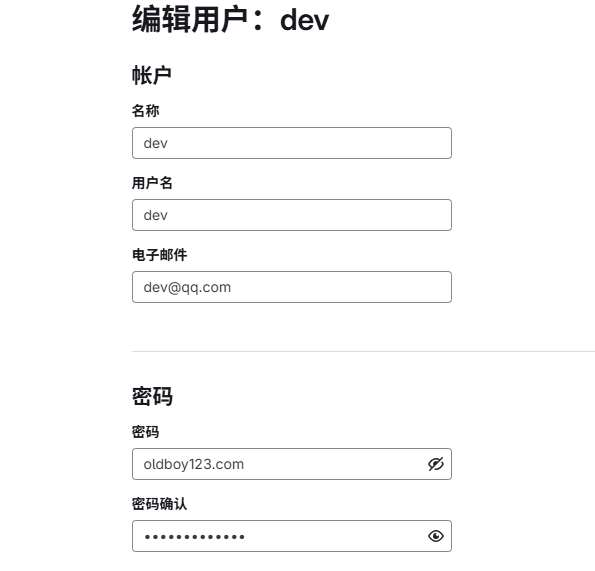
6.创建普通用户dev
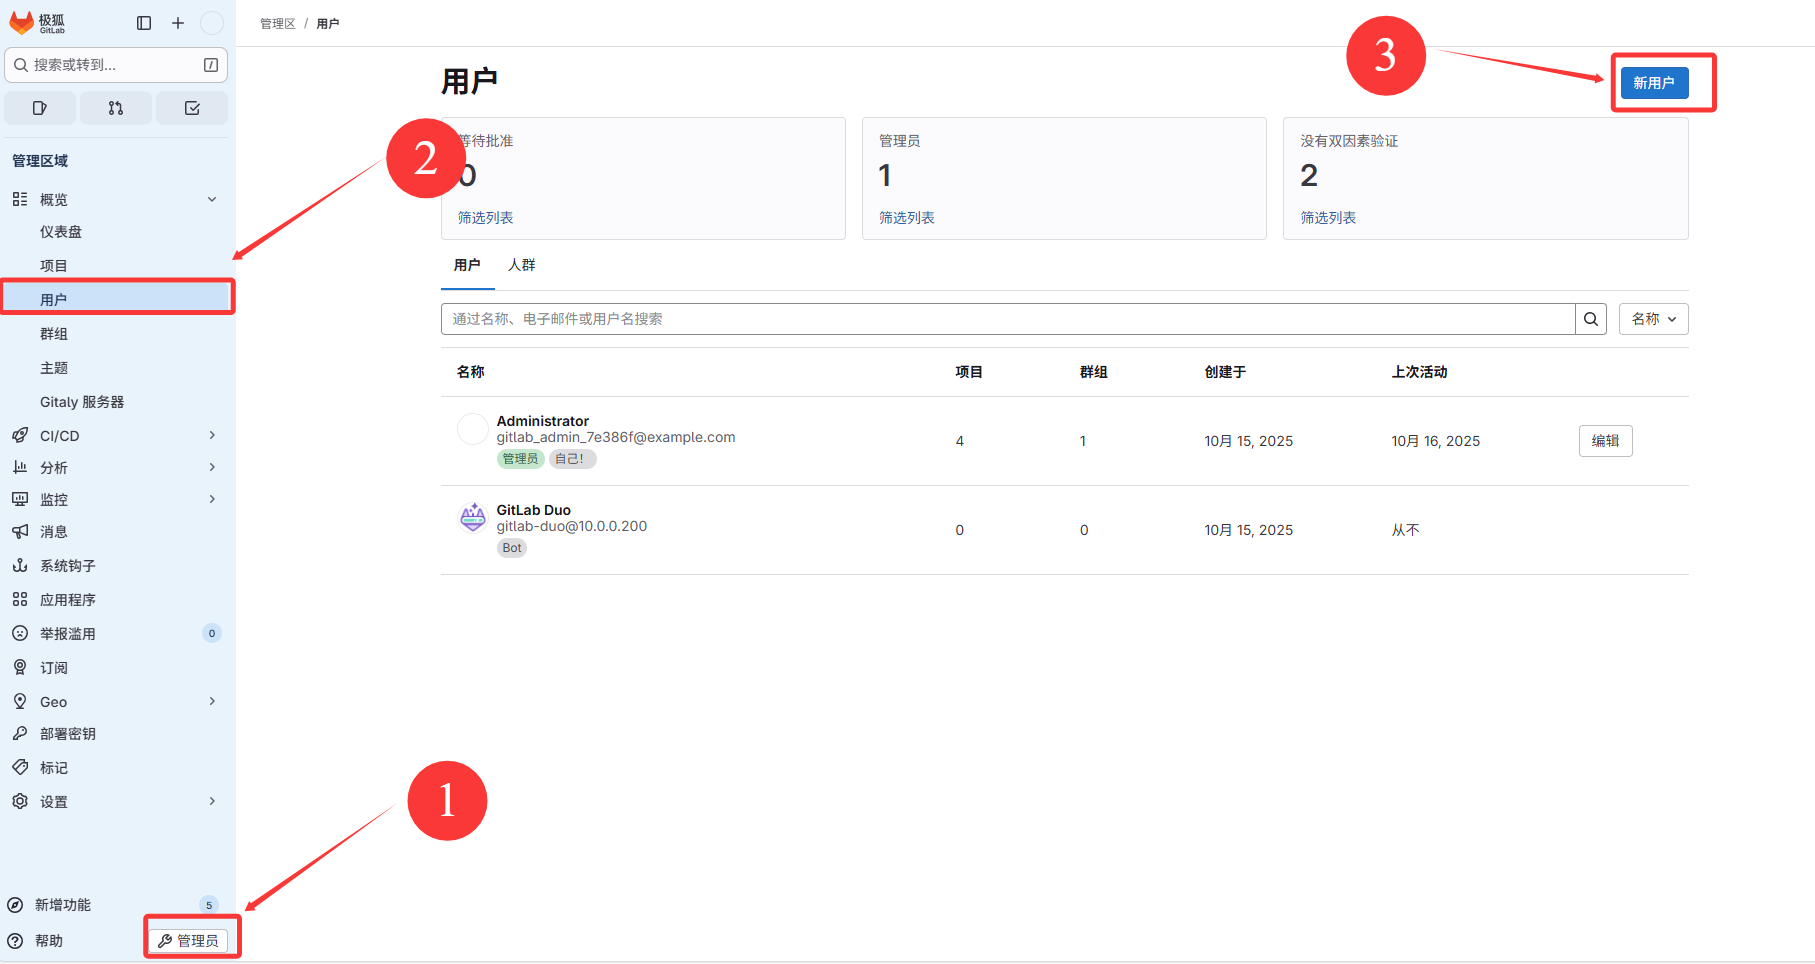
创建账户(模拟开发人员)
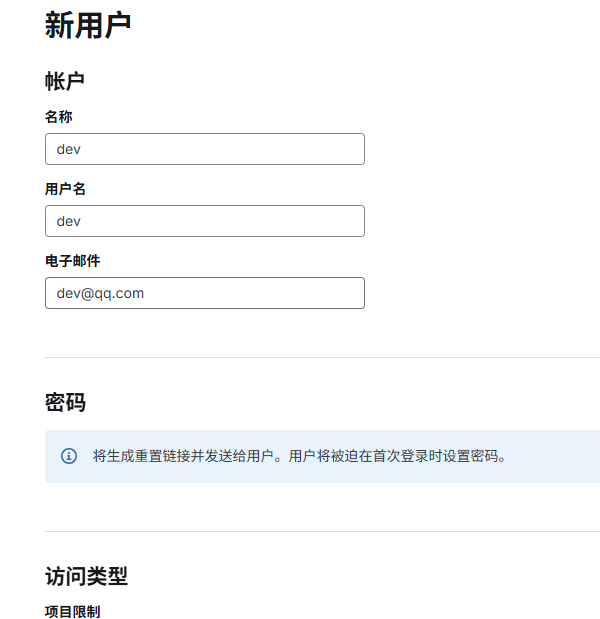
设置密码
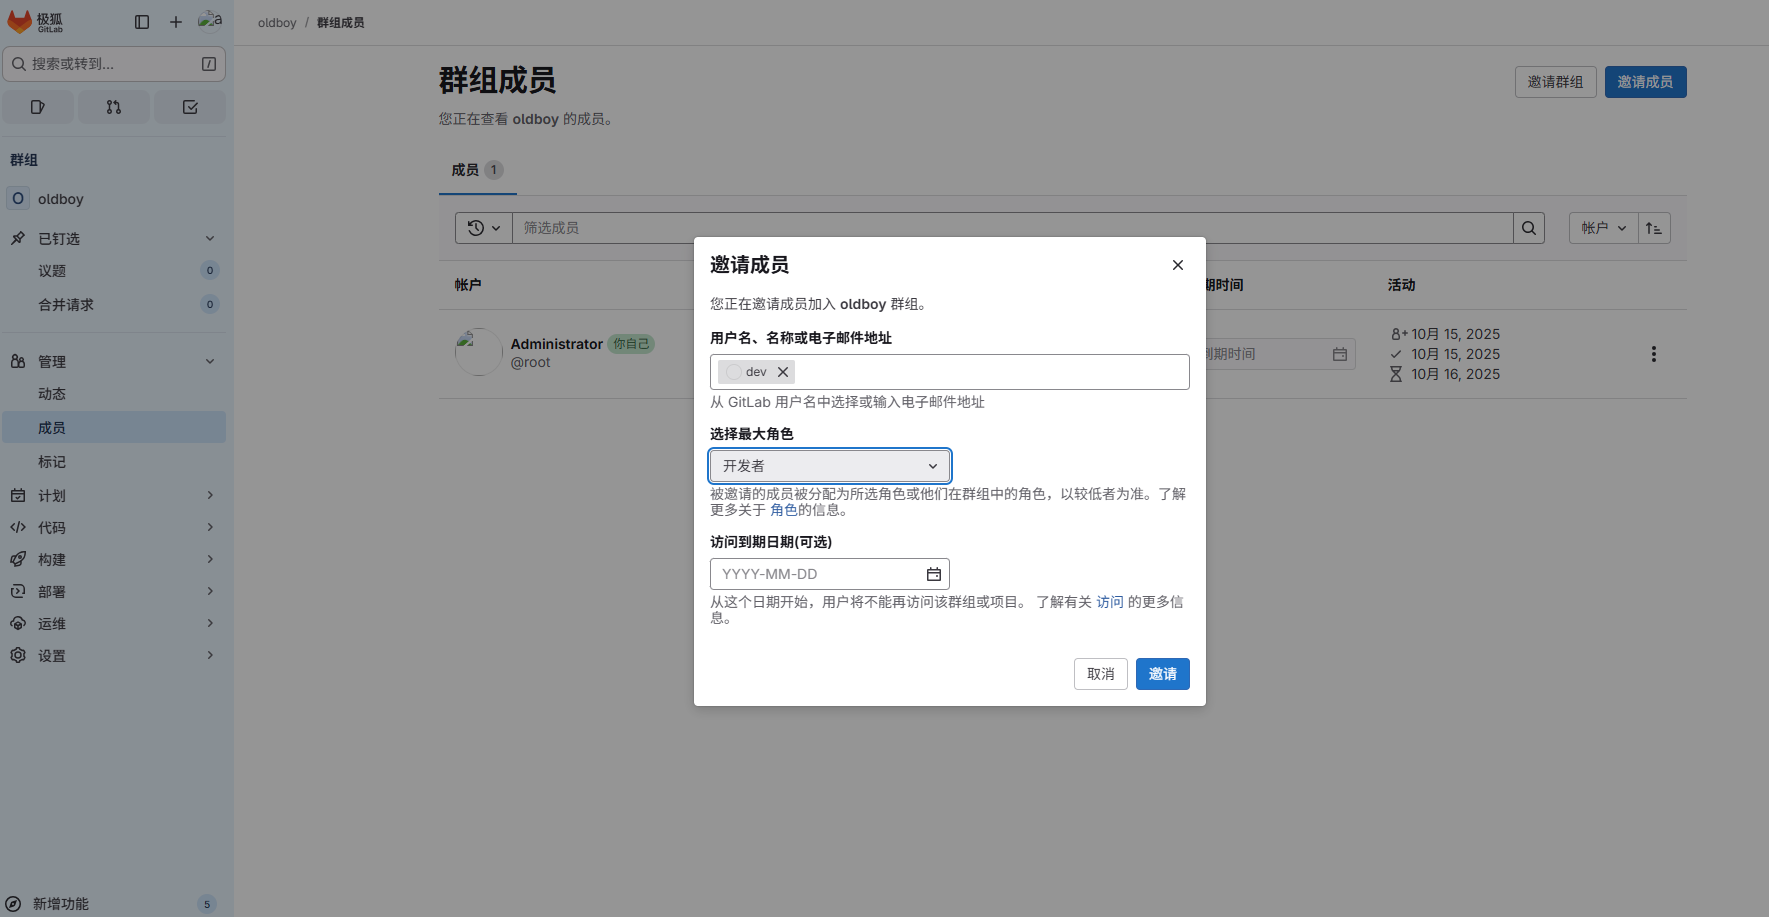
回到管理员将dev拉入群
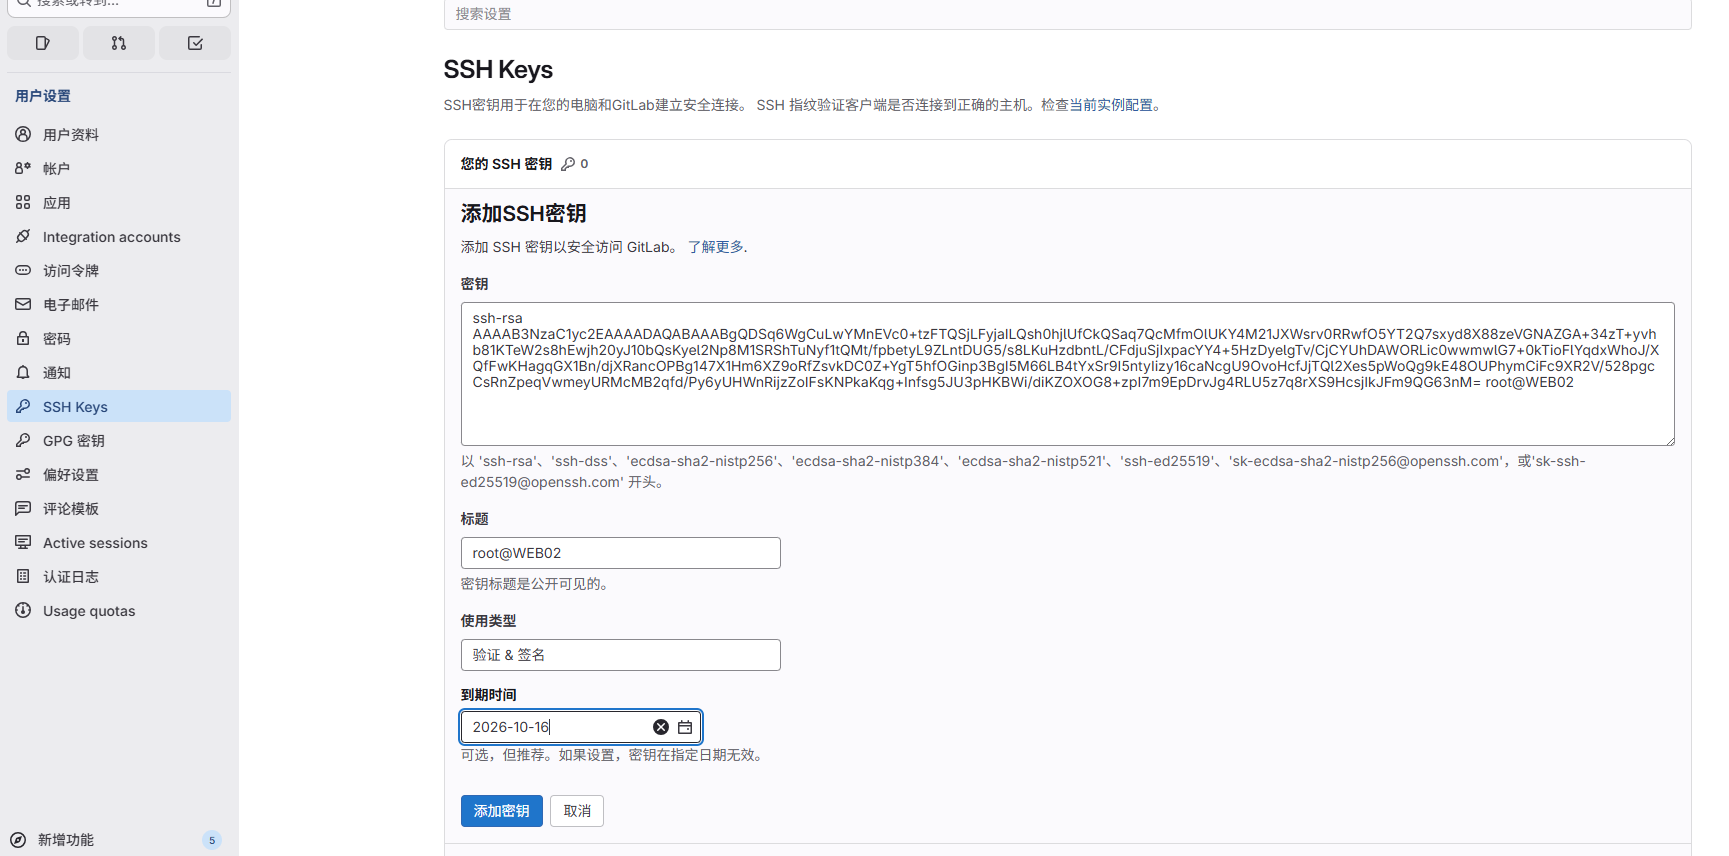
dev也要免密钥
7.开发上传代码的流程
复制链接

克隆代码
简述下开发的提交代码流程
修改代码(随便改)
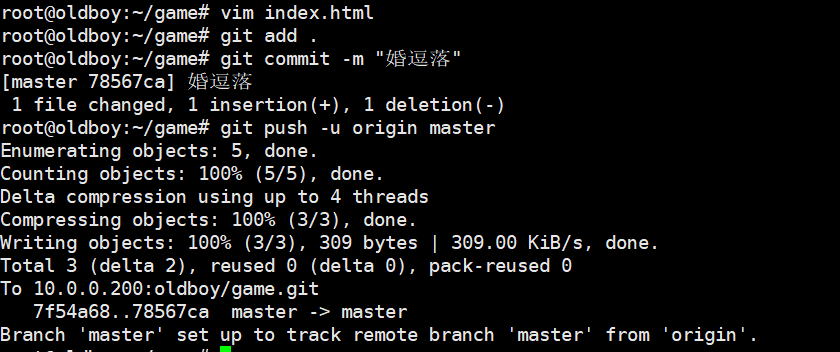
root@WEB02 ~/game# vim index.html
root@WEB02 ~/game# git add .
root@WEB02 ~/game# git commit -m "修改斗斗"

*** Please tell me who you are.

Run

  git config --global user.email "you@example.com"
  git config --global user.name "Your Name"

to set your account's default identity.
Omit --global to set the identity only in this repository.

fatal: unable to auto-detect email address (got 'root@WEB02.(none)')
root@WEB02 ~/game# git config --global user.email "dev@example.com"
root@WEB02 ~/game# git config --global user.name "dev"
root@WEB02 ~/game# git commit -m "修改斗斗"
[master 37f5bbc] 修改斗斗
 1 file changed, 2 insertions(+), 2 deletions(-)
root@WEB02 ~/game# git branch testing
root@WEB02 ~/game# git checkout
Your branch is ahead of 'origin/master' by 1 commit.
  (use "git push" to publish your local commits)
root@WEB02 ~/game# git branch
* master
  testing
root@WEB02 ~/game# git checkout testing
Switched to branch 'testing'
root@WEB02 ~/game# git branch
  master
* testing
root@WEB02 ~/game# git push -u origin testing
Enumerating objects: 5, done.
Counting objects: 100% (5/5), done.
Compressing objects: 100% (3/3), done.
Writing objects: 100% (3/3), 296 bytes | 296.00 KiB/s, done.
Total 3 (delta 2), reused 0 (delta 0), pack-reused 0
remote:
remote: To create a merge request for testing, visit:
remote:   http://10.0.0.200/oldboy/game/-/merge_requests/new?merge_request%5Bsource_branch%5D=testing
remote:
To 10.0.0.200:oldboy/game.git
 * [new branch]      testing -> testing
Branch 'testing' set up to track remote branch 'testing' from 'origin'.
dev和root都可以看到
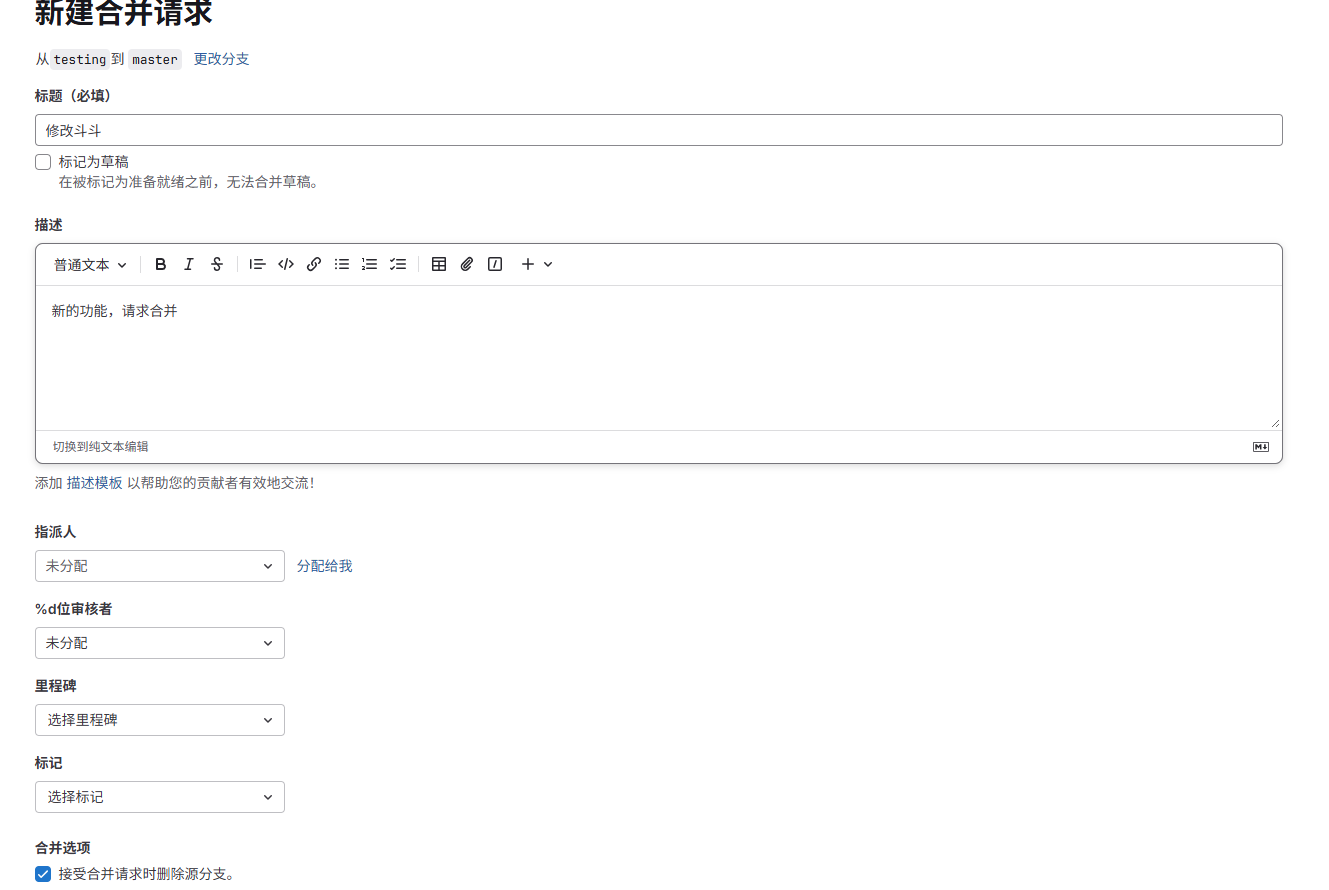
请求合并
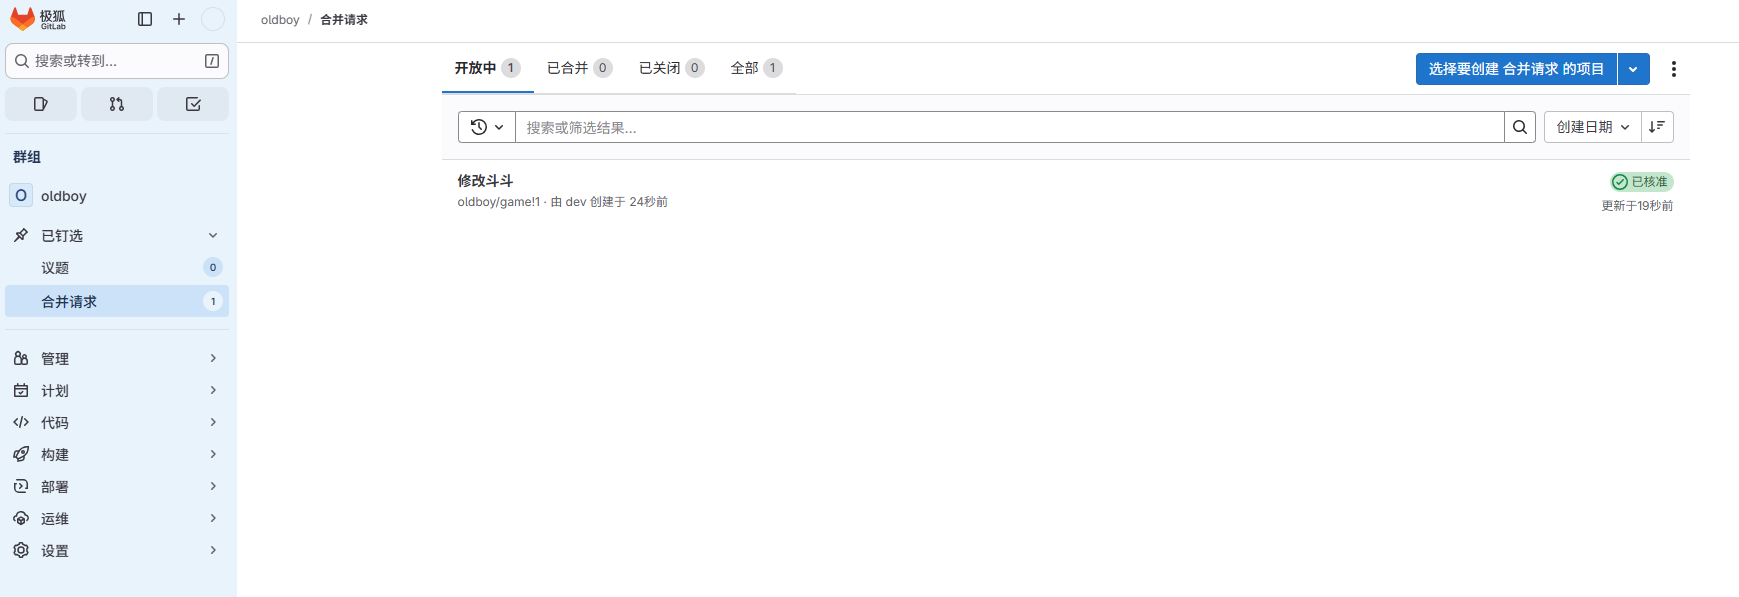
切换到root时,点击合并请求
合并
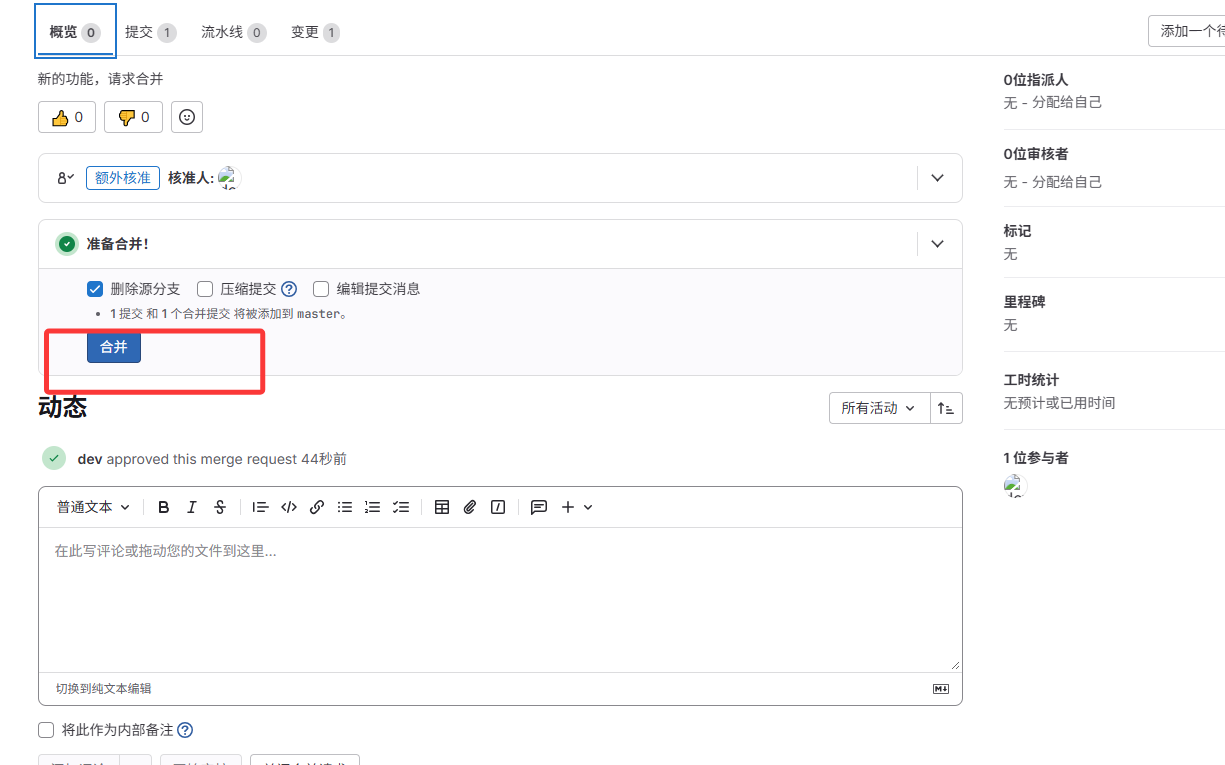
合并成功

3.Jenkins
官网 jenkins.io
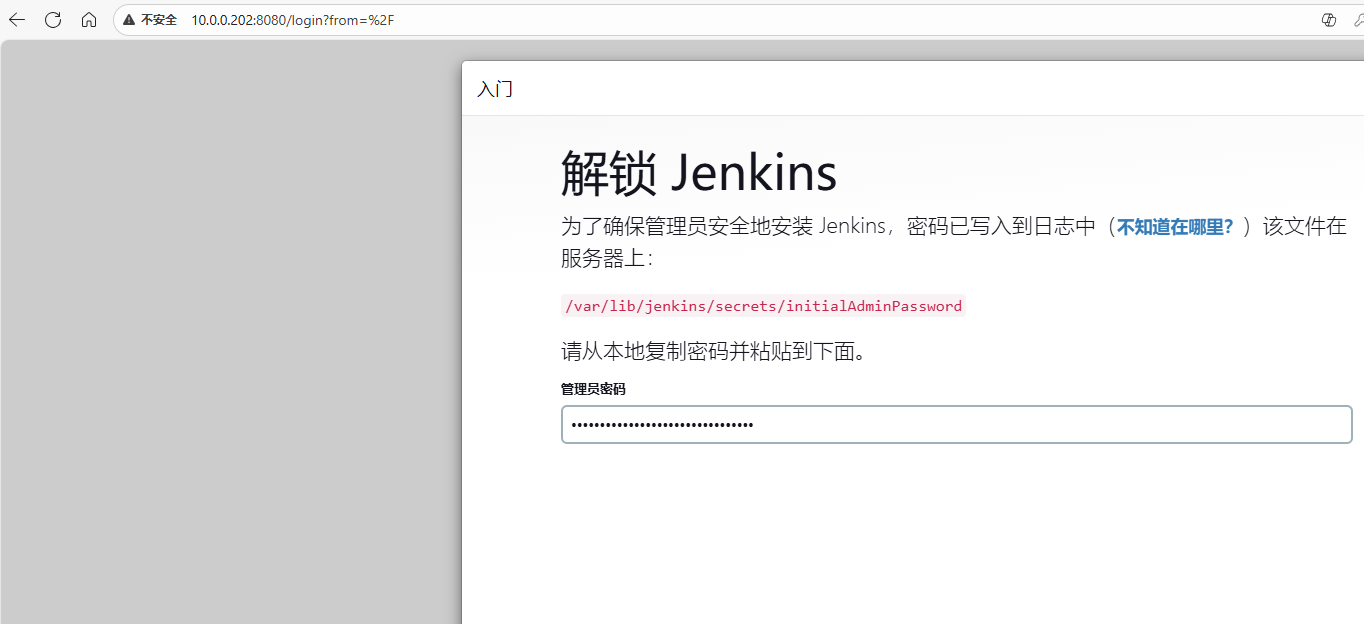
Jenkins是一个开源软件项目,是基于Java开发的一种持续集成工具,用于监控持续重复的工作,旨在提供一个开放易用的软件平台,使软件的持续集成变成可能。1.安装jenkins
#Kylin系统 10.0.0.202 1核2G内存
#安装JDK运行环境
root@oldboy ~# yum -y install java

#使用rpm安装jenkins
root@oldboy ~# rpm -ivh jenkins-2.405-1.1.noarch.rpm

#修改启动用户为root默认使用jenkins运行
root@oldboy ~# grep root /usr/lib/systemd/system/jenkins.service
User=root
Group=root

#重新加载配置文件
root@oldboy ~# systemctl daemon-reload

#修改配置文件中的启动用户
root@oldboy ~# grep root /etc/sysconfig/jenkins
JENKINS_USER="root"

#启动
root@oldboy ~# systemctl start jenkins
注意端口号
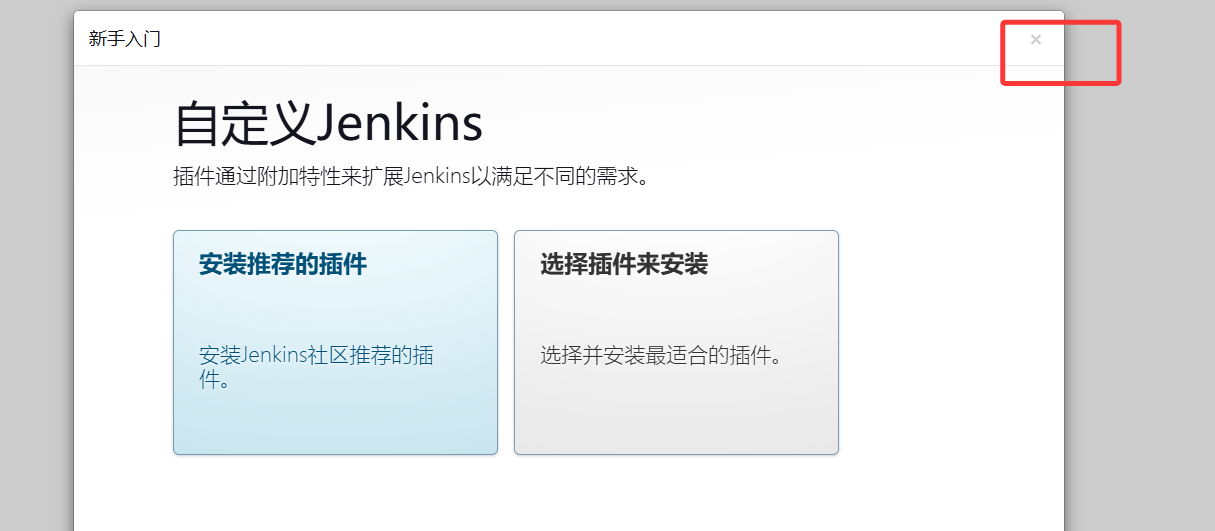
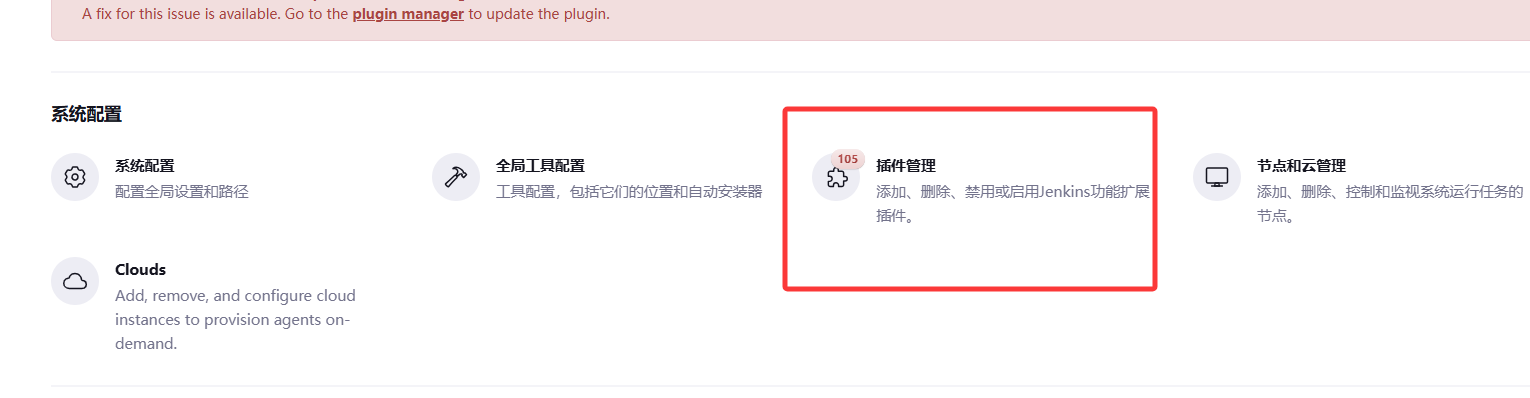
我们自己安装插件
进入后修改密码,不然每次都要复制大长串密码
进入/var/lib/jenkins/plugins,将插件安装到此
通过网盘分享的文件:jenkins_plu.tar.gz
链接: https://pan.baidu.com/s/11O7ZM4GsQ6s2eGvDFzzHfg?pwd=1234 提取码: 1234
--来自百度网盘超级会员v5的分享
将上面的安装包拖入,解压,重启
root@oldboy /var/lib/jenkins/plugins# tar xf jenkins_plu.tar.gz

root@oldboy /var/lib/jenkins/plugins# systemctl restart jenkins.service
有中文插件,就变成中文了
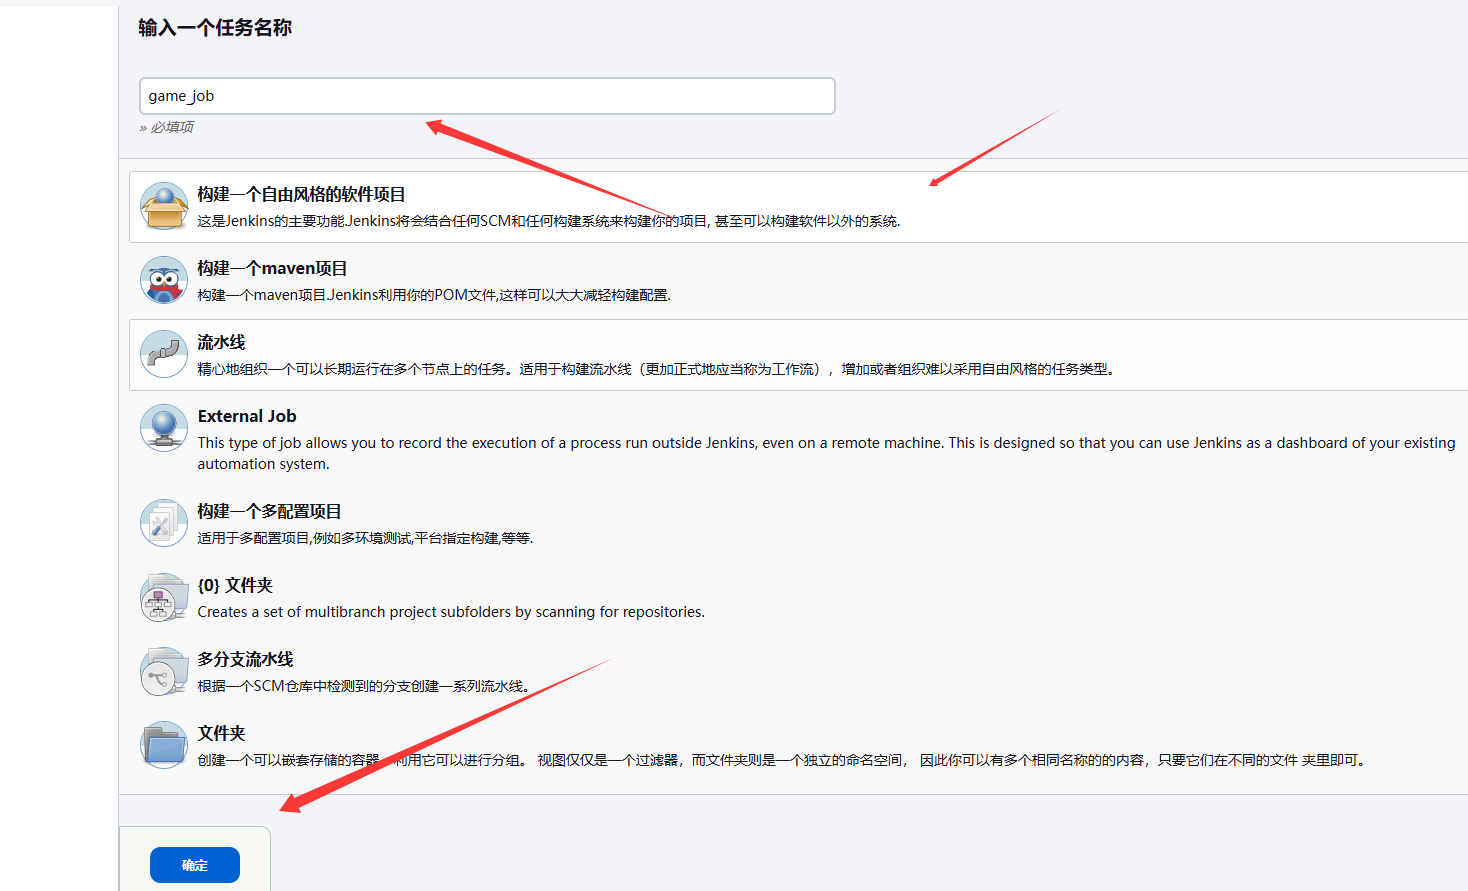
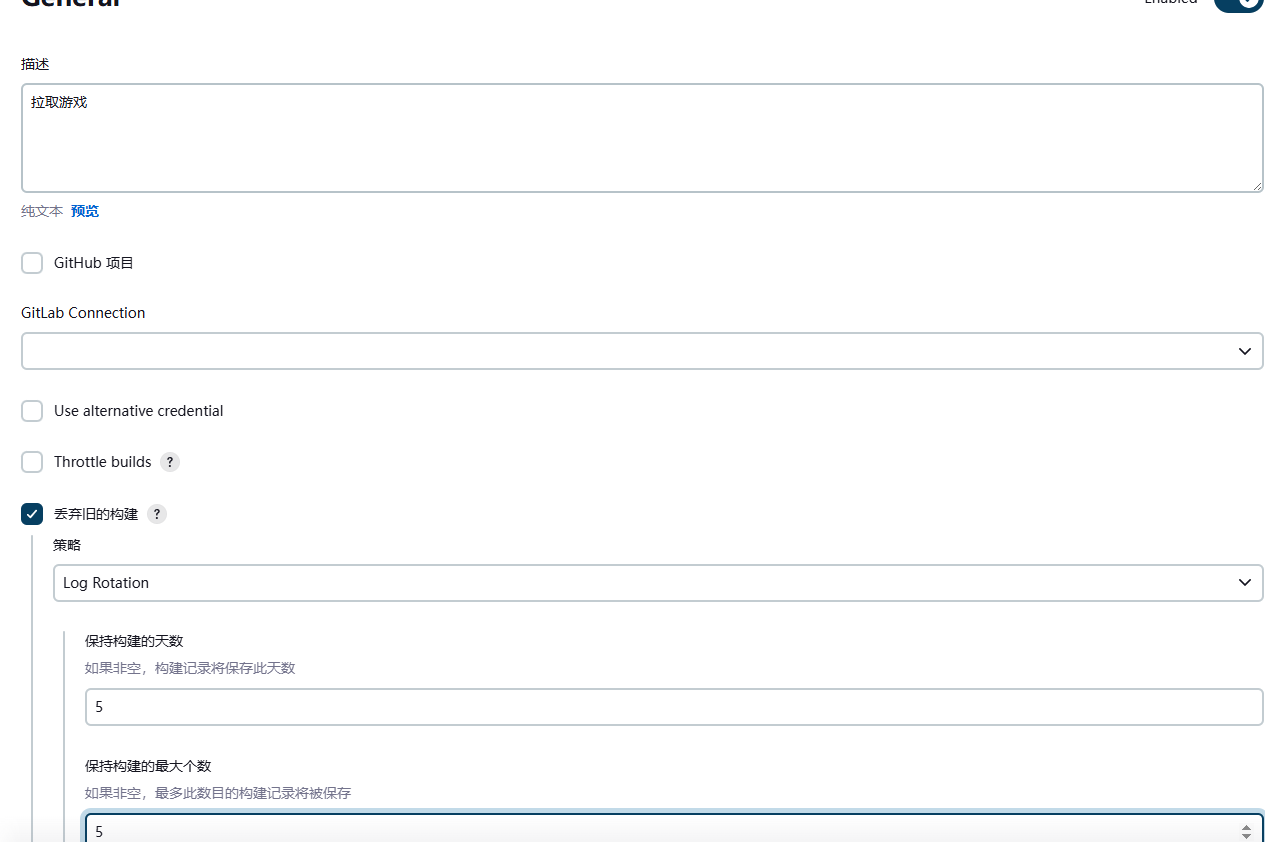
创建新项目
配置一下
可以看到工作目录
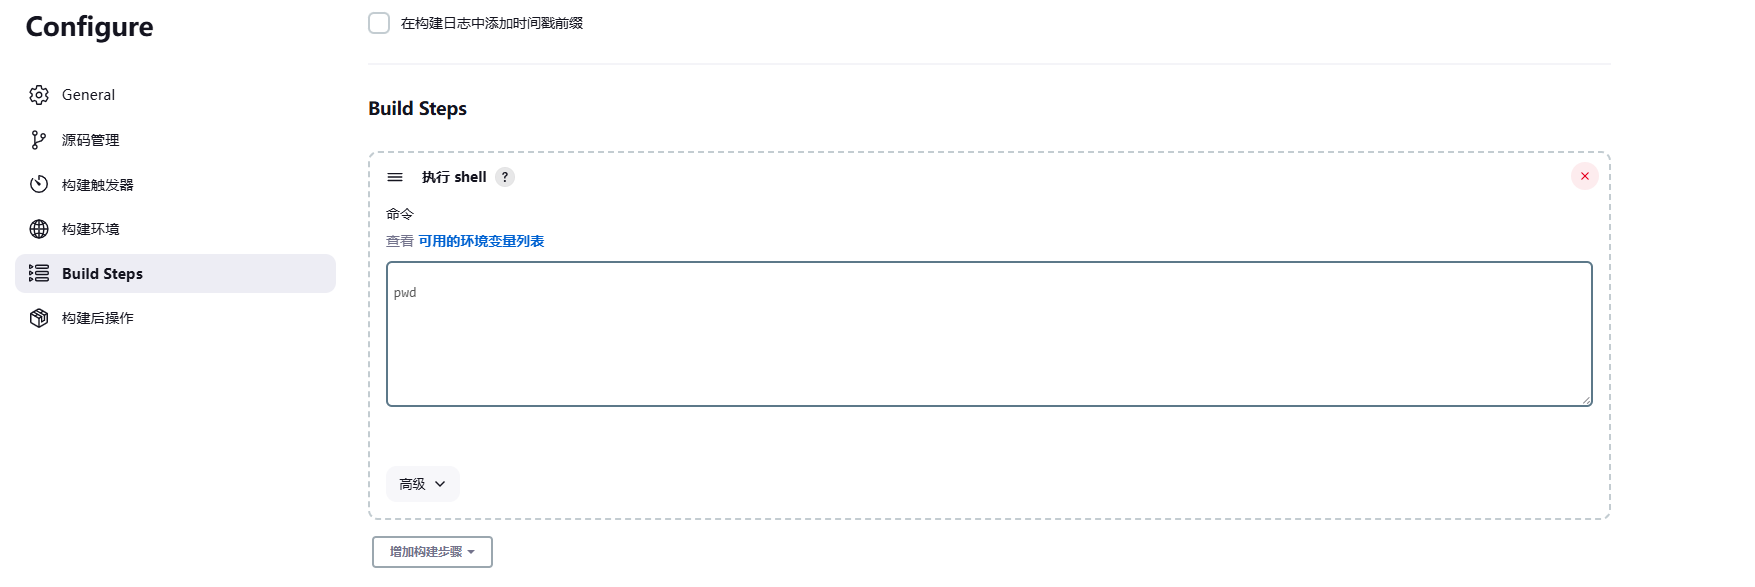
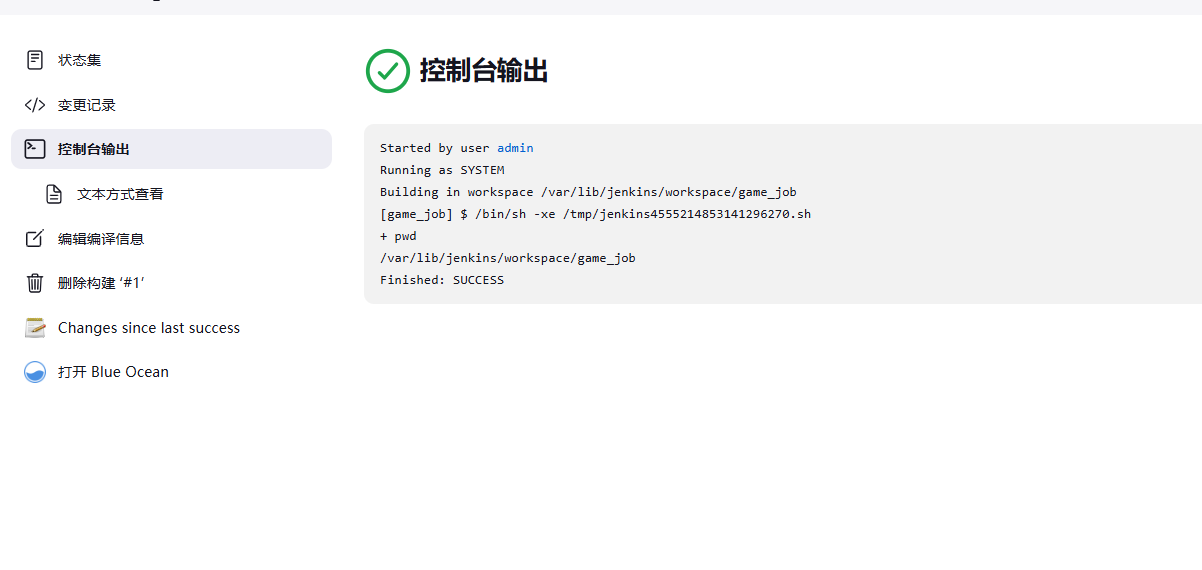
touch a.txt
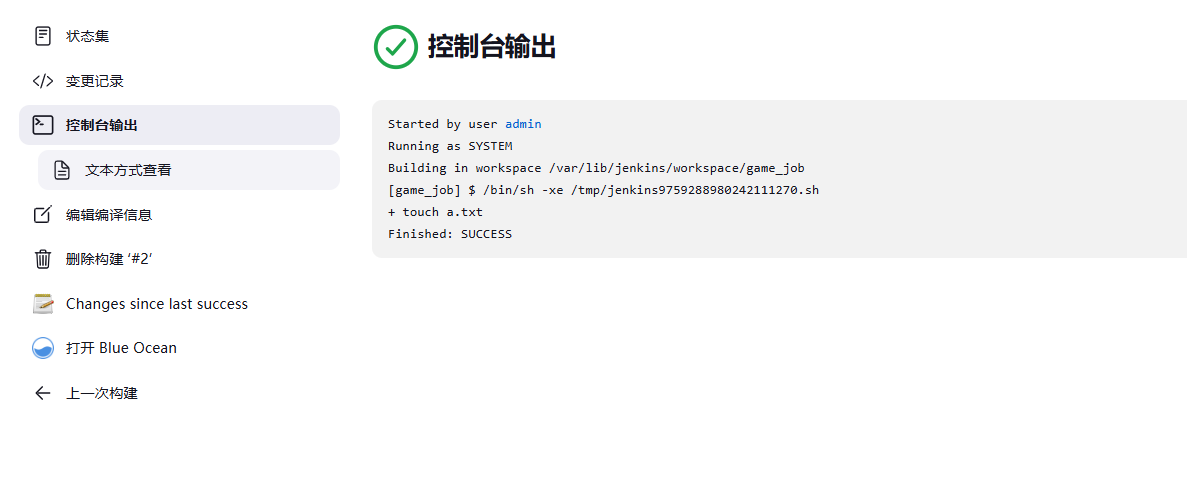
创建成功

拉取代码
gitlab
jk
1.生成密钥对

2.将公钥放到gitlab下
3.在jk命令行 克隆game项目
注意这里要先在命令行通过才行,不然会一只报红
因为页面没办法输入yes
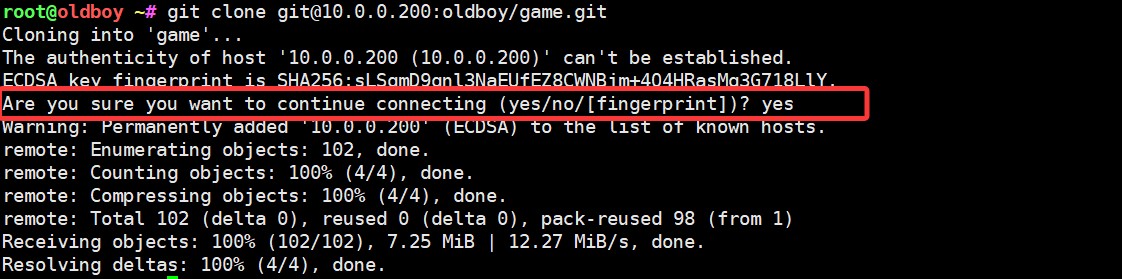
ok了
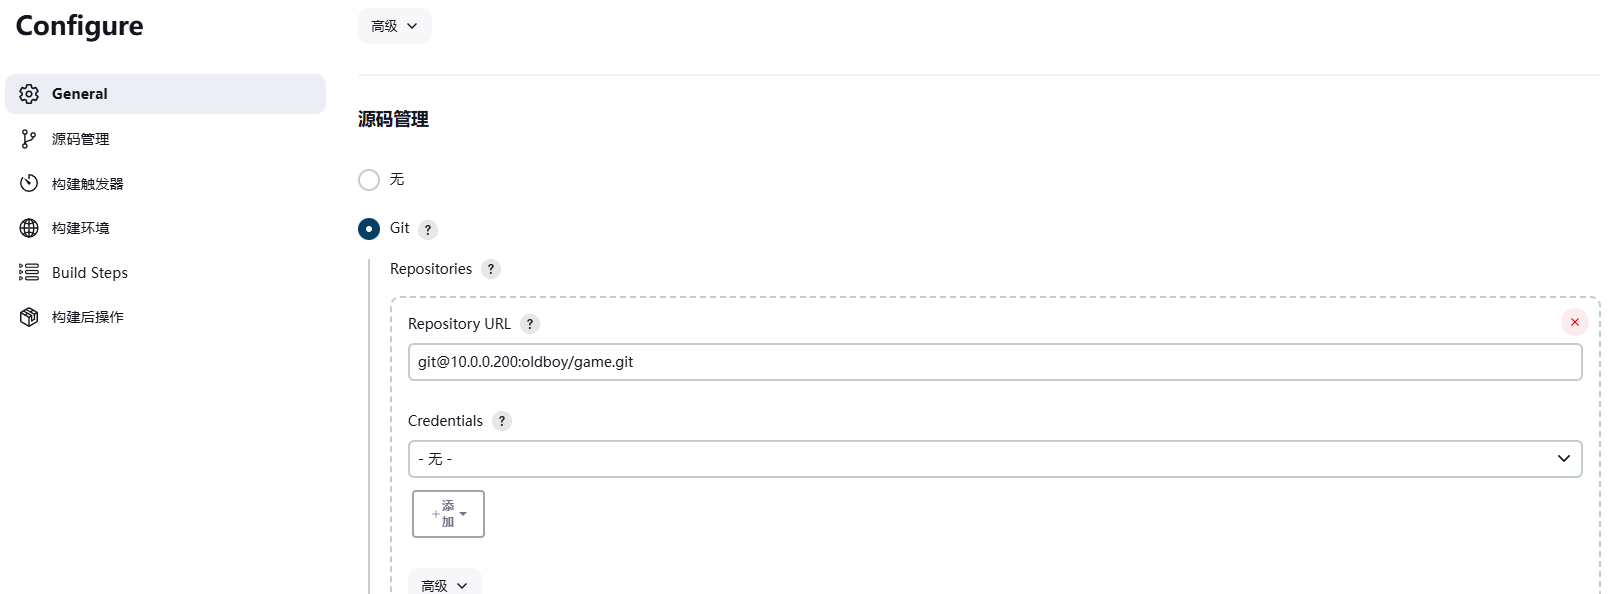
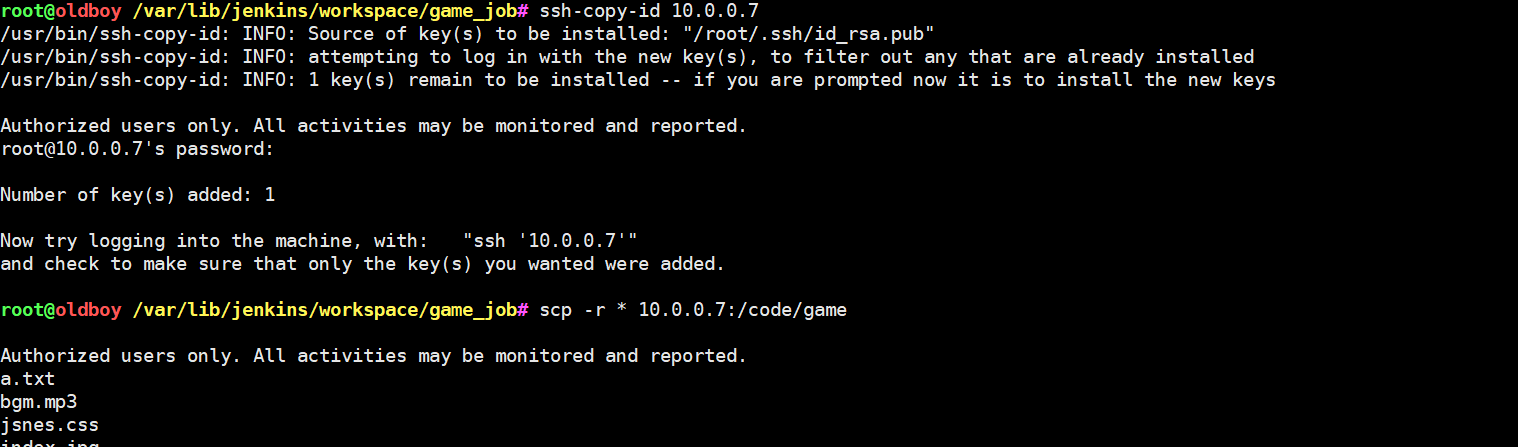
我想将jk拉取到的代码全部发给10.0.0.7
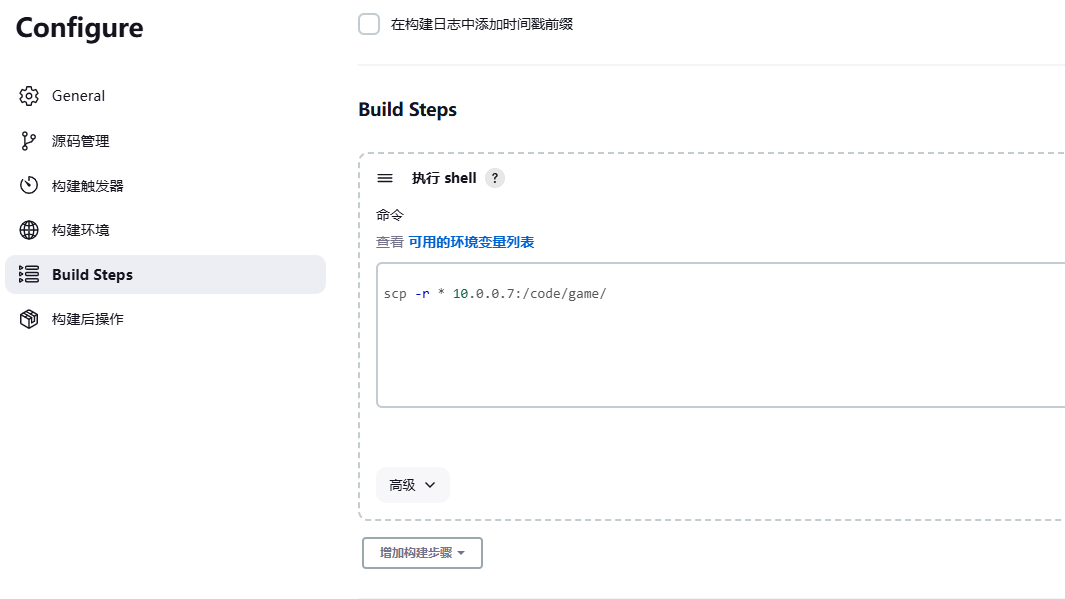
必须命令行要通过才可以(jk和web01的服务器打通)
3.Jnekins默认执行的Shell路径
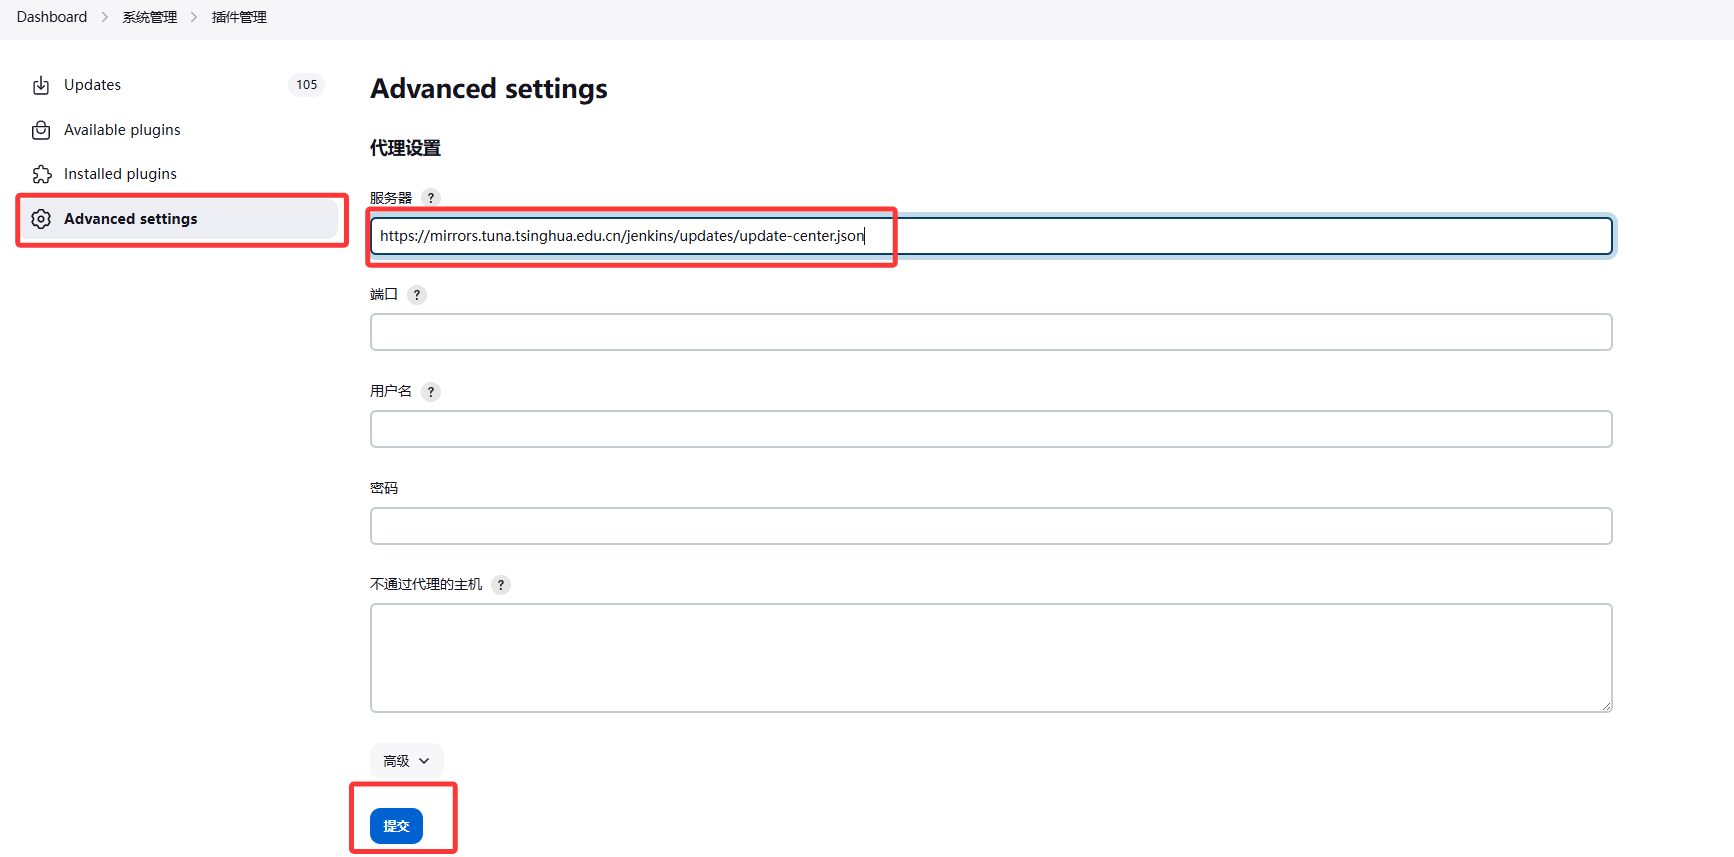
https://mirrors.tuna.tsinghua.edu.cn/jenkins/updates/update-center.json修改下载的网站为国内的清华园镜像
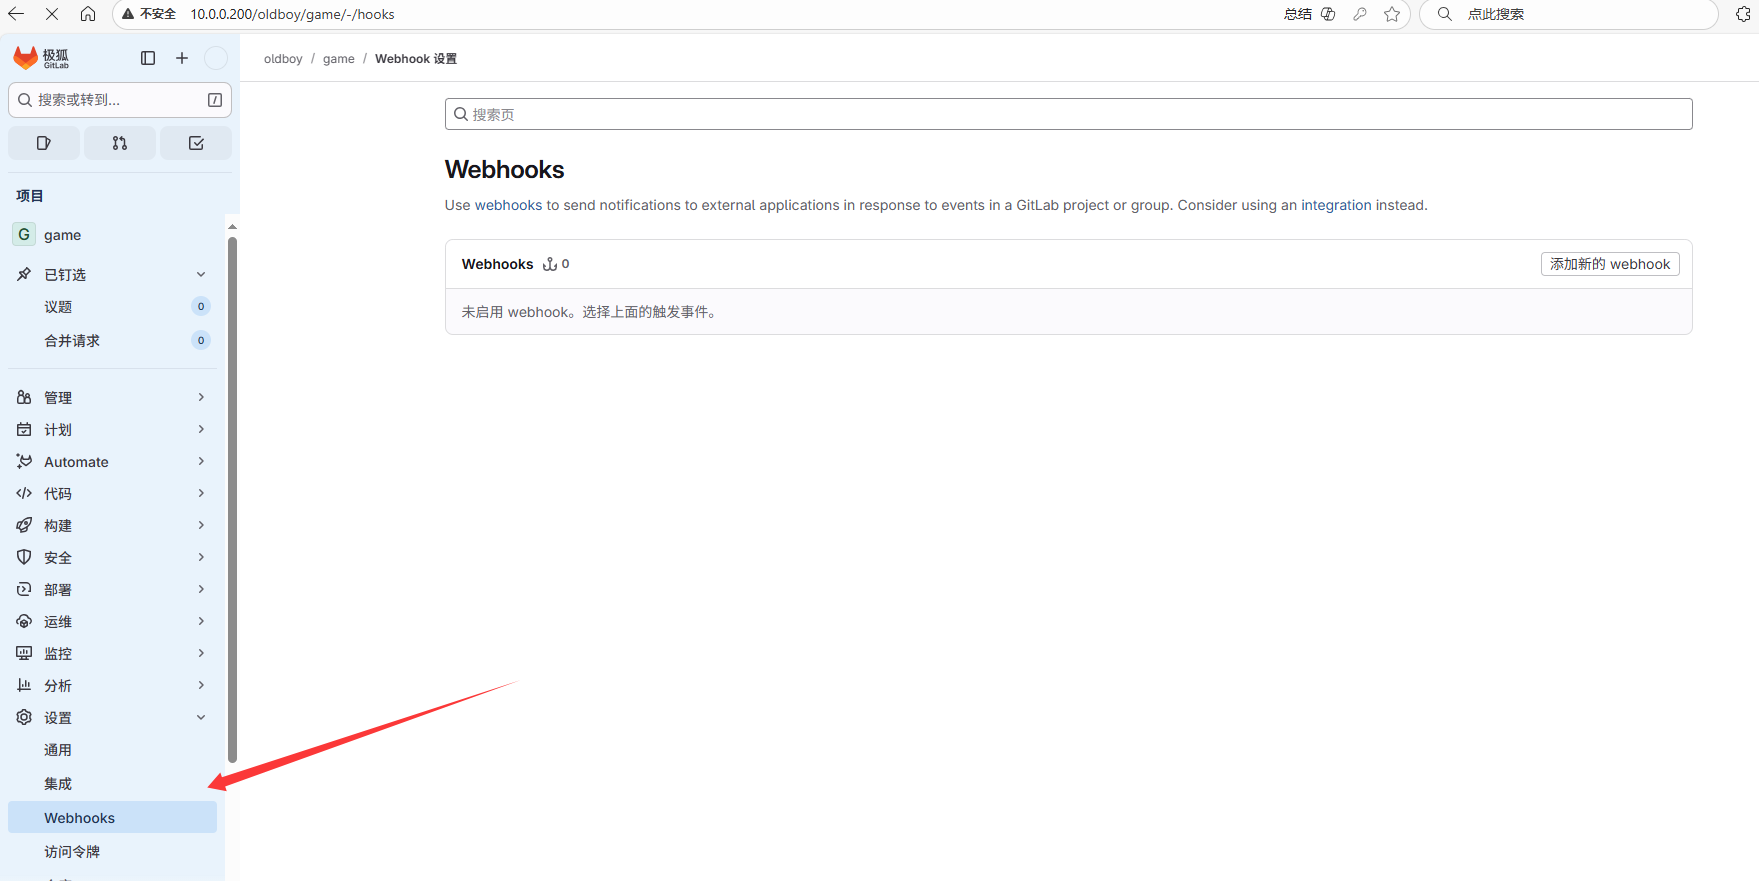
5.配置自动触发webhook勾子
在JK中打开触发器
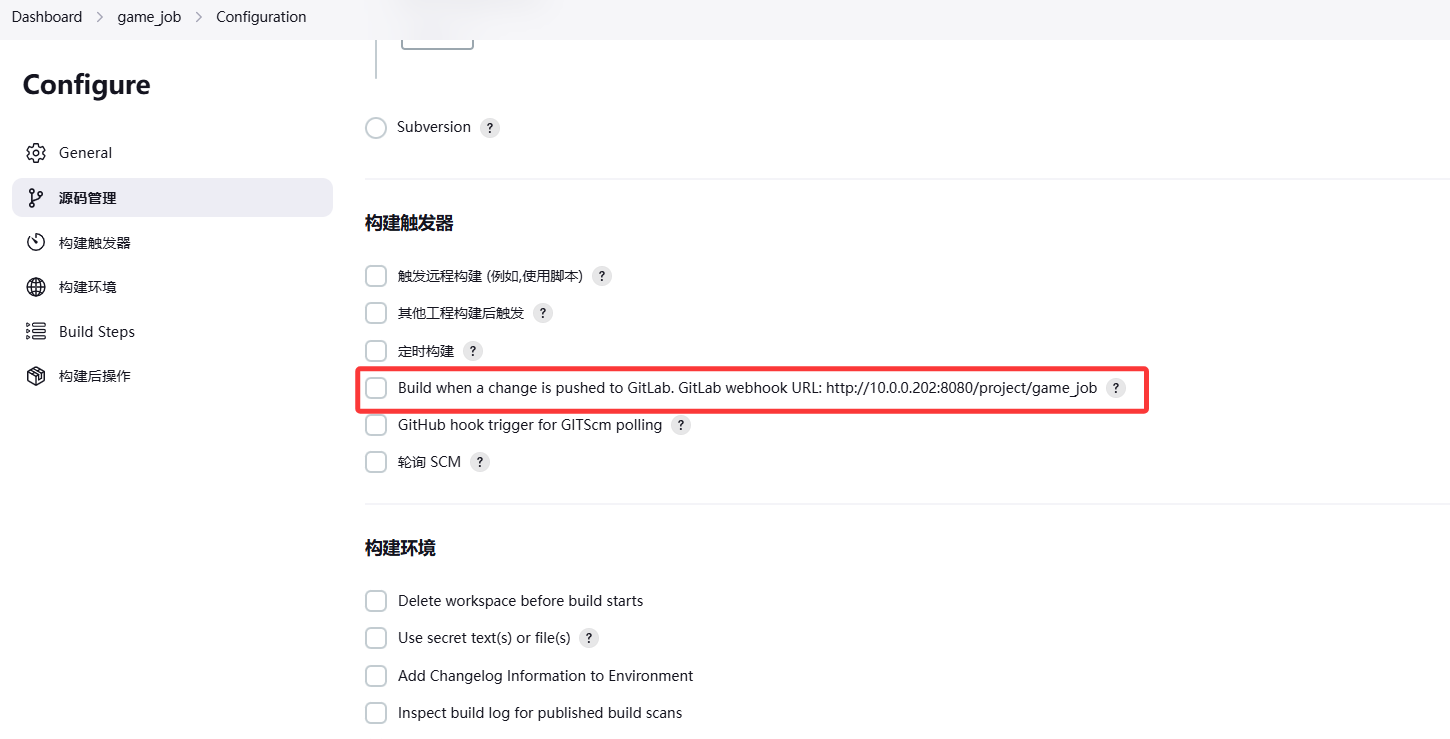
在gitlab中打开钩子
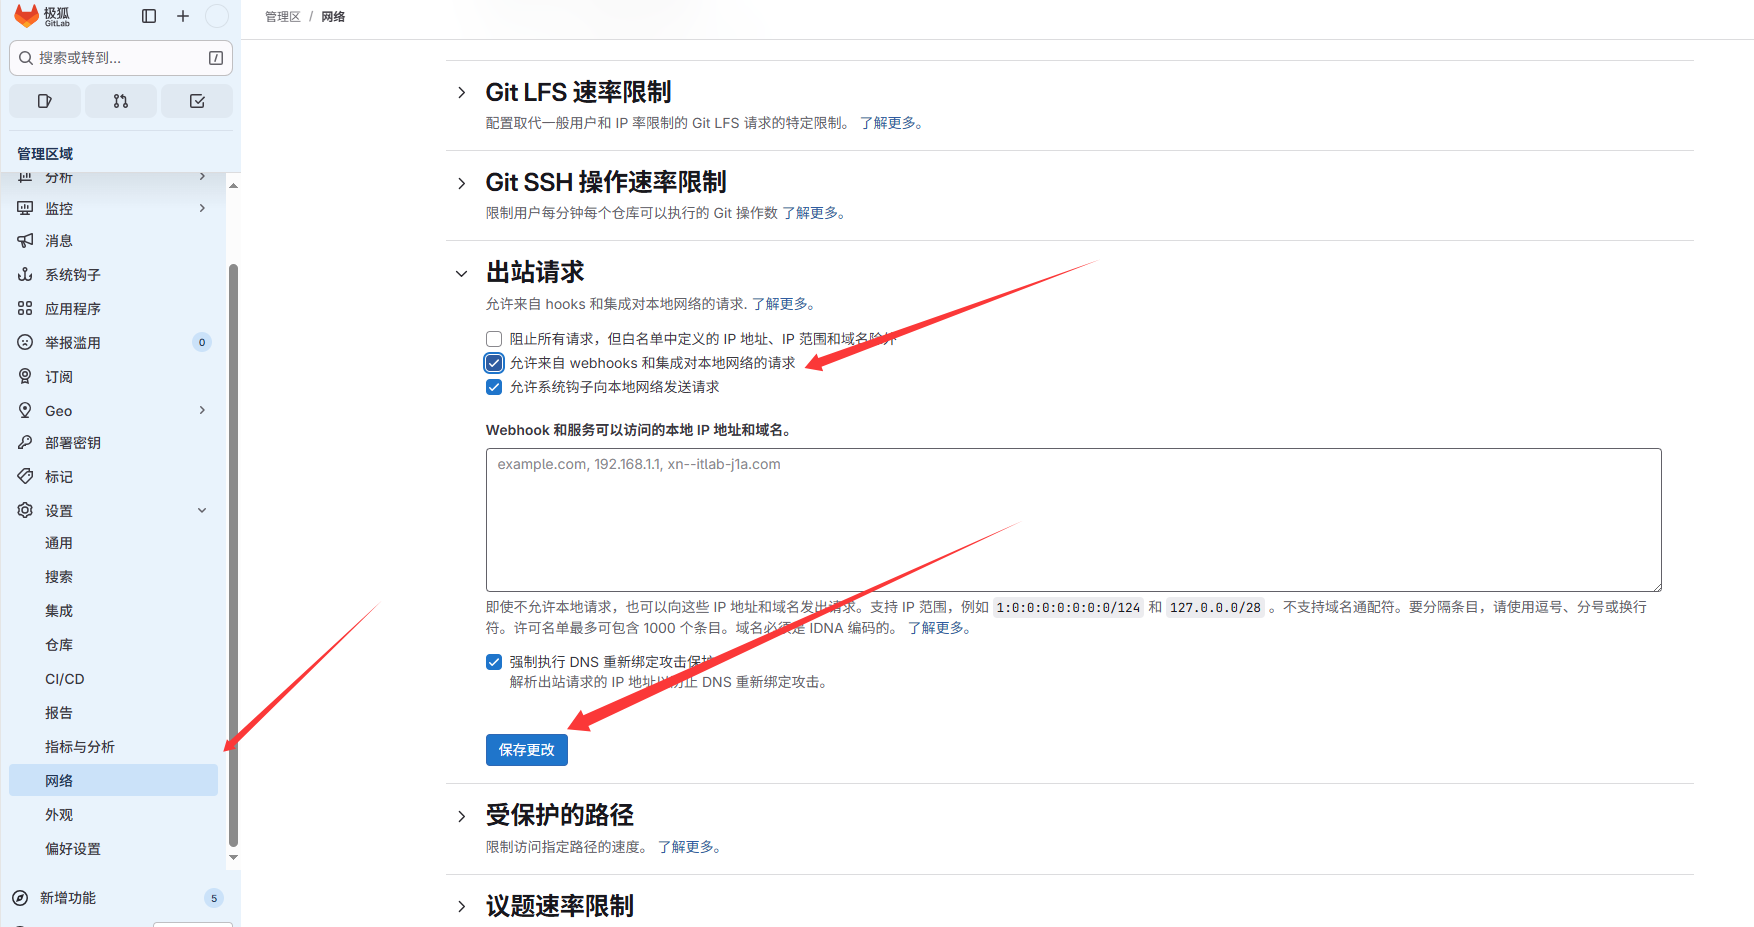
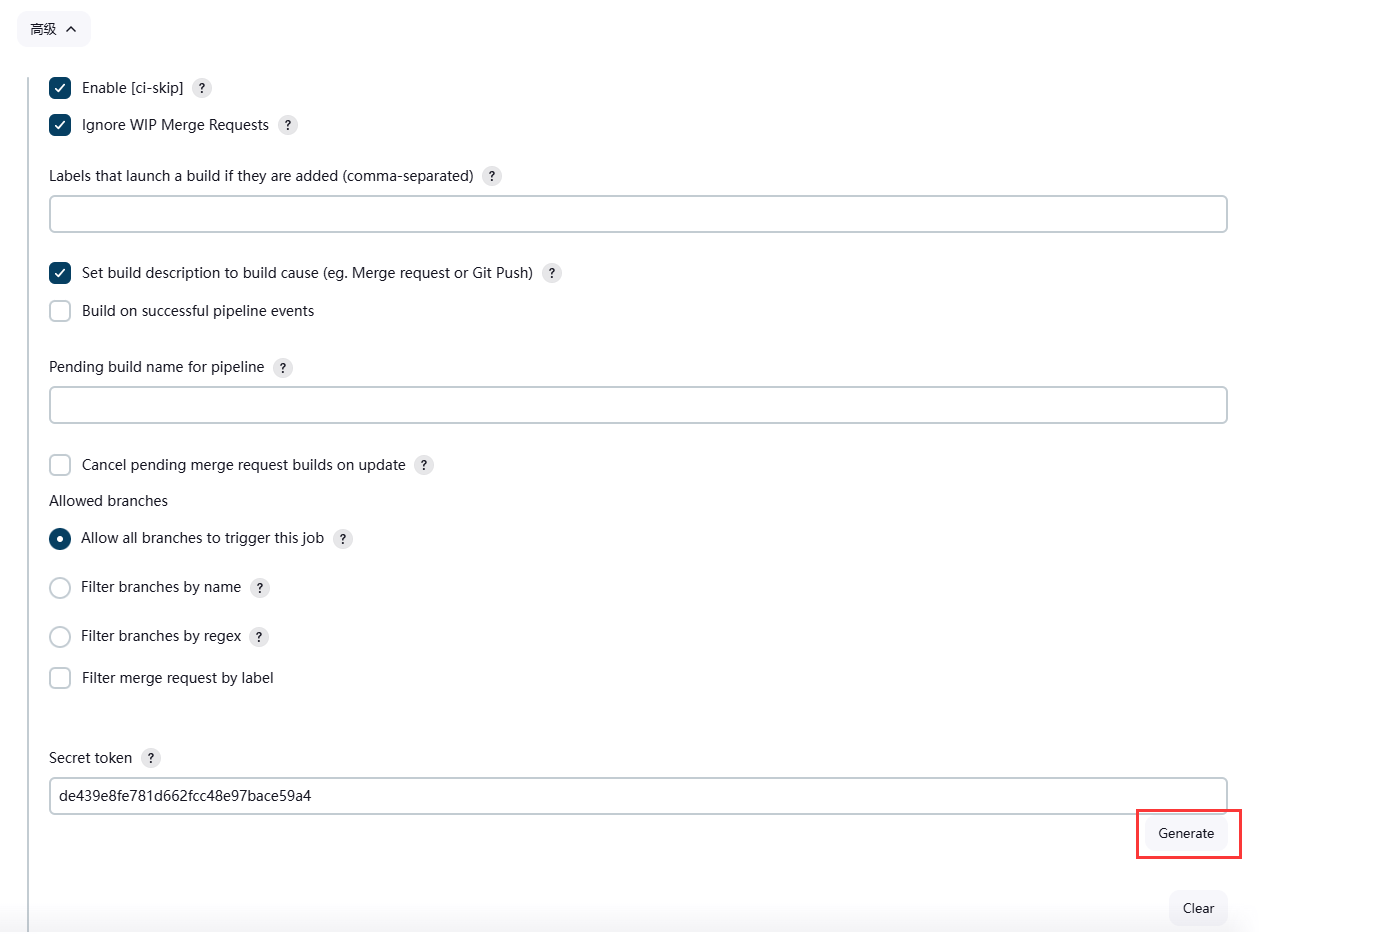
在JK中生成令牌
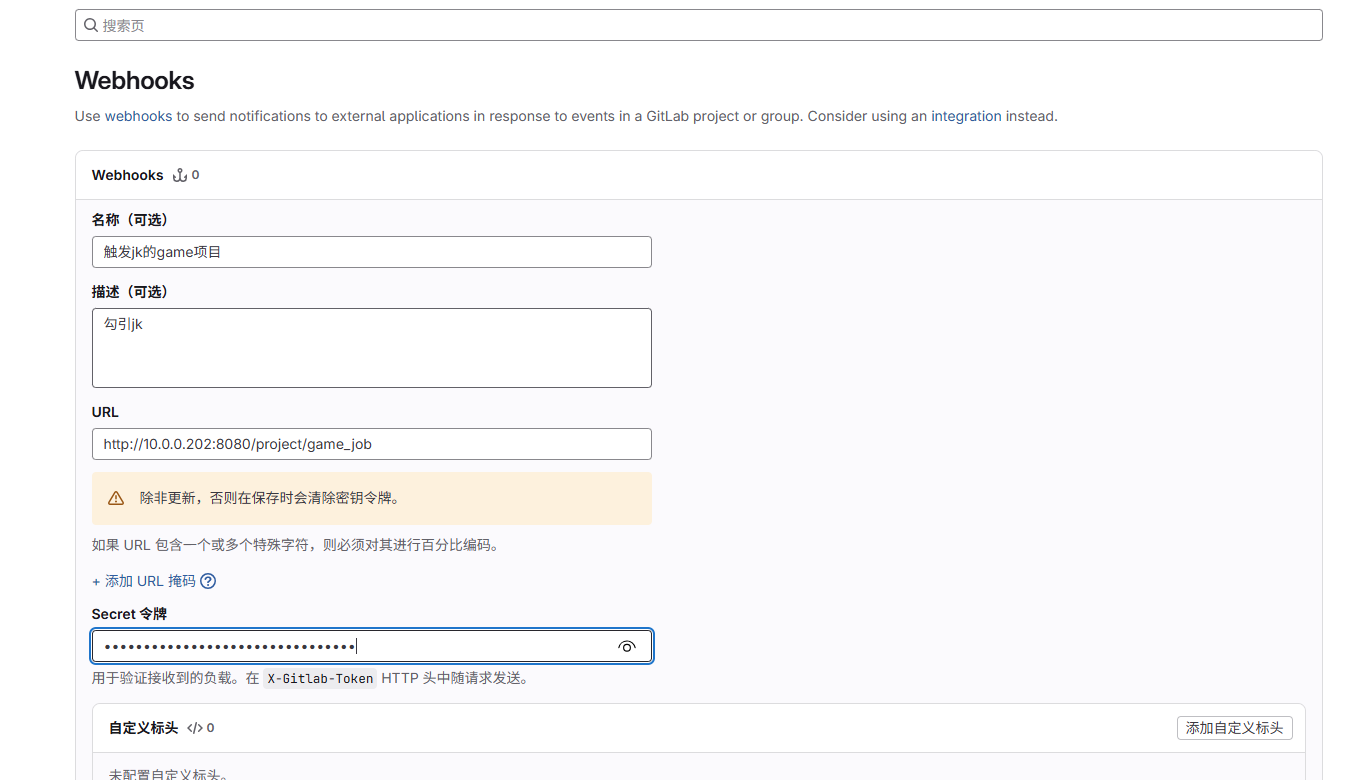
将网址和令牌设置到gitlab中

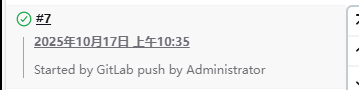
测试
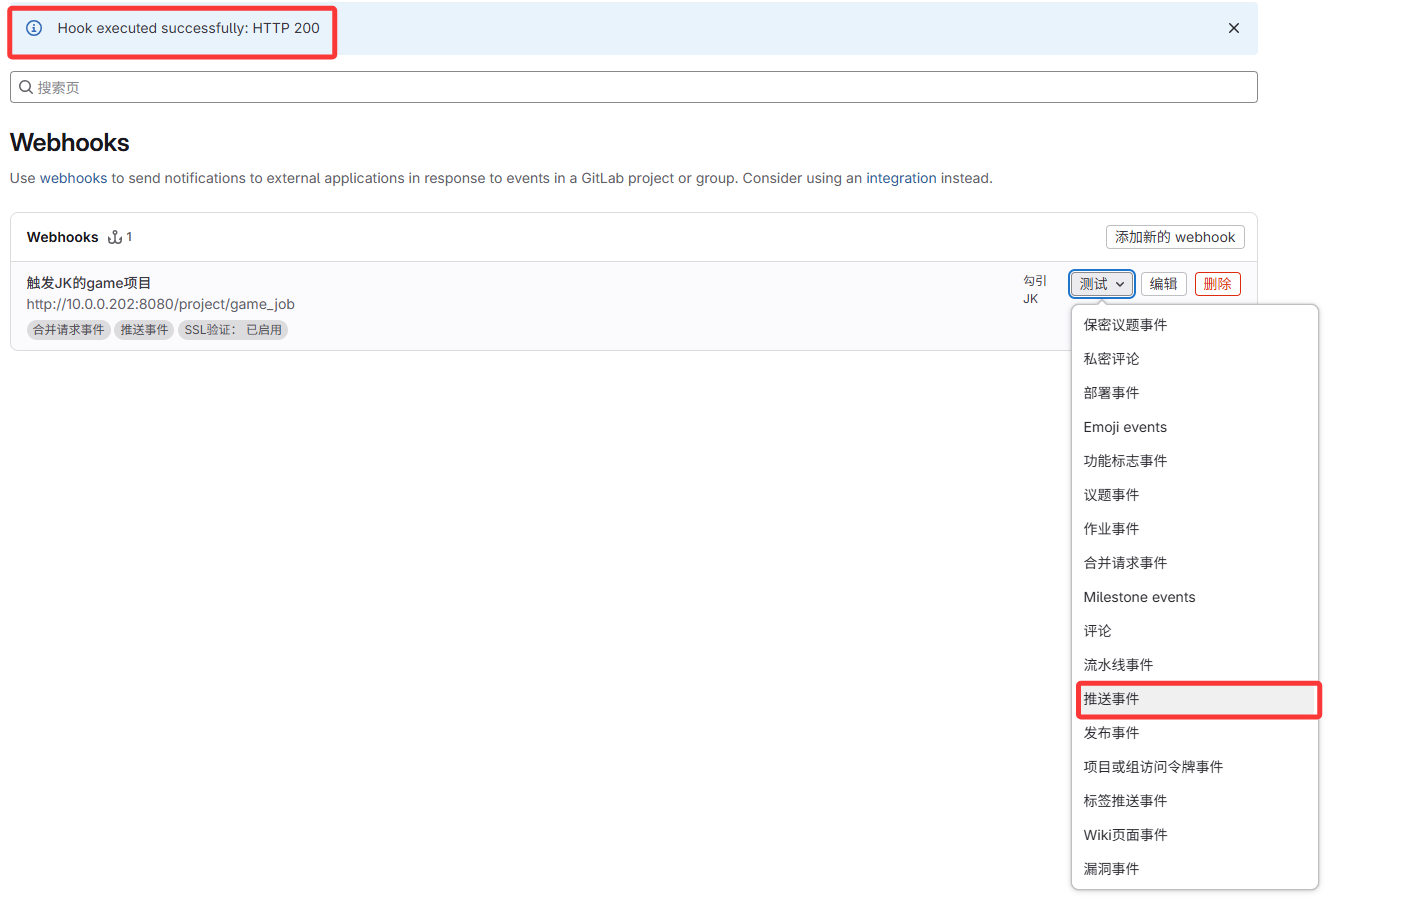
成功
4.SonarQube代码扫描
jenkins将代码拉取到jenkins本地,先将代码推送到sonar服务器上代码扫描检测,检测漏洞 逻辑创建服务器后
1.安装java
root@sonarqube ~# yum -y install java

2.安装mysql
root@sonarqube ~# wget dev.mysql.com/get/mysql-community-release-el6-5.noarch.rpm
root@sonarqube ~# rpm -ivh mysql-community-release-el6-5.noarch.rpm
#禁止gpgcheck
root@sonarqube ~# vim /etc/yum.repos.d/mysql-community.repo
...
# Enable to use MySQL 5.6
...
gpgcheck=0
...

root@sonarqube ~# yum -y install mariadb-server
root@sonarqube ~# service mysqld start
root@sonarqube ~# mysqladmin -uroot password Lidao996

root@sonarqube ~# mysql -uroot -pLidao996 -e "CREATE DATABASE sonar DEFAULT CHARACTER SET utf8;"
Warning: Using a password on the command line interface can be insecure.
root@sonarqube ~# mysql -uroot -pLidao996 -e "show databases;"
Warning: Using a password on the command line interface can be insecure.
+--------------------+
| Database           |
+--------------------+
| information_schema |
| mysql              |
| performance_schema |
| sonar              |
+--------------------+

3.安装sonarqube
#将文件拖入
#解压
root@sonarqube ~# unzip sonarqube-7.0.zip -d /usr/local/
#创建软链接
root@sonarqube ~# ln -s /usr/local/sonarqube-7.0/ /usr/local/sonarqube
#修改连接数据库信息
root@sonarqube /usr/local/sonarqube# vim conf/sonar.properties
...
sonar.jdbc.username=root
sonar.jdbc.password=Lidao996
...
sonar.jdbc.url=jdbc:mysql://localhost:3306/sonar?useUnicode=true&characterEncoding=utf8&rewriteBatchedStatements=true&useConfigs=maxPerformance&useSSL=false
...

4.创建普通用户sonar
root@sonarqube /usr/local/sonarqube# useradd sonar
root@sonarqube /usr/local/sonarqube# chown -R sonar.sonar /usr/local/sonarqube-7.0/

5.使用sonar用户运行服务
root@sonarqube /usr/local/sonarqube# su - sonar -c "/usr/local/sonarqube/bin/linux-x86-64/sonar.sh start"
6.安装插件
root@sonarqube /usr/local/sonarqube/extensions/plugins# cd /usr/local/sonarqube/extensions/plugins

#将插件压缩包上传
[root@sonarqube:plugins]#rm -rf *
[root@sonarqube:plugins]#tar xf sonar_plugins.tar.gz
[root@sonarqube:plugins]#mv plugins/* .

#重启sonarqube服务
[root@sonarqube:~]#su - sonar -c"/usr/local/sonarqube/bin/linux-x86-64/sonar.sh restart"
用户名和密码 admin
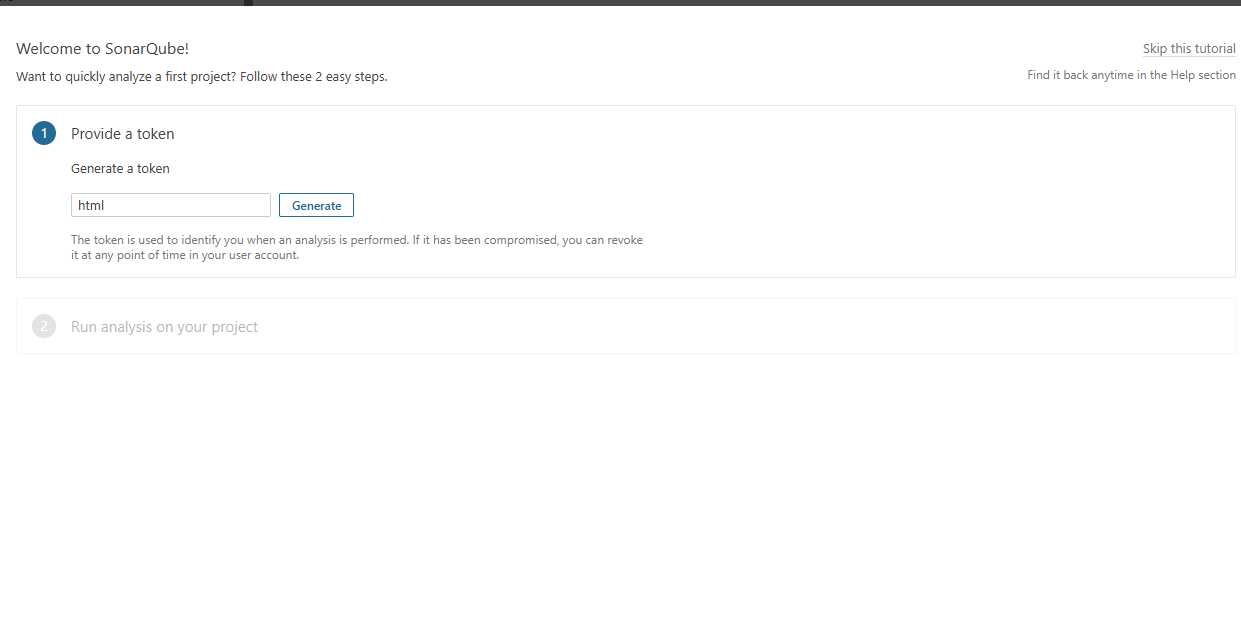
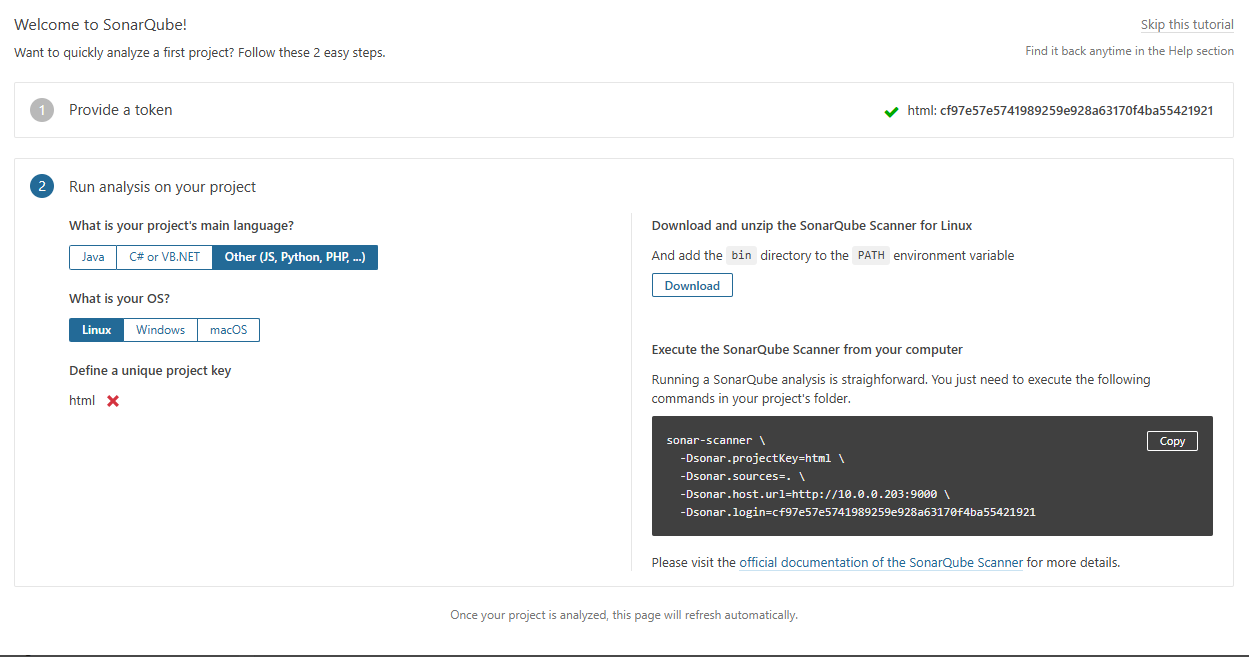
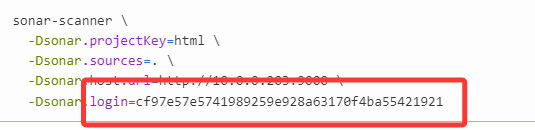
链接凭证:
sonar-scanner \
-Dsonar.projectKey=html \
-Dsonar.sources=. \
-Dsonar.host.url=http://10.0.0.203:9000 \
-Dsonar.login=cf97e57e5741989259e928a63170f4ba55421921
3.客户端执行代码扫描上传到sonar服务器
#安装客户端
root@oldboy ~#unzip sonar-scanner-cli-4.2.0.1873-linux.zip -d /usr/local/
root@oldboy /usr/local# ln -s sonar-scanner-4.2.0.1873-linux/ sonar-scanner

#将客户端命令写入PATH变量
root@oldboy /usr/local/sonar-scanner# tail -1 /etc/profile
export PATH="/usr/local/sbin:/usr/local/bin:/usr/sbin:/usr/bin:/root/bin:/root/bin:/usr/local/sonar-scanner/bin"

#执行代码扫描

sonar-scanner \
  -Dsonar.projectKey=html \
  -Dsonar.sources=. \
  -Dsonar.host.url=http://10.0.0.203:9000 \
  -Dsonar.login=cf97e57e5741989259e928a63170f4ba55421921
运行后

刷新一下
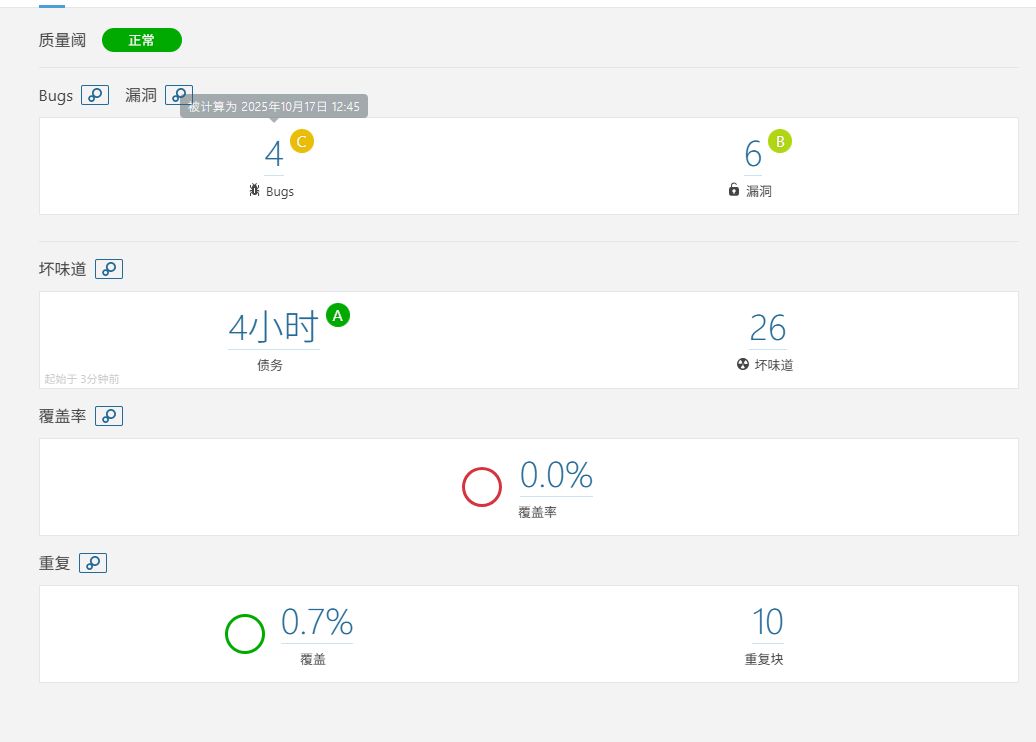
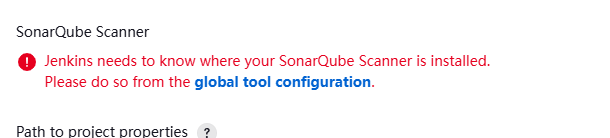
4.配置jenkins集成soanrqube
配置服务端
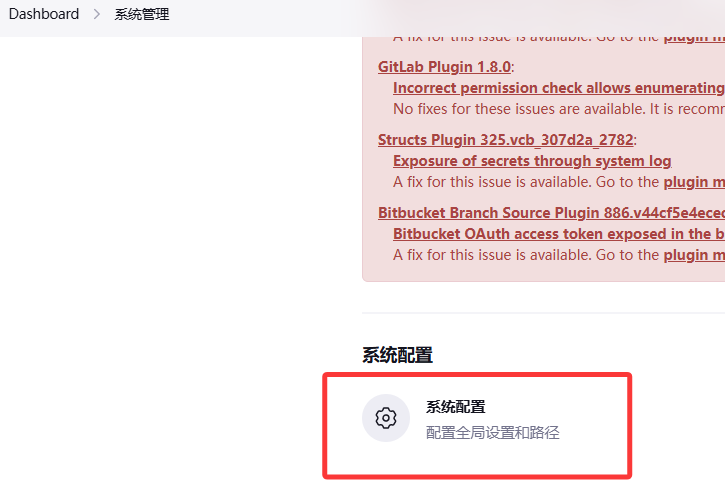
保存再重新进

密码为这个
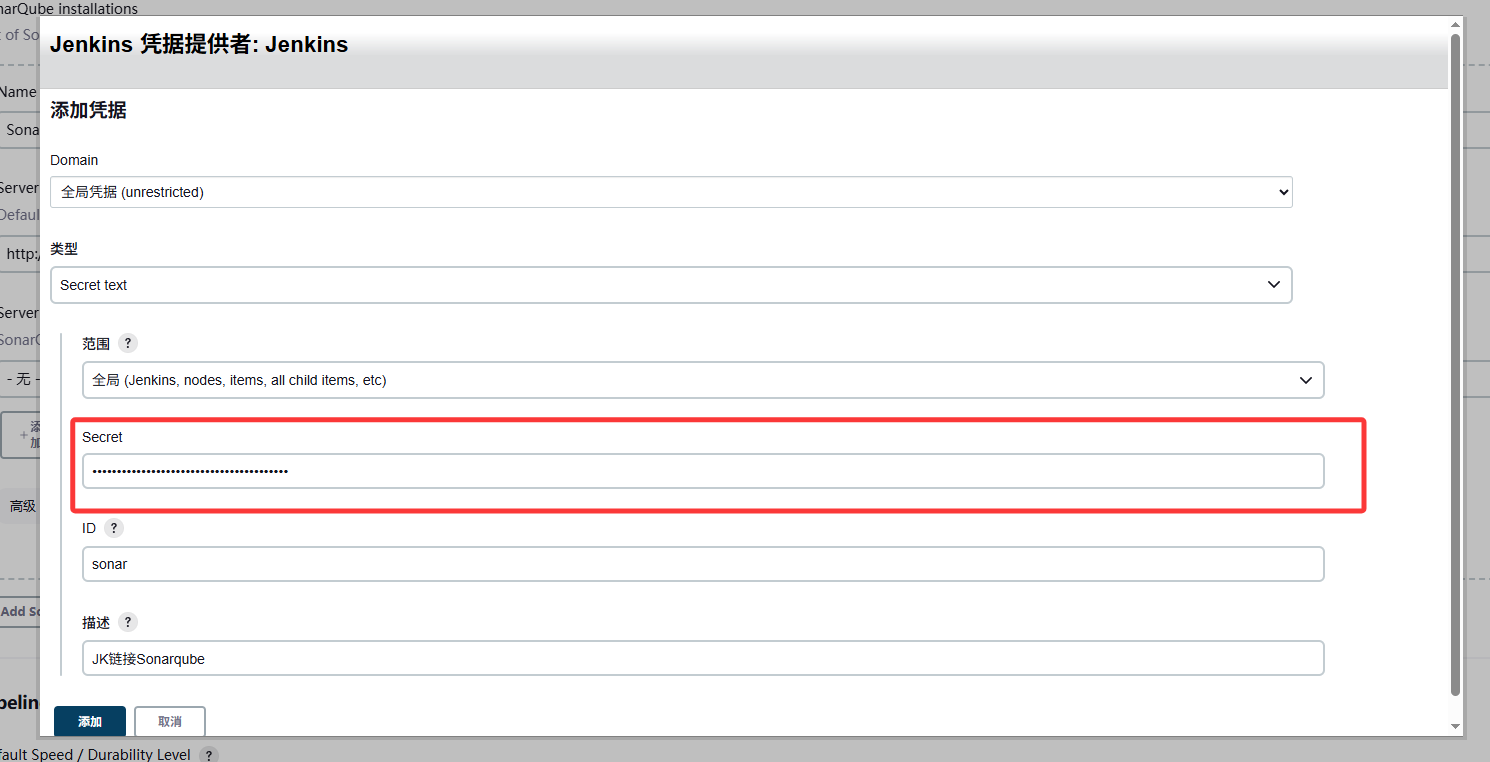
保存即可
配置客户端
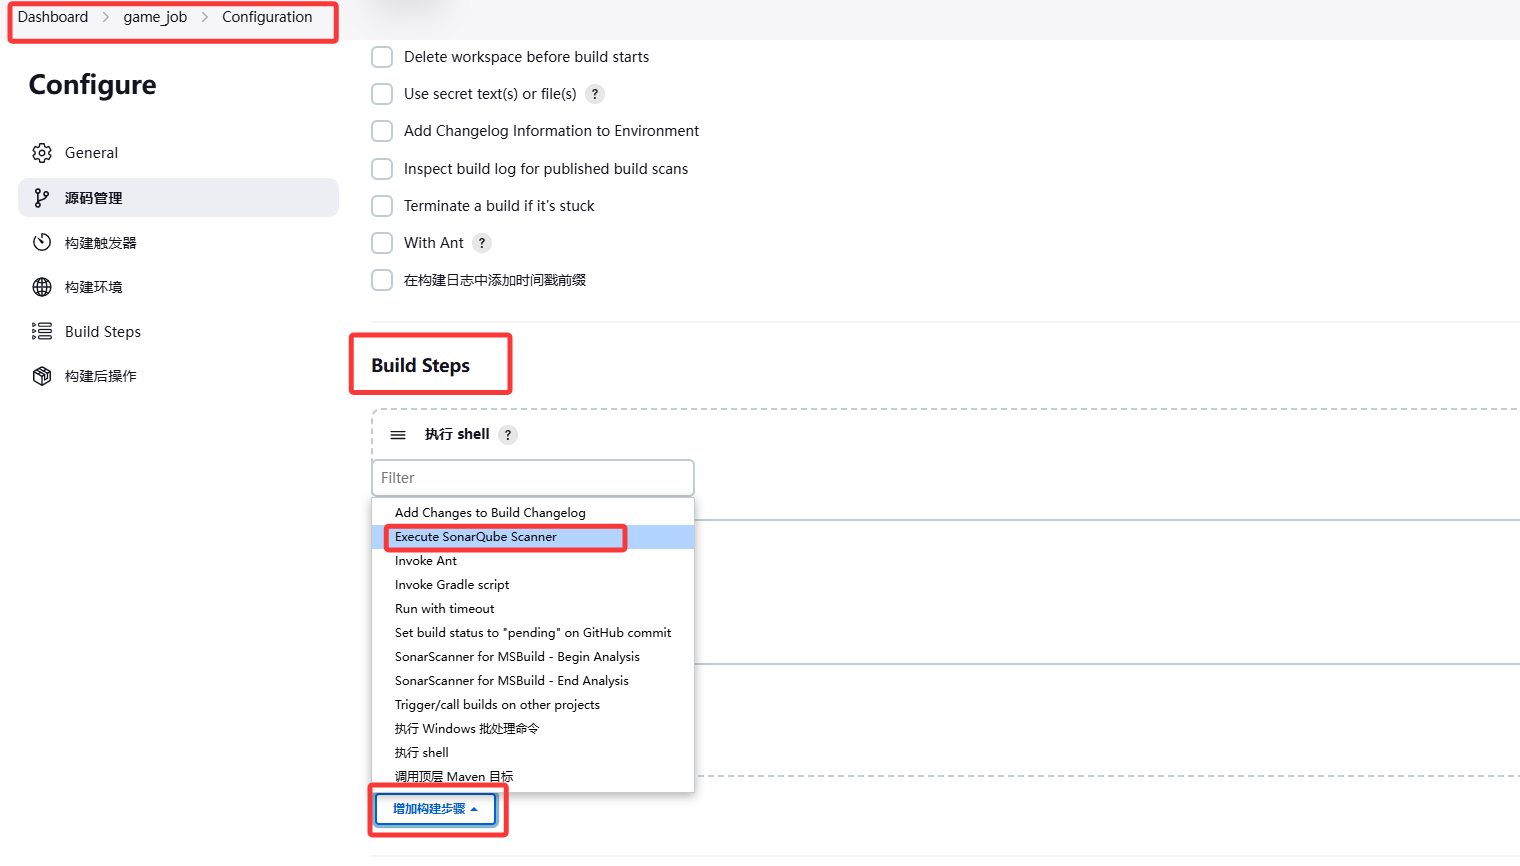
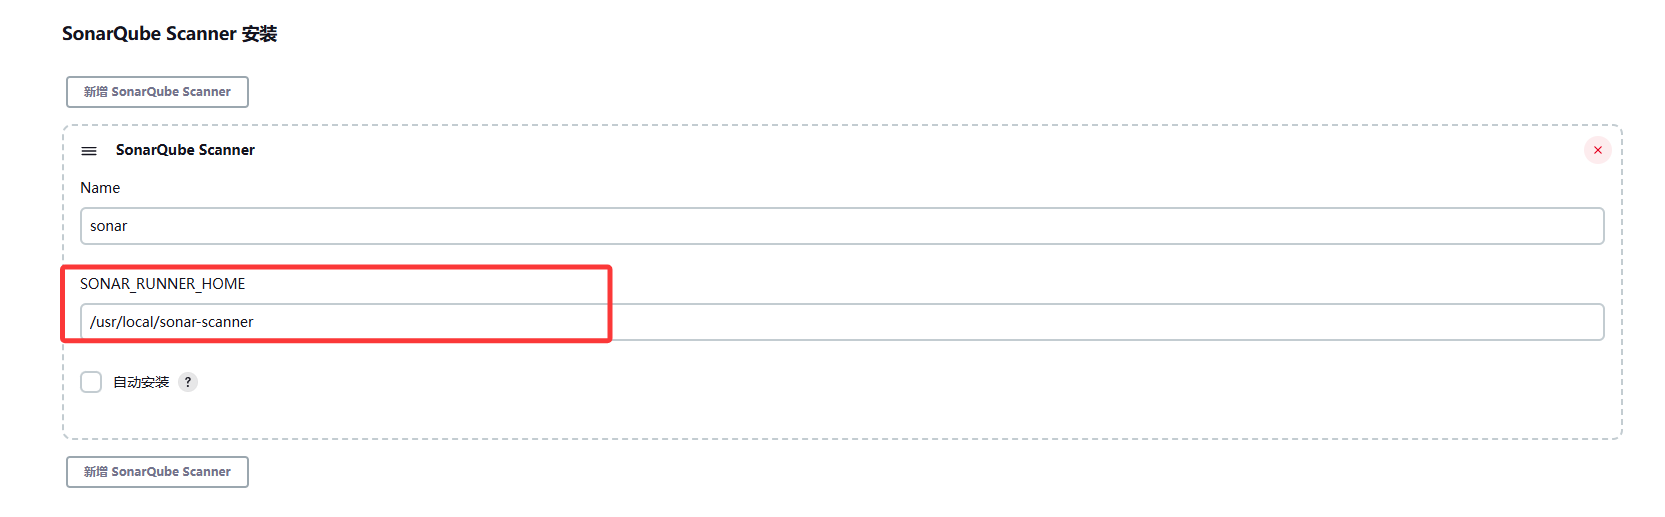
配置全局工具
将之前下载的sonar路径复制
再修改一下配置文件

sonar的配置改为sonarqube的9000端口以及密码
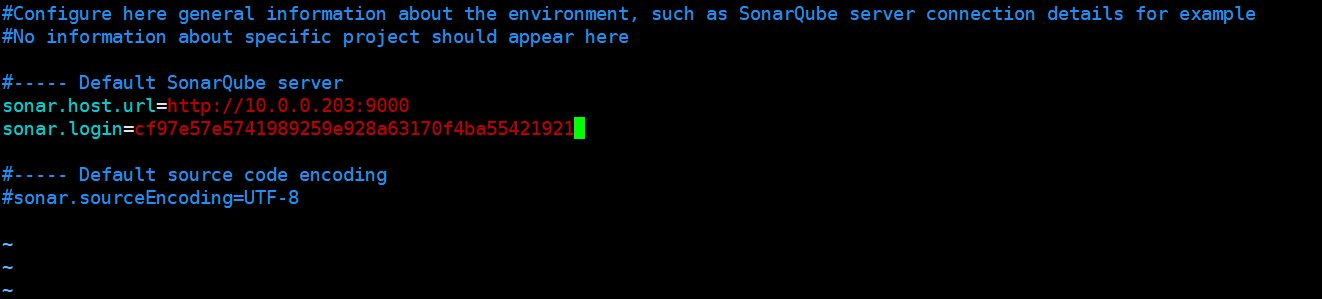
将这三行粘到这里
sonar.projectName=${JOB_NAME}
sonar.projectKey=html
sonar.sources=. 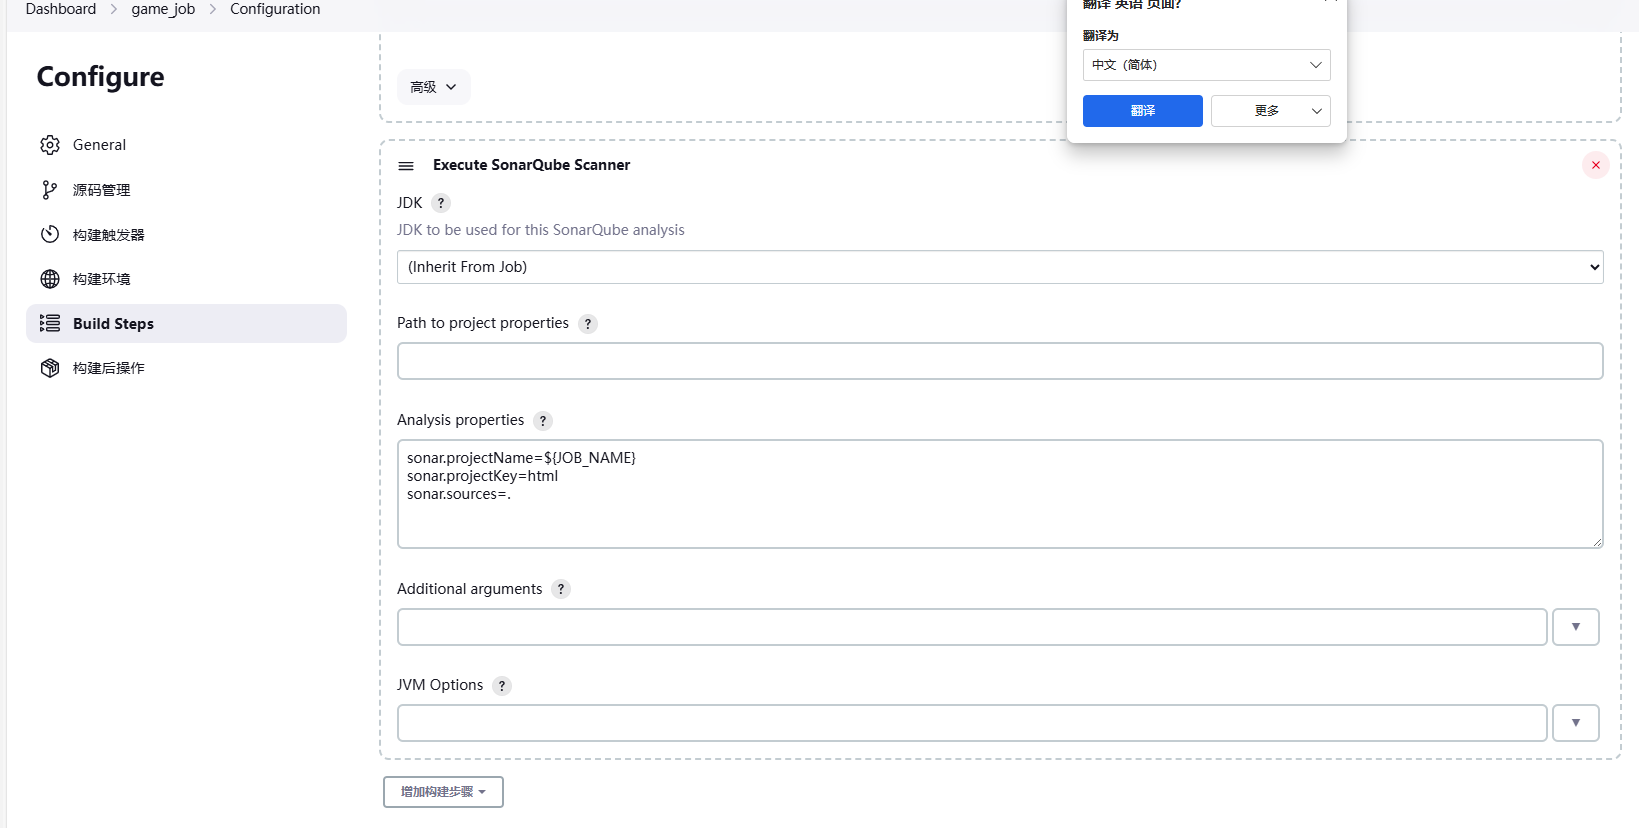
在10.0.0.200上面修改,上传代码
成功后直接看


5.今日总结
- gitlab的两种代码上传方式
- gitlab合并请求
- Jenkins的安装部署
- Jenkins自动拉取代码更新
- SonarQube代码自动检测