使用vs code 创建.net8.0以及.net6.0 webApi项目
以下是创建.net8.0的例子,.net6.0同理也是如此创建。
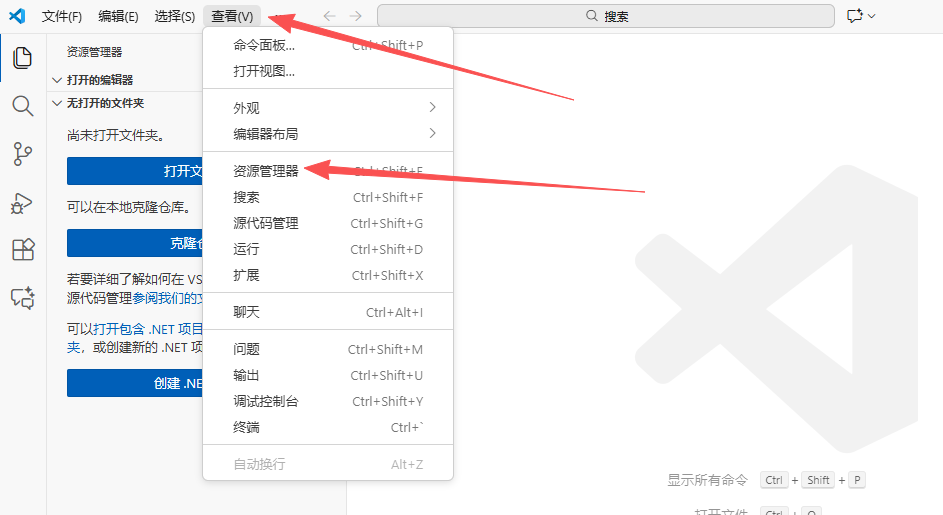
第一步:打开vscode
第二步:选择查看==》资源管理器
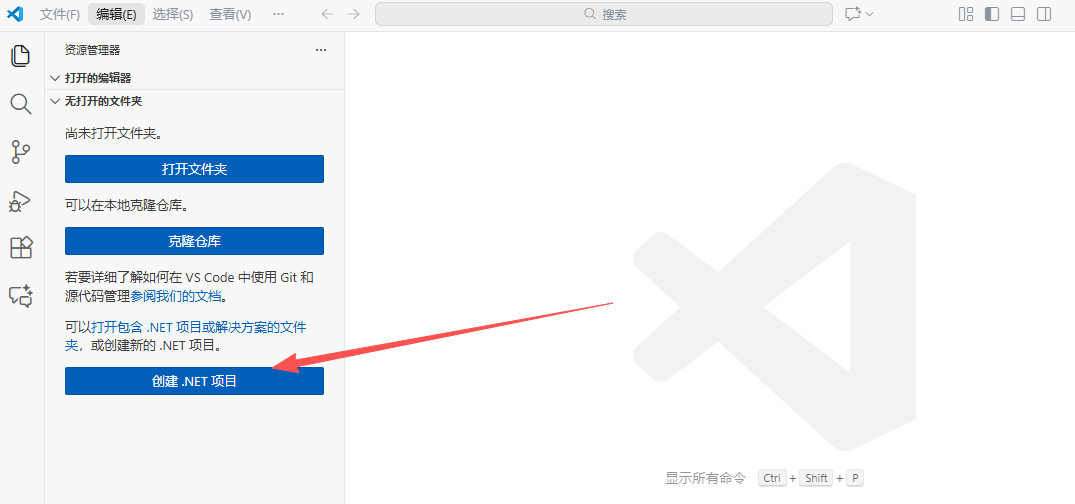
第三步:点击【创建.NET 项目】
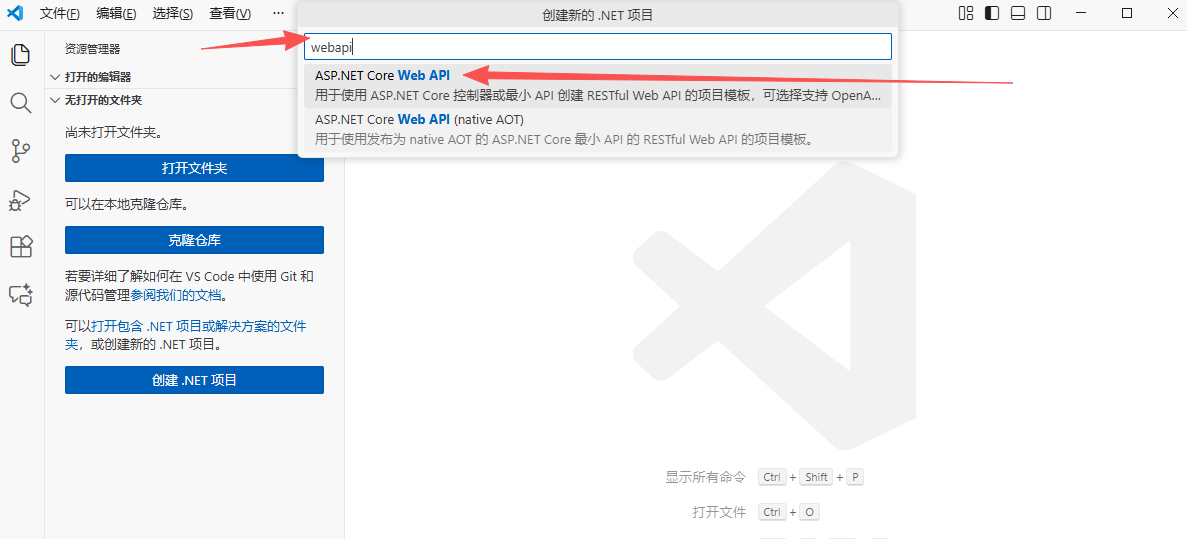
第三步:在搜索文本框框中输入 "webapi",选择 ASP.NET Core Web API,,然后选择要要保存代码的文件夹
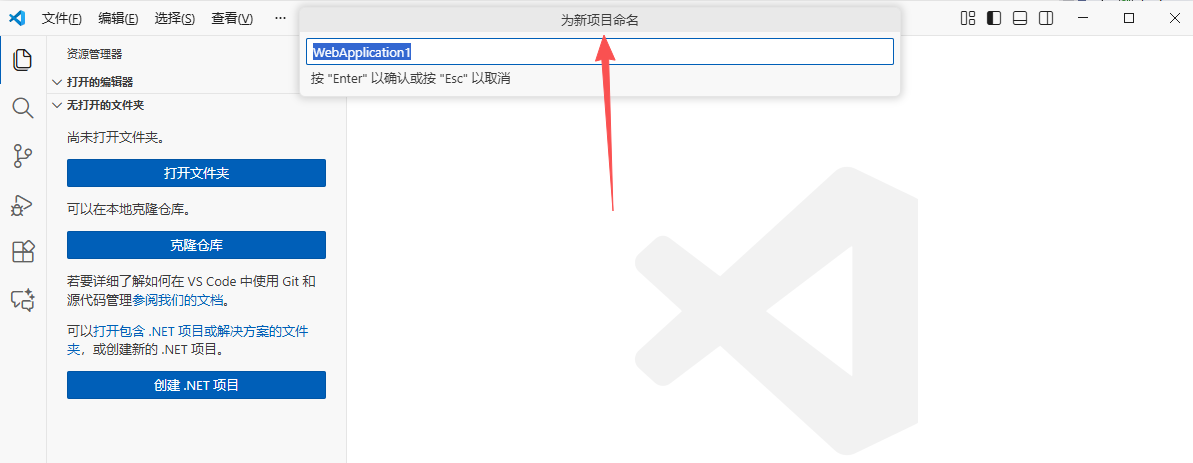
 第四步:为新项目命名,并按步骤选择解决方案文件格式

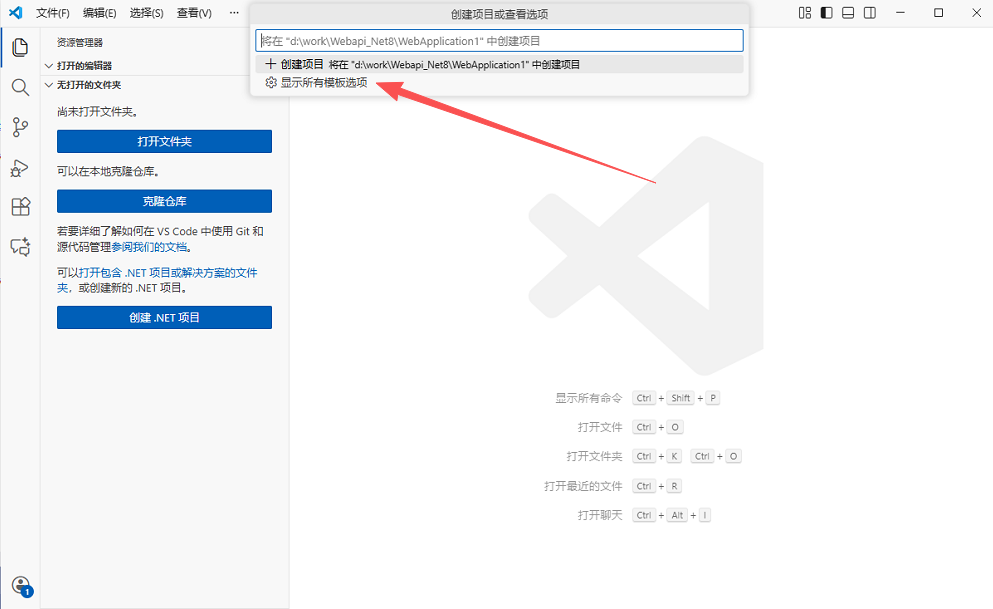
第五步:选择【显示所有模板选项】
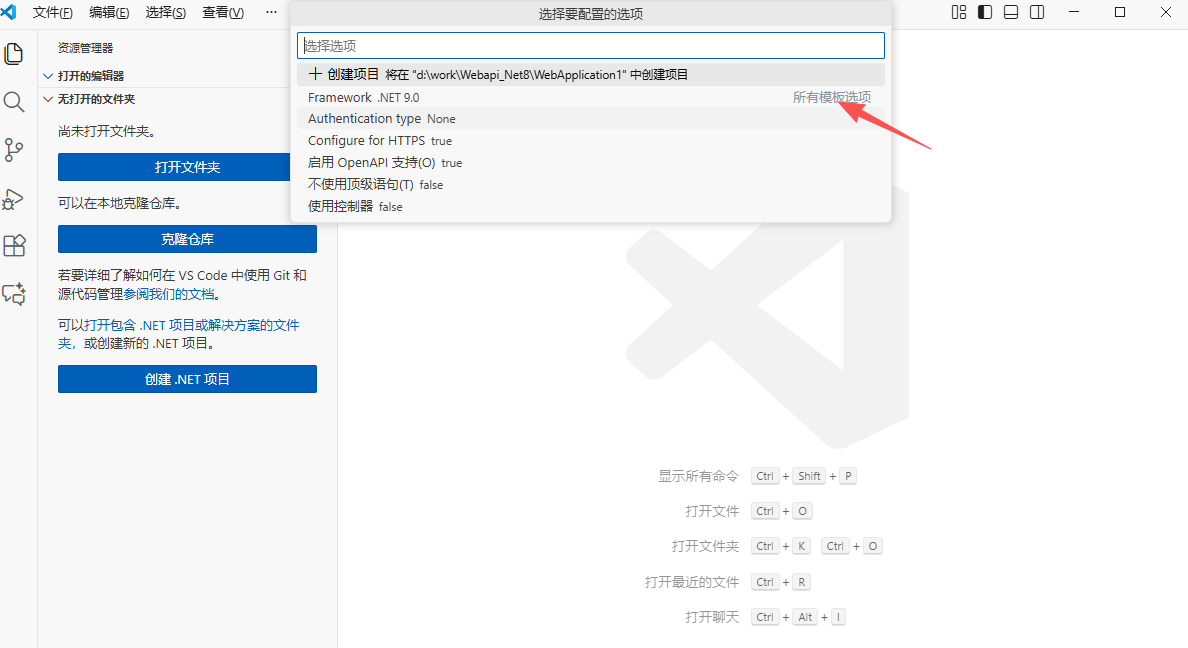
第六步:如截图所示,选择第二行 "所有模板选项"
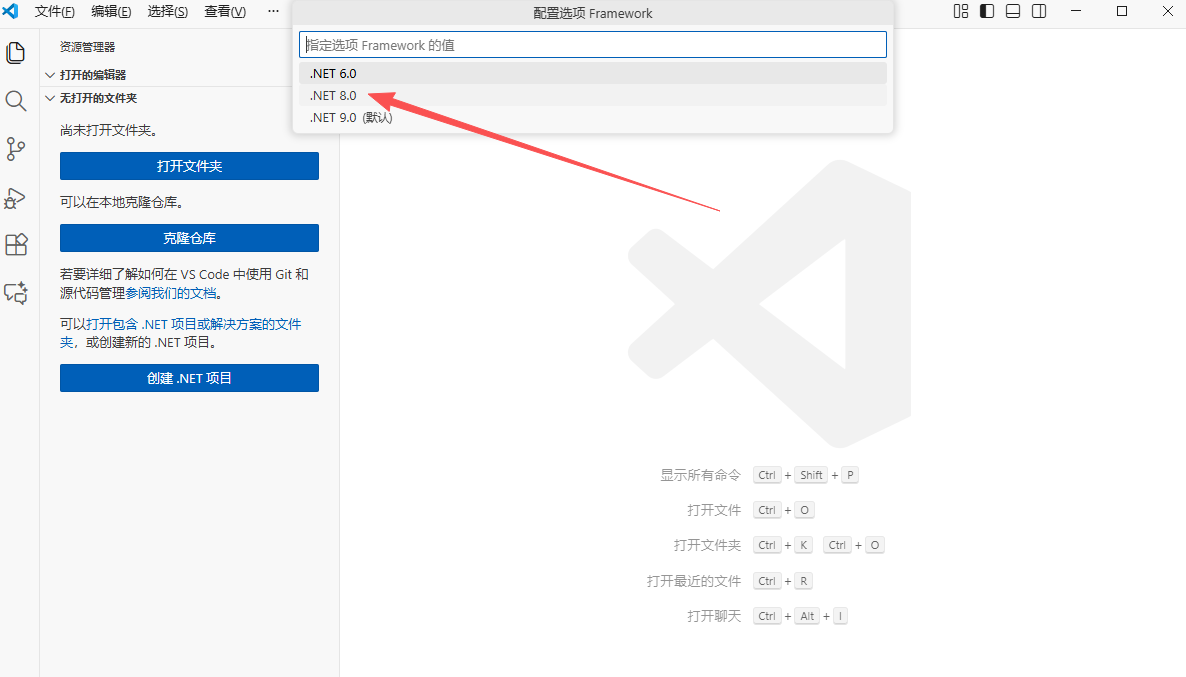
第七步:选择.NET8.0
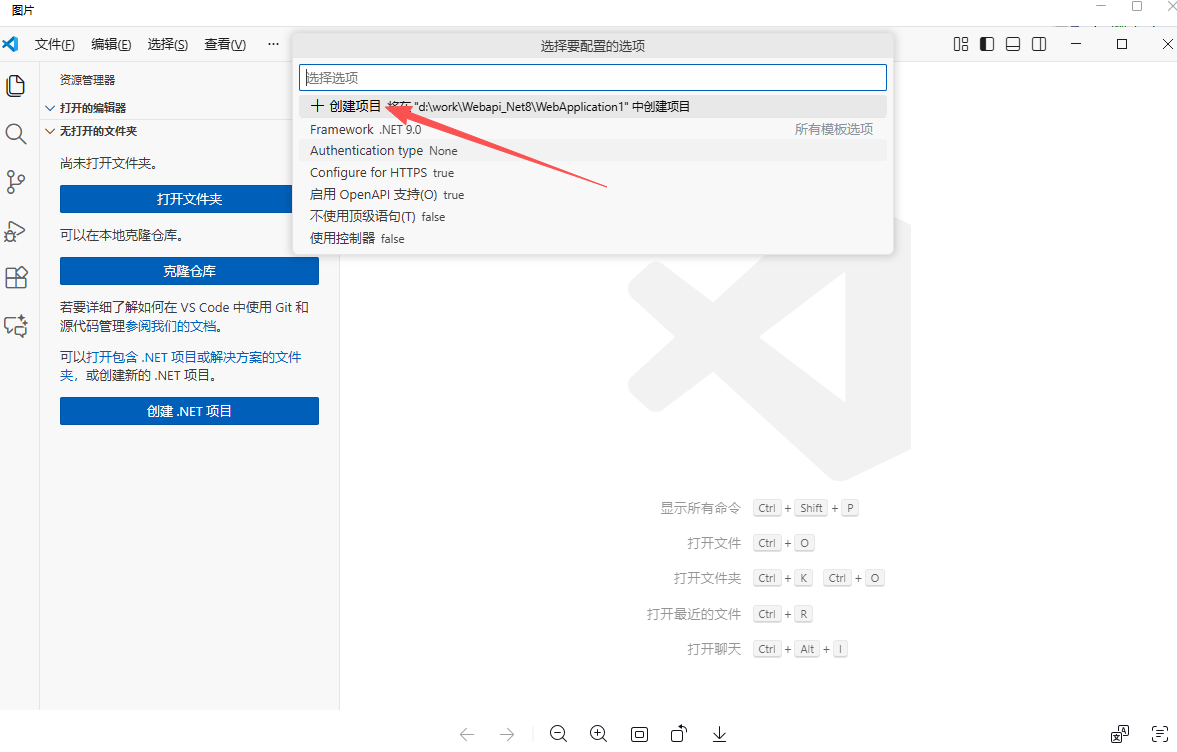
第八步:最后选择【创建项目......】,项目创建成功。
常用命令如下:
一.创建解决方案:
#创建解决方案 sln
dotnet new sln -n xxx
二.创建项目:
创建类库项目
dotnet new classlib -n xxx.Common
三.创建控制台应用程序
创建控制台应用程序
dotnet new console -n xxx.win
四.创建测试
创建xUnit单元测试项目
dotnet new xunit -n xxx.tests
五.添加引用和nuget引用
为 Tests 添加 Core 引用
dotnet add xxx.tests reference xxx.Common
为 项目添加 Nuget 引用
dotnet add xxx.Common package Hash --version 4.0.0
六.编译项目
#编译项目
dotnet build xxx.Common
七.单元测试
#执行单元测试,执行所有方法
dotnet test xxx.tests
#执行单元测试,指定的方法
dotnet test
xxx.tests --filter getUserName
八.运行项目
#运行
dotnet run --project xxx.win
九.发布项目
发布Release配置,包括 .net core 运行时,分别发布到 linux 和 windows
dotnet publish -c Release --self-contained -r linux-x64
dotnet publish -c Release --self-contained -r win-x64
发布Release配置,包括 .net core 运行时,指定目标框架 netcoreapp2.2
dotnet publish -c Release -f netcoreapp2.2 --self-contained -r linux-x64
dotnet publish -c Release -f netcoreapp2.2 --self-contained -r win-x64
dotnet run -c Release-f net6.0--runtimes net6.0 --self-contained -r win-x64 --未测试
发布Release配置,不包括 .net core 运行时
dotnet publish -c Release --self-contained false -r linux-x64
dotnet publish -c Release --self-contained false -r win-x64
发布Release配置,不包括 .net core 运行时,指定输出目录
dotnet publish -c Release --self-contained false -r linux-x64 -o C:\publish\linux-x64
dotnet publish -c Release --self-contained false -r win-x64 -o C:\publish\win-x64