资源代码:
https://download.csdn.net/download/hashiqimiya/92455258
如上
了解资源代码:
写了一个controller代码,控制接口对应该运行的函数。
package org.example.testproducttomcatwar;

import org.springframework.web.bind.annotation.GetMapping;
import org.springframework.web.bind.annotation.RestController;
@RestController
public class HelloController {
    @GetMapping("/hello")
    public String hello() {
        return "Spring Boot WAR 项目成功运行!";
    }
}
application的代码:
package org.example.testproducttomcatwar;

import org.springframework.boot.SpringApplication;
import org.springframework.boot.autoconfigure.SpringBootApplication;
import org.springframework.boot.builder.SpringApplicationBuilder;
import org.springframework.boot.web.servlet.support.SpringBootServletInitializer;

@SpringBootApplication
public class TestproducttomcatwarApplication extends SpringBootServletInitializer {

    public static void main(String[] args) {
        SpringApplication.run(TestproducttomcatwarApplication.class, args);
    }
    @Override
    protected SpringApplicationBuilder configure(SpringApplicationBuilder application) {
        return application.sources(TestproducttomcatwarApplication.class);
    }
}
在这段代码中,一定要继承父类并复写configure函数。
为什么要写configure函数?
是为了让导出的war包给tomcat使用的时候可以给tomcat识别到并调用
TestproducttomcatwarApplication.class依赖pom.xml如下:
<?xml version="1.0" encoding="UTF-8"?>
<project xmlns="http://maven.apache.org/POM/4.0.0" xmlns:xsi="http://www.w3.org/2001/XMLSchema-instance"
         xsi:schemaLocation="http://maven.apache.org/POM/4.0.0 https://maven.apache.org/xsd/maven-4.0.0.xsd">
    <modelVersion>4.0.0</modelVersion>
    <parent>
        <groupId>org.springframework.boot</groupId>
        <artifactId>spring-boot-starter-parent</artifactId>
        <version>4.0.0</version>
        <relativePath/> <!-- lookup parent from repository -->
    </parent>
    <groupId>org.example</groupId>
    <artifactId>testproducttomcatwar</artifactId>
    <version>0.0.1-SNAPSHOT</version>
    <!-- 打包方式修改成 war -->
    <packaging>war</packaging>
    <name>testproducttomcatwar</name>
    <description>testproducttomcatwar</description>
    <url/>
    <licenses>
        <license/>
    </licenses>
    <developers>
        <developer/>
    </developers>
    <scm>
        <connection/>
        <developerConnection/>
        <tag/>
        <url/>
    </scm>
    <properties>
        <java.version>17</java.version>
    </properties>
    <dependencies>
        <dependency>
            <groupId>org.springframework.boot</groupId>
            <artifactId>spring-boot-starter</artifactId>
        </dependency>

        <dependency>
            <groupId>org.springframework.boot</groupId>
            <artifactId>spring-boot-starter-test</artifactId>
            <scope>test</scope>
        </dependency>


        <!-- Web -->
        <dependency>
            <groupId>org.springframework.boot</groupId>
            <artifactId>spring-boot-starter-web</artifactId>
            <!-- 排除内置 Tomcat -->
            <exclusions>
                <exclusion>
                    <groupId>org.springframework.boot</groupId>
                    <artifactId>spring-boot-starter-tomcat</artifactId>
                </exclusion>
            </exclusions>
        </dependency>

        <!-- 使用外部容器时提供 Tomcat 运行环境 -->
        <dependency>
            <groupId>org.springframework.boot</groupId>
            <artifactId>spring-boot-starter-tomcat</artifactId>
            <scope>provided</scope>
        </dependency>
    </dependencies>

    <build>
        <plugins>
            <plugin>
                <groupId>org.springframework.boot</groupId>
                <artifactId>spring-boot-maven-plugin</artifactId>
            </plugin>
        </plugins>
    </build>

</project>
运行操作:
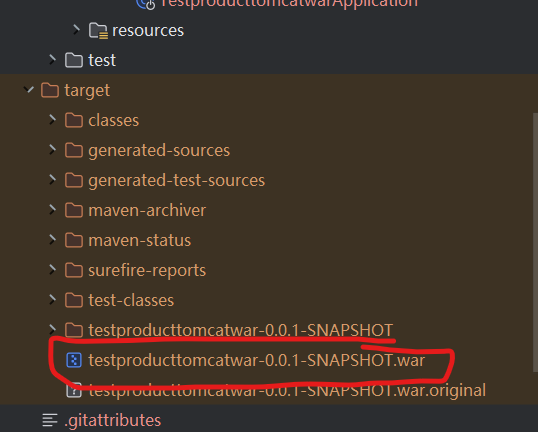
一、
idea运行
资源里的testproducttomcatwar项目,改项目终端运行mvn clean install,
生成war包
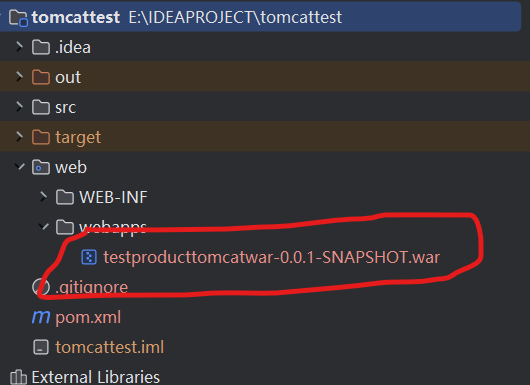
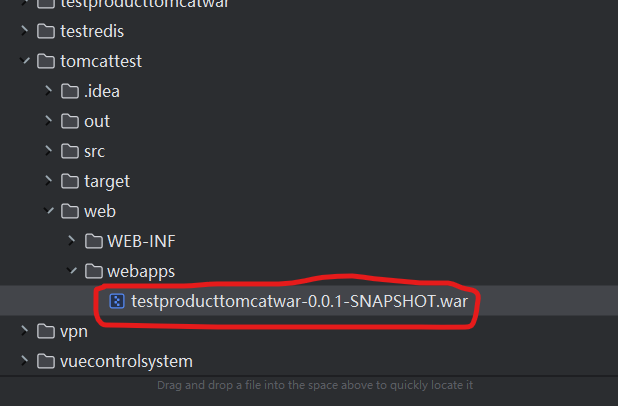
二、
将1中的war包粘贴到项目
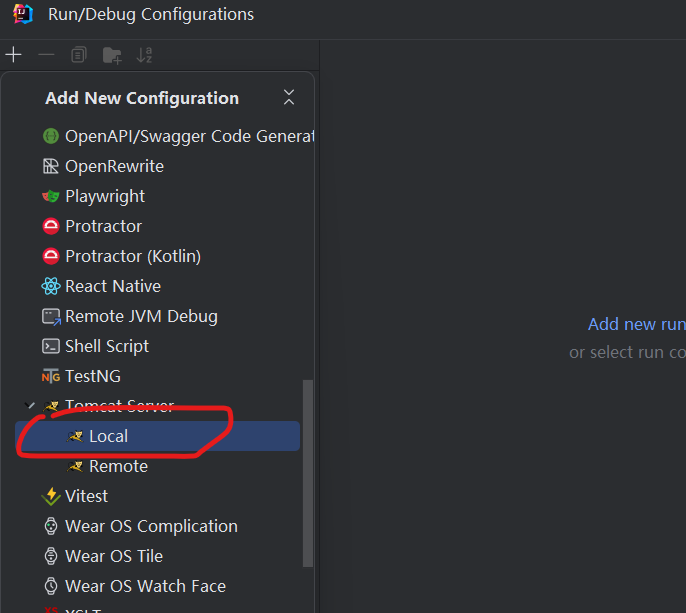
运行tomcattest项目时需要配置,
配置如下:
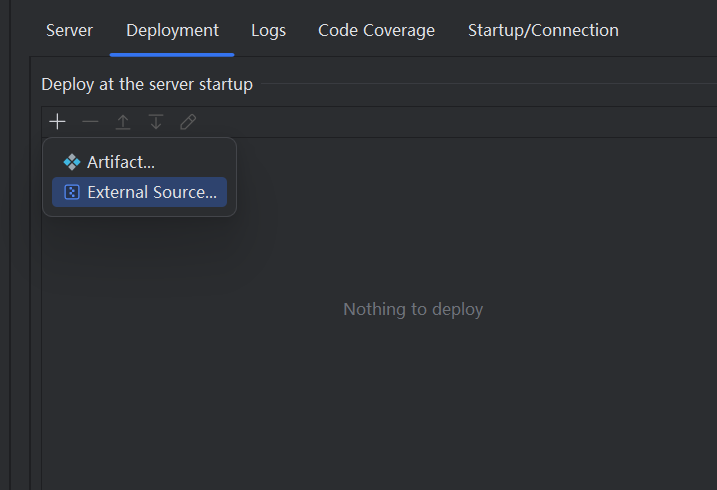
添加后

在配置里修改url
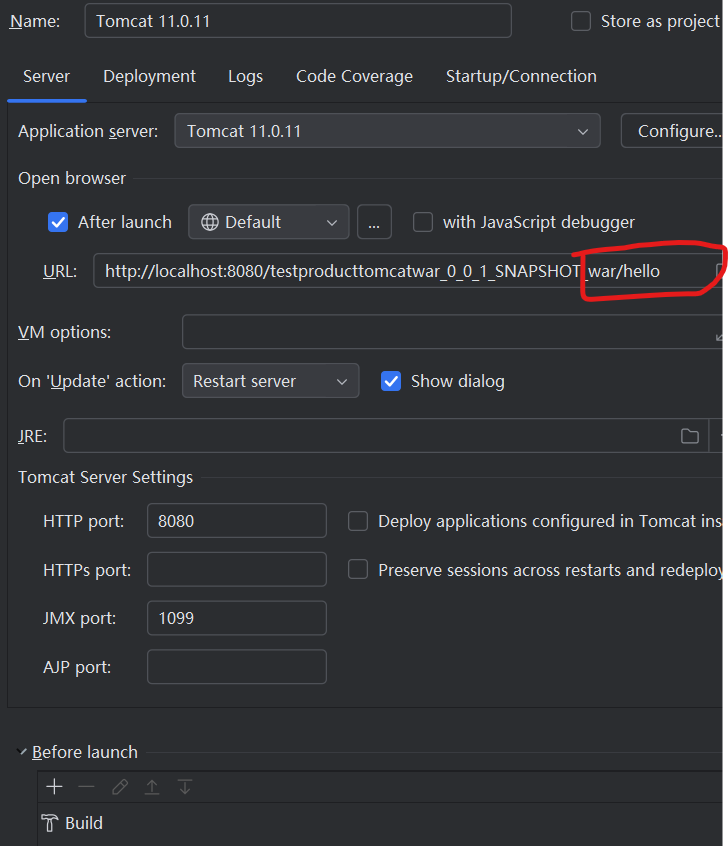
运行后,得到效果:

。。