前言
在上一篇中讲解了:鸿蒙 ArkUI基础语法,本篇将会讲解ArkUI状态管理、应用结构、路由相关内容。
上一篇一系列例子中,我们用到@State修饰符来让变量变成状态变量,让其拥有UI刷新的能力。
而@State是最基础的,除了它,鸿蒙还提供了一整套装饰器来解决不同组件之间的数据同步问题。
1、V1状态管理修饰器
注意:新项目建议直接用V2状态管理修饰器,V1已经逐渐被废弃了!
1.1 组件状态管理
1.1.1 @State
案例:
ArkTS
@Entry
@Component
struct StateExample {
  // @State 标记变量,变化时触发 build() 重绘
  @State count: number = 0;

  build() {
    Column() {
      Text(`当前点击次数:${this.count}`)
        .fontSize(30)

      Button("点我 +1")
        .onClick(() => {
          this.count++; // 修改状态,UI 自动刷新
        }).margin({top:20})
    }.width('100%')
    .height('100%')
    .justifyContent(FlexAlign.Center)
  }
}
运行效果:
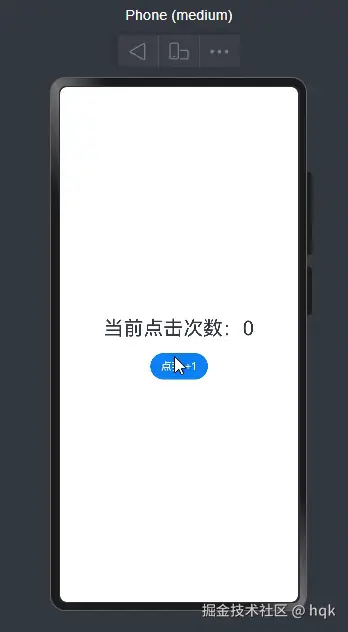
@State在上面的例子用了很多次,标记的变量,变化时将会触发UI重绘
1.1.2 @Prop
案例:
ArkTS
@Component
struct BatteryIcon {
  // @Prop 接收父组件的值,自己可以在内部修改,但不会同步回父组件
  @Prop batteryLevel: number;

  build() {
    Column() {
      Text(`子组件显示电量: ${this.batteryLevel}%`)
      Button("子组件偷偷耗电 -10")
        .onClick(() => {
          this.batteryLevel -= 10; // 这里改了,只会影响 BatteryIcon 自己
        })
    }
    .padding(10)
    .backgroundColor(Color.Pink)
  }
}

@Entry
@Component
struct PropExample {
  @State realBattery: number = 100;

  build() {
    Column({ space: 20 }) {
      Text(`父组件真实电量: ${this.realBattery}%`).fontSize(24)

      // 传递时直接传值(this.realBattery)
      BatteryIcon({ batteryLevel: this.realBattery })

      Button("父组件充电 +10")
        .onClick(() => {
          this.realBattery += 10; // 父组件一更新,子组件会被重置为最新值
        })
    }.width('100%')
    .height('100%')
    .justifyContent(FlexAlign.Center)
  }
}
运行效果:
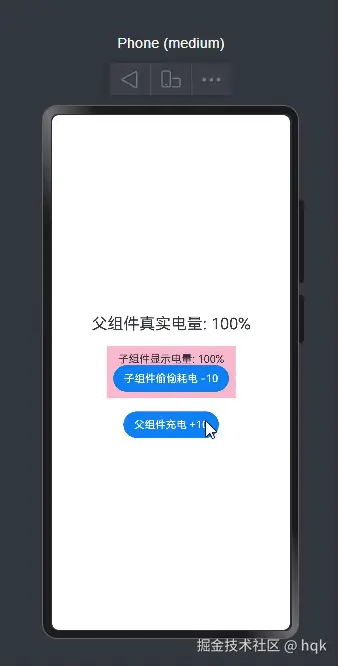
在这个例子中:
- 父组件
PropExample里面包含子组件BatteryIcon, - 子组件接受父组件的变量
batteryLevel被@Prop修饰符修饰 - 父组件的值改变会影响子组件的值的改变,而子组件的值改变不会影响父组件的值改变
一句话总结:单向同步(父 -> 子),子改父不变,父改子变
1.1.3 @Link
案例:
ArkTS
@Component
struct ControlPanel {
  // @Link 类似于指针,指向父组件的同一块内存
  @Link toggleState: boolean;

  build() {
    Row() {
      Text("子组件开关:")
      Toggle({ type: ToggleType.Switch, isOn: this.toggleState })
        .onChange((isOn: boolean) => {
          this.toggleState = isOn; // 子组件修改,父组件立马同步
        })
    }.backgroundColor(Color.Pink)
  }
}

@Entry
@Component
struct LinkExample {
  @State isWiFiOn: boolean = false;

  build() {
    Column({ space: 20 }) {
      Text(`父组件 WiFi 状态: ${this.isWiFiOn ? '开启' : '关闭'}`)
        .fontSize(24)
        .fontColor(this.isWiFiOn ? Color.Green : Color.Red)

      ControlPanel({ toggleState: this.isWiFiOn })
      //两种传值都可以
      ControlPanel({ toggleState: $isWiFiOn })

      Row() {
        Text("父组件开关:")
        Toggle({ type: ToggleType.Switch, isOn: this.isWiFiOn })
          .onChange((isOn: boolean) => {
            this.isWiFiOn = isOn; // 父组件修改,子组件也同步
          })
      }

    }.width('100%')
    .height('100%')
    .justifyContent(FlexAlign.Center)
  }
}
运行效果:
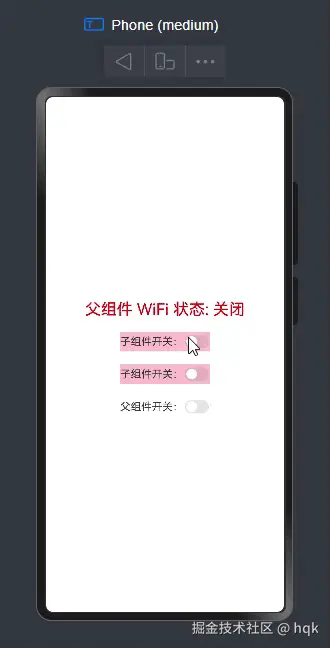
在这个案例中:
- 父组件
LinkExample里面包含子组件ControlPanel - 子组件接受父组件的变量
toggleState被@Link修饰符修饰 - 无论子组件改变值还是父组件改变值,都会更新最新的值并且渲染刷新UI(双向同步)
1.1.4 @Provide + @Consume
案例:
ArkTS
@Entry
@Component
struct ProvidePage {
  @Provide count: number = 0;
  build() {
    Row(){
      Column({space: 18}){
        Text(this.count.toString())
          .fontSize(50)
        Button('顶级组件').onClick( () => {
            this.count++
        })
        Divider()
        Child2()

      }
      .width('100%')

    }
    .height('100%')
  }
}

@Component
struct Child2 {
  @Consume count: number;
  build() {
    Column() {
      Text("子组件:"+this.count)
        .fontSize(40)
      Divider()
      Grand()
    }.backgroundColor(Color.Pink)
  }
}

@Component
struct Grand {
  @Consume count: number;
  build() {
    Column() {
      Text("孙组件")
        .fontSize(30)
      Text(this.count.toString())

      Button('修改').onClick( () => {
        this.count++
      })
    }.backgroundColor(Color.Green)
  }
}
运行效果:

在这个例子中:
- 父组件
ProvidePage对应的变量count由@Provide修饰,而子组件以及孙组件对应变量count由@Consume修饰。 - 它们之间并没有通过传参的方式传递变量,而是直接通过变量名自动匹配,因此它们之间的变量
count必须一致
1.1.5 @Observed + @ObjectLink
案例:
ArkTS
@Entry
@Component
struct CartPage {
  @State items: CartItem[] = [
    new CartItem(1, "可乐", 3),
    new CartItem(2, "薯片", 6),
    new CartItem(3, "巧克力", 12)
  ]
  @State totalPrice: number = 0

  /**
   * 重新计算总价
   */
  recalcTotal() {
    let total = 0
    for (let item of this.items) {
      total += item.count * item.price
    }
    this.totalPrice = total
  }

  build() {
    Column() {
      Text("购物车")
        .fontSize(24)
        .margin(10)

      // 商品列表
      ForEach(this.items, (item: CartItem) => {
        CartItemRow({
          item: item,
          onCountChange: () => {
            this.recalcTotal()
          }
        })
      })

      Divider().margin({ top: 20 })

      // 显示总价(不会 undefined)
      Text(`总价:¥${this.totalPrice}`)
        .fontSize(22)
        .fontWeight(FontWeight.Bold)
        .margin(20)
    }.width('100%')
    .height('100%')
    .onAppear(() => {
      this.recalcTotal() // 初次计算
    })
  }
}


@Component
struct CartItemRow {
  @ObjectLink item: CartItem
  onCountChange: () => void = () => {
  }

  build() {
    Row() {
      Text(this.item.name)
        .width(120)

      Text(`¥${this.item.price}`)
        .width(60)
        .fontColor(Color.Grey)

      Button("-")
        .onClick(() => {
          if (this.item.count > 1) {
            this.item.count--
            this.onCountChange()
          }
        })

      Text(`${this.item.count}`)
        .width(30)
        .textAlign(TextAlign.Center)

      Button("+")
        .onClick(() => {
          this.item.count++
          this.onCountChange()
        })
    }
    .padding(10)
  }
}


@Observed
class CartItem {
  id: number
  name: string
  price: number
  count: number

  constructor(id: number, name: string, price: number, count: number = 1) {
    this.id = id
    this.name = name
    this.price = price
    this.count = count
  }
}
运行效果:

在这个例子中:
-
使用了
@Observed + @ObjectLink修饰符,@Observed用于修饰 类,让类的属性变成可观察的。当属性变化时,UI 会自动刷新。@ObjectLink用于子组件接收父组件传入的 对象引用(而不是值);这样子组件内部修改对象 → 父组件也会同步 → UI 自动刷新
-
一句话总结:
@Observed让类的属性具有可观察性,@ObjectLink让不同组件共享同一个对象并保持同步更新。
上面的装饰器仅能在页面内,如果要实现应用级以及多个页面的状态数据共享,就需要用到应用级的状态管理。
1.2 应用状态管理
1.2.1 LocalStorage
LocalStorage:页面级UI状态存储,通常用于UIAbility内、页面间的状态共享。
1.2.1.1 基于页面间的状态共享
ArkTS
let count: Record<string, number> = { 'count': 0 }
let storage = new LocalStorage(count);

@Entry(storage)
@Component
struct Parent {
  @LocalStorageLink('count') count: number = 0;
  build() {
    Column() {
      Text("父组件")
      Button("加 1").onClick(() => this.count += 1)
      Text(`当前 Parent count: ${this.count}`)
      ChildDisplay().margin({top:20})
      ChildDisplay2().margin({top:20})
    }
    .width('100%')
    .height('100%')
    .justifyContent(FlexAlign.Center)
  }
}

@Component
struct ChildDisplay {
  @LocalStorageLink('count') count: number = 0;

  build() {
    Column({space:10}){
      Text("我是子组件双向绑定数据")
      Text(`当前 Child count: ${this.count}`)
      Button("减一").onClick(()=>{
        this.count-=1
      })
    }.backgroundColor(Color.Brown)

  }
}

@Component
struct ChildDisplay2 {
  @LocalStorageProp('count') count: number = 0;

  build() {
    Column({space:10}){
      Text("我是子组件单向绑定数据")
      Text(`当前 Child count: ${this.count}`)
      Button("减一").onClick(()=>{
        this.count-=1
      })
    }.backgroundColor(Color.Gray)

  }
}
运行效果:
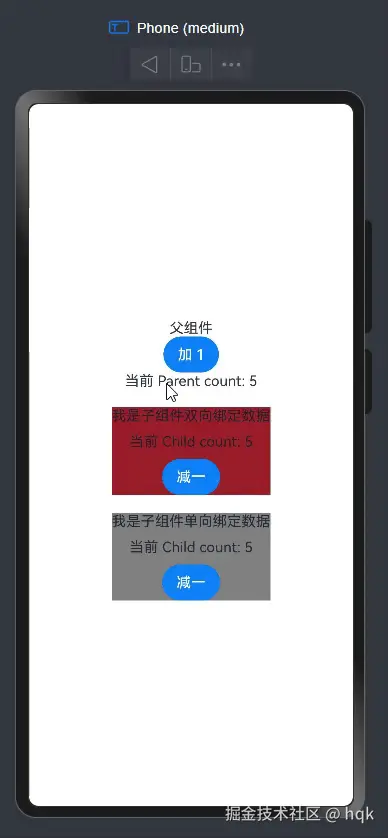
在这个例子中:
-
LocalStorage实现了页面内共享"数据库",并以Record<string, number>方式存储数据 -
组件树的根节点,被
@Entry(storage)装饰的@Component,可以被分配一个LocalStorage实例,此组件的所有子组件实例将自动获得对该LocalStorage实例的访问权限。 -
LocalStorage根据与@Component装饰的组件的同步类型不同,提供了两个装饰器:
- @LocalStorageProp装饰的变量与LocalStorage中给定属性建立单向同步关系。
- @LocalStorageLink装饰的变量与LocalStorage中给定属性建立双向同步关系。
该实例LocalStorage的实例仅仅在一个@Entry装饰的组件和其所属的子组件(一个页面)中共享,如果希望其在多个页面中共享,那么就要用到 基于UIAbility内状态共享
1.2.1.2 基于UIAbility内状态共享
既然要基于UIAbility内状态共享,那么就要在所属的UIAbility中创建LocalStorage实例
EntryAbility.ets
ArkTS
//....省略部分代码....

export default class EntryAbility extends UIAbility {

//....省略部分代码....

  onWindowStageCreate(windowStage: window.WindowStage): void {

    let data: Record<string, string> = {"userName" : 'hqk'}
    let myStorage = new LocalStorage(data)

    windowStage.loadContent('pages/dos/EntryLocalPage1',myStorage, (err) => {

    //....省略部分代码....
  }

//....省略部分代码....
}注意:在EntryAbility.ets里,我们在调用windowStage.loadContent时,传入了创建好的LocalStorage值。
既然EntryAbility已经创建了LocalStorage,那么对应的page页面该如何取值呢?
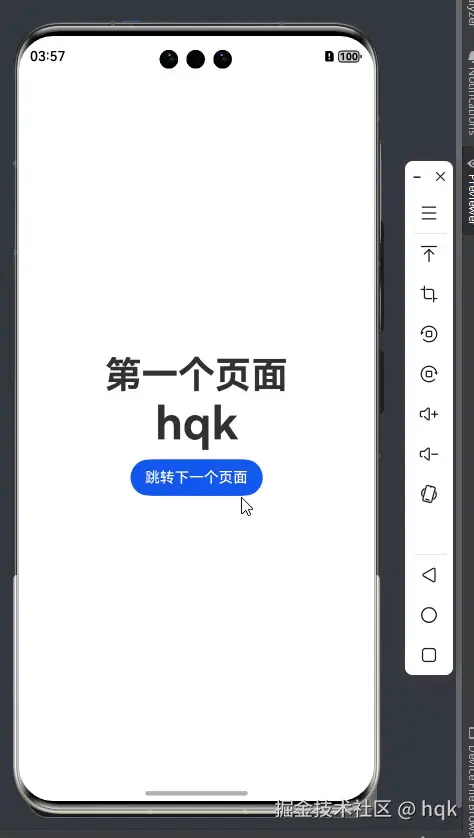
EntryLocalPage1
php
import { router } from '@kit.ArkUI';

@Entry({ useSharedStorage: true })
@Component
struct EntryLocalPage1 {
  @LocalStorageLink('userName') userName: string = 'page1';

  build() {
    RelativeContainer() {

      Text("第一个页面").fontSize(40)
        .fontWeight(FontWeight.Bold)
        .alignRules({
          bottom: { anchor: 'EntryLocalPage1HelloWorld', align: VerticalAlign.Top },
          middle: { anchor: '__container__', align: HorizontalAlign.Center }
        })

      Text(this.userName)
        .id('EntryLocalPage1HelloWorld')
        .fontSize(50)
        .fontWeight(FontWeight.Bold)
        .alignRules({
          center: { anchor: '__container__', align: VerticalAlign.Center },
          middle: { anchor: '__container__', align: HorizontalAlign.Center }
        })

      Button("跳转下一个页面").alignRules({
        top: { anchor: 'EntryLocalPage1HelloWorld', align: VerticalAlign.Bottom },
        middle: { anchor: '__container__', align: HorizontalAlign.Center }
      }).onClick(() => {
        router.pushUrl({url:"pages/dos/EntryLocalPage2"})
      }).margin({ top: 10 })
    }
    .height('100%')
    .width('100%')
  }
}
EntryLocalPage2
ArkTS
@Entry({ useSharedStorage: true })
@Component
struct EntryLocalPage2 {
  @LocalStorageLink('userName') userName: string = 'page2';

  build() {
    RelativeContainer() {
      Text("第二个页面").fontSize(40)
        .fontWeight(FontWeight.Bold)
        .alignRules({
          bottom: { anchor: 'EntryLocalPage2HelloWorld', align: VerticalAlign.Top },
          middle: { anchor: '__container__', align: HorizontalAlign.Center }
        })

      Text(this.userName)
        .id('EntryLocalPage2HelloWorld')
        .fontSize(50)
        .fontWeight(FontWeight.Bold)
        .alignRules({
          center: { anchor: '__container__', align: VerticalAlign.Center },
          middle: { anchor: '__container__', align: HorizontalAlign.Center }
        })

      Button("修改内容")
        .alignRules({
          top: { anchor: 'EntryLocalPage2HelloWorld', align: VerticalAlign.Bottom },
          middle: { anchor: '__container__', align: HorizontalAlign.Center }
        })
        .margin({ top: 10 })
        .onClick(() => {
          this.userName = "张三"
        })
    }
    .height('100%')
    .width('100%')
  }
}
运行效果
在该示例中:
- UIAbility中创建LocalStorage实例,通过
windowStage.loadContent方法使其对应 UIAbility内的所有page页面都具备访问 UIAbility中创建LocalStorage实例的资格 - 对应的page页面如果想要访问UIAbility中创建LocalStorage实例,那么
@Entry修饰符需要改为@Entry({ useSharedStorage: true }),使其能获取页面共享的LocalStorage实例 - 这里用到了
router路由跳转以及UIAbility相关知识点,稍后会详解
注意:该示例需要用真机或模拟器运行,预览器看不了该效果
1.2.2 AppStorage
AppStorage是与应用进程绑定的全局UI状态存储中心,由UI框架在应用启动时创建,将UI状态数据存储于运行内存,实现应用级全局状态共享
1.2.2.1 示例一
AppStoragePage1
ArkTS
import { promptAction, router } from '@kit.ArkUI';

@Entry
@Component
struct AppStoragePage1 {
  @State phone: string = ''
  @State name: string = ''

  build() {
    Column({ space: 20 }) {
      Text("数据提交")
        .fontSize(30)
        .fontWeight(FontWeight.Bold)
        .margin({ top: 40 })

      /** 手机号输入框 */
      Row() {
        TextInput({ placeholder: '姓名' })
          .type(InputType.Normal)
          .maxLength(11)
          .onChange(v => this.name = v)
      }
      .padding(12)
      .backgroundColor('#F7F7F7')
      .borderRadius(8)
      .width('85%')


      /** 手机号输入框 */
      Row() {
        TextInput({ placeholder: '请输入手机号' })
          .type(InputType.Number)
          .maxLength(11)
          .onChange(v => this.phone = v)
      }
      .padding(12)
      .backgroundColor('#F7F7F7')
      .borderRadius(8)
      .width('85%')

      /** 提交按钮 */
      Button("提交数据")
        .width('85%')
        .height(45)
        .backgroundColor('#007DFF')
        .fontColor(Color.White)
        .borderRadius(8)
        .onClick(() => this.submit())

    }
    .height('100%')
    .width('100%')
  }

  private submit() {
    if (this.name === '') {
      this.toast("请输入姓名")
      return
    }
    if (this.phone==='') {
      this.toast("请输入手机号")
      return
    }
    //向AppStorage作用域中放置了一个string数据
    AppStorage.setOrCreate<string>("name", this.name)
    AppStorage.setOrCreate<string>("phone",this.phone)
    router.pushUrl({url:"pages/AppStoragePage2"})
  }

  private toast(msg: string) {
    promptAction.showToast({ message: msg })
  }
}
AppStoragePage2
ArkTS
@Entry
@Component
struct AppStoragePage2 {
  @StorageLink('name') name: string = '';
  @StorageProp('phone') phone:string=''
  build() {
    Column({space:20}) {
      Text(`姓名为:${this.name}`)
        .fontSize(20)
        .fontWeight(FontWeight.Bold)

      Text(`手机号为:${this.phone}`)
        .fontSize(20)
        .fontWeight(FontWeight.Bold)
    }
    .height('100%')
    .width('100%')
    .justifyContent(FlexAlign.Center)
  }
}
预览效果
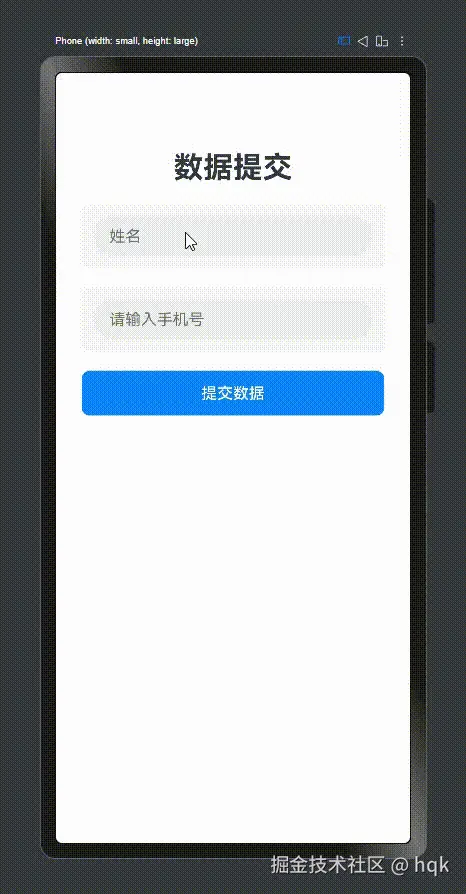
在这个例子中:
- 我们用
AppStorage.setOrCreate<T>这种方式成功的key-value形式保存值 - 在其他page页面中,可以用
@StorageLink(key)与@StorageProp(key)方式获取保存的值
那现在问题来了,上面例子中LocalStorage基于UIAbility状态共享的demo也是跨page页面共享,那为何要用AppStorage呢?
那就说明了AppStorage有LocalStorage做不到的事!跨UIAbility共享!
1.2.2.2 示例二
我们就在示例一的基础上修改
AppStoragePage1修改版
ArkTS
import { promptAction, router } from '@kit.ArkUI';
import { common, Want } from '@kit.AbilityKit';
@Entry
@Component
struct AppStoragePage1 {
  @State phone: string = ''
  @State name: string = ''

  private context = this.getUIContext().getHostContext() as common.UIAbilityContext;

  build() {
    Column({ space: 20 }) {
      Text("数据提交")
        .fontSize(30)
        .fontWeight(FontWeight.Bold)
        .margin({ top: 40 })

      /** 手机号输入框 */
      Row() {
        TextInput({ placeholder: '姓名' })
          .type(InputType.Normal)
          .maxLength(11)
          .onChange(v => this.name = v)
      }
      .padding(12)
      .backgroundColor('#F7F7F7')
      .borderRadius(8)
      .width('85%')


      /** 手机号输入框 */
      Row() {
        TextInput({ placeholder: '请输入手机号' })
          .type(InputType.Number)
          .maxLength(11)
          .onChange(v => this.phone = v)
      }
      .padding(12)
      .backgroundColor('#F7F7F7')
      .borderRadius(8)
      .width('85%')

      /** 提交按钮 */
      Button("提交数据")
        .width('85%')
        .height(45)
        .backgroundColor('#007DFF')
        .fontColor(Color.White)
        .borderRadius(8)
        .onClick(() => this.submit())


      /** 提交按钮 */
      Button("提交数据至其他Ability")
        .width('85%')
        .height(45)
        .backgroundColor('#007DFF')
        .fontColor(Color.White)
        .borderRadius(8)
        .onClick(() => this.submitOther())

    }
    .height('100%')
    .width('100%')
  }

  private submitOther() {
    if (!this.checkInput()) {
      return
    }
    //需要定义一个want的对象,意图对象
    let wantInfo: Want = {
      deviceId: '',// deviceId为空表示本设备
      bundleName: 'com.example.demo01', //模块的包名
      moduleName: 'user', //模块名
      abilityName: 'UserAbility',// 要跳转的Ability的名称
      parameters:{   //用于传递参数的一个对象

      }
    }

    //使用context去进行的跳转
    this.context.startAbility(wantInfo)

  }


  private submit() {
    if (!this.checkInput()) {
      return
    }
    router.pushUrl({ url: "pages/AppStoragePage2" })
  }

  private checkInput() {
    if (this.name === '') {
      this.toast("请输入姓名")
      return false
    }
    if (this.phone === '') {
      this.toast("请输入手机号")
      return false
    }
    //向AppStorage作用域中放置了一个string数据
    AppStorage.setOrCreate<string>("name", this.name)
    AppStorage.setOrCreate<string>("phone", this.phone)
    return true
  }

  private toast(msg: string) {
    promptAction.showToast({ message: msg })
  }
}
代码分析
- 新增了一个按钮并调用了
submitOther()方法 - 在这个方法里,创建了
Want对象,并将该值通过this.context.startAbility代码块传递(这个稍后会详解)
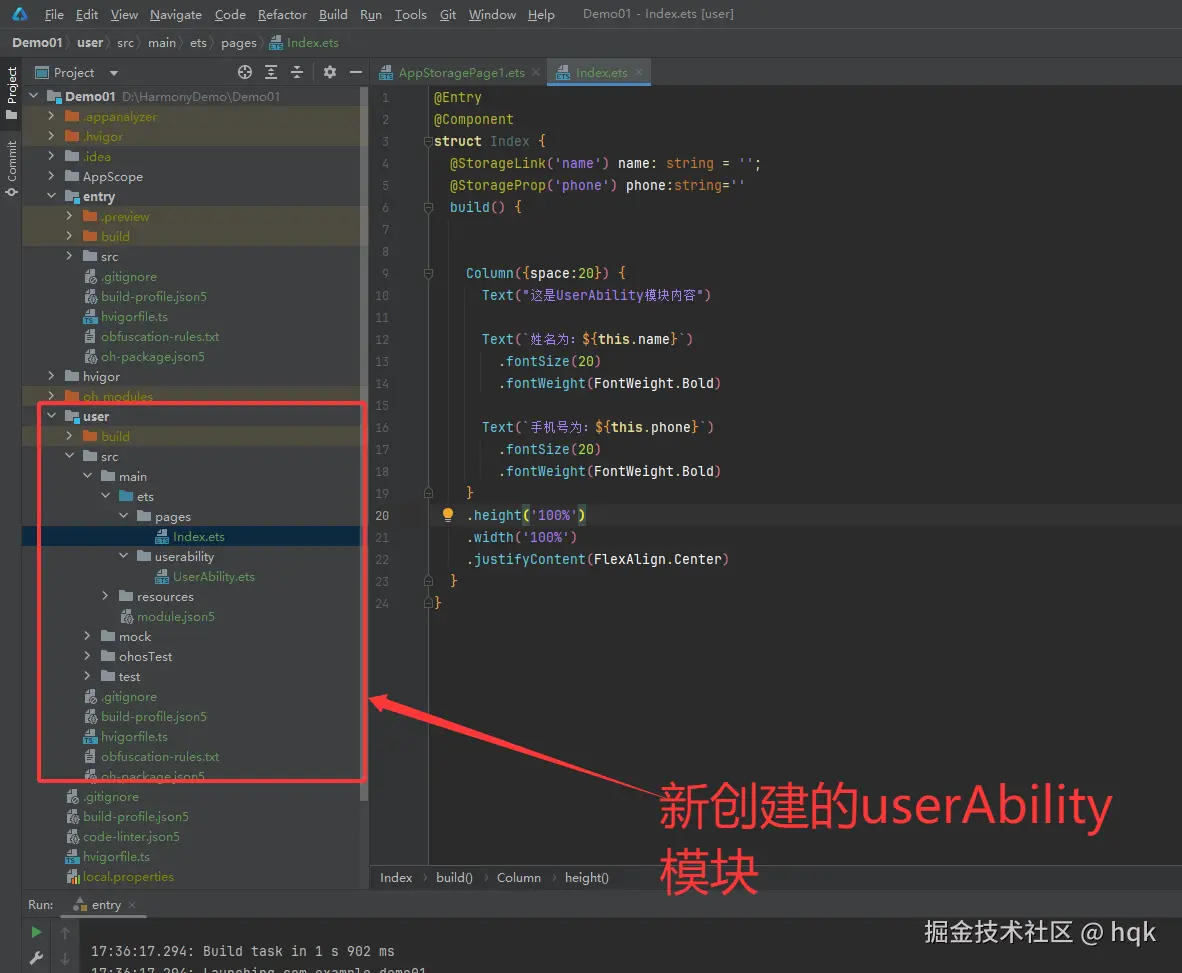
项目结构图:
运行效果图
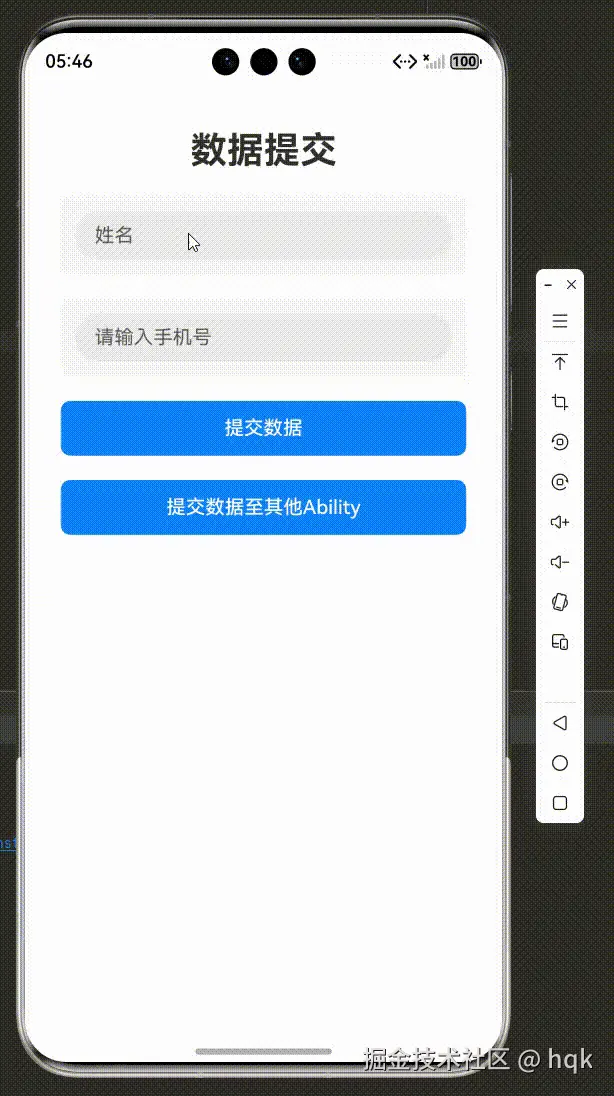
在这个例子中:
- 在这个项目结构里,创建了全新的UIModel为user模块,并且对应模块里有对应的UIAbility,
- 在对应的UIAbility中,有个默认启动page页面:index,
- 在默认page页面中,我们使用了
@StorageLink(key)与@StorageProp(key)方式获取保存的值 - 当我们跳转至其他UIAbility时,手机系统任务栏里将会创建全新的一个任务
OK,我们接着看下一个!
1.2.3 PersistentStorage
PersistentStorage提供状态变量持久化的能力,但是需要注意,其持久化和读回UI的能力都需要依赖AppStorag。
1.2.3.1 示例一
PersistentStoragePage
ArkTS
import { router } from '@kit.ArkUI';
PersistentStorage.persistProp<string>('userName', 'admin')
@Entry
@Component
struct PersistentStoragePage {
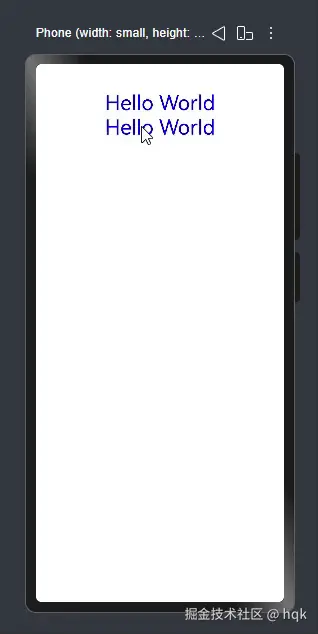
@StorageLink('userName') uname: string = 'Hello World';
build() {
Column() {
Text(this.uname)
.id('PersistentStoragePageHelloWorld')
.fontSize(50)
.fontWeight(FontWeight.Bold)
Button('修改值').onClick( () => {
AppStorage.setOrCreate<string>('userName', 'hqk')
})
Button('跳转到2').onClick( () => {
router.pushUrl({url: 'pages/PersistentStoragePage2'})
})
}
.height('100%')
.width('100%')
}
}PersistentStoragePage2
ArkTS
@Entry
@Component
struct PersistentStoragePage2 {

  @StorageLink('userName') uname: string = 'Hello World';

  build() {

    Column(){
      Text(this.uname)
        .id('PersistentStoragePageHelloWorld')
        .fontSize(50)
        .fontWeight(FontWeight.Bold)
        .alignRules({
          center: { anchor: '__container__', align: VerticalAlign.Center },
          middle: { anchor: '__container__', align: HorizontalAlign.Center }
        })

    }
    .width('100%')
    .height('100%')
  }
}
运行效果:
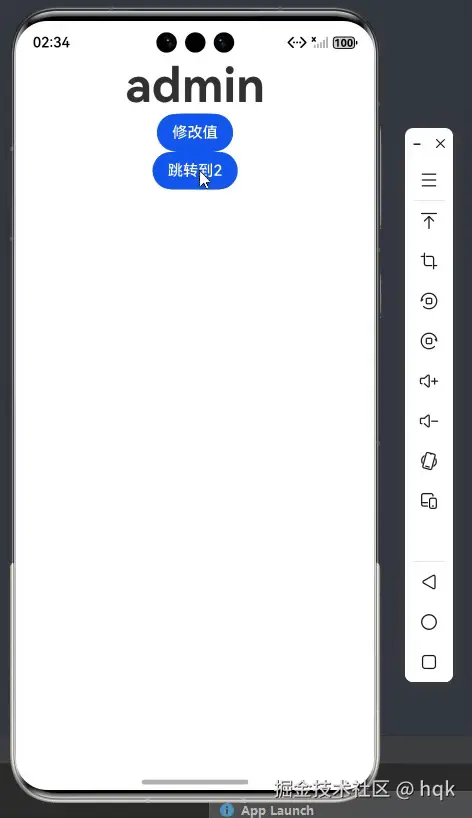
在这个例子中:
PersistentStorage可以通过PersistentStorage.persistProp持久化存储值- 当修改以及取值(读回UI的能力)时,需要依赖
AppStorage以及AppStorage对应的@StorageLink和@StorageProp
注意:持久化数据是一个相对缓慢的操作 ,持久化变量最好是小于2KB的数据 ,不要大量的数据持久化,因为PersistentStorage写入磁盘是在UI线程同步执行的!
1.3 其他状态管理
1.3.1 Watch
@Watch应用于对状态变量的监听。如果开发者需要关注某个状态变量的值是否改变,可以使用@Watch为状态变量设置回调函数。
ArkTS
import { promptAction } from '@kit.ArkUI'

@Entry
@Component
struct PageWatch {

  //监听某个变量的值,这个值如果发生改动,就会触发相应的函数的执行。

  @State
  @Watch('updateMoney')
  money: number = 100

  updateMoney(){
    promptAction.showToast({message: `${this.money}发生了变化》。。`})
  }

  build() {
   Column(){

     Button('修改值').onClick( () => {
       this.money += 10
     })
   }
   .width('100%')
   .height('100%')
  }
}
运行效果:
在这个示例中:
@Watch用于监听状态变量的变化,当状态变量变化时,@Watch的回调方法将被调用
这些都是V1状态修饰器,然而状态管理V1对于嵌套类的观测存在诸多限制,例如需要开发者通过@ObjectLink不断拆解嵌套类才能使其深层次数据具备观测能力。因此,在API12中为开发者提供了一套全新的状态管理V2。
V2的提出不仅解决了V1对于嵌套类观测的先天不足,同时对部分装饰器功能进行了加强!
现在我们来看所谓的V2状态管理修饰器
2、V2状态管理修饰器
2.1 组件状态管理
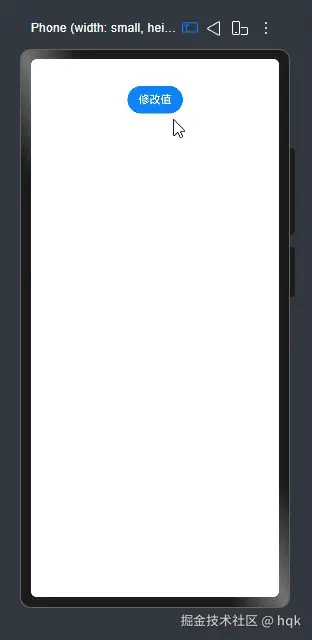
2.1.1 @Local
ArkTS
@Entry
@ComponentV2
// @Component //同时使用将会报错
struct PageLocal {
@Local message: string = 'Hello World';
build() {
Column() {
Text(this.message)
.id('PageLocalHelloWorld')
.fontSize(50)
.fontWeight(FontWeight.Bold)
.alignRules({
center: { anchor: '__container__', align: VerticalAlign.Center },
middle: { anchor: '__container__', align: HorizontalAlign.Center }
})
// LocalSub({message:this.message}) //这句话报错,不能被外部初始化
Button('修改').onClick( () => {
this.message = 'hello'
})
}
.height('100%')
.width('100%')
}
}
@ComponentV2
struct LocalSub {
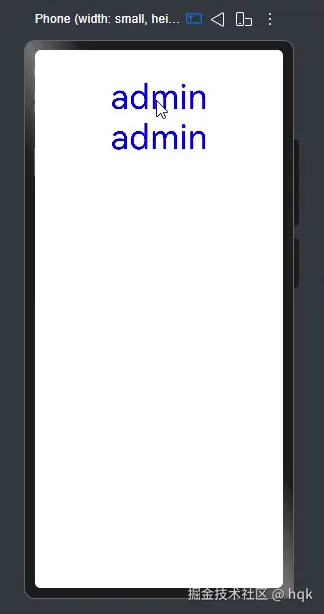
@Local message: string = ''
build() {
Column(){
Button('修改').onClick( () => {
this.message = 'admin'
})
}
.width('100%')
.height('100%')
}
}运行效果:
在这个示例中:
- 在
@ComponentV2装饰的自定义组件中,仅可以使用全新的变量装饰器(V2),不能和V1混用 - 同一个struct结构无法同时使用
@ComponentV2与@Component装饰 - 被
@Local装饰的变量无法从外部初始化,因此必须在组件内部进行初始化。 @Local可以理解为V1版本的@State,被@Local装饰的变量发生变化时,会刷新使用该变量的组件
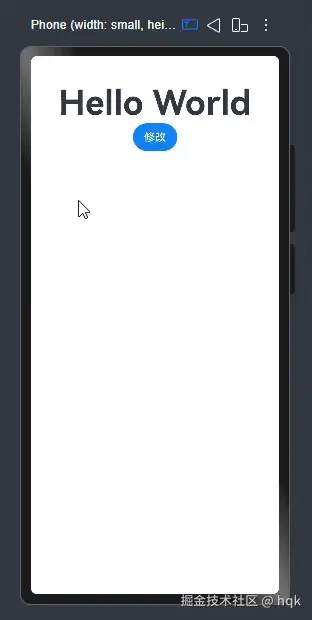
2.1.2 @Param
ArkTS
@Entry
@ComponentV2
struct PageParam {
  @Local message: string = 'Hello World';
  number: number = 0

  build() {
    Column() {
      Text(this.message).fontSize(30).fontColor(Color.Blue)
        .onClick(() => {
          this.number+=1
          this.message = 'hqk'+this.number
        })
      Divider()
      ParamSub({ message: this.message })
    }
    .width('100%')
    .height('100%')
  }
}

@ComponentV2
struct ParamSub {
  @Param @Require message: string='';
  build() {
    Text(this.message).fontSize(30).fontColor(Color.Blue)
      .onClick(() => {
        // this.message = 'admin' //这句话报错,不允许修改
      })
  }
}
运行效果:
在这个示例中:
@Require: 设置状态变量可以没有初始值- 被
@Param修饰的变量不允许自己修改,只能通过外界的传入,使其父子组件之间的数据能够进行同步 - 被
@Param修饰的变量变化时,也会刷新该变量关联的组件
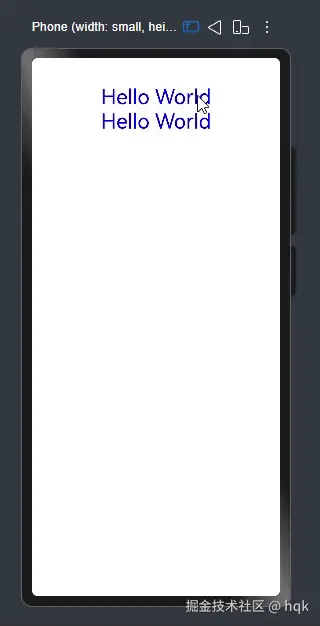
2.1.3 @Once
less
@Entry
@ComponentV2
struct PageParam {
  @Local message: string = 'Hello World';
  number: number = 0

  build() {
    Column() {
      Text(this.message).fontSize(30).fontColor(Color.Blue)
        .onClick(() => {
          this.number+=1
          this.message = 'hqk'+this.number
        })
      Divider()
      ParamSub({ message: this.message })
    }
    .width('100%')
    .height('100%')
  }
}

@ComponentV2
struct ParamSub {

  @Param @Once @Require message: string;
  number: number = 0

  build() {
    Text(this.message).fontSize(30).fontColor(Color.Blue)
      .onClick(() => {
        this.number+=1
        this.message = 'admin'+this.number
      })
  }
}
运行效果:
在这个示例中:
@Once装饰器在变量初始化时接受外部传入值进行初始化,后续数据源更改不会同步给子组件(变量仅初始化同步一次)@Once必须搭配@Param使用,单独使用或搭配其他装饰器使用都是不允许的@Once不影响@Param的观测能力,仅针对数据源的变化做拦截@Once与@Param搭配时,可以在本地修改@Param变量的值@Once与@Param装饰变量时,不分定义的先后顺序
我们发现当单独使用@Param时,子组件对应的变量不能修改,但是加入了@Once后,虽然子组件被@Param修饰的变量可以改变了,但改变后,父组件并未更新,因此我们就可以使用下一个装饰器------@Event
2.1.4 @Event
ArkTS
/**
 * 模拟Link
 */

@Entry
@Component
struct PageEvent {
  @State userName: string = 'admin';

  build() {
    Column(){

      Text(this.userName).fontSize(50).fontColor(Color.Blue)
        .onClick(()=>{
          this.userName = 'hqk'
        })

      SubEvent({sunUserName: this.userName, updateUserName:()=>{
        this.userName = '天高皇帝远'
      }})
    }
    .width('100%')
    .height('100%')
  }
}

@ComponentV2
struct SubEvent {

  @Require @Param sunUserName:string

  //定义一个用于修改父组件值的函数
  //@Event updateUserName: ()=>void  //没有初始化时,会自动生成一个空的函数作为默认回调

  @Event updateUserName: ()=>void = ()=>{}

  build() {
    Column(){
      Text(this.sunUserName).fontSize(50).fontColor(Color.Blue)
        .onClick(()=>{
          this.updateUserName()
        })
    }
    .width('100%')

  }
}
运行效果:
在这个示例中:
@Event用于装饰组件对外输出的方法@Event装饰的回调方法中参数以及返回值由开发者决定@Event装饰非回调类型的变量不会生效。当@Event没有初始化时,会自动生成一个空的函数作为默认回调- 当
@Event未被外部初始化,但本地有默认值时,会使用本地默认的函数进行处理 @Event相当于V1的@Link
2.1.5 @Provider+@Comsumer
ArkTS
@Entry
@ComponentV2
struct ProvidePage {
  @Provider() count: number = 0;
  build() {
    Row(){
      Column({space: 18}){
        Text(this.count.toString())
          .fontSize(50)
        Button('顶级组件').onClick( () => {
            this.count++
        })
        Divider()
        Child2()

      }
      .width('100%')

    }
    .height('100%')
  }
}

@ComponentV2
struct Child2 {
  @Consumer() count: number=0;
  build() {
    Column() {
      Text("子组件:"+this.count)
        .fontSize(40)
      Divider()
      Grand()
    }.backgroundColor(Color.Pink)
  }
}

@ComponentV2
struct Grand {
  @Consumer('count') myCount: number=0;
  build() {
    Column() {
      Text("孙组件")
        .fontSize(30)
      Text(this.myCount.toString())

      Button('修改').onClick( () => {
        this.myCount++
      })
    }.backgroundColor(Color.Green)
  }
}
运行效果:
在这个例子中:
@Provider和@Consumer用于跨组件层级数据双向同步,使其不用拘泥于组件层级@Provider,即数据提供方,使其所有的子组件都可以通过@Consumer绑定相同的key来获取@Provider提供的数据@Consumer,即数据消费方,可以通过绑定同样的key获取最近父节点的@Provider的数据,当查找不到@Provider的数据时,将会使用本地默认值@Provider和@Consumer装饰数据类型需要一致
2.1.6 @ObservedV2+@Trace
ArkTS
@Entry
@ComponentV2
struct CartPage {
  @Local items: CartItem[] = [
    new CartItem(1, "可乐", 3),
    new CartItem(2, "薯片", 6),
    new CartItem(3, "巧克力", 12)
  ]
  @Local totalPrice: number = 0

  /**
   * 重新计算总价
   */
  recalcTotal() {
    let total = 0
    for (let item of this.items) {
      total += item.count * item.price
    }
    this.totalPrice = total
  }

  build() {
    Column() {
      Text("购物车")
        .fontSize(24)
        .margin(10)

      // 商品列表
      ForEach(this.items, (item: CartItem) => {
        CartItemRow({
          item: item,
          onCountChange: () => {
            this.recalcTotal()
          }
        })
      })

      Divider().margin({ top: 20 })

      // 显示总价(不会 undefined)
      Text(`总价:¥${this.totalPrice}`)
        .fontSize(22)
        .fontWeight(FontWeight.Bold)
        .margin(20)
    }.width('100%')
    .height('100%')
    .onAppear(() => {
      this.recalcTotal() // 初次计算
    })
  }
}


@ComponentV2
struct CartItemRow {
  @Param @Require item: CartItem
  @Param @Require onCountChange: () => void

  build() {
    Row() {
      Text(this.item.name)
        .width(120)

      Text(`¥${this.item.price}`)
        .width(60)
        .fontColor(Color.Grey)

      Button("-")
        .onClick(() => {
          if (this.item.count > 1) {
            this.item.count--
            this.onCountChange()
          }
        })

      Text(`${this.item.count}`)
        .width(30)
        .textAlign(TextAlign.Center)

      Button("+")
        .onClick(() => {
          this.item.count++
          this.onCountChange()
        })
    }
    .padding(10)
  }
}


@ObservedV2
class CartItem {
  id: number
  name: string
  price: number
  @Trace count: number

  constructor(id: number, name: string, price: number, count: number = 1) {
    this.id = id
    this.name = name
    this.price = price
    this.count = count
  }
}
运行效果:
在这个例子中:
- 使用
@ObservedV2装饰的类中被@Trace装饰的属性具有被观测变化的能力,当该属性值变化时,会触发该属性绑定的UI组件刷新。 - 非
@Trace修饰的变量,发生改变不会触发UI更新 @Trace必须搭配@ObservedV2使用,不能单独使用- 等同于V1版本的
@Observed + @ObjectLink,V1版本修饰的类只要发生改变就会触发UI更新,但V2版本仅仅只有@Trace装饰的变量才会更新。也就是说V2能精准控制UI刷新的属性
2.1.7 @Computer
ArkTS
@Entry
@ComponentV2
struct CartPage {
  @Local items: CartItem[] = [
    new CartItem(1, "可乐", 3),
    new CartItem(2, "薯片", 6),
    new CartItem(3, "巧克力", 12)
  ]
  // @Local totalPrice: number = 0

  /**
   * 重新计算总价 使用了 @Computed
   */
   @Computed get recalcTotal():number {
    let total = 0
    for (let item of this.items) {
      total += item.count * item.price
    }
    // this.totalPrice = total
    return total
  }

  build() {
    Column() {
      Text("购物车")
        .fontSize(24)
        .margin(10)

      // 商品列表
      ForEach(this.items, (item: CartItem) => {
        CartItemRow({
          item: item,
          onCountChange: () => {
            this.recalcTotal
          }
        })
      })

      Divider().margin({ top: 20 })

      // 显示总价(不会 undefined)
      Text(`总价:¥${this.recalcTotal}`)
        .fontSize(22)
        .fontWeight(FontWeight.Bold)
        .margin(20)
    }.width('100%')
    .height('100%')
    .onAppear(() => {
      this.recalcTotal // 初次计算
    })
  }
}


@ComponentV2
struct CartItemRow {
  @Param @Require item: CartItem
  @Param @Require onCountChange: () => void

  build() {
    Row() {
      Text(this.item.name)
        .width(120)

      Text(`¥${this.item.price}`)
        .width(60)
        .fontColor(Color.Grey)

      Button("-")
        .onClick(() => {
          if (this.item.count > 1) {
            this.item.count--
            this.onCountChange()
          }
        })

      Text(`${this.item.count}`)
        .width(30)
        .textAlign(TextAlign.Center)

      Button("+")
        .onClick(() => {
          this.item.count++
          this.onCountChange()
        })
    }
    .padding(10)
  }
}


@ObservedV2
class CartItem {
  id: number
  name: string
  price: number
  @Trace count: number

  constructor(id: number, name: string, price: number, count: number = 1) {
    this.id = id
    this.name = name
    this.price = price
    this.count = count
  }
}
运行效果:
在这个例子中:
@Computed为方法装饰器,装饰getter方法@Computed会检测被 计算的属性变化,当被计算的属性变化时,@Computed会被求解一次。- 对于复杂的计算,使用
@Computed会有性能收益
既然V1有应用状态管理,那么V2也有对应的应用状态管理
2.2 应用状态管理
2.2.1 AppStorageV2
2.2.1.1 示例一
AppStoragePage1
ArkTS
import { promptAction, router, AppStorageV2 } from '@kit.ArkUI';

@ObservedV2
export class User {
  userId: number
  @Trace phone: string;
  @Trace userName: string;

  constructor(userId?: number, phone?: string, userName?: string) {
    this.userId = userId ?? 1;
    this.phone = phone ?? '';
    this.userName = userName ?? 'Jack';
  }
}

@Entry
@ComponentV2
struct AppStoragePage1 {
  @Local phone: string = ''
  @Local name: string = ''
  @Local user: User = AppStorageV2.connect<User>(User, () => new User())!;

  build() {
    Column({ space: 20 }) {
      Text("数据提交")
        .fontSize(30)
        .fontWeight(FontWeight.Bold)
        .margin({ top: 40 })

      /** 手机号输入框 */
      Row() {
        TextInput({ placeholder: '姓名' })
          .type(InputType.Normal)
          .maxLength(11)
          .onChange(v => this.name = v)
      }
      .padding(12)
      .backgroundColor('#F7F7F7')
      .borderRadius(8)
      .width('85%')


      /** 手机号输入框 */
      Row() {
        TextInput({ placeholder: '请输入手机号' })
          .type(InputType.Number)
          .maxLength(11)
          .onChange(v => this.phone = v)
      }
      .padding(12)
      .backgroundColor('#F7F7F7')
      .borderRadius(8)
      .width('85%')

      /** 提交按钮 */
      Button("提交数据")
        .width('85%')
        .height(45)
        .backgroundColor('#007DFF')
        .fontColor(Color.White)
        .borderRadius(8)
        .onClick(() => this.submit())

    }
    .height('100%')
    .width('100%')
  }

  private submit() {
    if (this.name === '') {
      this.toast("请输入姓名")
      return
    }
    if (this.phone === '') {
      this.toast("请输入手机号")
      return
    }
    // //向AppStorage作用域中放置了一个string数据
    // AppStorage.setOrCreate<string>("name", this.name)
    // AppStorage.setOrCreate<string>("phone", this.phone)
    this.user.phone = this.phone
    this.user.userName = this.name
    router.pushUrl({ url: "pages/AppStoragePage2" })
  }

  private toast(msg: string) {
    promptAction.showToast({ message: msg })
  }
}
预览效果
在这个例子中:
AppStorageV2是提供状态变量在应用级全局共享的能力,开发者可以通过connect绑定同一个key,进行跨ability的数据共享AppStorageV2使用connect接口即可实现对AppStorageV2中数据的修改和同步,如果修改的数据被@Trace装饰,该数据的修改会同步更新UI。AppStorageV2使用connect接口只支持class类型
2.2.2 PersistenceV2
2.2.2.1 示例一
PersistentStoragePage
ArkTS
import { router, PersistenceV2 } from '@kit.ArkUI';


@ObservedV2
export class User {
  userId: number
  @Trace userName: string;

  constructor(userId?: number, userName?: string) {
    this.userId = userId ?? 1;
    this.userName = userName ?? 'Jack';
  }
}

@Entry
@ComponentV2
struct PersistentStoragePage {
  @Local user: User = PersistenceV2.connect<User>(User, () => new User())!

  build() {
    Column({space:10}) {
      Text(this.user.userName)
        .id('PersistentStoragePageHelloWorld')
        .fontSize(50)
        .fontWeight(FontWeight.Bold)


      Button('修改值').onClick(() => {
        this.user.userName="hqk"
      })

      Button('跳转到2').onClick(() => {
        router.pushUrl({ url: 'pages/PersistentStoragePage2' })
      })
    }
    .height('100%')
    .width('100%')
  }
}
PersistentStoragePage2
ArkTS
import { User } from './PersistentStoragePage'
import { PersistenceV2 } from '@kit.ArkUI'

@Entry
@ComponentV2
struct PersistentStoragePage2 {

  @Local user: User = PersistenceV2.connect<User>(User, () => new User())!
  build() {

    Column(){
      Text(this.user.userName)
        .id('PersistentStoragePageHelloWorld')
        .fontSize(50)
        .fontWeight(FontWeight.Bold)
        .alignRules({
          center: { anchor: '__container__', align: VerticalAlign.Center },
          middle: { anchor: '__container__', align: HorizontalAlign.Center }
        })

    }
    .width('100%')
    .height('100%')
  }
}
运行效果:
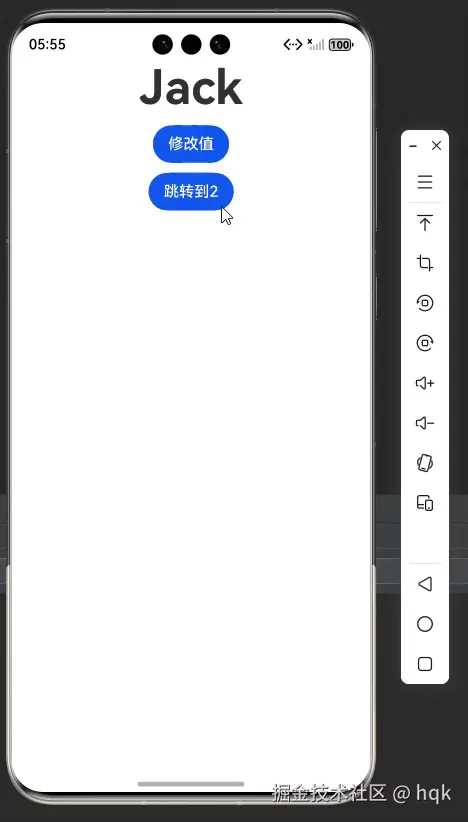
在这个示例中:
- 使用
PersistenceV2能将数据存储在设备磁盘上(持久化) PersistenceV2可以和UI组件同步,且可以在应用业务逻辑中被访问,需要和@ObservedV2对象关联,且对应变量需要被@Trace所修饰- 单个key支持数据大小约8k,过大会导致持久化失败
- 持久化的数据必须是class对象,如果需要持久化非class对象,建议使用
Persistence进行数据持久化
2.3 其他状态管理
2.3.1 @Monitor
2.3.1.1 示例一
ArkTS
@Entry
@ComponentV2
struct PageWatch {
  //监听某个变量的值,这个值如果发生改动,就会触发相应的函数的执行。
  @Local money: number = 100
  @Local age:number=10

  @Local keyStr: string = ''
  @Local beforeStr: string = ''
  @Local nowStr: string = ''

  @Monitor('money','age')
  onStrChange(monitor: IMonitor) {
    const names: string[] = monitor.dirty
    this.keyStr = JSON.stringify(names)
    // console.log("hqk",JSON.stringify(names))
    monitor.dirty.forEach((path: string) => {
      this.beforeStr = `${monitor.value(path)?.before}`
      this.nowStr = `${monitor.value(path)?.now}`
      // console.log('hqk', monitor.value(path)?.before, '改变到:', monitor.value(path)?.now)
    })
  }

  build() {
    Column({space:20}) {

      if (this.keyStr !== '') {
        Text(`变量${this.keyStr}被修改`)
      }
      if (this.beforeStr!==''){
        Text(`变量${this.keyStr}修改前的值:${this.beforeStr}`)
      }
      if (this.nowStr!==''){
        Text(`变量${this.keyStr}修改后的值:${this.nowStr}`)
      }

      Button('修改值Money').onClick(() => {
        this.money += 10
      })

      Button('修改值Age').onClick(() => {
        this.age += 10
      })
    }
    .width('100%')
    .height('100%')
  }
}
运行效果:
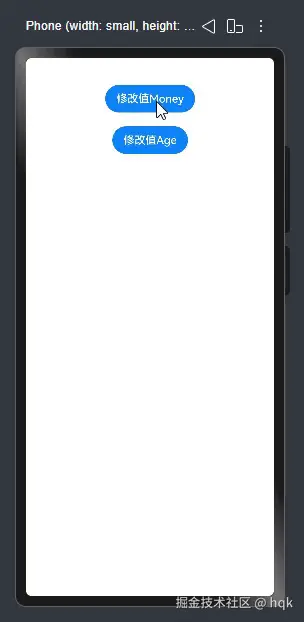
在这个示例中
@Monitor装饰器用于监听状态变量修改,使得状态变量具有深度监听的能力- 和
@Watch类似,不过@Monitor能同时检测多个状态变量
2.3.1.2 示例二
ArkTS
@ObservedV2
class UserInfo {
  @Trace name: string;
  @Trace age: number;

  constructor(name: string, age: number) {
    this.name = name;
    this.age = age;
  }
}

@Entry
@ComponentV2
struct UserProfile {

  @Local user: UserInfo = new UserInfo('hqk', 25);


  @Monitor('user.name', 'user.age')
  onUserInfoChange(monitor: IMonitor) {
    monitor.dirty.forEach((path: string) => {
      console.info(`[Monitor] ${path} changed: ${monitor.value(path)?.before} → ${monitor.value(path)?.now}`);
    });
  }

  build() {
    Column({space :20}) {
      Text(`Name: ${this.user.name}`)
      Text(`Age: ${this.user.age}`)

      Button('Change Name')
        .onClick(() => {
          this.user.name += '*';
        })

      Button('Change Age')
        .onClick(() => {
          this.user.age += 1;
        })
    }.width('100%')
    .height('100%')
    .justifyContent(FlexAlign.Center)
  }
}
运行效果:
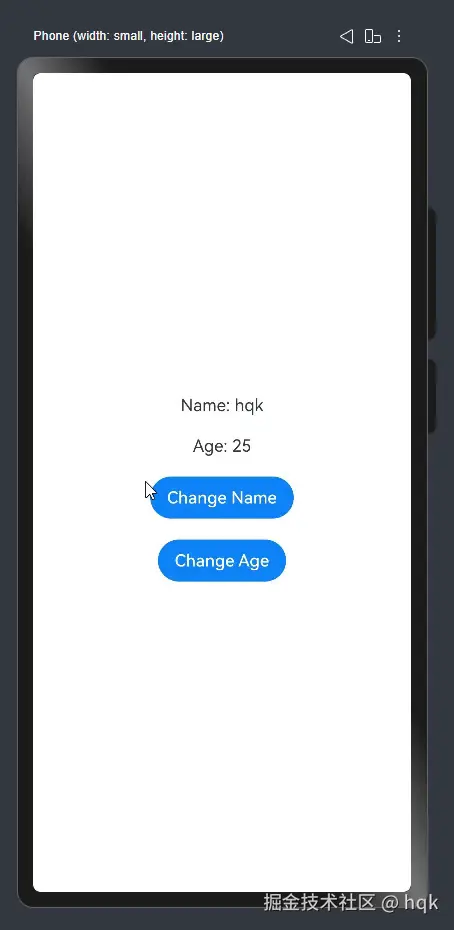
在这个示例中:
@Monitor可以监听深层属性的变化,该深层属性需要被@Trace装饰@Monitor可以同时监听多个属性,这些属性之间用","隔开
OK,到这鸿蒙的状态管理就结束了,接下来准备讲解鸿蒙的应用结构。
3、应用结构
鸿蒙的应用结构有两种模型:FA模型与Stage模型。目前来说FA模型已经被淘汰了而且与Stage模型差异化非常大,因此这里就只分析Stage模型。
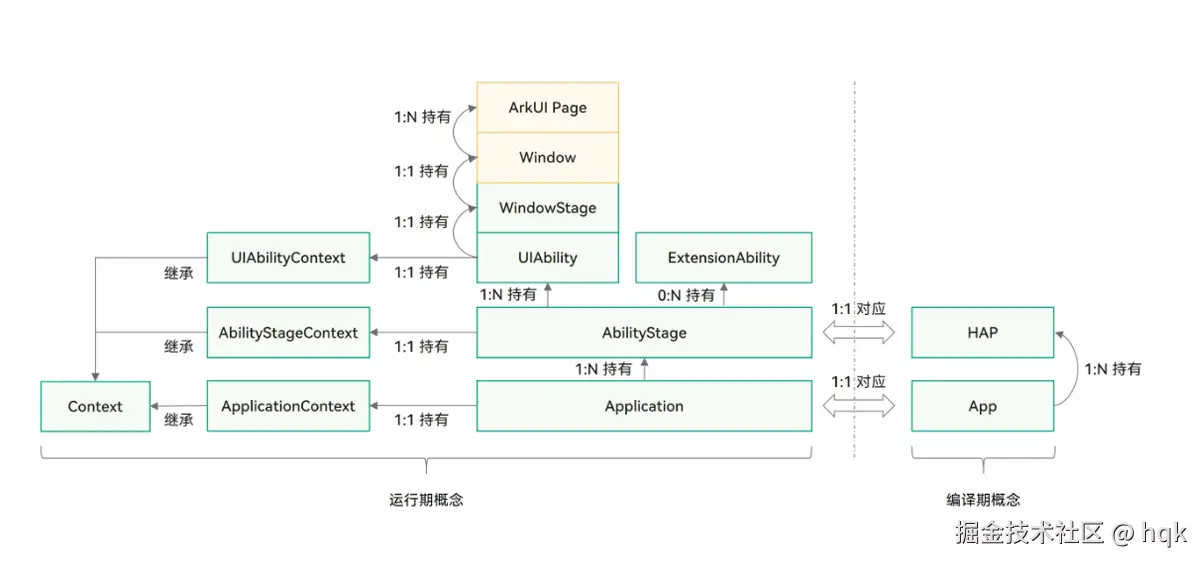
这是一个Stage模型基本概念图
如图所示,我们由浅入深逐步分析
- 我们先看最下面那一排,从右往左依次看:一个App对应了一个Application,对应了独有的ApplicationContext
- 接着我们再看倒数第二排:一个HAP对应了一个AbilityStage,也对应了独有的AbilityStageContext
- 而一个HAP包含多个UIAbility,与WindowStage、Window、保持一对一的关系,与ArkUI Page保持一对多的关系
那现在问题来了,那个所谓的HAP是什么玩意儿呢?
3.1 应用程序包
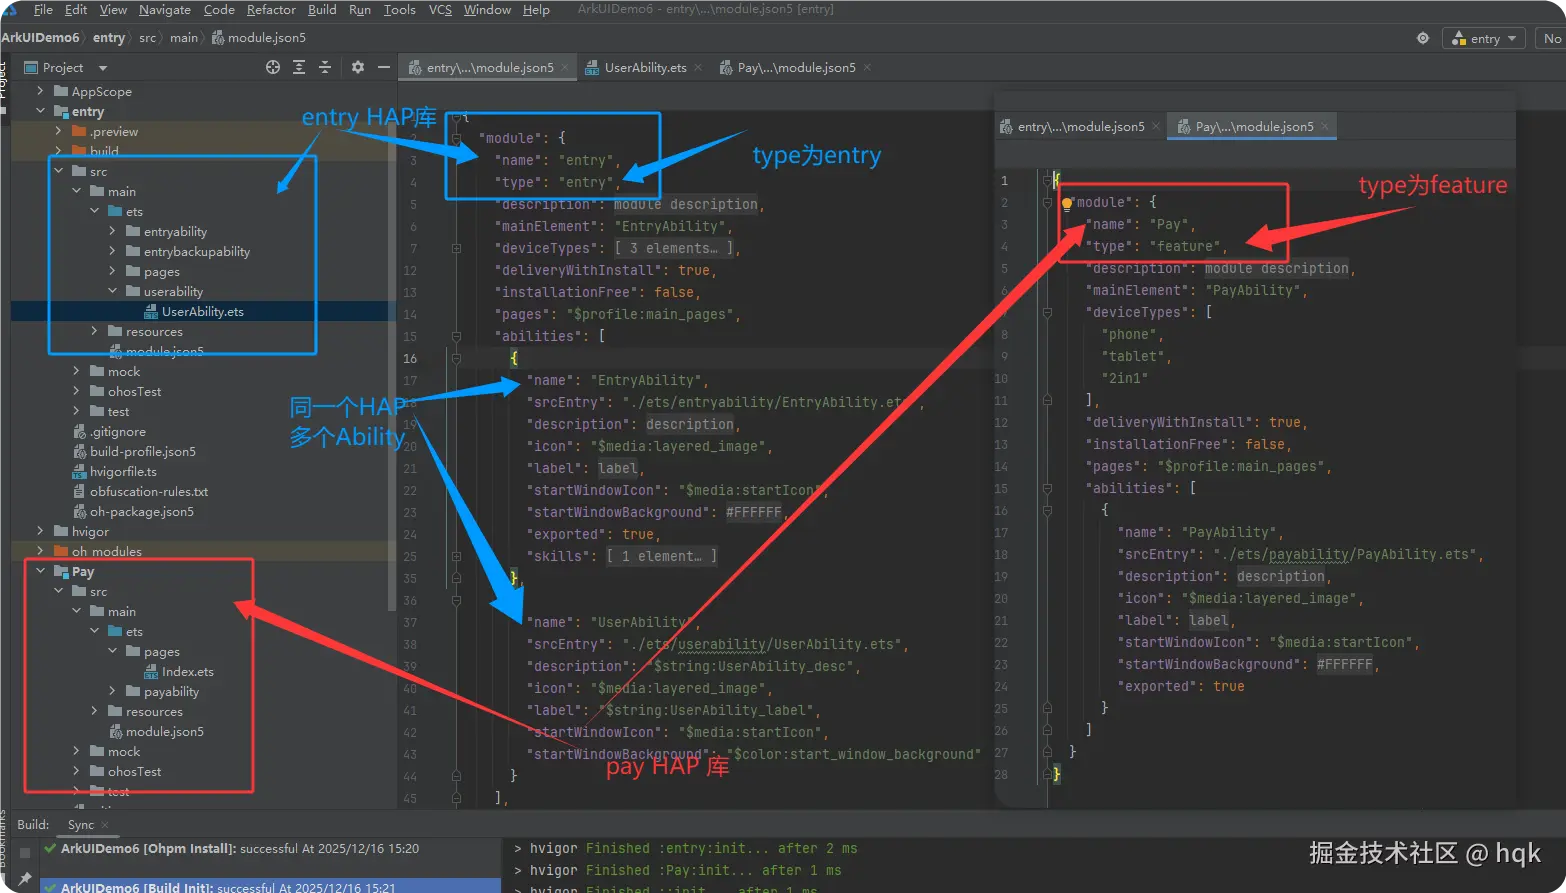
如图所示:
- 应用程序包可以只包含一个基础的entry包,也可以包含一个基础的entry包和多个功能性的feature包。
- 每个HAP对应配置文件
module.json5位置在:xx模块名/src/main/module.json5 - HAP包是由代码、资源、第三方库、配置文件等打包生成的模块包,其主要分为两种类型:entry和feature。
- entry:应用的主模块,作为应用的入口,提供了应用的基础功能。
- feature:应用的动态特性模块,作为应用能力的扩展,可以根据用户的需求和设备类型进行选择性安装。
同时也证明了一个HAP包含多个UIAbility,那我们就来看看所谓的UIAbility.
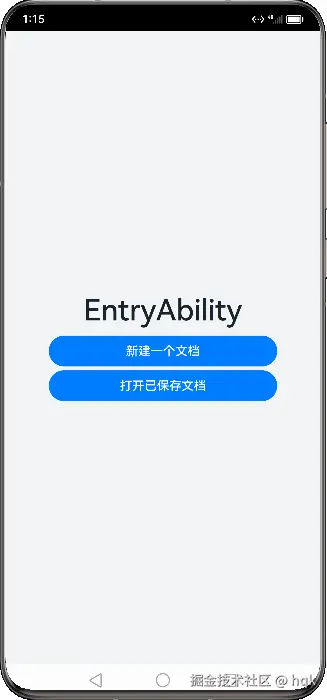
3.1.1 UIAbility介绍
什么是UIAbility?
-
UIAbility组件是一种包含UI界面的应用组件,主要用于和用户交互。
-
UIAbility组件是系统调度的基本单元,为应用提供绘制界面的窗口;
-
每一个UIAbility组件实例,都对应一个最近的任务列表中的任务(可参考:本文:1.2.2 AppStore 示例二)
-
一个UIAbility组件中可以通过多个页面来实现一个功能模块,而多个页面的跳转与参数传递则是通过路由来完成(稍后讲解)
而多个UIAbility之间可以实现相互跳转(同样参考:本文:1.2.2 AppStore 示例二)
既然UIAbility有跳转,那么就会就有对应的生命周期
3.1.2 UIAbility生命周期
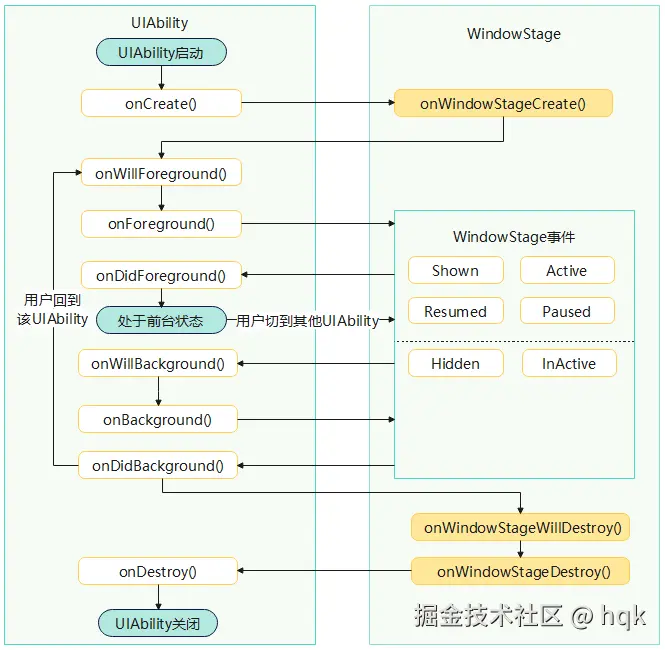
如图所示,生命周期变化如下:
- onCreate():当用户打开或切换到应用时,UIAbility被创建。就好像你打开一个应用,应用的页面被呈现在屏幕上;
- onForeground():当应用界面处于活跃状态时,它处于前台状态。这就像你正在使用一个应用,它是当前的焦点
- onBackground():如果你切换到了其他应用,原来的应用就进入了后台状态。UIAbility也会相应的从前台变成后台状态。
- onDestroy():当你关闭应用或者应用被系统销毁时,UIAbility也会被销毁。就像你关闭一个应用,它的界面消失了
既然UIAbility能够被创建,那么就会有对应的启动模式。
3.1.3 UIAbility启动模式
UIAbility的启动模式是指UIAbility实例在启动时的不同呈现状态。针对不同的业务场景,系统提供了三种启动模式。
-
singleton:单实例模式
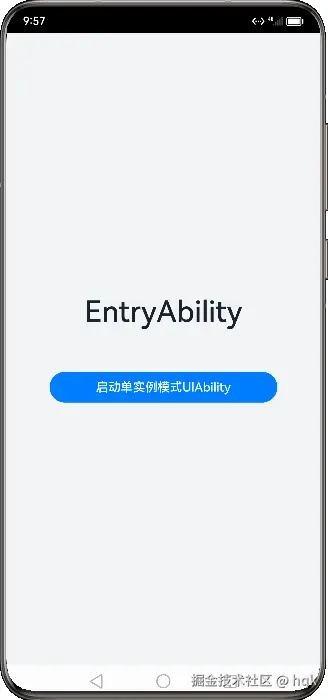
-
multiton:标准多实例模式

-
specified:指定实例模式
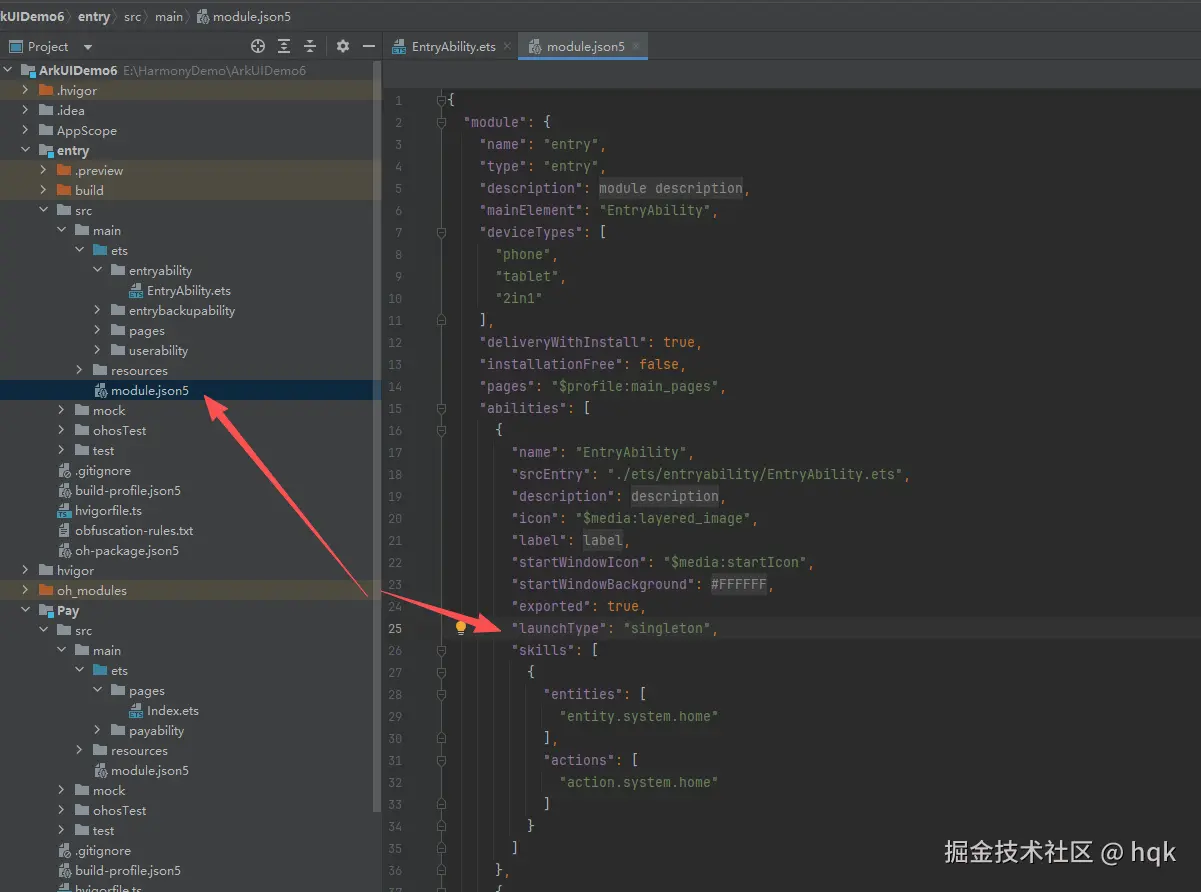
如图所示:
- 对应启动模式可在 对应模块下的配置文件(module.json5),配置"launchType"属性
那除了HAP,鸿蒙还有哪些应用程序包类型呢?
3.1.4 其他应用程序包介绍
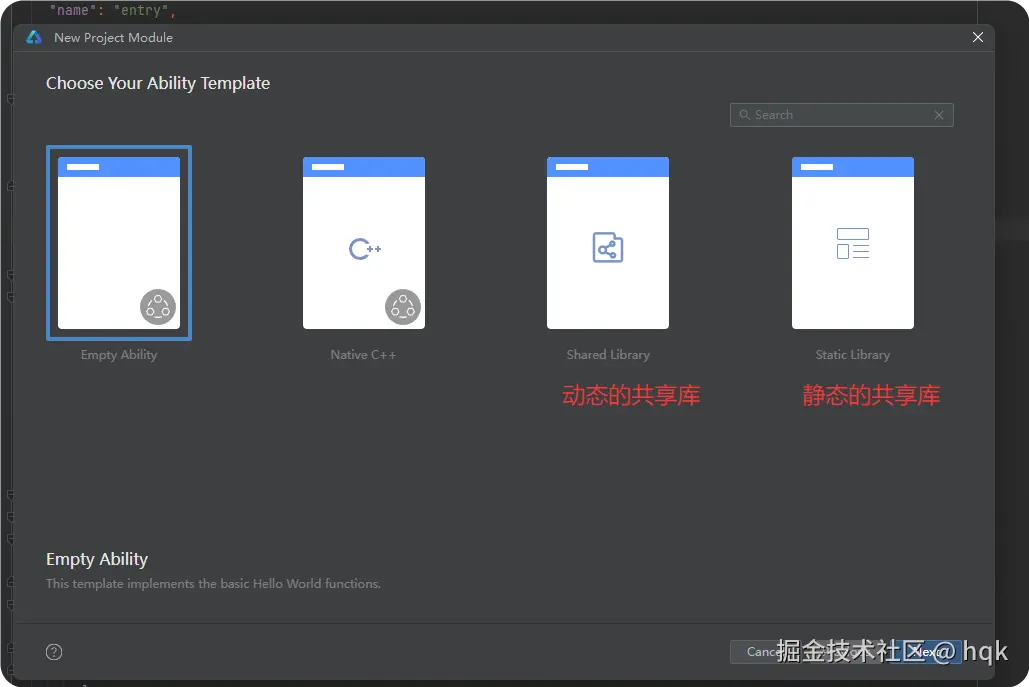
如图所示,应用程序包类型有:
-
HAP:带有界面的库
-
HAR:静态共享库(API14后支持UIAbility)
-
HSP:动态共享库
- 应用内HSP:在编译过程中与应用包名(bundleName)强耦合,只能给某个特定的应用使用
- 集成态HSP:构建、发布过程中,不与特定的应用包名耦合;使用时,工具链支持自动将集成态HSP的包名替换成宿主应用包名,并且会重新签名生成一个新的HSP包,作为宿主应用的安装包,这个新的HSP也属于宿主应用HAP的应用内HSP
而HAR与HSP都可以实现代码和资源的共享,同时都不支持独立发布上架,必须与宿主的APP包一起发布。
OK!接下来就是我们最后一个知识点了------路由
4、路由
页面路由指在应用程序中实现不同页面之间的跳转和数据传递。而官方目前给我们提供了两种路由跳转方式(Router与Navigation)。
先来看以前的老牌军Router
4.1 Router
Router的使用跳转都是基于Entry修饰的page组件
如图所示,Router都是基于resources/base/profile/main-page.json中的路由配置来跳转的。
同时Router提供了以下几个方法
-
pushUrl
- 目标页面不会替换当前页,而是压入页面栈。
- 保留当前页状态,可以通过返回键或者调用
back方法返回当前页 - 跳转提供了两种实例模式,分别是Standard和Single,这决定了目标Url是否有多个实例
ArkTSrouter.pushUrl({ url: 'pages/Detail' // 目标url }, router.RouterMode.Standard, (err) => { }); -
replaceUrl
- 目标页面会替换当前页,并销毁当前页
- 释放当前页的资源,并且无法返回到当前页
- 跳转提供了两种实例模式,分别是Standard和Single,这决定了目标Url是否有多个实例
ArkTSrouter.replaceUrl({ url: 'pages/Detail' // 目标url }, router.RouterMode.Single, (err) => { }); -
back 返回页面,可以使用以下几种方式返回页面
- 方式一:返回到上一个页面
ArkTSrouter.back();- 方式二:返回到指定页面
ArkTSrouter.back({ url: 'pages/Home' });- 方式三:返回到指定页面,并传递自定义参数信息
ArkTSrouter.back({ url: 'pages/Home', params: { info: '来自Home页' } }); -
clear
- 清空页面栈中的所有历史页面,仅保留当前页面作为栈顶页面
ArkTSrouter.clear() -
getParams :获取传递的参数
-
getState :获取当前路由状态
-
getLength :获取当前所有的路由长度
4.1.1 Router获取
目前Router获取方式有两种:
一是通过import方式导入ArkUI库进行获取
Ark
import { router } from '@kit.ArkUI';

Button('跳转B页面').onClick( () => {
  router.pushUrl({url: 'pages/router/BPage'}, router.RouterMode.Single)
})
但这种方式可能会导致UI上下文不明确的问题。
第二种方式通过getUIContext().getRouter获取。
Ark
import { router } from '@kit.ArkUI';

Button('跳转B页面').onClick( () => {
  this.getUIContext().getRouter().pushUrl({url: 'pages/router/BPage'}, router.RouterMode.Single)
})即使如此,官方还是不推荐使用Router跳转页面,推荐使用Navigation。
我们来看看它如何使用的。
4.2 Navigation
组件导航(Navigation)主要用于实现Navigation页面间的跳转,支持在不同Navigation页面间传递参数,提供灵活的跳转栈操作,从而更便捷地实现对不同页面的访问和复用。
在API version 9上,Navigation需要配合NavRouter组件实现页面路由。从API version 10开始,更推荐使用NavPathStack实现页面路由。
因此我们直接用NavPathStack实现页面路由。
4.2.1 示例一:
NavigationExample.ets
ArkTS
@Entry
@Component
struct NavigationExample {
  pageInfos: NavPathStack = new NavPathStack();
  build() {
    Navigation(this.pageInfos) {
      Column() {
        Button('pushPath')
          .width('80%')
          .height(40)
          .margin(20)
          .onClick(() => {
            this.pageInfos.pushPath({ name: 'pageOne' },
              { launchMode: LaunchMode.POP_TO_SINGLETON })
          })
      }
    }.title('NavIndex')
  }
}
源码解析
-
定义了
NavPathStack对象,并且在build()最外层套入了Navigation,并传入了NavPathStack对象 -
页面跳转时就可以通过
NavPathStack对象进行跳转,即将跳转至pageOne页面 -
launchMode表示页面的跳转模式STANDARD:默认导航堆栈操作模式。在此模式下,推送操作将指定的NavDestination页面添加到堆栈中;替换操作替换当前顶部导航目标页面MOVE_TO_TOP_SINGLETON:当具有指定名称的NavDestination存在时,它将被移动到堆栈顶部,否则,行为将与STANDARD模式一致POP_TO_SINGLETON:当具有指定名称的NavDestination存在时,堆栈将弹出,直到该NavDestination为止,否则,行为将与STANDARD模式一致。NEW_INSTANCE:此模式创建NavDestination的实例。与STANDARD相比,此模式不重用堆栈中同名的实例。
这个没有什么难度,就是套了一层壳,继续看下一个页面
PageOne
ArkTS
class TmpClass {
  count: number = 10;
}
@Builder
export function PageOneBuilder(name: string, param: Object) {
  PageOne()
}

@Component
export struct PageOne {
  pageInfos: NavPathStack = new NavPathStack();
  build() {
    NavDestination() {
      Column() {
        Button('pushPathByName')
          .width('80%')
          .height(40)
          .margin(20)
          .onClick(() => {
            let tmp = new TmpClass();
            this.pageInfos.pushPathByName('pageTwo', tmp); //将name指定的NavDestination页面信息入栈,传递的数据为param
          })

      }.width('100%').height('100%')
    }.title('pageOne')
    .onReady((context: NavDestinationContext) => {
      this.pageInfos = context.pathStack;
    })
  }
}
PageTwo
ArkTS
@Builder
export function PageTwoBuilder(name: string, param: Object) {
  PageTwo()
}

@Component
export struct PageTwo {
  pathStack: NavPathStack = new NavPathStack();

  build() {
    NavDestination() {
      Column() {
        Button('pushPathByName', { stateEffect: true, type: ButtonType.Capsule })
          .width('80%')
          .height(40)
          .margin(20)
          .onClick(() => {
            this.pathStack.pushPathByName('pageOne', null);
          })
      }.width('100%').height('100%')
    }.title('pageTwo')
    .onReady((context: NavDestinationContext) => {
      this.pathStack = context.pathStack;
      console.info(`current page config info is ${JSON.stringify(this.pathStack.getParamByName('pageTwo'))}`);
    })
  }
}
源码解析
- 注意看
PageOne与PageTwo这两个结构体都没有@Entry,和Router不一样,页面必须含有@Entry - 其次需要创建对应的
Builder,然后初始化对应页面的结构体 - 对应页面如果想要获取参数以及跳转其他页面,那么需要监听
NavDestination的onReady方法,并且通过NavDestinationContext获取NavPathStack对象 - 如果对应页面有参数传递过来,那么还需要通过
NavPathStack.getParamByName获取对应参数
那么到这里,代码就完了么?我们先来运行下效果:
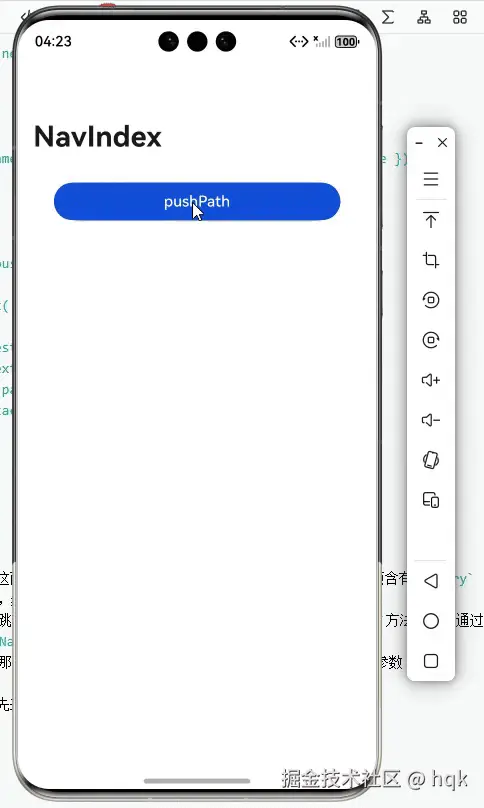
咦?好像不是想要的效果呢!
上面不是已经提到过PageOne与PageTwo这两个结构体都没有@Entry,那么使用NavDestination时,子页面需要额外添加配置
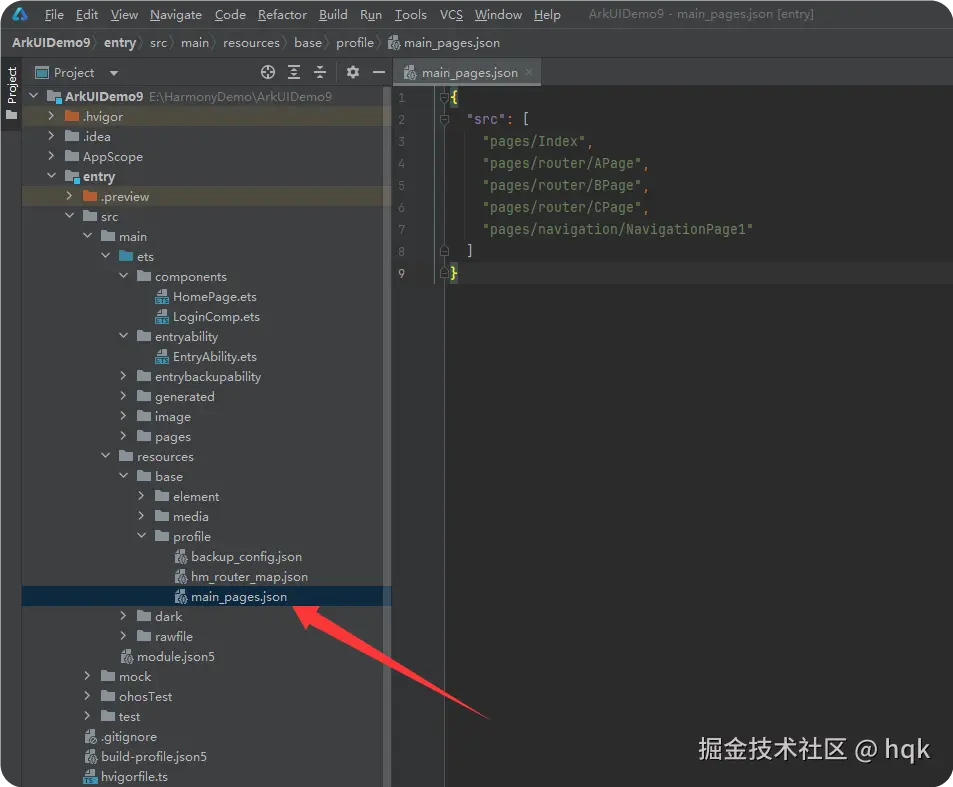
首先在对应的src/main/resources/base/profile文件夹下创建router_map.json,并将如下内容复制粘贴进去
json
{
  "routerMap": [
    {
      "name": "pageOne",
      "pageSourceFile": "src/main/ets/pages/navigation/PageOne.ets",
      "buildFunction": "PageOneBuilder",
      "data": {
        "description": "this is pageOne"
      }
    },
    {
      "name": "pageTwo",
      "pageSourceFile": "src/main/ets/pages/navigation/PageTwo.ets",
      "buildFunction": "PageTwoBuilder"
    }
  ]

}然后在对应的src/main/module.json5里面module结构下,添加如下代码"routerMap":"$profile:router_map"
最后再次运行看看效果:
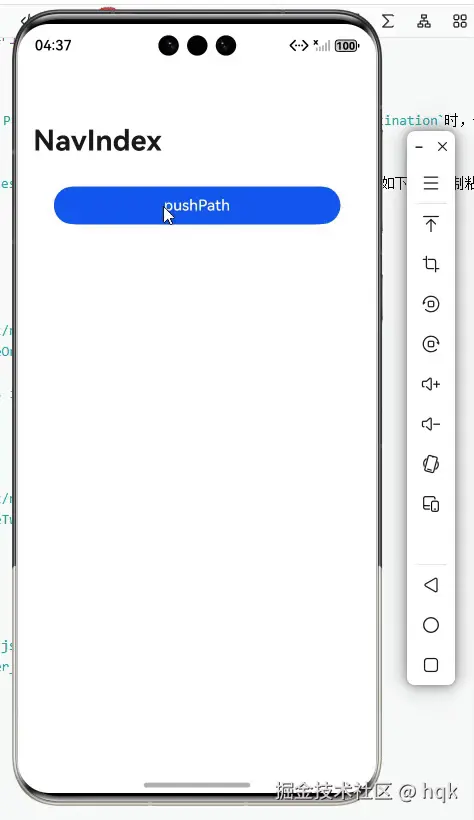
那为什么添加了这些代码运行效果就达到了想要的呢?
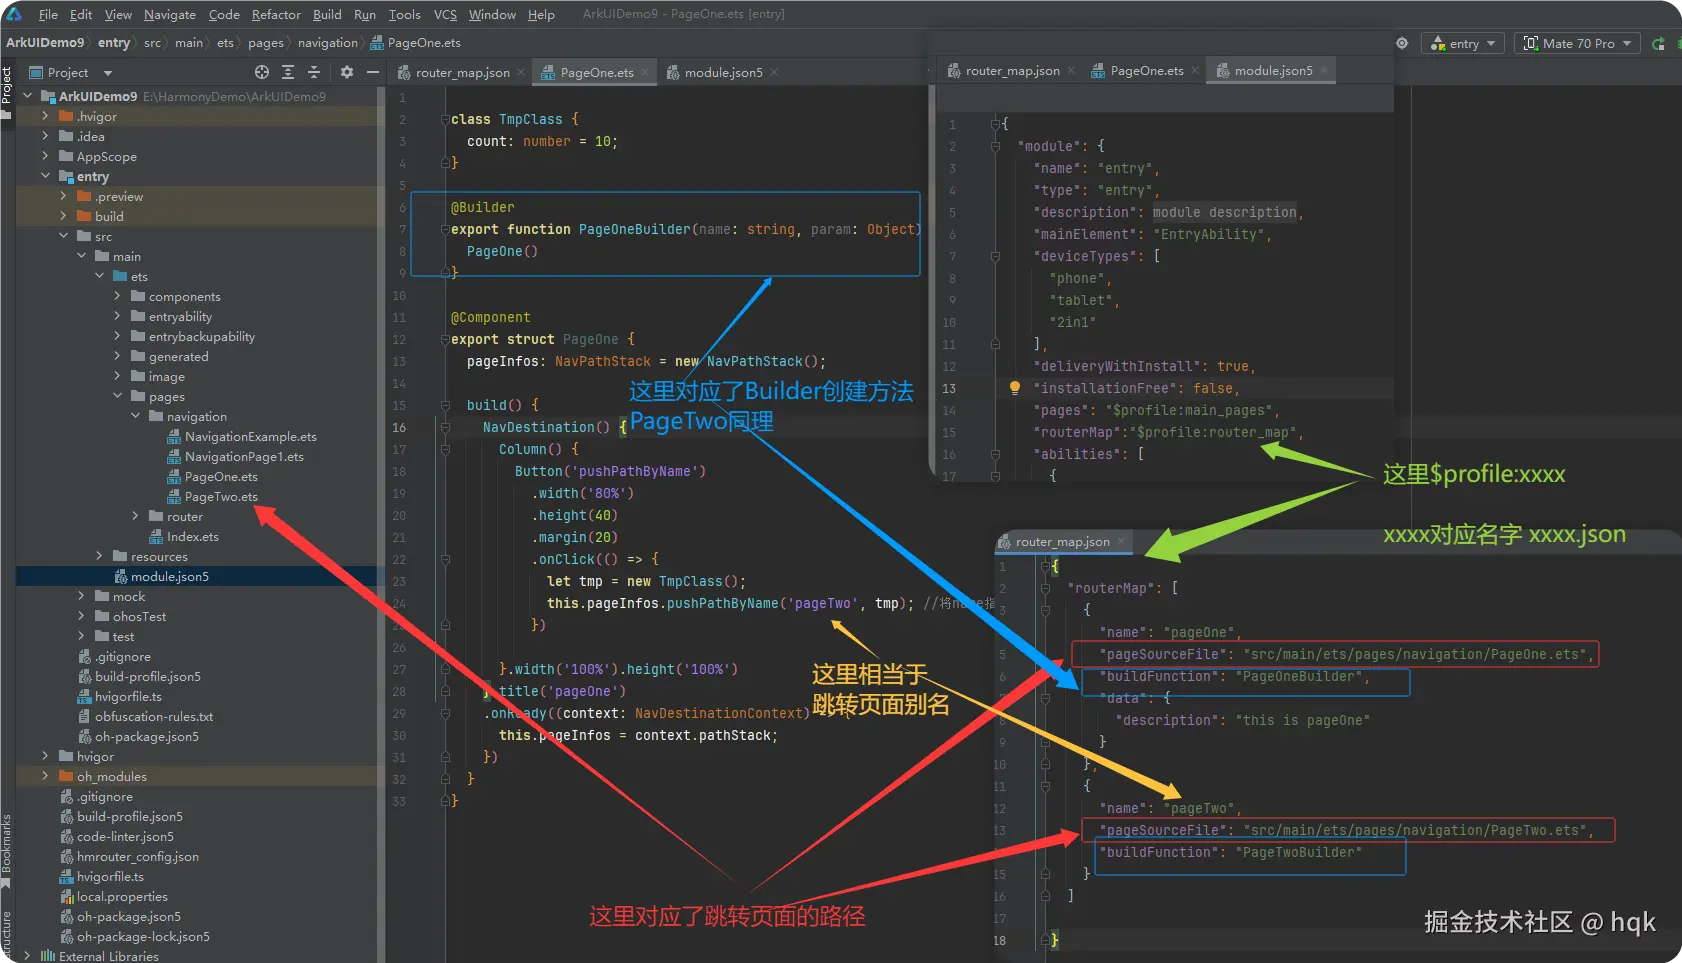
如图所示:
- 在
router_map.json配置文件里,配置对应的属性 - 然后在
module.json5里面通过"routerMap":"$profile:router_map"指定配置文件
是不是觉得很麻烦?没错!我也觉得!不仅麻烦,而且还严重侵入UI元素!还不如用回Router。
不过现在有个三方库,解决了官方Navigation配置麻烦的问题,我们来看看
4.3 HMRouter
官方已经有非常详细的集成与使用步骤,我这就不详细分析了,不过可以看看实际使用效果
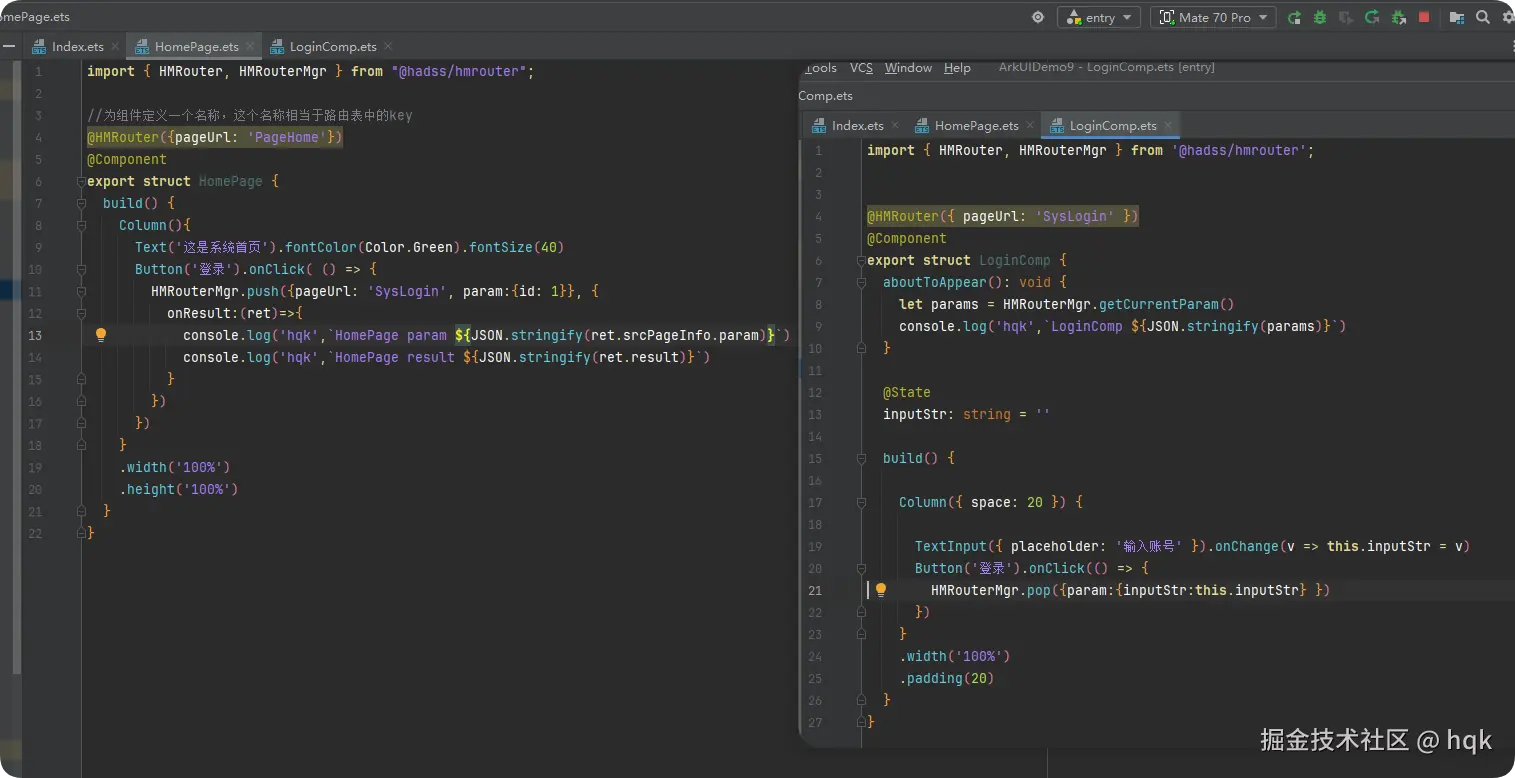
如图所示
- 通过
@HMRouter({pageUrl: 'PageHome'})定义了该组件的名称, - 通过
HMRouterMgr.push可以直接跳转至对应名称的组件
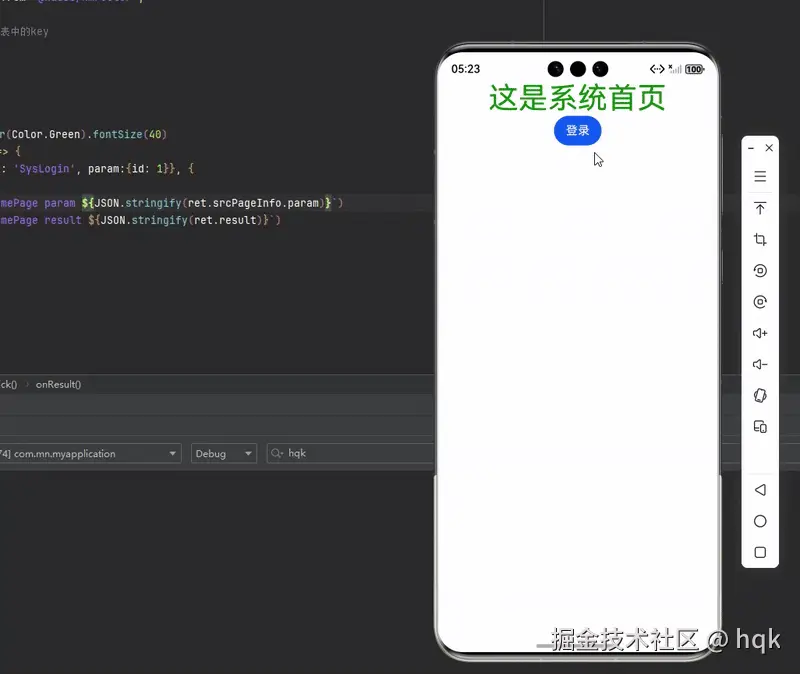
来看看效果:
5、结束语
OK!这篇文章到这已经结束了,下一篇将会讲解鸿蒙动画以及多媒体相关功能。