文章目录
-
- 基于动态页面的web架构
-
- 1、为什么需要LNMP架构
- 2、LNMP、LNMT
- 3、简单安装LNMP架构
-
- 3.1、部署nginx服务
- 3.2、安装php
-
- [1、使用第三方扩展 epel 源安装 php7.1](#1、使用第三方扩展 epel 源安装 php7.1)
- 2、安装扩展源(epel-release-7、webtatic-release)
- [3、配置第三方源,使用 Remi 仓库](#3、配置第三方源,使用 Remi 仓库)
- 4、安装php7.1版本
- [5 、替换php-fpm运行的用户和组,启动服务](#5 、替换php-fpm运行的用户和组,启动服务)
- [3.3、部署mysql 5.7.36](#3.3、部署mysql 5.7.36)
- 卸载所有mysql-community相关包
- [导入MySQL 5.7/8.0通用的最新GPG密钥(2022版)](#导入MySQL 5.7/8.0通用的最新GPG密钥(2022版))
- [(可选)若上述密钥仍不匹配,导入MySQL 5.7专属的旧密钥](#(可选)若上述密钥仍不匹配,导入MySQL 5.7专属的旧密钥)
- 重新安装mysql-community-server(会自动安装依赖包)
基于动态页面的web架构
1、为什么需要LNMP架构
因为nginx模块少,轻量级只能解析静态的网页,为了解决nginx访问动态网页的问题,需要通过架构去解决
2、LNMP、LNMT
L:linux,系统的平台也可以是w
N:前端web服务 Nginx 也可以是A Apache
M:后端数据库 mysql
P:语言 用于连接前端和后端的角色 PHP Perl Python
L:linux,系统的平台也可以是w
N:负载均衡 (代理)
M:后端数据库 mysql
T:Tomcat Java中间件(web服务)
3、简单安装LNMP架构
3.1、部署nginx服务
shell
yum安装 nginx1.14 php7.1 mysql5.7

1、使用官方yum源进行安装Nginx
[root@web01 yum.repos.d]# cat nginx.repo
[nginx]
name=nginx repo
baseurl=http://nginx.org/packages/centos/7/$basearch/
gpgcheck=0
enabled=1

[root@web01 ~]# yum -y install nginx

2、创建程序用户
[root@web01 ~]# groupadd www -g 666
[root@web01 ~]# useradd www -u 666 -g 666 -s /sbin/nologin -M

3、修改配置文件
[root@web01 nginx]# sed -i '/^user/c user www;' /etc/nginx/nginx.conf
[root@web01 nginx]# cat /etc/nginx/nginx.conf |head -10
user www;
worker_processes  auto;

error_log  /var/log/nginx/error.log notice;
pid        /var/run/nginx.pid;


events {
    worker_connections  1024;


4、启动并且自启动
[root@web01 nginx]# systemctl start nginx
[root@web01 nginx]# systemctl enable nginx
3.2、安装php
1、使用第三方扩展 epel 源安装 php7.1
bash
1、使用第三方扩展 epel 源安装 php7.1
#1.移除旧版php
[root@web01 nginx]# yum remove php-mysql-5.4 php php-fpm php-common -y
2、安装扩展源(epel-release-7、webtatic-release)
bash
# 下载epel-release-7-14.noarch.rpm(归档版本,稳定可用)
wget https://archives.fedoraproject.org/pub/archive/epel/7/x86_64/Packages/e/epel-release-7-14.noarch.rpm
# 安装该rpm包
rpm -Uvh epel-release-7-14.noarch.rpm
注意:webtatic 仓库已经停止维护,对 CentOS 7 的支持也已终止,建议尽量避免使用
rpm -Uvh https://mirror.webtatic.com/yum/el7/webtatic-release.rpm
3、配置第三方源,使用 Remi 仓库
bash
安装Remi-release-7
rpm -Uvh https://rpms.remirepo.net/enterprise/remi-release-7.rpm
安装yum-utils(提供yum-config-manager工具)
yum install -y yum-utils
启用Remi的PHP 7.4仓库(根据需要替换为5.6/7.2/8.0等)
yum-config-manager --enable remi-php74

清理缓存
[root@web01 nginx]# yum clean all
[root@web01 nginx]# yum makecache
4、安装php7.1版本
bash
[root@web01 nginx]# yum -y install php71w php71w-cli php71w-common php71w-devel php71w-embedded php71w-gd php71w-mcrypt php71w-mbstring php71w-pdo php71w-xml php71w-fpm php71w-mysqlnd php71w-opcache php71w-pecl-memcached php71w-pecl-redis php71w-pecl-mongodb5 、替换php-fpm运行的用户和组,启动服务
bash
[root@web01 php-fpm.d]# sed -i '/^user/c user = www' /etc/php-fpm.d/www.conf
[root@web01 php-fpm.d]# sed -i '/^group/c group = www' /etc/php-fpm.d/www.conf


[root@web01 php-fpm.d]# systemctl start php-fpm
[root@web01 php-fpm.d]# systemctl enable php-fpm
Created symlink from /etc/systemd/system/multi-user.target.wants/php-fpm.service to /usr/lib/systemd/system/php-fpm.service.
3.3、部署mysql 5.7.36
动态网站
根据用户输入的信息,在后端数据库中进行查询之后,组合的一个页面静态网站
固定的页面,所见即所得,现在的网页大部分都是动静结合,一般网页的首页都是静态的动态数据
用户的信息 网页的内容一般存放在数据库中静态数据
固定的文件(图片、音频、视频、文本)一般存放在磁盘中一般以5.6为分割,5.6已经稳定了,但是安全性还是不太好,5.7之后已经完善了
3.2.1、安装mysql
1、使用仓库进行安装、启动服务
bash
1、安装Mysql5.7
# 下载并安装MySQL社区版仓库包(适用于EL7/CentOS7)
[root@web01 ~]# rpm -ivh https://repo.mysql.com/mysql80-community-release-el7-3.noarch.rpm
默认情况下,上述仓库包会启用 MySQL 8.0 仓库,禁用 5.7 仓库,因此需要手动调整
# 安装yum-utils(提供yum-config-manager工具,若已安装可跳过)
[root@web01 ~]# yum install -y yum-utils
# 禁用MySQL 8.0仓库
[root@web01 ~]# yum-config-manager --disable mysql80-community
# 启用MySQL 5.7仓库
[root@web01 ~]# yum-config-manager --enable mysql57-community
# 安装MySQL 5.7社区版服务器
[root@web01 ~]# yum install -y mysql-community-server
[root@web01 ~]#  systemctl start mysqld
[root@web01 ~]# systemctl enable mysqld
安装过程中如果报错key失败可以操作以下命令
卸载所有mysql-community相关包
yum remove -y mysql-community-*
导入MySQL 5.7/8.0通用的最新GPG密钥(2022版)
rpm --import https://repo.mysql.com/RPM-GPG-KEY-mysql-2022
(可选)若上述密钥仍不匹配,导入MySQL 5.7专属的旧密钥
rpm --import https://repo.mysql.com/RPM-GPG-KEY-mysql57
重新安装mysql-community-server(会自动安装依赖包)
yum install -y mysql-community-server
2、修改密码
shell
修改密码
[root@web01 ~]# grep "temporary password" /var/log/mysqld.log
2025-12-17T02:02:36.996806Z 1 [Note] A temporary password is generated for root@localhost: #Elkj2gp0efb
[root@web01 ~]# mysql -uroot -p$(awk '/temporary password/{print $NF}' /var/log/mysqld.log)
mysql: [Warning] Using a password on the command line interface can be insecure.
Welcome to the MySQL monitor. Commands end with ; or \g.
Your MySQL connection id is 3
Server version: 5.7.44
Copyright (c) 2000, 2023, Oracle and/or its affiliates.
Oracle is a registered trademark of Oracle Corporation and/or its
affiliates. Other names may be trademarks of their respective
owners.
Type 'help;' or '\h' for help. Type '\c' to clear the current input statement.
mysql> ALTER USER 'root'@'localhost' IDENTIFIED BY 'Jy123.com';
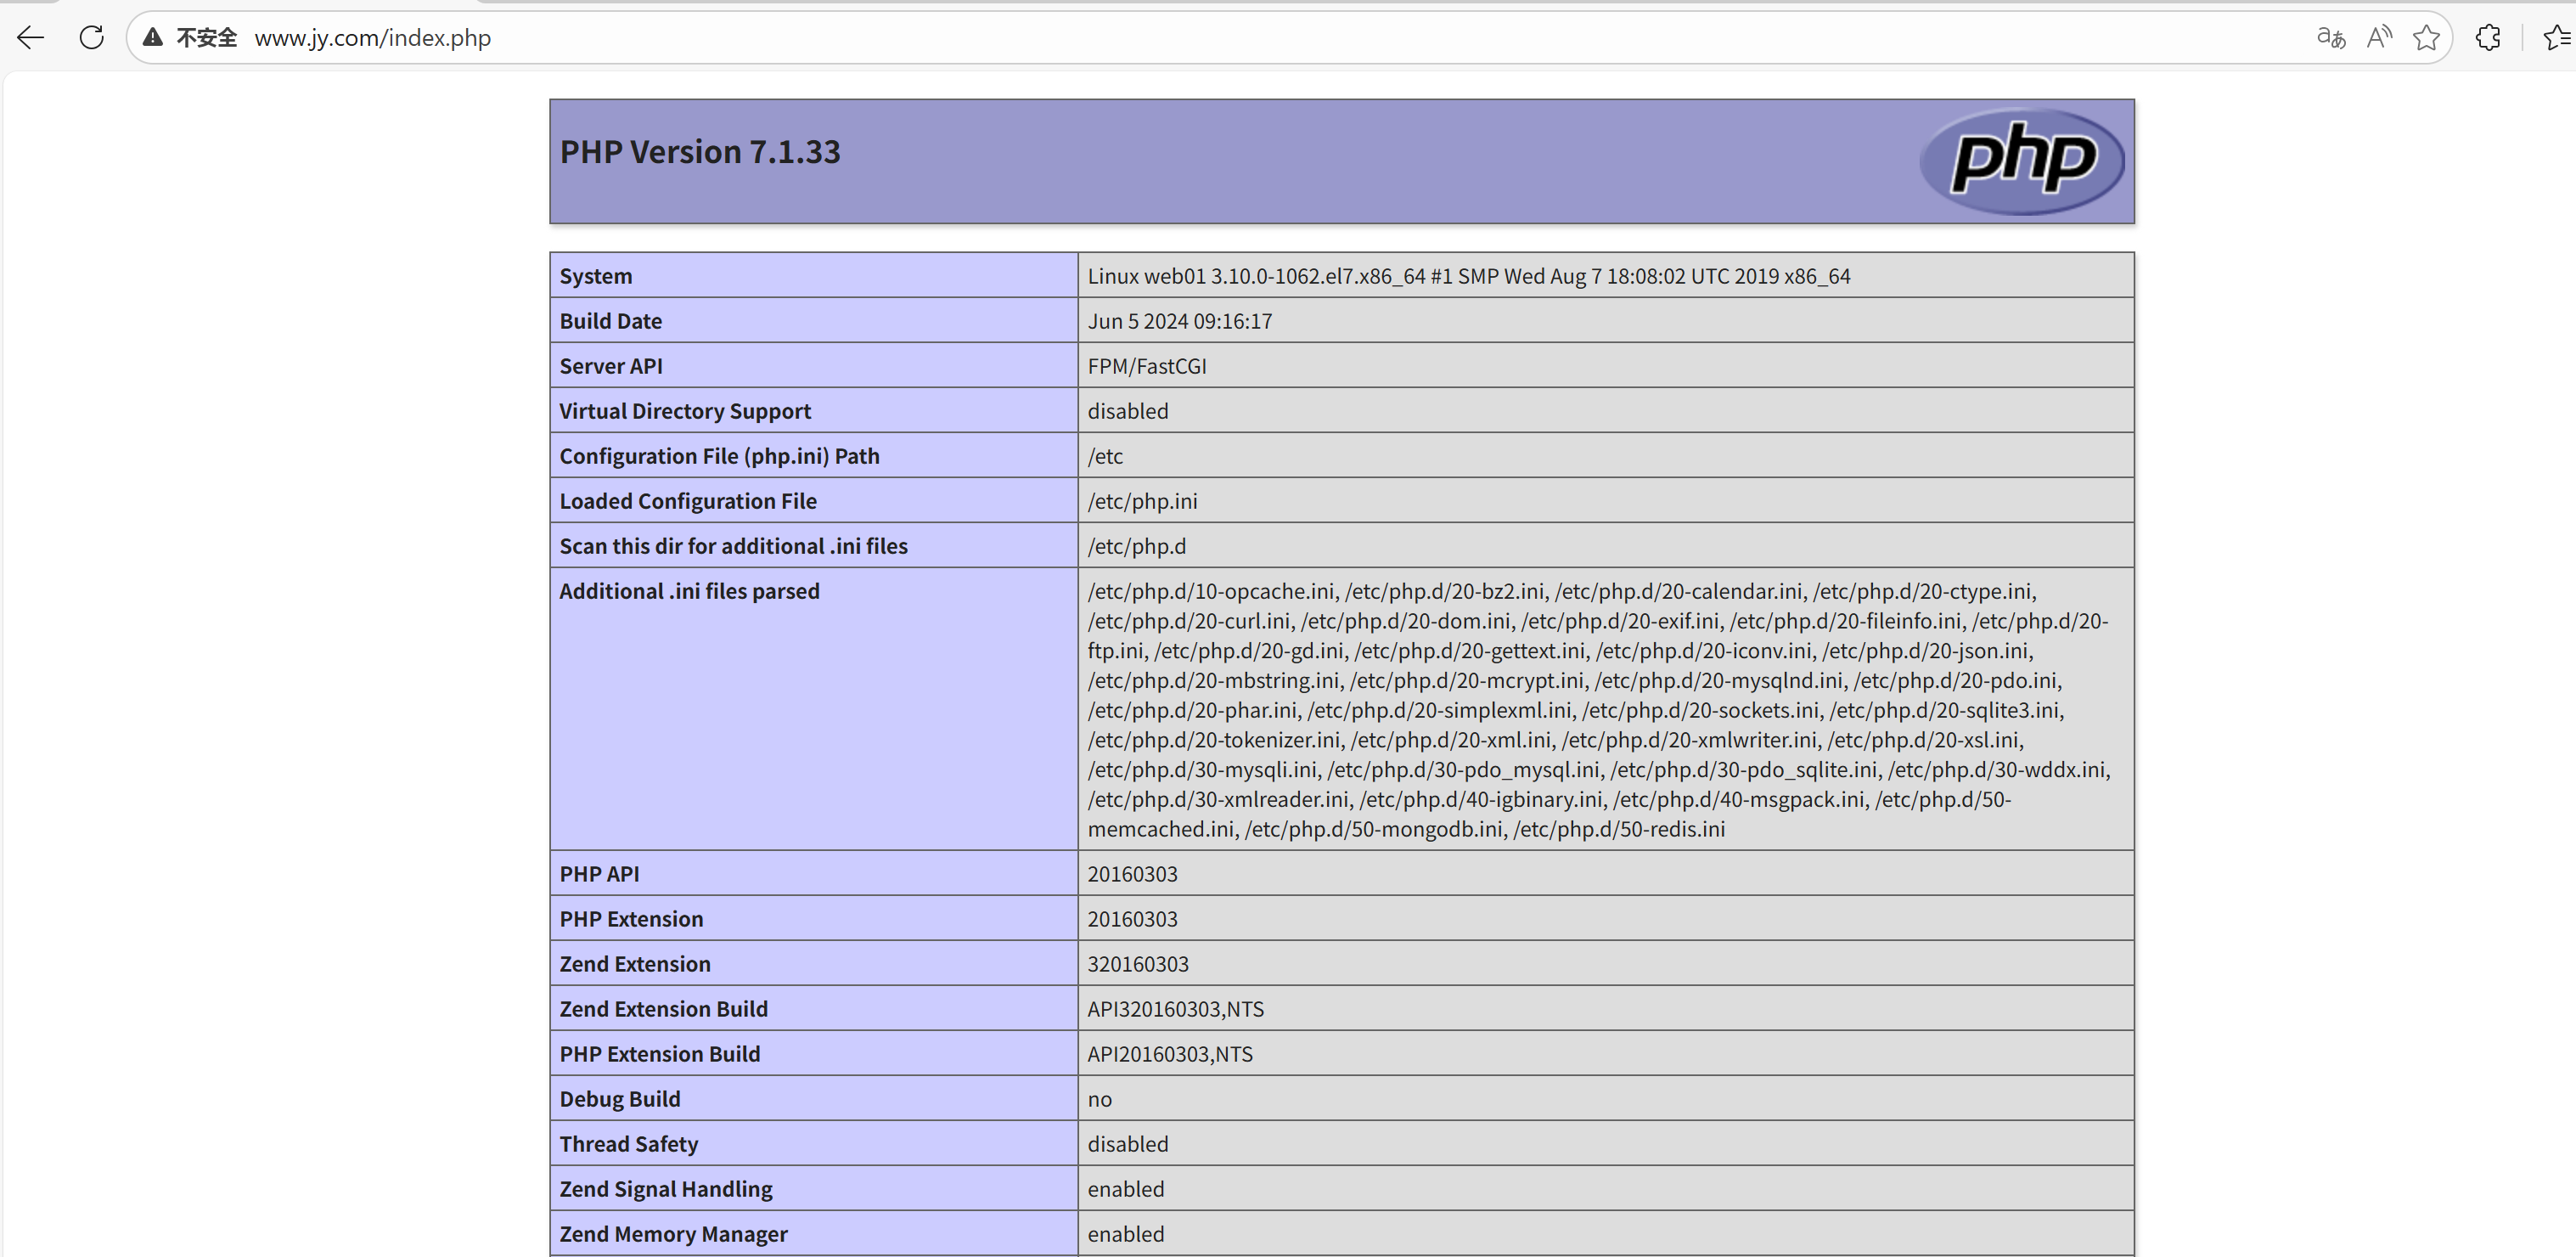
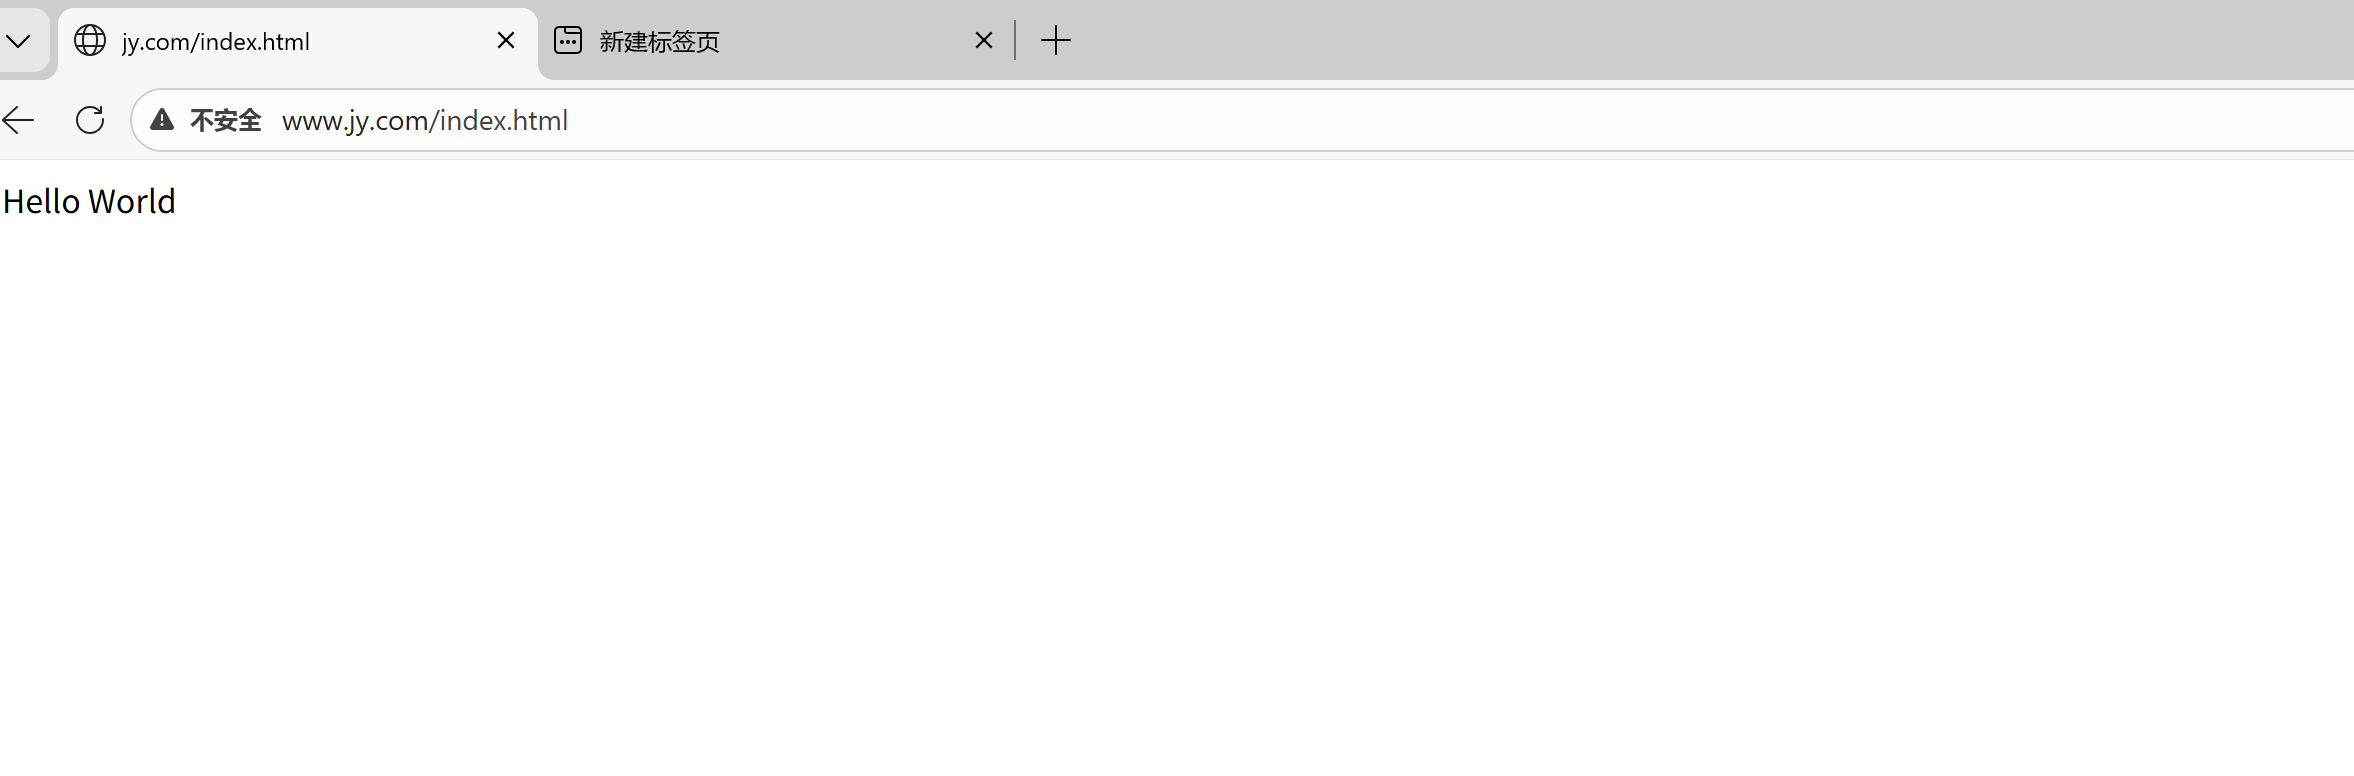
Query OK, 0 rows affected (0.01 sec)3.4、验证LNMP架构是否部署成功
1、Nginx 是否能正常解析 php 动态请求
2、php 程序能否正常连接数据库
1、编写Nginx的配置文件,连接PHP
bash
[root@web01 ~]# cat /etc/nginx/conf.d/www.conf
server{
      server_name www.jy.com;
      root /code/www;
      index index.php index.html;
      client_max_body_size 20M;

      location ~ \.php$ {

      # 定义php页面的路径,如果跟默认的root一样,可以不写
      root /code/www;

      # 定义php-fpm的访问方式
      fastcgi_pass   127.0.0.1:9000;

      # 定义php的索引文件名,跟站点默认index要匹配
      fastcgi_index  index.php;

      # 定义fastcgi的解析路径
      fastcgi_param  SCRIPT_FILENAME  $document_root$fastcgi_script_name;
      include        fastcgi_params;
    }

}


#注释,如果我们将root定义在location里面,那么每一个location里面都需要写路径
2、创建站点目录文件、完成授权
bash
[root@web01 ~]# mkdir -p /code/www
[root@web01 ~]# echo "<?php phpinfo(); ?>" > /code/www/index.php
[root@web01 ~]# echo "Hello World" > /code/www/index.html

授权:
更改目录的所有者为nginx(或设置通用权限)
[root@web01 ~]#  chown -R www.www /code/www
# 设置目录和文件的权限(目录755,文件644,安全且满足访问需求)
[root@web01 ~]#  chmod -R 755 /code/www
[root@web01 ~]#  chmod 644 /code/www/index.php /code/www/index.html

# 重新设置SELinux上下文(递归应用到/code/www)
chcon -R -t httpd_sys_content_t /code/www
# (可选)永久生效(避免重启后失效)
semanage fcontext -a -t httpd_sys_content_t "/code/www(/.*)?"
restorecon -R /code/www
3、完成主机映射,可以通过域名访问
bash
物理主机映射文件
C:\Windows\System32\drivers\etc
验证一:通过Nginx是否可以正常访问PHP资源
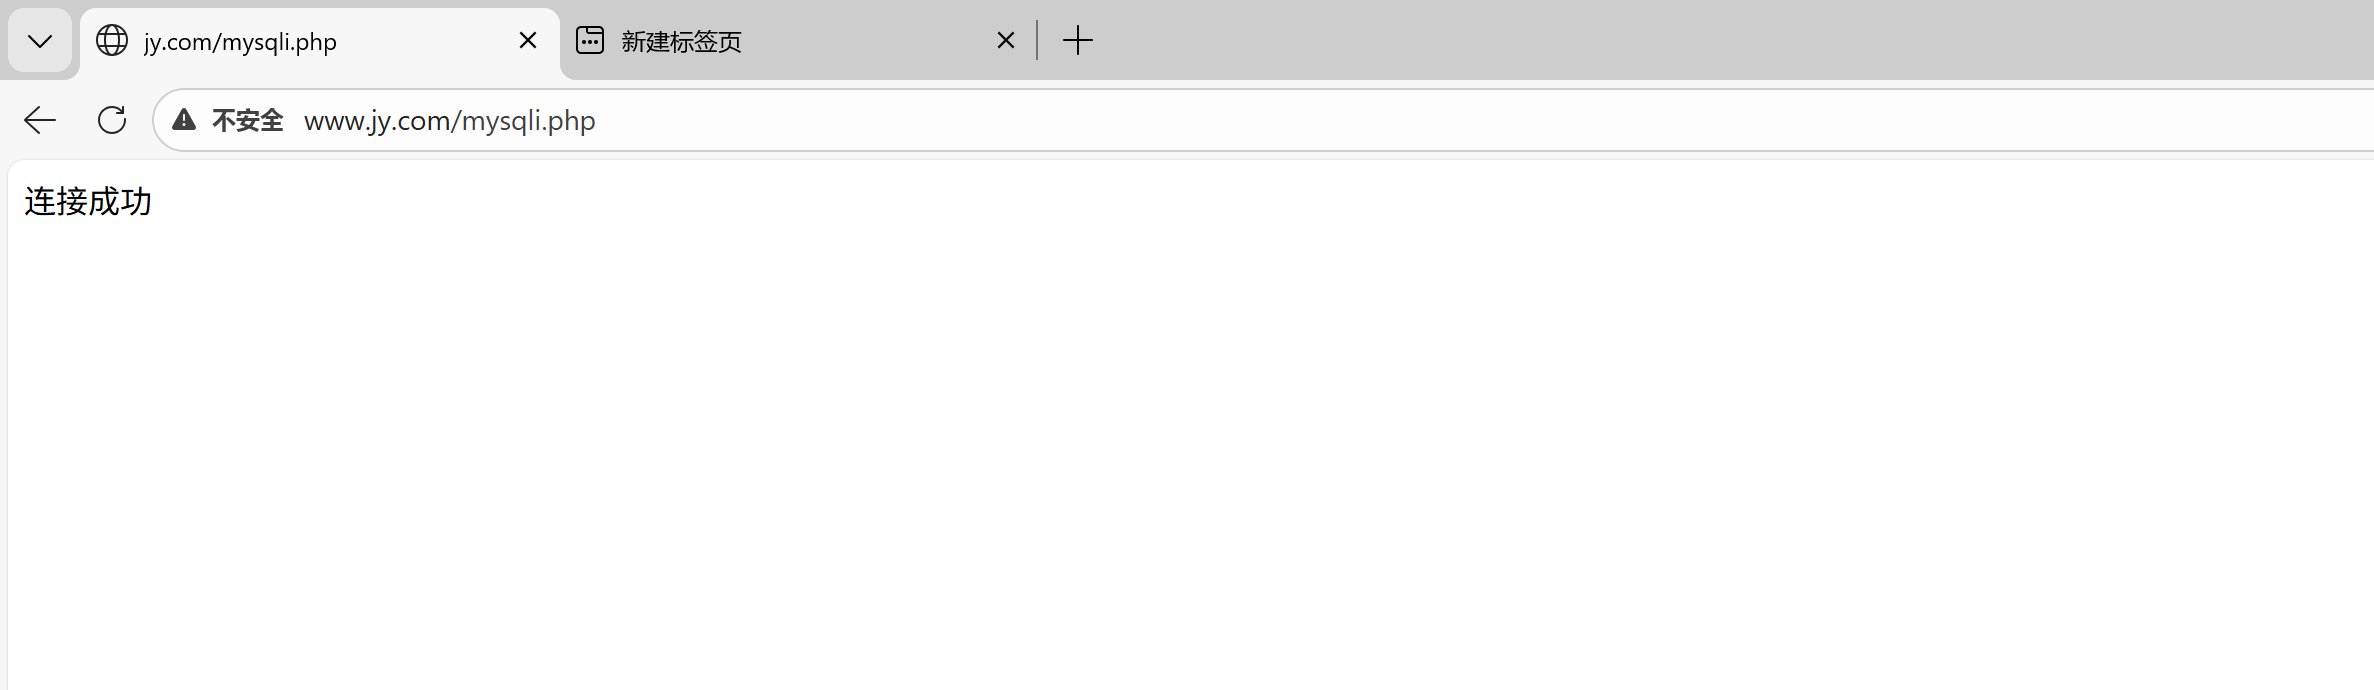
验证二:PHP是否正常连接数据库
bash
编写配置文件
[root@web01 ~]# cat /code/www/mysqli.php
<?php
$servername = "localhost";
$username = "root";
$password = "Tf123.com";
 // 创建连接
$conn = mysqli_connect($servername, $username, $password);
 // 检测连接
if (!$conn) {
 die("Connection failed: " . mysqli_connect_error());
 }
echo "连接成功";
?>