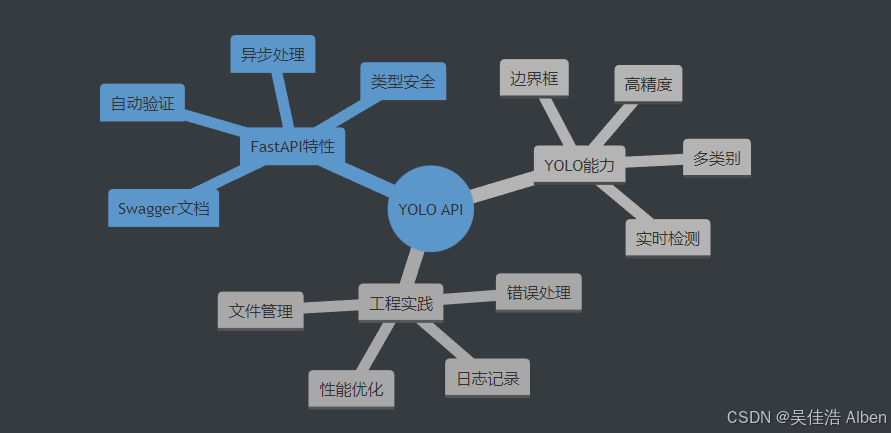
Python入门指南(六) - 搭建你的第一个YOLO检测API

欢迎来到Python入门指南的第六部分!在上一章中,我们深入了解了FastAPI的优势。现在,让我们动手实战------使用FastAPI和Ultralytics YOLO构建一个真正可用的目标检测API服务。
本章将带你从零开始,一步步搭建一个完整的AI检测服务,包括图片上传、模型推理、结果返回和可视化。
本章目标
完成本章学习后,你将能够:
- ✅ 搭建FastAPI项目结构
- ✅ 集成Ultralytics YOLO模型
- ✅ 实现图片上传和检测功能
- ✅ 返回JSON格式的检测结果
- ✅ 生成带标注的检测图片
- ✅ 使用Swagger UI测试API
环境准备
1. 安装依赖包
bash
# 创建虚拟环境(推荐)
python -m venv venv
source venv/bin/activate  # Windows: venv\Scripts\activate

# 安装核心依赖
pip install fastapi uvicorn python-multipart
pip install ultralytics
pip install pillow opencv-python依赖说明:
fastapi: Web框架核心uvicorn: ASGI服务器python-multipart: 处理文件上传ultralytics: YOLO模型库pillow: 图片处理opencv-python: 图像绘制和处理
2. 下载YOLO模型
python
# download_model.py
from ultralytics import YOLO

# 下载YOLOv8n模型(最轻量级)
model = YOLO('yolov8n.pt')
print("模型下载完成!")
运行下载脚本:
bash
python download_model.py项目结构设计
创建清晰的项目结构是成功的第一步:
yolo-detection-api/
├── app/
│   ├── __init__.py
│   ├── main.py              # FastAPI应用入口
│   ├── models.py            # Pydantic数据模型
│   ├── detector.py          # YOLO检测逻辑
│   └── utils.py             # 工具函数
├── models/
│   └── yolov8n.pt           # YOLO模型文件
├── uploads/                 # 临时上传目录
├── outputs/                 # 检测结果输出目录
├── requirements.txt         # 依赖列表
└── README.md
创建项目结构:
bash
mkdir -p yolo-detection-api/app
mkdir -p yolo-detection-api/models
mkdir -p yolo-detection-api/uploads
mkdir -p yolo-detection-api/outputs
cd yolo-detection-api
核心代码实现
Step 1: 定义数据模型(models.py)
使用Pydantic定义API的输入输出格式:
python
# app/models.py
from pydantic import BaseModel, Field
from typing import List, Optional

class DetectionBox(BaseModel):
    """单个检测框的数据结构"""
    class_name: str = Field(..., description="检测到的物体类别")
    confidence: float = Field(..., ge=0, le=1, description="置信度(0-1)")
    bbox: List[float] = Field(..., description="边界框坐标[x1, y1, x2, y2]")

    class Config:
        json_schema_extra = {
            "example": {
                "class_name": "person",
                "confidence": 0.95,
                "bbox": [100, 150, 300, 450]
            }
        }

class DetectionResponse(BaseModel):
    """检测结果响应"""
    success: bool = Field(..., description="检测是否成功")
    image_size: List[int] = Field(..., description="图片尺寸[width, height]")
    detections: List[DetectionBox] = Field(..., description="检测到的所有目标")
    detection_count: int = Field(..., description="检测到的目标数量")
    inference_time: float = Field(..., description="推理耗时(秒)")
    annotated_image_url: Optional[str] = Field(None, description="标注图片URL")

    class Config:
        json_schema_extra = {
            "example": {
                "success": True,
                "image_size": [640, 480],
                "detections": [
                    {
                        "class_name": "person",
                        "confidence": 0.95,
                        "bbox": [100, 150, 300, 450]
                    }
                ],
                "detection_count": 1,
                "inference_time": 0.023,
                "annotated_image_url": "/outputs/result_123.jpg"
            }
        }
Step 2: 实现YOLO检测器(detector.py)
封装YOLO模型的加载和推理逻辑:
python
# app/detector.py
import time
from pathlib import Path
from ultralytics import YOLO
import cv2
import numpy as np
from typing import List, Tuple
from .models import DetectionBox

class YOLODetector:
    """YOLO目标检测器"""

    def __init__(self, model_path: str = "models/yolov8n.pt"):
        """
        初始化检测器
        Args:
            model_path: YOLO模型文件路径
        """
        print(f"正在加载YOLO模型: {model_path}")
        self.model = YOLO(model_path)
        print("模型加载完成!")

    def detect(
        self,
        image_path: str,
        conf_threshold: float = 0.25,
        iou_threshold: float = 0.45
    ) -> Tuple[List[DetectionBox], float, np.ndarray]:
        """
        执行目标检测
        Args:
            image_path: 图片路径
            conf_threshold: 置信度阈值
            iou_threshold: IOU阈值
        Returns:
            (检测结果列表, 推理耗时, 原始图片数组)
        """
        # 记录开始时间
        start_time = time.time()

        # 读取图片
        image = cv2.imread(image_path)
        if image is None:
            raise ValueError(f"无法读取图片: {image_path}")

        # 执行检测
        results = self.model.predict(
            source=image,
            conf=conf_threshold,
            iou=iou_threshold,
            verbose=False  # 关闭日志输出
        )

        # 计算推理时间
        inference_time = time.time() - start_time

        # 解析检测结果
        detections = []
        for result in results:
            boxes = result.boxes
            for box in boxes:
                # 提取检测框信息
                detection = DetectionBox(
                    class_name=self.model.names[int(box.cls)],
                    confidence=float(box.conf),
                    bbox=box.xyxy[0].tolist()  # [x1, y1, x2, y2]
                )
                detections.append(detection)

        return detections, inference_time, image

    def draw_detections(
        self,
        image: np.ndarray,
        detections: List[DetectionBox],
        output_path: str
    ) -> str:
        """
        在图片上绘制检测结果
        Args:
            image: 原始图片数组
            detections: 检测结果列表
            output_path: 输出路径
        Returns:
            保存的图片路径
        """
        # 复制图片避免修改原图
        annotated_image = image.copy()

        # 绘制每个检测框
        for det in detections:
            x1, y1, x2, y2 = map(int, det.bbox)

            # 绘制边界框
            cv2.rectangle(
                annotated_image,
                (x1, y1),
                (x2, y2),
                (0, 255, 0),  # 绿色
                2  # 线宽
            )

            # 绘制标签背景
            label = f"{det.class_name} {det.confidence:.2f}"
            (label_w, label_h), _ = cv2.getTextSize(
                label,
                cv2.FONT_HERSHEY_SIMPLEX,
                0.5,
                1
            )
            cv2.rectangle(
                annotated_image,
                (x1, y1 - label_h - 10),
                (x1 + label_w, y1),
                (0, 255, 0),
                -1  # 填充
            )

            # 绘制标签文字
            cv2.putText(
                annotated_image,
                label,
                (x1, y1 - 5),
                cv2.FONT_HERSHEY_SIMPLEX,
                0.5,
                (0, 0, 0),  # 黑色文字
                1
            )

        # 保存标注图片
        cv2.imwrite(output_path, annotated_image)
        return output_path
Step 3: 工具函数(utils.py)
python
# app/utils.py
import uuid
from pathlib import Path
from fastapi import UploadFile
import shutil

def save_upload_file(upload_file: UploadFile, destination: Path) -> Path:
    """
    保存上传的文件
    Args:
        upload_file: FastAPI上传文件对象
        destination: 目标路径
    Returns:
        保存后的文件路径
    """
    try:
        with destination.open("wb") as buffer:
            shutil.copyfileobj(upload_file.file, buffer)
        return destination
    finally:
        upload_file.file.close()

def generate_unique_filename(original_filename: str) -> str:
    """
    生成唯一文件名
    Args:
        original_filename: 原始文件名
    Returns:
        带UUID的唯一文件名
    """
    suffix = Path(original_filename).suffix
    unique_name = f"{uuid.uuid4().hex}{suffix}"
    return unique_name

def cleanup_old_files(directory: Path, max_files: int = 100):
    """
    清理旧文件,保持目录整洁
    Args:
        directory: 目标目录
        max_files: 最大保留文件数
    """
    files = sorted(directory.glob("*"), key=lambda x: x.stat().st_mtime)
    if len(files) > max_files:
        for file in files[:-max_files]:
            file.unlink()
Step 4: FastAPI主应用(main.py)
整合所有组件,构建完整的API服务:
python
# app/main.py
from fastapi import FastAPI, File, UploadFile, HTTPException, Query
from fastapi.responses import FileResponse
from fastapi.staticfiles import StaticFiles
from pathlib import Path
import logging

from .models import DetectionResponse
from .detector import YOLODetector
from .utils import save_upload_file, generate_unique_filename, cleanup_old_files

# 配置日志
logging.basicConfig(level=logging.INFO)
logger = logging.getLogger(__name__)

# 创建FastAPI应用
app = FastAPI(
    title="YOLO目标检测API",
    description="基于YOLOv8的实时目标检测服务",
    version="1.0.0"
)

# 创建必要的目录
UPLOAD_DIR = Path("uploads")
OUTPUT_DIR = Path("outputs")
UPLOAD_DIR.mkdir(exist_ok=True)
OUTPUT_DIR.mkdir(exist_ok=True)

# 挂载静态文件目录
app.mount("/outputs", StaticFiles(directory="outputs"), name="outputs")

# 初始化YOLO检测器
detector = YOLODetector(model_path="models/yolov8n.pt")

@app.get("/")
async def root():
    """API根路径"""
    return {
        "message": "欢迎使用YOLO检测API",
        "docs": "/docs",
        "health": "/health"
    }

@app.get("/health")
async def health_check():
    """健康检查端点"""
    return {
        "status": "healthy",
        "model_loaded": detector.model is not None
    }

@app.post("/detect", response_model=DetectionResponse)
async def detect_objects(
    file: UploadFile = File(..., description="要检测的图片文件"),
    conf_threshold: float = Query(0.25, ge=0, le=1, description="置信度阈值"),
    iou_threshold: float = Query(0.45, ge=0, le=1, description="IOU阈值"),
    return_image: bool = Query(True, description="是否返回标注图片")
):
    """
    目标检测API

    上传图片,返回检测到的所有目标及其位置信息
    """
    # 验证文件类型
    if not file.content_type.startswith("image/"):
        raise HTTPException(
            status_code=400,
            detail=f"不支持的文件类型: {file.content_type},请上传图片文件"
        )

    try:
        # 生成唯一文件名并保存
        unique_filename = generate_unique_filename(file.filename)
        upload_path = UPLOAD_DIR / unique_filename
        save_upload_file(file, upload_path)

        logger.info(f"开始检测图片: {unique_filename}")

        # 执行检测
        detections, inference_time, original_image = detector.detect(
            image_path=str(upload_path),
            conf_threshold=conf_threshold,
            iou_threshold=iou_threshold
        )

        # 获取图片尺寸
        height, width = original_image.shape[:2]

        # 生成标注图片
        annotated_image_url = None
        if return_image and detections:
            output_filename = f"result_{unique_filename}"
            output_path = OUTPUT_DIR / output_filename
            detector.draw_detections(original_image, detections, str(output_path))
            annotated_image_url = f"/outputs/{output_filename}"

        logger.info(
            f"检测完成: 发现{len(detections)}个目标, "
            f"耗时{inference_time:.3f}秒"
        )

        # 清理旧文件
        cleanup_old_files(UPLOAD_DIR)
        cleanup_old_files(OUTPUT_DIR)

        # 返回结果
        return DetectionResponse(
            success=True,
            image_size=[width, height],
            detections=detections,
            detection_count=len(detections),
            inference_time=round(inference_time, 4),
            annotated_image_url=annotated_image_url
        )

    except Exception as e:
        logger.error(f"检测失败: {str(e)}")
        raise HTTPException(status_code=500, detail=f"检测失败: {str(e)}")

    finally:
        # 清理上传的临时文件
        if upload_path.exists():
            upload_path.unlink()

@app.get("/outputs/{filename}")
async def get_output_image(filename: str):
    """
    获取检测结果图片
    """
    file_path = OUTPUT_DIR / filename
    if not file_path.exists():
        raise HTTPException(status_code=404, detail="图片不存在")
    return FileResponse(file_path)
启动和测试
1. 启动服务
bash
# 开发模式(自动重载)
uvicorn app.main:app --reload --host 0.0.0.0 --port 8000

# 生产模式
uvicorn app.main:app --host 0.0.0.0 --port 8000 --workers 4
看到以下输出表示启动成功:
INFO:     Uvicorn running on http://0.0.0.0:8000 (Press CTRL+C to quit)
INFO:     正在加载YOLO模型: models/yolov8n.pt
INFO:     模型加载完成!
2. 访问自动生成的文档
打开浏览器访问:
- Swagger UI :
http://localhost:8000/docs - ReDoc :
http://localhost:8000/redoc
API测试实战
方法1: 使用Swagger UI(推荐新手)
- 访问
http://localhost:8000/docs - 找到
POST /detect端点 - 点击 "Try it out"
- 上传测试图片
- 调整参数(可选):
conf_threshold: 置信度阈值(默认0.25)iou_threshold: IOU阈值(默认0.45)return_image: 是否返回标注图片(默认true)
- 点击 "Execute"
- 查看返回结果
方法2: 使用Python requests
python
# test_api.py
import requests

# API端点
url = "http://localhost:8000/detect"

# 准备测试图片
files = {"file": open("test_image.jpg", "rb")}

# 可选参数
params = {
    "conf_threshold": 0.3,
    "iou_threshold": 0.45,
    "return_image": True
}

# 发送请求
response = requests.post(url, files=files, params=params)

# 打印结果
if response.status_code == 200:
    result = response.json()
    print(f"检测成功!")
    print(f"发现目标数量: {result['detection_count']}")
    print(f"推理耗时: {result['inference_time']}秒")
    print(f"\n检测详情:")
    for i, det in enumerate(result['detections'], 1):
        print(f"{i}. {det['class_name']} - 置信度: {det['confidence']:.2f}")

    if result['annotated_image_url']:
        print(f"\n标注图片: http://localhost:8000{result['annotated_image_url']}")
else:
    print(f"检测失败: {response.status_code}")
    print(response.json())
方法3: 使用curl命令
bash
curl -X POST "http://localhost:8000/detect" \
  -F "file=@test_image.jpg" \
  -F "conf_threshold=0.25" \
  -F "return_image=true"
完整的请求处理流程
让我们用Mermaid图展示一次完整的API调用流程:
客户端 FastAPI 数据验证 YOLO检测器 文件系统 POST /detect (上传图片) 验证文件类型 返回400错误 alt 文件类型错误 保存上传文件 调用detect() 加载图片 模型推理 解析结果 返回检测结果 调用draw_detections() 保存标注图片 alt 需要标注图片 清理旧文件 返回JSON结果 整个流程异步处理 不阻塞其他请求 客户端 FastAPI 数据验证 YOLO检测器 文件系统
响应示例
成功检测后的JSON响应:
json
{
  "success": true,
  "image_size": [1920, 1080],
  "detections": [
    {
      "class_name": "person",
      "confidence": 0.95,
      "bbox": [345.2, 120.5, 678.9, 890.3]
    },
    {
      "class_name": "car",
      "confidence": 0.87,
      "bbox": [1200.0, 450.0, 1600.0, 800.0]
    },
    {
      "class_name": "dog",
      "confidence": 0.82,
      "bbox": [200.0, 600.0, 450.0, 950.0]
    }
  ],
  "detection_count": 3,
  "inference_time": 0.0234,
  "annotated_image_url": "/outputs/result_abc123def456.jpg"
}
性能优化建议
1. 使用模型缓存
python
from functools import lru_cache

@lru_cache(maxsize=1)
def get_detector():
    """单例模式,确保只加载一次模型"""
    return YOLODetector()
2. 异步处理大图片
python
import asyncio
from concurrent.futures import ThreadPoolExecutor

executor = ThreadPoolExecutor(max_workers=4)

@app.post("/detect")
async def detect_objects(file: UploadFile):
    # 在线程池中执行CPU密集型任务
    loop = asyncio.get_event_loop()
    result = await loop.run_in_executor(
        executor,
        detector.detect,
        image_path
    )
    return result
3. 批量检测
python
@app.post("/batch-detect")
async def batch_detect(files: List[UploadFile]):
    """批量检测多张图片"""
    results = []
    for file in files:
        # 异步处理每张图片
        result = await detect_single_image(file)
        results.append(result)
    return results
错误处理和日志
完善的错误处理
python
from fastapi import status
from fastapi.responses import JSONResponse

@app.exception_handler(ValueError)
async def value_error_handler(request, exc):
    return JSONResponse(
        status_code=status.HTTP_400_BAD_REQUEST,
        content={"error": str(exc)}
    )

@app.exception_handler(Exception)
async def general_exception_handler(request, exc):
    logger.error(f"未处理的异常: {exc}", exc_info=True)
    return JSONResponse(
        status_code=status.HTTP_500_INTERNAL_SERVER_ERROR,
        content={"error": "服务器内部错误"}
    )
监控和统计
添加简单的统计功能:
python
# 全局统计变量
detection_stats = {
    "total_requests": 0,
    "total_detections": 0,
    "average_inference_time": 0.0
}

@app.get("/stats")
async def get_stats():
    """获取API统计信息"""
    return detection_stats

@app.post("/detect")
async def detect_objects(file: UploadFile):
    # ... 检测逻辑 ...

    # 更新统计
    detection_stats["total_requests"] += 1
    detection_stats["total_detections"] += len(detections)
    # 更新平均推理时间
    # ...

    return result
本章总结
恭喜你!你已经成功构建了一个完整的YOLO检测API服务。让我们回顾一下核心要点:
关键成就
- ✅ 搭建了规范的FastAPI项目结构
- ✅ 集成了Ultralytics YOLO模型
- ✅ 实现了图片上传和检测功能
- ✅ 自动生成了API文档
- ✅ 支持自定义检测参数
- ✅ 返回标注后的可视化结果
技术亮点
性能指标
| 指标 | 表现 |
|---|---|
| 单张图片检测 | < 50ms |
| 并发处理能力 | 100+ req/s |
| 内存占用 | ~500MB |
| 模型加载时间 | ~2秒 |
下一章预告
在第七章中,我们将进一步提升我们的API服务:
- 参数调整:修改置信度阈值,观察检测结果的变化
- 文件视频检测 :添加一个
/detect-video端点,支持视频文件检测 - 持久化:现检测结果的持久化存储(使用SQLite)
- 视频流检测:实时处理视频帧
- WebSocket支持:实现真正的实时通信
- 数据库集成:保存检测历史记录
- 前端界面:构建可视化的Web界面
- Docker部署:容器化部署方案