1. 问题描述
在按照 ms-agent 教程安装 ms-agent 时,运行下述命令后报错
bash
cd ms-agent

pip3 install -e .

#  该安装命令解释:
#  pip install:使用 pip 安装 Python 包。
#  -e:表示 "editable"(可编辑)模式。也称为"开发模式"(development mode)。
#  .:代表当前目录(即你运行命令时所在的目录)。
报错内容如下:
bash
error: externally-managed-environment

× This environment is externally managed
╰─> To install Python packages system-wide, try brew install
    xyz, where xyz is the package you are trying to
    install.

    If you wish to install a Python library that isn't in Homebrew,
    use a virtual environment:

    python3 -m venv path/to/venv
    source path/to/venv/bin/activate
    python3 -m pip install xyz

    If you wish to install a Python application that isn't in Homebrew,
    it may be easiest to use 'pipx install xyz', which will manage a
    virtual environment for you. You can install pipx with

    brew install pipx

    You may restore the old behavior of pip by passing
    the '--break-system-packages' flag to pip, or by adding
    'break-system-packages = true' to your pip.conf file. The latter
    will permanently disable this error.

    If you disable this error, we STRONGLY recommend that you additionally
    pass the '--user' flag to pip, or set 'user = true' in your pip.conf
    file. Failure to do this can result in a broken Homebrew installation.

    Read more about this behavior here: <https://peps.python.org/pep-0668/>

note: If you believe this is a mistake, please contact your Python installation or OS distribution provider. You can override this, at the risk of breaking your Python installation or OS, by passing --break-system-packages.
hint: See PEP 668 for the detailed specification.
2.报错分析
这是 PEP 668 的限制:现在用的 python3/pip3 是来自 Homebrew ,它把系统 Python 环境标记为"externally managed",禁止用 pip install 往这个全局环境里装包(避免把 Homebrew 的 Python 环境弄坏)。
最推荐的解决方式是:用虚拟环境 来安装(尤其这里是 pip install -e .,更应该用 venv)。
3. 创建虚拟环境再安装
3.1 在项目里建 venv 再install
bash
# 进入项目
cd ms-agent
# 1) 创建虚拟环境
python3 -m venv .venv
# 2) 激活虚拟环境
source .venv/bin/activate
# 3) 升级 venv 里的 pip(可选但建议)
python -m pip install -U pip
# 4) editable 安装
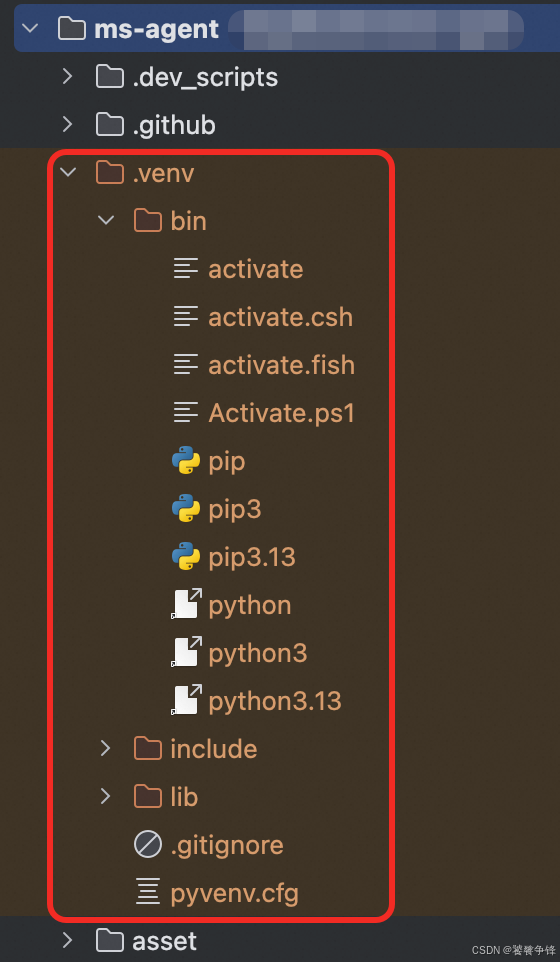
python -m pip install -e .在项目的 .venv 目录里,可以看到新创建的虚拟环境信息:
3.2 验证venv是否成功
bash
# 进入项目
cd ms-agent

# 激活虚拟环境
source .venv/bin/activate

# 查看虚拟环境的python位置
which python

# 查看虚拟环境里的 pip 版本
python -m pip -V

# 输出里应包含 .../ms-agent/.venv/...,而不是系统环境 /opt/homebrew/...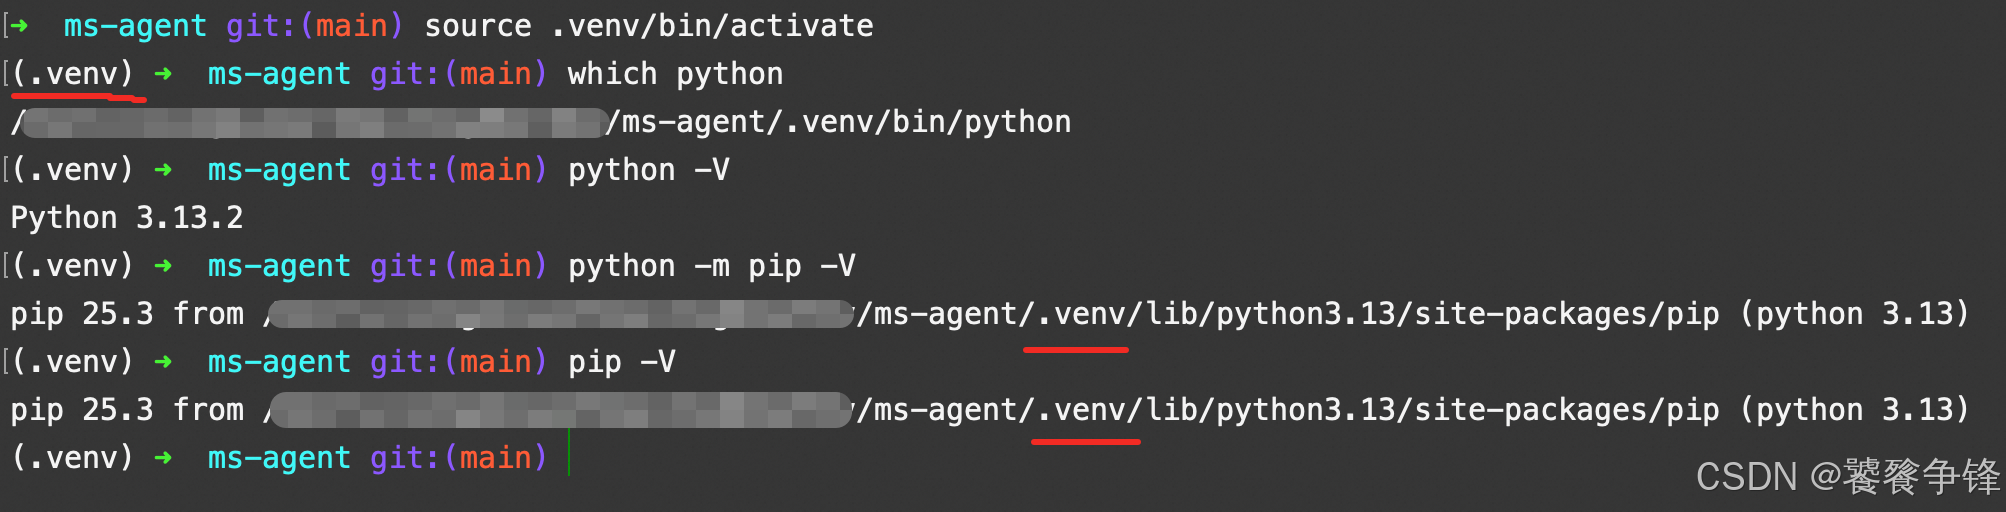
3.3 每次打开终端先激活虚拟环境
bash
# 进入项目
cd ms-agent

# 激活虚拟环境
source .venv/bin/activate
4. 相关文档
mac安装python: https://blog.csdn.net/taotiezhengfeng/article/details/156050387