
大家好,我是Tony Bai。
在软件开发的早期,我们都有过这样的经历:为了上线一个不确定的新功能,我们在代码里写下了:
go
if os.Getenv("ENABLE_NEW_FEATURE") == "true" {
    // 新逻辑
} else {
    // 旧逻辑
}
简单、直接,但也埋下了隐患。随着系统变得复杂,这种零散的、基于环境变量或配置文件的开关,迅速演变成了难以维护的"If-Else 地狱"。
为了解决这个问题,特性开关(Feature Flag)系统应运而生。它们允许我们在不重新部署代码的情况下,动态地开启或关闭功能,甚至针对特定用户群体进行灰度发布。
市面上已经有了许多成熟的解决方案:
-
LaunchDarkly: 商业化特性开关领域的领头羊,功能强大但价格不菲。
-
Split: 专注于实验和数据分析的特性管理平台。
-
Unleash: 开源界的明星项目,支持私有化部署。
-
GO-Feature-Flag: Go 语言生态中轻量级、基于文件的优秀开源方案。
这些工具都很棒,但随之而来的是新的烦恼:"供应商锁定"(Vendor Lock-in)等问题。
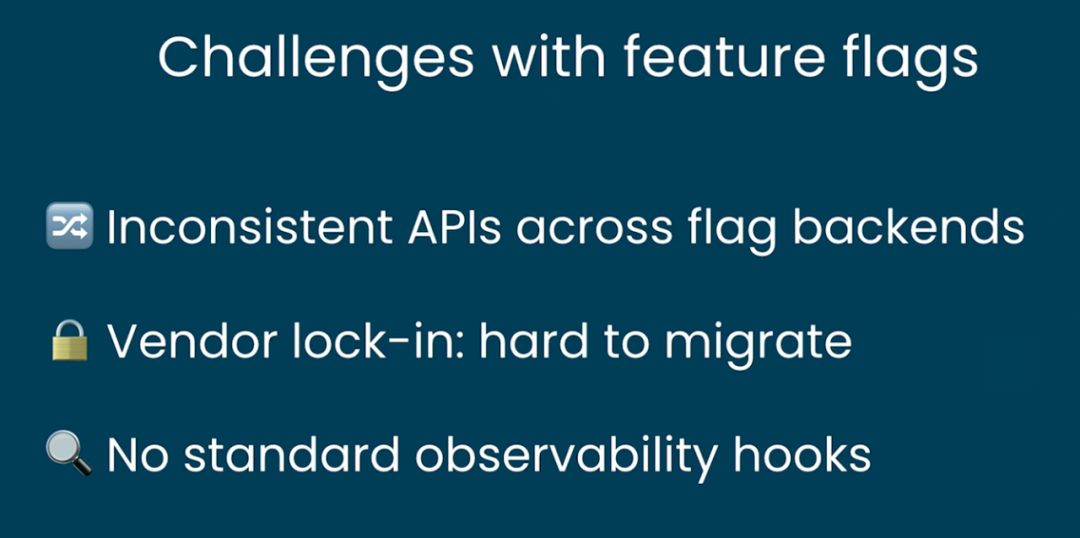
比如,一旦你选定了 LaunchDarkly,你的代码库里就会充斥着它的 SDK 调用;如果哪天想换成开源的 Unleash,或者公司自研的系统,那将是一场伤筋动骨的重构灾难。业务代码与具体的特性开关实现强耦合,让你失去了选择的自由。
我们是否可以有一种方式,既能享受特性开关的便利,又不必被具体的供应商(Provider) 绑定,并拥有统一的特性开关接口API呢?
答案就是 CNCF 的孵化项目 ------ OpenFeature。
OpenFeature:特性开关的"USB 接口"
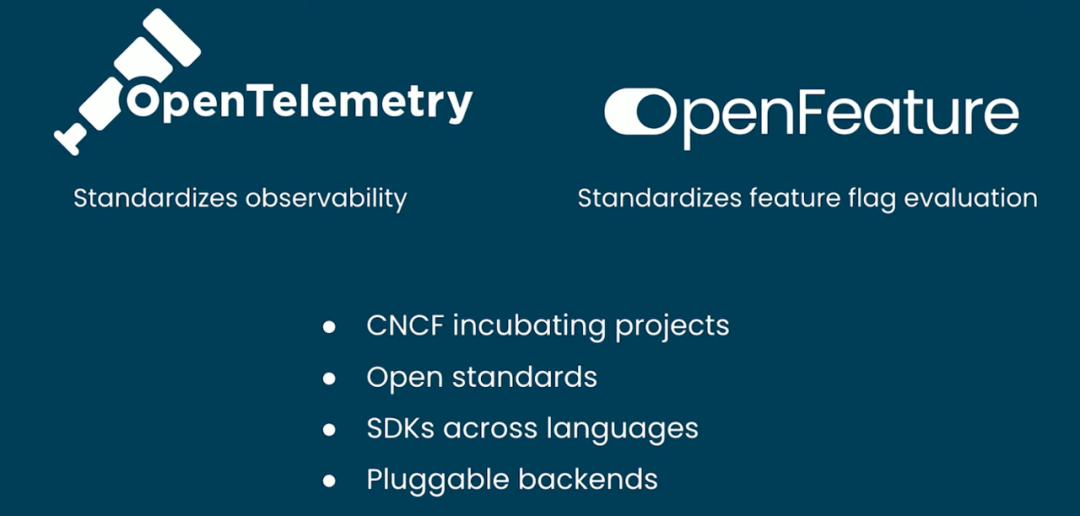
根据 OpenFeature 的官方定义,它是一套开放的标准 ,旨在为特性开关提供一个供应商无关(Vendor-Agnostic)、社区驱动的 API。
打个比方,OpenFeature 就像是电源插座的标准。
-
应用程序是电器。
-
特性开关服务(如 LaunchDarkly, go-feature-flag, 自研系统)是发电厂。
-
OpenFeature 就是那个标准化的插头和插座。
无论你背后用的是火电、水电还是核电(不同的供应商),对于电器(应用)来说,它只管插上插头(调用 OpenFeature API),就能获得电力(Flag 值)。
这种设计让你可以在不修改任何业务代码的情况下,随意切换后端的特性开关服务。
核心概念解析
在 OpenFeature 的规范(Specification)中,有几个关键角色:
-
Evaluation API (评估 API): 这是开发者直接调用的接口,用于获取开关的值。它独立于任何具体的后端实现。
-
Provider (供应商) : 这是幕后的"翻译官"。它负责适配具体的特性开关系统(如
go-feature-flag或Split),将 OpenFeature 的标准调用转化为具体系统的实现。 -
Client (客户端) : 应用程序内的轻量级对象,通常绑定到特定的**域(Domain)**或作用域,用于执行 Flag 的评估。
-
Evaluation Context (评估上下文) : 这是传递给 Provider 的"情报"。比如用户的 ID、IP 地址、会员等级等。Provider 根据这些情报,结合后台配置的规则,动态决定返回
true还是false。
实战演进:从"裸奔"到"标准化"
为了让你直观感受 OpenFeature 的价值,我们以一个具体的业务需求为例:判断用户是否享受假日折扣。
阶段一:原始时代 ------ 环境变量一把梭
在项目初期,我们没有任何外部依赖。我们使用环境变量作为最简单的特性开关。这种方式无需引入额外的库,但缺乏灵活性,无法针对特定用户进行灰度发布。
完整代码 (demo1/main.go):
go
package main

import (
"fmt"
"os"
)

func main() {
// 模拟当前请求的用户ID
 userID := "user-123"

// ❌ 痛点:
// 1. 全局生效:一旦开启,所有用户都会看到。
// 2. 修改需要重启:必须修改环境变量并重启服务才能生效。
// 3. 逻辑僵化:无法实现"只对 user-123 开启"这样的规则。

// 从环境变量获取开关状态
 enablePromo := os.Getenv("ENABLE_HOLIDAY_PROMO") == "true"

if enablePromo {
  fmt.Printf("User %s gets a discount!\n", userID)
 } else {
  fmt.Printf("User %s pays full price.\n", userID)
 }
}运行方式:
go
# 开启功能
export ENABLE_HOLIDAY_PROMO=true
go run main.go
# 输出: User user-123 gets a discount!

# 关闭功能
export ENABLE_HOLIDAY_PROMO=false
go run main.go
# 输出: User user-123 pays full price.
阶段二:工具时代 ------ 引入 go-feature-flag
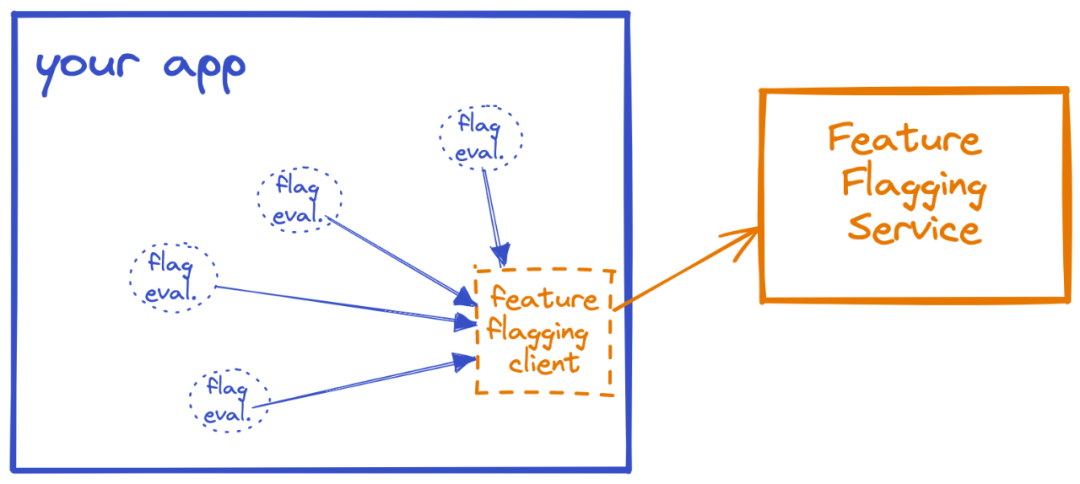
为了支持基于用户的灰度发布(比如只对特定用户开启),我们引入了专门的库 go-feature-flag。这是一个功能强大的 Go 开源库,支持本地文件、S3、K8s 等多种配置源。
这里我们使用本地文件作为规则源。
1. 准备规则文件 (demo2/flags.yaml):
go
holiday-promo:
  # 定义开关的两个状态:启用(true) 和 禁用(false)
variations:
    enabled:true
    disabled:false

# 默认情况下,对所有人禁用
defaultRule:
    variation:disabled

# 特殊规则:只对用户 "user-123" 启用
targeting:
    -query:keyeq"user-123"
      variation:enabled
2. 完整代码 (demo2/main.go):
go
package main

import (
"context"
"fmt"
"time"

 ffclient "github.com/thomaspoignant/go-feature-flag"
"github.com/thomaspoignant/go-feature-flag/ffcontext"
"github.com/thomaspoignant/go-feature-flag/retriever/fileretriever"
)

func main() {
// 初始化 go-feature-flag SDK
// 这里我们配置它从本地文件读取规则
 err := ffclient.Init(ffclient.Config{
  PollingInterval: 3 * time.Second,
  Retriever: &fileretriever.Retriever{
   Path: "flags.yaml",
  },
 })
if err != nil {
panic(err)
 }
// 确保程序退出时关闭 SDK,清理资源
defer ffclient.Close()

// 模拟当前请求的用户ID
 userID := "user-123"

// 创建评估上下文 (Evaluation Context)
// 这包含了判断 Flag 所需的用户信息
 userCtx := ffcontext.NewEvaluationContext(userID)

// ❌ 痛点:
// 代码与 "go-feature-flag" 强绑定。
// ffclient.BoolVariation 是特定库的 API。
// 如果未来要迁移到 LaunchDarkly 或自研系统,必须修改这里所有的调用代码。
 hasDiscount, _ := ffclient.BoolVariation("holiday-promo", userCtx, false)

if hasDiscount {
  fmt.Printf("User %s gets a discount!\n", userID)
 } else {
  fmt.Printf("User %s pays full price.\n", userID)
 }
}
**运行方式(在demo2目录下)**:
go
go mod tidy
go run main.go
# 输出: User user-123 gets a discount!
阶段三:标准时代 ------ 拥抱 OpenFeature
现在,我们进化到终极形态。我们依然使用 go-feature-flag 作为底层的Provider (供应商),但在业务代码中,我们只使用 OpenFeature 的标准 API。
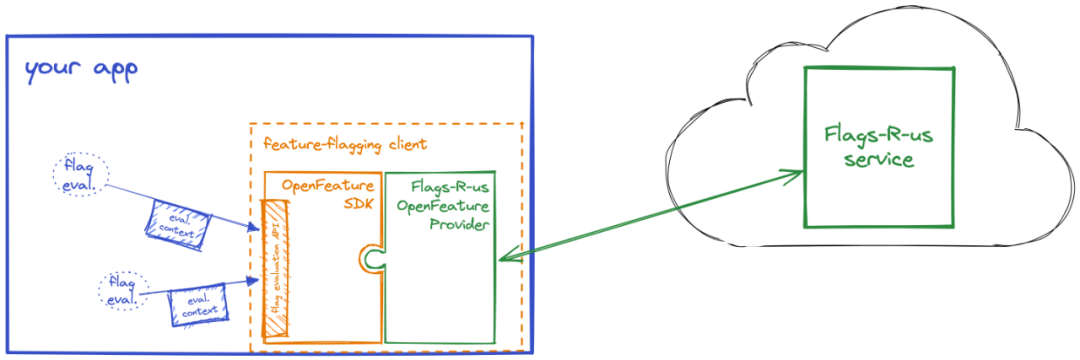
这意味着,我们的业务逻辑不再知道底层是谁在提供服务。
1. 准备规则文件 (flags.yaml):
(与阶段二相同)
go
holiday-promo:
  # 定义开关的两个状态:启用(true) 和 禁用(false)
variations:
    enabled:true
    disabled:false

# 默认情况下,对所有人禁用
defaultRule:
    variation:disabled

# 特殊规则:只对用户 "user-123" 启用
targeting:
    -query:keyeq"user-123"
      variation:enabled
2. 完整代码 (demo3/main.go):
go
package main

import (
"context"
"fmt"
"time"

// OpenFeature SDK
"github.com/open-feature/go-sdk/openfeature"

// GO Feature Flag In Process Provider
 gofeatureflaginprocess "github.com/open-feature/go-sdk-contrib/providers/go-feature-flag-in-process/pkg"

// GO Feature Flag 配置
 ffclient "github.com/thomaspoignant/go-feature-flag"
"github.com/thomaspoignant/go-feature-flag/retriever/fileretriever"
)

func main() {
// ==========================================
// A. 初始化层 (Infrastructure Layer)
// ==========================================

 ctx := context.Background()

// 1. 创建 GO Feature Flag In Process Provider
 options := gofeatureflaginprocess.ProviderOptions{
  GOFeatureFlagConfig: &ffclient.Config{
   PollingInterval: 3 * time.Second,
   Context:         ctx,
   Retriever: &fileretriever.Retriever{
    Path: "flags.yaml",
   },
  },
 }

 provider, err := gofeatureflaginprocess.NewProviderWithContext(ctx, options)
if err != nil {
panic(fmt.Errorf("failed to create provider: %v", err))
 }
defer provider.Shutdown()

// 2. 设置 OpenFeature Provider 并等待初始化完成
 err = openfeature.SetProviderAndWait(provider)
if err != nil {
panic(fmt.Errorf("failed to set provider: %v", err))
 }

 fmt.Println("✅ OpenFeature In-Process provider is ready!")

// ==========================================
// B. 业务逻辑层 (Business Logic Layer)
// ==========================================

// 1. 获取 OpenFeature 客户端
 client := openfeature.NewClient("app-backend")

// 2. 准备评估上下文
 userID := "user-123"
 evalCtx := openfeature.NewEvaluationContext(
  userID,
map[string]interface{}{
   "email": "test@example.com",
  },
 )

// 3. 评估 Flag
 hasDiscount, err := client.BooleanValue(
  context.Background(),
"holiday-promo", // Flag Key
false,           // Default Value
  evalCtx,         // Context
 )

if err != nil {
  fmt.Printf("Error evaluating flag: %v\n", err)
 }

if hasDiscount {
  fmt.Printf("✅ User %s gets a discount!\n", userID)
 } else {
  fmt.Printf("❌ User %s pays full price.\n", userID)
 }

// ==========================================
// C. 测试其他用户
// ==========================================

 fmt.Println("\n--- Testing another user ---")

 anotherUserCtx := openfeature.NewEvaluationContext(
"user-456",
map[string]interface{}{
   "email": "another@example.com",
  },
 )

 hasDiscountAnother, err := client.BooleanValue(
  context.Background(),
"holiday-promo",
false,
  anotherUserCtx,
 )

if err != nil {
  fmt.Printf("Error evaluating flag: %v\n", err)
 }

if hasDiscountAnother {
  fmt.Printf("✅ User user-456 gets a discount!\n")
 } else {
  fmt.Printf("❌ User user-456 pays full price.\n")
 }

// ==========================================
// D. 展示更复杂的评估上下文示例
// ==========================================

 fmt.Println("\n--- Testing with detailed user context ---")

 detailedUserCtx := openfeature.NewEvaluationContext(
"user-789",
map[string]interface{}{
   "firstname": "john",
   "lastname":  "doe",
   "email":     "john.doe@example.com",
   "admin":     true,
   "anonymous": false,
  },
 )

 hasDiscountDetailed, err := client.BooleanValue(
  context.Background(),
"holiday-promo",
false,
  detailedUserCtx,
 )

if err != nil {
  fmt.Printf("Error evaluating flag: %v\n", err)
 }

if hasDiscountDetailed {
  fmt.Printf("✅ User user-789 gets a discount!\n")
 } else {
  fmt.Printf("❌ User user-789 pays full price.\n")
 }
}运行方式:
go
$go mod tidy
$go run main.go
✅ OpenFeature In-Process provider is ready!
✅ User user-123 gets a discount!

--- Testing another user ---
❌ User user-456 pays full price.

--- Testing with detailed user context ---
❌ User user-789 pays full price.
解析:为什么阶段三更优?
在阶段三的代码中,我们实现了关注点分离:
-
配置代码 (A 部分):负责选型。今天用
go-feature-flag,明天老板有钱了想换商业版LaunchDarkly,只需要改这几行代码,引入新的 Provider 即可。 -
业务代码 (B 部分):负责使用。它只依赖
openfeature的接口。无论底层怎么变,业务逻辑都稳如泰山。
这就是 OpenFeature 带来的核心价值:用标准化的接口,以此御繁。
不过细心的读者可能会发现demo3的代码还是过于耦合go-feature-flag这个包了,没错!demo3只是一个基于本地配置文件的最简单的演示代码,openfeature官方更推荐使用relay proxy server的部署方式。接下来,我们来看看demo4。
阶段四:使用Relay Proxy Server进一步降低耦合
使用 Relay Proxy 方式的优势:
-
松耦合: 应用程序只依赖 OpenFeature SDK,不依赖 go-feature-flag 核心库
-
语言无关: Relay Proxy 提供 HTTP API,任何语言都可以使用
-
集中管理: 多个应用可以共享同一个 Relay Proxy
-
性能优化: Relay Proxy 做缓存和批量处理
-
生产就绪: 这是官方推荐的生产环境部署方式
我们来看代码。首先flags.yaml与demo2和demo3的一样,这里就不重复贴代码了。
我们建立demo4的main.go文件,内容如下:
go
// demo4/main.go

package main

import (
"context"
"fmt"
"net/http"
"time"

 // OpenFeature SDK
"github.com/open-feature/go-sdk/openfeature"

 // GO Feature Flag Provider (连接 Relay Proxy)
 gofeatureflag "github.com/open-feature/go-sdk-contrib/providers/go-feature-flag/pkg"
)

func main() {
 // ==========================================
 // A. 初始化层 (Infrastructure Layer)
 // ==========================================

 ctx := context.Background()

 // 1. 创建 GO Feature Flag Provider (连接到 Relay Proxy)
 options := gofeatureflag.ProviderOptions{
  Endpoint: "http://localhost:1031", // Relay Proxy 地址
  HTTPClient: &http.Client{
   Timeout: 5 * time.Second, // 设置 HTTP 超时时间
  },
 }

 provider, err := gofeatureflag.NewProviderWithContext(ctx, options)
if err != nil {
  panic(fmt.Errorf("failed to create provider: %v", err))
 }
 defer provider.Shutdown()

 // 2. 设置 OpenFeature Provider 并等待初始化完成
 err = openfeature.SetProviderAndWait(provider)
if err != nil {
  panic(fmt.Errorf("failed to set provider: %v", err))
 }

 fmt.Println("✅ OpenFeature provider connected to Relay Proxy successfully!")

 // ==========================================
 // B. 业务逻辑层 (Business Logic Layer)
 // ==========================================

 // 1. 获取 OpenFeature 客户端
 client := openfeature.NewClient("app-backend")

 // 2. 准备评估上下文 - 用户 user-123
 userID := "user-123"
 evalCtx := openfeature.NewEvaluationContext(
  userID,
  map[string]interface{}{
   "email": "test@example.com",
  },
 )

 // 3. 评估 Flag
 hasDiscount, err := client.BooleanValue(
  context.Background(),
"holiday-promo", // Flag Key
false,           // Default Value
  evalCtx,         // Context
 )

if err != nil {
  fmt.Printf("Error evaluating flag: %v\n", err)
 }

if hasDiscount {
  fmt.Printf("✅ User %s gets a discount!\n", userID)
 } else {
  fmt.Printf("❌ User %s pays full price.\n", userID)
 }

 // ==========================================
 // C. 测试其他用户
 // ==========================================

 fmt.Println("\n--- Testing another user ---")

 anotherUserCtx := openfeature.NewEvaluationContext(
"user-456",
  map[string]interface{}{
   "email": "another@example.com",
  },
 )

 hasDiscountAnother, err := client.BooleanValue(
  context.Background(),
"holiday-promo",
false,
  anotherUserCtx,
 )

if err != nil {
  fmt.Printf("Error evaluating flag: %v\n", err)
 }

if hasDiscountAnother {
  fmt.Printf("✅ User user-456 gets a discount!\n")
 } else {
  fmt.Printf("❌ User user-456 pays full price.\n")
 }

 // ==========================================
 // D. 展示更复杂的评估上下文示例
 // ==========================================

 fmt.Println("\n--- Testing with detailed user context ---")

 detailedUserCtx := openfeature.NewEvaluationContext(
"user-789",
  map[string]interface{}{
   "firstname": "john",
   "lastname":  "doe",
   "email":     "john.doe@example.com",
   "admin":     true,
   "anonymous": false,
  },
 )

 hasDiscountDetailed, err := client.BooleanValue(
  context.Background(),
"holiday-promo",
false,
  detailedUserCtx,
 )

if err != nil {
  fmt.Printf("Error evaluating flag: %v\n", err)
 }

if hasDiscountDetailed {
  fmt.Printf("✅ User user-789 gets a discount!\n")
 } else {
  fmt.Printf("❌ User user-789 pays full price.\n")
 }
}
运行这个程序之前,我们需要安装和运行relay proxy server,先在本地安装一个relay proxy server:
go
$go install github.com/thomaspoignant/go-feature-flag/cmd/relayproxy@latest接下来,创建一个relay proxy的配置:relay-proxy-config.yaml
go
# HTTP 服务配置
listen: 1031

# 轮询间隔 (毫秒)
pollingInterval: 1000

# 如果检索器出错是否启动
startWithRetrieverError: false

# 配置文件检索器, 使用了我们特性开关配置文件flags.yaml
retriever:
  kind: file
  path: flags.yaml

# 日志导出器(可选)
exporter:
  kind: log
运行relay-proxy的配置:
go
$relayproxy --config=relay-proxy-config.yaml
█▀▀ █▀█   █▀▀ █▀▀ ▄▀█ ▀█▀ █ █ █▀█ █▀▀   █▀▀ █   ▄▀█ █▀▀
█▄█ █▄█   █▀  ██▄ █▀█  █  █▄█ █▀▄ ██▄   █▀  █▄▄ █▀█ █▄█

     █▀█ █▀▀ █   ▄▀█ █▄█   █▀█ █▀█ █▀█ ▀▄▀ █▄█
     █▀▄ ██▄ █▄▄ █▀█  █    █▀▀ █▀▄ █▄█ █ █  █

GO Feature Flag Relay Proxy - Version localdev
_____________________________________________
{"level":"warn","ts":1766376488.501164,"caller":"config/config_server.go:92","msg":"The server port is set using `port`, this option is deprecated, please migrate to `server.port`"}
{"level":"info","ts":1766376488.5039968,"msg":"flag added","key":"holiday-promo"}
{"level":"warn","ts":1766376488.504297,"caller":"config/config_server.go:92","msg":"The server port is set using `port`, this option is deprecated, please migrate to `server.port`"}
{"level":"info","ts":1766376488.5043359,"caller":"api/server.go:185","msg":"Starting go-feature-flag relay proxy ...","address":"0.0.0.0:1031","version":"localdev"}
之后,我们运行main.go:
go
$go run main.go
✅ OpenFeature provider connected to Relay Proxy successfully!
✅ User user-123 gets a discount!

--- Testing another user ---
❌ User user-456 pays full price.

--- Testing with detailed user context ---
❌ User user-789 pays full price.
main连接到relay-proxy server,并将评估上下文传递给 relay proxy server。后者结合后台配置的规则(flags.yaml),动态决定返回 true 还是 false。
深度价值:不仅仅是解耦
OpenFeature 的规范中还包含了一些强大的高级特性:
-
Hooks (钩子): 你可以在 Flag 评估的生命周期中(Before, After, Error, Finally)插入自定义逻辑。
-
- 应用场景:每当 Flag 被评估时,自动向 Prometheus 发送指标;或者在 Flag 评估失败时,自动记录详细的错误日志。
-
Type Safety (类型安全) : OpenFeature SDK 提供了强类型的方法,如
BooleanValue,StringValue,ObjectValue,避免了类型转换的繁琐和风险。
小结
正如 OpenTelemetry 让可观测性变得标准统一,OpenFeature 正在让特性开关的管理变得规范有序。
对于 Go 开发者来说,尽早拥抱 OpenFeature,不仅是为了避免未来的重构成本,更是为了建立一种更加健壮、灵活的发布文化。告别混乱的 if-else,让你的代码在标准化的轨道上飞驰吧。
本文涉及的示例源码,可以在这里(https://github.com/bigwhite/experiments/tree/master/openfeature)下载。
资料链接:
聊聊你的"开关"故事
特性开关是现代软件交付的利器,但也可能成为技术债的温床。你在项目中是如何管理特性开关的?是否遇到过因为开关未及时清理而导致的"幽灵代码"问题?或者,你对 OpenFeature 这种标准化方案有什么看法?
欢迎在评论区分享你的经验和吐槽! 让我们一起探索更优雅的工程实践。👇
如果这篇文章对你有帮助,别忘了点个【赞】和【在看】,并转发给你的团队,让大家一起告别"If-Else地狱"!
如果本文对你有所帮助,请帮忙点赞、推荐和转发 !
!
点击下面标题,阅读更多干货!
🔥 还在为"复制粘贴喂AI"而烦恼?我的新极客时间专栏 《AI原生开发工作流实战》 将带你:
-
告别低效,重塑开发范式
-
驾驭AI Agent(Claude Code),实现工作流自动化
-
从"AI使用者"进化为规范驱动开发的"工作流指挥家"
扫描下方二维码👇,开启你的AI原生开发之旅。
