在AI Agent时代,如何让智能体安全、优雅地生成用户界面?A2UI协议给出了答案。本文将深入剖析一个完整的.NET 9 Blazor实现,揭示声明式UI协议背后的技术奥秘。
引言:AI生成UI的困境与突破
当ChatGPT、Claude等大语言模型席卷全球时,一个问题逐渐浮出水面:AI能生成代码,但如何让AI直接生成用户界面?
传统方案面临三大困境:
-
安全性噩梦:让AI生成可执行代码?这简直是在玩火。想象一下,一个恶意提示词就能让AI生成删除数据库的代码。
-
跨平台地狱:AI为Web生成React代码,移动端怎么办?桌面端怎么办?每个平台都要重新生成?
-
体验割裂:iframe嵌入?样式不统一。代码注入?性能堪忧。用户体验支离破碎。
Google的A2UI协议横空出世,用一个优雅的思路解决了这些问题:不生成代码,生成数据。
这不是简单的JSON配置,而是一套完整的声明式UI协议。Agent发送的是UI的"意图",客户端用自己的原生组件渲染。就像建筑师给出设计图纸,施工队用当地材料建造------同样的设计,不同的实现,完美的本地化。
本文将带你深入一个完整的.NET 9 Blazor实现,从协议设计到代码细节,从架构思想到实战应用,全方位解析这个革命性的技术方案。
第一章:A2UI协议的核心哲学
1.1 声明式UI的本质
什么是声明式UI?简单说,就是"告诉系统你要什么,而不是怎么做"。
传统命令式UI(如jQuery时代):
// 命令式:一步步告诉浏览器怎么做
const button = document.createElement('button');
button.textContent = '点击我';
button.onclick = function() { alert('Hello'); };
document.body.appendChild(button);
声明式UI(如React、Flutter):
// 声明式:描述你想要什么
<Button onClick={() => alert('Hello')}>点击我</Button>
A2UI更进一步,连组件类型都抽象了:
{
  "Button": {
    "child": "btn-text",
    "action": { "name": "say_hello" }
  }
}
这个JSON不包含任何可执行代码,只是数据。客户端收到后,用自己的Button组件渲染。Web用HTML button,Flutter用Material Button,iOS用UIButton------同一份数据,多端原生体验。
1.2 Adjacency List:扁平化的组件树
传统UI框架用树形结构表示组件:
{
  "type": "Card",
  "children": [
    {
      "type": "Column",
      "children": [
        { "type": "Text", "text": "标题" },
        { "type": "Text", "text": "内容" }
      ]
    }
  ]
}
这种嵌套结构对人类友好,但对LLM不友好。深层嵌套容易出错,增量更新困难。
A2UI采用Adjacency List(邻接表)模型:
{
  "components": [
    { "id": "card", "Card": { "child": "content" } },
    { "id": "content", "Column": { "children": ["title", "body"] } },
    { "id": "title", "Text": { "text": { "literalString": "标题" } } },
    { "id": "body", "Text": { "text": { "literalString": "内容" } } }
  ],
  "root": "card"
}
扁平化的好处:
-
LLM友好:每个组件独立,易于生成和修改
-
增量更新:只需添加/修改数组中的元素
-
引用清晰:通过ID引用,避免深层嵌套
-
流式传输:可以逐个发送组件,边生成边渲染
这就像图数据库的思想------节点和边分离,灵活高效。
1.3 数据绑定:响应式的灵魂
A2UI的数据绑定系统设计精妙,支持三种模式:
1. 字面值(Literal)
{ "text": { "literalString": "Hello World" } }直接指定值,简单直接。
2. 路径绑定(Path Binding)
{ "text": { "path": "/user/name" } }绑定到数据模型的某个路径,数据变化时UI自动更新。
3. 初始化简写(Initialization Shorthand)
{ "text": { "literalString": "张三", "path": "/user/name" } }同时指定字面值和路径,字面值作为初始值写入数据模型,后续通过路径更新。
这种设计既保证了灵活性,又简化了常见场景的使用。
第二章:架构设计------分层的艺术
一个优秀的架构,应该像洋葱一样层次分明。A2UI Blazor实现采用了四层架构:
┌─────────────────────────────────────┐
│   A2UI.Blazor.Components (UI层)    │  ← Blazor组件,用户可见
├─────────────────────────────────────┤
│   A2UI.Theming (主题层)             │  ← 样式和主题管理
├─────────────────────────────────────┤
│   A2UI.Core (核心协议层)            │  ← 消息处理、数据绑定
├─────────────────────────────────────┤
│   A2UI.AgentSDK (Agent开发层)       │  ← Fluent API,简化Agent开发
└─────────────────────────────────────┘
2.1 核心层:A2UI.Core的精妙设计
核心层是整个系统的大脑,负责协议解析、状态管理和数据绑定。
2.1.1 MessageProcessor:消息处理的中枢
MessageProcessor是核心中的核心,它管理着所有Surface(UI表面)的生命周期:
public class MessageProcessor
{
    private readonly Dictionary<string, Surface> _surfaces = new();

    public void ProcessMessage(ServerToClientMessage message)
    {
        if (message.BeginRendering != null)
            HandleBeginRendering(message.BeginRendering);
        else if (message.SurfaceUpdate != null)
            HandleSurfaceUpdate(message.SurfaceUpdate);
        else if (message.DataModelUpdate != null)
            HandleDataModelUpdate(message.DataModelUpdate);
        else if (message.DeleteSurface != null)
            HandleDeleteSurface(message.DeleteSurface);
    }
}
设计亮点:
-
Surface隔离:每个Surface独立管理,互不干扰。一个聊天应用可以有多个Surface,每个对话一个。
-
事件驱动 :通过
SurfaceUpdated事件通知UI更新,解耦核心逻辑和UI渲染。 -
流式处理:支持JSONL格式,可以边接收边处理,实现流式渲染。
2.1.2 DataBindingResolver:数据绑定的魔法师
数据绑定是响应式UI的核心。DataBindingResolver负责解析BoundValue并从数据模型中提取值:
public class DataBindingResolver
{
    public T? ResolveBoundValue<T>(
        Dictionary<string, object> boundValue,
        string surfaceId,
        string? dataContextPath = null)
    {
        // 1. 优先检查字面值
        if (boundValue.TryGetValue("literalString", out var literal))
            return (T)literal;

        // 2. 检查路径绑定
        if (boundValue.TryGetValue("path", out var pathObj))
        {
            var path = pathObj as string;
            var dataValue = _messageProcessor.GetData(
                surfaceId, path, dataContextPath);

            // 3. 初始化简写:如果同时有literal和path,先设置literal
            if (boundValue.ContainsKey("literalString"))
            {
                _messageProcessor.SetData(
                    surfaceId, path, literal, dataContextPath);
            }

            return (T)dataValue;
        }

        return default;
    }
}
这段代码看似简单,实则精妙:
-
类型安全:泛型方法保证类型安全,编译时检查
-
上下文感知 :支持
dataContextPath,实现相对路径绑定(列表项场景) -
初始化简写:自动处理literal+path的组合,简化Agent代码
2.1.3 EventDispatcher:事件分发的指挥官
用户点击按钮、输入文本,这些操作如何传回Agent?EventDispatcher负责这个任务:
public class EventDispatcher
{
    public event EventHandler<UserActionEventArgs>? UserActionDispatched;

    public void DispatchUserAction(UserActionMessage action)
    {
        UserActionDispatched?.Invoke(this, new UserActionEventArgs(action));
    }
}
简洁的设计背后是深思熟虑:
-
解耦:UI组件不直接依赖Agent通信层,通过事件解耦
-
可测试:事件模式易于单元测试
-
灵活:应用层可以决定如何处理事件(HTTP、WebSocket、SignalR等)
2.2 UI层:Blazor组件的动态渲染
Blazor的组件模型天生适合A2UI。静态类型+动态渲染,完美结合。
2.2.1 A2UISurface:Surface容器
A2UISurface是UI的入口,它监听Surface更新并触发重渲染:
@inject MessageProcessor MessageProcessor
@implements IDisposable

@if (Surface?.IsReadyToRender == true)
{
    <div class="a2ui-surface">
        <A2UIRenderer SurfaceId="@SurfaceId"
                      ComponentId="@Surface.RootComponentId" />
    </div>
}

@code {
    [Parameter] public required string SurfaceId { get; set; }
    private Surface? Surface;

    protected override void OnInitialized()
    {
        MessageProcessor.SurfaceUpdated += OnSurfaceUpdated;
        LoadSurface();
    }

    private void OnSurfaceUpdated(object? sender, SurfaceUpdatedEventArgs e)
    {
        if (e.SurfaceId == SurfaceId)
        {
            LoadSurface();
            InvokeAsync(StateHasChanged);
        }
    }
}
关键设计:
-
响应式更新 :订阅
SurfaceUpdated事件,数据变化自动重渲染 -
条件渲染 :只有
IsReadyToRender为true才渲染,避免闪烁 -
资源管理 :实现
IDisposable,组件销毁时取消订阅,防止内存泄漏
2.2.2 A2UIRenderer:动态组件渲染器
这是整个系统最精彩的部分------动态组件渲染:
@inject MessageProcessor MessageProcessor

@if (ComponentNode != null)
{
    <DynamicComponent Type="@GetComponentType()"
                      Parameters="@GetParameters()" />
}

@code {
    [Parameter] public required string ComponentId { get; set; }
    [Parameter] public string? DataContextPath { get; set; }

    private Type GetComponentType()
    {
        return ComponentNode.Type switch
        {
            "Text" => typeof(A2UIText),
            "Button" => typeof(A2UIButton),
            "Card" => typeof(A2UICard),
            "Row" => typeof(A2UIRow),
            "Column" => typeof(A2UIColumn),
            _ => typeof(A2UIText) // 降级处理
        };
    }
}Blazor的DynamicComponent是关键。它允许运行时决定渲染哪个组件,完美适配A2UI的动态特性。
2.2.3 组件实现:以Button为例
让我们深入一个具体组件的实现,看看如何处理用户交互:
@inherits A2UIComponentBase
@inject DataBindingResolver BindingResolver
@inject EventDispatcher EventDispatcher

<button class="@GetCssClass()" @onclick="HandleClick">
    @if (!string.IsNullOrEmpty(ChildComponentId))
    {
        <A2UIRenderer SurfaceId="@SurfaceId"
                      ComponentId="@ChildComponentId" />
    }
</button>

@code {
    private string? ChildComponentId;
    private Dictionary<string, object>? ActionData;

    protected override void OnParametersSet()
    {
        ChildComponentId = GetStringProperty("child");
        ActionData = GetDictionaryProperty("action");
    }

    private void HandleClick()
    {
        if (ActionData == null) return;

        var actionName = ActionData["name"] as string;
        var contextEntries = ActionData["context"] as List<...>;

        // 解析action context
        var context = BindingResolver.ResolveActionContext(
            contextEntries, SurfaceId, Component.DataContextPath);

        // 创建并分发用户操作
        var userAction = EventDispatcher.CreateUserAction(
            actionName, SurfaceId, Component.Id, context);
        EventDispatcher.DispatchUserAction(userAction);
    }
}
这段代码展示了几个关键技术:
-
组件嵌套 :Button可以包含任意子组件(通常是Text),通过
A2UIRenderer递归渲染 -
Action Context解析:将绑定表达式解析为实际值,传递给Agent
-
事件冒泡 :通过
EventDispatcher将用户操作传递到应用层
2.3 主题层:可定制的视觉系统
UI框架如果不支持主题定制,就像餐厅只有一种口味------无法满足所有人。
2.3.1 主题接口设计
public interface IA2UITheme
{
    string Name { get; }

    // 颜色系统
    string PrimaryColor { get; }
    string SecondaryColor { get; }
    string BackgroundColor { get; }
    string TextColor { get; }

    // 组件样式
    ComponentStyles Components { get; }

    // 间距系统
    SpacingScale Spacing { get; }
}
2.3.2 CSS变量生成
主题系统的核心是CSS变量生成器:
public static class ThemeCssGenerator
{
    public static string GenerateCssVariables(IA2UITheme theme)
    {
        return $@"
:root {{
    --a2ui-primary: {theme.PrimaryColor};
    --a2ui-secondary: {theme.SecondaryColor};
    --a2ui-background: {theme.BackgroundColor};
    --a2ui-text: {theme.TextColor};

    --a2ui-spacing-xs: {theme.Spacing.XSmall};
    --a2ui-spacing-sm: {theme.Spacing.Small};
    --a2ui-spacing-md: {theme.Spacing.Medium};
    --a2ui-spacing-lg: {theme.Spacing.Large};
}}";
    }
}
使用CSS变量的好处:
-
动态切换:运行时切换主题,无需重新编译
-
浏览器原生:利用浏览器的CSS变量支持,性能优秀
-
级联继承:子组件自动继承父组件的主题变量
2.3.3 主题服务
public class ThemeService
{
    private IA2UITheme _currentTheme;
    private readonly Dictionary<string, IA2UITheme> _themes = new();

    public event EventHandler<ThemeChangedEventArgs>? ThemeChanged;

    public bool SetTheme(string themeName)
    {
        if (_themes.TryGetValue(themeName, out var theme))
        {
            var oldTheme = _currentTheme;
            _currentTheme = theme;
            ThemeChanged?.Invoke(this,
                new ThemeChangedEventArgs(oldTheme, theme));
            return true;
        }
        return false;
    }
}
主题切换触发事件,UI组件订阅事件并重新渲染。优雅的观察者模式。
第三章:Agent SDK------开发者的福音
协议再好,如果难用,也是白搭。Agent SDK的目标是让开发者用最少的代码生成UI。
3.1 Fluent Builder API
传统方式创建A2UI消息,需要手写大量JSON:
// 传统方式:冗长且易错
var messages = new List<ServerToClientMessage>
{
    new ServerToClientMessage
    {
        SurfaceUpdate = new SurfaceUpdateMessage
        {
            SurfaceId = "my-surface",
            Components = new List<ComponentDefinition>
            {
                new ComponentDefinition
                {
                    Id = "card",
                    Component = new Dictionary<string, object>
                    {
                        ["Card"] = new Dictionary<string, object>
                        {
                            ["child"] = "content"
                        }
                    }
                }
                // ... 更多组件
            }
        }
    }
};
使用Fluent Builder API,代码变得优雅:
var messages = new SurfaceBuilder("my-surface")
    .AddCard("card", card => card.WithChild("content"))
    .AddColumn("content", col => col
        .AddChild("title")
        .AddChild("body"))
    .AddText("title", text => text
        .WithText("欢迎使用A2UI")
        .WithUsageHint("h2"))
    .AddText("body", text => text
        .WithText("这是一个示例卡片"))
    .WithRoot("card")
    .Build();
Fluent API的优势:
-
链式调用:一气呵成,代码流畅
-
类型安全:编译时检查,减少错误
-
IntelliSense支持:IDE自动补全,开发效率高
-
可读性强:代码即文档,一目了然
3.2 组件构建器的设计
每个组件都有对应的Builder:
public class ButtonComponentBuilder
{
    private string _id;
    private string? _childId;
    private string? _actionName;
    private List<(string key, object value)> _actionContext = new();
    private bool _isPrimary;

    public ButtonComponentBuilder WithChild(string childId)
    {
        _childId = childId;
        return this;
    }

    public ButtonComponentBuilder WithAction(string actionName)
    {
        _actionName = actionName;
        return this;
    }

    public ButtonComponentBuilder AddActionContext(string key, string path)
    {
        _actionContext.Add((key, new { path }));
        return this;
    }

    public ButtonComponentBuilder AsPrimary()
    {
        _isPrimary = true;
        return this;
    }

    public ComponentDefinition Build()
    {
        var properties = new Dictionary<string, object>();

        if (_childId != null)
            properties["child"] = _childId;

        if (_actionName != null)
        {
            var action = new Dictionary<string, object>
            {
                ["name"] = _actionName
            };

            if (_actionContext.Count > 0)
                action["context"] = _actionContext;

            properties["action"] = action;
        }

        if (_isPrimary)
            properties["primary"] = true;

        return new ComponentDefinition
        {
            Id = _id,
            Component = new Dictionary<string, object>
            {
                ["Button"] = properties
            }
        };
    }
}
Builder模式的精髓:
-
渐进式构建:一步步添加属性,灵活可控
-
默认值处理:可选属性不设置就不添加,保持JSON简洁
-
验证逻辑:可以在Build时验证必填属性
3.3 QuickStart辅助方法
对于常见场景,提供快捷方法:
public static class A2UIQuickStart
{
    public static List<ServerToClientMessage> CreateTextCard(
        string surfaceId, string title, string body)
    {
        return new SurfaceBuilder(surfaceId)
            .AddCard("card", card => card.WithChild("content"))
            .AddColumn("content", col => col
                .AddChild("title")
                .AddChild("body"))
            .AddText("title", text => text
                .WithText(title)
                .WithUsageHint("h3"))
            .AddText("body", text => text.WithText(body))
            .WithRoot("card")
            .Build();
    }

    public static ServerToClientMessage CreateDataUpdate(
        string surfaceId, Dictionary<string, object> data)
    {
        var entries = data.Select(kvp => new DataEntry
        {
            Key = kvp.Key,
            ValueString = kvp.Value as string,
            ValueNumber = kvp.Value as double?,
            ValueBoolean = kvp.Value as bool?
        }).ToList();

        return new ServerToClientMessage
        {
            DataModelUpdate = new DataModelUpdateMessage
            {
                SurfaceId = surfaceId,
                Contents = entries
            }
        };
    }
}
一行代码创建卡片,三行代码更新数据。开发体验拉满。
第四章:实战应用------构建智能聊天界面
理论讲完了,来点实战。我们构建一个完整的AI聊天应用。
4.1 应用架构
用户输入 → Blazor前端 → Agent服务 → LLM → A2UI JSON → 前端渲染
   ↑                                                          ↓
   └──────────────── 用户操作(按钮点击等)──────────────────┘
4.2 前端实现
@page "/chat"
@inject MessageProcessor MessageProcessor
@inject EventDispatcher EventDispatcher
@inject A2AClientService AgentClient

<div class="chat-container">
    <div class="messages">
        @foreach (var msg in _messages)
        {
            @if (msg.Role == "user")
            {
                <div class="user-message">@msg.Content</div>
            }
            else if (msg.SurfaceId != null)
            {
                <A2UISurface SurfaceId="@msg.SurfaceId" />
            }
        }
    </div>

    <div class="input-area">
        <input @bind="_input" @onkeypress="HandleKeyPress" />
        <button @onclick="SendMessage">发送</button>
    </div>
</div>

@code {
    private List<ChatMessage> _messages = new();
    private string _input = "";
    private int _surfaceCounter = 0;

    protected override void OnInitialized()
    {
        // 订阅用户操作
        EventDispatcher.UserActionDispatched += OnUserAction;
    }

    private async Task SendMessage()
    {
        if (string.IsNullOrWhiteSpace(_input)) return;

        // 添加用户消息
        _messages.Add(new ChatMessage
        {
            Role = "user",
            Content = _input
        });

        // 生成唯一的Surface ID
        var surfaceId = $"surface-{++_surfaceCounter}";

        // 发送到Agent并获取A2UI响应
        var messages = await AgentClient.SendQueryAsync(_input, surfaceId);

        // 添加Agent响应
        _messages.Add(new ChatMessage
        {
            Role = "agent",
            SurfaceId = surfaceId
        });

        _input = "";
    }

    private async void OnUserAction(object? sender, UserActionEventArgs e)
    {
        // 用户点击了UI中的按钮,发送action到Agent
        await AgentClient.SendActionAsync(e.Action);
    }
}
4.3 Agent服务实现
Agent端需要根据用户查询生成A2UI消息:
public class A2AClientService
{
    private readonly HttpClient _httpClient;
    private readonly MessageProcessor _messageProcessor;

    public async Task<List<ServerToClientMessage>> SendQueryAsync(
        string query, string surfaceId)
    {
        // 调用Agent API(可以是本地LLM或远程服务)
        var response = await _httpClient.PostAsJsonAsync("/agent/query",
            new { query, surfaceId });

        var jsonLines = await response.Content.ReadAsStringAsync();

        // 解析JSONL响应
        var messages = new List<ServerToClientMessage>();
        foreach (var line in jsonLines.Split('\n'))
        {
            if (string.IsNullOrWhiteSpace(line)) continue;

            var message = JsonSerializer.Deserialize<ServerToClientMessage>(line);
            if (message != null)
            {
                messages.Add(message);
                // 立即处理消息,实现流式渲染
                _messageProcessor.ProcessMessage(message);
            }
        }

        return messages;
    }
}
4.4 Agent端:智能UI生成
这是最有趣的部分------如何让LLM生成A2UI?
public class RestaurantAgent
{
    private readonly ILLMService _llm;

    public async Task<List<ServerToClientMessage>> HandleQueryAsync(
        string query, string surfaceId)
    {
        // 根据查询类型选择模板或让LLM生成
        if (query.Contains("餐厅") || query.Contains("restaurant"))
        {
            return GenerateRestaurantList(surfaceId);
        }
        else if (query.Contains("预订") || query.Contains("book"))
        {
            return GenerateBookingForm(surfaceId);
        }
        else
        {
            // 让LLM生成A2UI
            return await GenerateWithLLM(query, surfaceId);
        }
    }

    private List<ServerToClientMessage> GenerateRestaurantList(string surfaceId)
    {
        var restaurants = _database.GetRestaurants();

        var builder = new SurfaceBuilder(surfaceId)
            .AddColumn("root", col => col.AddChild("title"));

        builder.AddText("title", text => text
            .WithText("附近的餐厅")
            .WithUsageHint("h2"));

        // 动态添加餐厅卡片
        foreach (var restaurant in restaurants)
        {
            var cardId = $"restaurant-{restaurant.Id}";
            var contentId = $"content-{restaurant.Id}";
            var nameId = $"name-{restaurant.Id}";
            var descId = $"desc-{restaurant.Id}";
            var btnId = $"btn-{restaurant.Id}";
            var btnTextId = $"btn-text-{restaurant.Id}";

            builder
                .AddCard(cardId, card => card.WithChild(contentId))
                .AddColumn(contentId, col => col
                    .AddChild(nameId)
                    .AddChild(descId)
                    .AddChild(btnId))
                .AddText(nameId, text => text
                    .WithText(restaurant.Name)
                    .WithUsageHint("h3"))
                .AddText(descId, text => text
                    .WithText(restaurant.Description))
                .AddButton(btnId, btn => btn
                    .WithChild(btnTextId)
                    .WithAction("book_restaurant")
                    .AddActionContext("restaurantId", restaurant.Id.ToString())
                    .AsPrimary())
                .AddText(btnTextId, text => text.WithText("预订"));

            // 将卡片添加到根列表
            builder.AddColumn("root", col => col.AddChild(cardId));
        }

        return builder.WithRoot("root").Build();
    }
}
这段代码展示了A2UI的强大之处:
-
数据驱动:从数据库查询数据,动态生成UI
-
模板化:常见场景用模板,快速响应
-
可扩展:复杂场景可以调用LLM生成
4.5 LLM集成:让AI生成UI
最激动人心的部分------让LLM直接生成A2UI JSON:
private async Task<List<ServerToClientMessage>> GenerateWithLLM(
    string query, string surfaceId)
{
    var systemPrompt = @"
你是一个A2UI生成专家。根据用户查询,生成合适的UI界面。

可用组件:
- Text: 文本显示,支持h1-h5, body, caption
- Button: 按钮,可以是primary或secondary
- Card: 卡片容器
- Row/Column: 布局容器
- Image: 图片
- TextField: 文本输入

输出格式:JSONL格式的A2UI消息

示例:
用户:显示一个欢迎卡片
输出:
{""surfaceUpdate"":{""surfaceId"":""demo"",""components"":[{""id"":""card"",""Card"":{""child"":""content""}},{""id"":""content"",""Column"":{""children"":[""title"",""body""]}},{""id"":""title"",""Text"":{""text"":{""literalString"":""欢迎""},""usageHint"":""h2""}},{""id"":""body"",""Text"":{""text"":{""literalString"":""这是一个示例""}}}]}}
{""beginRendering"":{""surfaceId"":""demo"",""root"":""card""}}
";

    var userPrompt = $@"
用户查询:{query}
Surface ID:{surfaceId}

请生成合适的A2UI界面。";

    var response = await _llm.GenerateAsync(systemPrompt, userPrompt);

    // 解析LLM生成的JSONL
    var messages = new List<ServerToClientMessage>();
    foreach (var line in response.Split('\n'))
    {
        if (string.IsNullOrWhiteSpace(line)) continue;

        try
        {
            var message = JsonSerializer.Deserialize<ServerToClientMessage>(line);
            if (message != null)
                messages.Add(message);
        }
        catch (JsonException ex)
        {
            Console.WriteLine($"解析失败: {ex.Message}");
        }
    }

    return messages;
}
LLM生成UI的优势:
-
灵活性:可以处理任意查询,不局限于预定义模板
-
创造性:LLM可以组合组件,创造新的UI模式
-
自然语言:用户用自然语言描述需求,LLM理解并生成
实际测试中,GPT-4和Claude对A2UI的JSON格式理解很好,生成的UI质量高。
第五章:高级特性------深入技术细节
5.1 列表渲染与数据上下文
列表是UI中最常见的场景。A2UI通过dataContext实现列表项的数据绑定:
var messages = new SurfaceBuilder("list-demo")
    .AddList("root", list => list
        .WithItems("/items")
        .WithTemplate("item-template")
        .WithDirection("vertical"))
    .AddCard("item-template", card => card
        .WithChild("item-content"))
    .AddColumn("item-content", col => col
        .AddChild("item-name")
        .AddChild("item-price"))
    .AddText("item-name", text => text
        .BindToPath("name"))  // 相对路径,绑定到当前item
    .AddText("item-price", text => text
        .BindToPath("price"))
    .AddData("items", new List<object>
    {
        new { name = "商品A", price = 99.9 },
        new { name = "商品B", price = 199.9 }
    })
    .WithRoot("root")
.Build();渲染器处理列表时,会为每个item设置dataContextPath:
// A2UIList.razor
@foreach (var (item, index) in Items.Select((x, i) => (x, i)))
{
    var itemPath = $"{ItemsPath}/{index}";
    <A2UIRenderer SurfaceId="@SurfaceId"
                  ComponentId="@TemplateId"
                  DataContextPath="@itemPath" />
}这样,模板中的相对路径name会被解析为/items/0/name、/items/1/name等。
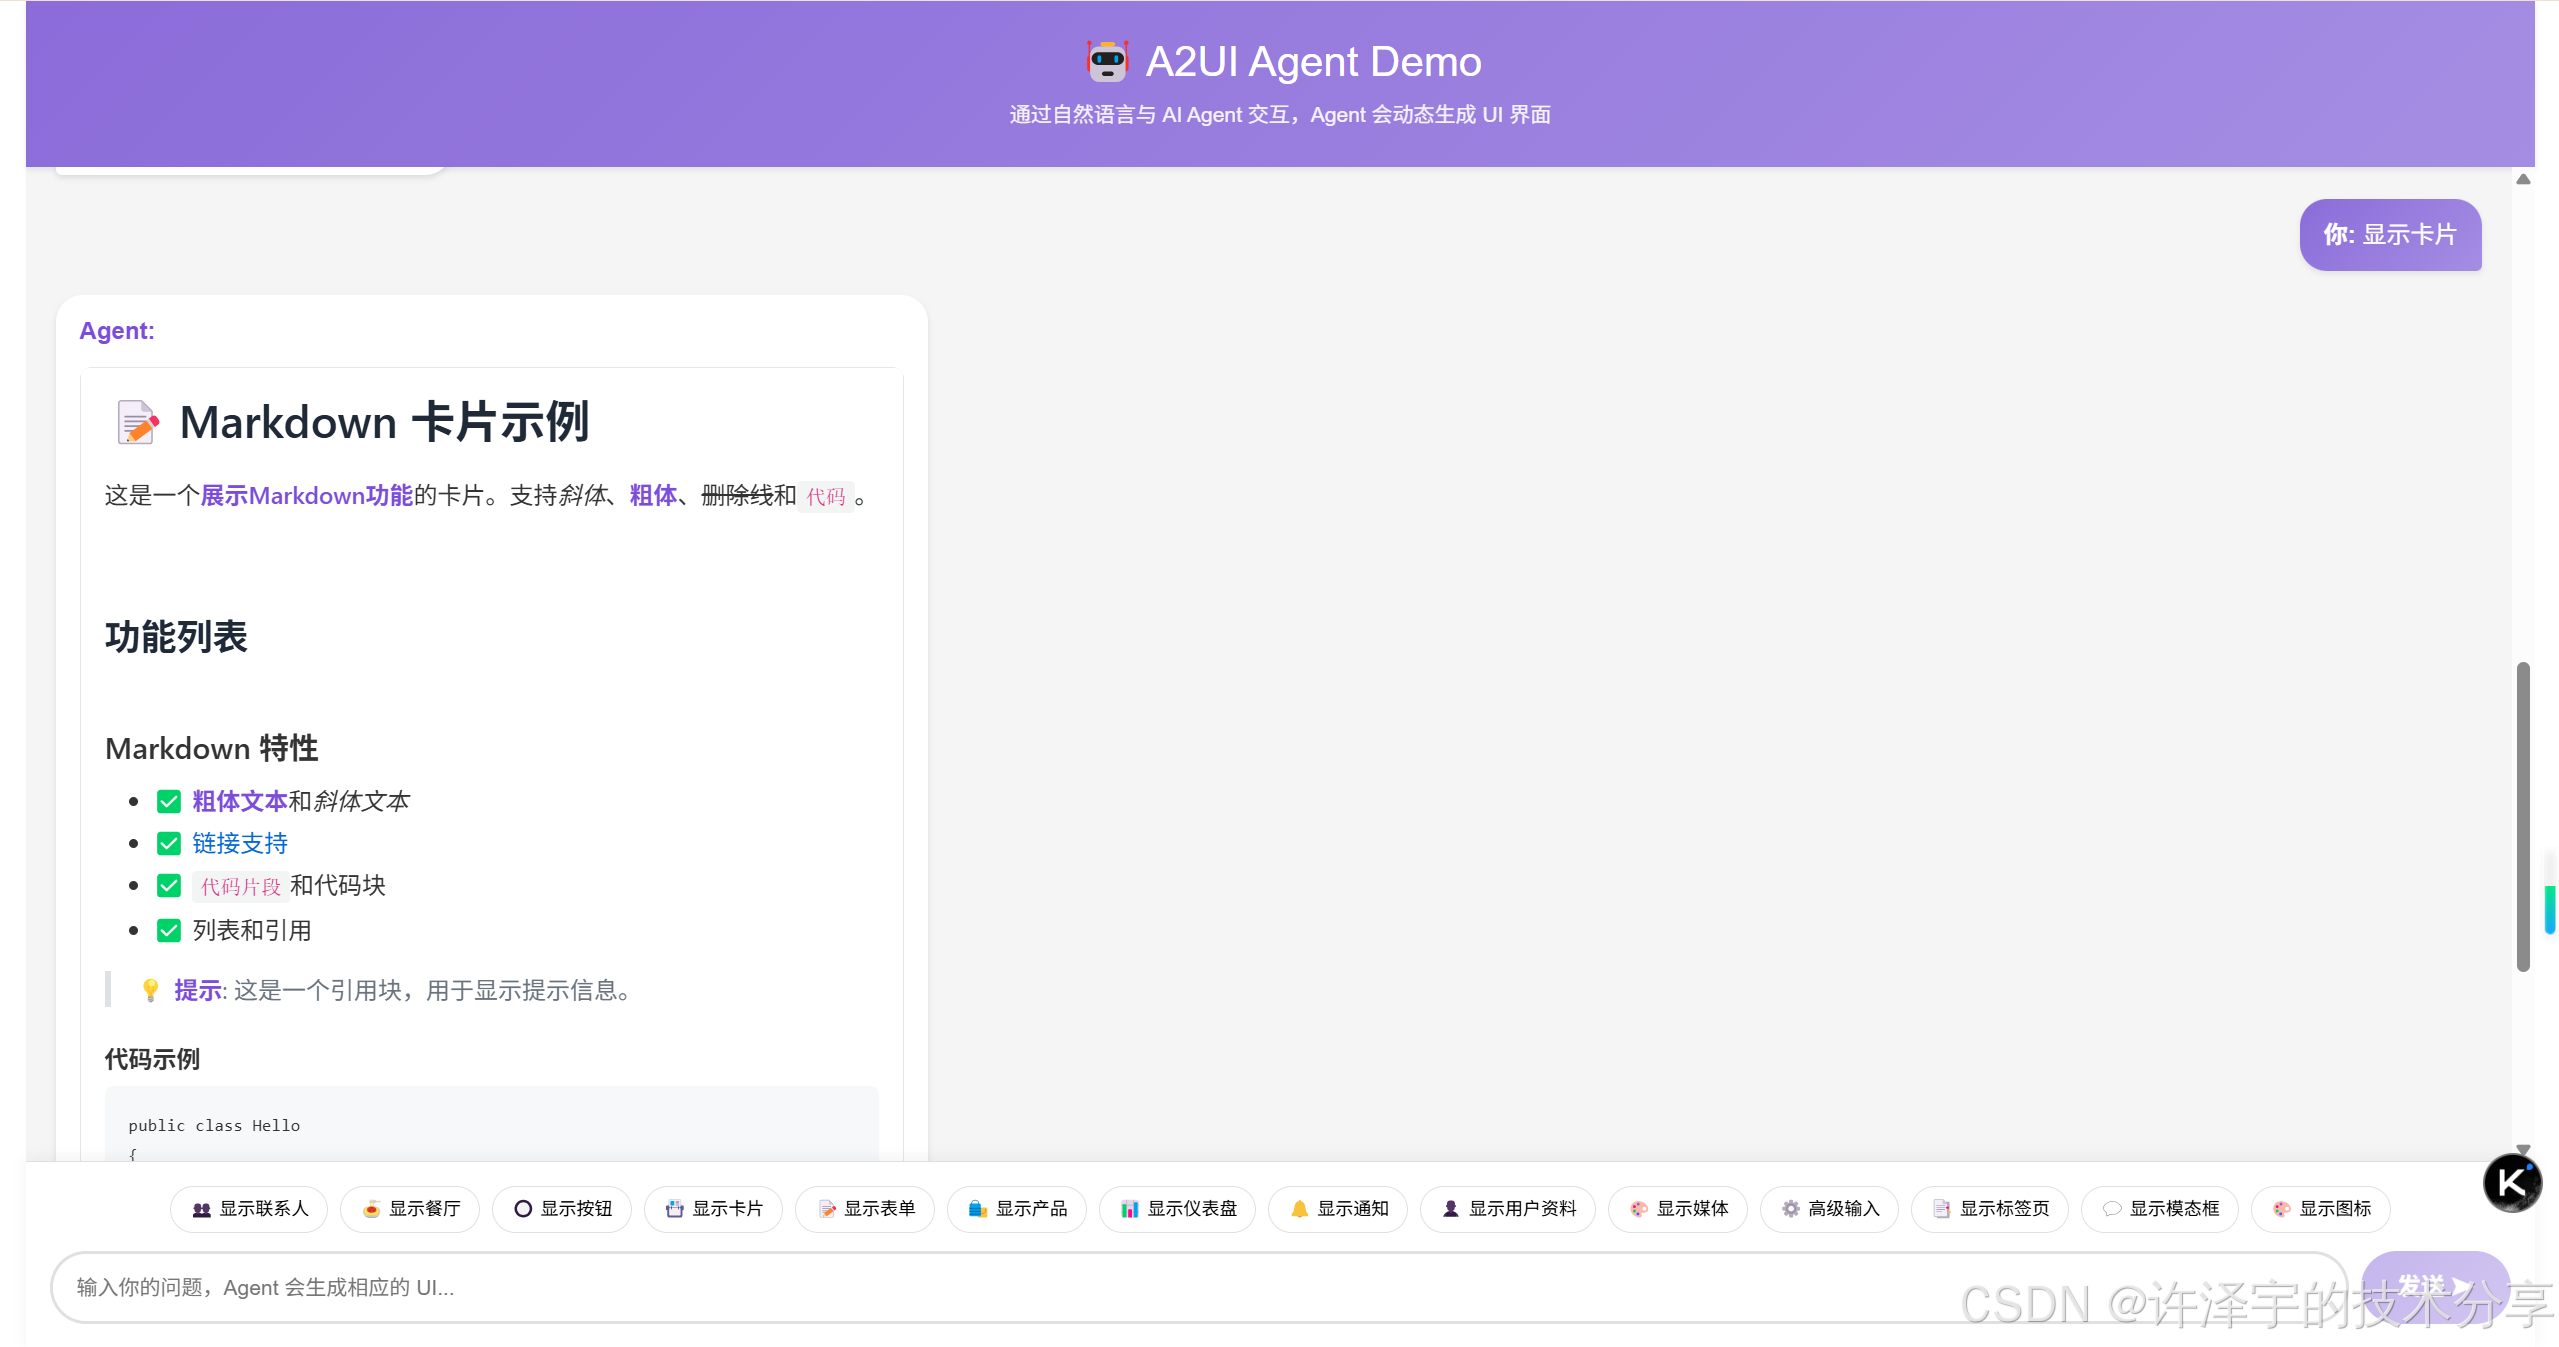
5.2 Markdown渲染支持
现代UI少不了富文本。A2UI的Text组件支持Markdown:
public class MarkdownRenderer
{
    public string Render(string markdown,
        Dictionary<string, string[]>? tagClassMap = null)
    {
        // 基础Markdown解析
        var html = markdown
            .Replace("**", "<strong>", 1).Replace("**", "</strong>", 1)
            .Replace("*", "<em>", 1).Replace("*", "</em>", 1)
            .Replace("\n", "<br>");

        // 标题
        html = Regex.Replace(html, @"^# (.+)$",
            m => $"<h1>{m.Groups[1].Value}</h1>",
            RegexOptions.Multiline);
        html = Regex.Replace(html, @"^## (.+)$",
            m => $"<h2>{m.Groups[1].Value}</h2>",
            RegexOptions.Multiline);

        // 链接
        html = Regex.Replace(html, @"\[([^\]]+)\]\(([^\)]+)\)",
            m => $"<a href=\"{m.Groups[2].Value}\">{m.Groups[1].Value}</a>");

        // 应用自定义样式
        if (tagClassMap != null)
        {
            foreach (var (tag, classes) in tagClassMap)
            {
                var classAttr = string.Join(" ", classes);
                html = html.Replace($"<{tag}>", $"<{tag} class=\"{classAttr}\">");
            }
        }

        return html;
    }

    public static bool IsMarkdown(string text)
    {
        // 简单的Markdown检测
        return text.Contains("**") || text.Contains("##") ||
               text.Contains("[") || text.Contains("```");
    }
}
使用时:
.AddText("content", text => text
    .WithText("## 标题\n\n这是**粗体**文本,这是*斜体*文本。\n\n[链接](https://example.com)"))
自动检测Markdown并渲染为HTML。
5.3 性能优化技巧
5.3.1 组件缓存
频繁创建组件对象会影响性能。使用对象池:
public class ComponentNodePool
{
    private readonly ConcurrentBag<ComponentNode> _pool = new();

    public ComponentNode Rent()
    {
        if (_pool.TryTake(out var node))
        {
            return node;
        }
        return new ComponentNode();
    }

    public void Return(ComponentNode node)
    {
        // 清理节点
        node.Properties.Clear();
        _pool.Add(node);
    }
}
5.3.2 增量更新
只更新变化的部分,而不是整个Surface:
// 只更新特定组件
var updateMessage = new ServerToClientMessage
{
    SurfaceUpdate = new SurfaceUpdateMessage
    {
        SurfaceId = surfaceId,
        Components = new List<ComponentDefinition>
        {
            // 只包含需要更新的组件
            new ComponentDefinition
            {
                Id = "status-text",
                Component = new Dictionary<string, object>
                {
                    ["Text"] = new Dictionary<string, object>
                    {
                        ["text"] = new Dictionary<string, object>
                        {
                            ["literalString"] = "已更新"
                        }
                    }
                }
            }
        }
    }
};
5.3.3 虚拟滚动
对于长列表,使用虚拟滚动只渲染可见项:
<div class="list-container" @onscroll="HandleScroll">
    @foreach (var index in GetVisibleIndices())
    {
        var item = Items[index];
        <div class="list-item" style="top: @(index * ItemHeight)px">
            <A2UIRenderer ComponentId="@TemplateId"
                          DataContextPath="@GetItemPath(index)" />
        </div>
    }
</div>

@code {
    private int _scrollTop = 0;
    private const int ItemHeight = 100;
    private const int ViewportHeight = 600;

    private IEnumerable<int> GetVisibleIndices()
    {
        var startIndex = _scrollTop / ItemHeight;
        var endIndex = (int)Math.Ceiling(
            (_scrollTop + ViewportHeight) / (double)ItemHeight);

        return Enumerable.Range(startIndex, endIndex - startIndex + 1)
            .Where(i => i >= 0 && i < Items.Count);
    }
}
5.4 安全性考虑
A2UI的核心优势是安全,但实现时仍需注意:
5.4.1 组件白名单
只允许渲染预定义的组件:
private static readonly HashSet<string> AllowedComponents = new()
{
    "Text", "Button", "Card", "Row", "Column",
    "Image", "Icon", "List", "TextField"
};

private Type GetComponentType()
{
    if (!AllowedComponents.Contains(ComponentNode.Type))
    {
        Console.WriteLine($"未知组件类型: {ComponentNode.Type}");
        return typeof(A2UIText); // 降级到安全组件
    }

    return ComponentNode.Type switch
    {
        "Text" => typeof(A2UIText),
        "Button" => typeof(A2UIButton),
        // ...
    };
}
5.4.2 XSS防护
渲染用户输入时,必须转义HTML:
public static string EscapeHtml(string text)
{
return text
.Replace("&", "&")
.Replace("<", "<")
.Replace(">", ">")
.Replace("\"", """)
.Replace("'", "'");
}Markdown渲染时,只允许安全的HTML标签:
private static readonly HashSet<string> AllowedTags = new()
{
    "p", "br", "strong", "em", "h1", "h2", "h3", "h4", "h5",
    "ul", "ol", "li", "a", "code", "pre"
};

public string SanitizeHtml(string html)
{
    var doc = new HtmlDocument();
    doc.LoadHtml(html);

    // 移除不允许的标签
    var nodes = doc.DocumentNode.Descendants()
        .Where(n => !AllowedTags.Contains(n.Name))
        .ToList();

    foreach (var node in nodes)
    {
        node.Remove();
    }

    return doc.DocumentNode.OuterHtml;
}
5.4.3 URL验证
Image和链接组件需要验证URL:
public static bool IsValidUrl(string url)
{
    if (!Uri.TryCreate(url, UriKind.Absolute, out var uri))
        return false;

    // 只允许https和data协议
    return uri.Scheme == "https" || uri.Scheme == "data";
}
第六章:实际应用场景
6.1 企业工作流审批系统
想象一个智能审批助手,根据审批类型动态生成表单:
public class ApprovalAgent
{
    public List<ServerToClientMessage> GenerateApprovalForm(
        ApprovalRequest request, string surfaceId)
    {
        var builder = new SurfaceBuilder(surfaceId)
            .AddCard("root", card => card.WithChild("content"))
            .AddColumn("content", col => col
                .AddChild("header")
                .AddChild("details")
                .AddChild("actions"));

        // 标题
        builder.AddText("header", text => text
            .WithText($"{request.Type}审批")
            .WithUsageHint("h2"));

        // 详情(根据类型动态生成)
        var detailsBuilder = builder.AddColumn("details", col => col);

        switch (request.Type)
        {
            case "请假":
                detailsBuilder
                    .AddChild("applicant")
                    .AddChild("start-date")
                    .AddChild("end-date")
                    .AddChild("reason");

                builder
                    .AddText("applicant", text => text
                        .WithText($"申请人:{request.Applicant}"))
                    .AddText("start-date", text => text
                        .WithText($"开始日期:{request.StartDate:yyyy-MM-dd}"))
                    .AddText("end-date", text => text
                        .WithText($"结束日期:{request.EndDate:yyyy-MM-dd}"))
                    .AddText("reason", text => text
                        .WithText($"原因:{request.Reason}"));
                break;

            case "报销":
                detailsBuilder
                    .AddChild("applicant")
                    .AddChild("amount")
                    .AddChild("category")
                    .AddChild("receipt");

                builder
                    .AddText("applicant", text => text
                        .WithText($"申请人:{request.Applicant}"))
                    .AddText("amount", text => text
                        .WithText($"金额:¥{request.Amount:F2}"))
                    .AddText("category", text => text
                        .WithText($"类别:{request.Category}"))
                    .AddImage("receipt", img => img
                        .WithUrl(request.ReceiptUrl)
                        .WithUsageHint("medium-feature"));
                break;
        }

        // 操作按钮
        builder
            .AddRow("actions", row => row
                .AddChild("approve-btn")
                .AddChild("reject-btn")
                .WithDistribution("space-around"))
            .AddButton("approve-btn", btn => btn
                .WithChild("approve-text")
                .WithAction("approve")
                .AddActionContext("requestId", request.Id.ToString())
                .AsPrimary())
            .AddText("approve-text", text => text.WithText("批准"))
            .AddButton("reject-btn", btn => btn
                .WithChild("reject-text")
                .WithAction("reject")
                .AddActionContext("requestId", request.Id.ToString()))
            .AddText("reject-text", text => text.WithText("拒绝"));

        return builder.WithRoot("root").Build();
    }
}
用户点击"批准"或"拒绝",触发UserAction,后端处理审批逻辑。
6.2 智能客服系统
客服机器人根据用户问题动态生成帮助界面:
public class CustomerServiceAgent
{
    private readonly ILLMService _llm;
    private readonly IKnowledgeBase _kb;

    public async Task<List<ServerToClientMessage>> HandleQueryAsync(
        string query, string surfaceId)
    {
        // 1. 理解用户意图
        var intent = await _llm.ClassifyIntentAsync(query);

        // 2. 根据意图生成UI
        return intent switch
        {
            "查询订单" => await GenerateOrderQuery(query, surfaceId),
            "退换货" => GenerateReturnForm(surfaceId),
            "产品咨询" => await GenerateProductInfo(query, surfaceId),
            "投诉建议" => GenerateFeedbackForm(surfaceId),
            _ => await GenerateGeneralHelp(query, surfaceId)
        };
    }

    private async Task<List<ServerToClientMessage>> GenerateOrderQuery(
        string query, string surfaceId)
    {
        // 提取订单号
        var orderNumber = ExtractOrderNumber(query);

        if (string.IsNullOrEmpty(orderNumber))
        {
            // 需要用户输入订单号
            return new SurfaceBuilder(surfaceId)
                .AddColumn("root", col => col
                    .AddChild("prompt")
                    .AddChild("input")
                    .AddChild("submit"))
                .AddText("prompt", text => text
                    .WithText("请输入您的订单号:"))
                .AddTextField("input", field => field
                    .WithPlaceholder("订单号")
                    .BindToPath("/orderNumber"))
                .AddButton("submit", btn => btn
                    .WithChild("submit-text")
                    .WithAction("query_order")
                    .AddActionContext("orderNumber", "/orderNumber")
                    .AsPrimary())
                .AddText("submit-text", text => text.WithText("查询"))
                .WithRoot("root")
                .Build();
        }
        else
        {
            // 查询订单并显示
            var order = await _orderService.GetOrderAsync(orderNumber);

            return new SurfaceBuilder(surfaceId)
                .AddCard("root", card => card.WithChild("content"))
                .AddColumn("content", col => col
                    .AddChild("title")
                    .AddChild("status")
                    .AddChild("items")
                    .AddChild("total"))
                .AddText("title", text => text
                    .WithText($"订单 {orderNumber}")
                    .WithUsageHint("h3"))
                .AddText("status", text => text
                    .WithText($"状态:{order.Status}"))
                .AddList("items", list => list
                    .WithItems("/order/items")
                    .WithTemplate("item-template"))
                .AddText("item-template", text => text
                    .BindToPath("name"))
                .AddText("total", text => text
                    .WithText($"总计:¥{order.Total:F2}")
                    .WithUsageHint("h4"))
                .AddData("order", new { items = order.Items })
                .WithRoot("root")
                .Build();
        }
    }
}
6.3 数据可视化仪表盘
Agent根据数据动态生成图表和指标卡片:
public class DashboardAgent
{
    public List<ServerToClientMessage> GenerateDashboard(
        DashboardData data, string surfaceId)
    {
        var builder = new SurfaceBuilder(surfaceId)
            .AddColumn("root", col => col
                .AddChild("header")
                .AddChild("metrics")
                .AddChild("charts"));

        // 标题
        builder.AddText("header", text => text
            .WithText("业务仪表盘")
            .WithUsageHint("h1"));

        // 指标卡片行
        builder.AddRow("metrics", row => row
            .AddChild("metric-revenue")
            .AddChild("metric-users")
            .AddChild("metric-orders")
            .WithDistribution("space-between"));

        // 收入指标
        builder
            .AddCard("metric-revenue", card => card.WithChild("revenue-content"))
            .AddColumn("revenue-content", col => col
                .AddChild("revenue-label")
                .AddChild("revenue-value")
                .AddChild("revenue-change"))
            .AddText("revenue-label", text => text
                .WithText("总收入")
                .WithUsageHint("caption"))
            .AddText("revenue-value", text => text
                .WithText($"¥{data.Revenue:N0}")
                .WithUsageHint("h2"))
            .AddText("revenue-change", text => text
                .WithText($"↑ {data.RevenueChange:P1}"));

        // 用户指标
        builder
            .AddCard("metric-users", card => card.WithChild("users-content"))
            .AddColumn("users-content", col => col
                .AddChild("users-label")
                .AddChild("users-value")
                .AddChild("users-change"))
            .AddText("users-label", text => text
                .WithText("活跃用户")
                .WithUsageHint("caption"))
            .AddText("users-value", text => text
                .WithText($"{data.ActiveUsers:N0}")
                .WithUsageHint("h2"))
            .AddText("users-change", text => text
                .WithText($"↑ {data.UsersChange:P1}"));

        // 订单指标
        builder
            .AddCard("metric-orders", card => card.WithChild("orders-content"))
            .AddColumn("orders-content", col => col
                .AddChild("orders-label")
                .AddChild("orders-value")
                .AddChild("orders-change"))
            .AddText("orders-label", text => text
                .WithText("订单数")
                .WithUsageHint("caption"))
            .AddText("orders-value", text => text
                .WithText($"{data.Orders:N0}")
                .WithUsageHint("h2"))
            .AddText("orders-change", text => text
                .WithText($"↑ {data.OrdersChange:P1}"));

        // 图表区域(可以集成Chart.js等)
        builder
            .AddColumn("charts", col => col
                .AddChild("chart-revenue")
                .AddChild("chart-users"))
            .AddCard("chart-revenue", card => card.WithChild("chart-revenue-img"))
            .AddImage("chart-revenue-img", img => img
                .WithUrl(GenerateChartUrl(data.RevenueHistory))
                .WithUsageHint("large-feature"));

        return builder.WithRoot("root").Build();
    }
}实时数据更新只需发送DataModelUpdate消息,UI自动刷新。
6.4 教育培训平台
智能教学助手根据学习进度生成个性化课程界面:
public class EducationAgent
{
    public List<ServerToClientMessage> GenerateLessonUI(
        Student student, Lesson lesson, string surfaceId)
    {
        var builder = new SurfaceBuilder(surfaceId)
            .AddColumn("root", col => col
                .AddChild("progress-bar")
                .AddChild("lesson-content")
                .AddChild("quiz")
                .AddChild("navigation"));

        // 进度条
        builder
            .AddCard("progress-bar", card => card.WithChild("progress-content"))
            .AddRow("progress-content", row => row
                .AddChild("progress-text")
                .AddChild("progress-percent"))
            .AddText("progress-text", text => text
                .WithText($"课程进度:{student.CompletedLessons}/{student.TotalLessons}"))
            .AddText("progress-percent", text => text
                .WithText($"{student.Progress:P0}"));

        // 课程内容(支持Markdown)
        builder
            .AddCard("lesson-content", card => card.WithChild("content-text"))
            .AddText("content-text", text => text
                .WithText(lesson.Content)); // Markdown自动渲染

        // 测验(根据学生水平动态生成)
        if (lesson.HasQuiz)
        {
            builder
                .AddCard("quiz", card => card.WithChild("quiz-content"))
                .AddColumn("quiz-content", col => col
                    .AddChild("quiz-title")
                    .AddChild("quiz-question")
                    .AddChild("quiz-options"));

            builder
                .AddText("quiz-title", text => text
                    .WithText("课后测验")
                    .WithUsageHint("h3"))
                .AddText("quiz-question", text => text
                    .WithText(lesson.Quiz.Question))
                .AddMultipleChoice("quiz-options", choice => choice
                    .WithOptions(lesson.Quiz.Options)
                    .BindToPath("/quiz/answer")
                    .WithSingleSelect());
        }

        // 导航按钮
        builder
            .AddRow("navigation", row => row
                .AddChild("prev-btn")
                .AddChild("next-btn")
                .WithDistribution("space-between"))
            .AddButton("prev-btn", btn => btn
                .WithChild("prev-text")
                .WithAction("previous_lesson")
                .AddActionContext("lessonId", lesson.Id.ToString()))
            .AddText("prev-text", text => text.WithText("← 上一课"))
            .AddButton("next-btn", btn => btn
                .WithChild("next-text")
                .WithAction("next_lesson")
                .AddActionContext("lessonId", lesson.Id.ToString())
                .AddActionContext("quizAnswer", "/quiz/answer")
                .AsPrimary())
            .AddText("next-text", text => text.WithText("下一课 →"));

        return builder.WithRoot("root").Build();
    }
}
学生点击"下一课"时,Agent检查测验答案,给出反馈,并生成下一课的UI。
第七章:与其他技术的对比
7.1 A2UI vs 传统Web框架
| 特性 | A2UI | React/Vue | 传统MVC |
|---|---|---|---|
| 安全性 | ✅ 声明式数据 | ⚠️ 可执行代码 | ⚠️ 服务器渲染 |
| 跨平台 | ✅ 一份JSON多端渲染 | ❌ 需要重写 | ❌ Web only |
| AI友好 | ✅ LLM易生成 | ⚠️ 需要理解框架 | ❌ 复杂 |
| 增量更新 | ✅ 扁平化结构 | ✅ Virtual DOM | ❌ 全量刷新 |
| 开发体验 | ✅ Fluent API | ✅ JSX | ⚠️ 模板语法 |
| 性能 | ✅ 原生组件 | ✅ 优化良好 | ⚠️ 依赖实现 |
7.2 A2UI vs Server-Driven UI
Server-Driven UI(如Airbnb的Ghost Platform)也是服务器控制UI,但有本质区别:
Server-Driven UI:
-
服务器发送组件配置
-
客户端有预定义的组件库
-
主要用于A/B测试和快速迭代
A2UI:
-
专为AI Agent设计
-
支持流式渲染和增量更新
-
数据绑定和事件系统更完善
-
LLM友好的扁平化结构
7.3 A2UI vs Low-Code平台
Low-Code平台(如OutSystems、Mendix)让非程序员构建应用,A2UI让AI构建UI:
| 维度 | A2UI | Low-Code |
|---|---|---|
| 目标用户 | AI Agent | 业务人员 |
| 交互方式 | JSON协议 | 可视化拖拽 |
| 灵活性 | 高(编程扩展) | 中(平台限制) |
| 学习曲线 | 低(对AI) | 中(对人类) |
| 应用场景 | 对话式UI | 企业应用 |
A2UI不是要取代Low-Code,而是开辟新的领域------AI生成的动态UI。
第八章:最佳实践与设计模式
8.1 组件设计原则
8.1.1 单一职责
每个组件只做一件事:
// ❌ 不好:一个组件做太多事
.AddCard("user-card", card => card
    .WithChild("content")
    .WithAction("click")
    .WithData(userData))

// ✅ 好:职责分离
.AddCard("user-card", card => card.WithChild("content"))
.AddButton("action-btn", btn => btn
    .WithAction("view_profile")
    .AddActionContext("userId", "/user/id"))
8.1.2 组合优于继承
通过组合构建复杂UI:
// 可复用的用户头像组件
private void AddUserAvatar(SurfaceBuilder builder, string id, string userId)
{
    builder
        .AddRow(id, row => row
            .AddChild($"{id}-img")
            .AddChild($"{id}-name")
            .WithAlignment("center"))
        .AddImage($"{id}-img", img => img
            .BindToPath($"{userId}/avatar")
            .WithUsageHint("avatar"))
        .AddText($"{id}-name", text => text
            .BindToPath($"{userId}/name"));
}

// 使用
var builder = new SurfaceBuilder("profile");
AddUserAvatar(builder, "user-header", "/currentUser");
8.1.3 数据驱动
UI结构由数据决定:
public List<ServerToClientMessage> GenerateProductList(
    List<Product> products, string surfaceId)
{
    var builder = new SurfaceBuilder(surfaceId)
        .AddColumn("root", col => col.AddChild("title"));

    builder.AddText("title", text => text
        .WithText("产品列表")
        .WithUsageHint("h2"));

    // 根据数据动态生成
    foreach (var product in products)
    {
        var cardId = $"product-{product.Id}";
        AddProductCard(builder, cardId, product);
        builder.AddColumn("root", col => col.AddChild(cardId));
    }

    return builder.WithRoot("root").Build();
}
8.2 状态管理模式
8.2.1 集中式状态
将所有状态放在数据模型的根路径:
// 初始化状态
.AddData("ui", new Dictionary<string, object>
{
    { "loading", false },
    { "error", null },
    { "selectedTab", "home" }
})
.AddData("data", new Dictionary<string, object>
{
    { "users", new List<User>() },
    { "products", new List<Product>() }
})

// 组件绑定到状态
.AddText("loading-text", text => text
    .BindToPath("/ui/loading")
    .WithText("加载中..."))
8.2.2 局部状态
对于组件内部状态,使用相对路径:
// 表单组件的局部状态
.AddColumn("form", col => col
    .AddChild("name-input")
    .AddChild("email-input")
    .WithDataContext("/form"))
.AddTextField("name-input", field => field
    .BindToPath("name"))  // 相对于/form
.AddTextField("email-input", field => field
    .BindToPath("email"))
8.3 错误处理策略
8.3.1 优雅降级
组件加载失败时,显示占位符:
private Type GetComponentType()
{
    try
    {
        return ComponentNode.Type switch
        {
            "Text" => typeof(A2UIText),
            "Button" => typeof(A2UIButton),
            _ => throw new UnknownComponentException(ComponentNode.Type)
        };
    }
    catch (Exception ex)
    {
        Console.WriteLine($"组件加载失败: {ex.Message}");
        return typeof(A2UIErrorPlaceholder);
    }
}
8.3.2 错误边界
捕获组件渲染错误,防止整个UI崩溃:
<ErrorBoundary>
    <ChildContent>
        <A2UIRenderer ComponentId="@ComponentId" />
    </ChildContent>
    <ErrorContent Context="ex">
        <div class="error-boundary">
            <p>⚠️ 组件渲染失败</p>
            <details>
                <summary>错误详情</summary>
                <pre>@ex.Message</pre>
            </details>
        </div>
    </ErrorContent>
</ErrorBoundary>
8.3.3 用户友好的错误消息
public List<ServerToClientMessage> CreateErrorUI(
    string surfaceId, string errorMessage, string? details = null)
{
    return new SurfaceBuilder(surfaceId)
        .AddCard("root", card => card.WithChild("content"))
        .AddColumn("content", col => col
            .AddChild("icon")
            .AddChild("message")
            .AddChild("details")
            .AddChild("retry-btn"))
        .AddIcon("icon", icon => icon.WithIcon("⚠️"))
        .AddText("message", text => text
            .WithText(errorMessage)
            .WithUsageHint("h3"))
        .AddText("details", text => text
            .WithText(details ?? "请稍后重试"))
        .AddButton("retry-btn", btn => btn
            .WithChild("retry-text")
            .WithAction("retry"))
        .AddText("retry-text", text => text.WithText("重试"))
        .WithRoot("root")
        .Build();
}
8.4 性能优化清单
8.4.1 减少不必要的重渲染
// 使用ShouldRender控制更新
protected override bool ShouldRender()
{
    // 只有关键属性变化时才重渲染
    return _previousComponentId != ComponentId ||
           _previousSurfaceId != SurfaceId;
}
8.4.2 批量更新
// ❌ 不好:多次单独更新
foreach (var item in items)
{
    var msg = CreateUpdateMessage(item);
    MessageProcessor.ProcessMessage(msg);
}

// ✅ 好:批量更新
var messages = items.Select(CreateUpdateMessage).ToList();
MessageProcessor.ProcessMessages(messages);
8.4.3 懒加载
// 只在需要时加载数据
.AddButton("load-more", btn => btn
    .WithChild("load-text")
    .WithAction("load_more_items")
    .AddActionContext("offset", "/pagination/offset")
    .AddActionContext("limit", "/pagination/limit"))
8.4.4 缓存策略
public class CachedMessageProcessor
{
    private readonly Dictionary<string, List<ServerToClientMessage>> _cache = new();

    public List<ServerToClientMessage> GetOrGenerate(
        string key, Func<List<ServerToClientMessage>> generator)
    {
        if (_cache.TryGetValue(key, out var cached))
        {
            return cached;
        }

        var messages = generator();
        _cache[key] = messages;
        return messages;
    }
}
第九章:测试策略
9.1 单元测试
9.1.1 测试消息处理
[Fact]
public void ProcessMessage_ShouldCreateSurface()
{
    // Arrange
    var processor = new MessageProcessor();
    var message = new ServerToClientMessage
    {
        BeginRendering = new BeginRenderingMessage
        {
            SurfaceId = "test-surface",
            Root = "root-component"
        }
    };

    // Act
    processor.ProcessMessage(message);

    // Assert
    var surface = processor.GetSurface("test-surface");
    Assert.NotNull(surface);
    Assert.Equal("root-component", surface.RootComponentId);
    Assert.True(surface.IsReadyToRender);
}
9.1.2 测试数据绑定
[Fact]
public void ResolveBoundValue_ShouldReturnLiteralString()
{
    // Arrange
    var processor = new MessageProcessor();
    var resolver = new DataBindingResolver(processor);
    var boundValue = new Dictionary<string, object>
    {
        ["literalString"] = "Hello"
    };

    // Act
    var result = resolver.ResolveString(boundValue, "test-surface");

    // Assert
    Assert.Equal("Hello", result);
}

[Fact]
public void ResolveBoundValue_ShouldReturnPathValue()
{
    // Arrange
    var processor = new MessageProcessor();
    processor.SetData("test-surface", "/user/name", "张三");

    var resolver = new DataBindingResolver(processor);
    var boundValue = new Dictionary<string, object>
    {
        ["path"] = "/user/name"
    };

    // Act
    var result = resolver.ResolveString(boundValue, "test-surface");

    // Assert
    Assert.Equal("张三", result);
}
9.2 集成测试
9.2.1 测试完整流程
[Fact]
public async Task EndToEnd_ShouldRenderUI()
{
    // Arrange
    using var host = await CreateTestHost();
    var processor = host.Services.GetRequiredService<MessageProcessor>();
    var messages = A2UIQuickStart.CreateTextCard(
        "test-surface", "标题", "内容");

    // Act
    processor.ProcessMessages(messages);

    // Assert
    var surface = processor.GetSurface("test-surface");
    Assert.NotNull(surface);
    Assert.True(surface.IsReadyToRender);
    Assert.Equal(4, surface.Components.Count); // card, column, title, body
}
9.2.2 测试用户交互
[Fact]
public async Task UserAction_ShouldBeDispatched()
{
    // Arrange
    var dispatcher = new EventDispatcher();
    UserActionMessage? capturedAction = null;

    dispatcher.UserActionDispatched += (s, e) =>
    {
        capturedAction = e.Action;
    };

    // Act
    var action = EventDispatcher.CreateUserAction(
        "test_action", "test-surface", "btn-1",
        new Dictionary<string, object> { ["key"] = "value" });
    dispatcher.DispatchUserAction(action);

    // Assert
    Assert.NotNull(capturedAction);
    Assert.Equal("test_action", capturedAction.Name);
    Assert.Equal("value", capturedAction.Context["key"]);
}
9.3 UI测试
使用bUnit进行Blazor组件测试:
[Fact]
public void A2UIButton_ShouldRenderCorrectly()
{
    // Arrange
    using var ctx = new TestContext();
    ctx.Services.AddSingleton<MessageProcessor>();
    ctx.Services.AddSingleton<DataBindingResolver>();
    ctx.Services.AddSingleton<EventDispatcher>();

    var component = new ComponentNode
    {
        Id = "test-btn",
        Type = "Button",
        Properties = new Dictionary<string, object>
        {
            ["child"] = "btn-text",
            ["primary"] = true
        }
    };

    // Act
    var cut = ctx.RenderComponent<A2UIButton>(parameters => parameters
        .Add(p => p.SurfaceId, "test")
        .Add(p => p.Component, component));

    // Assert
    var button = cut.Find("button");
    Assert.Contains("a2ui-button-primary", button.ClassName);
}
第十章:未来展望与技术趋势
10.1 A2UI的演进方向
10.1.1 更丰富的组件库
当前A2UI定义了18个标准组件,未来可能扩展:
-
高级图表:折线图、柱状图、饼图等数据可视化组件
-
富文本编辑器:支持格式化文本输入
-
地图组件:集成地图服务,显示位置信息
-
视频会议:嵌入式视频通话组件
-
3D渲染:Three.js集成,展示3D模型
10.1.2 AI原生特性
专为AI设计的新特性:
{
  "SmartForm": {
    "intent": "collect_user_info",
    "fields": "auto",  // AI自动决定需要哪些字段
    "validation": "intelligent"  // AI验证输入合理性
  }
}
AI不仅生成UI,还能理解用户意图,动态调整界面。
10.1.3 多模态支持
结合语音、图像、手势:
{
  "VoiceInput": {
    "language": "zh-CN",
    "onTranscript": { "action": "process_voice" }
  },
  "ImageCapture": {
    "onCapture": { "action": "analyze_image" }
  }
}
用户可以说话、拍照,AI理解并生成相应UI。
10.2 与新兴技术的融合
10.2.1 WebAssembly
将A2UI渲染器编译为WASM,实现:
-
极致性能:接近原生速度
-
跨语言:Rust、C++等语言实现渲染器
-
离线运行:完全在浏览器中运行,无需服务器
// Rust实现的A2UI渲染器
#[wasm_bindgen]
pub struct A2UIRenderer {
surfaces: HashMap<String, Surface>,
}#[wasm_bindgen]
impl A2UIRenderer {
pub fn process_message(&mut self, json: &str) -> Result<(), JsValue> {
let message: ServerToClientMessage = serde_json::from_str(json)?;
// 处理消息...
Ok(())
}
}
10.2.2 边缘计算
将Agent部署到边缘节点:
用户设备 ←→ 边缘节点(Agent) ←→ 云端(LLM)
         低延迟              按需调用
常见查询在边缘处理,复杂查询才调用云端LLM,降低延迟和成本。
10.2.3 联邦学习
保护用户隐私的同时改进Agent:
用户A的Agent ──┐
用户B的Agent ──┼──→ 聚合模型更新 ──→ 全局模型
用户C的Agent ──┘
每个用户的Agent在本地学习,只上传模型参数,不上传原始数据。
10.3 行业应用前景
10.3.1 医疗健康
智能诊断助手根据症状生成问诊界面:
患者:我头疼
AI:生成头疼相关问诊表单(持续时间、位置、伴随症状等)
患者:填写表单
AI:分析后生成建议和预约界面
10.3.2 金融服务
智能理财顾问根据用户画像生成投资建议:
用户:我想投资
AI:生成风险评估问卷
用户:完成评估
AI:生成个性化投资组合界面(图表、产品卡片、购买按钮)
10.3.3 智能制造
工厂管理系统根据设备状态动态生成监控界面:
设备正常:显示简洁的状态卡片
设备异常:生成详细的诊断界面(参数图表、历史数据、维修建议)
10.4 开源生态建设
A2UI的成功需要社区支持:
10.4.1 多语言SDK
-
Python:适合AI/ML开发者
-
JavaScript/TypeScript:Web开发者
-
Java:企业应用
-
Go:高性能服务
10.4.2 框架集成
-
React:React A2UI Renderer
-
Vue:Vue A2UI Plugin
-
Angular:Angular A2UI Module
-
Flutter:Flutter A2UI Widget
-
SwiftUI:SwiftUI A2UI Views
10.4.3 工具链
-
A2UI Designer:可视化设计工具
-
A2UI Validator:JSON验证器
-
A2UI Playground:在线测试环境
-
VS Code Extension:开发辅助插件
第十一章:实战经验与踩坑指南
11.1 常见问题与解决方案
11.1.1 Surface不渲染
问题 :A2UISurface组件显示调试信息,但不渲染UI。
原因:
-
没有发送
BeginRendering消息 -
Root组件ID不存在 -
消息顺序错误
解决:
// ✅ 正确的消息顺序
var messages = new List<ServerToClientMessage>
{
    // 1. 先发送组件定义
    new ServerToClientMessage { SurfaceUpdate = ... },
    // 2. 再发送数据(如果需要)
    new ServerToClientMessage { DataModelUpdate = ... },
    // 3. 最后发送BeginRendering
    new ServerToClientMessage { BeginRendering = ... }
};
11.1.2 数据绑定不生效
问题:修改数据模型后,UI没有更新。
原因 :没有触发SurfaceUpdated事件。
解决:
// 修改数据后,手动触发更新
MessageProcessor.SetData(surfaceId, "/user/name", "新名字");
MessageProcessor.NotifySurfaceUpdated(surfaceId);或者发送DataModelUpdate消息(推荐):
var updateMsg = A2UIQuickStart.CreateDataUpdate(
    surfaceId,
    new Dictionary<string, object> { ["user"] = new { name = "新名字" } }
);
MessageProcessor.ProcessMessage(updateMsg);
11.1.3 按钮点击无响应
问题 :点击按钮没有触发UserAction。
原因:
-
没有订阅
UserActionDispatched事件 -
Action定义错误
-
EventDispatcher未注入
解决:
// 1. 确保注册服务
builder.Services.AddScoped<EventDispatcher>();

// 2. 订阅事件
protected override void OnInitialized()
{
    EventDispatcher.UserActionDispatched += OnUserAction;
}

// 3. 正确定义Action
.AddButton("btn", btn => btn
    .WithChild("btn-text")
    .WithAction("my_action"))  // 必须有action name
11.1.4 JSON解析失败
问题:LLM生成的JSON无法解析。
原因:LLM生成的JSON格式不规范。
解决:
// 添加容错处理
private ServerToClientMessage? ParseMessage(string json)
{
    try
    {
        // 尝试标准解析
        return JsonSerializer.Deserialize<ServerToClientMessage>(json);
    }
    catch (JsonException)
    {
        // 尝试修复常见问题
        json = json.Trim();

        // 移除Markdown代码块标记
        if (json.StartsWith("```json"))
            json = json.Substring(7);
        if (json.EndsWith("```"))
            json = json.Substring(0, json.Length - 3);

        // 再次尝试
        return JsonSerializer.Deserialize<ServerToClientMessage>(json);
    }
}
11.2 性能陷阱
11.2.1 过度渲染
问题:每次数据变化都重渲染整个Surface。
解决 :使用@key指令优化列表渲染:
@foreach (var item in Items)
{
    <div @key="item.Id">
        <A2UIRenderer ComponentId="@GetItemComponentId(item)" />
    </div>
}
11.2.2 内存泄漏
问题:长时间运行后内存占用越来越高。
原因:事件订阅未取消。
解决:
public class MyComponent : IDisposable
{
    protected override void OnInitialized()
    {
        MessageProcessor.SurfaceUpdated += OnSurfaceUpdated;
        EventDispatcher.UserActionDispatched += OnUserAction;
    }

    public void Dispose()
    {
        // 必须取消订阅
        MessageProcessor.SurfaceUpdated -= OnSurfaceUpdated;
        EventDispatcher.UserActionDispatched -= OnUserAction;
    }
}
11.2.3 大数据量渲染
问题:渲染1000+项的列表时卡顿。
解决:实现虚拟滚动或分页:
// 分页加载
.AddButton("load-more", btn => btn
    .WithChild("load-text")
    .WithAction("load_more")
    .AddActionContext("page", "/pagination/currentPage"))

// Agent端
private List<ServerToClientMessage> LoadMore(int page)
{
    var items = _database.GetItems(page, pageSize: 20);

    // 只发送新增的组件
    var builder = new SurfaceBuilder(surfaceId);
    foreach (var item in items)
    {
        AddItemComponent(builder, item);
    }

    return builder.Build();
}
11.3 安全最佳实践
11.3.1 输入验证
永远不要信任Agent发送的数据:
private void ValidateComponent(ComponentDefinition component)
{
    // 验证ID
    if (string.IsNullOrWhiteSpace(component.Id))
        throw new ValidationException("Component ID不能为空");

    if (component.Id.Length > 100)
        throw new ValidationException("Component ID过长");

    // 验证类型
    if (!AllowedComponentTypes.Contains(component.Type))
        throw new ValidationException($"不支持的组件类型: {component.Type}");

    // 验证属性
    foreach (var prop in component.Properties)
    {
        ValidateProperty(component.Type, prop.Key, prop.Value);
    }
}
11.3.2 URL白名单
限制Image和链接的URL:
private static readonly HashSet<string> AllowedDomains = new()
{
    "example.com",
    "cdn.example.com",
    "images.example.com"
};

private bool IsUrlAllowed(string url)
{
    if (!Uri.TryCreate(url, UriKind.Absolute, out var uri))
        return false;

    // 允许data URL(Base64图片)
    if (uri.Scheme == "data")
        return true;

    // 检查域名白名单
    return uri.Scheme == "https" &&
           AllowedDomains.Contains(uri.Host);
}
11.3.3 速率限制
防止恶意Agent发送大量消息:
public class RateLimitedMessageProcessor
{
    private readonly Dictionary<string, Queue<DateTime>> _requestHistory = new();
    private const int MaxRequestsPerMinute = 60;

    public bool CanProcess(string agentId)
    {
        if (!_requestHistory.TryGetValue(agentId, out var history))
        {
            history = new Queue<DateTime>();
            _requestHistory[agentId] = history;
        }

        // 清理1分钟前的记录
        var cutoff = DateTime.UtcNow.AddMinutes(-1);
        while (history.Count > 0 && history.Peek() < cutoff)
        {
            history.Dequeue();
        }

        // 检查是否超过限制
        if (history.Count >= MaxRequestsPerMinute)
            return false;

        history.Enqueue(DateTime.UtcNow);
        return true;
    }
}
11.4 调试技巧
11.4.1 启用详细日志
public class MessageProcessor
{
    private readonly ILogger<MessageProcessor> _logger;
    private readonly bool _enableDebugLogging;

    public void ProcessMessage(ServerToClientMessage message)
    {
        if (_enableDebugLogging)
        {
            _logger.LogDebug("处理消息: {MessageType}",
                GetMessageType(message));
            _logger.LogDebug("消息内容: {Message}",
                JsonSerializer.Serialize(message));
        }

        // 处理逻辑...
    }
}
11.4.2 Surface状态检查器
创建一个调试组件显示Surface状态:
@inject MessageProcessor MessageProcessor

<div class="debug-panel">
    <h3>🔍 Surface调试信息</h3>

    @foreach (var surface in MessageProcessor.Surfaces)
    {
        <details>
            <summary>Surface: @surface.Key</summary>
            <ul>
                <li>IsReady: @surface.Value.IsReadyToRender</li>
                <li>Root: @surface.Value.RootComponentId</li>
                <li>组件数: @surface.Value.Components.Count</li>
                <li>数据模型: <pre>@GetDataModelJson(surface.Value)</pre></li>
            </ul>

            <h4>组件列表:</h4>
            <table>
                <tr><th>ID</th><th>类型</th><th>属性</th></tr>
                @foreach (var comp in surface.Value.Components)
                {
                    <tr>
                        <td>@comp.Key</td>
                        <td>@comp.Value.Type</td>
                        <td><pre>@JsonSerializer.Serialize(comp.Value.Properties)</pre></td>
                    </tr>
                }
            </table>
        </details>
    }
</div>
11.4.3 消息录制与回放
记录所有消息,方便重现问题:
public class MessageRecorder
{
    private readonly List<(DateTime timestamp, ServerToClientMessage message)> _history = new();

    public void Record(ServerToClientMessage message)
    {
        _history.Add((DateTime.UtcNow, message));
    }

    public void SaveToFile(string path)
    {
        var json = JsonSerializer.Serialize(_history, new JsonSerializerOptions
        {
            WriteIndented = true
        });
        File.WriteAllText(path, json);
    }

    public async Task ReplayAsync(MessageProcessor processor)
    {
        foreach (var (timestamp, message) in _history)
        {
            processor.ProcessMessage(message);
            await Task.Delay(100); // 模拟真实时间间隔
        }
    }
}
第十二章:总结与展望
12.1 技术总结
通过本文的深入剖析,我们全面了解了A2UI协议在.NET Blazor中的实现:
核心价值:
-
安全第一:声明式数据而非可执行代码,从根本上杜绝代码注入风险
-
跨平台:一份JSON多端渲染,真正的"Write Once, Run Anywhere"
-
AI友好:扁平化结构、增量更新,LLM易于生成和维护
-
原生体验:使用平台原生组件,继承应用样式和性能
架构亮点:
-
分层清晰:Core、Theming、Components、SDK四层架构,职责分明
-
事件驱动:解耦核心逻辑和UI渲染,易于测试和扩展
-
类型安全:充分利用C#的类型系统,编译时检查
-
开发友好:Fluent API、QuickStart辅助方法,降低使用门槛
实现细节:
-
消息处理:支持JSONL流式处理,实现渐进式渲染
-
数据绑定:三种绑定模式(字面值、路径、初始化简写),灵活强大
-
动态渲染:利用Blazor的DynamicComponent,运行时决定组件类型
-
主题系统:CSS变量+主题服务,支持动态切换
12.2 适用场景
A2UI特别适合以下场景:
✅ 推荐使用:
-
对话式AI应用(聊天机器人、智能助手)
-
动态表单生成(审批流程、数据采集)
-
个性化界面(根据用户画像定制UI)
-
跨平台应用(Web、移动、桌面统一协议)
-
远程Agent(微服务架构中的UI服务)
⚠️ 谨慎使用:
-
复杂的交互式应用(游戏、图形编辑器)
-
性能要求极高的场景(实时渲染、大数据可视化)
-
需要复杂动画的应用(过渡效果、粒子系统)
❌ 不推荐:
-
静态网站(用传统HTML/CSS更简单)
-
纯展示型应用(没有动态生成需求)
-
离线优先应用(需要Agent连接)
12.3 学习路径建议
初学者(1-2周):
-
理解A2UI协议基础概念
-
运行示例应用,体验效果
-
使用QuickStart方法创建简单UI
-
学习数据绑定和事件处理
进阶开发者(2-4周):
-
深入学习Fluent Builder API
-
实现自定义组件
-
集成LLM生成UI
-
优化性能和用户体验
架构师(1-2个月):
-
研究协议规范细节
-
设计企业级应用架构
-
实现自定义渲染器
-
贡献开源社区
12.4 开源贡献指南
A2UI是开源项目,欢迎贡献:
代码贡献:
-
实现新组件
-
优化性能
-
修复Bug
-
改进文档
社区贡献:
-
分享使用经验
-
编写教程和示例
-
翻译文档
-
回答问题
生态建设:
-
开发工具和插件
-
创建组件库
-
集成其他框架
-
推广应用案例
12.5 未来展望
A2UI代表了UI开发的新范式------AI驱动的声明式UI。
在不远的将来,我们可能看到:
技术层面:
-
更智能的组件:自适应布局、智能表单验证
-
更强大的AI:理解用户意图,主动优化UI
-
更丰富的生态:各种语言、框架的实现
应用层面:
-
个性化体验:每个用户看到的UI都不同
-
无障碍访问:AI自动生成适配不同能力的UI
-
多模态交互:语音、手势、眼动结合
商业层面:
-
降低开发成本:AI生成UI,减少人工编码
-
加速迭代速度:修改提示词即可调整UI
-
提升用户满意度:动态适应用户需求
12.6 结语
从jQuery到React,从MVC到MVVM,UI开发范式一直在演进。A2UI不是终点,而是AI时代UI开发的新起点。
它告诉我们:UI不必是代码,可以是数据;不必是静态的,可以是生成的;不必是通用的,可以是个性化的。
作为开发者,我们站在这个激动人心的转折点上。掌握A2UI,就是掌握未来UI开发的钥匙。
希望本文能帮助你深入理解A2UI的技术细节,在实际项目中应用这个革命性的技术。让我们一起,用AI重新定义用户界面!
附录
A. 完整代码示例
完整的示例代码可以在GitHub仓库找到:
-
核心库:
src/A2UI.Core/ -
Blazor组件:
src/A2UI.Blazor.Components/ -
Agent SDK:
src/A2UI.AgentSDK/ -
示例应用:
samples/A2UI.Sample.BlazorServer/