一、Vert.x框架介绍
Vert.x(全称Eclipse Vert.x)是一个基于时间驱动、非阻塞的轻量级应用框架。他不是传统意义上的"应用服务器",而是一套工具集,可以用来构建高性能、可伸缩的分布式应用。
二、Vert.x框架特点
1、高性能:Vert.x完全基于事件循环(Event Loop)和非阻塞 I/O 模型构建;
2、轻量级:无侵入,低开销;Vert.x不是"重量级应用服务器",而是一套轻量级工具集;无需部署到 Tomcat/Jetty 等容器,main 方法即可启动,启动时间毫秒级(对比 Spring Boot 秒级启动);运行时内存占用极低,可轻松嵌入到小型设备(如 IoT 网关)或作为微服务的轻量组件。核心包(vertx-core)仅几十 KB,其他组件(如 Web、Redis 客户端)按需引入,不引入冗余依赖。
3、支持多语言:原生支持Java、Kotlin、Scala、JavaScript、Groovy、Ruby 等;不同语言编写的Vertical可通过事件总线无缝通信(例如Java写的核心逻辑,可调用JS写的脚本组件);
4、弹性伸缩:适配多核与分布式;
5、丰富的组件生态:网络通信(HTTP/HTTPS、TCP/UDP、WebSocket、gRPC)、数据存储(JDBC、Redis、MongoDB、Elasticsearch)、消息队列(Kafka、RabbitMQ、ActiveMQ 集成)、工具类(配置管理、日志、限流、熔断、认证授权);
6、API兼容性强,版本迭代稳定;
7、可与传统框架集成:例如与Spring Boot、Quarkus等框架无缝集成。
三、场景1:使用Vert.x的网络通信,请求DataDex的JSON数据
1、在DataDex官网中,构建托管的JSON数据报文
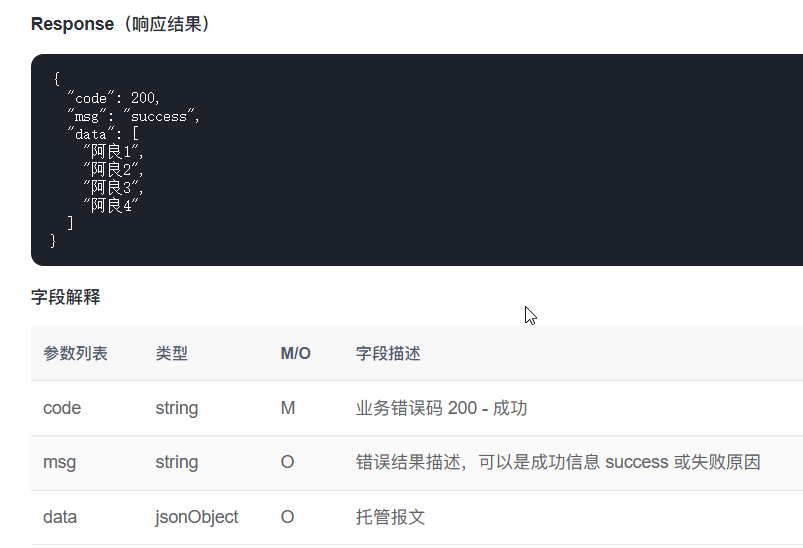
2、使用hutool工具,进行http网络请求获取JSON数据
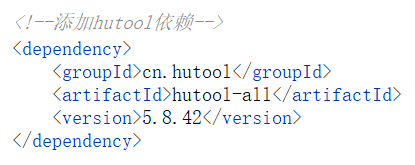
maven工程添加依赖:
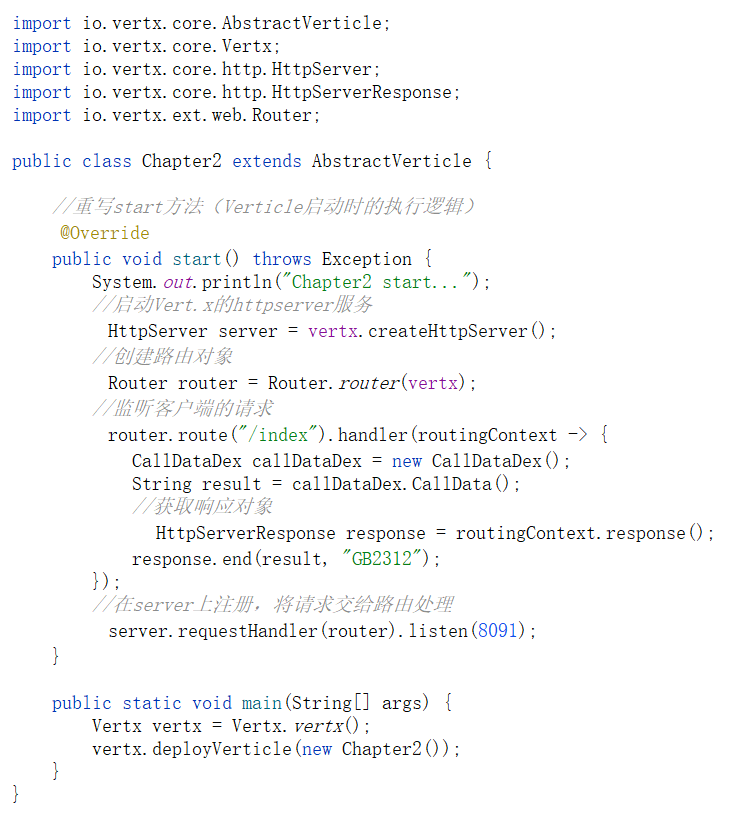
创建类callDataDex
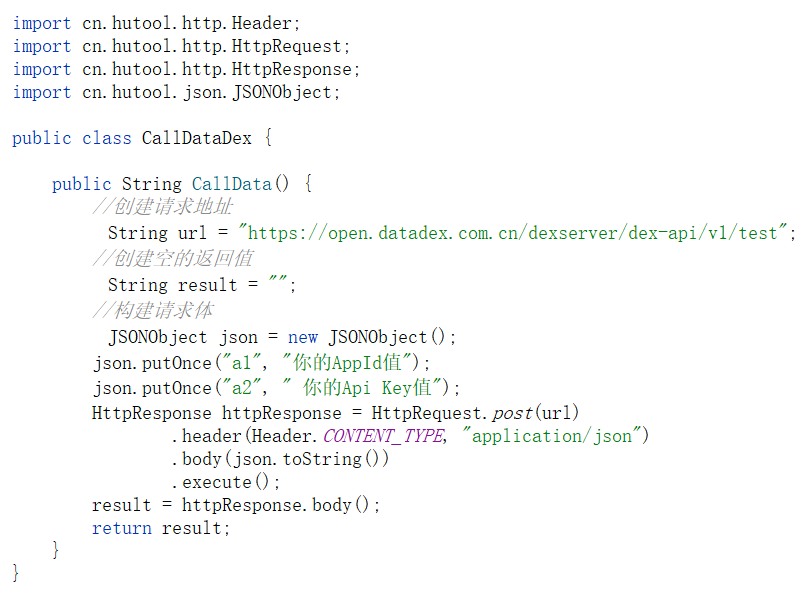
创建vert.x实例,获取的JSON数据,防止中文出现乱码,使用GB2312字节编码(默认使用UTF-8编码)
运行结果:

四、场景2、vert.x 结合th模板语言和MySql数据库作结合,模拟实现登录功能
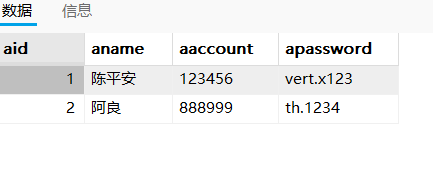
1、创建表t_admin
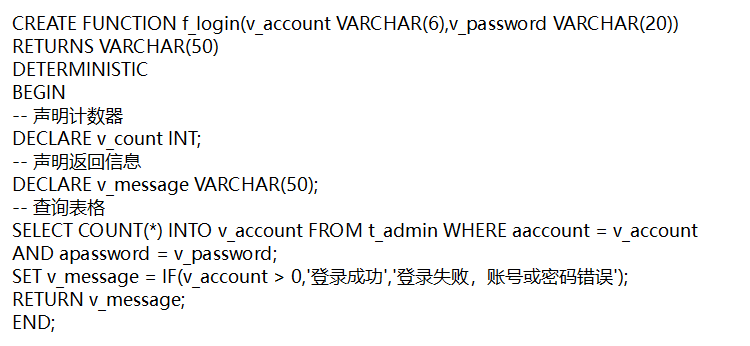
2、构建自定义函数,输入账号和密码,返回登录情况
3、创建DBController连接数据库,调用自定义函数,获取登录情况
public class DBController {
    //创建连接对象
    private Connection connection;

    public DBController() {
        //加载数据库驱动
        try {
            Class.forName("com.mysql.cj.jdbc.Driver");
            connection = DriverManager.getConnection("jdbc:mysql://127.0.0.1:3306/student", "root", "123456");
            System.out.println("成功连接到数据库student");
        } catch (ClassNotFoundException e) {
            throw new RuntimeException(e);
        } catch (SQLException e) {
            throw new RuntimeException(e);
        }
    }

    //创建方法,调用自定义函数,判断是否登录成功
    public String callFunc(String account, String password) {
        //即将执行的sql语句
        String sql = "{ ? = call f_login(?,?)}";
        //获取返回结果
        String result = "";
        try {
            //预执行语句
            CallableStatement callStmt = this.connection.prepareCall(sql);
            //注册参数
            callStmt.registerOutParameter(1, Types.VARCHAR);
            callStmt.setString(2, account);
            callStmt.setString(3, password);
            //执行自定义函数
            callStmt.execute();
            //获取返回结果
            result = callStmt.getString(1);
            System.out.println("登录的结果为:" + result);
        } catch (SQLException e) {
            throw new RuntimeException(e);
        }
        return result;
    }
}
4、创建类Login,配置路由"/login":使用表单获取用户的账号和密码信息;"/index":用于显示用户的登录情况。
public class Login extends AbstractVerticle {

    @Override
    public void start() {
        System.out.println("start...");
        //启动httpserver服务
        HttpServer server = vertx.createHttpServer();
        Router router = Router.router(vertx);

        //创建Thymelea模板引擎实例
        ThymeleafTemplateEngine engine = ThymeleafTemplateEngine.create(vertx);
        System.out.println("1.-->" + engine);
        //注册BodyHandler(处理表单参数)
        router.route().handler(BodyHandler.create());

        router.get("/login").handler(routingContext -> {
            System.out.println("2.-->" + routingContext);
            JsonObject renderData = new JsonObject()
                    .put("title", "用户登录")
                    .put("errorMsg", "服务器繁忙"); // 预留错误提示字段
            engine.render(renderData, "templates/login.html", res -> {
                if (res.succeeded()) {
                    HttpServerResponse response = routingContext.response();
                    response.putHeader("content-type", "text/html").end(res.result());
                } else {
                    routingContext.fail(res.cause());
                }
            });
        });

        router.post("/index").handler(routingContext -> {
            String account = routingContext.request().getParam("account");
            String password = routingContext.request().getParam("password");
            System.out.println("获取的account:" + account + ",密码为:" + password);
            DBController dbController = new DBController();
            String result = dbController.callFunc(account, password);
            System.out.println("result:" + result);
            HttpServerResponse response = routingContext.response();
            response.putHeader("content-type", "text/html").end(result, "GB2312");
        });

        //设置监听的端口号
        server.requestHandler(router).listen(8900);
    }

    public static void main(String[] args) {
        Vertx vertx = Vertx.vertx();
        vertx.deployVerticle(new Login());
    }
}
******pom.xml文件添加的依赖
    <dependencies>
        <dependency>
            <groupId>io.vertx</groupId>
            <artifactId>vertx-core</artifactId>
            <version>4.5.1</version>
        </dependency>

        <dependency>
            <groupId>io.vertx</groupId>
            <artifactId>vertx-web</artifactId>
            <version>4.5.1</version> <!-- 使用最新的版本号 -->
        </dependency>
        <!-- Vert.x 整合 Thymeleaf 核心依赖 -->
        <dependency>
            <groupId>io.vertx</groupId>
            <artifactId>vertx-web-templ-thymeleaf</artifactId>
            <version>4.5.1</version>
        </dependency>
        <!--添加hutool依赖-->
        <dependency>
            <groupId>cn.hutool</groupId>
            <artifactId>hutool-all</artifactId>
            <version>5.8.42</version>
        </dependency>
        <!-- MySQL数据库依赖   -->
        <dependency>
            <groupId>mysql</groupId>
            <artifactId>mysql-connector-java</artifactId>
            <version>8.0.23</version>
        </dependency>
    </dependencies>
5、登录页面html语言构建
......
<body>
<div class="login-container">
<h2 class="login-title">用户登录</h2>
<form method="post" action="/index">
<div class="input-group">
<label class="input-label" for="account">账号</label>
<input type="text" id="account" name="account" class="input-field" placeholder="请输入您的账号" required>
</div>
<div class="input-group">
<label class="input-label" for="password">密码</label>
<input type="password" id="password" name="password" class="input-field password-field" placeholder="请输入您的密码" required>
</div>
<button type="submit" class="login-btn" >登录</button>
</form>
</div>
</body>
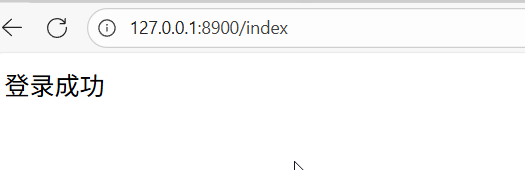
</html>6、运行结果
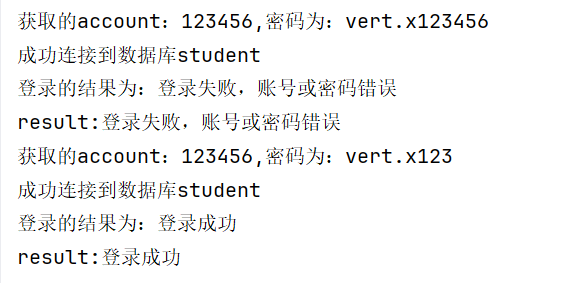
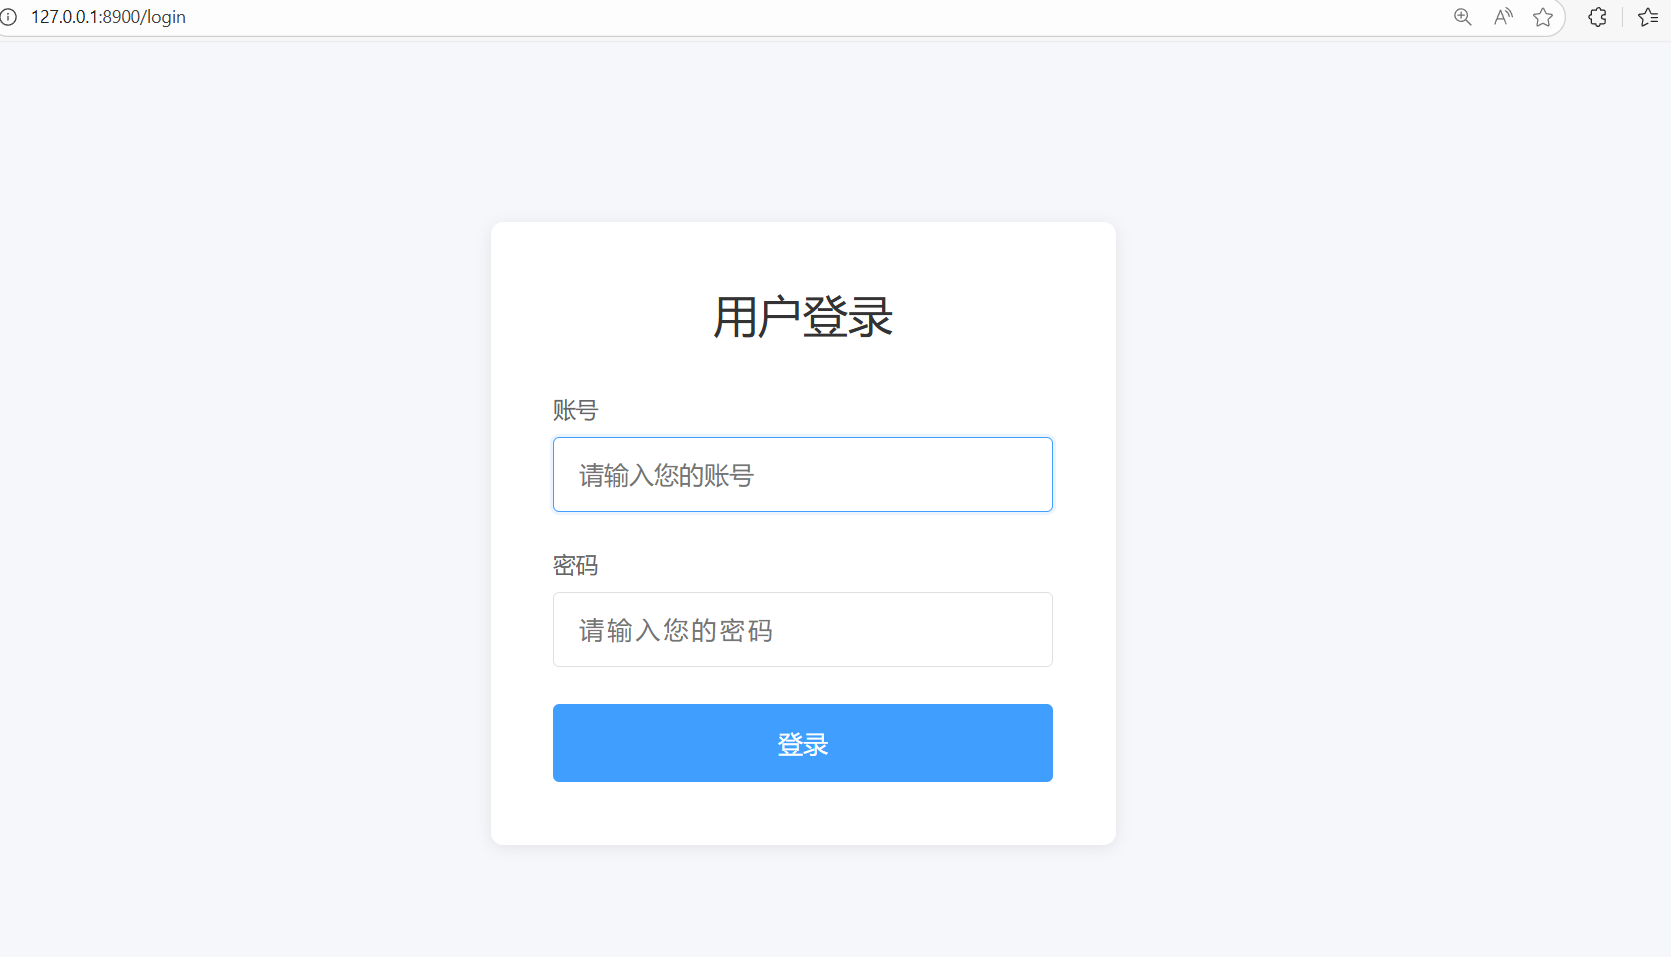
登录界面:
输入账号密码跳转至index路由:登录失败/登录成功

控制台输出结果: