一、集合
1.1.数组
cs
//定义
string[] devices = new string[3];
//增
devices[0] = "电机A";
devices[1] = "传感器B";
//删
无法真正删除只能是跳过这个元素赋值给新数组
//改
devices[0]="电机B";
1.2.List
注意改的时候任然使用索引器,但是List虽然是动态列表但是只能使用Add函数来增加位数,不能直接devices100=''hello''这样会超出数组索引范围
cs
//定义
var devices = new List<string> { "电机A", "传感器B", "PLC-C" };
//增
devices.Add("变频器D");
//改
devices[3] = "PLC-C升级版";
//按照值删除
devices.Remove("传感器B");
//按照索引删除
devices.RemoveAt(0);
//查
string s = devices[0];
1.3.observableCollection(可观察集合)
**特点:**只要修改observableCollection的元素就会通知ui变化,无需手动通知
注意:当元素内部变化,例如元素为对象,对象的属性值发生就不会通知
cs
//定义
var devices = new ObservableCollection<string> { "电机A", "传感器B", "PLC-C" };
//增
devices.Add("变频器D");
devices.Insert(0, "编码器E");
Console.WriteLine("--增---");
//删
Console.WriteLine("--删---");
devices.Remove("传感器B");
devices.RemoveAt(2);
//改
devices[0] = "1111";
//查
string st = devices[0];
//清空
devices.Clear()(通知 UI)
二、动态生成
通过绑定集合的方式来实现动态生成ui上的控件
ItemsSource:绑定一个集合 (如 List<T>),是数据的来源
XML
<ItemsControl ItemsSource="{Binding MyDataList}" />
XML
<ItemsControl.ItemTemplate>
    <DataTemplate>
        <!-- 这里写"单行"的布局 -->
        <TextBlock Text="{Binding Name}" />
        <Ellipse Fill="{Binding Color}" ... />
    </DataTemplate>
</ItemsControl.ItemTemplate>
后台:
cs
namespace 模板try
{
    /// <summary>
    /// Interaction logic for MainWindow.xaml
    /// </summary>
    public partial class MainWindow : Window
    {
        public ObservableCollection<string> StatusItems { get; set; }
        = new ObservableCollection<string> { "Item1", "Item2", "Item3" };
        public MainWindow()
        {
            InitializeComponent();
            DataContext = this;
        }
    }
}
三、转换器的简单使用
目的:解决UI 需要的属性和数据源的值类型不匹配的问题
例一:根据布尔值切换红绿灯
要求:显示一个圆形"灯":true → 绿色,false → 红色。
但是WPF 的绑定系统不能自动把 bool 翻译成 Brush去将true变成灯的绿色,所以我们需要一个"翻译官"------这就是 转换器(Converter)
第一步:创建类文件继承IValueConverter,自动实现接口
cs
namespace CPA.Converters
{
    public class BoolToBrushConverter : IValueConverter
    {
        public object Convert(object value, Type targetType, object parameter, CultureInfo culture)
        {//"#FF0000"
            if (value is bool && (bool)value == true)
                return new SolidColorBrush(Color.FromRgb(0xFF, 0x00, 0x00));
            return new SolidColorBrush(Color.FromRgb(0x71, 0xFF, 0x30));
        }

        public object ConvertBack(object value, Type targetType, object parameter, CultureInfo culture)
        {
            throw new NotImplementedException();
        }
    }
}
|--------------|---------------------------|
| value | 绑定源的值(这里是 属性的值,比如 true) |
| targetType | 使用转换的控件属性 |
| parameter | 可携带参数 |
| culture | 本地化信息(如中文/英文环境,本例忽略) |
xaml中使用:
cs
  <Rectangle
      Width="30"
      Height="20"
      HorizontalAlignment="Left"
      VerticalAlignment="Center"
      Fill="{Binding IsOn, Converter={StaticResource BoolToBrush}}"
      Stroke="Black"
StrokeThickness="1"/>例二:利用TargetType和Parameter来实现一个转换器解决多个数据和ui属性不匹配
ui:
cs
<TextBlock
    VerticalAlignment="Center"
    FontSize="12"
    Text="{Binding InputValue, Converter={StaticResource ByteTwoBitsConverter}, ConverterParameter=High}"
    TextAlignment="Center" />
转换器:根据输入参数来返回不同结果
cs
  class ByteTwoBitsConverter : IValueConverter
  {
      public object Convert(object value, Type targetType, object parameter, CultureInfo culture)
      {

          if (value is byte b&& parameter is string para)
          {
               if (para == "Middle")
                  return ((b >> 4) & 0b11); // 提取次高两位
              else if (para == "High")
                  return ((b >> 6) & 0b11).ToString(); // 提取高两位
          }
          return "0";
      }

      public object ConvertBack(object value, Type targetType, object parameter, CultureInfo culture)
      {
          throw new NotImplementedException();
      }
  }
四、使用位运算符取二进制每一bit办法
**使用场景:**Byte每一位都有单独的意义,而非只是作为数据的存储单位
掩码定义: 就像用一张带孔的纸盖在数字上,只有孔对应的位置能被看到,其余部分被"遮住"了 ------ 这张"带孔的纸"就是掩码(实现只展示想要的数据的工具)
**左位移和右位移的本质:**右位移的本质是右移n位等于原值除以2的n次方(类比10进制,100右移一位为10)
4.1使用掩码&(源数据位移运算值)取目标位
只需要掩码目标位数的二进制值为1即可,下面进行位运算只是为了降低数值含义
4.1.1取固定几位
cs
byte value = 0b11010010; // 示例:二进制 11010010

// 取高两位:右移 6 位,保留最低 2 位
int highTwoBits = (value >> 6) & 0b11; // 或 & 3
//右移6位等价于除以2的6次方
int hignTwoBits=(value&0b11000000)/64;

Console.WriteLine(highTwoBits); // 输出: 3 (因为 11b = 3)
4.1.2取每一位
value&掩码,只有当和掩码对应那一位为1时才等于掩码的值。
cs
byte value = 0b10110000; // 或 Convert.ToByte("10110000", 2);
for (int i = 7; i >= 0; i--)
{
     //将掩码值转换为bool类型
   // isOn 就是第 i 位的状态
    bool isOn = (value & (1 << i)) != 0;
 //取出该位的值
Byte BitValue = (value & (1 << i));
}
五、依赖属性
依赖属性(Dependency Property) 是 WPF(Windows Presentation Foundation)的核心机制之一,它为数据绑定、动画、样式、模板、资源等高级功能提供了底层支持。
当前场景
在用户控件中使用依赖属性来作为用户控件的输入
怎么使用?
1.propdp+两次tab
cs
//这是依赖属性包装器
public int MyProperty
       {
           get { return (int)GetValue(MyPropertyProperty); }
           set { SetValue(MyPropertyProperty, value); }
       }

       //下面是依赖属性
       public static readonly DependencyProperty MyPropertyProperty =
           DependencyProperty.Register(
"MyProperty",//属性名称要和包装器相同
 typeof(int),//属性类型
 typeof(BitStatusDisplay),//属性所属类
 new PropertyMetadata(0));//初始值,这个非必须,不填默认为类型的默认值
2.PropertyMetadata有重载方法,使用ctrl+左键点开PropertyMetadata

增加回调函数的依赖属性
cs
     public int MyProperty
     {
         get { return (int)GetValue(MyPropertyProperty); }
         set { SetValue(MyPropertyProperty, value); }
     }

     public static readonly DependencyProperty MyPropertyProperty =
         DependencyProperty.Register("MyProperty", typeof(int), typeof(BitStatusDisplay), new PropertyMetadata(0, OnMyPropertyChanged));

     private static void OnMyPropertyChanged(DependencyObject d, DependencyPropertyChangedEventArgs e)
     {
         throw new NotImplementedException();
     }
回调函数怎么生成?
直接写函数名,然后使用提示创建函数
注意:回调函数是静态方法无法直接调用非静态方法,只能通过实例来调用
回调函数的调用时机
当值改变的时候自动调用
注意: 无论哪种方式(xaml,绑定,动画)修改依赖属性,WPF 都会触发回调和绑定更新;但只有 C# 赋值会调用 属性中的set,C# 赋值会走完整链路:set → SetValue → 回调 → 绑定更新,原因是Setvalue方法
c#赋值例如:
cs
bitStatusDisplay.MyProperty = 42;
cs
     public int MyProperty
     {
         get { return (int)GetValue(MyPropertyProperty); }
         set { SetValue(MyPropertyProperty, value); }
     }

     public static readonly DependencyProperty MyPropertyProperty =
         DependencyProperty.Register("MyProperty", typeof(int), typeof(BitStatusDisplay), new PropertyMetadata(0, OnMyPropertyChanged));

     private static void OnMyPropertyChanged(DependencyObject d, DependencyPropertyChangedEventArgs e)
     {
         throw new NotImplementedException();
     }
核心语句
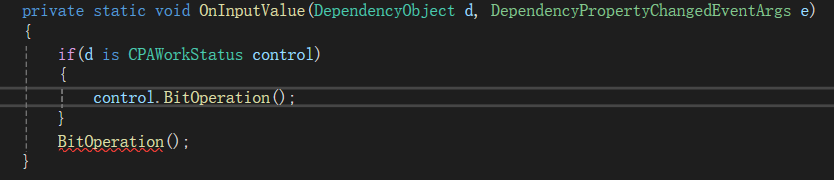
这里很有意思,当前的场景是在用户控件中使用依赖属性来作为用户控件的输入,那么传入的d就是用户控件本身,根据形式参数的字段=实际参数的地址,那么其实是多态的写法,但是现在不是要多态,而是要调用子类自定义的类型和方法,必须要转换为子类类型
通常is关键字表示是,写法如下,返回值为bool类型
cs
bool aa=human is animal下面是高级特性,可以实现转换,将d重命名为BitStatusDisplay类型的control
cs
if (d is BitStatusDisplay control)
{}
参数内容
DependencyPropertyChangedEventArgs e函数参数:
e.OldValue→ 变化前的值(object类型)e.NewValue→ 变化后的值(object类型)