背景需求
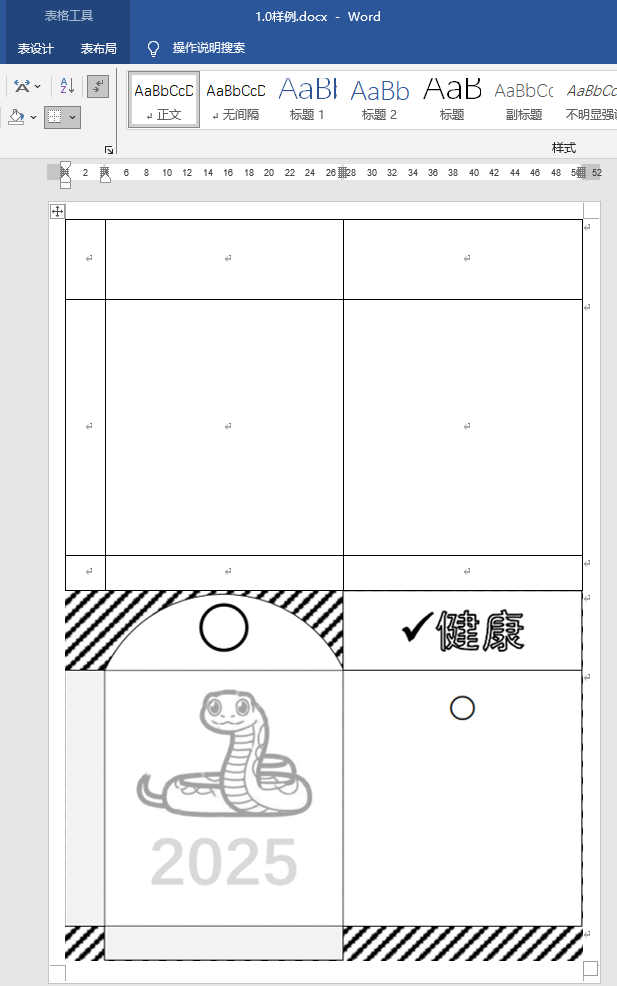
前期用WORD模版做蛇年红包
【教学类-89-01】20250127新年篇01------ 蛇年红包(WORD模版)![]() https://mp.csdn.net/mp_blog/creation/editor/145259449
https://mp.csdn.net/mp_blog/creation/editor/145259449
当时是用WORD,插入背景图片和小蛇图案费了很长时间,所以很希望明年2025过年时,用Python代码做出这个红包样式)
Python红包模版图片
今年我想找红包模版,发现已经找不到了o(╥﹏╥)o,
就用原来的CSDN上的模版图片做了图片版,预设了图片每个格子的大小和坐标
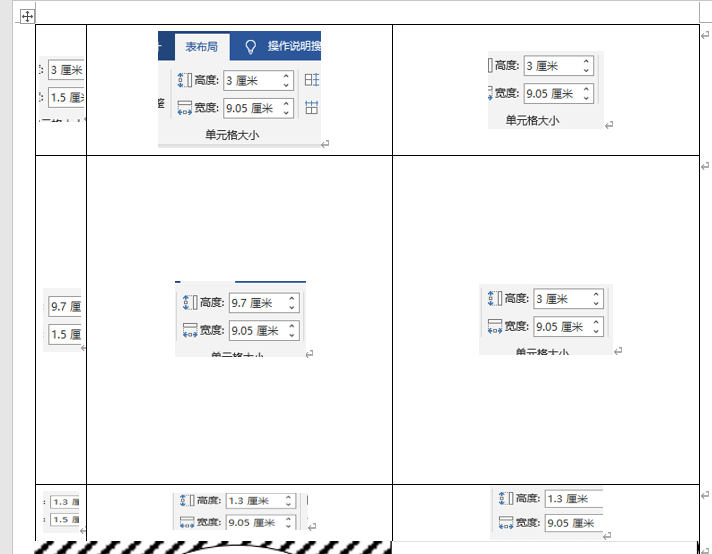
图片整张是1960*140的大小
代码展示
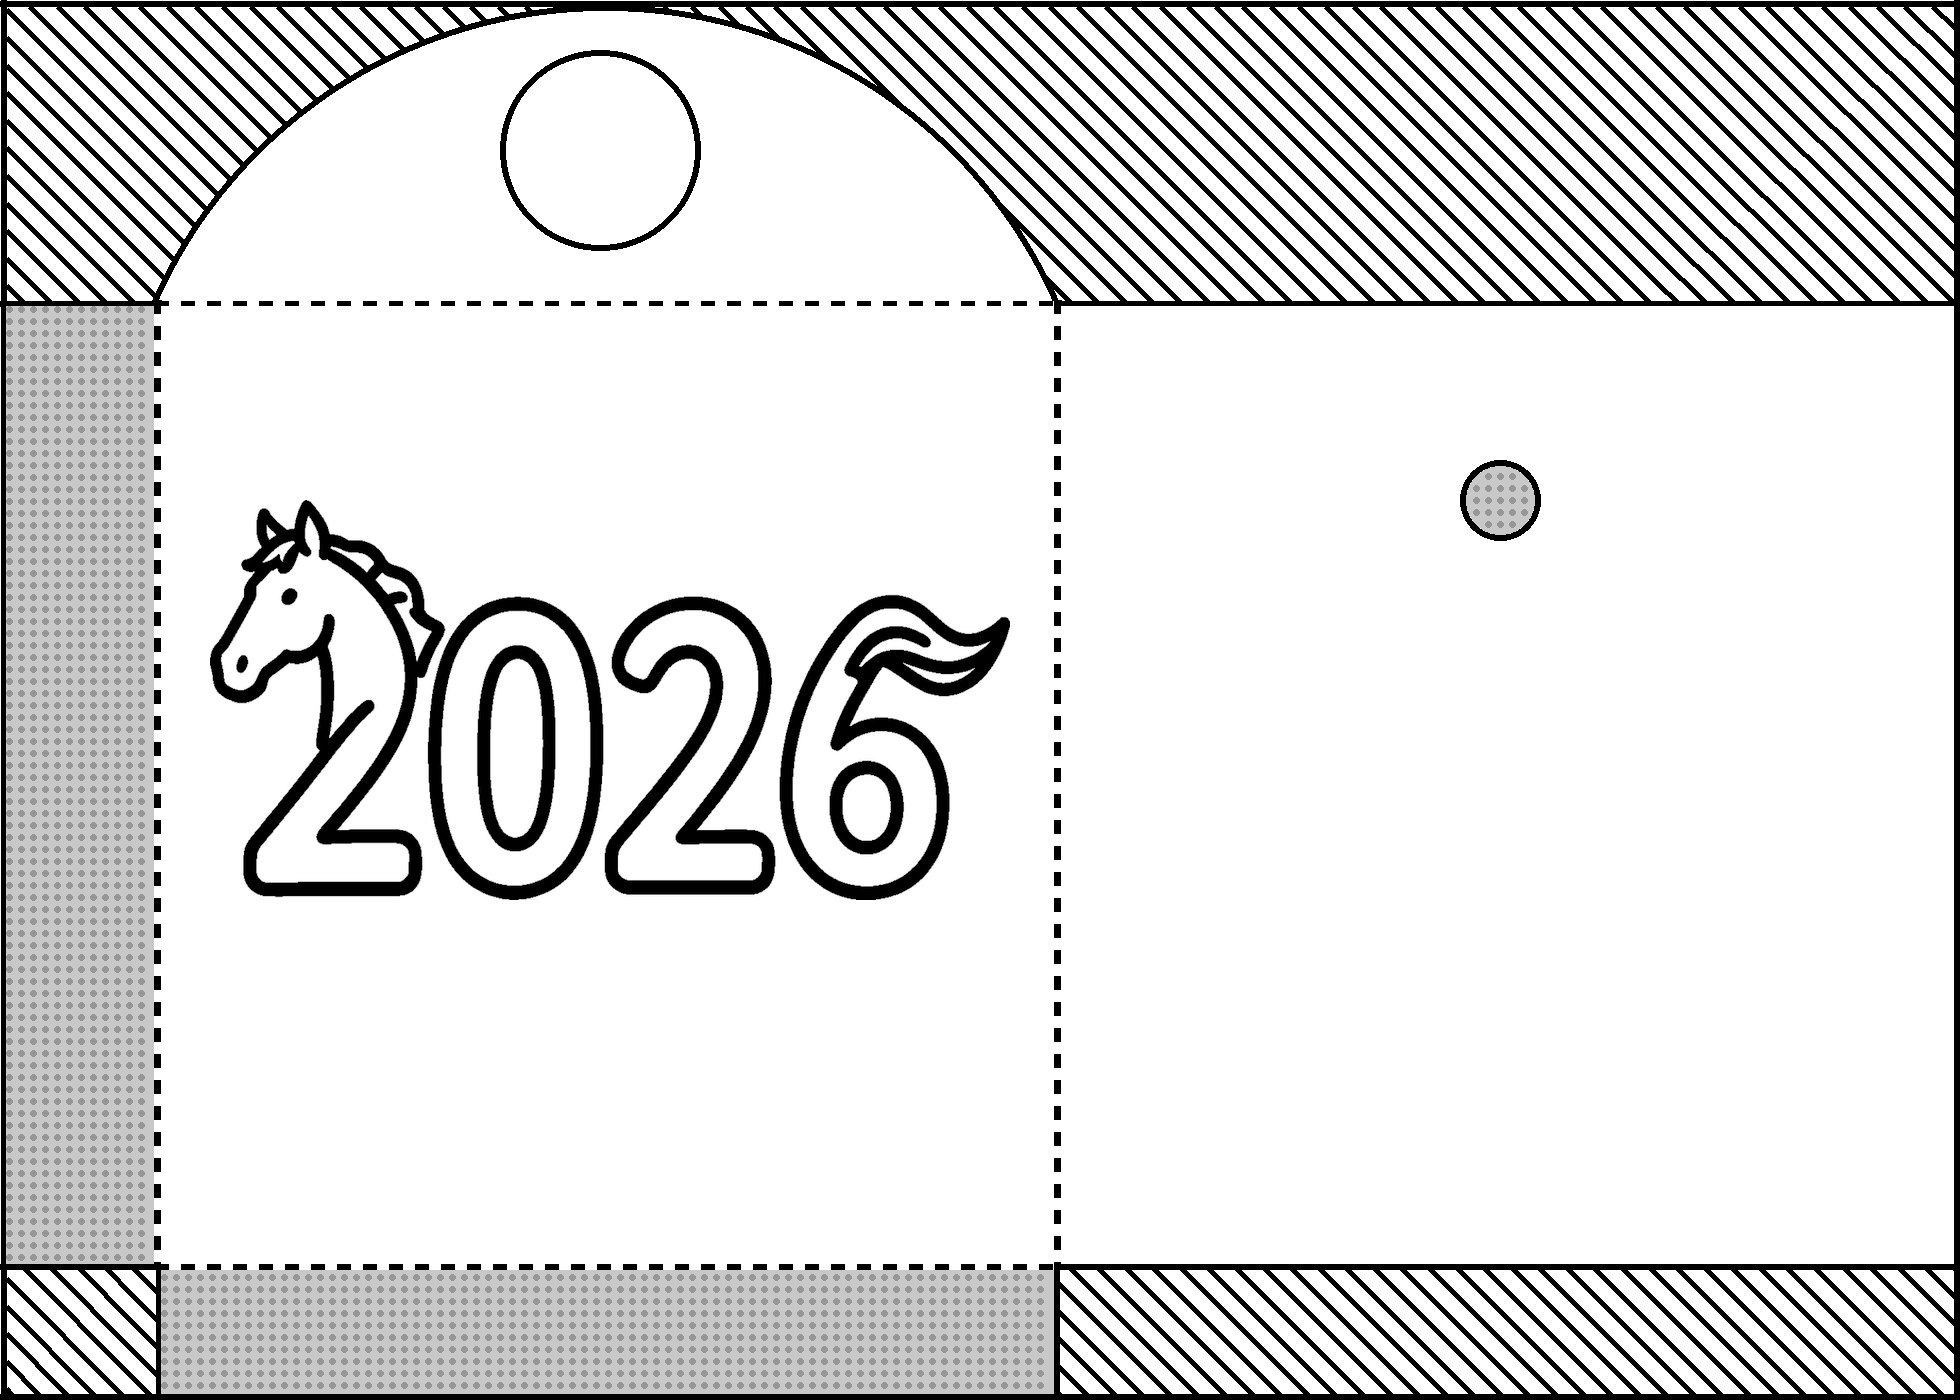
 一、制作背景图片(红包基础图)
python
'''
马年2026红包基础背景图
Deepseek,阿夏
20251229
'''
from PIL import Image, ImageDraw
import math
def create_background_with_debug_and_rectangle():
# 创建图像
width = 1960
height = 1400
# 创建白色背景
image = Image.new('RGB', (width, height), 'white')
draw = ImageDraw.Draw(image)
# 边框宽度
border_px = int(5 * 1.33)
# 斜线参数
line_px = int(5 * 1.33)
spacing_px = int(30 * 1.33)
# 计算内边缘
inner_top = border_px
inner_bottom = height - border_px
inner_left = border_px
inner_right = width - border_px
# 画参考线(红色,用于调试)
# 内边缘参考线
draw.rectangle([(inner_left, inner_top), (inner_right, inner_bottom)],
outline='red', width=1)
# 计算45度斜线的间距
step = spacing_px / math.sqrt(2)
# 画斜线
b = -inner_right
while b <= inner_bottom:
points = []
# 计算线与内边缘的交点
y1 = inner_left + b
if inner_top <= y1 <= inner_bottom:
points.append((inner_left, y1))
y2 = inner_right + b
if inner_top <= y2 <= inner_bottom:
points.append((inner_right, y2))
x1 = inner_top - b
if inner_left <= x1 <= inner_right:
points.append((x1, inner_top))
x2 = inner_bottom - b
if inner_left <= x2 <= inner_right:
points.append((x2, inner_bottom))
# 如果有两个交点,画线
if len(points) == 2:
points.sort(key=lambda p: p[0])
draw.line([points[0], points[1]], fill='black', width=line_px)
b += step
# 画黑色边框
# 上边线
draw.line([(0, border_px//2), (width-1, border_px//2)],
fill='black', width=border_px)
# 下边线
draw.line([(0, height-1 - border_px//2), (width-1, height-1 - border_px//2)],
fill='black', width=border_px)
# 左边线
draw.line([(border_px//2, 0), (border_px//2, height-1)],
fill='black', width=border_px)
# 右边线
draw.line([(width-1 - border_px//2, 0), (width-1 - border_px//2, height-1)],
fill='black', width=border_px)
# 画长方形(5磅黑线边框,白色填充)
rect_border_px = int(5 * 1.33) # 5磅边框
dash_length_px = int(10 * 1.33) # 虚线黑色线段长度(10磅)
gap_length_px = int(10 * 1.33) # 虚线白色间距长度(10磅)
dash_pattern_length = dash_length_px + gap_length_px # 一个完整虚线段的长度
# 点子参数
dot_diameter = int(5 * 1.33) # 5磅直径
dot_spacing = int(5 * 1.33) # 5磅间距
dot_color = (150, 150, 150) # 深灰色
dot_radius = dot_diameter // 2
dot_step = dot_diameter + dot_spacing # 点子直径+间距
# ========== 第一步:先画第3个矩形 ==========
# 第三个长方形:在(150, 500)位置画一个1560高×905宽的长方形,四条边都是5磅黑色实线,填充灰色(200,200,200)
rect3_x = 155 # 左上角x坐标
rect3_y = 500 # 左上角y坐标
rect3_width = 905 # 宽度
rect3_height = 1560 # 高度
# 计算第三个长方形的位置和尺寸,确保不超出图像边界
rect3_right = min(rect3_x + rect3_width, width)
rect3_bottom = min(rect3_y + rect3_height, height)
print(f"第一个绘制:第三个长方形位置: ({rect3_x}, {rect3_y})")
print(f"第三个长方形尺寸: {rect3_width} × {rect3_height}")
# 计算内部区域(去掉边框后的区域)
inner_left3 = rect3_x + rect_border_px
inner_top3 = rect3_y + rect_border_px
inner_right3 = rect3_right - 1 - rect_border_px
inner_bottom3 = rect3_bottom - 1 - rect_border_px
# 画第三个长方形上边线(实线)
top_line_y3 = rect3_y + rect_border_px//2
draw.line([(rect3_x, top_line_y3), (rect3_right-1, top_line_y3)],
fill='black', width=rect_border_px)
# 画第三个长方形下边线(实线)
bottom_line_y3 = rect3_bottom - 1 - rect_border_px//2
draw.line([(rect3_x, bottom_line_y3), (rect3_right-1, bottom_line_y3)],
fill='black', width=rect_border_px)
# 画第三个长方形左边线(实线)
left_line_x3 = rect3_x + rect_border_px//2
draw.line([(left_line_x3, rect3_y), (left_line_x3, rect3_bottom-1)],
fill='black', width=rect_border_px)
# 画第三个长方形右边线(实线)
right_line_x3 = rect3_right - 1 - rect_border_px//2
draw.line([(right_line_x3, rect3_y), (right_line_x3, rect3_bottom-1)],
fill='black', width=rect_border_px)
# 填充第三个长方形灰色内部
draw.rectangle(
[(inner_left3, inner_top3),
(inner_right3, inner_bottom3)],
fill=(200, 200, 200) # 浅灰色
)
# 在第三个长方形内部画深灰色点子
# 计算可画点子的区域
dot_area_left3 = inner_left3 + dot_radius
dot_area_top3 = inner_top3 + dot_radius
dot_area_right3 = inner_right3 - dot_radius
dot_area_bottom3 = inner_bottom3 - dot_radius
# 计算可以画多少个点子
num_dots_x3 = int((dot_area_right3 - dot_area_left3) / dot_step) + 1
num_dots_y3 = int((dot_area_bottom3 - dot_area_top3) / dot_step) + 1
print(f"第三个长方形点子数量: {num_dots_x3}×{num_dots_y3} = {num_dots_x3 * num_dots_y3}个")
# 绘制第三个长方形的点子网格
for i in range(num_dots_x3):
for j in range(num_dots_y3):
# 计算点子中心位置
center_x = dot_area_left3 + i * dot_step
center_y = dot_area_top3 + j * dot_step
# 确保点子在区域内
if (center_x <= dot_area_right3 and center_y <= dot_area_bottom3):
# 计算椭圆边界
left = center_x - dot_radius
top = center_y - dot_radius
right = center_x + dot_radius
bottom = center_y + dot_radius
# 画圆点
draw.ellipse([(left, top), (right, bottom)], fill=dot_color)
# ========== 在第一步后面添加:画一个圆形 ==========
# 在(600, 500)的坐标上画一个直径为996的黑边5磅实线圆形,填充白色
circle_center_x = 605
circle_center_y = 500
circle_diameter = 990
circle_radius = circle_diameter // 2
print(f"\n绘制大圆形:中心位置({circle_center_x}, {circle_center_y}),直径{circle_diameter}")
# 计算圆形的边界框
circle_left = circle_center_x - circle_radius
circle_top = circle_center_y - circle_radius
circle_right = circle_center_x + circle_radius
circle_bottom = circle_center_y + circle_radius
# 先画白色填充的圆形
draw.ellipse([(circle_left, circle_top), (circle_right, circle_bottom)],
fill='white', outline='black', width=rect_border_px)
# 如果需要更精确的边框控制,也可以分别画填充和边框
# 填充白色
draw.ellipse([(circle_left + rect_border_px, circle_top + rect_border_px),
(circle_right - rect_border_px, circle_bottom - rect_border_px)],
fill='white')
# 画5磅黑色边框
draw.ellipse([(circle_left, circle_top), (circle_right, circle_bottom)],
outline='black', width=rect_border_px)
# ========== 第1步:再画第1个矩形 ==========
# 第一个长方形:在(0, 300)位置画一个970高×160宽的长方形,右边线虚线,填充灰色(200,200,200)
rect1_x = 0 # 左上角x坐标
rect1_y = 300 # 左上角y坐标
rect1_width = 160 # 宽度(3-6格子全部做)
rect1_height = 970 # 高度
# 计算长方形的位置和尺寸,确保不超出图像边界
rect1_right = min(rect1_x + rect1_width, width)
rect1_bottom = min(rect1_y + rect1_height, height)
print(f"\n第二个绘制:第一个长方形位置: ({rect1_x}, {rect1_y})")
print(f"第一个长方形尺寸: {rect1_width} × {rect1_height}")
# 画第一个长方形上边线(实线)
top_line_y1 = rect1_y + rect_border_px//2
draw.line([(rect1_x, top_line_y1), (rect1_right-1, top_line_y1)],
fill='black', width=rect_border_px)
# 画第一个长方形下边线(实线)
bottom_line_y1 = rect1_bottom - 1 - rect_border_px//2
draw.line([(rect1_x, bottom_line_y1), (rect1_right-1, bottom_line_y1)],
fill='black', width=rect_border_px)
# 画第一个长方形左边线(实线)
left_line_x1 = rect1_x + rect_border_px//2
draw.line([(left_line_x1, rect1_y), (left_line_x1, rect1_bottom-1)],
fill='black', width=rect_border_px)
# 画第一个长方形右边线(虚线:5磅黑线,黑色线段10磅,白色间距10磅)
right_line_x1 = rect1_right - 1 - rect_border_px//2
# 绘制第一个长方形右边虚线(改进版:确保白色间距为白色)
y_start1 = rect1_y
y_end1 = rect1_bottom - 1
line_length1 = y_end1 - y_start1
num_dashes1 = int(line_length1 / dash_pattern_length) + 1
# 先画一条完整的白色实线作为底色
draw.line([(right_line_x1, y_start1), (right_line_x1, y_end1)],
fill='white', width=rect_border_px)
# 然后在上面的白色底线上画黑色虚线
for i in range(num_dashes1):
dash_y_start = y_start1 + i * dash_pattern_length
dash_y_end = min(dash_y_start + dash_length_px, y_end1)
if dash_y_start < y_end1 and dash_y_end > dash_y_start:
draw.line([(right_line_x1, dash_y_start), (right_line_x1, dash_y_end)],
fill='black', width=rect_border_px)
# 计算第一个长方形的内部区域
inner_left1 = rect1_x + rect_border_px
inner_top1 = rect1_y + rect_border_px
inner_right1 = rect1_right - 1 - rect_border_px
inner_bottom1 = rect1_bottom - 1 - rect_border_px
# 填充第一个长方形灰色内部(这会覆盖第三个矩形的部分区域)
draw.rectangle(
[(inner_left1, inner_top1),
(inner_right1, inner_bottom1)],
fill=(200, 200, 200) # 浅灰色
)
# 在第一个长方形内部画深灰色点子
# 计算可画点子的区域
dot_area_left1 = inner_left1 + dot_radius
dot_area_top1 = inner_top1 + dot_radius
dot_area_right1 = inner_right1 - dot_radius
dot_area_bottom1 = inner_bottom1 - dot_radius
# 计算可以画多少个点子
num_dots_x1 = int((dot_area_right1 - dot_area_left1) / dot_step) + 1
num_dots_y1 = int((dot_area_bottom1 - dot_area_top1) / dot_step) + 1
print(f"第一个长方形点子数量: {num_dots_x1}×{num_dots_y1} = {num_dots_x1 * num_dots_y1}个")
# 绘制第一个长方形的点子网格
for i in range(num_dots_x1):
for j in range(num_dots_y1):
# 计算点子中心位置
center_x = dot_area_left1 + i * dot_step
center_y = dot_area_top1 + j * dot_step
# 确保点子在区域内
if (center_x <= dot_area_right1 and center_y <= dot_area_bottom1):
# 计算椭圆边界
left = center_x - dot_radius
top = center_y - dot_radius
right = center_x + dot_radius
bottom = center_y + dot_radius
# 画圆点
draw.ellipse([(left, top), (right, bottom)], fill=dot_color)
# ========== 第三步:画第2个矩形 ==========
# 第二个长方形:在(150, 300)位置画一个905高×960宽的长方形,四条边都是虚线,白色填充
rect2_x = 155 # 左上角x坐标
rect2_y = 300 # 左上角y坐标
rect2_width = 905 # 宽度
rect2_height = 970 # 高度
# 计算第二个长方形的位置和尺寸,确保不超出图像边界
rect2_right = min(rect2_x + rect2_width, width)
rect2_bottom = min(rect2_y + rect2_height, height)
print(f"\n第三个绘制:第二个长方形位置: ({rect2_x}, {rect2_y})")
print(f"第二个长方形尺寸: {rect2_width} × {rect2_height}")
# 画第二个长方形上边线(虚线)
top_line_y2 = rect2_y + rect_border_px//2
# 绘制上边虚线(从左到右) - 改进版:确保白色间距为白色
x_start2 = rect2_x
x_end2 = rect2_right - 1
line_length_x2 = x_end2 - x_start2
num_dashes_horizontal2 = int(line_length_x2 / dash_pattern_length) + 1
# 先画一条完整的白色实线作为底色
draw.line([(x_start2, top_line_y2), (x_end2, top_line_y2)],
fill='white', width=rect_border_px)
# 然后在上面的白色底线上画黑色虚线
for i in range(num_dashes_horizontal2):
dash_x_start = x_start2 + i * dash_pattern_length
dash_x_end = min(dash_x_start + dash_length_px, x_end2)
if dash_x_start < x_end2 and dash_x_end > dash_x_start:
draw.line([(dash_x_start, top_line_y2), (dash_x_end, top_line_y2)],
fill='black', width=rect_border_px)
# 画第二个长方形下边线(虚线) - 改进版
bottom_line_y2 = rect2_bottom - 1 - rect_border_px//2
# 先画一条完整的白色实线作为底色
draw.line([(x_start2, bottom_line_y2), (x_end2, bottom_line_y2)],
fill='white', width=rect_border_px)
# 然后在上面的白色底线上画黑色虚线
for i in range(num_dashes_horizontal2):
dash_x_start = x_start2 + i * dash_pattern_length
dash_x_end = min(dash_x_start + dash_length_px, x_end2)
if dash_x_start < x_end2 and dash_x_end > dash_x_start:
draw.line([(dash_x_start, bottom_line_y2), (dash_x_end, bottom_line_y2)],
fill='black', width=rect_border_px)
# 画第二个长方形左边线(虚线) - 改进版
left_line_x2 = rect2_x + rect_border_px//2
y_start2 = rect2_y
y_end2 = rect2_bottom - 1
line_length_y2 = y_end2 - y_start2
num_dashes_vertical2 = int(line_length_y2 / dash_pattern_length) + 1
# 先画一条完整的白色实线作为底色
draw.line([(left_line_x2, y_start2), (left_line_x2, y_end2)],
fill='white', width=rect_border_px)
# 然后在上面的白色底线上画黑色虚线
for i in range(num_dashes_vertical2):
dash_y_start = y_start2 + i * dash_pattern_length
dash_y_end = min(dash_y_start + dash_length_px, y_end2)
if dash_y_start < y_end2 and dash_y_end > dash_y_start:
draw.line([(left_line_x2, dash_y_start), (left_line_x2, dash_y_end)],
fill='black', width=rect_border_px)
# 画第二个长方形右边线(虚线) - 改进版
right_line_x2 = rect2_right - 1 - rect_border_px//2
# 先画一条完整的白色实线作为底色
draw.line([(right_line_x2, y_start2), (right_line_x2, y_end2)],
fill='white', width=rect_border_px)
# 然后在上面的白色底线上画黑色虚线
for i in range(num_dashes_vertical2):
dash_y_start = y_start2 + i * dash_pattern_length
dash_y_end = min(dash_y_start + dash_length_px, y_end2)
if dash_y_start < y_end2 and dash_y_end > dash_y_start:
draw.line([(right_line_x2, dash_y_start), (right_line_x2, dash_y_end)],
fill='black', width=rect_border_px)
# 填充第二个长方形白色内部(这会覆盖第三个矩形的部分区域)
draw.rectangle(
[(rect2_x + rect_border_px, rect2_y + rect_border_px),
(rect2_right-1 - rect_border_px, rect2_bottom-1 - rect_border_px)],
fill='white'
)
# ========== 第四步:重复第三步,坐标在(150, 900)开始,但左侧是虚线,上右下都是实线 ==========
# 第四个长方形:在(150, 900)位置画一个905高×960宽的长方形,左侧虚线,上右下实线,白色填充
rect4_x = 1055 # 左上角x坐标
rect4_y = 300 # 左上角y坐标(从900开始)
rect4_width = 905 # 宽度
rect4_height = 970 # 高度
# 计算第四个长方形的位置和尺寸,确保不超出图像边界
rect4_right = min(rect4_x + rect4_width, width)
rect4_bottom = min(rect4_y + rect4_height, height)
print(f"\n第四个绘制:第四个长方形位置: ({rect4_x}, {rect4_y})")
print(f"第四个长方形尺寸: {rect4_width} × {rect4_height}")
# 画第四个长方形上边线(实线)
top_line_y4 = rect4_y + rect_border_px//2
draw.line([(rect4_x, top_line_y4), (rect4_right-1, top_line_y4)],
fill='black', width=rect_border_px)
# 画第四个长方形下边线(实线)
bottom_line_y4 = rect4_bottom - 1 - rect_border_px//2
draw.line([(rect4_x, bottom_line_y4), (rect4_right-1, bottom_line_y4)],
fill='black', width=rect_border_px)
# 画第四个长方形左边线(虚线) - 改进版
left_line_x4 = rect4_x + rect_border_px//2
y_start4 = rect4_y
y_end4 = rect4_bottom - 1
line_length_y4 = y_end4 - y_start4
num_dashes_vertical4 = int(line_length_y4 / dash_pattern_length) + 1
# 先画一条完整的白色实线作为底色
draw.line([(left_line_x4, y_start4), (left_line_x4, y_end4)],
fill='white', width=rect_border_px)
# 然后在上面的白色底线上画黑色虚线
for i in range(num_dashes_vertical4):
dash_y_start = y_start4 + i * dash_pattern_length
dash_y_end = min(dash_y_start + dash_length_px, y_end4)
if dash_y_start < y_end4 and dash_y_end > dash_y_start:
draw.line([(left_line_x4, dash_y_start), (left_line_x4, dash_y_end)],
fill='black', width=rect_border_px)
# 画第四个长方形右边线(实线)
right_line_x4 = rect4_right - 1 - rect_border_px//2
draw.line([(right_line_x4, rect4_y), (right_line_x4, rect4_bottom-1)],
fill='black', width=rect_border_px)
# 填充第四个长方形白色内部(这会覆盖第三个矩形的部分区域)
draw.rectangle(
[(rect4_x + rect_border_px, rect4_y + rect_border_px),
(rect4_right-1 - rect_border_px, rect4_bottom-1 - rect_border_px)],
fill='white'
)
# ========== 在圆形之后添加两个小圆形 ==========
# 第一个小圆形:在(300, 200)位置,直径100,5磅黑色边框,白色填充
small_circle1_x = 600
small_circle1_y = 150
small_circle1_diameter = 200
small_circle1_radius = small_circle1_diameter // 2
print(f"\n绘制小圆形1:中心位置({small_circle1_x}, {small_circle1_y}),直径{small_circle1_diameter}")
# 计算第一个小圆形的边界框
circle1_left = small_circle1_x - small_circle1_radius
circle1_top = small_circle1_y - small_circle1_radius
circle1_right = small_circle1_x + small_circle1_radius
circle1_bottom = small_circle1_y + small_circle1_radius
# 画白色填充的圆形
draw.ellipse([(circle1_left, circle1_top), (circle1_right, circle1_bottom)],
fill='white', outline='black', width=rect_border_px)
# 第二个小圆形:在(600, 200)位置,直径50,5磅黑色边框,灰色填充,带深灰色点点
small_circle2_x = 1500
small_circle2_y = 500
small_circle2_diameter = 80
small_circle2_radius = small_circle2_diameter // 2
print(f"绘制小圆形2:中心位置({small_circle2_x}, {small_circle2_y}),直径{small_circle2_diameter}")
# 计算第二个小圆形的边界框
circle2_left = small_circle2_x - small_circle2_radius
circle2_top = small_circle2_y - small_circle2_radius
circle2_right = small_circle2_x + small_circle2_radius
circle2_bottom = small_circle2_y + small_circle2_radius
# 先画灰色填充
draw.ellipse([(circle2_left + rect_border_px, circle2_top + rect_border_px),
(circle2_right - rect_border_px, circle2_bottom - rect_border_px)],
fill=(200, 200, 200))
# 画黑色边框
draw.ellipse([(circle2_left, circle2_top), (circle2_right, circle2_bottom)],
outline='black', width=rect_border_px)
# 在第二个小圆形内部画深灰色点子
# 计算圆形内部的点子区域
circle_inner_radius = small_circle2_radius - rect_border_px - dot_radius
if circle_inner_radius > 0:
# 计算可以画多少个点子
max_dots = int(circle_inner_radius * 2 / dot_step)
# 从中心开始画点子
for i in range(-max_dots, max_dots + 1):
for j in range(-max_dots, max_dots + 1):
# 计算点子中心位置
center_x = small_circle2_x + i * dot_step
center_y = small_circle2_y + j * dot_step
# 检查点子是否在圆形内部
distance = math.sqrt((center_x - small_circle2_x) ** 2 + (center_y - small_circle2_y) ** 2)
if distance <= circle_inner_radius:
# 计算椭圆边界
left = center_x - dot_radius
top = center_y - dot_radius
right = center_x + dot_radius
bottom = center_y + dot_radius
# 画圆点
draw.ellipse([(left, top), (right, bottom)], fill=dot_color)
# 添加调试信息
print(f"\n绘制顺序: 1.第三个矩形 → 2.大圆形 → 3.两个小圆形 → 4.第一个矩形 → 5.第二个矩形 → 6.第四个矩形")
print(f"长方形边框宽度: {rect_border_px}像素 ({int(rect_border_px/1.33)}磅)")
print(f"虚线参数: {int(dash_length_px/1.33)}磅黑线 + {int(gap_length_px/1.33)}磅白间距")
print(f"灰色填充(200,200,200),深灰色点子(150,150,150)")
print(f"大圆形: 中心(605,500),直径990,5磅黑边,白色填充")
print(f"小圆形1: 中心(300,200),直径100,5磅黑边,白色填充")
print(f"小圆形2: 中心(600,200),直径50,5磅黑边,灰色填充,带深灰色点子")
print(f"虚线改进: 先画白色实线作为底色,再画黑色虚线,确保白色间距为纯白色")
print(f"第四个矩形: 左侧虚线,上、右、下边实线")
return image
# 创建带有长方形的版本
image_with_rect = create_background_with_debug_and_rectangle()
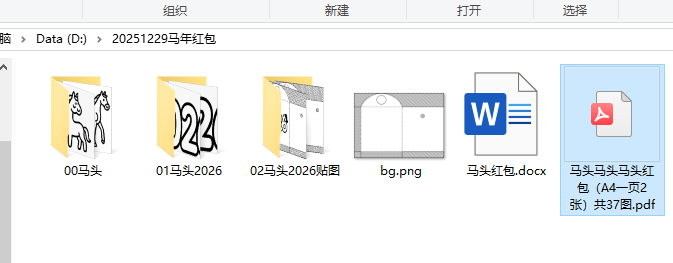
path = r'D:\20251229马年红包'
image_with_rect.save(path + r'\bg.png')
print("图像已保存为 'background_with_rectangle.png'")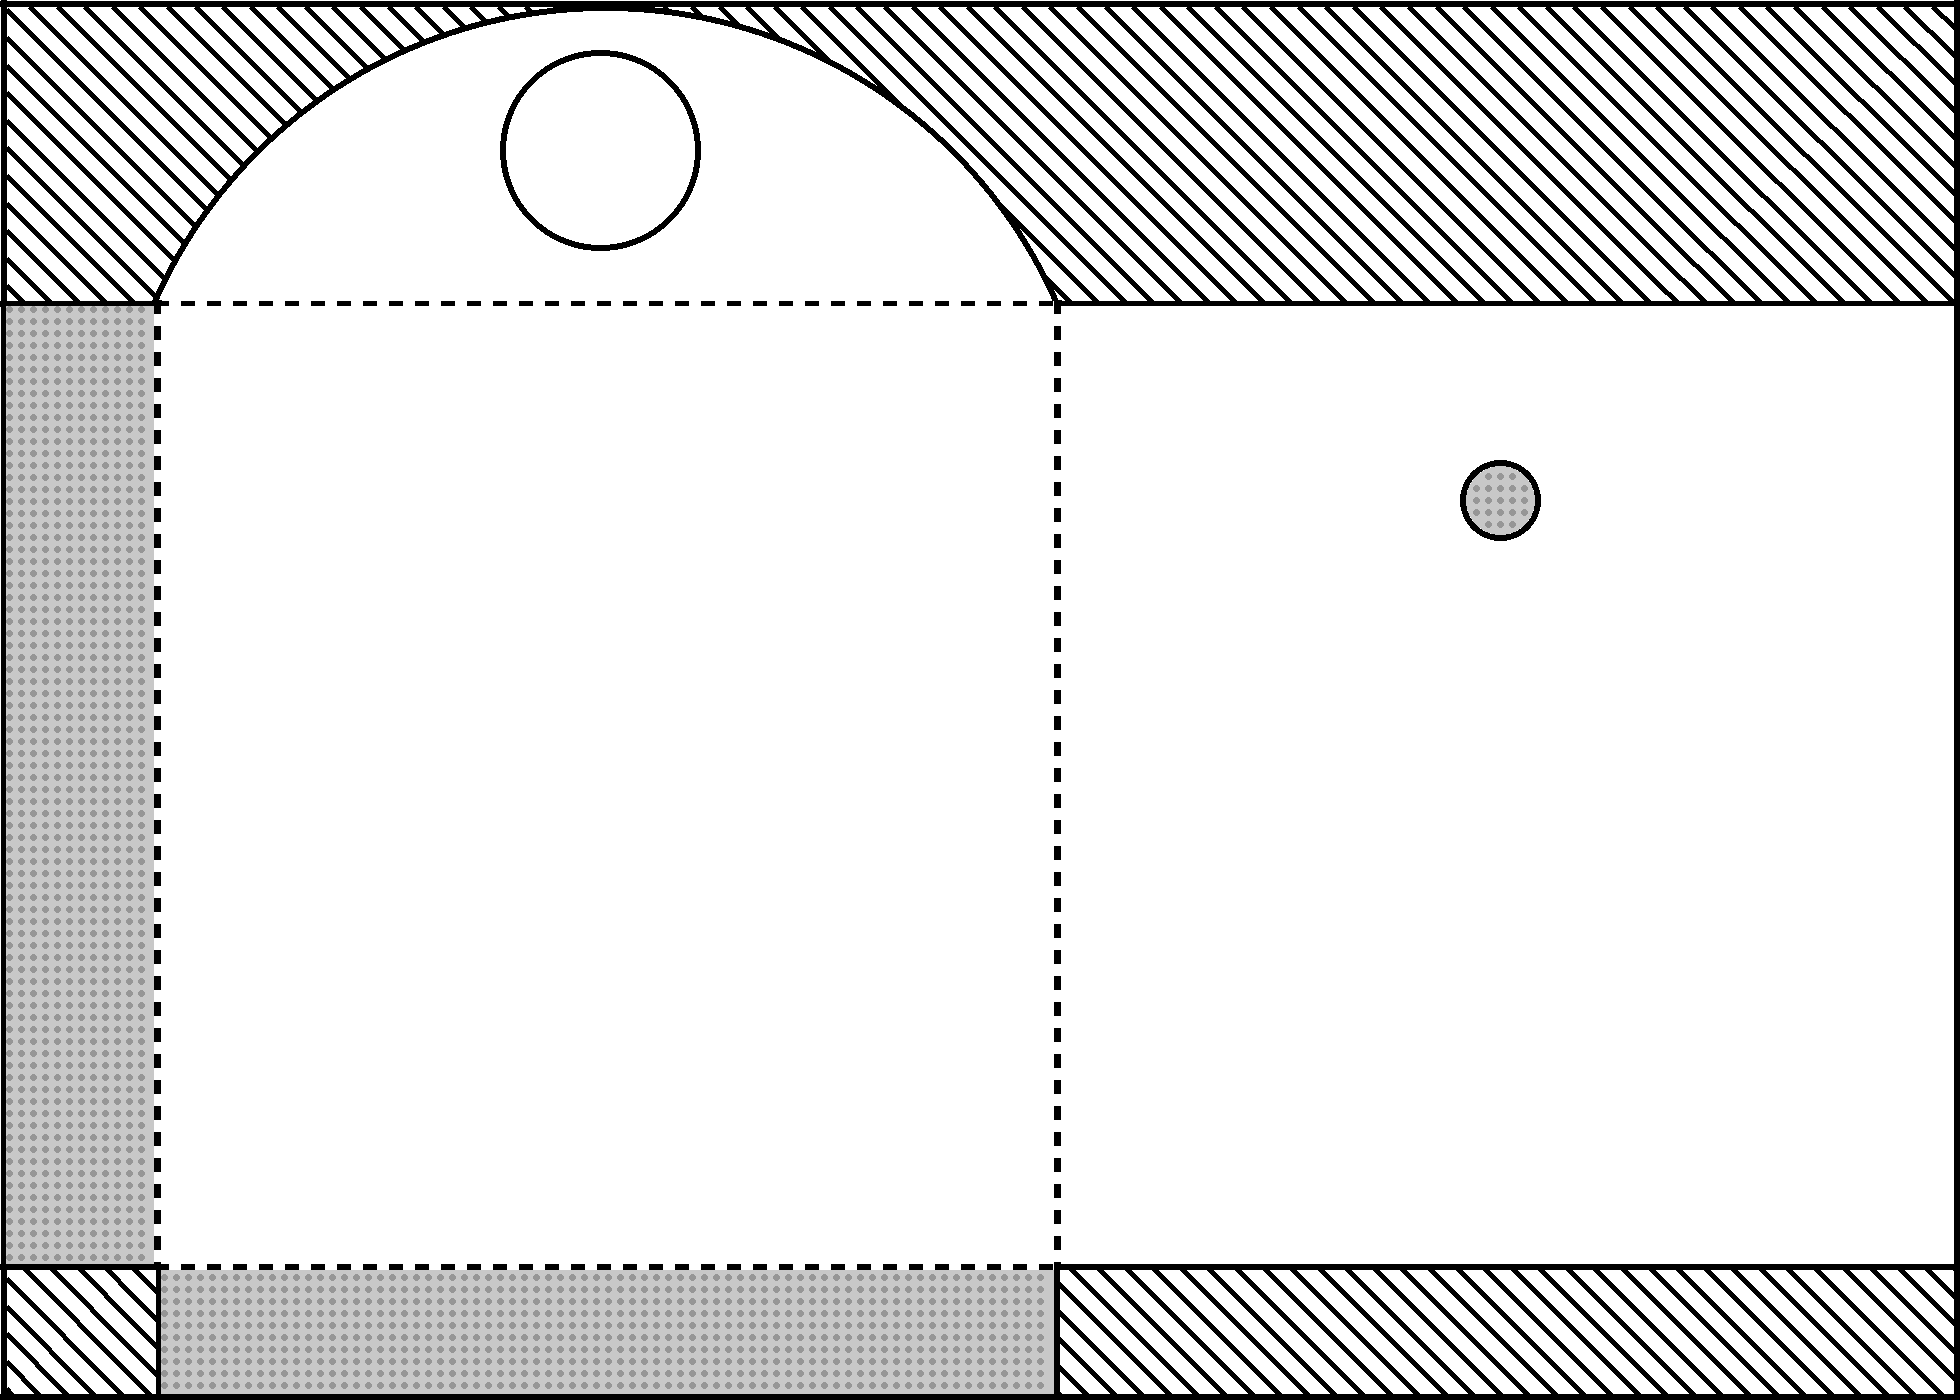
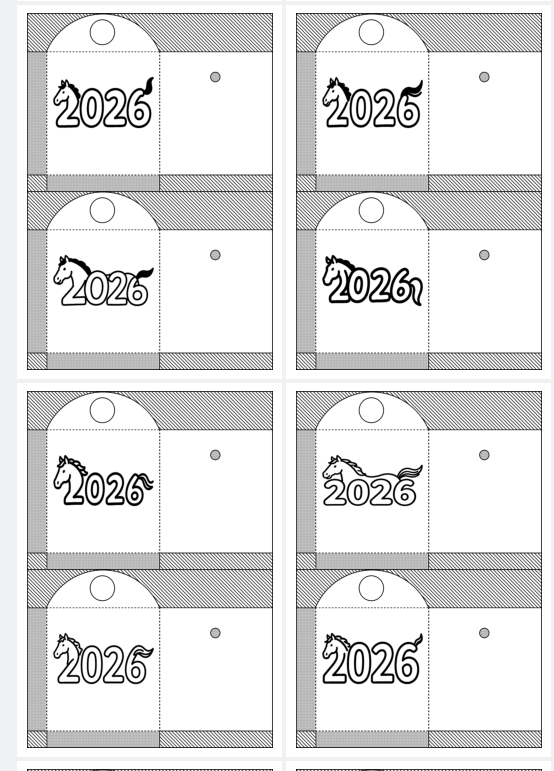
二、写入不同的马2026图片
python
'''
马年2026红包基础背景图+插入马图片
Deepseek,阿夏
20251229
'''
import os
from PIL import Image
def process_transparent_images():
# 定义文件夹路径
path=r'D:\20251229马年红包'
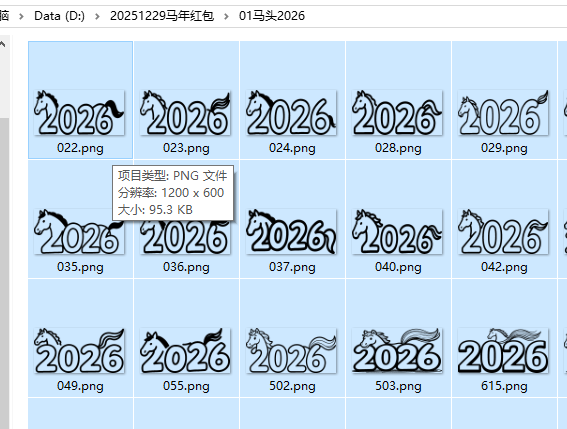
source_folder = path +r'\01马头2026' # 透明图片源文件夹
background_image_path =path+ r'\bg.png' # 背景图片
output_folder = path +r'\02马头2026贴图' # 输出文件夹
# 创建输出文件夹(如果不存在)
if not os.path.exists(output_folder):
os.makedirs(output_folder)
# 检查源文件夹是否存在
if not os.path.exists(source_folder):
print(f"错误:源文件夹 '{source_folder}' 不存在!")
return
# 检查背景图片是否存在
if not os.path.exists(background_image_path):
print(f"错误:背景图片 '{background_image_path}' 不存在!")
return
# 获取所有图片文件
image_extensions = ('.png', '.jpg', '.jpeg', '.gif', '.bmp', '.tiff', '.webp')
image_files = [f for f in os.listdir(source_folder)
if f.lower().endswith(image_extensions)]
if not image_files:
print(f"在 '{source_folder}' 中没有找到图片文件!")
return
print(f"找到 {len(image_files)} 个图片文件")
# 加载背景图片
try:
background = Image.open(background_image_path).convert('RGBA')
print(f"已加载背景图片: {background_image_path}")
print(f"背景图片尺寸: {background.size}")
except Exception as e:
print(f"加载背景图片时出错: {e}")
return
# 处理每个图片
for i, image_file in enumerate(image_files):
try:
# 构建完整文件路径
source_path = os.path.join(source_folder, image_file)
# 加载透明图片
transparent_img = Image.open(source_path).convert('RGBA')
original_size = transparent_img.size
print(f"\n处理第 {i+1}/{len(image_files)} 个文件: {image_file}")
print(f" 原始尺寸: {original_size}")
# 调整透明图片尺寸为300×200
target_size = (800, 400)
resized_img = transparent_img.resize(target_size, Image.Resampling.LANCZOS)
print(f" 调整后尺寸: {target_size}")
# 创建背景图片的副本
result = background.copy()
# 将透明图片贴到(100,100)位置
paste_position = (210, 500)
result.paste(resized_img, paste_position, resized_img)
# 保存结果
# 保持原文件名,但确保使用.png格式以保留透明度信息
output_filename = os.path.splitext(image_file)[0] + '.png'
output_path = os.path.join(output_folder, output_filename)
# 保存为PNG格式以保留透明度
result.save(output_path, 'PNG')
print(f" 已保存到: {output_path}")
except Exception as e:
print(f" 处理文件 {image_file} 时出错: {e}")
print(f"\n处理完成!所有图片已保存到 '{output_folder}' 文件夹")
# 运行处理函数
process_transparent_images()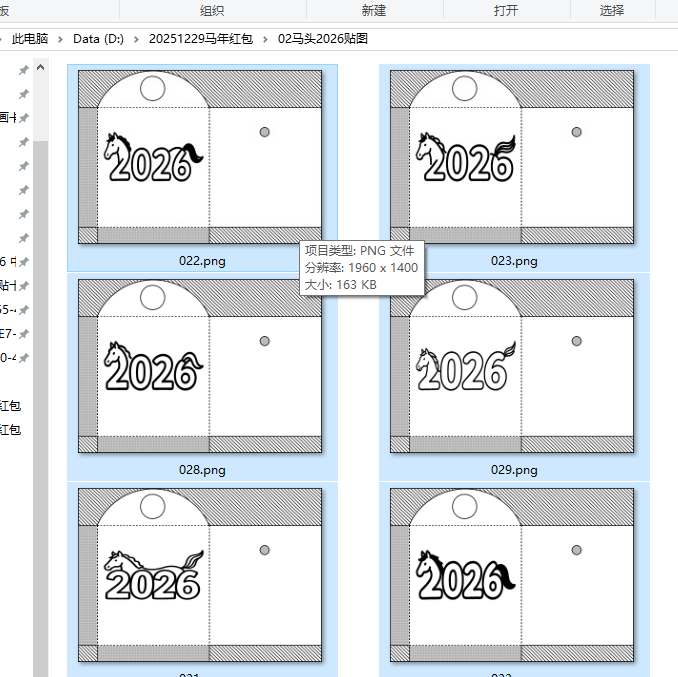
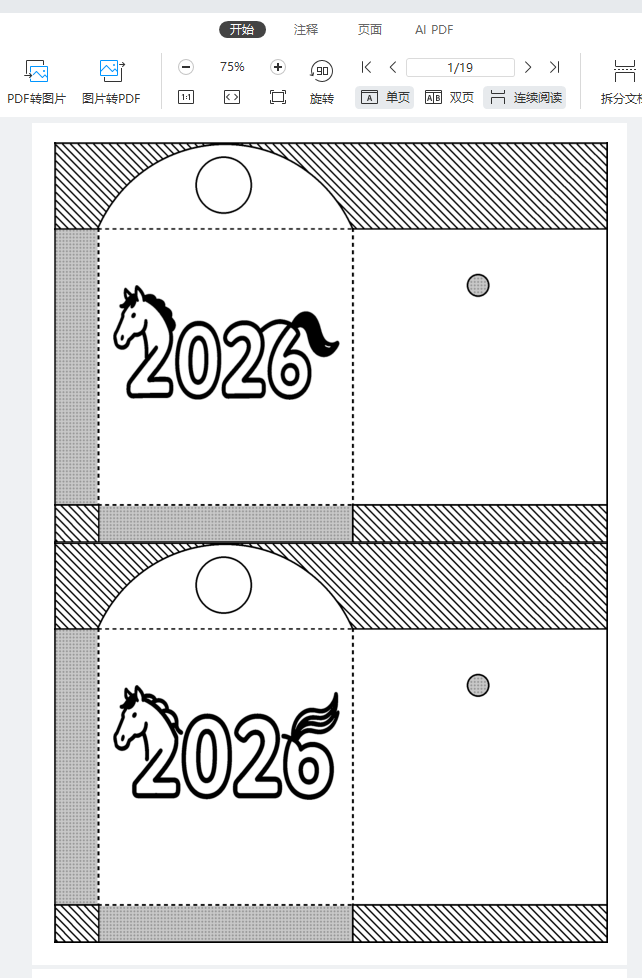
三、合并PDF(最大化,间距和缩进都不要自动右缩进)
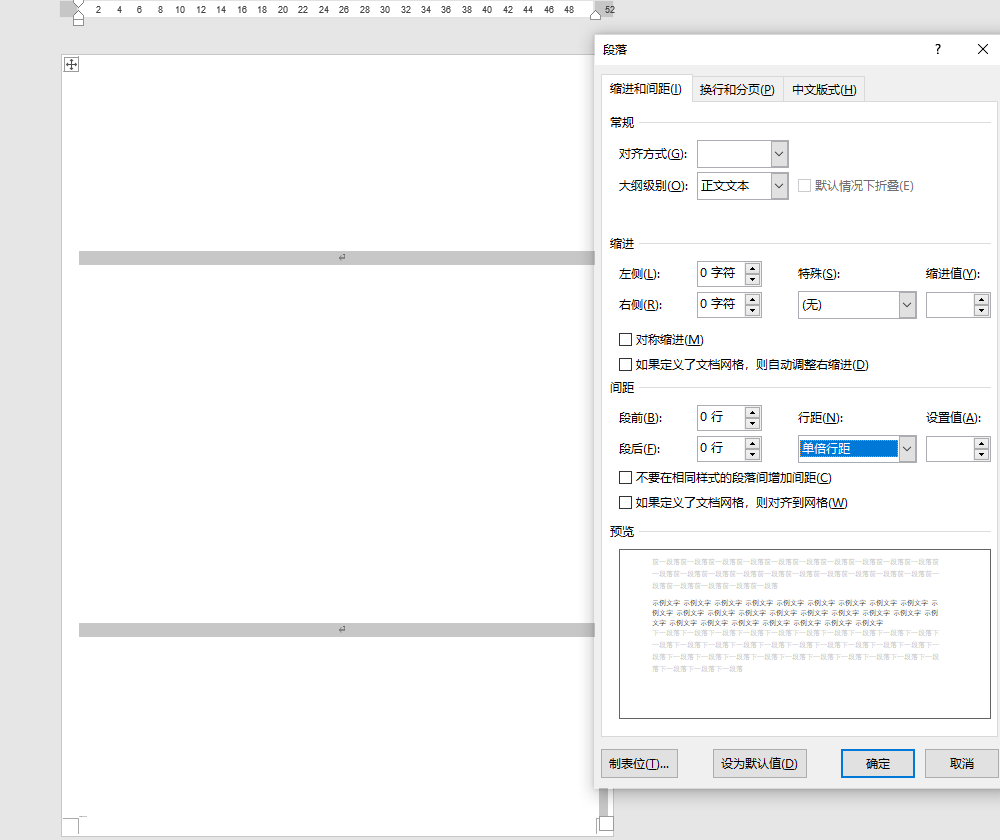
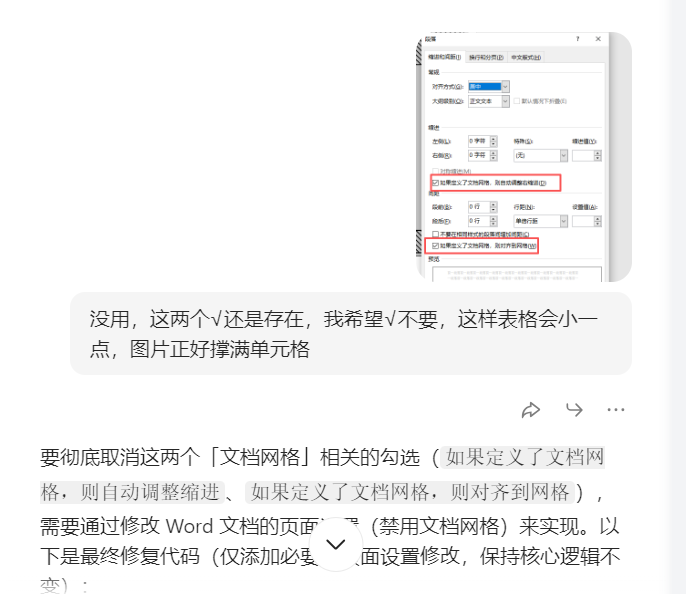
豆包实现图片撑满单元格,没有定义文档网络出现的上下空隙
python
'''
马年2026红包基础背景图+插入马图片+PDF图片撑满格
Deepseek,阿夏
20251229
'''
import random
import math
from PIL import Image, ImageDraw, ImageFont
import os
import time
from docx import Document
from docx.shared import Cm, Pt
from docx.enum.text import WD_ALIGN_PARAGRAPH
from docx.enum.section import WD_SECTION
from docx2pdf import convert
from PyPDF2 import PdfMerger
import shutil
# 100%保留你的原始参数
path=r'D:\20251229马年红包'
sl = 2
names = f'02马头2026贴图'
input_path = path + fr'\{names}'
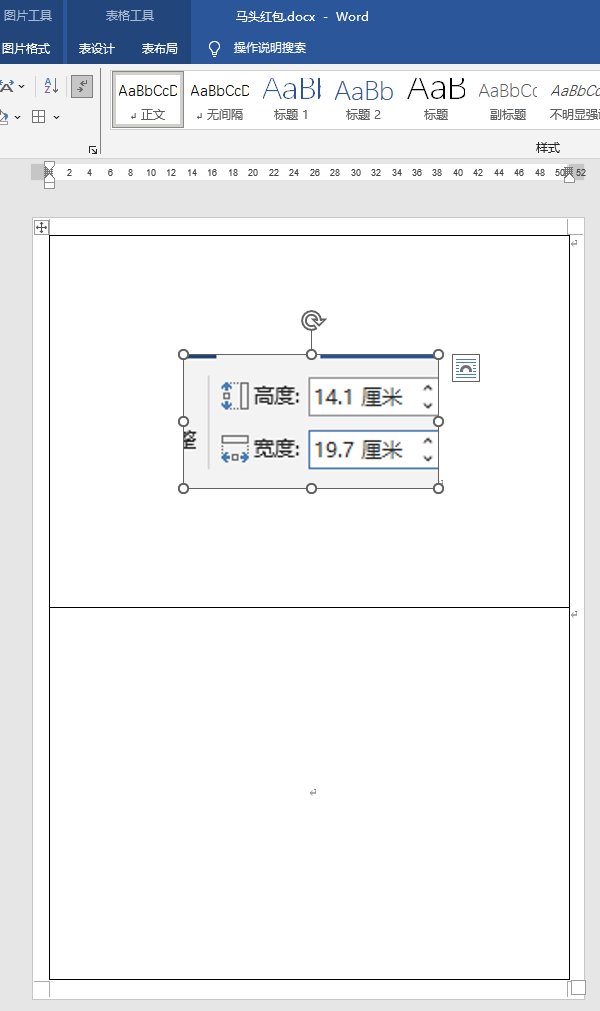
mb = '马头红包'
L = 19.5
# 19.6(WORD)预设19.45
h = 14.1
def check_and_repair_image(image_path):
try:
with Image.open(image_path) as img:
img.verify()
return True
except (IOError, SyntaxError, Exception) as e:
print(f"图片文件损坏: {image_path}, 错误: {e}")
return False
def get_valid_image_files(input_path):
valid_files = []
for file in os.listdir(input_path):
if file.lower().endswith(('.png', '.jpg', '.jpeg', '.bmp', '.gif')):
file_path = os.path.join(input_path, file)
if check_and_repair_image(file_path):
valid_files.append(file_path)
else:
print(f"跳过损坏的图片: {file}")
return valid_files
print('----1、检查图片文件------------')
file_paths = get_valid_image_files(input_path)
print(f"找到 {len(file_paths)} 张有效图片")
if len(file_paths) == 0:
print("没有找到有效的图片文件,程序退出")
exit()
grouped_files = [file_paths[i:i+sl] for i in range(0, len(file_paths), sl)]
print(f"分成 {len(grouped_files)} 组")
print('----2、创建临时文件夹------------')
new_folder = path + r'\零时文件夹'
if os.path.exists(new_folder):
shutil.rmtree(new_folder)
os.makedirs(new_folder, exist_ok=True)
print('----3、插入docx,制作pdf------------')
def disable_document_grid(doc):
"""禁用文档网格(彻底取消那两个勾选)"""
for section in doc.sections:
# 获取页面设置的XML元素
sect_pr = section._sectPr
# 删除文档网格设置(没有网格则不会触发那两个勾选)
grid_elems = sect_pr.xpath('.//w:docGrid')
for grid_elem in grid_elems:
sect_pr.remove(grid_elem)
return doc
def create_document_with_images(group, group_index):
try:
template_path = path + fr'\{mb}.docx'
if not os.path.exists(template_path):
print(f"模板文件不存在: {template_path}")
return False
doc = Document(template_path)
# 关键:禁用文档网格(彻底取消那两个勾选)
doc = disable_document_grid(doc)
if len(doc.tables) == 0:
print("模板文档中没有找到表格")
return False
table = doc.tables[0]
rows = len(table.rows)
cols = len(table.columns)
total_cells = rows * cols
print(f"表格大小: {rows}行 x {cols}列, 共{total_cells}个单元格")
for cell_index, image_file in enumerate(group):
if not image_file or not os.path.exists(image_file):
print(f"图片文件不存在: {image_file}")
continue
if cell_index >= total_cells:
print(f"图片数量超过表格容量,跳过第{cell_index + 1}张图片")
break
row = cell_index // cols
col = cell_index % cols
cell = table.cell(row, col)
# 清除单元格原有内容
for paragraph in cell.paragraphs:
p = paragraph._element
p.getparent().remove(p)
# 添加新段落
cell_paragraph = cell.add_paragraph()
cell_paragraph.alignment = WD_ALIGN_PARAGRAPH.CENTER
# 取消段落间距和缩进
para_format = cell_paragraph.paragraph_format
para_format.space_before = Pt(0)
para_format.space_after = Pt(0)
para_format.line_spacing = 1.0
para_format.left_indent = Pt(0)
para_format.right_indent = Pt(0)
# 插入图片
run = cell_paragraph.add_run()
try:
run.add_picture(image_file, height=Cm(h),width=Cm(L))
print(f"成功插入图片到表格位置({row+1},{col+1}): {os.path.basename(image_file)}")
except Exception as e:
print(f"插入图片失败 {image_file}: {e}")
continue
# 保存文档
docx_path = os.path.join(new_folder, f'{group_index + 1:03d}.docx')
doc.save(docx_path)
print(f"创建文档成功: {group_index + 1:03d}.docx")
return True
except Exception as e:
print(f"创建文档失败 组{group_index + 1}: {e}")
return False
# 处理每一组图片
success_count = 0
for group_index, group in enumerate(grouped_files):
if create_document_with_images(group, group_index):
success_count += 1
print(f"成功创建 {success_count} 个Word文档")
print('----4、转换为PDF------------')
pdf_files = []
if success_count > 0:
docx_files = [f for f in os.listdir(new_folder) if f.endswith('.docx')]
docx_files.sort()
for docx_file in docx_files:
docx_path = os.path.join(new_folder, docx_file)
pdf_path = docx_path.replace('.docx', '.pdf')
try:
convert(docx_path, pdf_path)
pdf_files.append(pdf_path)
print(f"转换成功: {docx_file} -> {os.path.basename(pdf_path)}")
time.sleep(0.5)
except Exception as e:
print(f"转换失败 {docx_file}: {e}")
print('----5、合并PDF------------')
if pdf_files:
pdf_files.sort()
merger = PdfMerger()
for pdf_file in pdf_files:
try:
merger.append(pdf_file)
print(f"添加PDF: {os.path.basename(pdf_file)}")
except Exception as e:
print(f"添加PDF失败 {pdf_file}: {e}")
pdf_output_path = path + fr'\{mb[:2]}{names[2:4]}{mb}(A4一页{sl}张)共{len(file_paths)}图.pdf'
try:
merger.write(pdf_output_path)
merger.close()
print(f"PDF合并完成: {pdf_output_path}")
except Exception as e:
print(f"PDF合并失败: {e}")
else:
print("没有可合并的PDF文件")
print('----6、清理临时文件------------')
try:
shutil.rmtree(new_folder)
print("临时文件夹已清理")
except Exception as e:
print(f"清理临时文件夹失败: {e}")
print('----程序执行完成------------')