部署 Sphinx 文档到 GitHub Pages 指南
本文将详细介绍如何将 Sphinx 生成的文档部署到 GitHub Pages,包括手动部署和使用 GitHub Actions 的自动部署方案。我们将以 dlt645 项目的 Python 版本文档为例进行说明。
1. 准备工作
1.1 项目结构
在开始之前,让我们先了解一下典型的 Sphinx 文档项目结构(以 dlt645/python/docs 为例):
docs/
├── source/
│   ├── conf.py          # Sphinx 配置文件
│   ├── index.rst        # 文档首页
│   ├── modules.rst      # 模块索引
│   └── ...              # 其他文档源文件
├── build/               # 构建输出目录
│   └── html/            # HTML 文档输出
├── Makefile             # 构建脚本
└── make.bat             # Windows 构建脚本
1.2 确保 Sphinx 配置正确
在 conf.py 中,确保以下配置项正确设置:
python
# conf.py

# 项目信息
project = 'dlt645'
copyright = '2026, 陈东宇'
author = '陈东宇'
release = 'v1.4.0'

# 确保 sphinx.ext.githubpages 扩展已启用
extensions = [
    # 其他扩展...
    'sphinx.ext.githubpages',
]

# HTML 主题配置
html_theme = 'sphinx_rtd_theme'
html_theme_options = {
    'collapse_navigation': False,
    'navigation_depth': -1,
}
1.3 生成 HTML 文档
首先,确保能够成功生成 HTML 文档:
bash
# 在 docs 目录下执行
cd python/docs
make html
生成的 HTML 文档将位于 build/html/ 目录下。
2. 手动部署到 GitHub Pages
手动部署适合简单项目或初次部署测试。
2.1 推送 HTML 文件到 gh-pages 分支
-
构建文档:在项目根目录下,执行 Sphinx 构建命令,生成 HTML 文件,文件在build/html/目录下
bashmake html # 或者直接使用 sphinx-build # sphinx-build -b html docs/source docs/build/html
-
准备部署目录:进入构建输出目录(如
docs/_build/html或build/html),初始化一个 Git 仓库并设置远程地址cd docs/build/html git init git remote add origin https://github.com/<你的用户名>/<你的仓库名>.git
-
创建并推送至 gh-pages 分支:将生成的所有文件提交并强制推送到远程仓库的
gh-pages分支# 添加所有文件 git add . # 提交 git commit -m "Deploy Sphinx documentation to GitHub Pages" # 推送到远程仓库 git push -f origin main:gh-pages
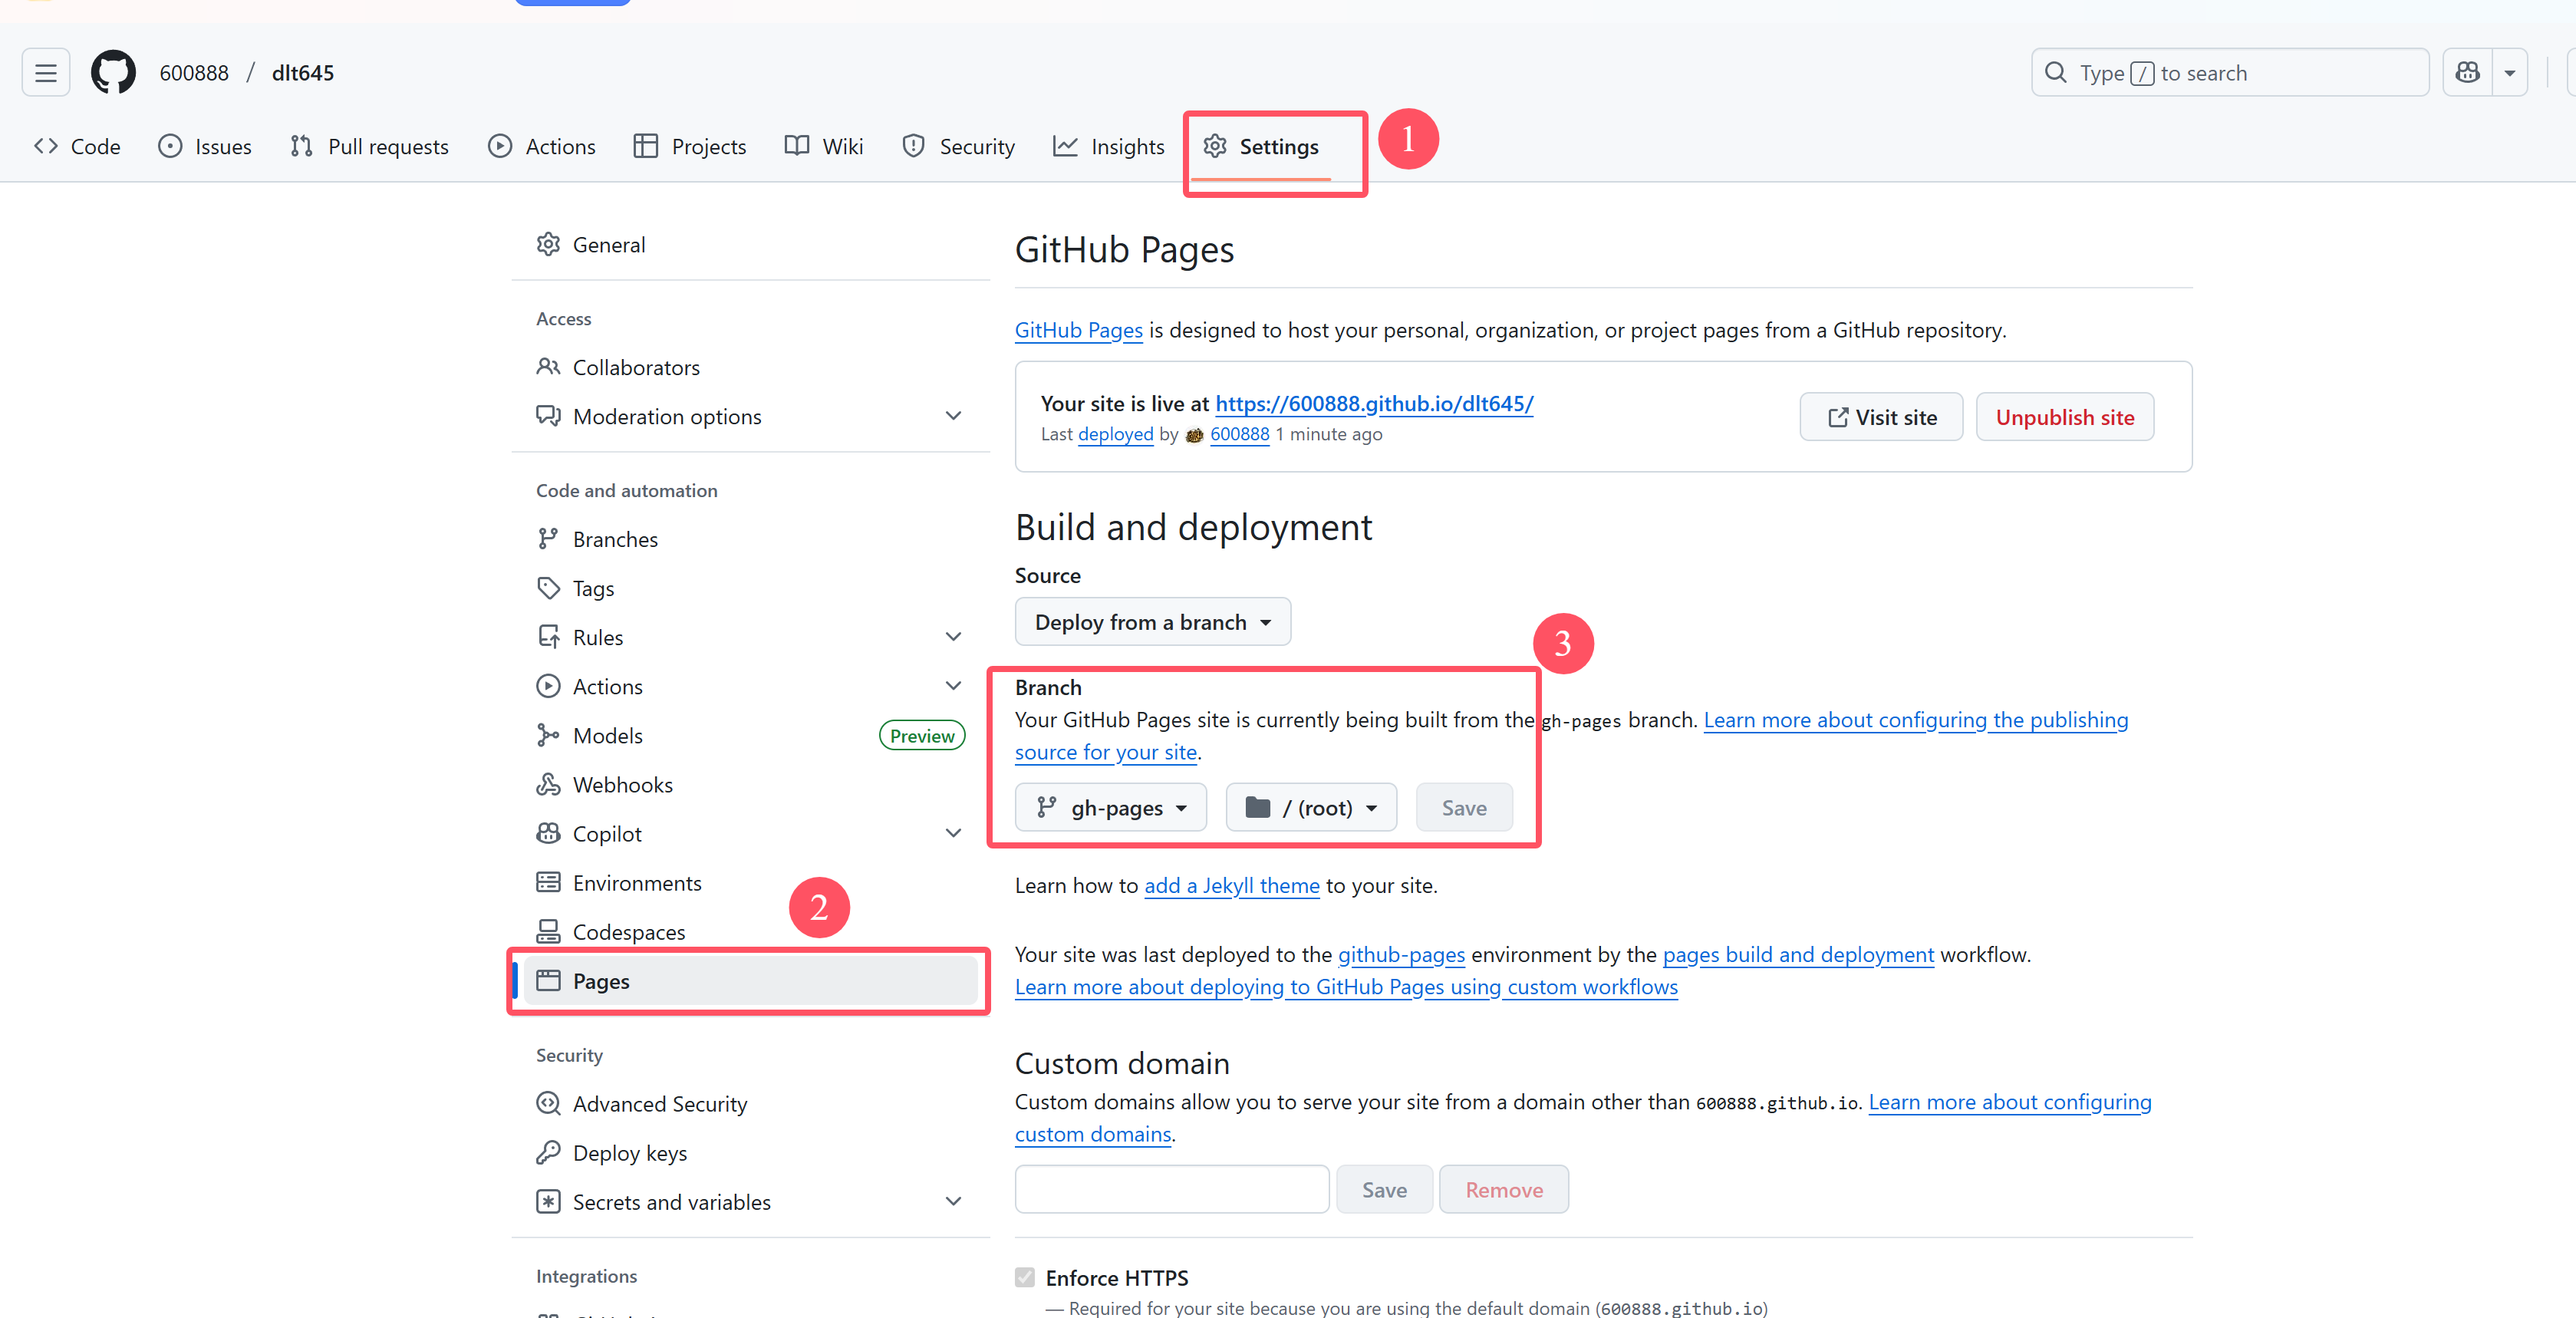
2.3 配置 GitHub Pages
部署完成后,需要在 GitHub 仓库中配置 Pages:
- 登录 GitHub,进入项目仓库
- 点击
Settings→Pages - 在
Source部分,选择gh-pages分支和/(root)目录 - 点击
Save
3. 自动部署(GitHub Actions)
使用 GitHub Actions 可以实现文档的自动构建和部署,当代码变更时自动更新文档。
3.1 创建 GitHub Actions 工作流
在项目根目录下创建 .github/workflows/ 目录,并添加部署工作流文件:
bash
mkdir -p .github/workflows
touch .github/workflows/deploy-docs.yml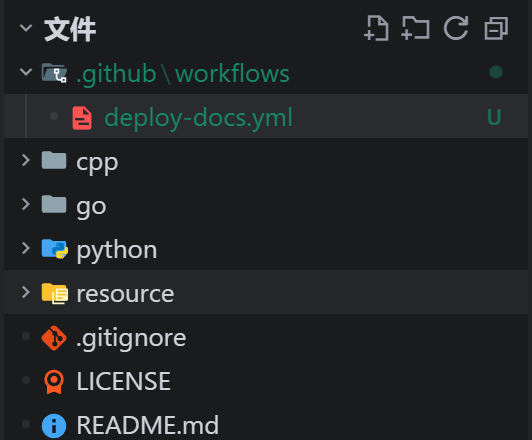
3.2 编写工作流配置
编辑 deploy-docs.yml 文件,添加以下内容:
yaml
name: Deploy Sphinx Documentation
on:
# 当主分支或开发分支有推送时触发
push:
branches: [ main, master, develop ]
# 允许手动触发
workflow_dispatch:
jobs:
build-and-deploy:
runs-on: ubuntu-latest
permissions:
contents: write # 需要写入内容权限
pages: write # 需要操作 Pages 权限
id-token: write # 需要生成 ID Token
steps:
# 步骤 1: 检出代码
- name: Checkout repository
uses: actions/checkout@v4
with:
fetch-depth: 0 # 确保获取完整的提交历史
# 步骤 2: 设置 Python 环境
- name: Set up Python
uses: actions/setup-python@v4
with:
python-version: '3.10'
cache: 'pip'
# 步骤 3: 安装依赖
- name: Install dependencies
run: |
pip install --upgrade pip
pip install -r python/requirements.txt
pip install sphinx sphinx-rtd-theme sphinx-autodoc-typehints sphinx-copybutton
# 步骤 4: 生成 HTML 文档
- name: Build HTML documentation
run: |
cd python/docs
make html
# 步骤 5: 部署到 GitHub Pages
- name: Deploy to GitHub Pages
uses: peaceiris/actions-gh-pages@v4
with:
# 文档源目录
publish_dir: ./python/docs/build/html
# 提交信息
commit_message: "Deploy Sphinx docs for ${{ github.sha }}"
# 个人访问令牌(如果需要)
github_token: ${{ secrets.GITHUB_TOKEN }}
# 推送的分支
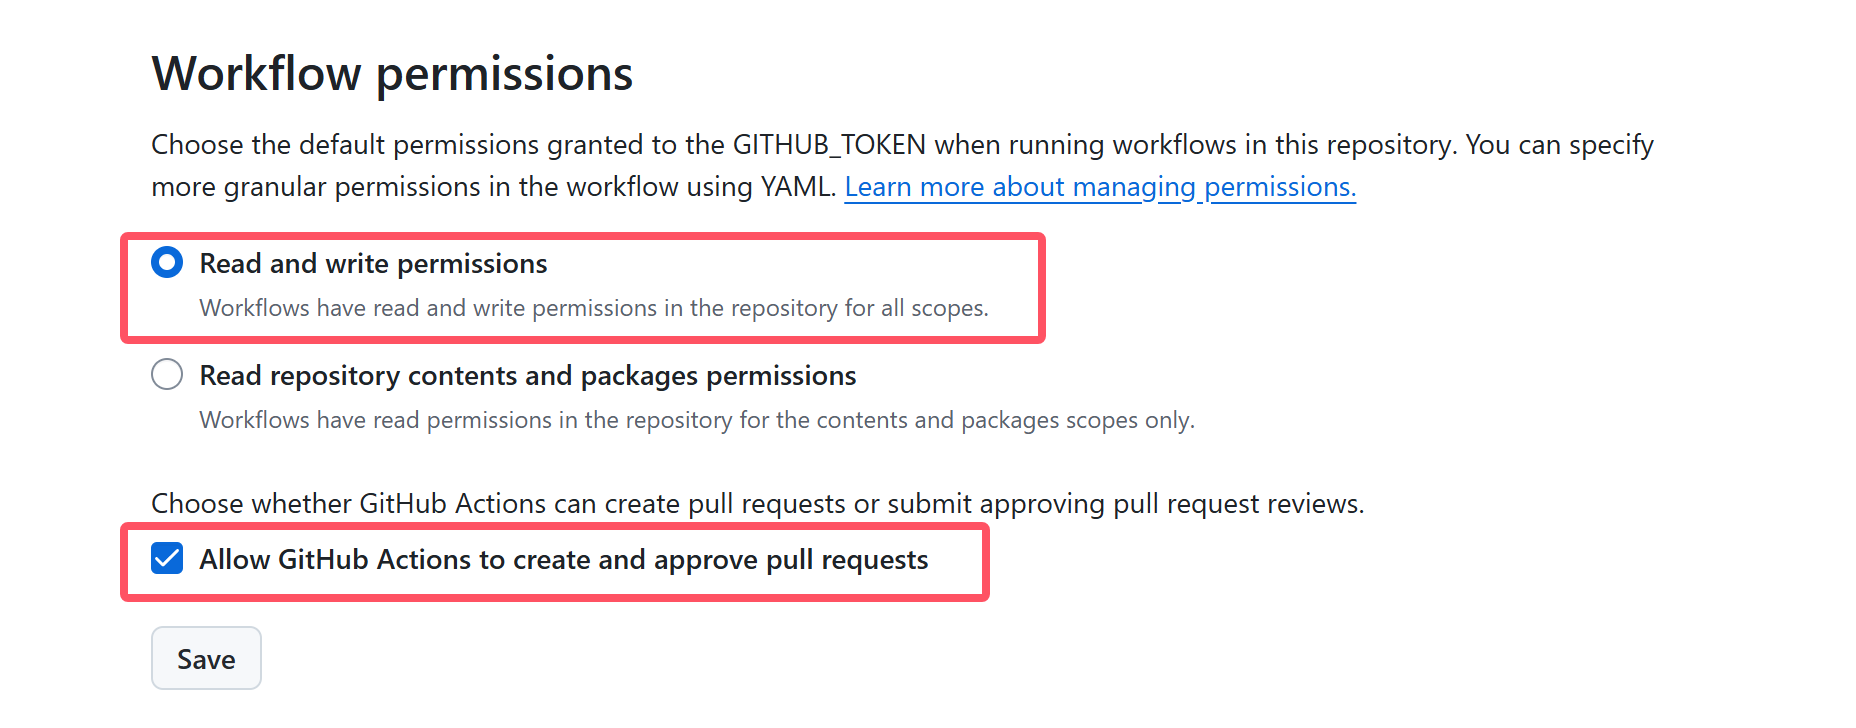
publish_branch: gh-pages3.3 配置权限
确保 GitHub 仓库的 Actions 有足够的权限:
- 进入仓库
Settings→Actions→General - 在
Workflow permissions部分,选择Read and write permissions - 勾选
Allow GitHub Actions to create and approve pull requests - 点击
Save
3.4 测试自动部署
提交工作流文件到主分支:
bash
git add .github/workflows/deploy-docs.yml
git commit -m "Add GitHub Actions workflow for docs deployment"
git push origin main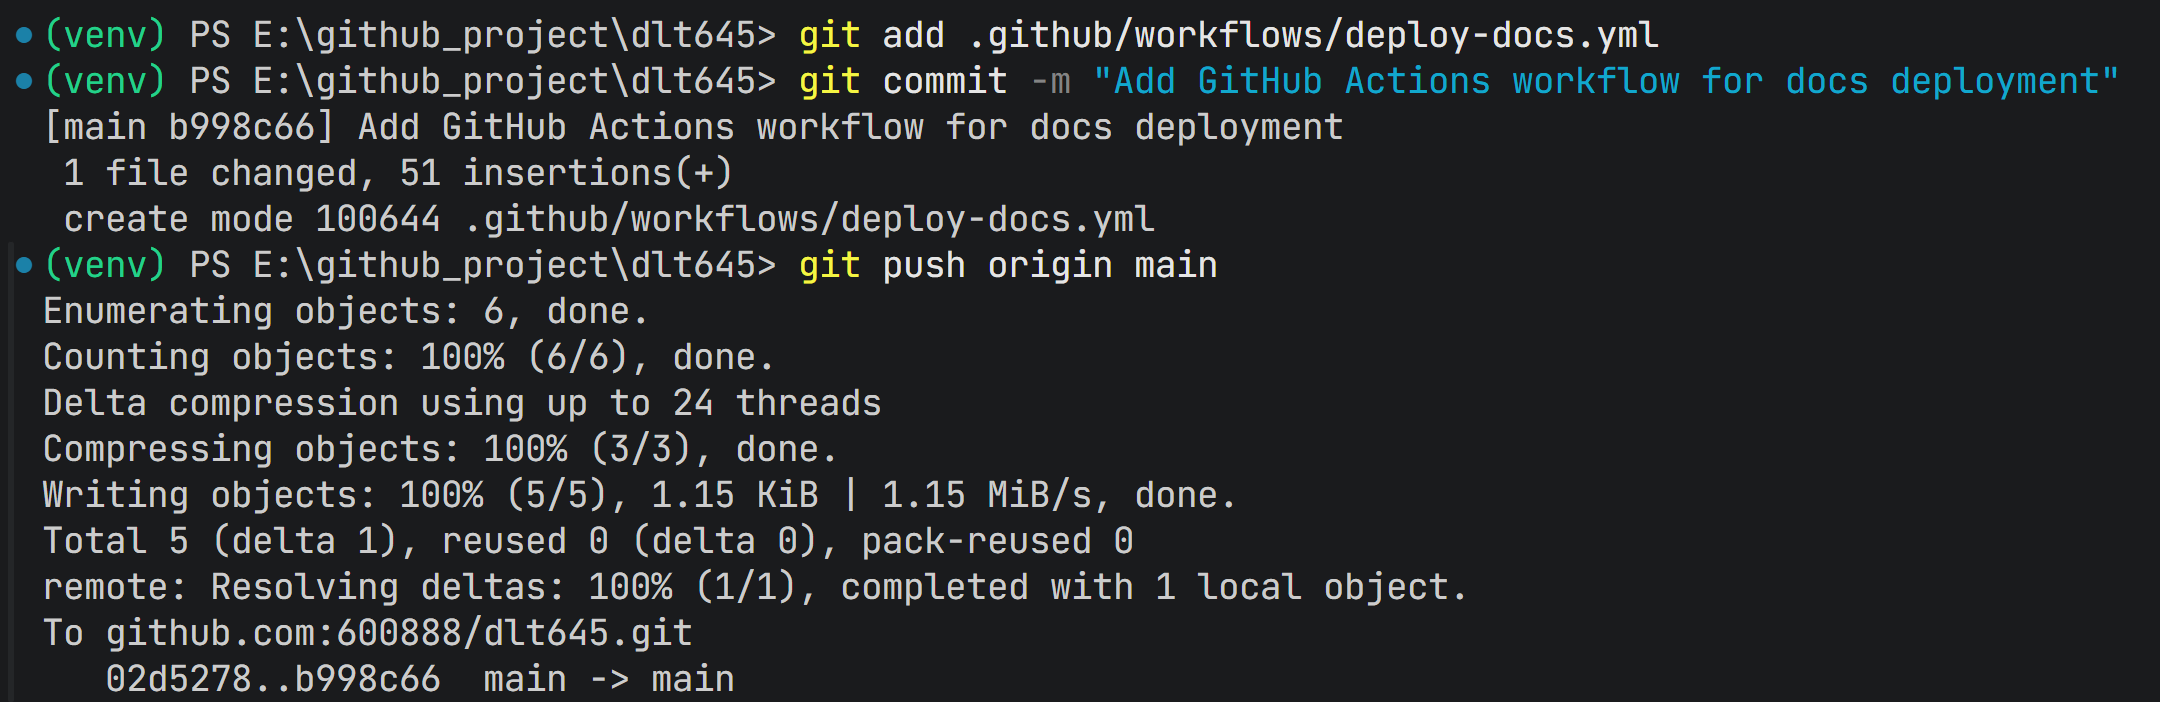
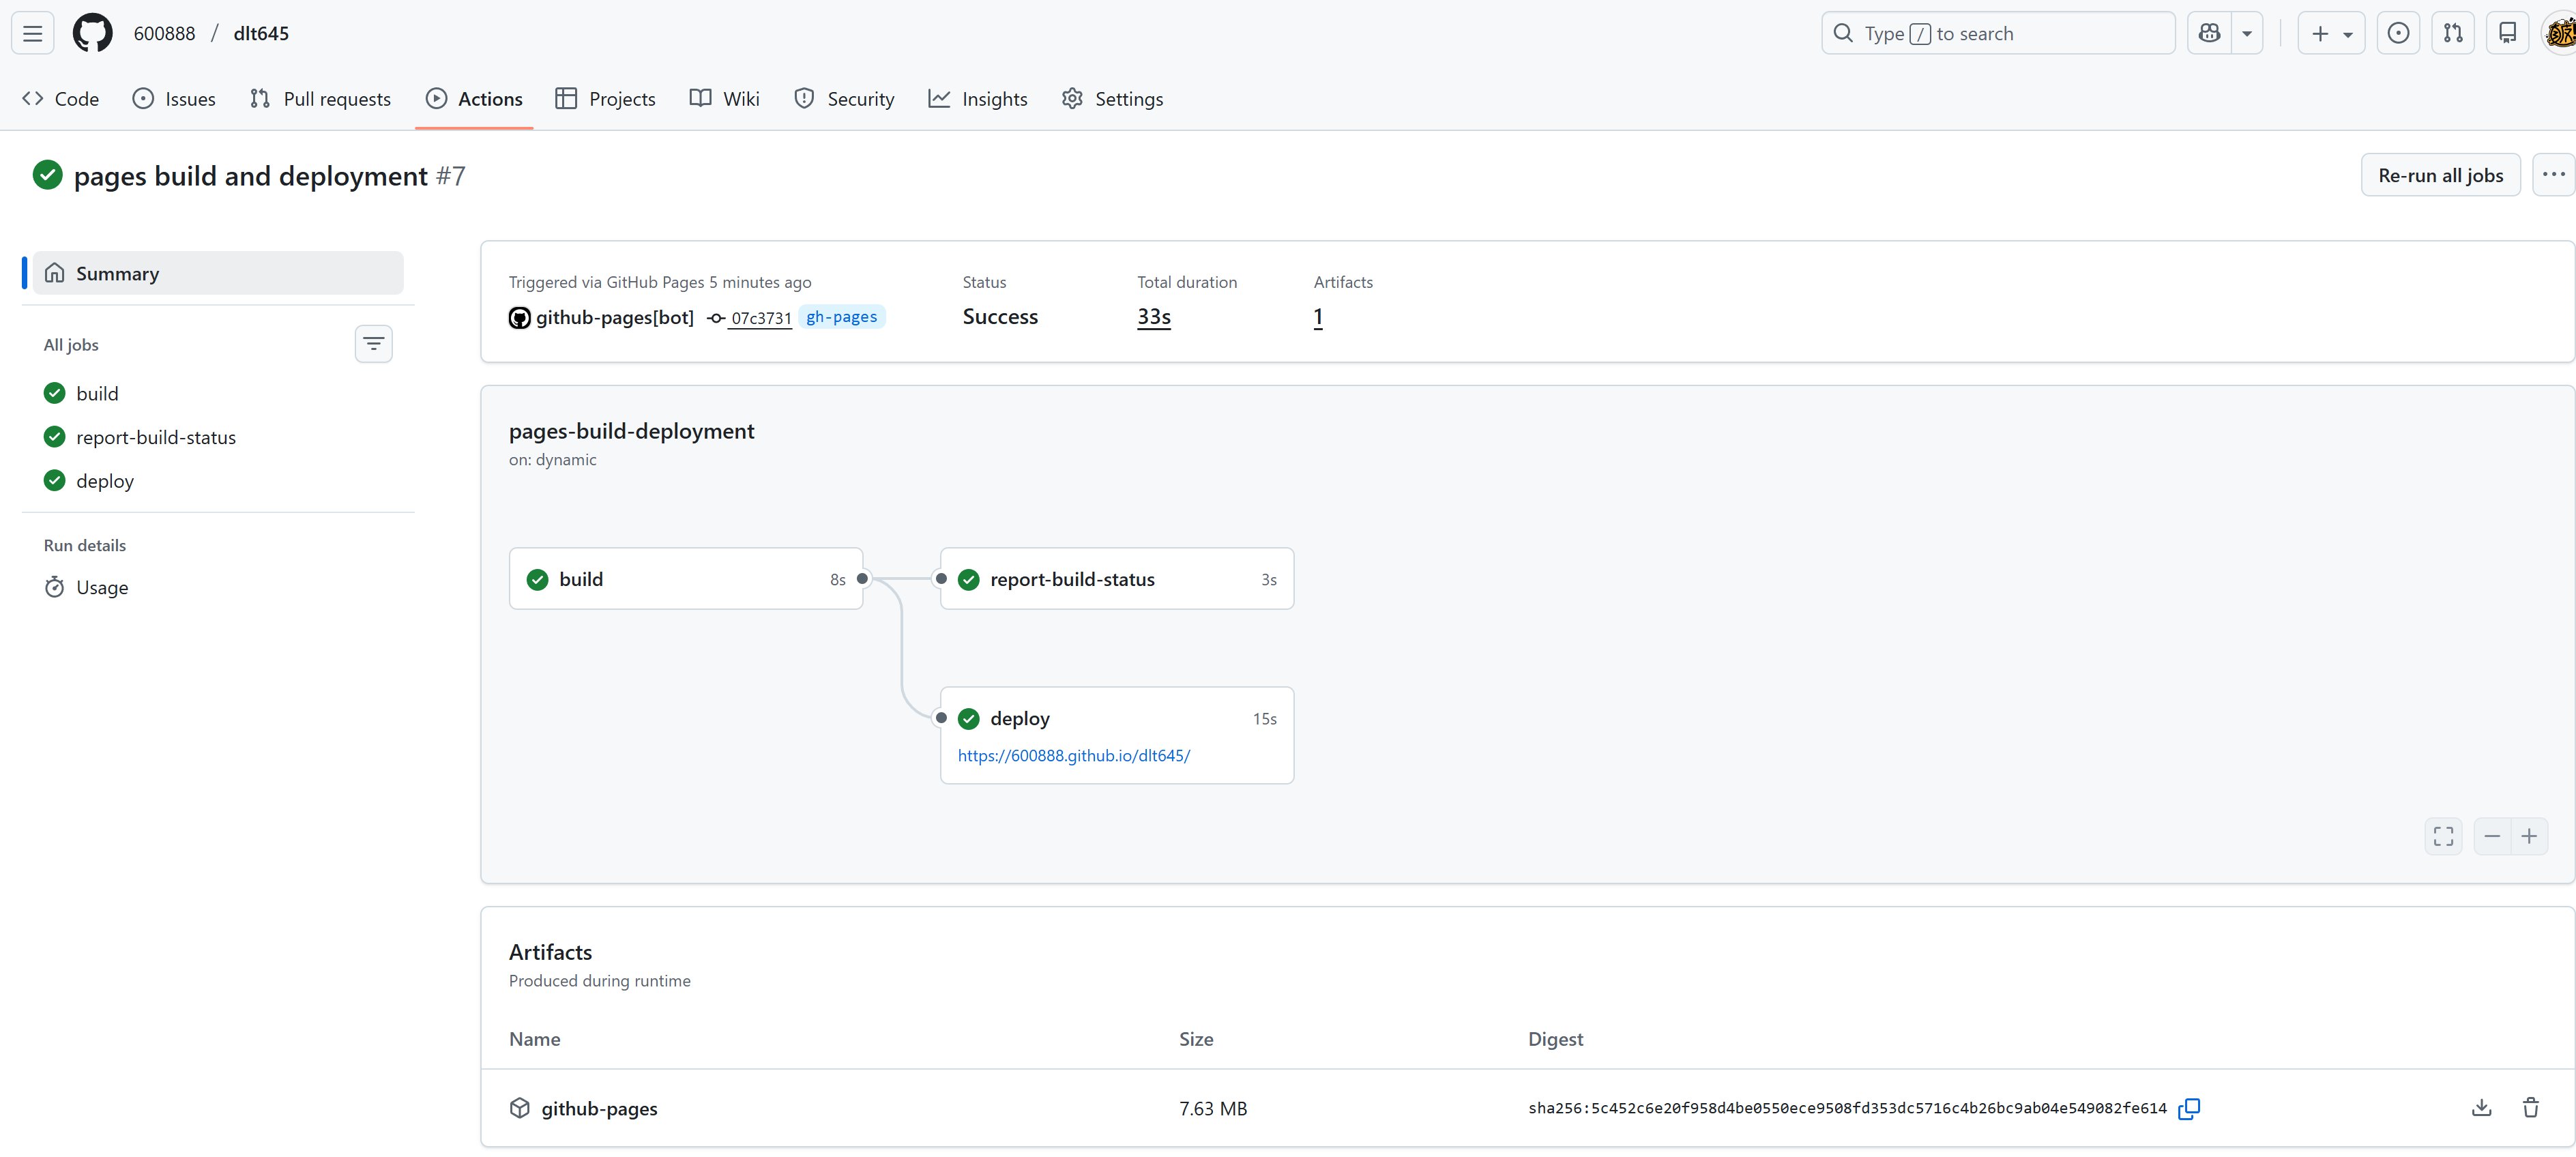
然后在 GitHub 仓库的 Actions 标签页中查看部署进度。
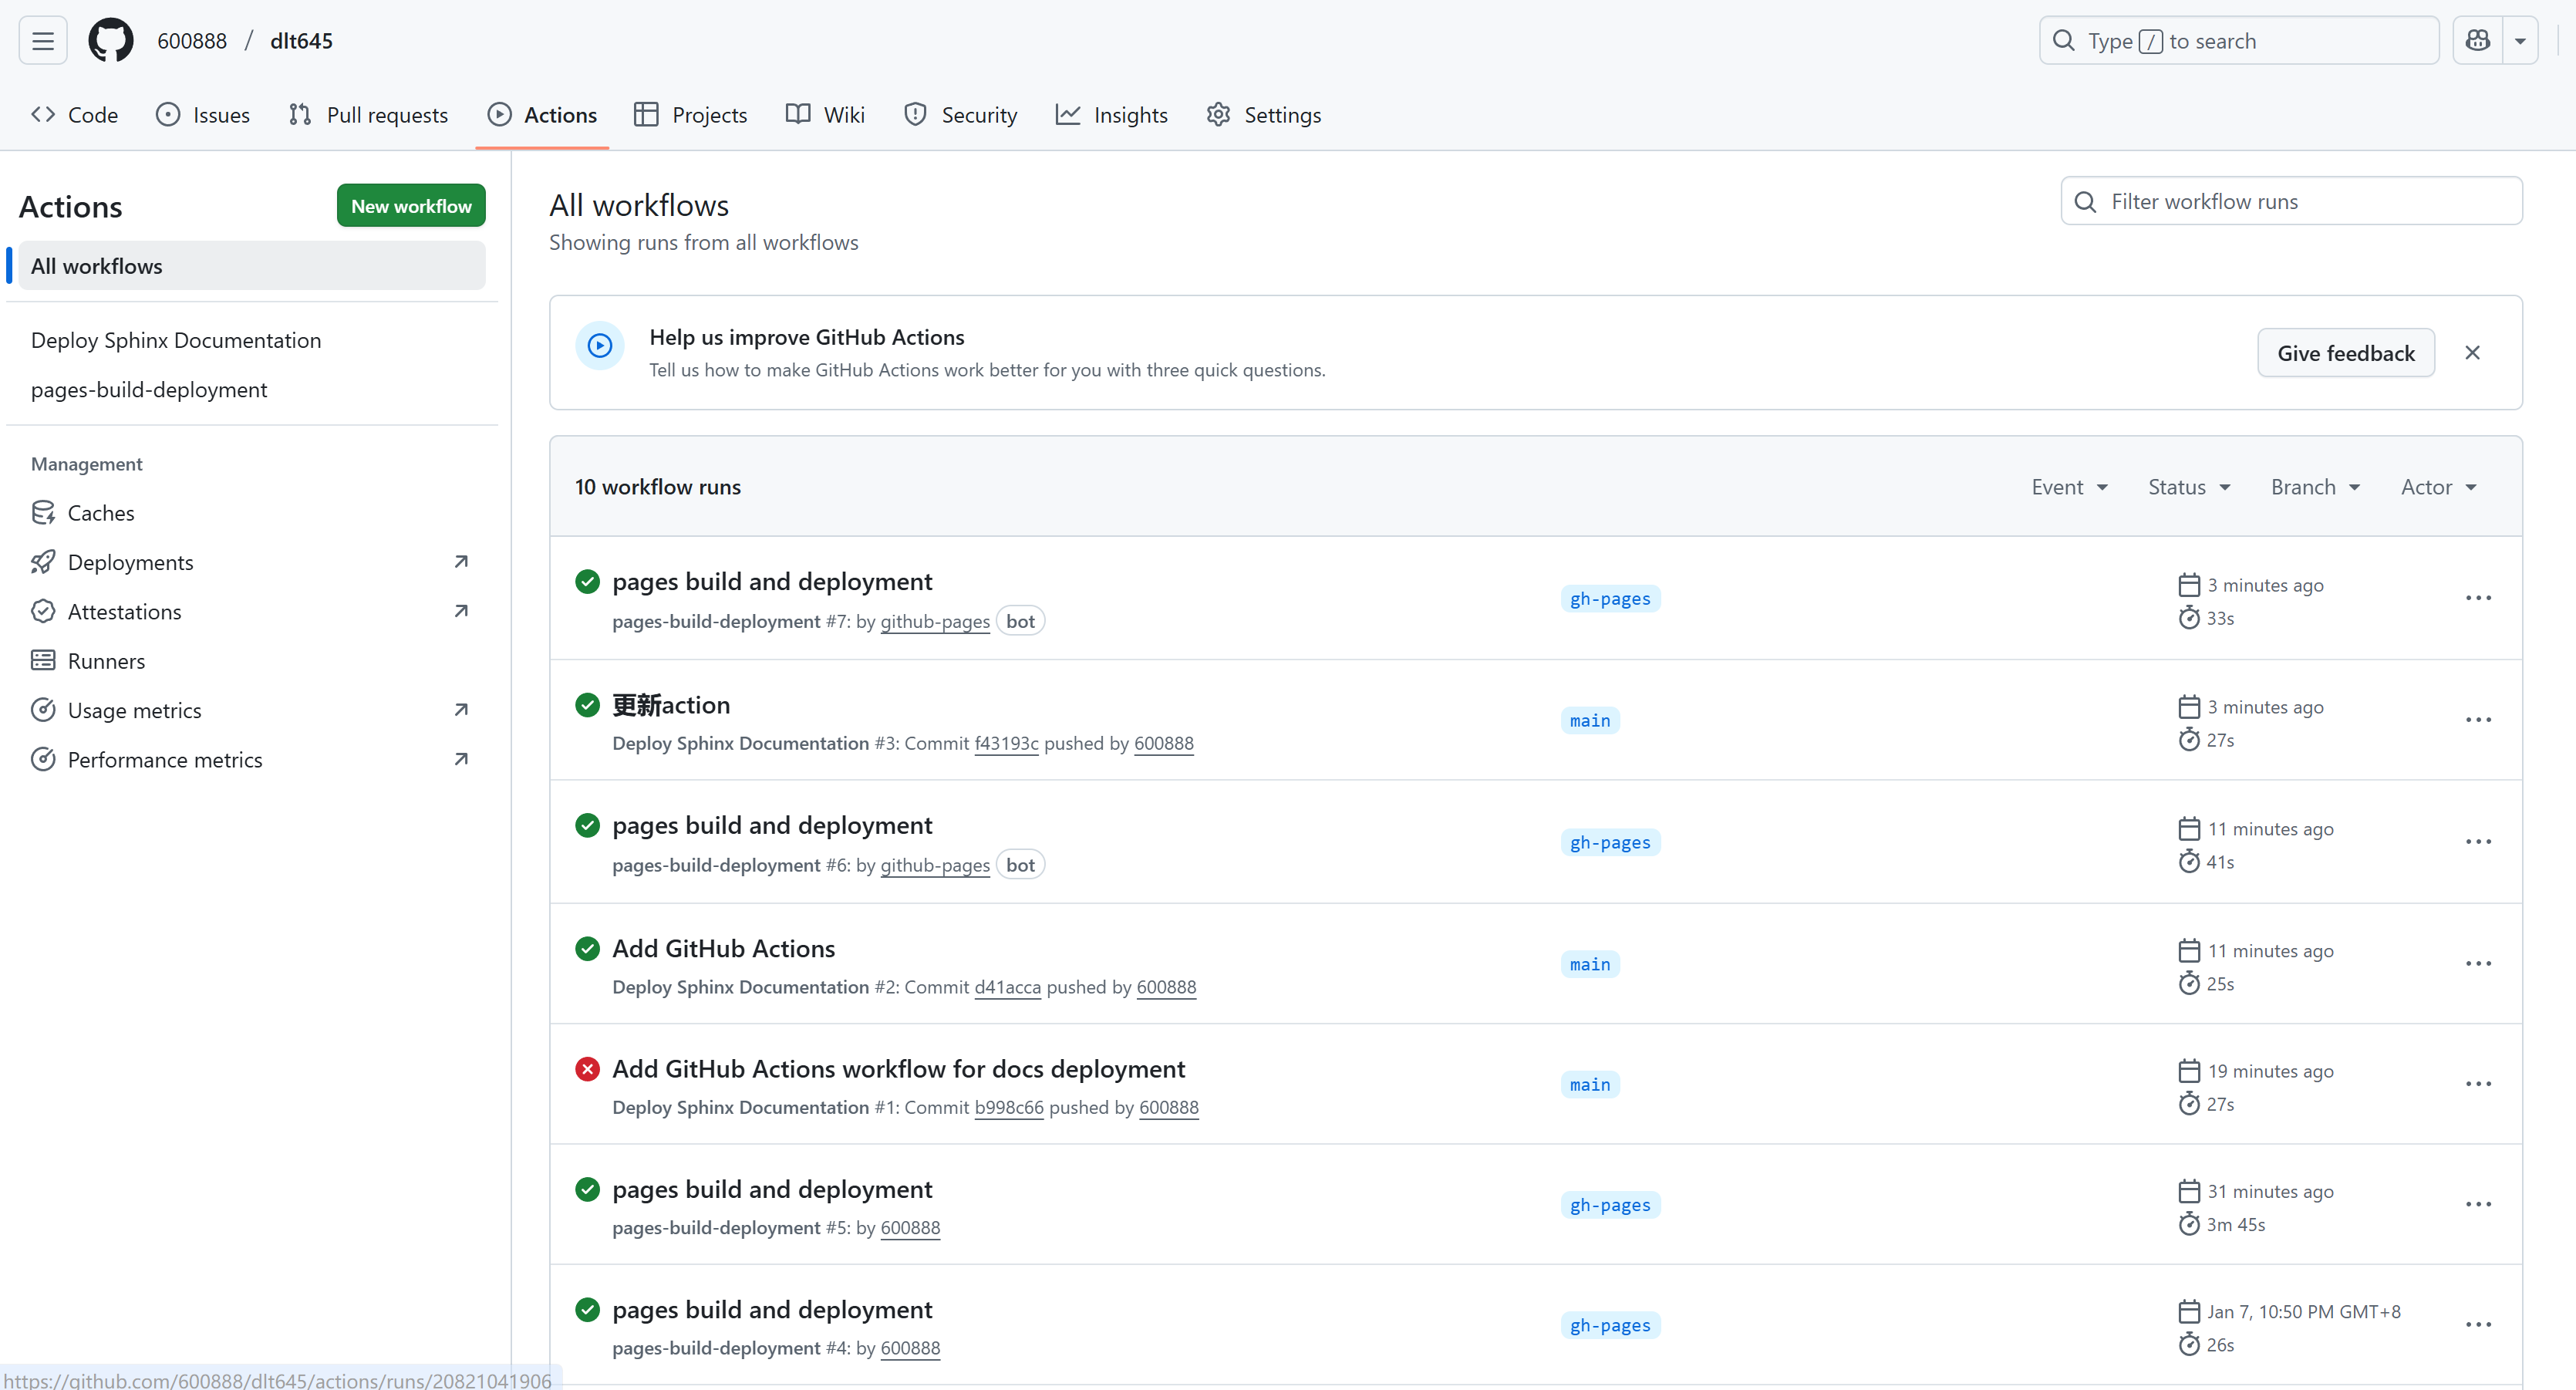
可以看到我最新提交的一次action已经成功
4. 高级配置
4.1 自定义域名
如果需要使用自定义域名,可以在 gh-pages 分支根目录添加 CNAME 文件:
bash
echo "docs.dlt645.example.com" > CNAME然后在 DNS 服务商处添加 CNAME 记录,指向 username.github.io。
4.2 文档版本管理
对于多版本文档,可以使用 sphinx-multiversion 扩展:
bash
pip install sphinx-multiversion在 conf.py 中添加:
python
extensions = [
    # 其他扩展...
    'sphinx_multiversion',
]

# 配置 sphinx-multiversion
smv_tag_whitelist = r'^v\d+\.\d+\.\d+$'  # 只包含版本标签
smv_branch_whitelist = r'^main$|^master$'  # 只包含主分支
smv_remote_whitelist = r'^origin$'         # 只包含 origin 远程仓库
smv_outputdir_format = '{ref.name}'        # 输出目录格式
然后使用 sphinx-multiversion 命令生成多版本文档:
bash
sphinx-multiversion source build/html4.3 文档搜索优化
为了让 GitHub Pages 正确处理 Sphinx 的搜索功能,需要确保 .nojekyll 文件存在,以禁用 Jekyll 的处理。
5. 常见问题与解决方案
5.1 文档样式丢失
问题:部署后文档样式丢失,显示为原始 HTML。
解决方案:
- 确保添加了
.nojekyll文件 - 检查
html_baseurl配置是否正确 - 确保静态资源路径配置正确
5.2 部署权限错误
问题:GitHub Actions 部署时出现权限错误。
解决方案:
- 确保工作流文件中设置了正确的权限
- 检查仓库的 Actions 权限设置
- 如果使用个人访问令牌,确保令牌有足够的权限
5.3 自动部署不触发
问题:推送代码后自动部署不触发。
解决方案:
- 检查工作流文件中的
on触发条件 - 确保推送的分支与配置的分支匹配
- 查看 Actions 日志了解具体原因
5.4 文档更新不及时
问题:部署后文档内容未更新。
解决方案:
- 确保构建命令正确生成了新文档
- 检查 GitHub Pages 的缓存设置
- 尝试强制刷新浏览器或使用无痕模式访问
6. 总结
本文介绍了两种将 Sphinx 文档部署到 GitHub Pages 的方法:
- 手动部署:适合简单项目或初次测试,包括直接推送和使用 git worktree 两种方式。
- 自动部署:使用 GitHub Actions 实现文档的自动构建和部署,提高开发效率。
通过正确配置和部署,可以确保 Sphinx 文档始终保持最新,并通过 GitHub Pages 方便地分享给用户。