传统View在Compose组件中的等价物
对于刚接触Compose的Android开发者来说,最想知道的莫过于:我在传统View的界面组件,用Compose怎么来实现呢 ?
1. 常见组件
1.1 TextView
TextView文本,在Compose中,对应的是Text
kotlin
Text("Hello World")
可以给Text设置一个颜色,比如这里讲文本设置为白色
kotlin
Text("Hello World", color = Color.White)
1.2 ImageView
ImageView图片,在Compose中,对应的是Image,Image有两个参数是必填的 :
- painter : 用来指定要显示的图像资源,是 Compose 中处理图像绘制的核心载体,替代了传统 View 体系中的 Drawable
- contentDescription : 用来支持 Android 无障碍服务提供图像的语义含义,如无需该功能,可传入null
kotlin
Image(painter = painterResource(R.drawable.ic_navi), contentDescription = null)
1.3 Button
Button按钮,在Compose中,对应的也是Button,Compose中的Button由两个组件构成,Button本身是一个容器,还有一个用来展示具体内容的组件,比如Text
kotlin
Button(onClick = {}) {
    Text("Click me")
}
Compose为什么要这么设计呢 ? 为什么要用两个组件来实现一个按钮,合并成一个组件不好吗 ?
答案是这样做能够更动态,这也是Compose这么设计相较于传统View的优势了。
比如我需要展示一个带Icon的Button,那直接多添加一行代码增加一个Image组件,就可以实现了。
kotlin
Button(onClick = {}) {
    Image(painter = painterResource(R.drawable.ic_navi), contentDescription = null)
    Text("Click me")
}
那如果想改个背景颜色,圆角啥的,也很简单,直接在构造方法里传入就行
kotlin
Button(
    onClick = {},
    colors = ButtonDefaults.buttonColors(containerColor = Color.DarkGray),
    shape = RoundedCornerShape(12.dp)
) {
    Image(painter = painterResource(R.drawable.ic_navi), contentDescription = null)
    Text("Click me")
}
如果想把Button内部的组件竖向排列呢 ? 也很简单,套一层Column组件就行
kotlin
Button(
    onClick = {},
    colors = ButtonDefaults.buttonColors(containerColor = Color.DarkGray),
    shape = RoundedCornerShape(12.dp)
) {
    Column(horizontalAlignment = Alignment.CenterHorizontally) {
        Image(painter = painterResource(R.drawable.ic_navi), contentDescription = null)
        Text("Click me")
    }
}
既然讲到了Column,我们就来讲下Compose中的常见布局。
2. 常见布局
2.1 LinearLayout
LinearLayout在Compose中,对应的是Column和Row,Column是竖向的,而Row是横向的。
kotlin
Column {
    Image(painter = painterResource(R.drawable.ic_navi), contentDescription = null)
    Text("Hello World", color = Color.White)
}
我们 将 Column 替换为 Row ,可以看到就变成横向排列了
kotlin
Row {
    Image(painter = painterResource(R.drawable.ic_navi), contentDescription = null)
    Text("Hello World", color = Color.White)
}
2.2 FrameLayout
FrameLayout在Compose中,对应的是Box,其作用也是一样的,默认是叠着放。
kotlin
Box {
    Image(painter = painterResource(R.drawable.ic_navi), contentDescription = null)
    Text("Hello World", color = Color.White)
}
2.3 RelativeLayout
RelativeLayout在Compose中,没有对应的组件。那要怎么实现类似RelativeLayout的功能呢 ?
直接用Box、Column、Row多套几层来写就行。
你可能会有疑问了,这样写不会造成性能问题吗 ? 在Android传统View中,最禁忌的就是嵌套布局的写法,会造成性能指数级的下降。
答案是不会,在Compose中,布局层级嵌套,几乎不会造成性能损耗。
为啥呢 ? 因为Compose在约束不变、内容 / 样式不变的前提下,每个节点仅测量一次,所以所以不再需要RelativeLayout这种工具了。
2.4 ConstraintLayout
ConstraintLayout可以理解为RelativeLayout的加强版,同样在Compose中,直接用Box、Column、Row多套几层来写就行了。
ConstraintLayout是有Compose版本的,但是那是在Compose还不完善的时候,需要实现特定功能时会用ConstraintLayout,而现在Compose功能逐渐完善了,Compose版的ConstraintLayout就已经完成其历史使命了。
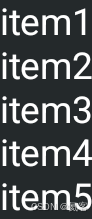
2.5 RecyclerView
RecyclerView在Compose中,对应使用的是 LazyColumn / LazyRow。
相比传统View中的Recyclerview,Compose中不需要写 Adapter + ViewHolder + XML 布局这些大量的模板代码, LazyColumn 仅需几行声明式代码即可替代。
kotlin
val data = mutableListOf("item1", "item2", "item3", "item4", "item5")

LazyColumn {
    items(data) {
        Text(text = it, color = Color.White)
    }
}
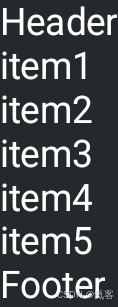
而且在Compose中,可以很方便的添加Header和Footer,相比之下Recyclerview就要麻烦多了。
kotlin
val data = mutableListOf("item1", "item2", "item3", "item4", "item5")

LazyColumn {
    item { Text(text = "Header", color = Color.White) }
    items(data) {
        Text(text = it, color = Color.White)
    }
    item { Text(text = "Footer", color = Color.White) }
}
给item添加click事件也很容易
kotlin
val data = mutableListOf("item1", "item2", "item3", "item4", "item5")

LazyColumn {
    item { Text(text = "Header", color = Color.White) }
    items(data) {
        Text(text = it, modifier = Modifier.clickable { //给item添加点击事件
            toast(it)
        }, color = Color.White)
    }
    item { Text(text = "Footer", color = Color.White) }
}
2.6 ScrollView
ScrollView和Recyclerview的区别是,它内部的滑动组件不是动态的而是预先写好的。在Compose中,要实现和ScrollView同样的效果,只需要在Modifier中添加verticalScroll,就实现竖向的ScrollView的效果了。
如果是横向的ScrollView,那就改成Row和Modifier.horizontalScroll就行。
kotlin
Column(modifier = Modifier.verticalScroll(rememberScrollState())) {
    Text("item1", color = Color.White)
    Text("item2", color = Color.White)
    Text("item3", color = Color.White)
    Text("item4", color = Color.White)
    Text("item5", color = Color.White)
}
2.7 ViewPager
ViewPager,在Compose中应的是HorizontalPager/VerticalPager,横向滑动的是HorizontalPager,垂直方向滑动的是VerticalPager。
kotlin
HorizontalPager(
    state = rememberPagerState(pageCount = { 3 }),
    modifier = Modifier.fillMaxWidth()
) { page ->
    Text(text = "第 ${page + 1} 页!")
}