表单
浏览器对表单提交有默认行为,比如刷新
1.以前的表单处理方式-使用onSubmit
import React, { useState } from "react"

export const Form=()=>{
    // 自己来管理状态
const [formData,setFormData]=useState({
  username: "",
  password:""
})
// react开发ev对象要通过泛型指明
const handleSubmit=(ev:React.FormEvent<HTMLFormElement>)=>{
  ev.preventDefault();   //没有这句话,浏览器会将输入的用户名和密码添加到url
   console.log(formData)
}

    return(

 <form onSubmit={handleSubmit}>
      <label>
         用户名:
         <input type="text" name="username"
         onChange={(ev)=>setFormData({...formData,username: ev.target.value})}
         />
      </label>
         <label>
         密码:
         <input type="password" name="password"
         onChange={(ev)=>setFormData({...formData,password:ev.target.value})}
         />
      </label>
      <button type="submit" >提交</button>
    </form>

    )

}
控制台输出
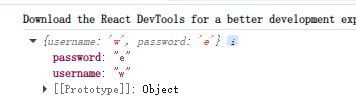
上述写法主要是要自己管理状态
新版本19写法-使用form action
以前action都是提交给后端,表单的行为("action")就是执行submitAction
// 关心的是提交后的Action

import { useState } from "react"

export const FormAction=()=>{

    const [formData,setFormData]=useState(
        {
            username:"",
            password:""
        }
    )
// const handleAction=(ev:React.FormEvent<HTMLFormElement>)=>{
//     ev.preventDefault()
//     console.log(formData)

// }

const handleAction=(formData:FormData)=>{
    console.log(...formData.keys())   //formData数据很深,需要解构   就是username,password
    console.log(...formData.values())   //formData数据很深,需要解构
}

return (
    <form action={handleAction}>
        <label>
            用户名:
            <input
            type="text"
            name="username"


            />

        </label>
         <label>
            密码:
            <input
            type="password"
            name="password"

            />

        </label>
        <button type="submit">提交</button>

    </form>
)

}
服务端Action与客户端Action
Action可以是定义在客户端的普通异步函数(客户端Action),也可以是结合"use Server"指令,在服务端执行的函数(服务端Action),服务端Action是React Server Components下一个强大特性(在
Next.js全栈应用),允许前后端以前所未有的方式实现无缝的RPC调用,
在子组件中获取上层的表单状态可以用useFormStatus
例1
// 关心的是提交后的Action

import { useActionState, useState } from "react"

export const FormAction=()=>{

    const [formData,setFormData]=useState(
        {
            username:"",
            password:""
        }
    )


const handleAction=async(previousState:any,formData:FormData)=>{
    console.log(...formData.keys())   //formData数据很深,需要解构   就是username,password
    console.log(...formData.values())   //formData数据很深,需要解构

    return {
      success:true,
      //还可以返回其他数据
      data:{
       username:formData.get('username'),
       password:formData.get('password')

      }
    }
}


const [state,submitAction,isPending]=useActionState(handleAction,null)
console.log('Form Action~ispending',isPending);   //刚进入页面是false,表单提交之后变为true,之后又变成false
console.log('Form Action~isState',state)   //刚进入页面是null, 表单提交之后是success:true
return (
    <form action={submitAction}>
        <label>
            用户名:
            <input
            type="text"
            name="username"


            />

        </label>
         <label>
            密码:
            <input
            type="password"
            name="password"

            />

        </label>

        <button type="submit">提交</button>

    </form>
)

}
例2 模拟网络延时
handleAction返回会慢些
// 关心的是提交后的Action

import { useActionState, useState } from "react"
function delay(ms: number){
    return new Promise((resolve)=>{
        setTimeout(resolve,ms)
    })
}


export const FormAction=()=>{

    const [formData,setFormData]=useState(
        {
            username:"",
            password:""
        }
    )


const handleAction=async(previousState:any,formData:FormData)=>{
    console.log(...formData.keys())   //formData数据很深,需要解构   就是username,password
    console.log(...formData.values())   //formData数据很深,需要解构
    // 模拟网络延时返回  ms
    await delay(3000)
    // 为了使用useActionState,添加返回
    return {
      success:true,
      //还可以返回其他数据
      data:{
       username:formData.get('username'),
       password:formData.get('password')

      }
    }
}


const [state,submitAction,isPending]=useActionState(handleAction,null)
console.log('Form Action~ispending',isPending);   //刚进入页面是false,表单提交之后变为true,之后又变成false
console.log('Form Action~isState',state)   //刚进入页面是null, 表单提交之后是success:true
return (
    <form action={submitAction}>
        <label>
            用户名:
            <input
            type="text"
            name="username"


            />

        </label>
         <label>
            密码:
            <input
            type="password"
            name="password"

            />

        </label>

        <button type="submit">提交</button>

    </form>
)

}
例3 提交在子组件
增加了SubmitButton() , 父组件的Button 也修改了增加了isPending
// 关心的是提交后的Action

import { useActionState, useState } from "react"
import {  useFormStatus } from "react-dom"
function delay(ms: number){
    return new Promise((resolve)=>{
        setTimeout(resolve,ms)
    })
}

// 这里SubmitButton 是本子组件的子组件
const SubmitButton=()=>{
    // 引入深层次传值API useFormStatus
    const {pending,data,method}=useFormStatus()
    console.log("-------pending------",pending);
     console.log("-------data------",data);
      console.log("-------method------",method);

// 引入useFormStatus 这里也可以用{pending ? "提交中":"提交"} 了
    return (
        <button type="submit">{pending ? "提交中":"提交"}</button>
    )
}


export const FormAction=()=>{

    const [formData,setFormData]=useState(
        {
            username:"",
            password:""
        }
    )


const handleAction=async(previousState:any,formData:FormData)=>{
    console.log(...formData.keys())   //formData数据很深,需要解构   就是username,password
    console.log(...formData.values())   //formData数据很深,需要解构
    // 模拟网络延时返回  ms
    await delay(3000)
    // 为了使用useActionState,添加返回
    return {
      success:true,
      //还可以返回其他数据
      data:{
       username:formData.get('username'),
       password:formData.get('password')

      }
    }
}


const [state,submitAction,isPending]=useActionState(handleAction,null)
console.log('Form Action~ispending',isPending);   //刚进入页面是false,表单提交之后变为true,之后又变成false
console.log('Form Action~isState',state)   //刚进入页面是null, 表单提交之后是success:true
return (
    <form action={submitAction}>
        <label>
            用户名:
            <input
            type="text"
            name="username"


            />

        </label>
         <label>
            密码:
            <input
            type="password"
            name="password"

            />

        </label>

        {/* <button type="submit">{isPending?"提交中":"提交"}</button> */}
        {/* 深层次都是用context 而不是props传值 */}

        {/* 下面这个使用了下一阶的子组件 */}
<SubmitButton />
    </form>
)

}
填完内容提交的效果
19 版-Suspense
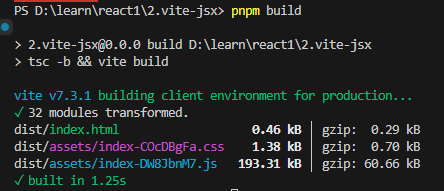
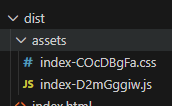
正常pnpm build产生的只有1份js文件
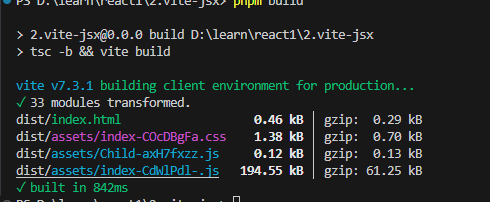
但是如果想让子组件作为异步组件导入,单独作为一份js文件,就要用suspense
suspense主要用来加载异步组件
1)首先改造想作为异步子组件的组件内容,主要是要用 export default
//如果想让自己成为异步组件,就不能用这个了
// export const Child=()=>{

//     return (<div>Child</div>)
// }

// 异步写法
const Child=()=>{
    return (<div>异步子组件</div>)
}

export default Child
2)再改造父组件
引入lazy
引入Suspense
import { lazy, Suspense } from "react";
// import { Child } from "./Child";
// 加载异步组件1,react提供lazy
const Child=lazy(()=>import("./Child"))


export const SuspenseDemo=()=>{


    return (
        <div>
            <Suspense fallback={<div>加载中......</div>}>
              <Child/>
            </Suspense>

        </div>
    )
}
编译结果,会出现两份js
运行页面会有一会在加载中
import {Suspense,useEffect,useState} from "react"


//等待函数
const delay=(ms:number)=>{
    return new Promise(
        (resolve)=>{
            setTimeout(resolve,ms)
        }

    );
}

//模拟外部接口的异步函数

const fetchMessage=async()=>{
    await delay(2000);
    return "hello world"
}


//Message专门用来加载远程数据,需要先去接口请求数据
const Message=()=>{
//为了请求远程数据,状态
const [loading,setLoading]=useState(false)
const [message,setMessage]=useState("")


//使用副作用来获取结果
useEffect(()=>{
    setLoading(true)
    fetchMessage().then((message)=>{
        setMessage(message)
    }).finally(
        ()=>{
            setLoading(false)
        }
    );
},[]);

    return <div>{loading ? "加载中....." : message}</div>
}


export const SuspenseNew=()=>{
   return(
    <div>
        <Suspense  fallback={<div>loading.....</div>}>
            <Message/>


        </Suspense>
    </div>


    )
}
rendor as your fetch
import { Suspense, use } from "react";


//获取数据,返回一个Promise
const fetchMessage=()=>{
    return new Promise((resolve)=>setTimeout(()=>{
        resolve("Hello from the futrue"),2000
    }));
}

//Message组件在渲染时读取Promise
const Message=({messagePromise}:{messagePromise: Promise<String>})=>{
    //在渲染期间直接use(Promise)
    const  message =use(messagePromise);
    console.log('消息-----',message)
    return (<div>{message}</div>)
};

//APP组件管理Promise的创建和边界
export const SuspenseNew2=()=>{
    const messagePromise=fetchMessage();
    return (
        <div>
            <Suspense fallback={<div>加载中...</div>}>
                <Message messagePromise={messagePromise}   />
            </Suspense>
        </div>
    )
}
这种模式被称为"Render-as-you-fetch"。我们不再需要在useEffect中获取数据,也无需手动管理
loading状态。数据获取的请求在渲染开始时就已发出,组件则声明式地等待数据就位。这避免了网络请求的瀑布
流问题,并使得数据加载的UI逻辑变得异常简洁和健壮。
新特性use0ptimistic:
实现乐观更新,提升交互体验
在与服务器交互时,为了让应用感觉更"快",我们常常使用乐观更新(OptimisticUpdates)技术。即在操作的请求
还未得到服务器确认时,就先假设它会成功,并立即更新UI。
useOptimisticHook将这种复杂的模式变得非常简单。它接收一个当前状态,并返回一个该状态的"乐观"副本
以及一个更新函数。在异步操作期间,你可以调用更新函数来设置一个临时的、乐观的状态值。当异步操作结束后,
无论是成功还是失败,React都会自动将UI回滚到原始的、与服务器一致的状态。
新特性AssetLoading:
通过Suspense管理资源加载
在过去,我们常常会遇到样式闪烁(FOUC)或因字体未加载完成而导致的布局抖动。React19将样式、学体、脚
等资源的加载也整合进了Suspense机制。
现在,React能够自动检测到组件染所依赖的样式表或字体,并在这些资源加载完成之前,暂停渲染并显示
<Suspense>的fallbackUI。这从根本上保证了用户看到的永远是内容与样式完全匹配的、完整的界面,极大地
升了用户体验的稳定性。
新特性ref作为Prop
ref作为Prop:简化forwardRef
forwardRef是React中用于将ref从父组件转发到子组件内部DOM节点的API,但它的写法相对长和不直
观。在React19 中,这个过程被大大简化了。现在,ref 可以像普通prop一样直接传递给函数式组件,无需再用
forwardRef进行包装。
//旧方式
const MyInputOld=React.forwardRef((props,ref)=>{
return <input ref={ref} {...props} />;
});

//19新方式
const MyInputNew=(props)=>{
//ref是一个常规的prop
return <input ref={props.ref} {...props} />;
});
//使用时
const App=()=>{
const inputRef=useRef();
return <MyInputNew ref={inputref}/>

}
Forget:ReactCompiler
其实是编译优化、忘记手动优化
优点
- 自动记忆化(Memoization):
避免使用useMemo useCallback,React.memo进行手动优化,但是编译后还是会自动产生
2)提升开发者体验
- 保持JS语义
原理
ReactCompiler并非运行时库的一部分,而是一个编译时工具(通常作为Babel插件),它在项目打包的过程中,对源代码进行深度分析和重写,通过编译时和运行时配合优化
深度静态分析
建模与依赖追踪
智能代码重写
地址
https://github.com/facebook/react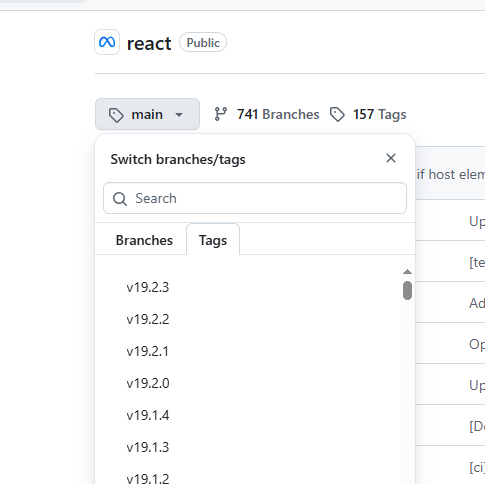
tags选择19,就能发现compiler,这个以前是没有的

进一步查看packages:
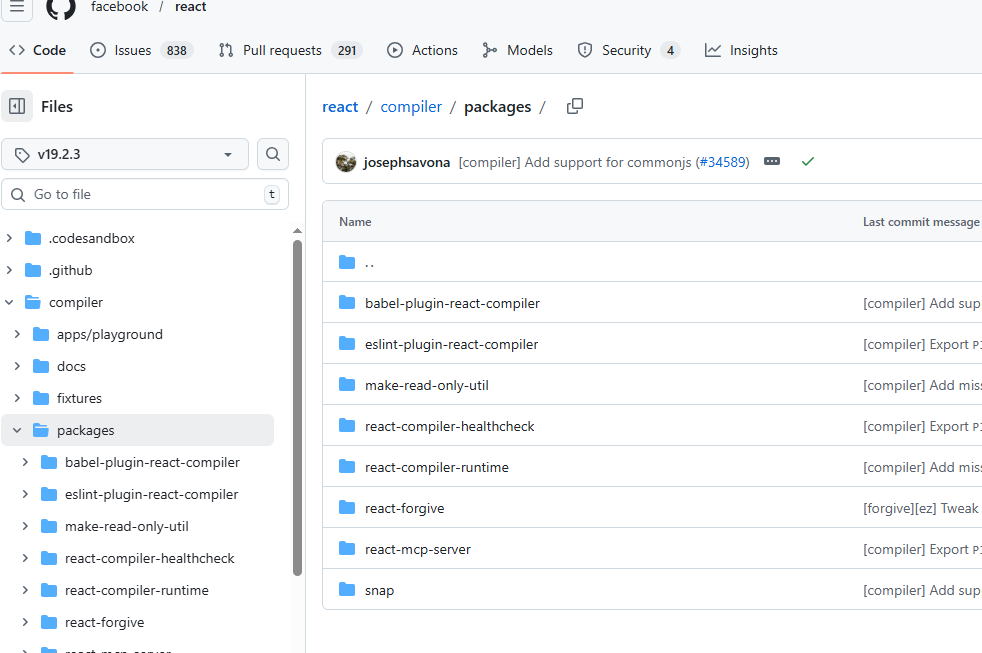
里面最核心的是 react-forgive
编译时
上面以babel开始都是在编译的过程中处理,比如如下的optimization文件夹
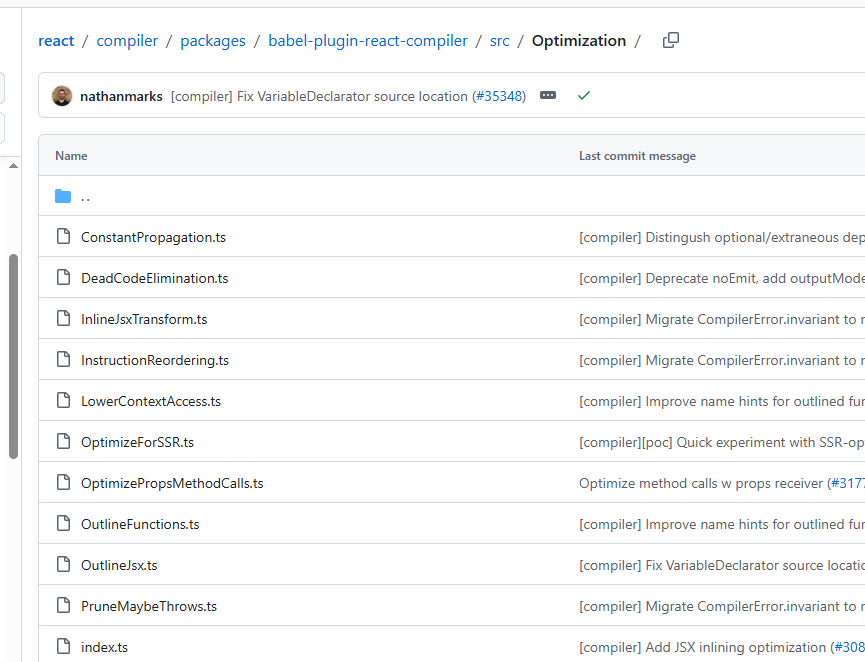
比如找到JSX

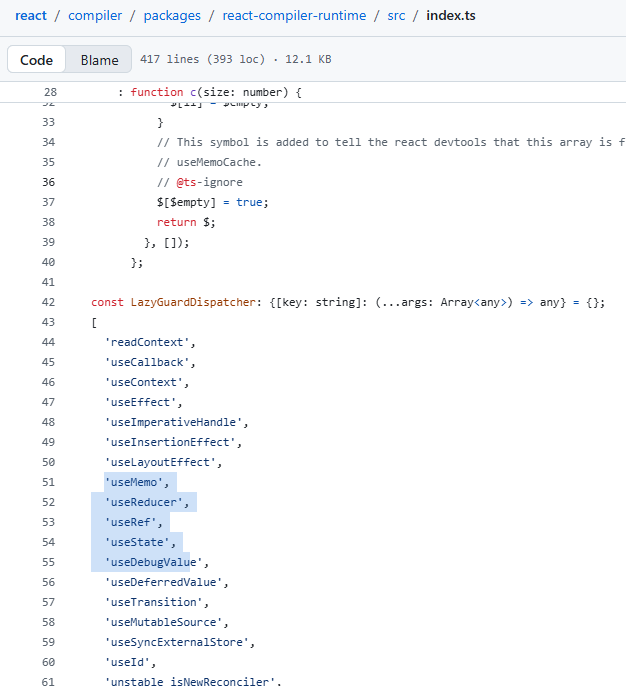
运行时
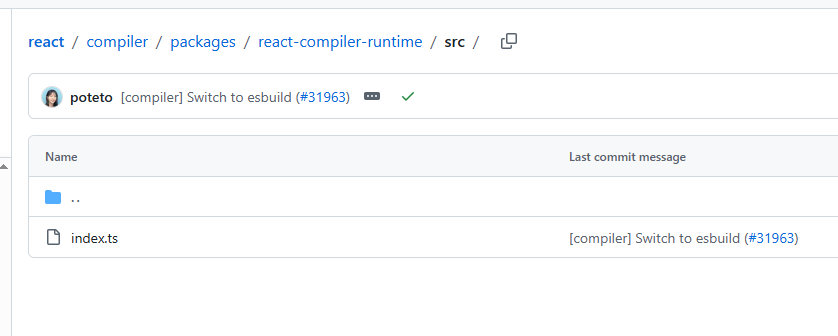
打开,可以发现 LazyGuardDispatcher
安装
Babel插件安装,点击下面的Readme.md
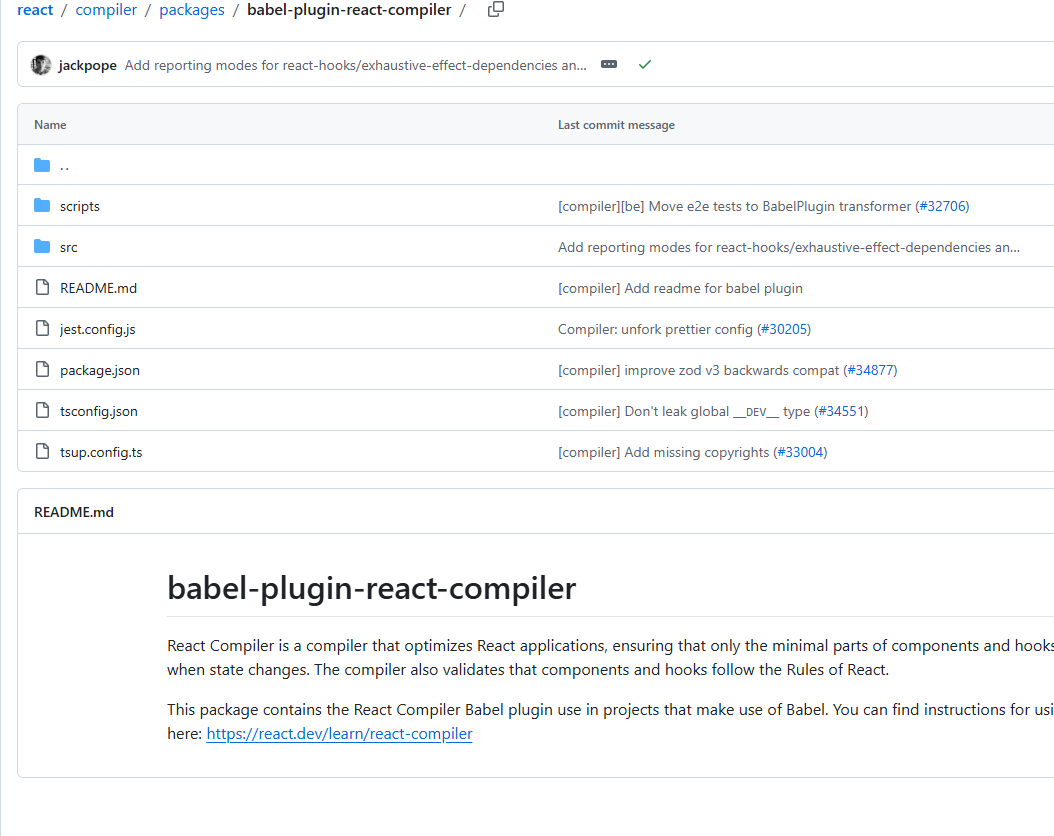
在package.json中进行指定,
然后使用pnpm -来更新依赖
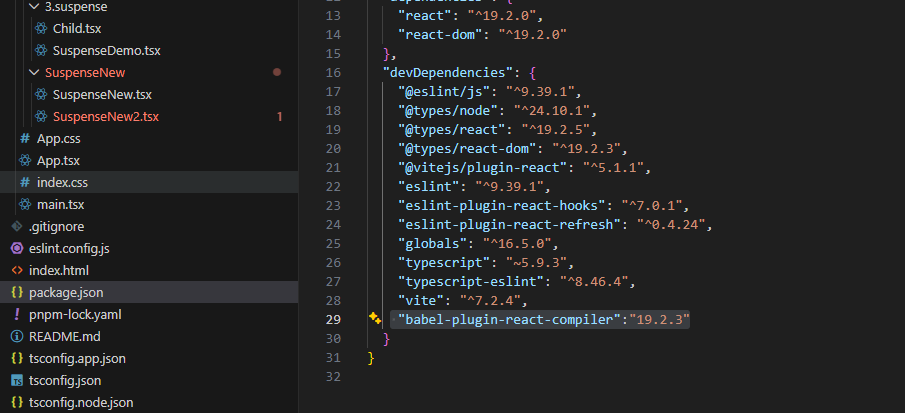
如果随便乱输版本,pnpm i会报错
"babel-plugin-react-compiler":"bbb"报错:

可以根据报错的提示来修正
"babel-plugin-react-compiler":"rc: 19.1.0-rc.3"修改vite.config.ts
没改之前
import { defineConfig } from 'vite'
import react from '@vitejs/plugin-react'

// https://vite.dev/config/
export default defineConfig({
  plugins: [react(

  )],
})
修改之后,加入babel plugin
import { defineConfig } from 'vite'
import react from '@vitejs/plugin-react'

// https://vite.dev/config/
export default defineConfig({
  plugins: [react({

     babel: {
      plugins:["babel-plugin-react-compiler"]
     }


  }

  )],
})
验证
pnpm build可以在编译输出文件dist/assets中看到useMemo useMemoCache

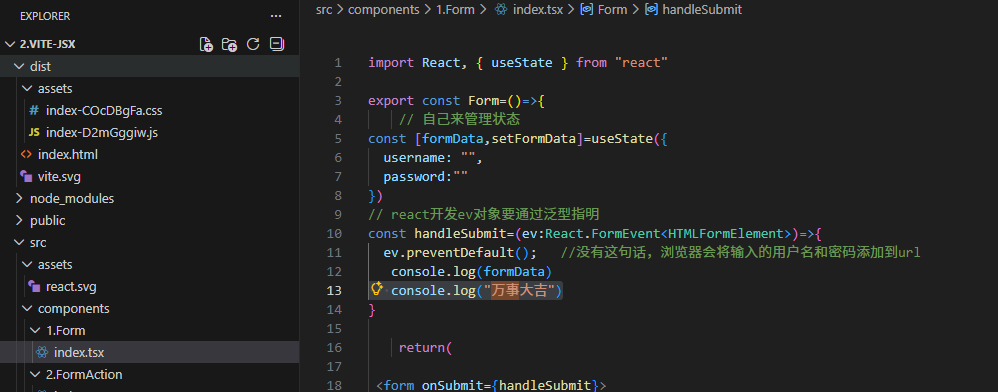
再次验证
在Form handle Submit中添加打印语句
console.log("万事大吉")
记得在App.tsx中引用上述修改的子组件 <Form/>
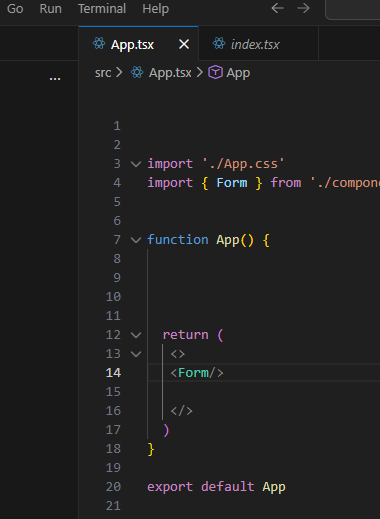
然后编译 pnpm build,在编译后的文件中dist/assets/可以搜索到 万事大吉
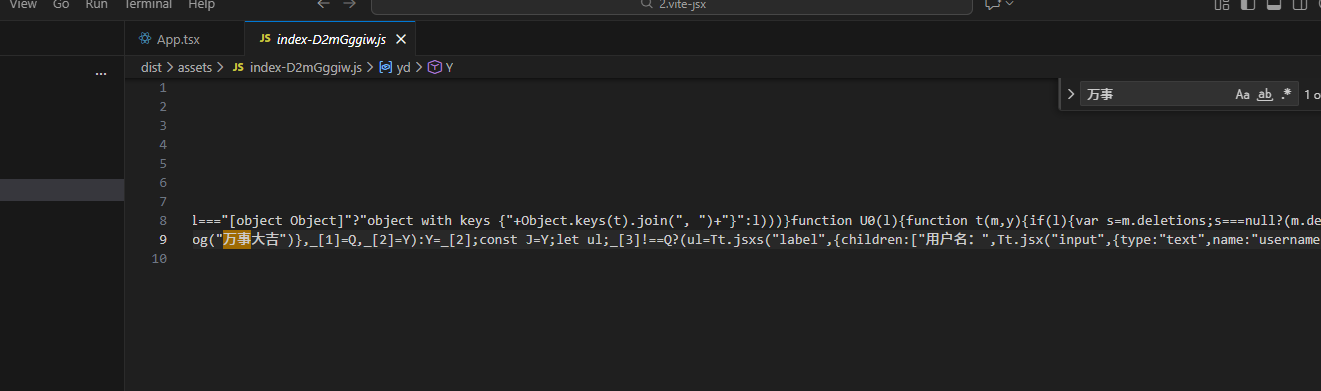
再次验证2
console.log 输出中文字符,不会被编译替换
如果vite.config.ts去掉 babel: {
plugins:"babel-plugin-react-compiler"
},编译后就不会出现memoCache这些
状态管理
UseState
组件内
import { useState } from "react";

export const UseState = () => {
    // const[count,setCount]=useState(0);   //1.基本使用
    const[count, setCount] = useState(()=>0); //3.也可以使用函数式初始化
  return (
    <div>

       <p>count: {count}</p>
       <button onClick={()=>setCount(count+1)}>Increment</button>
       {/* 2.就近取值性能优化 */}
            <button onClick={()=>setCount(c=>c+1)}>Increment</button>
       <button onClick={()=>setCount(count-1)}>Decrement</button>


         </div>
  )
}
UseReducer
相对复杂,比如涉及到对象的多个属性的修改
redux作者开发,单向数据流
import { useReducer } from "react";

// export const UserReducer=()=>{
//      const[info,setInfo]=useState({name:'zhangsan',age:18});


//     return(
//         <div>
//             <p>
//                 name:{info.name},age:{info.age}
//             </p>
//             <input value={info.name} onChange={(e)=>setInfo({...info,name:e.target.value})}/>   //先把info展开,然后修改对应的值
//             <input value={info.age} onChange={(e)=>setInfo({...info,age:Number(e.target.value)})}/>
//                </div>
//     )
// }

// Redux设计思想 UseReducer是同一个作者完成
// 对于状态的操作,我们需要提取出来,叫做action
// 然后action 需要有专门的方法来完成状态值的更新,Reducer
//结果state, 驱动视图更新

const initialState={name:'zhangsan',age:18};
const reducer=(
    state:typeof initialState,
    action:{type:string,payload:any})=>{
        switch(action.type){
            case 'changeName':
                return {...state,name:action.payload};
            case 'changeAge':
                return {...state,age:action.payload};
            default:
                return state;
        }

      }


export const UserReducer=()=>{
const[info,dispatch]=useReducer(reducer,initialState);

return (
    <div>
        <p>
            name:{info.name},age:{info.age}
        </p>
        <input value={info.name}
        onChange={(e)=>dispatch(
            {type:'changeName',payload:e.target.value})}/>
        <input value={info.age}
         onChange={(e)=>dispatch(
            {type:'changeAge',payload:Number(e.target.value)})}/>
    </div>
)
}
UseContext
方法1 层层传递
如下在父组件中切换主题,通过theme层层传递
parent:
import { useState } from "react";
import { Child } from "./2.Child";


// export const Parent = ({theme}:{theme:string}) => {
    export const Parent = () => {
const [theme,setTheme]=useState("light");

  return <div><Child theme={theme}/>

  <button onClick={() => setTheme(theme === "light" ? "dark" : "light")}>
    切换主题
  </button>
  </div>;
}
child
import { GrandChild } from "./3.GrandChild";

export const Child = ({theme}:{theme:string}) => {
  return <div><GrandChild theme={theme}/></div>;
}
granddhild:
export const GrandChild = ({theme}:{theme:string}) => {
  return <div>GrandChild {theme}</div>;
}
方法2 createContext
定义createContext
import { createContext } from "react"

// 当前主题
export const ThemeContext = createContext(

{
 theme: "light",
  toggleTheme: () => {},
}


)
parent:
import { useState } from "react";
import { Child } from "./2.Child";
import { ThemeContext } from "./ThemeContext";


// export const Parent = ({theme}:{theme:string}) => {
    export const Parent = () => {
const [theme,setTheme]=useState("light");
const toggleTheme=()=>{
  setTheme(theme === "light" ? "dark" : "light")
}

  return (
<div>
    <ThemeContext.Provider value={{theme, toggleTheme}}>


 <Child />

  <button onClick={toggleTheme}>切换主题</button>
   </ThemeContext.Provider>
  </div>

  )
}
child:
import { GrandChild } from "./3.GrandChild";

export const Child = () => {

  return <div><GrandChild/></div>;
}
Grandchild:
import { useContext } from "react";
import { ThemeContext } from "./ThemeContext";

export const GrandChild = () => {
//       const {theme} = useContext(ThemeContext);
//   return <div>GrandChild {theme}</div>;

return(
    <ThemeContext.Consumer>
      {({ theme }) => <div>GrandChild {theme}</div>}
    </ThemeContext.Consumer>
)
}
方法3 自定义hooks-最常用
增加useTheme这个hooks,其实就是增加一个方法
import { useContext } from "react";
import { ThemeContext } from "./ThemeContext";

export const useTheme = () => {
    const {theme} = useContext(ThemeContext);
    return theme;
}
改变GrandChild.tsx
import { useTheme } from "./useTheme";

export const GrandChild = () => {
//       const {theme} = useContext(ThemeContext);
//   return <div>GrandChild {theme}</div>;

// return(
//     <ThemeContext.Consumer>
//       {({ theme }) => <div>GrandChild {theme}</div>}
//     </ThemeContext.Consumer>
// )

const theme = useTheme();
return <div>GrandChild {theme}</div>;
}
性能优化
注意不要过早优化,当使用React DevTools Profiler等工具确认了某个组件存在性能瓶颈时再优化
React.memo
用于包裹函数式组件,对传入的props可进行浅比较,变化时才会重新渲染被包裹组件
import { memo } from "react";
import { GrandChild } from "./3.GrandChild";

export const Child =memo(
() => {

  return <div><GrandChild/></div>;
},()=>true        //如果memo的第二个参数返回true,则不进行重新渲染,判断前后参数是否相等,true表示相等

)
useMemo
这个hook用于记忆化一个结果,接收一个函数和和一个依赖项数组,只有在依赖项发生变化时,才会重新执行该函数,并返回新的值
a.缓存开销巨大的计算结果,避免在每次渲染时后重新计算
b.当向一个被React.memo包裹的子组件传递对象或数组作为props时,使用useMemo来保证该prop引用稳定性,
import { useCallback, useMemo, useState } from "react";

export const Memo=() => {
    const [count,setCount]=useState(0);
    const [count2,setCount2]=useState(0);
    // 缓存当前数值double,派生   当count变化时,重新计算doubleInfo,而不是count2变化时
    const doubleInfo=useMemo(() =>({info:count*2}),[count]);

    // const handleClick=() => {
    //     setCount(count+1);
    // }
        const handleClick=useCallback(() => {    //缓存函数  当count变化时,重新创建函数,而不是count2变化时
        setCount(count+1);
    },[count]);
    return <div>{doubleInfo.info}

    <div onClick={handleClick}></div>
    </div>
}
useCallback
用于记忆化一个函数实例,与useMemo类似,但是专门用于函数,当向一个被React.memo包裹的子组件传递函数作为props时,使用useMemo来保证该prop引用稳定性,
自定义Hooks
自定义一个
//自定义hook,使用了TS 泛型
import { useState, useEffect } from "react";
export function UseLocalStorageState<T>(
    key: string,
    defaultValue: T):[T, React.Dispatch<React.SetStateAction<T>>] {
    // 从localStorage中读取初始值
    const [state, setState] = useState<T>(() => {
        const storedValue = localStorage.getItem(key);
        return storedValue===null ? JSON.parse(storedValue) : defaultValue;
    });

    //每当state变化时,同步到localStorage
    useEffect(() => {
        localStorage.setItem(key, JSON.stringify(state));
    }   , [key, state]);

    return [state, setState];
}
使用
import { useState } from "react";


export const CustomExample=() => {
    const [count, setCount] = useState(0);
    return <div>
        <h1>自定义Hook应用举例</h1>
        <p>当前计数 {count}</p>
        <button onClick={() => setCount(count + 1)}>增加</button>
        <button onClick={()=>setCount(count-1)}></button>
        </div>
}
泛型Hook
事件
ZOD
运行时的类型检查,和JS很好结合去使用
增加到package.json
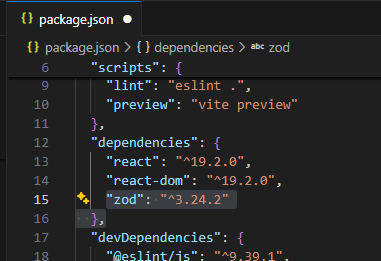
安装 pnpmi
使用
//
import z from "zod";
const ResponseSchema = z.object({
id: z.string(),
name: z.string(),
suscess: z.boolean()
});
ResponseSchema.parse({
id:"1",
name:"aaa",
success2:true
});
export const ZodDemo = () => {
return <div>aaa</div>
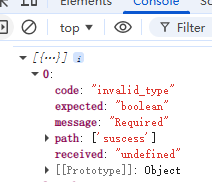
}因为出入的是success2
控制台直接会报错,网页不出现内容
ncaught ZodError: [
  {
    "code": "invalid_type",
    "expected": "boolean",
    "received": "undefined",
    "path": [
      "suscess"
    ],
    "message": "Required"
  }
]
用trycatch包裹
//

import z from "zod";

const ResponseSchema = z.object({
    id: z.string(),
  name: z.string(),
  suscess: z.boolean()
});

try {
  ResponseSchema.parse({
  id:"1",
  name:"aaa",
  success2:true
});
} catch (error) {
  if(error instanceof z.ZodError){
    console.log(error.issues)
  }
}


export const ZodDemo = () => {

    return <div>aaa</div>
}
控制台会输出
用法2 通过zod转为ts
//

import z from "zod";

// 对运行时数据检查
const ResponseSchema = z.object({
    id: z.string(),
  name: z.string(),
  suscess: z.boolean()
});

try {
  //也可以用safeparse
  ResponseSchema.parse({
  id:"1",
  name:"aaa",
  success2:true
});
} catch (error) {
  if(error instanceof z.ZodError){
    console.log(error.issues)
  }
}

// 通过zod转为ts
type User=z.infer<typeof ResponseSchema>


export const ZodDemo = () => {

  const user: User={
    id:"1",
    name:"libai",
    suscess:true
  }

    return <div>aaa</div>
}
高级类型
Utility Types
1)Partial<Type> 将Type中的所有属性变为可选
2)Required<Type> 将Type中的所有属性变为必选
- Pick<Type,Keys> 从Type中挑选出指定的Keys属性来创建一个新类型
4)Omit<Type,Keys>从Type中排除掉指定的Keys属性来创建一个新类型