Threejs (11)
一、聚光源SpotLight
javascript
import * as THREE from "three";

const shape = new THREE.Shape();
shape.moveTo(0, 0); //.currentPoint变为(10,0)

shape.lineTo(100, 0);
shape.lineTo(100, 100);
shape.lineTo(0, 100);

// ShapeGeometry填充Shape获得一个平面几何体
const geometry = new THREE.ShapeGeometry(shape);
const material = new THREE.MeshLambertMaterial({
  color: 0xffffff,
  transparent: true,
  opacity: 0.8,
  side: THREE.DoubleSide,
});
const mesh = new THREE.Mesh(geometry, material); //网格模型对象Mesh
// 绕 X 轴旋转 90 度
mesh.rotation.x = Math.PI / 2;
export default mesh;
javascript
import * as THREE from "three";


const geometry = new THREE.PlaneGeometry(1000, 1000, 2, 1);

const material = new THREE.MeshLambertMaterial({
  color: 0xffffff,
  // transparent: true,
  // opacity: 0.8,
  side: THREE.DoubleSide,
});
const mesh = new THREE.Mesh(geometry, material); //网格模型对象Mesh
// 绕 X 轴旋转 90 度
mesh.rotation.x = Math.PI / 2;
export default mesh;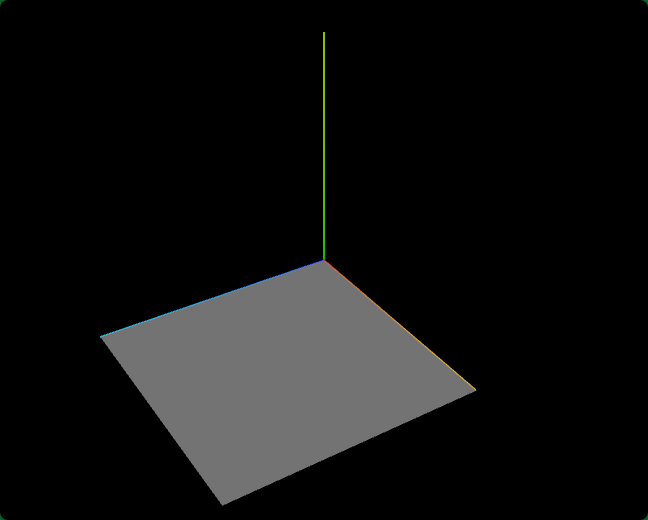
创建聚光源SpotLight
index.js
javascript
// 聚光源
// 0xffffff:光源颜色
// 1.0:光照强度intensity
const spotLight = new THREE.SpotLight(0xffffff,1.0);
scene.add(spotLight);//光源添加到场景中
javascript
spotLight.intensity = 1.0;//光照强度聚光源发散角度.angle
javascript
// 设置聚光光源发散角度
spotLight.angle = Math.PI / 6;//光锥角度的二分之一
光源衰减
javascript
spotLight.decay = 0.0;//设置光源不随距离衰减聚光源位置.position
聚光源SpotLight的父类是Light,Light的父类是Object3D,聚光源SpotLight会继承父类Object3D的位置属性.position。
javascript
// 设置聚光光源位置
spotLight.position.set(0, 50, 0);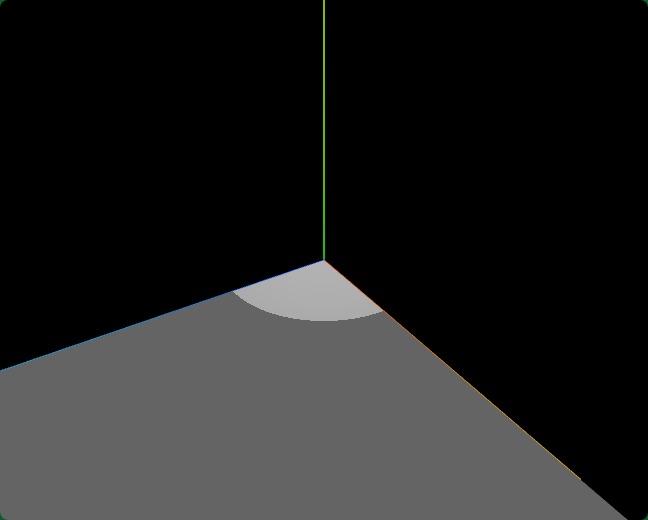
聚光源目标对象.target
javascript
console.log("聚光源指向目标", spotLight.target);
javascript
// spotLight.target是一个模型对象Object3D,默认在坐标原点
spotLight.target.position.set(50,0,50);
//spotLight.target添加到场景中.target.position才会起作用
scene.add(spotLight.target);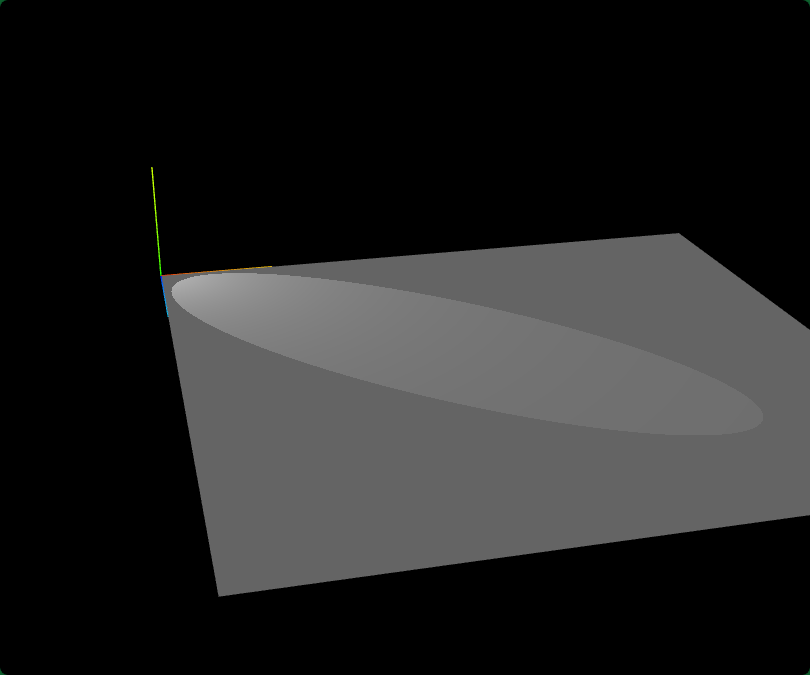
聚光源辅助对象SpotLightHelper
javascript
// 聚光源辅助对象,可视化聚光源
const spotLightHelper = new THREE.SpotLightHelper(spotLight,0xffffff)
scene.add(spotLightHelper);
二、平行光阴影计算
javascript
import * as THREE from "three";


const geometry = new THREE.PlaneGeometry(1000, 1000, 2, 1);

const material = new THREE.MeshLambertMaterial({
  color: 0xffffff,
  // transparent: true,
  // opacity: 0.8,
  side: THREE.DoubleSide,
});

const mesh = new THREE.Mesh(geometry, material); //网格模型对象Mesh
// 绕 X 轴旋转 90 度
mesh.rotation.x = Math.PI / 2;

// 添加第二个矩形几何体
const geometry1 = new THREE.BoxGeometry(50, 50, 50);
const material1 = new THREE.MeshLambertMaterial({
  color: 0x00b7ce,
  side: THREE.DoubleSide,
});
const mesh1 = new THREE.Mesh(geometry1, material1);
mesh1.position.set(100, 50, 100); // 设置位置

export default {mesh, mesh1};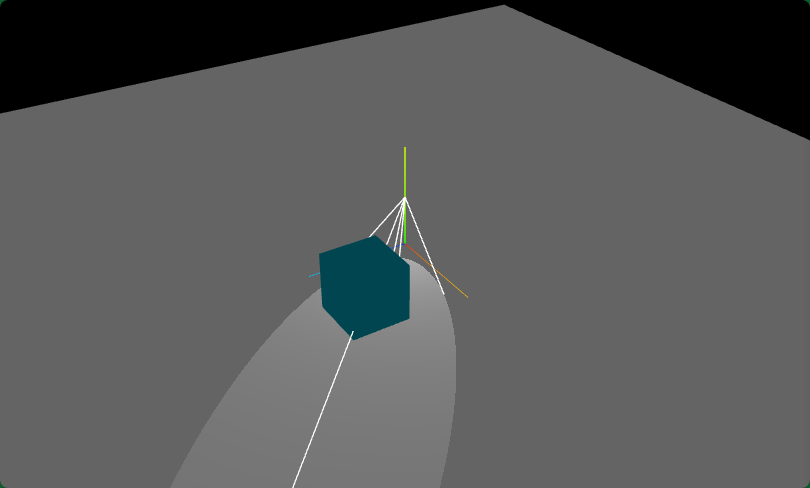
模型阴影投射.castShadow
javascript
// 设置产生投影的网格模型
mesh1.castShadow = true;光源阴影投射属性.castShadow
javascript
// 平行光
const directionalLight = new THREE.DirectionalLight(0xffffff, 1);
// 平行光设置产生阴影的光源对象,开启光源阴影的计算功能
directionalLight.castShadow = true;模型阴影接收属性.receiveShadow
javascript
// 设置接收阴影的投影面
mesh.receiveShadow = true;.shadowMap.enabled允许渲染器渲染阴影
javascript
// 设置渲染器,允许光源阴影渲染
renderer.shadowMap.enabled = true; 平行光阴影相机属性.shadow.camera(阴影渲染范围)
javascript
// 查看平行光阴影相机属性
console.log('阴影相机属性',directionalLight.shadow.camera);
忘记注释聚光光源了
CameraHelper可视化.shadow.camera
javascript
// 可视化平行光阴影对应的正投影相机对象
const cameraHelper = new THREE.CameraHelper(directionalLight.shadow.camera);
scene.add(cameraHelper);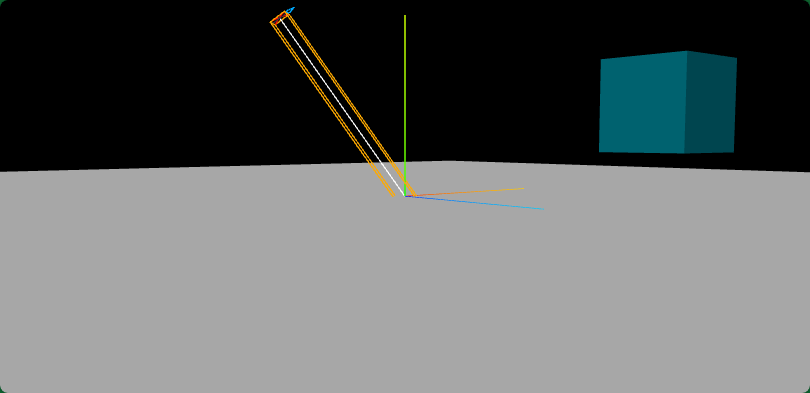
javascript
console.log('shadow.camera位置',directionalLight.shadow.camera.position);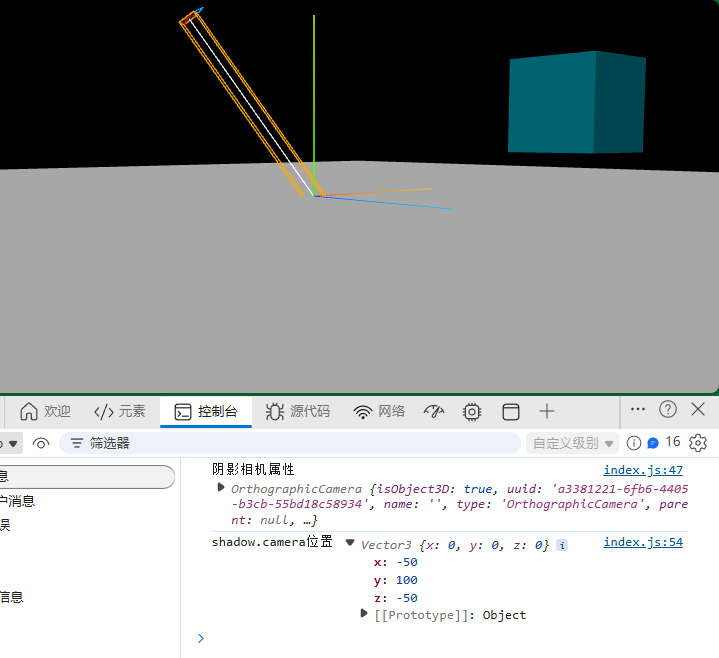
.shadow.camera设置阴影渲染范围
javascript
// 设置三维场景计算阴影的范围
directionalLight.shadow.camera.left = -50;
directionalLight.shadow.camera.right = 50;
directionalLight.shadow.camera.top = 200;
directionalLight.shadow.camera.bottom = -100;
directionalLight.shadow.camera.near = 0.5;
directionalLight.shadow.camera.far = 600;
三、阴影范围.shadow.camera
index.js
javascript
import * as THREE from "three";
import { OrbitControls } from "three/addons/controls/OrbitControls.js";

import modelGroup from "./model.js"; //模型对象

//场景
const scene = new THREE.Scene();
scene.add(modelGroup.mesh); //模型对象添加到场景中
scene.add(modelGroup.mesh1); //第二个模型对象添加到场景中
scene.add(modelGroup.group); //第三个模型对象添加到场景中

//辅助观察的坐标系
const axesHelper = new THREE.AxesHelper(100);
scene.add(axesHelper);

//光源设置
const ambient = new THREE.AmbientLight(0xffffff, 0.4);
scene.add(ambient);
const directionalLight = new THREE.DirectionalLight(0xffffff, 1);
directionalLight.position.set(-50, 100, -50);
scene.add(directionalLight);
// 聚光源
// 1.0:光照强度intensity
const spotLight = new THREE.SpotLight(0xffffff, 1);
// 设置聚光光源发散角度
spotLight.angle = Math.PI / 6; //光锥角度的二分之一
spotLight.decay = 0.0; //设置光源不随距离衰减
// 设置聚光光源位置
spotLight.position.set(0, 50, 0);
// console.log("聚光源指向目标", spotLight.target);
// spotLight.target是一个模型对象Object3D,默认在坐标原点
spotLight.target.position.set(50, 0, 50);
//spotLight.target添加到场景中.target.position才会起作用
scene.add(spotLight.target);

// 平行光设置产生阴影的光源对象,开启光源阴影的计算功能
directionalLight.castShadow = true;
// 设置三维场景计算阴影的范围
directionalLight.shadow.camera.left = -50;
directionalLight.shadow.camera.right = 50;
directionalLight.shadow.camera.top = 200;
directionalLight.shadow.camera.bottom = -100;
directionalLight.shadow.camera.near = 0.5;
directionalLight.shadow.camera.far = 600;


// 查看平行光阴影相机属性
// console.log("阴影相机属性", directionalLight.shadow.camera);

// scene.add(spotLight); //光源添加到场景中
// 可视化平行光阴影对应的正投影相机对象
const cameraHelper = new THREE.CameraHelper(directionalLight.shadow.camera);
scene.add(cameraHelper);

console.log("shadow.camera位置", directionalLight.shadow.camera.position);

// 聚光源辅助对象,可视化聚光源
const spotLightHelper = new THREE.SpotLightHelper(spotLight, 0xffffff);
// scene.add(spotLightHelper);

//相机
const width = window.innerWidth;
const height = window.innerHeight;
const camera = new THREE.PerspectiveCamera(30, width / height, 1, 3000);
camera.position.set(292, 223, 185);
camera.lookAt(0, 0, 0);

// WebGL渲染器设置
const renderer = new THREE.WebGLRenderer({
  antialias: true, //开启优化锯齿
});
renderer.setPixelRatio(window.devicePixelRatio); //防止输出模糊
renderer.setSize(width, height);
document.body.appendChild(renderer.domElement);
// 设置渲染器,允许光源阴影渲染
renderer.shadowMap.enabled = true;
// 渲染循环
function render() {
  renderer.render(scene, camera);
  requestAnimationFrame(render);
}
render();

const controls = new OrbitControls(camera, renderer.domElement);

// 画布跟随窗口变化
window.onresize = function () {
  renderer.setSize(window.innerWidth, window.innerHeight);
  camera.aspect = window.innerWidth / window.innerHeight;
  camera.updateProjectionMatrix();
};
model.js
javascript
import * as THREE from "three";


const geometry = new THREE.PlaneGeometry(850, 850);
// 平面
const material = new THREE.MeshLambertMaterial({
  color: 0xffffff,
  side: THREE.DoubleSide,
});

const mesh = new THREE.Mesh(geometry, material); //网格模型对象Mesh
// 绕 X 轴旋转 90 度
mesh.rotation.x = Math.PI / 2;

// 添加矩形几何体
const geometry1 = new THREE.BoxGeometry(50, 50, 50);
const material1 = new THREE.MeshLambertMaterial({
  color: 0x00b7ce,
  side: THREE.DoubleSide,
});
const mesh1 = new THREE.Mesh(geometry1, material1);
mesh1.position.set(100, 50, 100); // 设置位置

const group = new THREE.Group();
group.add(mesh1);

// 设置产生投影的网格模型
mesh1.castShadow = true;

// 设置接收阴影的投影面
mesh.receiveShadow = true;

for (let i = -3; i < 4; i++) {
  const mesh2 = mesh1.clone();
  // 设置产生投影的网格模型
  mesh2.castShadow = true;
  mesh2.position.z = 100 * i;
  group.add(mesh2);
}

export default {mesh, mesh1, group};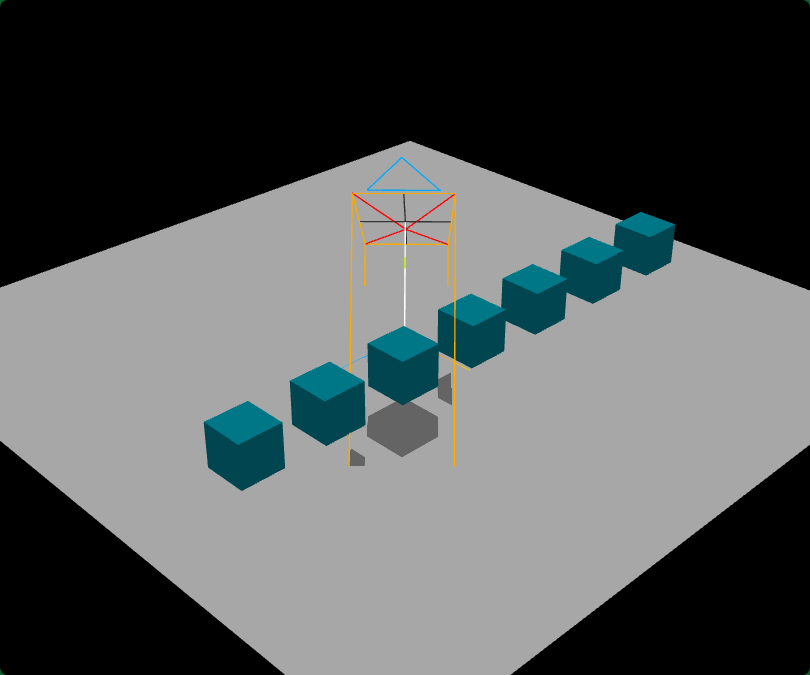
设置相机.shadow.camera长方体范围
javascript
// 设置三维场景计算阴影的范围
directionalLight.shadow.camera.left = -50;
directionalLight.shadow.camera.right = 50;


directionalLight.shadow.camera.top = 200;
directionalLight.shadow.camera.bottom = -100;
directionalLight.shadow.camera.near = 0.5;
directionalLight.shadow.camera.far = 600;
调节光源位置
javascript
directionalLight.position.set(-50, 100, -50);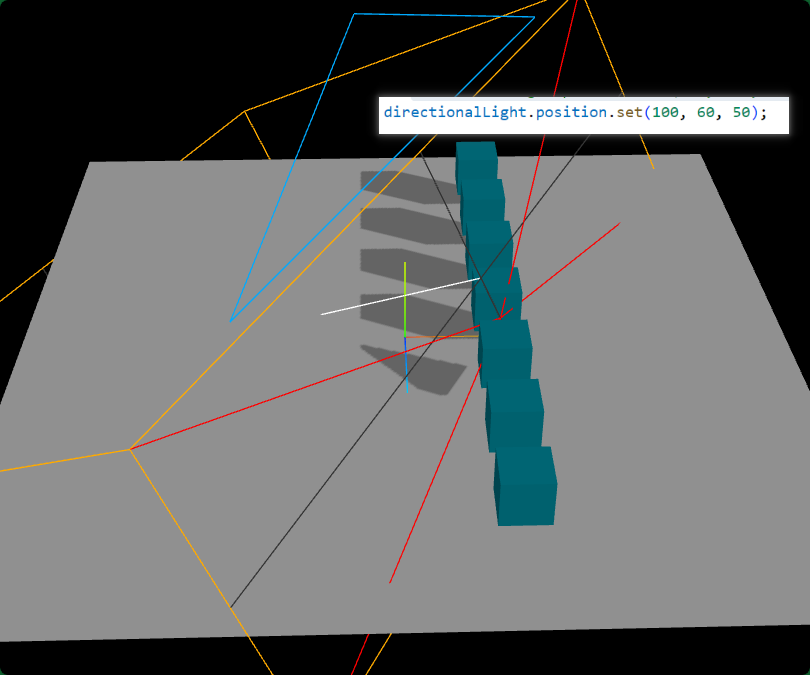
确定阴影计算范围,根据尺寸数量级设置阴影渲染范围
javascript
// 设置三维场景计算阴影的范围
directionalLight.shadow.camera.left = -50*7;
directionalLight.shadow.camera.right = 50*5;

directionalLight.shadow.camera.top = 200;
directionalLight.shadow.camera.bottom = -50;
directionalLight.shadow.camera.near = 0.5;
directionalLight.shadow.camera.far = 600;
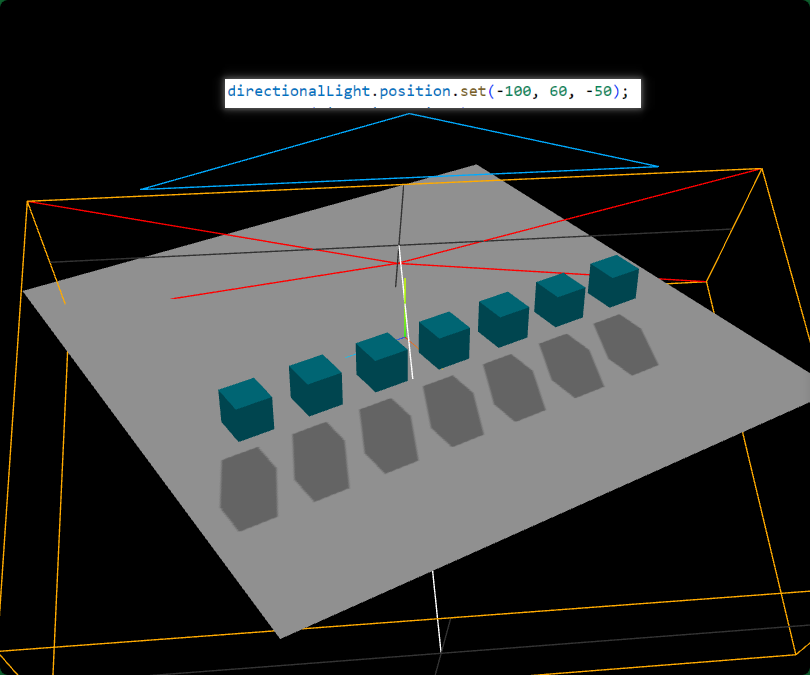
javascript
directionalLight.position.set(-100, 60, -50);
四、阴影.mapSize和.radius
light.shadow.mapSize阴影贴图尺寸属性
javascript
// mapSize属性默认512x512
console.log('阴影默认像素',directionalLight.shadow.mapSize);
javascript
directionalLight.shadow.mapSize.set(128,128)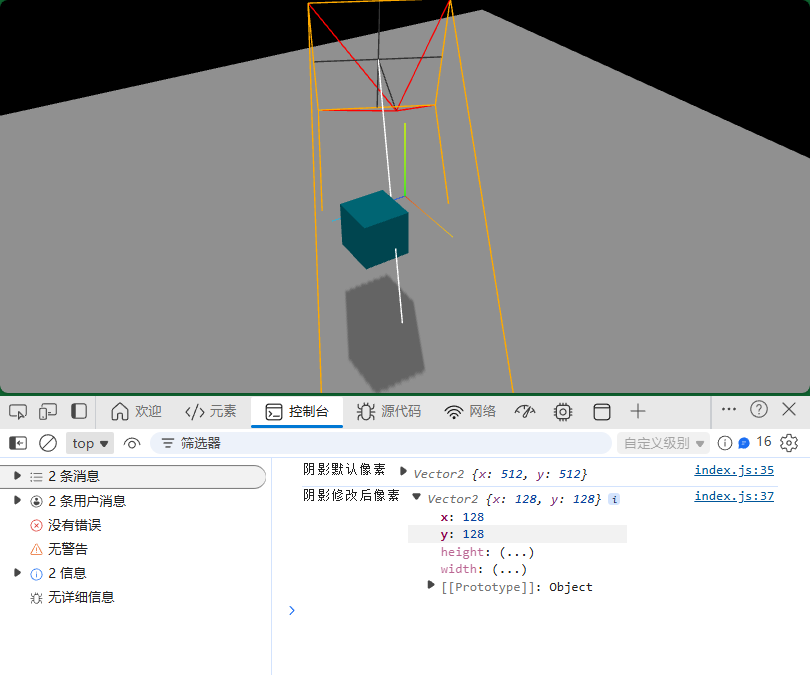
javascript
directionalLight.shadow.mapSize.set(2048, 2048);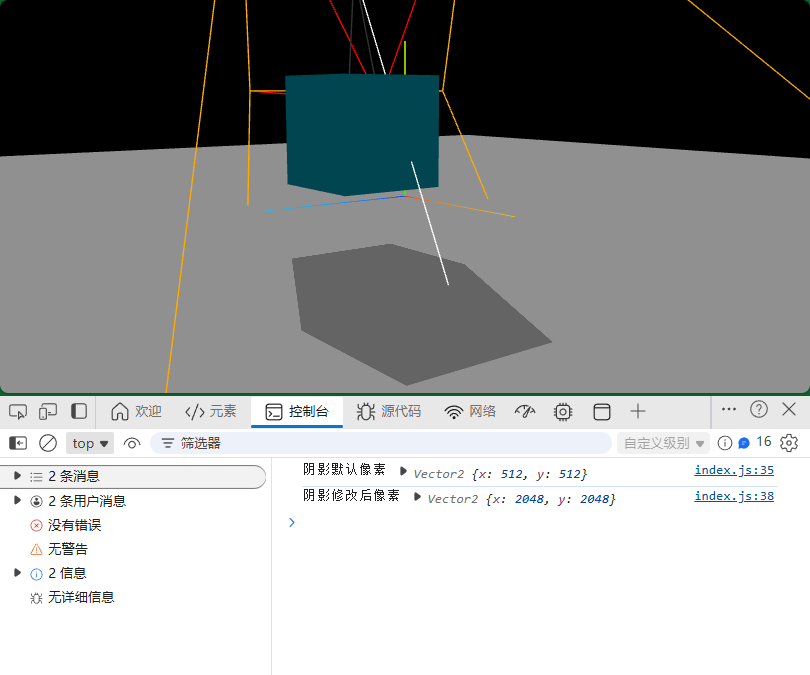
阴影半径.shadow.radius属性
javascript
// 模糊弱化阴影边缘
console.log('.shadow.radius',directionalLight.shadow.radius);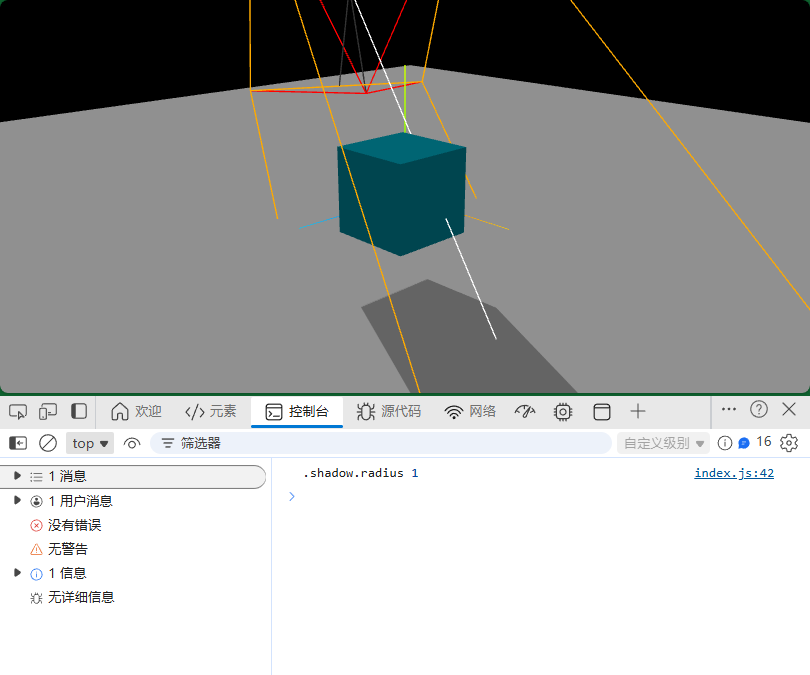
javascript
directionalLight.shadow.radius = 3;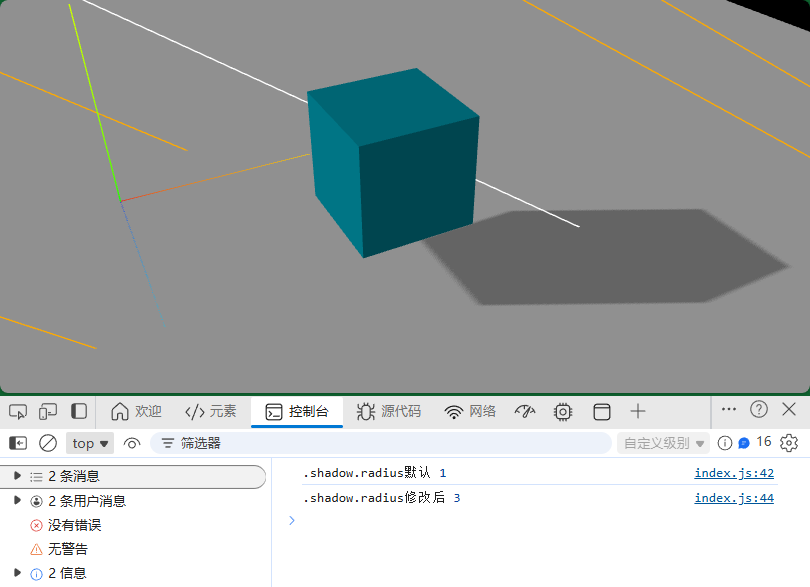
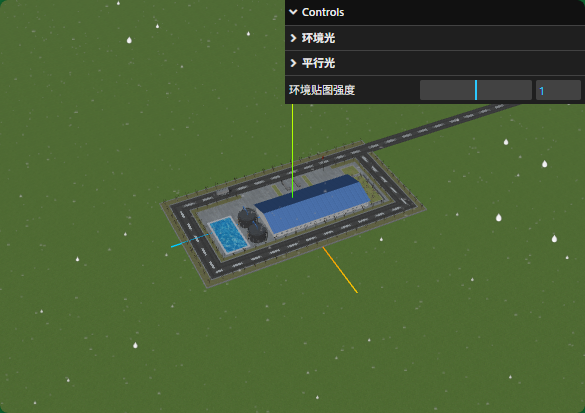
五、工厂光源(环境贴图和环境光)
环境贴图
不设置任何光源和环境贴图,gltf模型默认PBR材质不会正常显示,一片漆黑
javascript
const model = new THREE.Group(); //声明一个组对象,用来添加加载成功的三维场景
const textureCube = new THREE.CubeTextureLoader()
  .setPath("./环境贴图/")
  .load(["px.jpg", "nx.jpg", "py.jpg", "ny.jpg", "pz.jpg", "nz.jpg"]);
textureCube.encoding = THREE.sRGBEncoding;

// 单独.glb文件
loader.load("../../工厂.glb", function (gltf) {
  model.add(gltf.scene);
  gltf.scene.traverse(function (obj) {
    if (obj.isMesh) {
      //判断是否是网格模型
      obj.material.envMap = textureCube; //设置环境贴图
      obj.material.envMapIntensity = 1.0;
    }
  });
});
环境光
javascript
const ambient = new THREE.AmbientLight(0xffffff, 0.4);
scene.add(ambient);
GUI可视化调试
javascript
// 从threejs扩展库引入gui.js
import { GUI } from 'three/addons/libs/lil-gui.module.min.js';
const gui = new GUI();//创建GUI对象
gui.domElement.style.right = '0px';
gui.domElement.style.width = '300px';gui控制环境光光照强度.intensity
javascript
// 环境光子菜单
const ambientFolder = gui.addFolder("环境光");
ambientFolder.close(); //关闭菜单
// 环境光强度
ambientFolder.add(directionalLight, "intensity", 0, 2).name("环境光强度");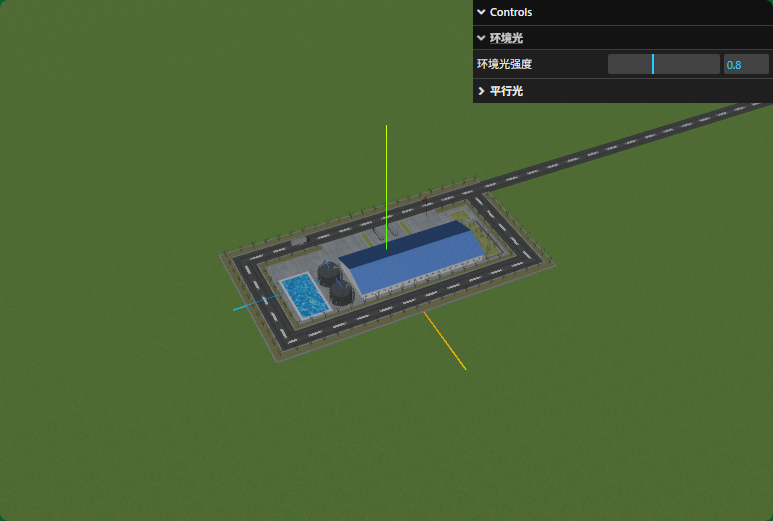
GUI控制环境贴图强度.envMapIntensity
javascript
// 引入Three.js
import * as THREE from "three";
// 引入gltf模型加载库GLTFLoader.js
import { GLTFLoader } from "three/addons/loaders/GLTFLoader.js";

import gui from "./gui.js";

const loader = new GLTFLoader(); //创建一个GLTF加载器

const model = new THREE.Group(); //声明一个组对象,用来添加加载成功的三维场景
const textureCube = new THREE.CubeTextureLoader()
  .setPath("./环境贴图/")
  .load(["px.jpg", "nx.jpg", "py.jpg", "ny.jpg", "pz.jpg", "nz.jpg"]);
textureCube.encoding = THREE.sRGBEncoding;

// 单独.glb文件
loader.load("../../工厂.gltf", function (gltf) {
  model.add(gltf.scene);
  gltf.scene.traverse(function (obj) {
    if (obj.isMesh) {
      //判断是否是网格模型
      obj.material.envMap = textureCube; //设置环境贴图
      obj.material.envMapIntensity = 1.0;
    }
  });
  const obj = {
    envMapIntensity: 1.0,
  };
  gui
    .add(obj, "envMapIntensity", 0, 2)
    .name("环境贴图强度")
    .onChange(function (value) {
      // 递归遍历,批量设置模型材质的`.envMapIntensity`属性
      gltf.scene.traverse(function (obj) {
        if (obj.isMesh) {
          obj.material.envMapIntensity = value;
        }
      });
    });

});

export default model;
六、工厂光源(平行光模拟太阳光)
平行光模拟太阳光
javascript
const directionalLight = new THREE.DirectionalLight(0xffffff, 1);
directionalLight.position.set(100, 60, 50);
scene.add(directionalLight);平行光辅助对象DirectionalLightHelper
javascript
// 参数2表示平行光.position附近方框的尺寸
const dirHelper = new THREE.DirectionalLightHelper( directionalLight, 5);
scene.add( dirHelper );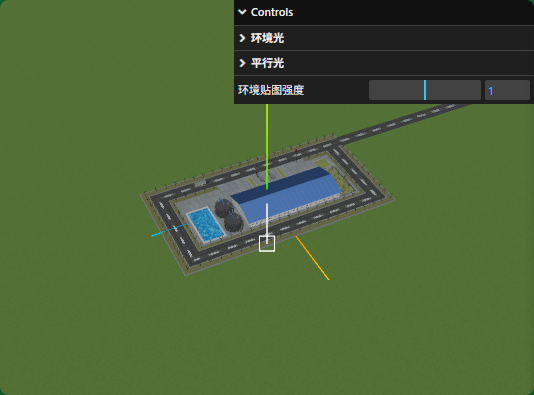
平行光位置和方向GUI可视化控制
javascript
// 平行光子菜单
const dirFolder = gui.addFolder("平行光");
dirFolder.close(); //关闭菜单
// 平行光强度
dirFolder.add(directionalLight, "intensity", 0, 2).name("平行光强度");
const dirFolder2 = dirFolder.addFolder("位置"); //子菜单的子菜单
dirFolder2.close(); //关闭菜单
// 平行光位置
dirFolder2.add(directionalLight.position, "x", -400, 400);
dirFolder2.add(directionalLight.position, "y", -400, 400);
dirFolder2.add(directionalLight.position, "z", -400, 400);
平行光位置在XOZ平面上绕着y轴旋转,可以给一个半径R,一个角度值angle,然后改变平行光在XOZ平面上旋转角度,通过三角函数计算x和z坐标。
index.js
javascript
const obj = {
  R: 100,
  angle: 0,
};
gui.add(obj, "angle", 0, Math.PI * 2).onChange(function (value) {
  directionalLight.position.x = obj.R * Math.cos(value);
  directionalLight.position.z = obj.R * Math.sin(value);
});
七、工厂(模拟太阳光阴影)
工厂设置平行光阴影
允许光源 和渲染器光源投影计算
index.js
javascript
// 产生阴影的模型对象
directionalLight.castShadow = true;

renderer.shadowMap.enabled = true; 所有Mesh都批量设置.castShadow和.receiveShadow属性。
model.js
javascript
//递归遍历场景,允许所有Mesh产生投影、接收投影
gltf.scene.traverse(function (obj) {
    if (obj.isMesh) { //判断是否是网格模型
        // 批量设置所有Mesh都可以产生阴影和接收阴影
        obj.castShadow = true;
        obj.receiveShadow = true;
    }
});
设置工厂阴影范围
javascript
// 设置三维场景计算阴影的范围
directionalLight.shadow.camera.left = -100;
directionalLight.shadow.camera.right = 100;
directionalLight.shadow.camera.top = 100;
directionalLight.shadow.camera.bottom = -100;
directionalLight.shadow.camera.near = 0.5;
directionalLight.shadow.camera.far = 100;CameraHelper辅助调试参数
javascript
// 可视化平行光阴影对应的正投影相机对象
const cameraHelper = new THREE.CameraHelper(directionalLight.shadow.camera);
scene.add(cameraHelper);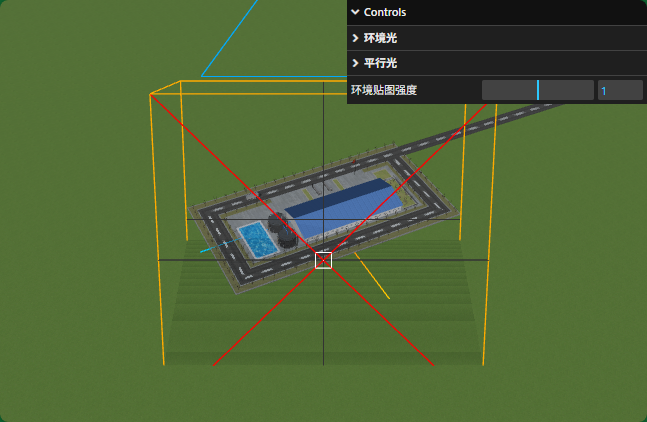
javascript
// 设置三维场景计算阴影的范围
directionalLight.shadow.camera.left = -100;
directionalLight.shadow.camera.right = 100;
directionalLight.shadow.camera.top = 100;
directionalLight.shadow.camera.bottom = -100;
directionalLight.shadow.camera.near = 0.5;
directionalLight.shadow.camera.far = 100*3;
阴影条纹问题解决.shadowMap.type
javascript
// 模型表面产生条纹影响渲染效果,可以改变.shadowMap.type默认值优化
renderer.shadowMap.type = THREE.VSMShadowMap; 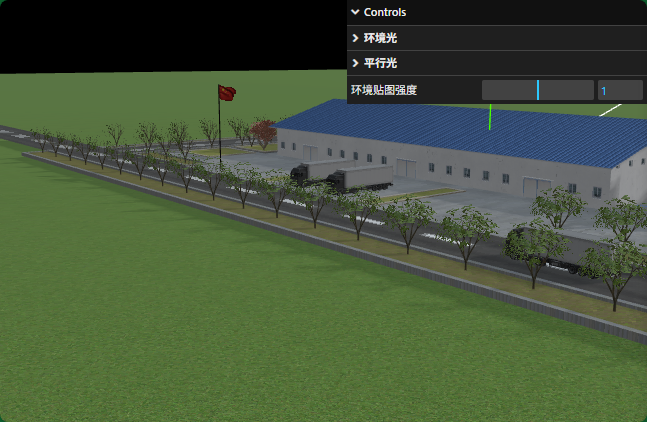
阴影像素.shadow.mapSize
javascript
// 如果阴影边缘锯齿感的时候,可以适当提升像素
directionalLight.shadow.mapSize.set(1024,1024);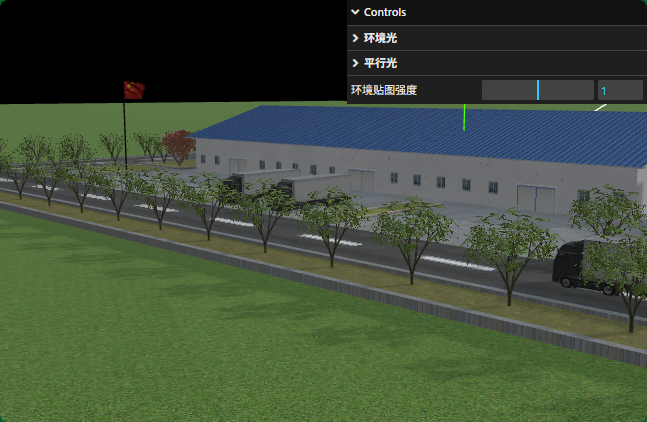
阴影边缘弱化.shadow.radius
javascript
// 模糊弱化阴影边缘
directionalLight.shadow.radius = 3;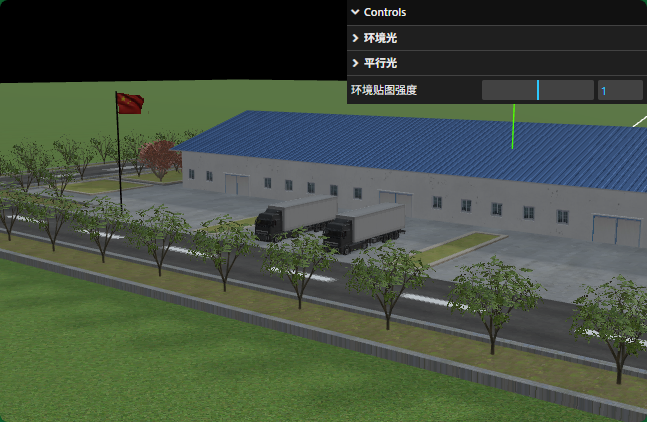
八、gui辅助调节光源阴影
阴影范围可视化调节
index.js
javascript
// 阴影子菜单
const shadowFolder = gui.addFolder('平行光阴影');
const cam = directionalLight.shadow.camera;
// 相机left、right等属性变化执行.updateProjectionMatrix();
// 相机变化了,执行CameraHelper的更新方法.update();
shadowFolder.add(cam,'left',-500,0).onChange(function(v){
    cam.updateProjectionMatrix();//相机更新投影矩阵
    cameraHelper.update();//相机范围变化了,相机辅助对象更新
});
Threejs (12)
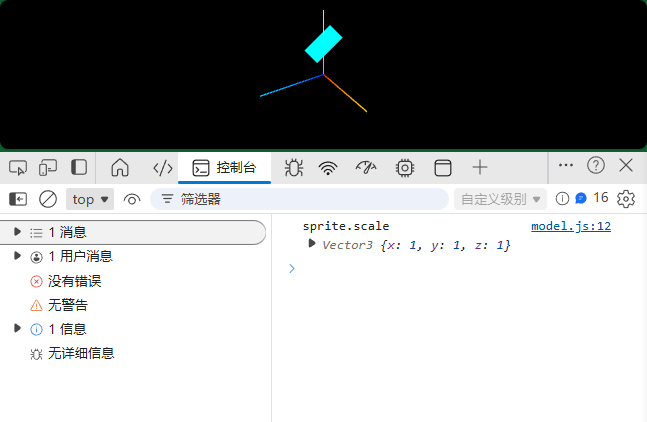
一、精灵模型对象Sprite
创建精灵模型Sprite
javascript
// 创建精灵材质对象SpriteMaterial
const spriteMaterial = new THREE.SpriteMaterial({
  color:0x00ffff,//设置颜色
});
javascript
// 创建精灵模型对象,不需要几何体geometry参数
const sprite = new THREE.Sprite(spriteMaterial);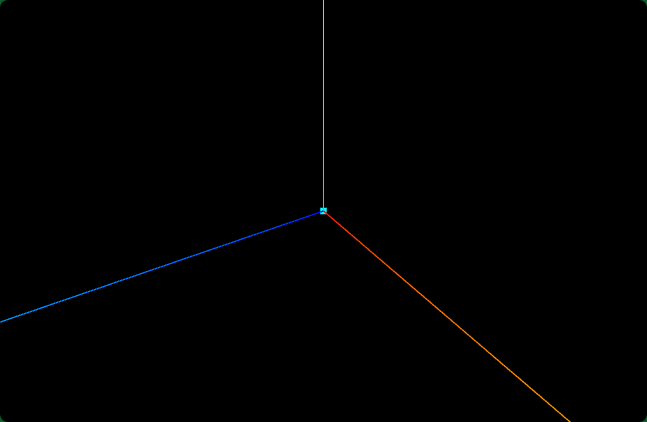
正投影相机验证Sprite尺寸
javascript
const s = 0.5;//控制left, right, top, bottom范围大小
const camera = new THREE.OrthographicCamera(-s * k, s * k, s, -s, 1, 8000);
javascript
//相机
const width = window.innerWidth;
const height = window.innerHeight;
const k = width / height;
const s = 0.5; //控制left, right, top, bottom范围大小
const camera = new THREE.OrthographicCamera(-s * k, s * k, s, -s, 1, 8000);

// const camera = new THREE.PerspectiveCamera(30, width / height, 1, 3000);
camera.position.set(292, 223, 185);
camera.lookAt(0, 0, 0);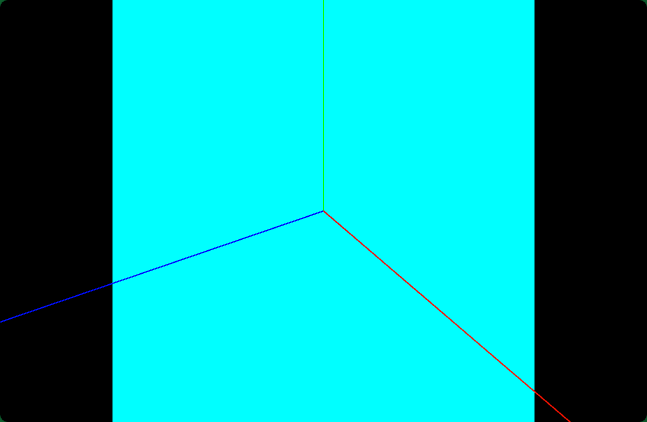
Sprite与矩形平面Mesh的区别在于,当你旋转三维场景的时候,如果通过相机控件OrbitControls旋转测试,Sprite矩形平面会始终平行于Canvas画布或者说屏幕,而矩形平面Mesh的姿态角度会跟着旋转,不一定平行于canvas画布。
Sprite属性.position、.scale
javascript
// 控制精灵大小
console.log('sprite.scale',sprite.scale);
sprite.scale.set(50, 25, 1); //只需要设置x、y两个分量就可以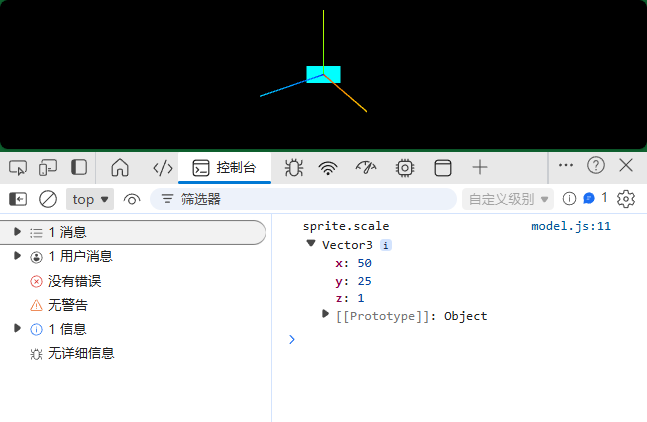
javascript
sprite.position.set(0,50,0);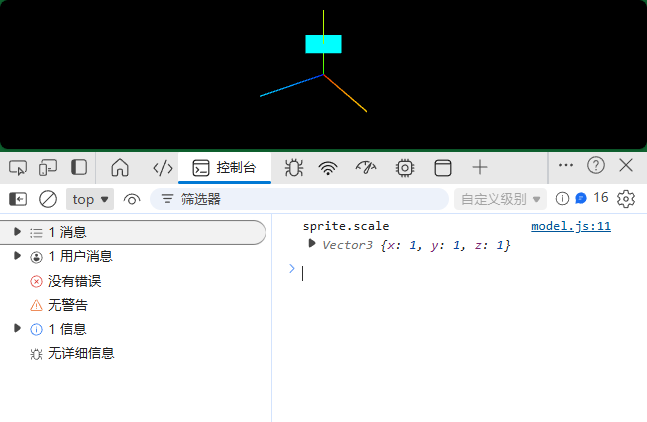
SpriteMaterial旋转属性.rotation
javascript
const spriteMaterial = new THREE.SpriteMaterial({
  rotation:Math.PI/4,//旋转精灵对象45度,弧度值
});
二、精灵模型标注场景(贴图)
精灵模型设置颜色贴图.map
javascript
const texture = new THREE.TextureLoader().load("./光点.png");
const spriteMaterial = new THREE.SpriteMaterial({
  map: texture, //设置精灵纹理贴图
});
// 创建精灵模型对象,不需要几何体geometry参数
const sprite = new THREE.Sprite(spriteMaterial);
sprite.scale.set(10, 10, 1); //只需要设置x、y两个分量就可以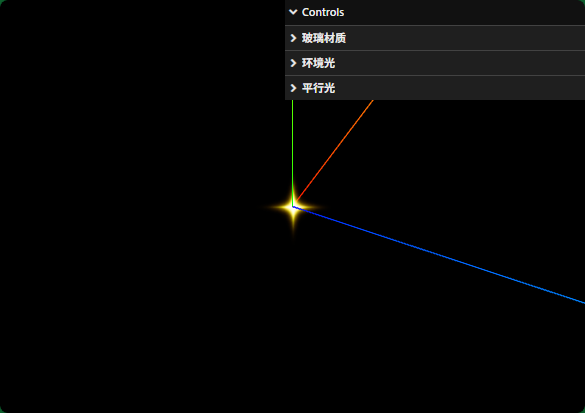
.transparent属性
javascript
const spriteMaterial = new THREE.SpriteMaterial({
  transparent:true,//SpriteMaterial默认是true
});.color与.map混合
javascript
color:0x00ffff,//设置颜色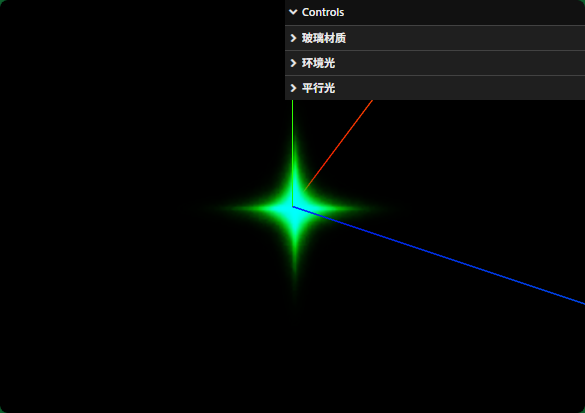
Sprite标注三维场景
javascript
const geometry = new THREE.BoxGeometry(25, 100, 50);
geometry.translate(0, 50, 0);
// mesh顶部中心添加标注,顶部中心坐标是(0,100,0)
const mesh = new THREE.Mesh(geometry, material);
javascript
sprite.position.set(0, 100 + 10/2, 0);//设置位置,要考虑sprite尺寸影响
javascript
const texture = new THREE.TextureLoader().load("./光点.png");
const spriteMaterial = new THREE.SpriteMaterial({
  map: texture, //设置精灵纹理贴图
});
// 创建精灵模型对象,不需要几何体geometry参数
const sprite = new THREE.Sprite(spriteMaterial);
sprite.scale.set(10, 10, 1); //只需要设置x、y两个分量就可以
sprite.position.set(0, 100, 0); //设置位置,要考虑sprite尺寸影响

const geometry = new THREE.BoxGeometry(25, 100, 50);
geometry.translate(0, 50, 0);
const material = new THREE.MeshBasicMaterial({
  color: 0x90a4ae, //设置颜色
});
// mesh顶部中心添加标注,顶部中心坐标是(0,100,0)
const mesh = new THREE.Mesh(geometry, material);

const group = new THREE.Group();
group.add(mesh);
group.add(sprite);
三、Sprite模拟下雨、下雪
javascript
const texture = new THREE.TextureLoader().load("./雨滴.png");
const spriteMaterial = new THREE.SpriteMaterial({
    map: texture,
});
const sprite = new THREE.Sprite(spriteMaterial);
雨滴在3D空间随机分布
javascript
for (let i = 0; i < 16000; i++) {
  // 精灵模型共享材质
  const sprite = new THREE.Sprite(spriteMaterial);
  group.add(sprite);
  sprite.scale.set(1, 1, 1);
  // 设置精灵模型位置,在长方体空间上上随机分布
  const x = 1000 * (Math.random() - 0.5);
  const y = 600 * Math.random();
  const z = 1000 * (Math.random() - 0.5);
  sprite.position.set(x, y, z);
}
周期性改变雨滴Sprite位置
javascript
function loop() {
    // loop()每次执行都会更新雨滴的位置,进而产生动画效果
    group.children.forEach(sprite => {
        // 雨滴的y坐标每次减1
        sprite.position.y -= 1;
        if (sprite.position.y < 0) {
            // 如果雨滴落到地面,重置y,从新下落
            sprite.position.y = 600;
        }
    });
    requestAnimationFrame(loop);
}
loop();
根据时间计算Sprite位置
javascript
const clock = new THREE.Clock();
function loop() {
    // loop()两次执行时间间隔
    const t = clock.getDelta();
    group.children.forEach(sprite => {
        // 雨滴的y坐标每次减t*60
        sprite.position.y -= t*60;
        if (sprite.position.y < 0) {
            sprite.position.y = 600;
        }
    });
    requestAnimationFrame(loop);
}
loop();
相机镜头附近的雨滴偏大
把near调整大一些,这样距离相机非常近的Sprite不会渲染
javascript
const camera = new THREE.PerspectiveCamera(30, width / height, 50, 3000);
水滴替换成雪花
