'''
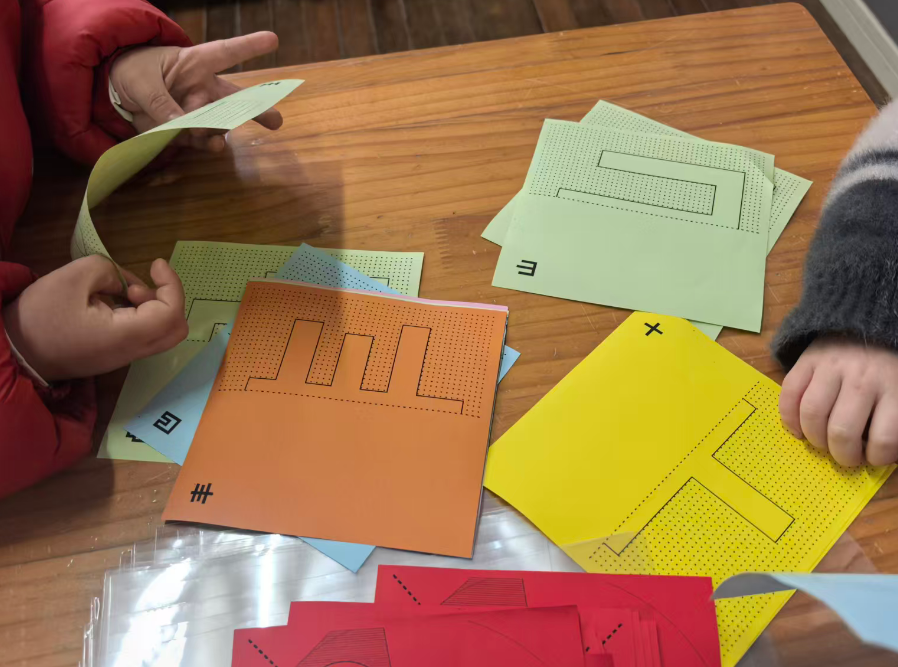
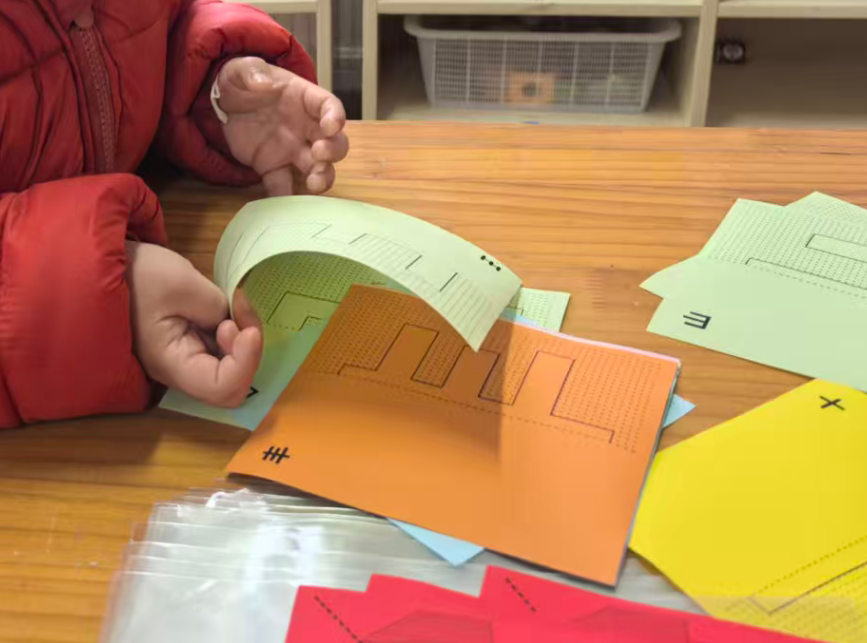
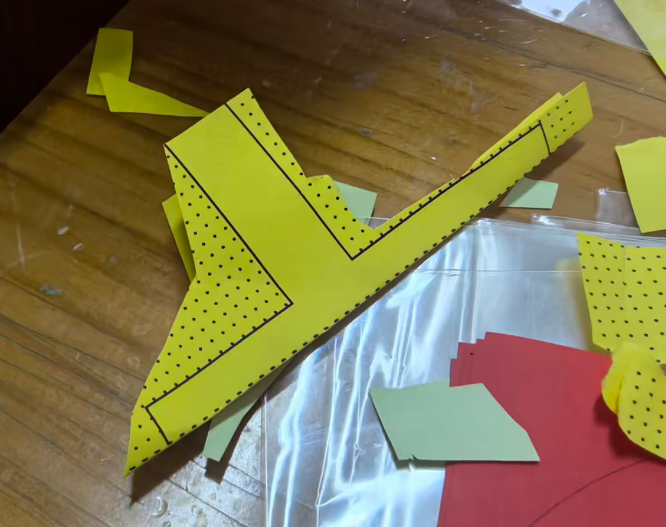
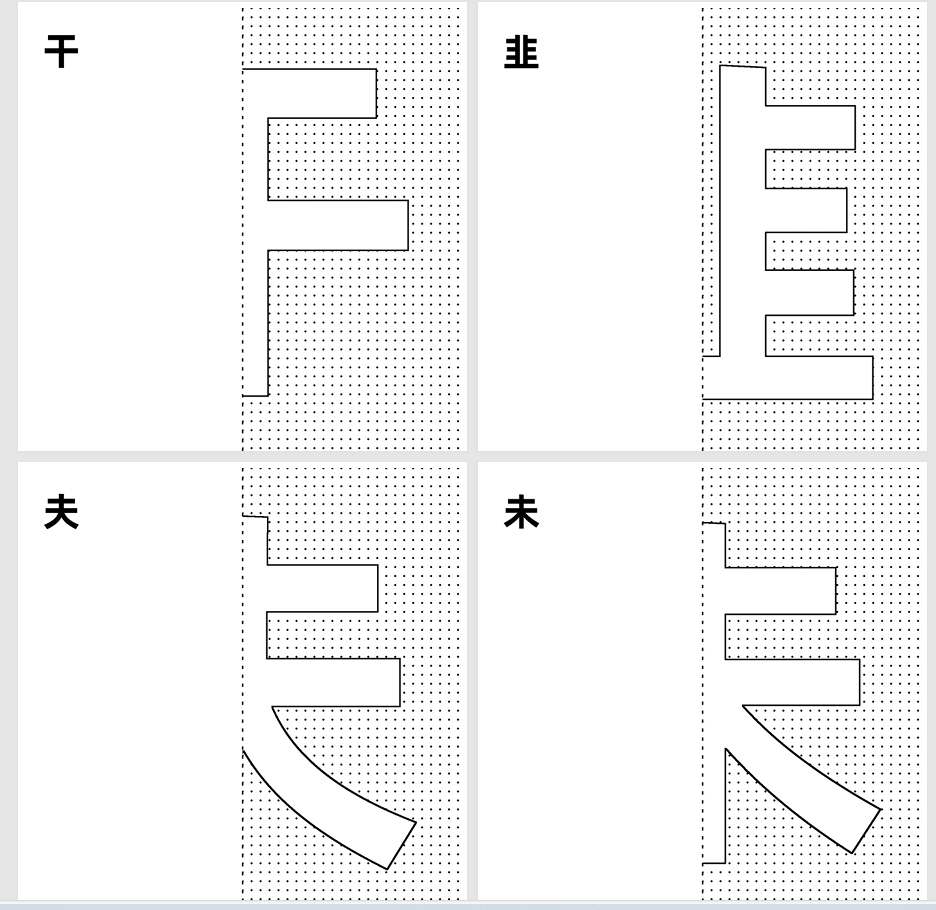
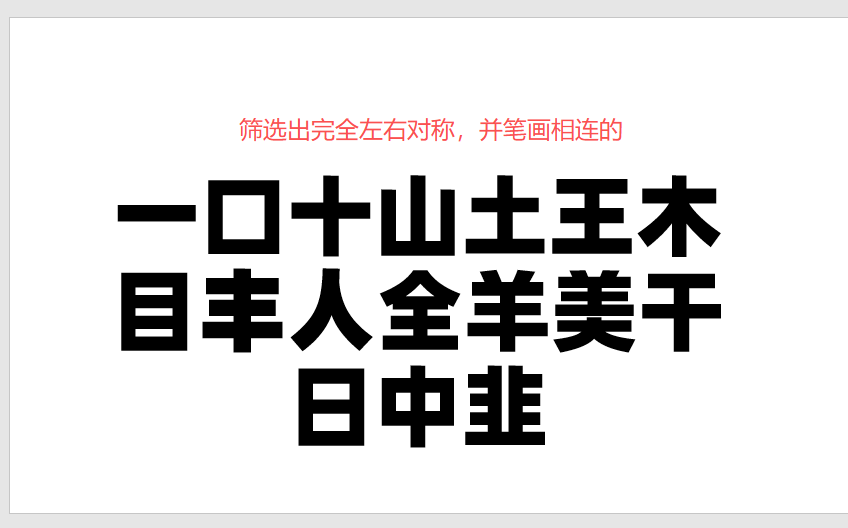
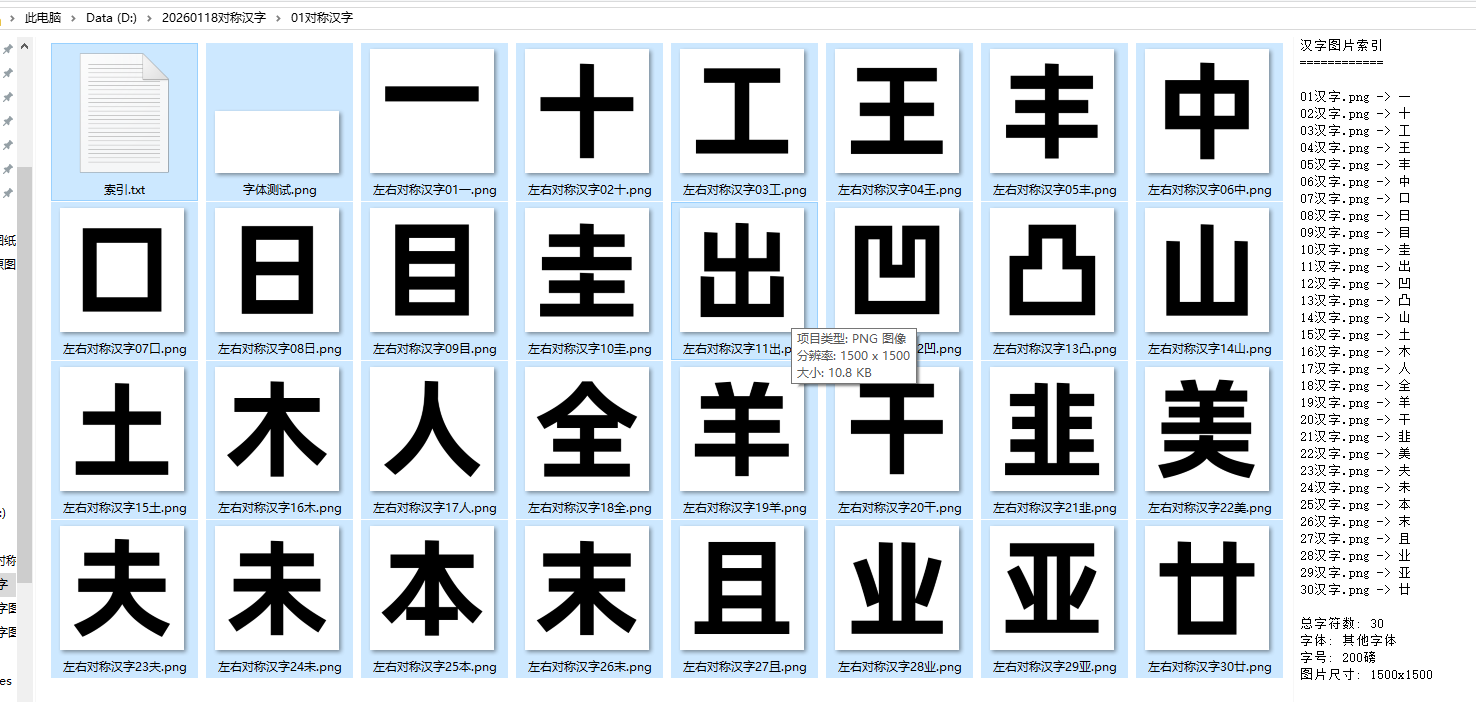
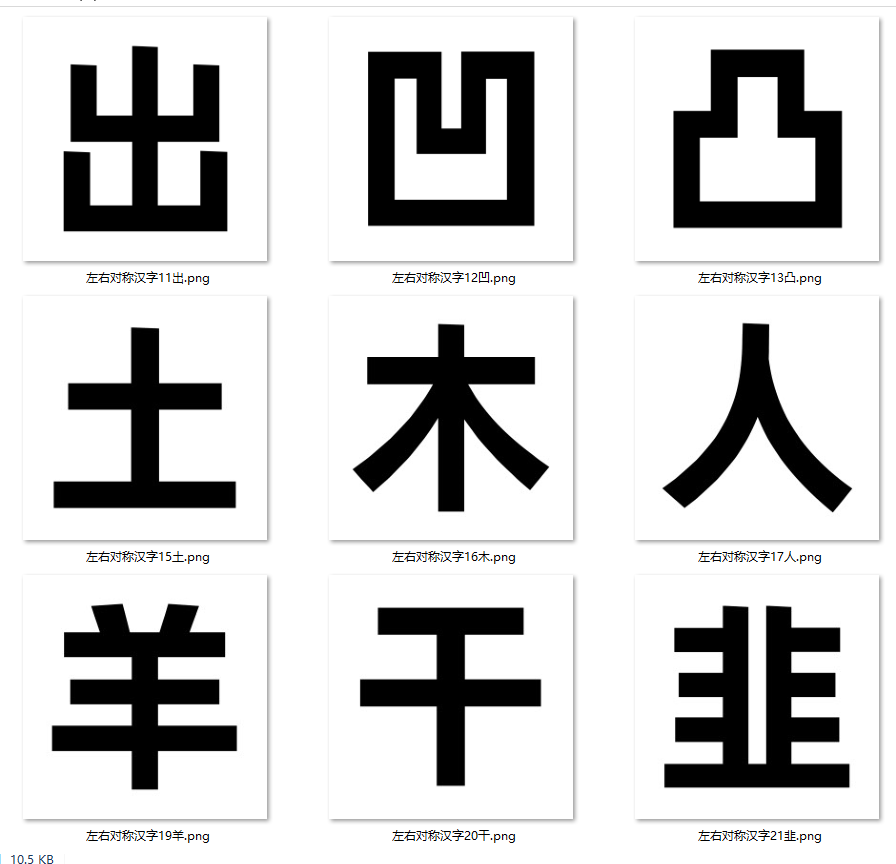
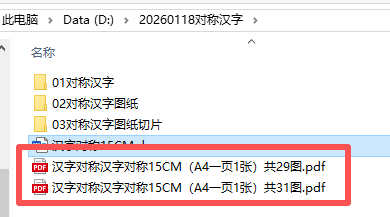
对称并笔画连续的汉字29个,制作对称折纸图01
制作1500的大小1300汉字
豆包、deep seek、阿夏
20250118
'''
from PIL import Image, ImageDraw, ImageFont
import os
# 你的汉字列表
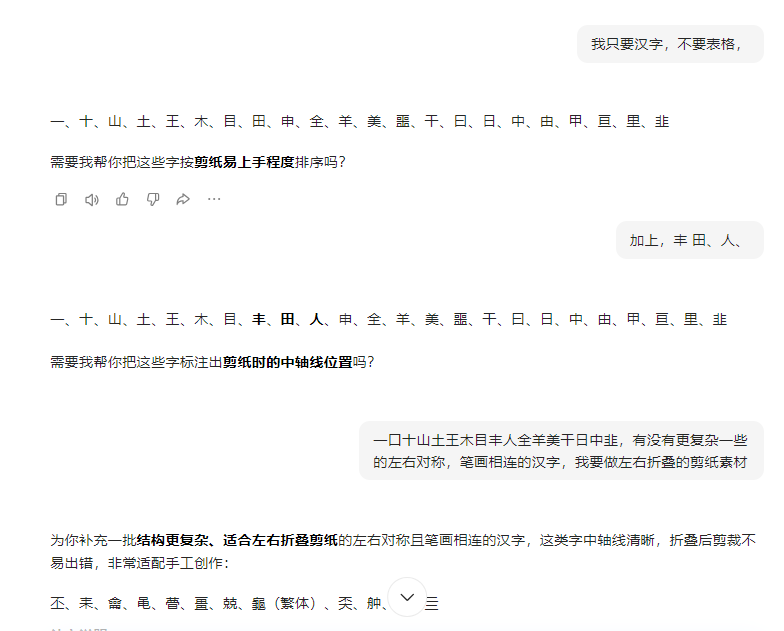
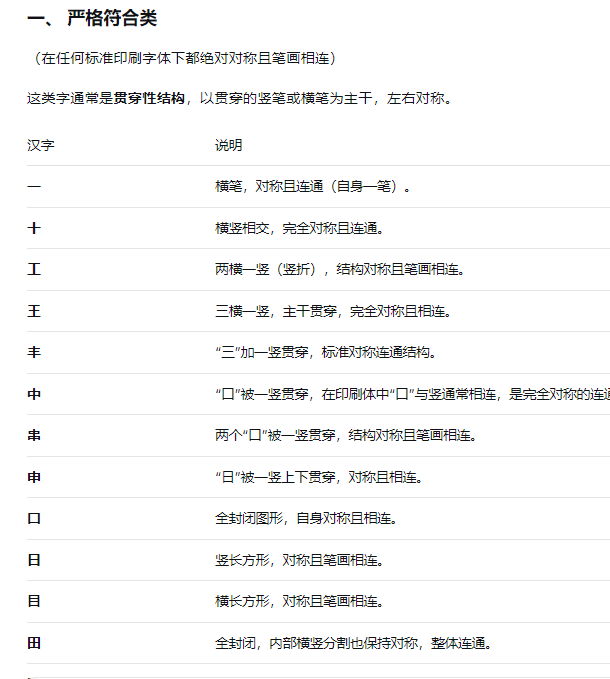
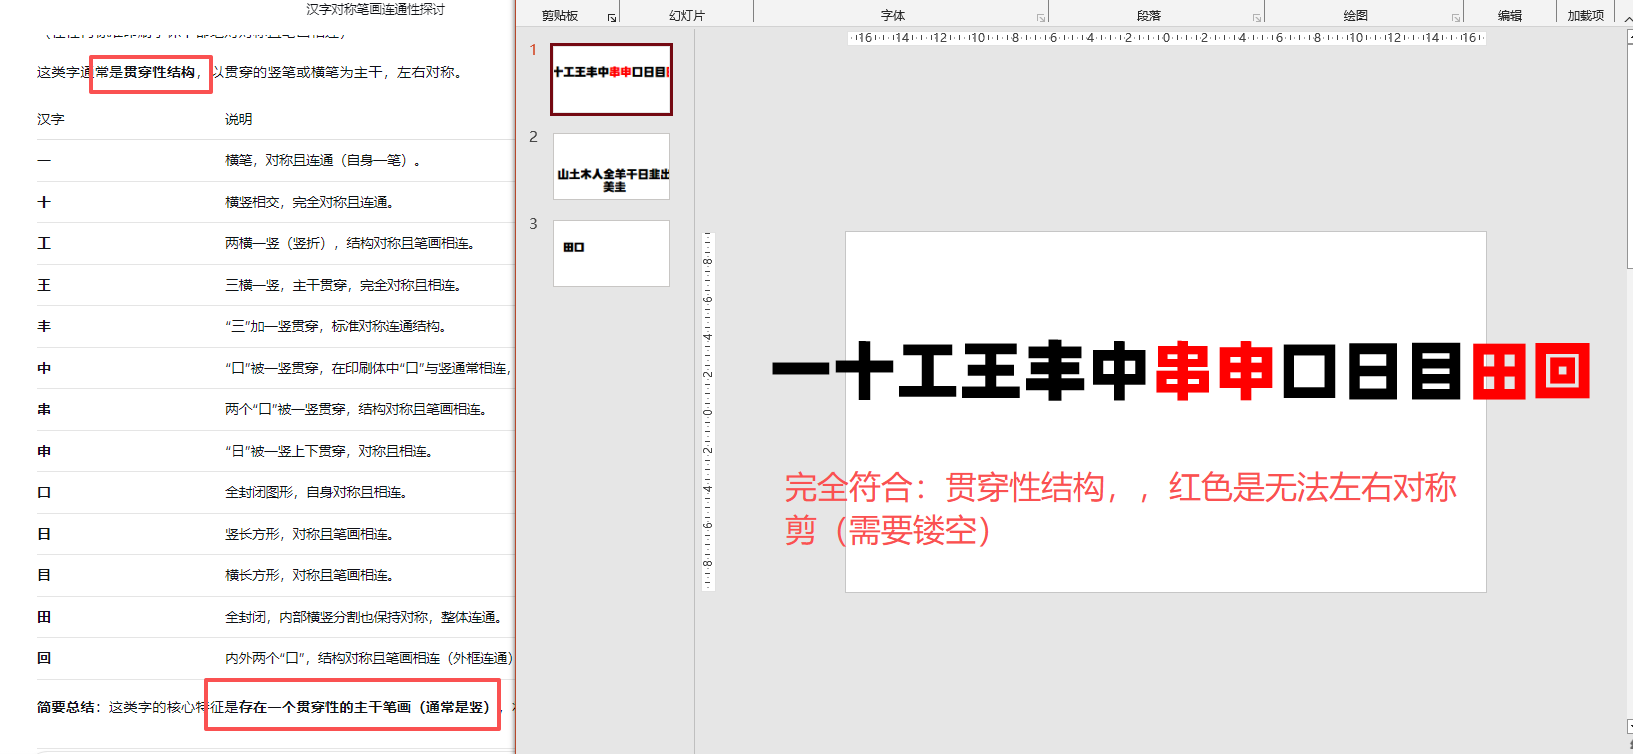
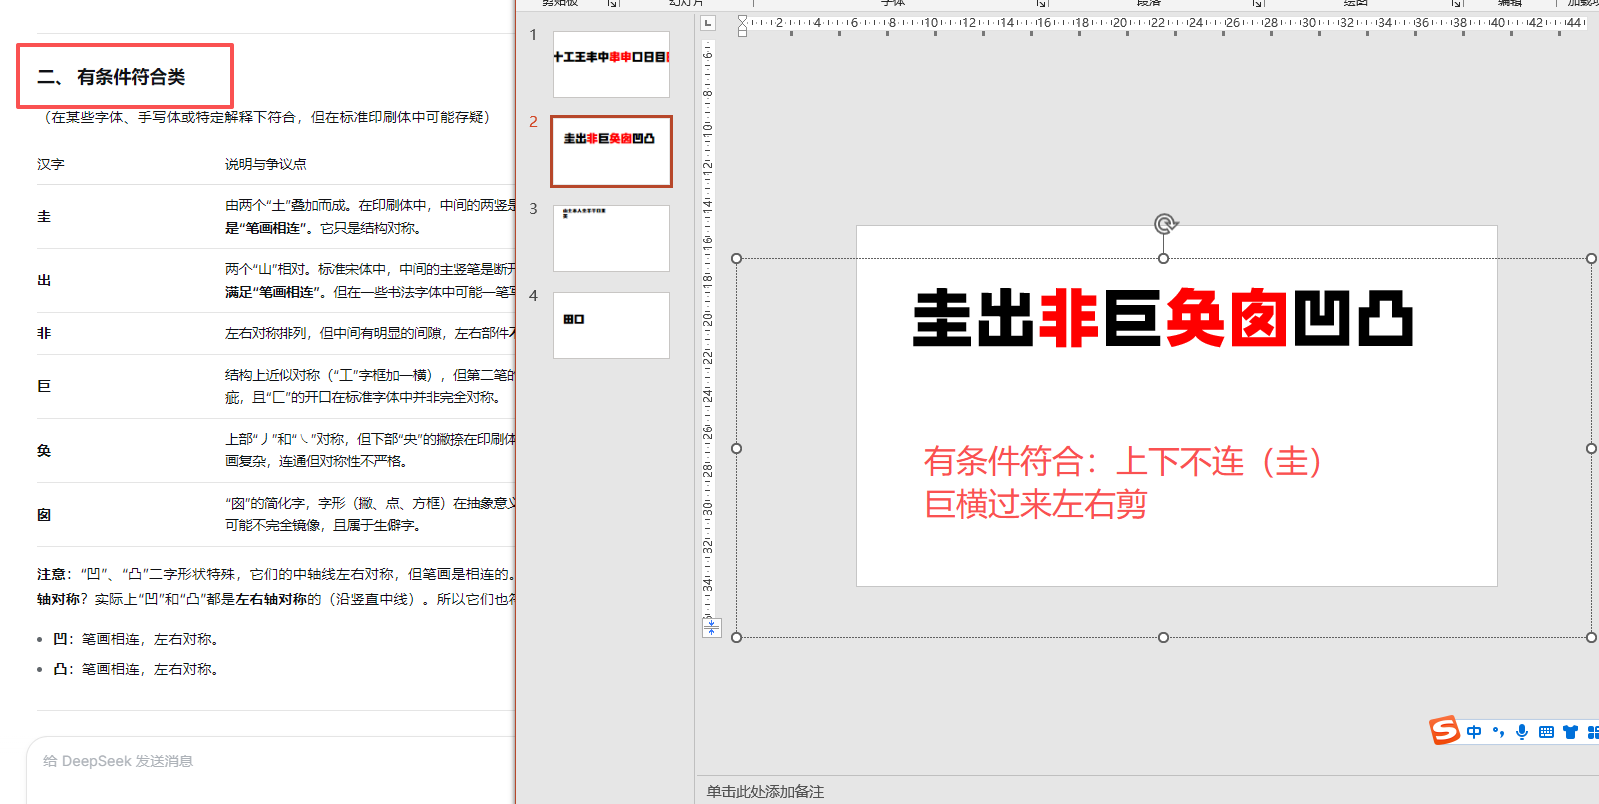
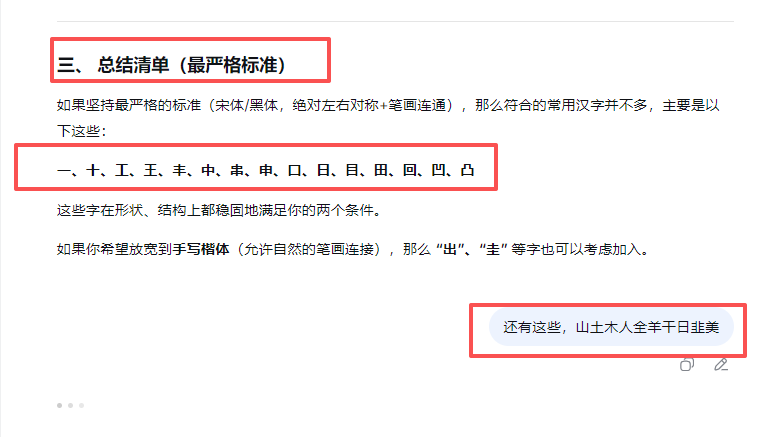
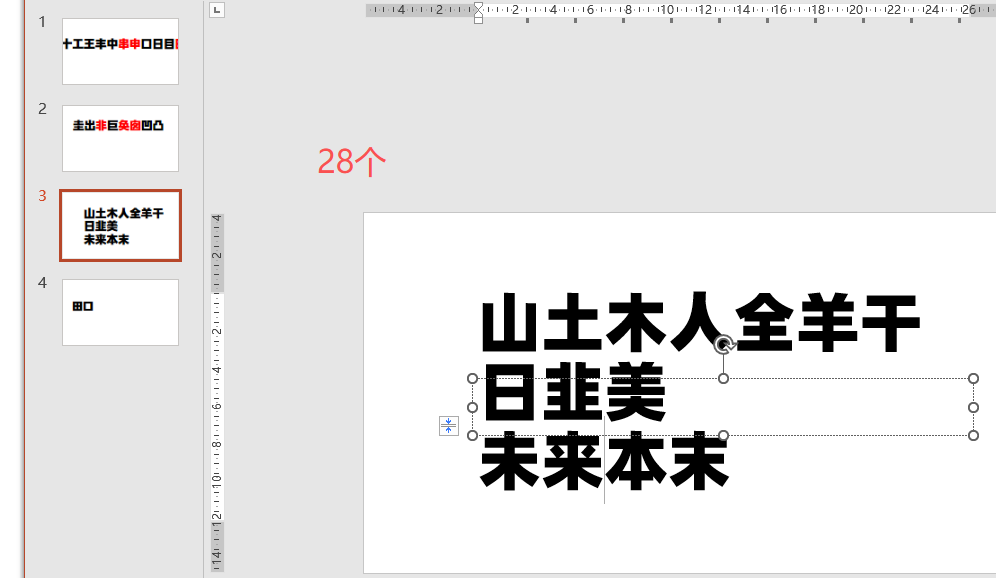
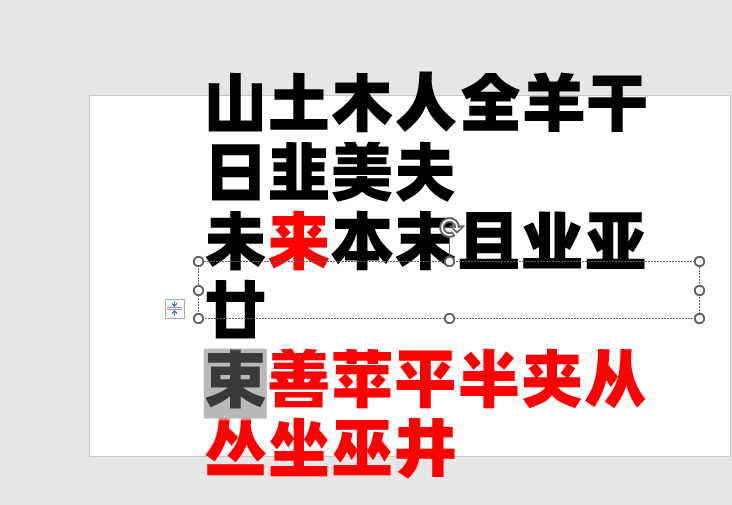
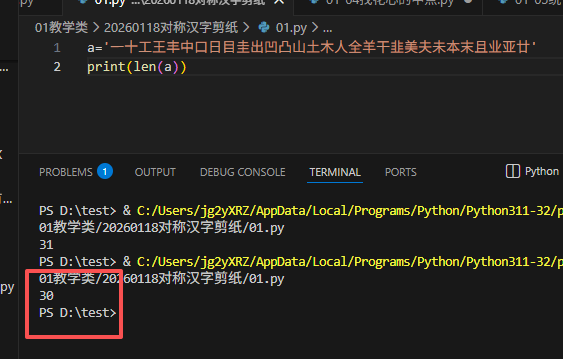
a = '一十工王丰中口日目出凹凸山土木人全羊干韭夫未本末且业亚廿'
# a = '一十工王丰中口日目圭出凹凸山土木人全羊干韭美夫未本末且业亚廿'
# 图片尺寸
width, height = 1500,1500
# 文字尘螨1500,70是边距
# 创建保存文件夹
save_folder = r"D:\20260118对称汉字\01对称汉字"
if not os.path.exists(save_folder):
os.makedirs(save_folder)
# 直接指定阿里巴巴普惠体路径 - 修改为你实际的字体文件路径
font_path = r"C:\Users\jg2yXRZ\AppData\Local\Microsoft\Windows\Fonts\Alibaba-PuHuiTi-Bold.otf" # 修改这个路径!阿里巴巴普惠体加粗H
# 或者如果字体在系统字体文件夹
# font_path = r"C:\Windows\Fonts\AlibabaPuHuiTi-3-55-Regular.ttf"
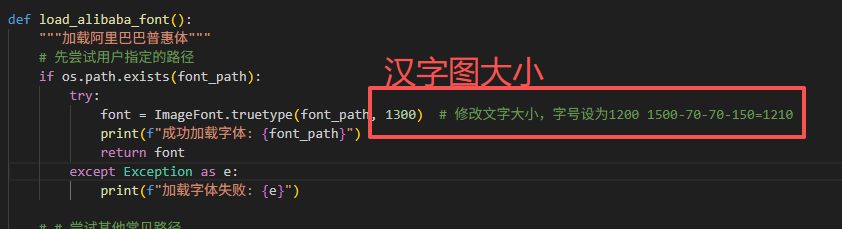
def load_alibaba_font():
"""加载阿里巴巴普惠体"""
# 先尝试用户指定的路径
if os.path.exists(font_path):
try:
font = ImageFont.truetype(font_path, 1300) # 修改文字大小,字号设为1200 1500-70-70-150=1210
print(f"成功加载字体: {font_path}")
return font
except Exception as e:
print(f"加载字体失败: {e}")
# # 尝试其他常见路径
# other_paths = [
# r"C:\Windows\Fonts\AlibabaPuHuiTi-3-55-Regular.ttf",
# r"C:\Windows\Fonts\AlibabaPuHuiTi-3-45-Light.ttf",
# r"C:\Windows\Fonts\ALIBABA-PuHuiTi-Regular.ttf",
# "AlibabaPuHuiTi-3-55-Regular.ttf", # 当前目录
# "alibaba-puhuiti.ttf", # 当前目录
# ]
for path in other_paths:
try:
if os.path.exists(path):
# 文字大小200
font = ImageFont.truetype(path, 200)
print(f"找到并加载字体: {path}")
return font
except:
continue
# 如果找不到,询问用户
print("\n" + "="*60)
print("未找到阿里巴巴普惠体!")
print("请执行以下步骤:")
print("1. 从 https://fonts.alibabagroup.com/ 下载阿里巴巴普惠体")
print("2. 解压后找到 AlibabaPuHuiTi-3-55-Regular.ttf 文件")
print("3. 将文件放在以下位置之一:")
print(" a) 脚本同目录下")
print(" b) C:/Windows/Fonts/ 文件夹")
print(" c) 修改代码中的 font_path 变量指向字体文件")
print("="*60)
# 使用默认字体作为备选
print("\n使用微软雅黑作为替代...")
# 文字大小修改
return ImageFont.truetype(r"C:\Windows\Fonts\msyh.ttc", 200)
# 创建字体 - 字号应该是200而不是1500
font = load_alibaba_font()
# 生成每张图片
print(f"开始生成 {len(a)} 个汉字的图片...")
print(f"保存到: {save_folder}")
for i, character in enumerate(a):
# 创建白色背景图像
img = Image.new('RGB', (width, height), color='white')
draw = ImageDraw.Draw(img)
# 计算文字位置(居中)
try:
# 新版本PIL获取文字边界框
bbox = draw.textbbox((0, 0), character, font=font)
text_width = bbox[2] - bbox[0]
text_height = bbox[3] - bbox[1]
print(f"字符 '{character}' 的边界框: {bbox}")
print(f"字符 '{character}' 的尺寸: {text_width}x{text_height}")
# 计算居中位置
x = (width - text_width) / 2
y = (height - text_height) / 2
# 调整位置,因为bbox[0]和bbox[1]可能是负数
x -= bbox[0]
y -= bbox[1]
position = (x, y)
except Exception as e:
print(f"计算位置时出错: {e}")
# 使用简化方法
try:
# 旧版本PIL
text_width, text_height = draw.textsize(character, font=font)
position = ((width - text_width) // 2, (height - text_height) // 2)
except:
position = (width // 2 - 100, height // 2 - 100)
print(f"字符 '{character}' 绘制位置: {position}")
# 绘制黑色文字
draw.text(position, character, fill='black', font=font)
# 生成文件名(01汉字、02汉字等)
filename = f"左右对称汉字{i+1:02d}{a[i]}.png"
filepath = os.path.join(save_folder, filename)
# 保存图片
img.save(filepath)
print(f"已生成: {filename} - 字符: {character}\n")
print(f"\n{'='*60}")
print(f"完成!共生成 {len(a)} 张图片到 '{save_folder}' 文件夹")
print(f"字符列表: {a}")
print(f"对应编号: 01-{len(a):02d}")
print(f"{'='*60}")
# 同时生成一个索引文件,方便查看对应关系
index_file = os.path.join(save_folder, "索引.txt")
with open(index_file, 'w', encoding='utf-8') as f:
f.write("汉字图片索引\n")
f.write("============\n\n")
for i, character in enumerate(a):
f.write(f"{i+1:02d}汉字.png -> {character}\n")
f.write(f"\n总字符数: {len(a)}\n")
f.write(f"字体: {'阿里巴巴普惠体' if 'Alibaba' in str(font) else '其他字体'}\n")
f.write(f"字号: 200磅\n")
f.write(f"图片尺寸: {width}x{height}\n")
print(f"已生成索引文件: {index_file}")
# 测试字体是否真的是阿里巴巴普惠体
print(f"\n字体信息测试:")
test_img = Image.new('RGB', (400, 200), color='white')
test_draw = ImageDraw.Draw(test_img)
test_draw.text((10, 50), "测试字体:阿里巴巴普惠体", fill='black', font=font)
test_img.save(os.path.join(save_folder, "字体测试.png"))
print("已生成字体测试图片,请查看确认是否为阿里巴巴普惠体")
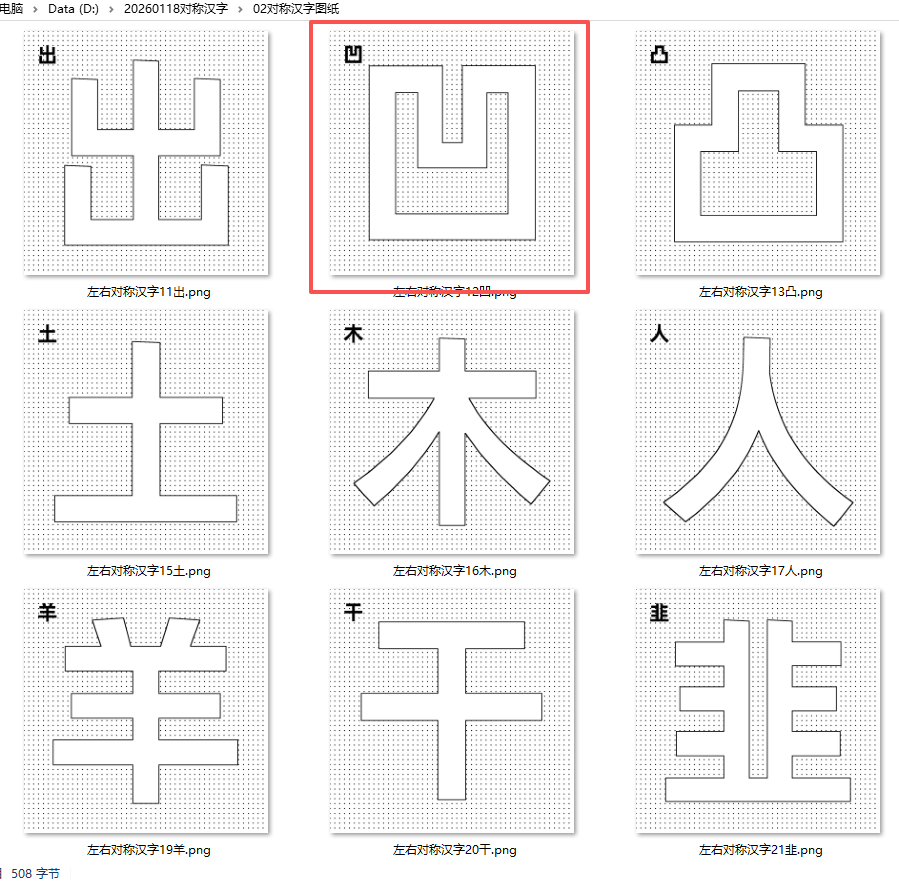
"""
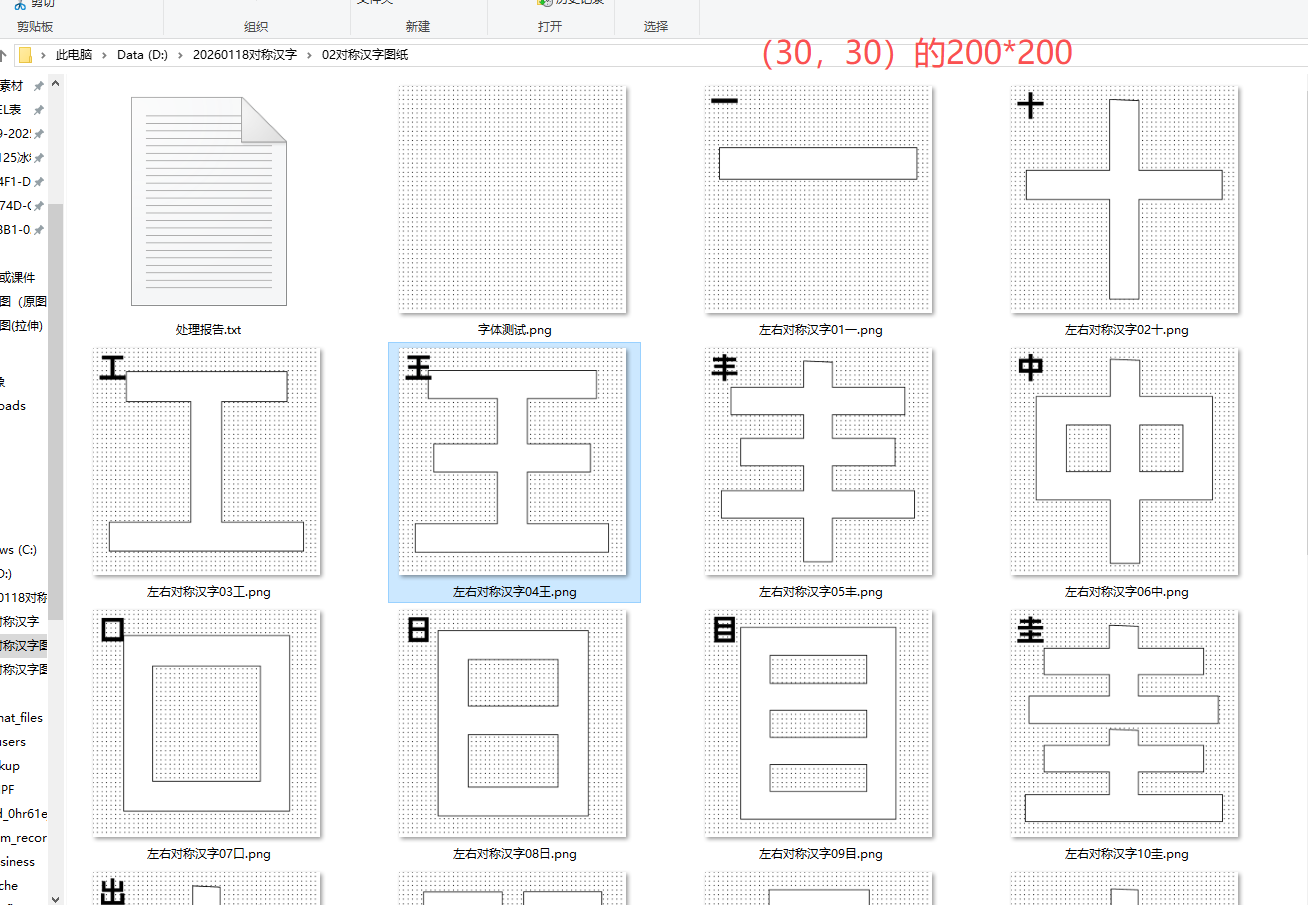
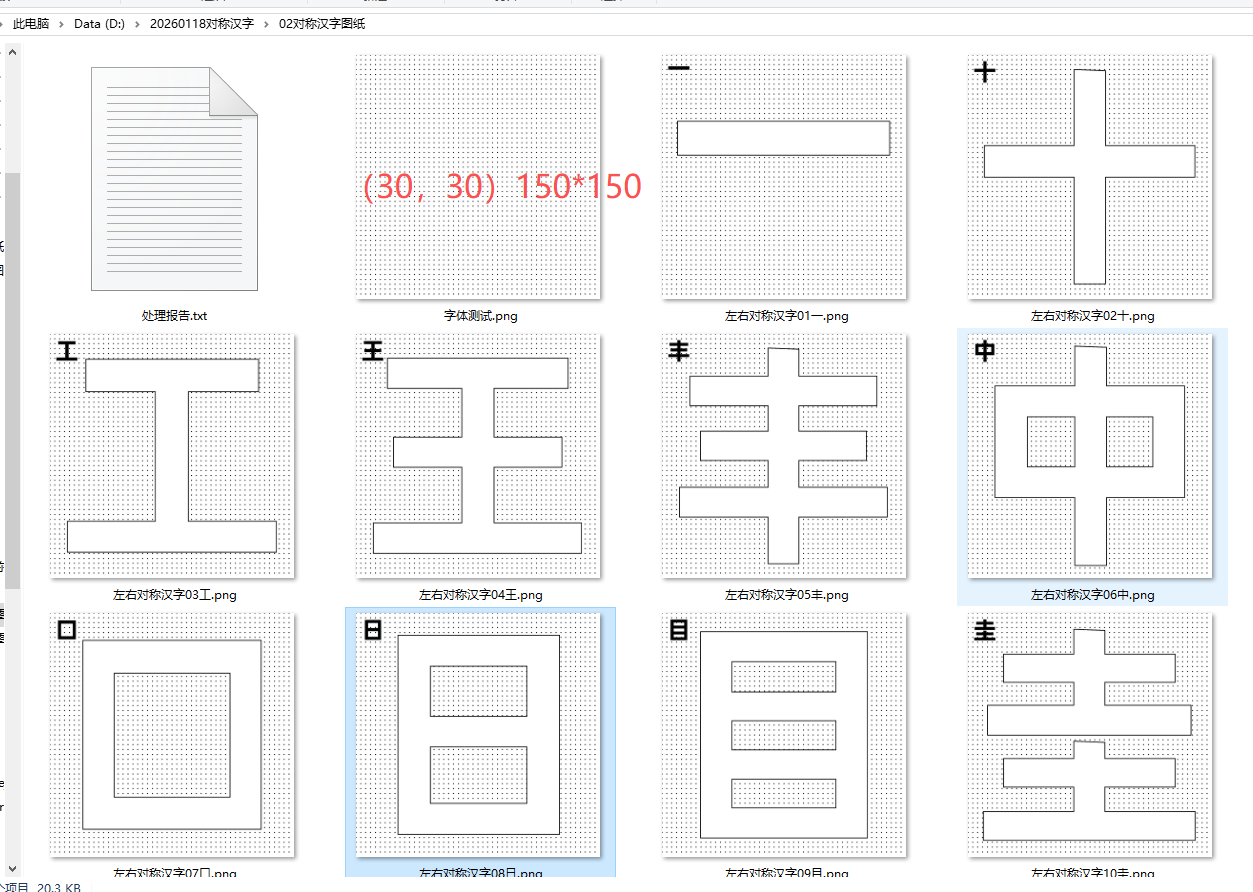
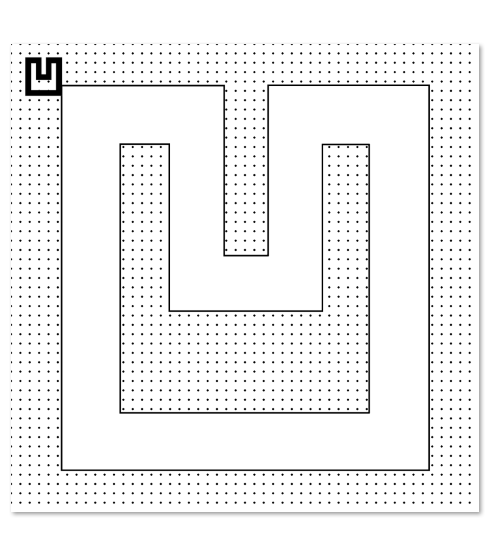
对称并笔画连续的汉字29个,制作对称折纸图02
读取D:\20260118对称汉字\01对称汉字里面的图片,
1. 保持1500×1500大小
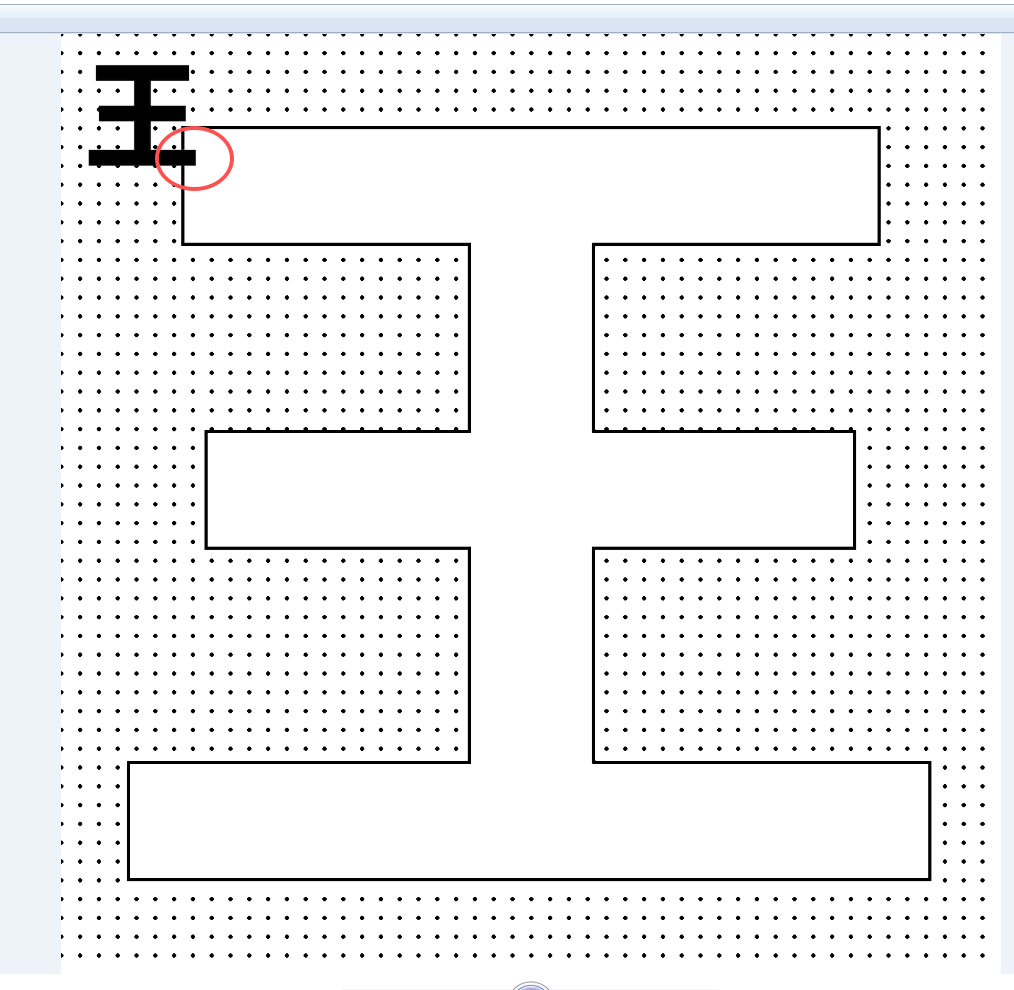
2. 白色部分:填充黑色点点,斜线排列
3. 黑色部分:填充白色,保留黑色轮廓框
4. 左上角(30,30)位置插入原始汉字图片,白色转为透明,尺寸200×200
5. 保存到02对称汉字图纸文件夹下
豆包、deep seek、阿夏
20250118
'''
"""
import os
from PIL import Image, ImageDraw
import numpy as np
import math
def create_diagonal_dots_pattern(img, white_mask, dot_size=2, spacing=25):
"""
在白色区域创建斜线排列的黑色圆点
"""
width, height = img.size
# 创建临时画布绘制圆点
dot_canvas = Image.new('RGBA', (width, height), (255, 255, 255, 0))
dot_draw = ImageDraw.Draw(dot_canvas)
# 在白色区域内按斜线排列绘制圆点
for x in range(0, width, spacing):
for y in range(0, height, spacing):
# 主对角线方向的点
px = x + (y % spacing) * 0.5 # 稍微偏移以形成斜线效果
if 0 <= px < width and 0 <= y < height:
if white_mask[y, int(px)]:
dot_draw.ellipse([px - dot_size, y - dot_size,
px + dot_size, y + dot_size],
fill=(0, 0, 0, 255))
# 另一种斜线方向的点
for x in range(0, width, spacing):
for y in range(0, height, spacing):
# 副对角线方向的点
px = x - (y % spacing) * 0.5 # 反向偏移
if 0 <= px < width and 0 <= y < height:
if white_mask[y, int(px)]:
dot_draw.ellipse([px - dot_size, y - dot_size,
px + dot_size, y + dot_size],
fill=(0, 0, 0, 255))
# 将圆点合并到原图
img.paste(dot_canvas, (0, 0), dot_canvas)
return img
def create_black_outline_with_white_fill(img, black_mask, outline_thickness=3):
"""
为黑色区域创建黑色轮廓,内部填充白色
"""
width, height = img.size
data = np.array(img)
# 创建新的图像数据
new_data = data.copy()
# 找到黑色区域的边缘(轮廓)
outline_mask = np.zeros((height, width), dtype=bool)
# 检查8个方向的邻居
directions = [(-1, -1), (-1, 0), (-1, 1),
(0, -1), (0, 1),
(1, -1), (1, 0), (1, 1)]
for y in range(height):
for x in range(width):
if black_mask[y, x]:
is_edge = False
# 检查是否在边缘
for dy, dx in directions:
ny, nx = y + dy, x + dx
if 0 <= ny < height and 0 <= nx < width:
if not black_mask[ny, nx]:
is_edge = True
break
else:
is_edge = True
break
if is_edge:
outline_mask[y, x] = True
else:
# 内部区域填充白色
new_data[y, x] = [255, 255, 255, 255]
# 绘制加粗的黑色轮廓
for y in range(height):
for x in range(width):
if outline_mask[y, x]:
# 绘制轮廓点
for dy in range(-outline_thickness + 1, outline_thickness):
for dx in range(-outline_thickness + 1, outline_thickness):
nx, ny = x + dx, y + dy
if 0 <= nx < width and 0 <= ny < height:
# 计算距离,创建圆形笔触
distance = math.sqrt(dx*dx + dy*dy)
if distance < outline_thickness:
new_data[ny, nx] = [0, 0, 0, 255]
return Image.fromarray(new_data, 'RGBA')
def make_white_transparent(image):
"""
将图片中的白色转为透明
参数:
image: PIL Image对象 (RGBA模式)
返回:
处理后的图片
"""
data = np.array(image)
# 定义白色的阈值(RGB值都大于240)
white_threshold = 240
# 创建白色区域的掩码
white_mask = np.all(data[:, :, :3] > white_threshold, axis=2)
# 将白色区域的透明度设为0
data[:, :, 3] = np.where(white_mask, 0, data[:, :, 3])
return Image.fromarray(data, 'RGBA')
def add_corner_image(background_img, corner_img_path, position=(30, 30), size=(200, 200)):
"""
在背景图片的左上角添加小图 - 白色转为透明
"""
try:
# 打开小图
corner_img = Image.open(corner_img_path).convert('RGBA')
print(f" 小图原始尺寸: {corner_img.size}")
# 将小图中的白色转为透明
print(f" 将白色转为透明...")
corner_img = make_white_transparent(corner_img)
# 调整小图尺寸,保持比例,最大边为200
corner_img.thumbnail((size[0], size[1]), Image.Resampling.LANCZOS)
print(f" 小图缩放后尺寸: {corner_img.size}")
# 如果缩放后不是200×200,创建200×200的透明背景
if corner_img.size != size:
new_corner = Image.new('RGBA', size, (255, 255, 255, 0))
# 居中放置小图
x_offset = (size[0] - corner_img.width) // 2
y_offset = (size[1] - corner_img.height) // 2
print(f" 小图在背景中的偏移: ({x_offset}, {y_offset})")
new_corner.paste(corner_img, (x_offset, y_offset), corner_img)
corner_img = new_corner
else:
print(f" 小图已调整为: {size}")
# 将小图粘贴到主图的指定位置(使用透明度)
background_img.paste(corner_img, position, corner_img)
print(f" 已添加透明小图到位置: {position}")
return True
except Exception as e:
print(f" 添加左上角小图失败: {str(e)}")
import traceback
traceback.print_exc()
return False
def process_single_image(input_path, output_path, target_size=(1500, 1500),
dot_size=3, spacing=30, outline_thickness=3,
corner_position=(30, 30), corner_size=(200, 200)):
"""
处理单张图片
"""
try:
print(f"处理: {os.path.basename(input_path)}")
# 1. 打开图片并调整到1500×1500
img = Image.open(input_path).convert('RGBA')
# 记录原始文件名用于日志
original_name = os.path.basename(input_path)
# 如果图片不是1500×1500,调整大小
if img.size != target_size:
print(f" 调整大小: {img.size} -> {target_size}")
# 创建1500×1500的白色背景
new_img = Image.new('RGBA', target_size, (255, 255, 255, 255))
# 保持原图比例,居中放置
scale = min(target_size[0] / img.width, target_size[1] / img.height)
new_width = int(img.width * scale)
new_height = int(img.height * scale)
img_resized = img.resize((new_width, new_height), Image.Resampling.LANCZOS)
x_offset = (target_size[0] - new_width) // 2
y_offset = (target_size[1] - new_height) // 2
new_img.paste(img_resized, (x_offset, y_offset))
img = new_img
# 2. 分析颜色区域
data = np.array(img)
# 定义白色和黑色区域(考虑透明度)
# 白色区域:RGB值都大于200,透明度大于128
white_mask = np.all(data[:, :, :3] > 200, axis=2) & (data[:, :, 3] > 128)
# 黑色区域:RGB值都小于100,透明度大于128
black_mask = np.all(data[:, :, :3] < 100, axis=2) & (data[:, :, 3] > 128)
print(f" 白色区域: {np.sum(white_mask)} 像素")
print(f" 黑色区域: {np.sum(black_mask)} 像素")
# 3. 创建结果图像(白色背景)
result_img = Image.new('RGBA', target_size, (255, 255, 255, 255))
# 4. 如果有黑色区域,处理黑色部分
if np.any(black_mask):
print(f" 处理黑色轮廓...")
black_processed = create_black_outline_with_white_fill(
img.copy(), black_mask, outline_thickness
)
result_img = Image.alpha_composite(result_img, black_processed)
# 5. 如果有白色区域,添加斜线排列的黑色圆点
if np.any(white_mask):
print(f" 添加斜线圆点...")
# 创建圆点图层
dot_layer = Image.new('RGBA', target_size, (255, 255, 255, 0))
dot_layer = create_diagonal_dots_pattern(dot_layer, white_mask, dot_size, spacing)
# 合并到结果
result_img = Image.alpha_composite(result_img, dot_layer)
# 6. 如果既没有黑色区域也没有白色区域,说明可能是透明背景图片
if not np.any(black_mask) and not np.any(white_mask):
print(f" 检测到透明背景图片,使用灰度阈值...")
# 将图片转换为灰度
gray_img = img.convert('L')
gray_data = np.array(gray_img)
# 使用阈值分割
threshold = 128
black_mask = gray_data < threshold # 暗色区域作为黑色
white_mask = gray_data >= threshold # 亮色区域作为白色
print(f" 灰度阈值分割 - 暗色区域: {np.sum(black_mask)} 像素")
print(f" 灰度阈值分割 - 亮色区域: {np.sum(white_mask)} 像素")
# 重新创建结果图像
result_img = Image.new('RGBA', target_size, (255, 255, 255, 255))
# 处理黑色区域
if np.any(black_mask):
print(f" 处理灰度黑色轮廓...")
# 需要将灰度掩码转换为RGB格式
black_rgb = np.stack([black_mask, black_mask, black_mask, np.ones_like(black_mask)*255], axis=-1)
black_img = Image.fromarray((black_rgb * 255).astype(np.uint8), 'RGBA')
black_processed = create_black_outline_with_white_fill(
black_img, black_mask, outline_thickness
)
result_img = Image.alpha_composite(result_img, black_processed)
# 处理白色区域
if np.any(white_mask):
print(f" 添加灰度白色区域圆点...")
dot_layer = Image.new('RGBA', target_size, (255, 255, 255, 0))
dot_layer = create_diagonal_dots_pattern(dot_layer, white_mask, dot_size, spacing)
result_img = Image.alpha_composite(result_img, dot_layer)
# 7. 在左上角(30,30)添加原始汉字小图(200×200),白色转为透明
print(f" 添加左上角小图(白色转透明)...")
success = add_corner_image(result_img, input_path, corner_position, corner_size)
if not success:
print(f" 警告: 添加小图失败,尝试备用方法...")
# 备用方法:直接绘制红色边框标记位置
draw = ImageDraw.Draw(result_img)
draw.rectangle([corner_position[0], corner_position[1],
corner_position[0] + corner_size[0],
corner_position[1] + corner_size[1]],
outline='red', width=5)
print(f" 已绘制红色边框标记小图位置")
# 8. 保存结果
result_img.save(output_path, 'PNG')
print(f" ✓ 保存到: {os.path.basename(output_path)}")
return True, original_name
except Exception as e:
print(f" ✗ 处理失败: {str(e)}")
import traceback
traceback.print_exc()
return False, os.path.basename(input_path)
def main():
"""主函数"""
print("=" * 60)
print("对称汉字图片处理程序")
print("=" * 60)
print("特点: 左上角小图中的白色部分将转为透明")
print("=" * 60)
# 设置路径
base_dir = r'D:\20260118对称汉字'
input_dir = os.path.join(base_dir, "01对称汉字")
output_dir = os.path.join(base_dir, "02对称汉字图纸")
# 检查输入文件夹
if not os.path.exists(input_dir):
print(f"错误: 输入文件夹不存在: {input_dir}")
print("请检查路径或文件夹名称")
return
# 创建输出文件夹
os.makedirs(output_dir, exist_ok=True)
print(f"输入文件夹: {input_dir}")
print(f"输出文件夹: {output_dir}")
print(f"目标尺寸: 1500×1500")
print("处理规则:")
print("1. 调整到1500×1500大小")
print("2. 白色部分: 黑色圆点,斜线排列")
print("3. 黑色部分: 白色填充,黑色轮廓框")
print("4. 左上角(30,30): 原始汉字图片,白色转透明,200×200")
print("5. 支持透明背景图片处理")
print("=" * 60)
# 支持的图片格式
supported_formats = ('.png', '.jpg', '.jpeg', '.bmp', '.tiff', '.gif', '.webp')
# 获取图片文件
image_files = []
for filename in os.listdir(input_dir):
if any(filename.lower().endswith(fmt) for fmt in supported_formats):
image_files.append(filename)
if not image_files:
print("未找到任何图片文件!")
return
# 排序
image_files.sort()
print(f"找到 {len(image_files)} 个图片文件")
print("开始处理...")
print("-" * 60)
# 处理参数
TARGET_SIZE = (1500, 1500) # 固定尺寸
DOT_SIZE = 3 # 圆点大小
SPACING = 30 # 点间距
OUTLINE_THICKNESS = 3 # 轮廓线粗细
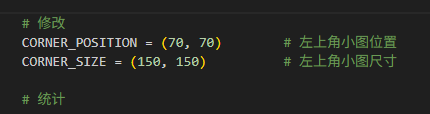
# 修改
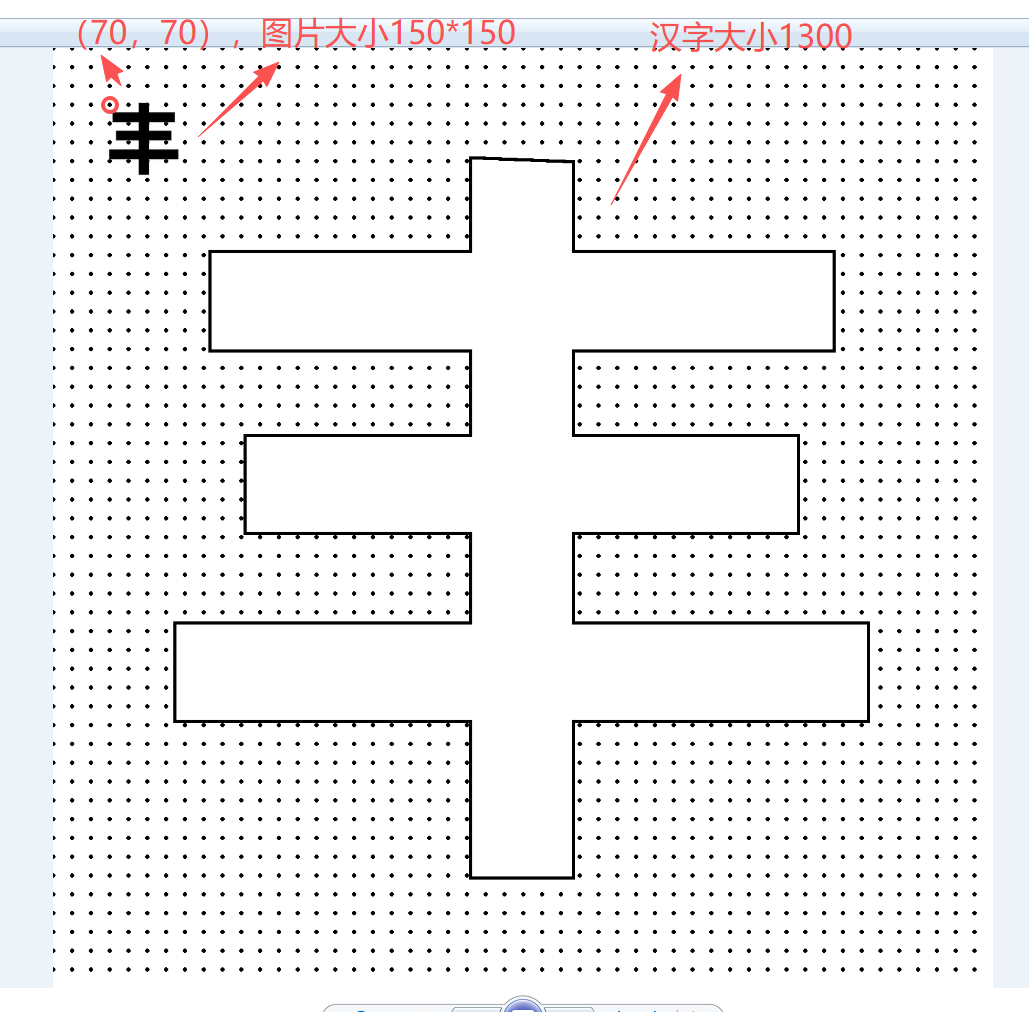
CORNER_POSITION = (70, 70) # 左上角小图位置
CORNER_SIZE = (150, 150) # 左上角小图尺寸
# 统计
success_count = 0
failed_files = []
# 批量处理
for i, filename in enumerate(image_files, 1):
print(f"[{i}/{len(image_files)}] ", end="")
input_path = os.path.join(input_dir, filename)
# 输出文件名(保持原名,转换为PNG格式)
name, ext = os.path.splitext(filename)
output_filename = f"{name}.png"
output_path = os.path.join(output_dir, output_filename)
# 处理单张图片
success, original_name = process_single_image(
input_path, output_path,
target_size=TARGET_SIZE,
dot_size=DOT_SIZE,
spacing=SPACING,
outline_thickness=OUTLINE_THICKNESS,
corner_position=CORNER_POSITION,
corner_size=CORNER_SIZE
)
if success:
success_count += 1
else:
failed_files.append(original_name)
print("-" * 40)
# 输出结果
print("=" * 60)
print("处理完成!")
print(f"成功处理: {success_count}/{len(image_files)} 张图片")
print(f"所有处理后的图片已保存到: {output_dir}")
# 显示效果说明
print("\n处理效果说明:")
print("┌─────────────────────────────────────────────────────┐")
print("│ +-------+ │")
print("│ | 原始 | 白色区域:黑色斜线圆点 │")
print("│ | 汉字 | 黑色区域:白色填充+黑色轮廓 │")
print("│ |透明背景| (白色部分已转为透明) │")
print("│ +-------+ │")
print("│ │")
print("│ │")
print("│ │")
print("│ │")
print("│ │")
print("│ │")
print("│ │")
print("│ │")
print("└─────────────────────────────────────────────────────┘")
if failed_files:
print(f"\n失败的图片 ({len(failed_files)} 张):")
for filename in failed_files[:10]:
print(f" - {filename}")
if len(failed_files) > 10:
print(f" ... 还有 {len(failed_files) - 10} 个失败文件")
# 生成报告
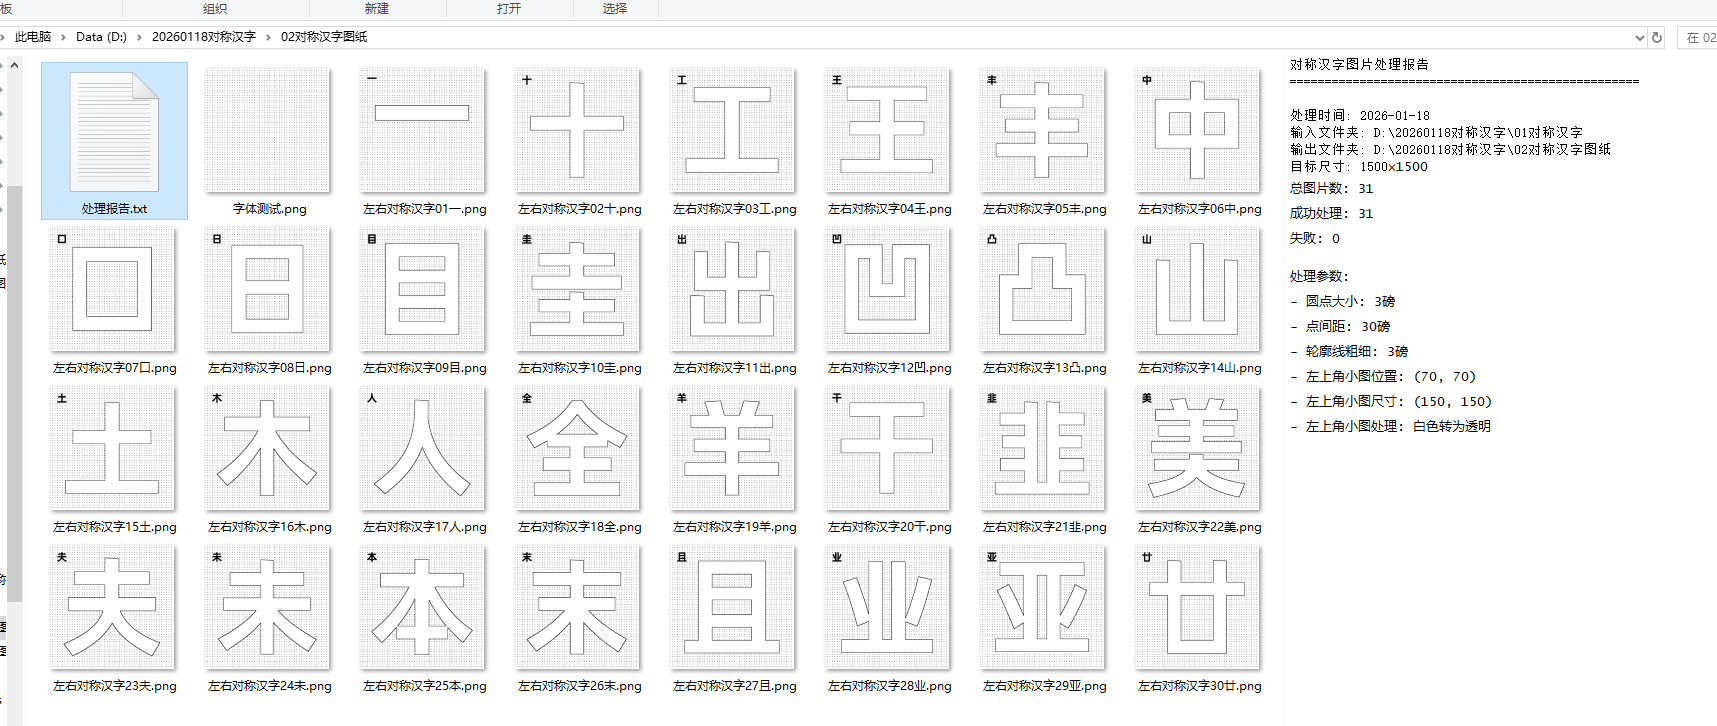
report_path = os.path.join(output_dir, "处理报告.txt")
with open(report_path, 'w', encoding='utf-8') as f:
f.write("对称汉字图片处理报告\n")
f.write("=" * 50 + "\n\n")
f.write(f"处理时间: 2026-01-18\n")
f.write(f"输入文件夹: {input_dir}\n")
f.write(f"输出文件夹: {output_dir}\n")
f.write(f"目标尺寸: 1500×1500\n")
f.write(f"总图片数: {len(image_files)}\n")
f.write(f"成功处理: {success_count}\n")
f.write(f"失败: {len(failed_files)}\n\n")
f.write("处理参数:\n")
f.write(f"- 圆点大小: {DOT_SIZE}磅\n")
f.write(f"- 点间距: {SPACING}磅\n")
f.write(f"- 轮廓线粗细: {OUTLINE_THICKNESS}磅\n")
f.write(f"- 左上角小图位置: {CORNER_POSITION}\n")
f.write(f"- 左上角小图尺寸: {CORNER_SIZE}\n")
f.write(f"- 左上角小图处理: 白色转为透明\n\n")
if failed_files:
f.write("失败文件列表:\n")
for filename in failed_files:
f.write(f" - {filename}\n")
print(f"\n处理报告: {report_path}")
if __name__ == "__main__":
# 检查依赖库
try:
from PIL import Image, ImageDraw
import numpy as np
except ImportError:
print("请先安装必要的库:")
print("pip install Pillow numpy")
exit(1)
main()
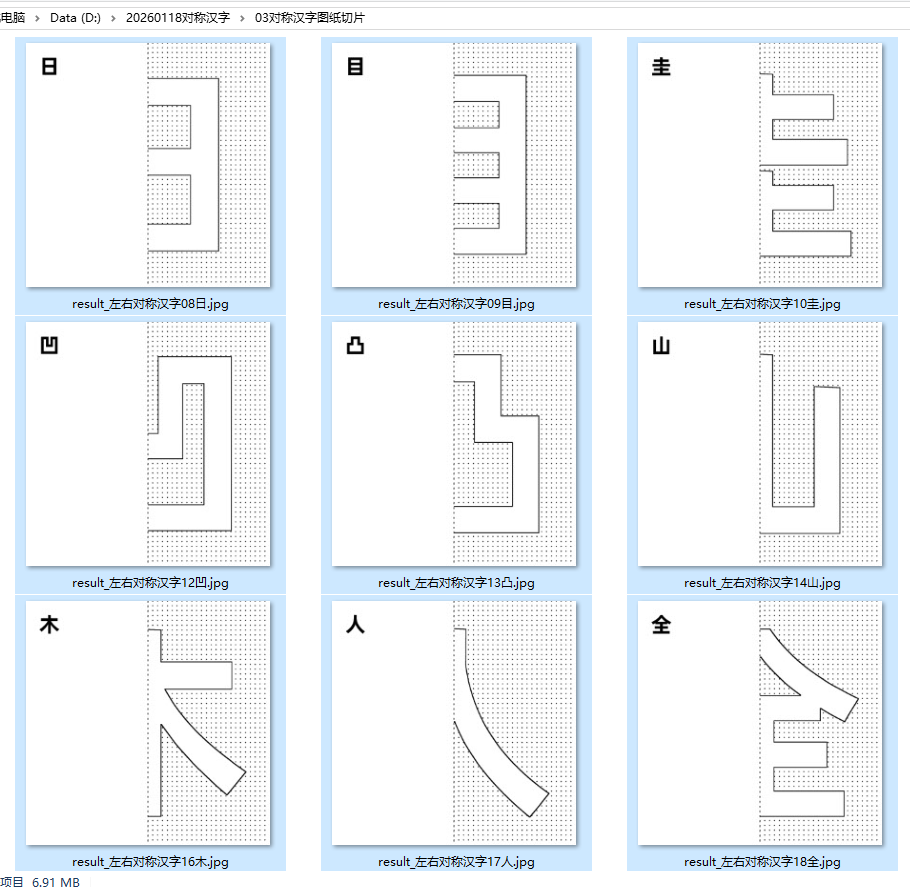
"""
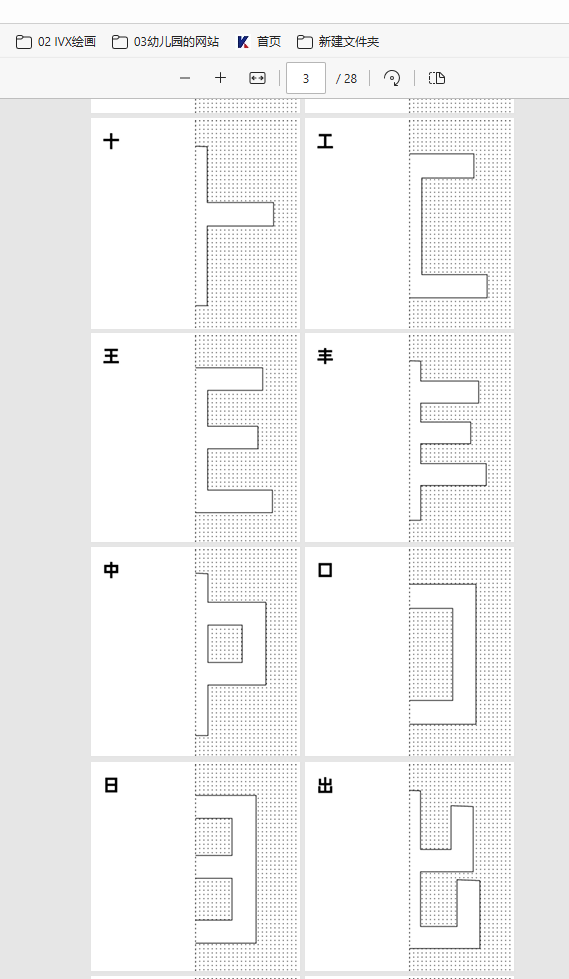
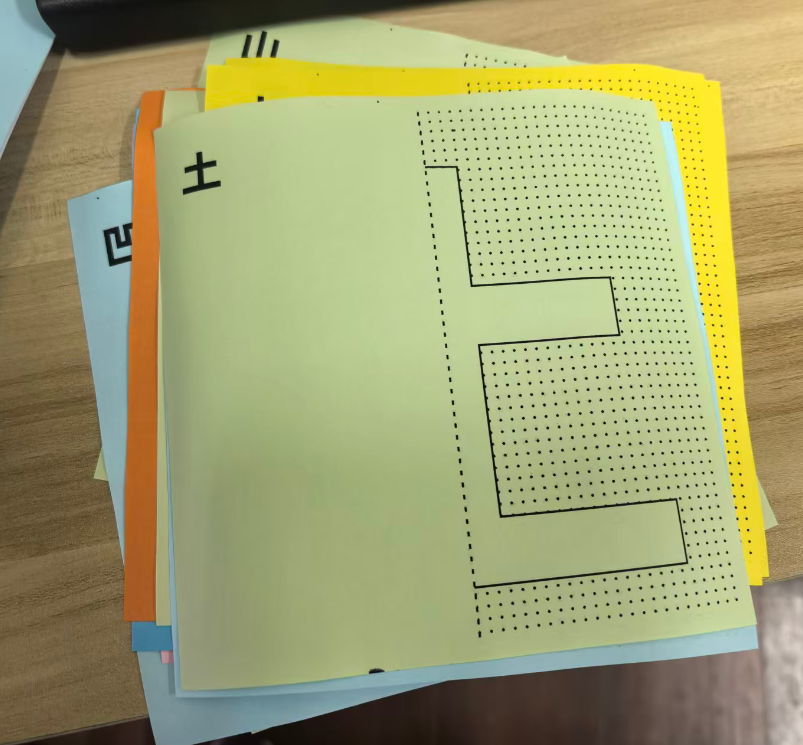
对称并笔画连续的汉字29个,制作对称折纸图03
读取D:\20260118对称汉字\"01对称汉字"和"02对称汉字图纸"
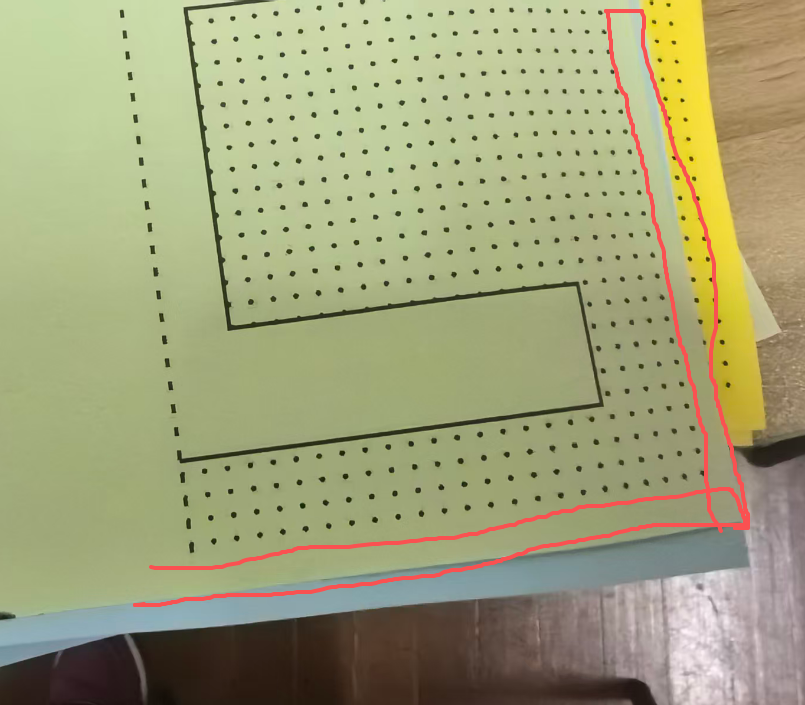
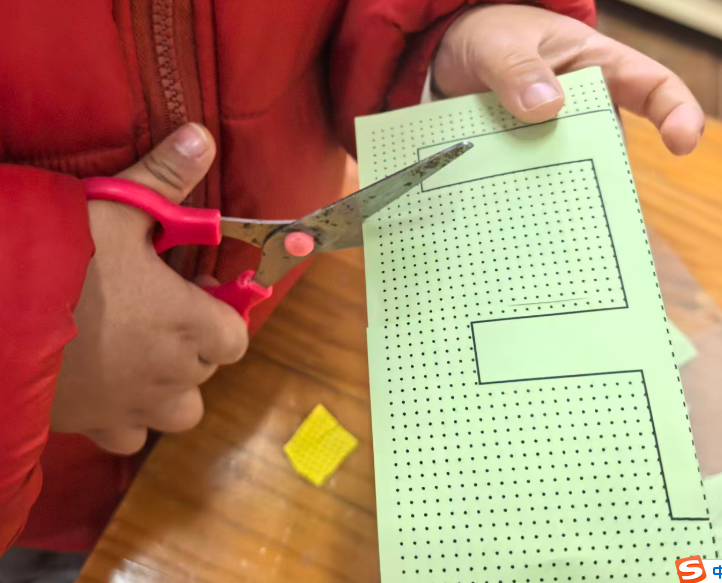
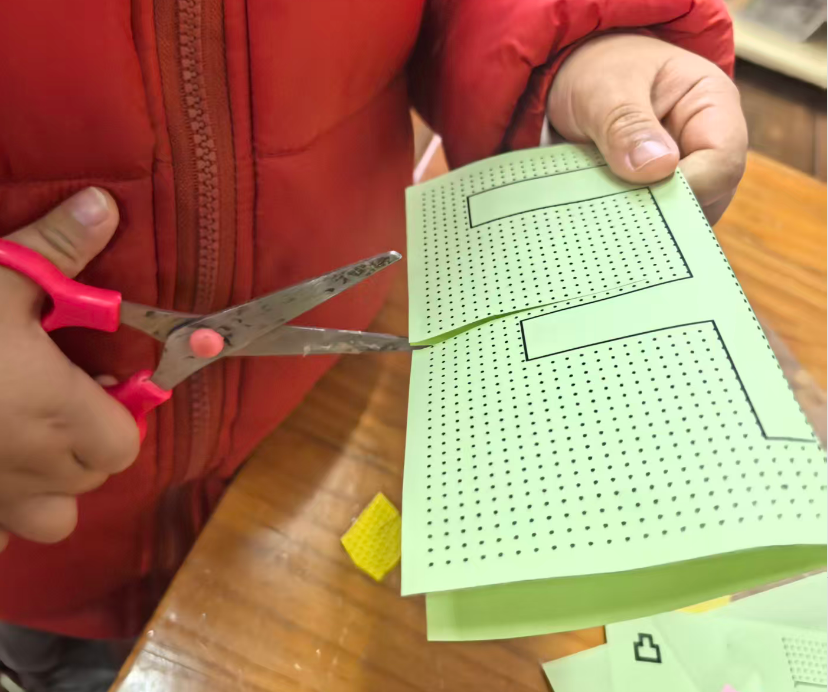
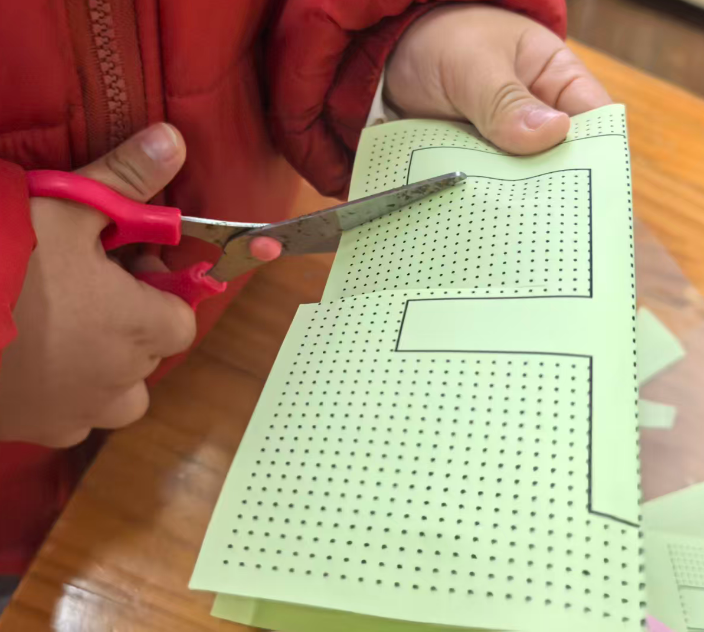
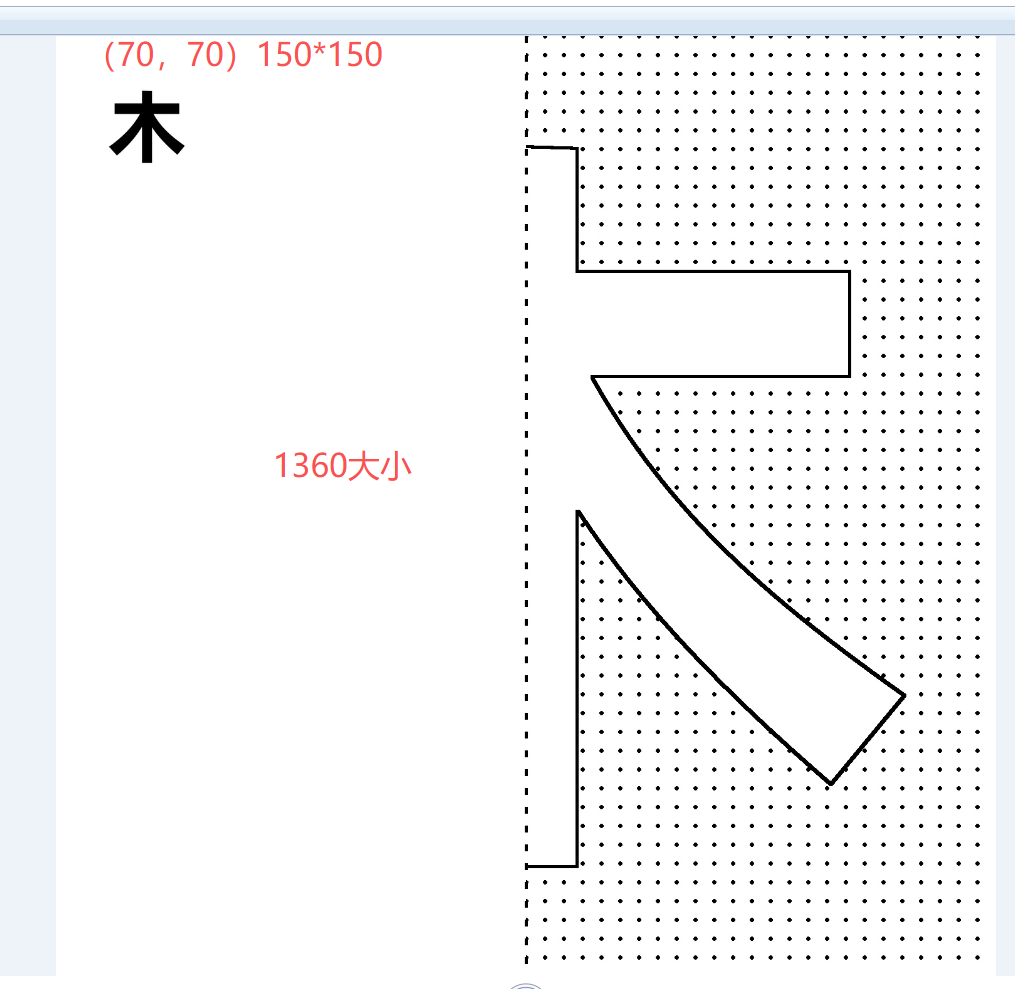
1. 切割图纸的右侧一半,
2. 贴入新建1500*1500的背景图上,上下中线画虚线
3. 左上角(30,30)位置插入原始汉字图片,白色转为透明,尺寸200×200
5. 保存到03对称汉字图纸切片
豆包、deep seek、阿夏
20250118
'''
"""
import os
from PIL import Image, ImageDraw
import math
def process_images(input_folder1, input_folder2, output_folder, target_size=1500):
"""
处理图片:将两种图片合并到同一张背景上
参数:
input_folder1: 第一个输入文件夹路径(用于切割右侧)
input_folder2: 第二个输入文件夹路径(用于左上角小图)
output_folder: 输出图片保存路径
target_size: 目标图片大小(正方形)
"""
# 创建输出文件夹
os.makedirs(output_folder, exist_ok=True)
# 获取两个文件夹中的图片文件
valid_extensions = ('.jpg', '.jpeg', '.png', '.bmp', '.gif', '.tiff', '.webp')
# 获取第一个文件夹的图片
images1_files = []
for file in sorted(os.listdir(input_folder1)): # 按文件名排序
if file.lower().endswith(valid_extensions):
images1_files.append(file)
# 获取第二个文件夹的图片
images2_files = []
for file in sorted(os.listdir(input_folder2)): # 按文件名排序
if file.lower().endswith(valid_extensions):
images2_files.append(file)
print(f"找到 {len(images1_files)} 张图片在文件夹1")
print(f"找到 {len(images2_files)} 张图片在文件夹2")
# 确保两个文件夹有相同数量的图片
min_count = min(len(images1_files), len(images2_files))
if min_count == 0:
print("错误:至少有一个文件夹没有图片!")
return
print(f"将处理 {min_count} 对图片")
# 处理每对图片
for i in range(min_count):
try:
# 获取对应的文件名
filename1 = images1_files[i]
filename2 = images2_files[i]
print(f"处理第 {i+1}/{min_count} 对: {filename1} + {filename2}")
# 打开第一个图片(用于切割)
img1_path = os.path.join(input_folder1, filename1)
img1 = Image.open(img1_path).convert('RGB')
# 获取图片1尺寸并切割右侧
width1, height1 = img1.size
right_half = img1.crop((width1 // 2, 0, width1, height1))
right_width, right_height = right_half.size
# 创建1500x1500白色背景图片
background = Image.new('RGB', (target_size, target_size), color='white')
# 计算右侧图片在背景上的放置位置(垂直居中)
y_offset = (target_size - right_height) // 2
# 关键修改:让大图片的左边贴着背景图的中线
# 中线位置是 target_size // 2,所以将图片的左边放在这个位置
x_offset_right = target_size // 2 # 左边贴在中间虚线上
# 将右侧图片粘贴到背景的右侧(左边贴着中线)
background.paste(right_half, (x_offset_right, y_offset))
print(f" 大图片位置: 左边在 x={x_offset_right}, 垂直居中 y={y_offset}")
# 打开第二个图片(用于左上角)
img2_path = os.path.join(input_folder2, filename2)
img2 = Image.open(img2_path).convert('RGB')
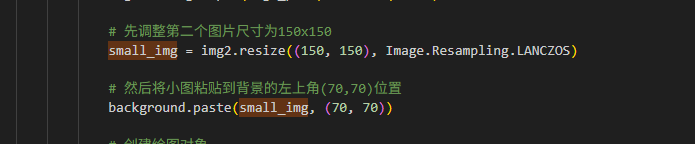
# 先调整第二个图片尺寸为150x150
small_img = img2.resize((150, 150), Image.Resampling.LANCZOS)
# 然后将小图粘贴到背景的左上角(70,70)位置
background.paste(small_img, (70, 70))
# 创建绘图对象
draw = ImageDraw.Draw(background)
# 计算虚线参数
dash_length = 10 # 10磅的黑色线段
gap_length = 10 # 10磅的白色间隔
line_width = 5 # 5磅的粗细
# 中线坐标(垂直虚线)
middle_x = target_size // 2
top_center = (middle_x, 0)
bottom_center = (middle_x, target_size - 1)
# 计算线段总长度
total_length = target_size - 1
# 计算虚线段的循环次数
dash_pattern_length = dash_length + gap_length
num_segments = math.ceil(total_length / dash_pattern_length)
# 绘制虚线
current_y = 0
segment_index = 0
while current_y < total_length:
# 计算当前线段结束位置
dash_end = min(current_y + dash_length, total_length)
# 如果是黑色段(虚线)
if segment_index % 2 == 0:
# 绘制黑色线段
draw.line([(middle_x, current_y),
(middle_x, dash_end)],
fill='black', width=line_width)
current_y = dash_end
segment_index += 1
# 如果有间隔
if segment_index % 2 == 1:
# 跳过白色间隔
current_y = min(current_y + gap_length, total_length)
# 可选:在虚线位置添加一个红色参考线,便于查看对齐效果
# draw.line([(middle_x, 0), (middle_x, target_size)], fill='red', width=1)
# 保存图片,使用第一个图片的文件名
output_filename = f"result_{os.path.splitext(filename1)[0]}.jpg"
output_path = os.path.join(output_folder, output_filename)
background.save(output_path, 'JPEG', quality=95)
print(f" 已保存到: {output_path}")
except Exception as e:
print(f"处理图片对 {i+1} 时出错: {e}")
import traceback
traceback.print_exc()
print("处理完成!")
def main():
"""主函数"""
print("开始处理图片...")
# 设置文件夹路径
base_dir = r'D:\20260118对称汉字'
input_folder1 = os.path.join(base_dir, "02对称汉字图纸") # 用于切割的图片
input_folder2 = os.path.join(base_dir, "01对称汉字") # 用于左上角小图
output_folder = os.path.join(base_dir, "03对称汉字图纸切片")
# 检查输入文件夹是否存在
if not os.path.exists(input_folder1):
print(f"错误: 输入文件夹 '{input_folder1}' 不存在!")
return
if not os.path.exists(input_folder2):
print(f"错误: 输入文件夹 '{input_folder2}' 不存在!")
return
# 处理图片
process_images(input_folder1, input_folder2, output_folder)
if __name__ == "__main__":
main()


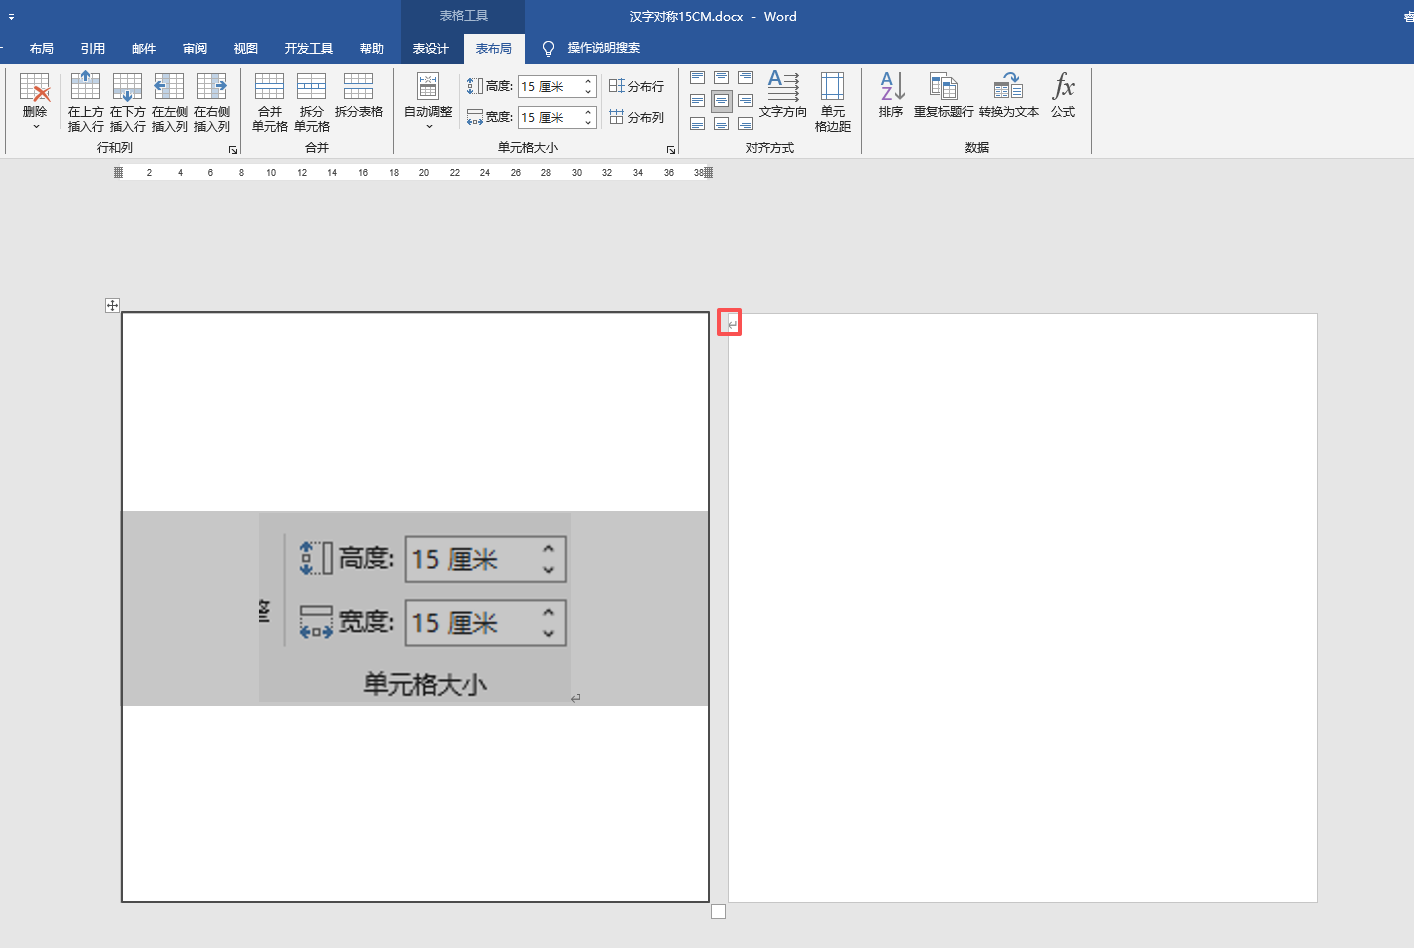


 自动遮盖0.7CM边距