1 HAL简介
STM32的HAL(Hardware Abstraction Layer,硬件抽象层)是一套由ST官方提供的高级函数库,它将复杂的底层寄存器操作封装成通用的、易读的API函数,让开发者能够脱离具体的硬件手册(寄存器地址),通过类似"调用功能模块"的方式(如HAL_UART_Transmit)快速配置和控制芯片外设。它的核心价值在于极高的开发效率和跨型号的可移植性,配合图形化配置工具STM32CubeMX,可以将原本需要数天调试的底层初始化缩短至几分钟,可以极大的提高效率。
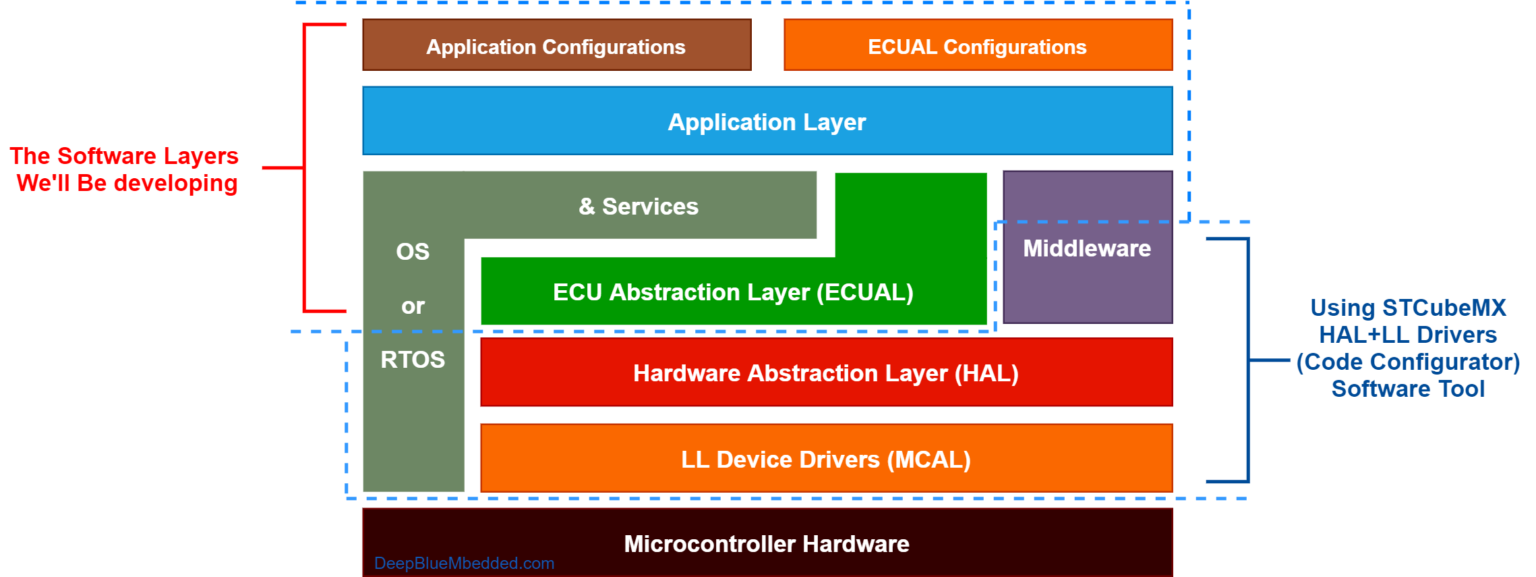
在ST的体系中,对于软件开发有几个层次,寄存器级,LL层,HAL层,ECUAL层。寄存器级,LL层比较贴近硬件,LL层就是简单封装了一下寄存器。ECUAL是车规,一般开发用不到。普通开发最常用的应该还是HAL了。
因为我以前做过MFC,感觉HAL的思路和MFC比较接近。ClassWizard对应的就是STM32CubeMX,尽量简化上手难度,可以快速出产品。
这里再比较一下我比较熟悉的树莓派Pico。
| 维度 | STM32 HAL | Pico SDK |
|---|---|---|
| 核心目标 | 统一抽象,屏蔽芯片差异 | 暴露硬件能力 |
| 使用对象 | 工程团队、产品开发 | 程序员、教育、黑客 |
| API 风格 | 面向"外设功能" | 面向"寄存器 + 外设" |
| 是否隐藏细节 | 是(很多) | 几乎不隐藏 |
感觉学习可以用Pico,工业开发这种极度求稳的项目用STM32还是好一些。不过一些关键技术点的突破,估计要下到底层,这时就需要LL层,就要用到Pico里面学到的知识了。。。
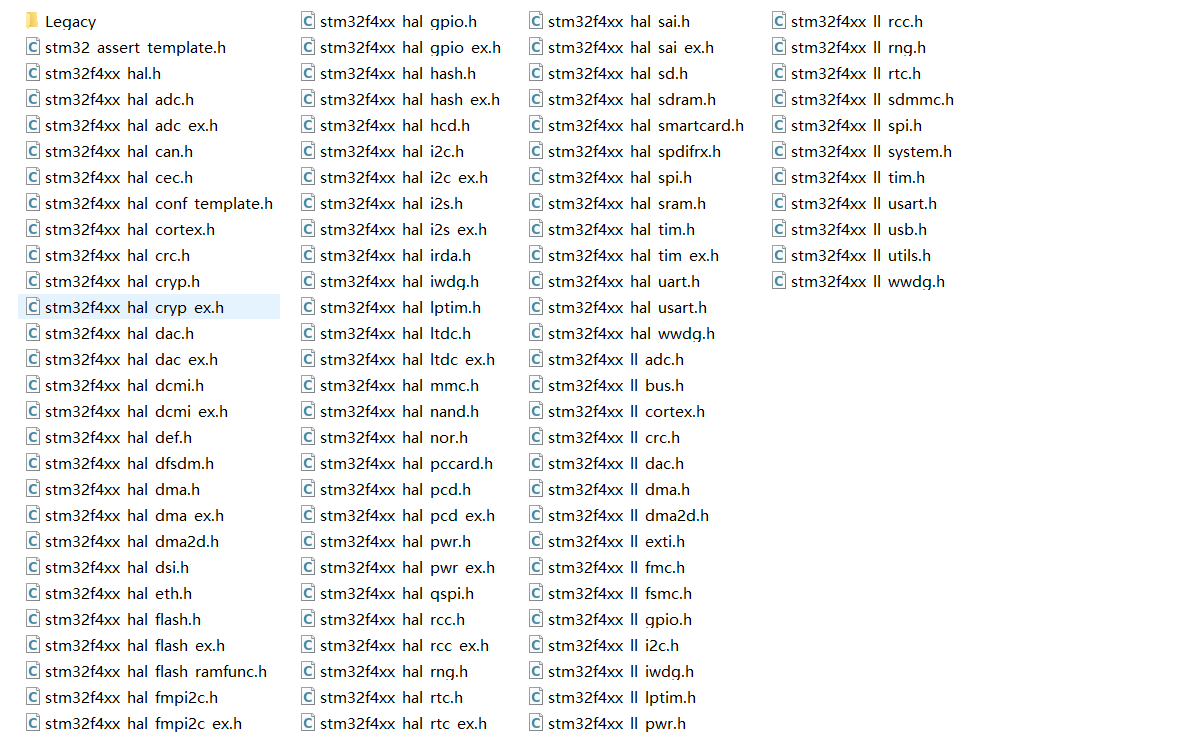
从正点原子的例子看来,HAL其实代码量也不是特别大(F4为例)。
头文件:
实现文件:
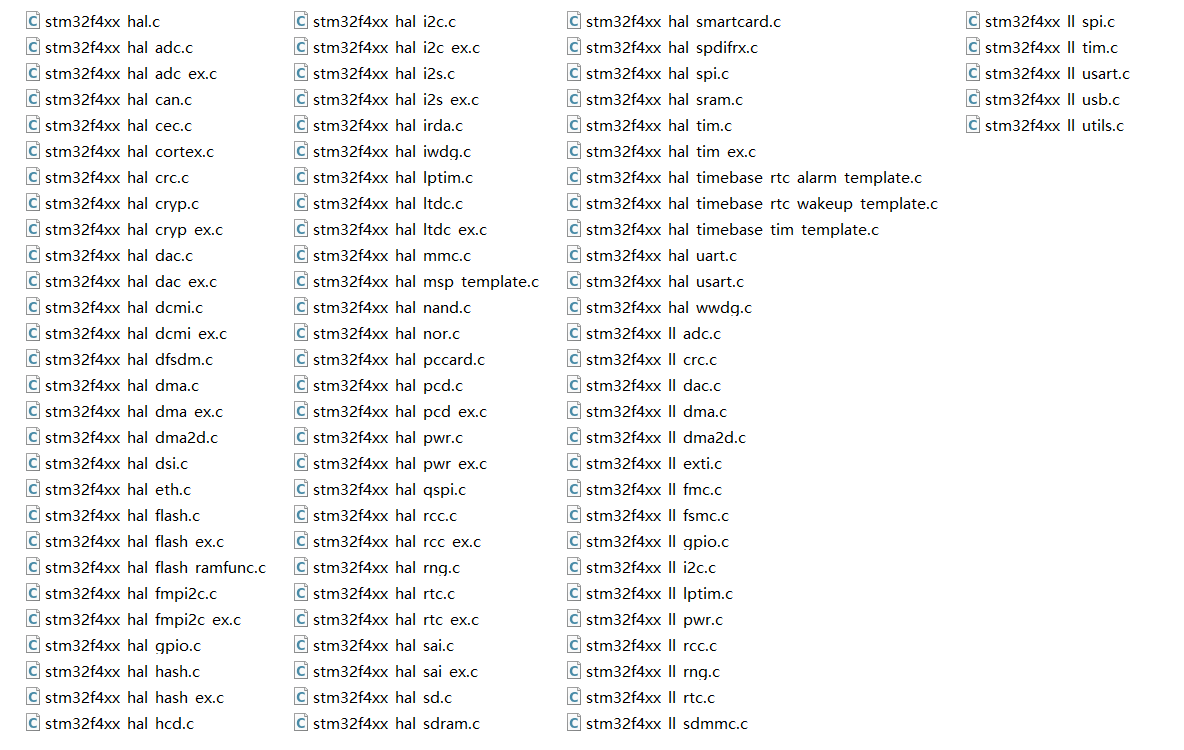
除开LL的,HAL的学习工作量感觉还是可控。
对了,Android也有一个HAL层,两个都叫HAL,一个STM32是屏蔽不同MCU的差别,而Android是屏蔽不同硬件平台的差异。明显谷歌还是牛批一些。。。
学习HAL的方法查了一下资料,最权威的是https://www.st.com/resource/en/user_manual/um1725-description-of-stm32f4-hal-and-lowlayer-drivers-stmicroelectronics.pdf如果想省点事,简单点的方式是直接看上面的源代码。接口定义在H文件,用法直接看.C。简单粗暴。。。有不懂用AI查一下,理解了之后直接用AI生成再检查就好了。
另外有一个网上教程也还可以:https://deepbluembedded.com/stm32-arm-programming-tutorials/#stm32-tutorials
下面就具体操作一下。
2 GPIO
定义是在stm32f4xx_hal_gpio.h。除开废话,核心的定义就是这几个。
cpp
/** @addtogroup GPIO_Exported_Functions_Group1
  * @{
  */
/* Initialization and de-initialization functions *****************************/
void  HAL_GPIO_Init(GPIO_TypeDef  *GPIOx, GPIO_InitTypeDef *GPIO_Init);
void  HAL_GPIO_DeInit(GPIO_TypeDef  *GPIOx, uint32_t GPIO_Pin);
/**
  * @}
  */

/** @addtogroup GPIO_Exported_Functions_Group2
  * @{
  */
/* IO operation functions *****************************************************/
GPIO_PinState HAL_GPIO_ReadPin(GPIO_TypeDef* GPIOx, uint16_t GPIO_Pin);
void HAL_GPIO_WritePin(GPIO_TypeDef* GPIOx, uint16_t GPIO_Pin, GPIO_PinState PinState);
void HAL_GPIO_TogglePin(GPIO_TypeDef* GPIOx, uint16_t GPIO_Pin);
HAL_StatusTypeDef HAL_GPIO_LockPin(GPIO_TypeDef* GPIOx, uint16_t GPIO_Pin);
void HAL_GPIO_EXTI_IRQHandler(uint16_t GPIO_Pin);
void HAL_GPIO_EXTI_Callback(uint16_t GPIO_Pin);
然后在C文件中有用法:
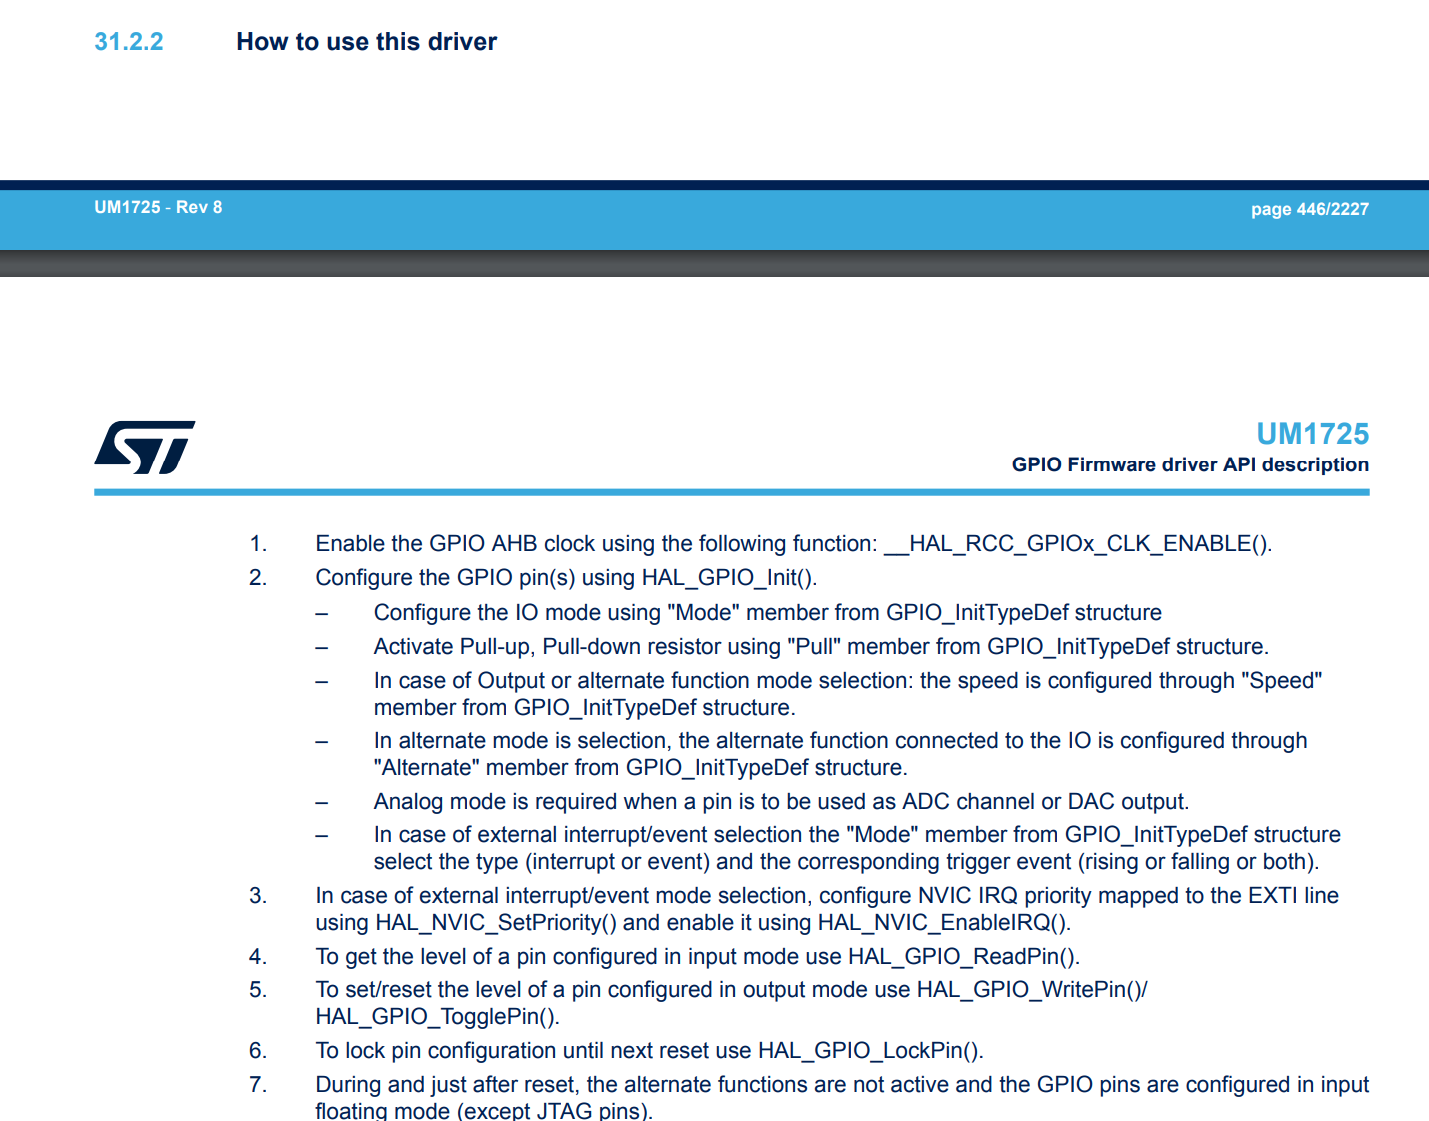
How to use this driver
==============================================================================
..
(#) Enable the GPIO AHB clock using the following function: __HAL_RCC_GPIOx_CLK_ENABLE().
(#) Configure the GPIO pin(s) using HAL_GPIO_Init().
(++) Configure the IO mode using "Mode" member from GPIO_InitTypeDef structure
(++) Activate Pull-up, Pull-down resistor using "Pull" member from GPIO_InitTypeDef
structure.
(++) In case of Output or alternate function mode selection: the speed is
configured through "Speed" member from GPIO_InitTypeDef structure.
(++) In alternate mode is selection, the alternate function connected to the IO
is configured through "Alternate" member from GPIO_InitTypeDef structure.
(++) Analog mode is required when a pin is to be used as ADC channel
or DAC output.
(++) In case of external interrupt/event selection the "Mode" member from
GPIO_InitTypeDef structure select the type (interrupt or event) and
the corresponding trigger event (rising or falling or both).
(#) In case of external interrupt/event mode selection, configure NVIC IRQ priority
mapped to the EXTI line using HAL_NVIC_SetPriority() and enable it using
HAL_NVIC_EnableIRQ().
(#) To get the level of a pin configured in input mode use HAL_GPIO_ReadPin().
(#) To set/reset the level of a pin configured in output mode use
HAL_GPIO_WritePin()/HAL_GPIO_TogglePin().
(#) To lock pin configuration until next reset use HAL_GPIO_LockPin().
(#) During and just after reset, the alternate functions are not
active and the GPIO pins are configured in input floating mode (except JTAG
pins).
(#) The LSE oscillator pins OSC32_IN and OSC32_OUT can be used as general purpose
(PC14 and PC15, respectively) when the LSE oscillator is off. The LSE has
priority over the GPIO function.
(#) The HSE oscillator pins OSC_IN/OSC_OUT can be used as
general purpose PH0 and PH1, respectively, when the HSE oscillator is off.
The HSE has priority over the GPIO function.
这里其实和那个官方pdf是一致的,明显这个注释就是doxygen的格式,用来生成文档的。果然,pdf里面和这里的是一摸一样。所以直接看代码也够了。