conda下载地址【清华镜像】:
我的是python311版,就下载了:Miniconda3-py311_23.5.2-0-Windows-x86_64.exe
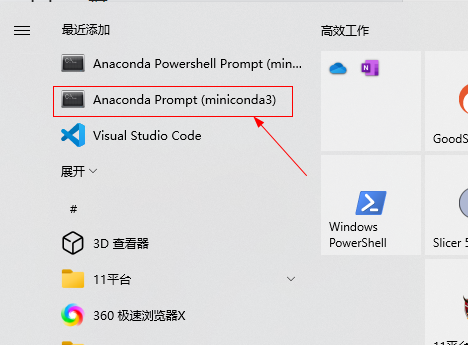
安装完成后打开Anaconda Prompt(管理员模式),就可以定制环境了。注意:所有指令都在这里执行,不是CMD环境。
提前准备:修改虚拟环境 & 安装包路径:(默认装在C盘会占用大量空间,开始没注意回头弄浪费大量时间)
参考网友这篇:
https://blog.csdn.net/2301_77798916/article/details/152122441查看虚拟环境默认路径
conda config --show envs_dirs
查看安装包缓存默认路径
conda config --show pkgs_dirs
添加新的虚拟环境路径(优先级1,最优先使用)
conda config --add envs_dirs D:\CondaConfig\envs
添加新的包缓存路径(优先级1)
conda config --add pkgs_dirs D:\CondaConfig\pkgs
手动修改:
- Windows :打开文件管理器,在地址栏输入
C:\Users\用户名(如C:\Users\33562),找到.condarc文件(若隐藏,需开启"显示隐藏文件")。- 修改他即可。
在conda中安装python311环境:
# 创建Python 3.11的conda环境
conda create -n nnunet311_env python=3.11 -y

# 激活环境
conda activate nnunet311_env

# 升级pip(适配Python 3.11)
python -m pip install --upgrade pip setuptools wheel
安装 Python 3.11 兼容的依赖
# 安装CUDA 11.8版本PyTorch(适配Python 3.11,GPU版)
pip install torch==2.1.2+cu118 torchvision==0.16.2+cu118 torchaudio==2.1.2+cu118 --index-url https://download.pytorch.org/whl/cu118

#下载太慢 Ctrl + C 中断下载,改用镜像下载
pip3 原地址 -i https://pypi.tuna.tsinghua.edu.cn/simple

# 若无GPU,安装CPU版PyTorch
# pip install torch==2.1.2 torchvision==0.16.2 torchaudio==2.1.2
# 镜像下载
pip3 install torch==2.1.2 torchvision==0.16.2 torchaudio==2.1.2 -i https://pypi.tuna.tsinghua.edu.cn/simple

# 安装nnU-Net V2核心依赖(Python 3.11适配)
pip install SimpleITK==2.3.1 nibabel==5.2.1 pydicom==2.4.4 tqdm==4.66.1 requests==2.31.0 psutil==5.9.8 scipy==1.11.4 scikit-image==0.22.0
#镜像下载
pip3 install SimpleITK==2.3.1 nibabel==5.2.1 pydicom==2.4.4 tqdm==4.66.1 requests==2.31.0 psutil==5.9.8 scipy==1.11.4 scikit-image==0.22.0 -i https://pypi.tuna.tsinghua.edu.cn/simple

# 从源码安装nnU-Net V2(解决Python 3.11兼容性)
cd nnUNet
git clone https://github.com/MIC-DKFZ/nnUNet.git
cd nnUNet
pip install -e .

# 验证安装(关键:输出版本则成功)
nnUNetv2 --version
----------------------
如果不能运行
# 激活环境
conda activate nnunet311_env
# 进入nnUNet源码目录
cd D:\nnUNet\nnUNet
# 强制重新安装(管理员权限)
pip install -e . --force-reinstall       #强制重装
pip下载慢,修改下载镜像地址,快得飞起:
永久设置(推荐,全局生效)
Windows 系统(你的环境)
打开文件资源管理器,在地址栏输入 %APPDATA% 并回车,进入系统的应用数据目录;
在该目录下新建一个名为 pip 的文件夹;
进入 pip 文件夹,新建一个名为 pip.ini 的文本文件;
用记事本打开 pip.ini,粘贴以下内容(以清华源为例,可替换为其他源):

[global]
index-url = https://pypi.tuna.tsinghua.edu.cn/simple
[install]
trusted-host = pypi.tuna.tsinghua.edu.cn
disable-pip-version-check = true
timeout = 6000
git拉取失败:

首先尝试增大 Git 的 HTTP 缓存和超时设置,解决数据传输中断问题:
# 设置 HTTP 缓存大小为 500MB
git config --global http.postBuffer 524288000

# 设置连接超时时间为 300 秒
git config --global http.lowSpeedLimit 0
git config --global http.lowSpeedTime 300

#再拉取:
git clone https://github.com/MIC-DKFZ/nnUNet.git
如果还是直接访问 GitHub 速度过慢,可改用国内镜像源:
# 使用 fastgit 镜像(推荐)
git clone https://hub.fastgit.xyz/MIC-DKFZ/nnUNet.git

# 或使用 gitee 镜像(备用)
git clone https://gitee.com/mirrors/nnUNet.git
若
git clone失败,手动下载源码包:nnUNet 源码,解压到D:\nnUNet,进入该文件夹执行:
pip install -e .使用源码安装python应用。
配置 nnU-Net 环境变量(conda 环境内)
# 永久设置环境变量(仅对当前conda环境生效)
conda env config vars set nnUNet_raw_data_base=D:\nnUNet_raw
conda env config vars set nnUNet_preprocessed=D:\nnUNet_preprocessed
conda env config vars set nnUNet_results=D:\nnUNet_results

# 重启环境使变量生效
conda deactivate
conda activate nnunet311_env

# 创建文件夹
mkdir D:\nnUNet_raw D:\nnUNet_preprocessed D:\nnUNet_results
conda+Python 3.11:权重下载(两种方式)
方式 1:命令行一键下载(推荐)
# 激活conda环境
conda activate nnunet311_env

# 下载Task022肺动静脉权重(Python 3.11兼容)
nnUNetv2_download_pretrained_model Task022_PulmonaryVessels

# 验证权重(查看文件夹)
dir D:\nnUNet_results\nnUNet\3d_fullres\Task022_PulmonaryVessels\
方式 2:手动下载(命令失败时备用)
- 权重地址:Task022_PulmonaryVessels.zip
- 解压到:
D:\nnUNet_results\nnUNet\3d_fullres\Task022_PulmonaryVessels\(无文件夹则逐层新建)。
到这里无法继续了,权重文件无法下载。
conda+Python 3.11:DICOM 转 NIfTI + 分割推理
步骤 1:DICOM 转 NIfTI 脚本(适配 Python 3.11)
新建dicom2nnunet_conda311.py,复制以下代码:
import os
import sys
import SimpleITK as sitk
import nibabel as nib
import numpy as np

# Python 3.11编码/类型适配
os.environ["PYTHONIOENCODING"] = "utf-8"
sys.stdout.reconfigure(encoding='utf-8')

def dicom2nifti(dicom_dir, output_dir):
    """conda+Python 3.11专用:DICOM转nnU-Net格式"""
    # 校验输入
    if not os.path.isdir(dicom_dir):
        print(f"❌ 错误:DICOM目录不存在 → {dicom_dir}", file=sys.stderr)
        sys.exit(1)

    # 创建输出目录
    os.makedirs(output_dir, exist_ok=True)

    # 读取DICOM序列
    reader = sitk.ImageSeriesReader()
    try:
        dicom_files = reader.GetGDCMSeriesFileNames(dicom_dir)
        if not dicom_files:
            raise Exception("DICOM序列不完整(仅单张切片?)")
        reader.SetFileNames(dicom_files)
        img = reader.Execute()
    except Exception as e:
        print(f"❌ DICOM读取失败:{str(e)}", file=sys.stderr)
        sys.exit(1)

    # 转换为numpy数组(Python 3.11类型适配)
    img_np = sitk.GetArrayFromImage(img).astype(np.float32)
    img_np = np.transpose(img_np, (0, 1, 2))  # nnU-Net要求(z,y,x)

    # 生成affine矩阵(修复Python 3.11 numpy报错)
    affine = np.eye(4, dtype=np.float32)
    spacing = img.GetSpacing()
    affine[0, 0] = spacing[2]
    affine[1, 1] = spacing[1]
    affine[2, 2] = spacing[0]

    # 保存为nnU-Net输入格式
    output_path = os.path.join(output_dir, "case001_0000.nii.gz")
    nii_img = nib.Nifti1Image(img_np, affine)
    nib.save(nii_img, output_path)
    print(f"✅ 转换完成 → {output_path}")
    return output_path

if __name__ == "__main__":
    # ########## 修改为你的路径 ##########
    DICOM_DIR = r"D:\input_dicom\case001"  # 你的DICOM文件夹
    OUTPUT_DIR = r"D:\nnUNet_input"        # NIfTI输出目录
    # ###################################
    dicom2nifti(DICOM_DIR, OUTPUT_DIR)
步骤 2:运行转换脚本(conda 环境)
# 激活环境
conda activate nnunet311_env

# 进入脚本目录
cd D:\你的脚本目录

# 执行转换
python dicom2nifti_conda311.py
步骤 3:执行分割推理(conda+Python 3.11 核心命令)
# 激活环境
conda activate nnunet311_env

# 进入nnU-Net源码目录
cd D:\nnUNet

# 执行分割(Python 3.11适配)
nnUNetv2_predict -i D:\nnUNet_input -o D:\nnUNet_output -d 022 -c 3d_fullres -f 0输出结果:D:\nnUNet_output\case001.nii.gz,其中:
- 像素值
1= 肺动脉 - 像素值
2= 肺静脉