设置页面是用户自定义应用的重要功能。这篇文章我们来实现一个完整的设置页面,包括主题切换、缓存清理、通知设置、以及语言选择。通过这个功能,我们能展示如何构建一个完整的设置系统 。
页面的基本结构
SettingsScreen是设置页面的主页面:
dart
class SettingsScreen extends StatefulWidget {
  const SettingsScreen({super.key});

  @override
  State<SettingsScreen> createState() => _SettingsScreenState();
}

class _SettingsScreenState extends State<SettingsScreen> {
  @override
  Widget build(BuildContext context) {
    final l10n = AppLocalizations.of(context);

    return Scaffold(
      appBar: AppBar(title: Text(l10n.settings)),
      body: ListView(
        padding: const EdgeInsets.all(16),
        children: [
          _buildSectionTitle(context, l10n.appearance),
          // 主题设置
          // 缓存设置
          // 通知设置
          // 语言设置
        ],
      ),
    );
  }
}
页面用ListView展示多个设置项。
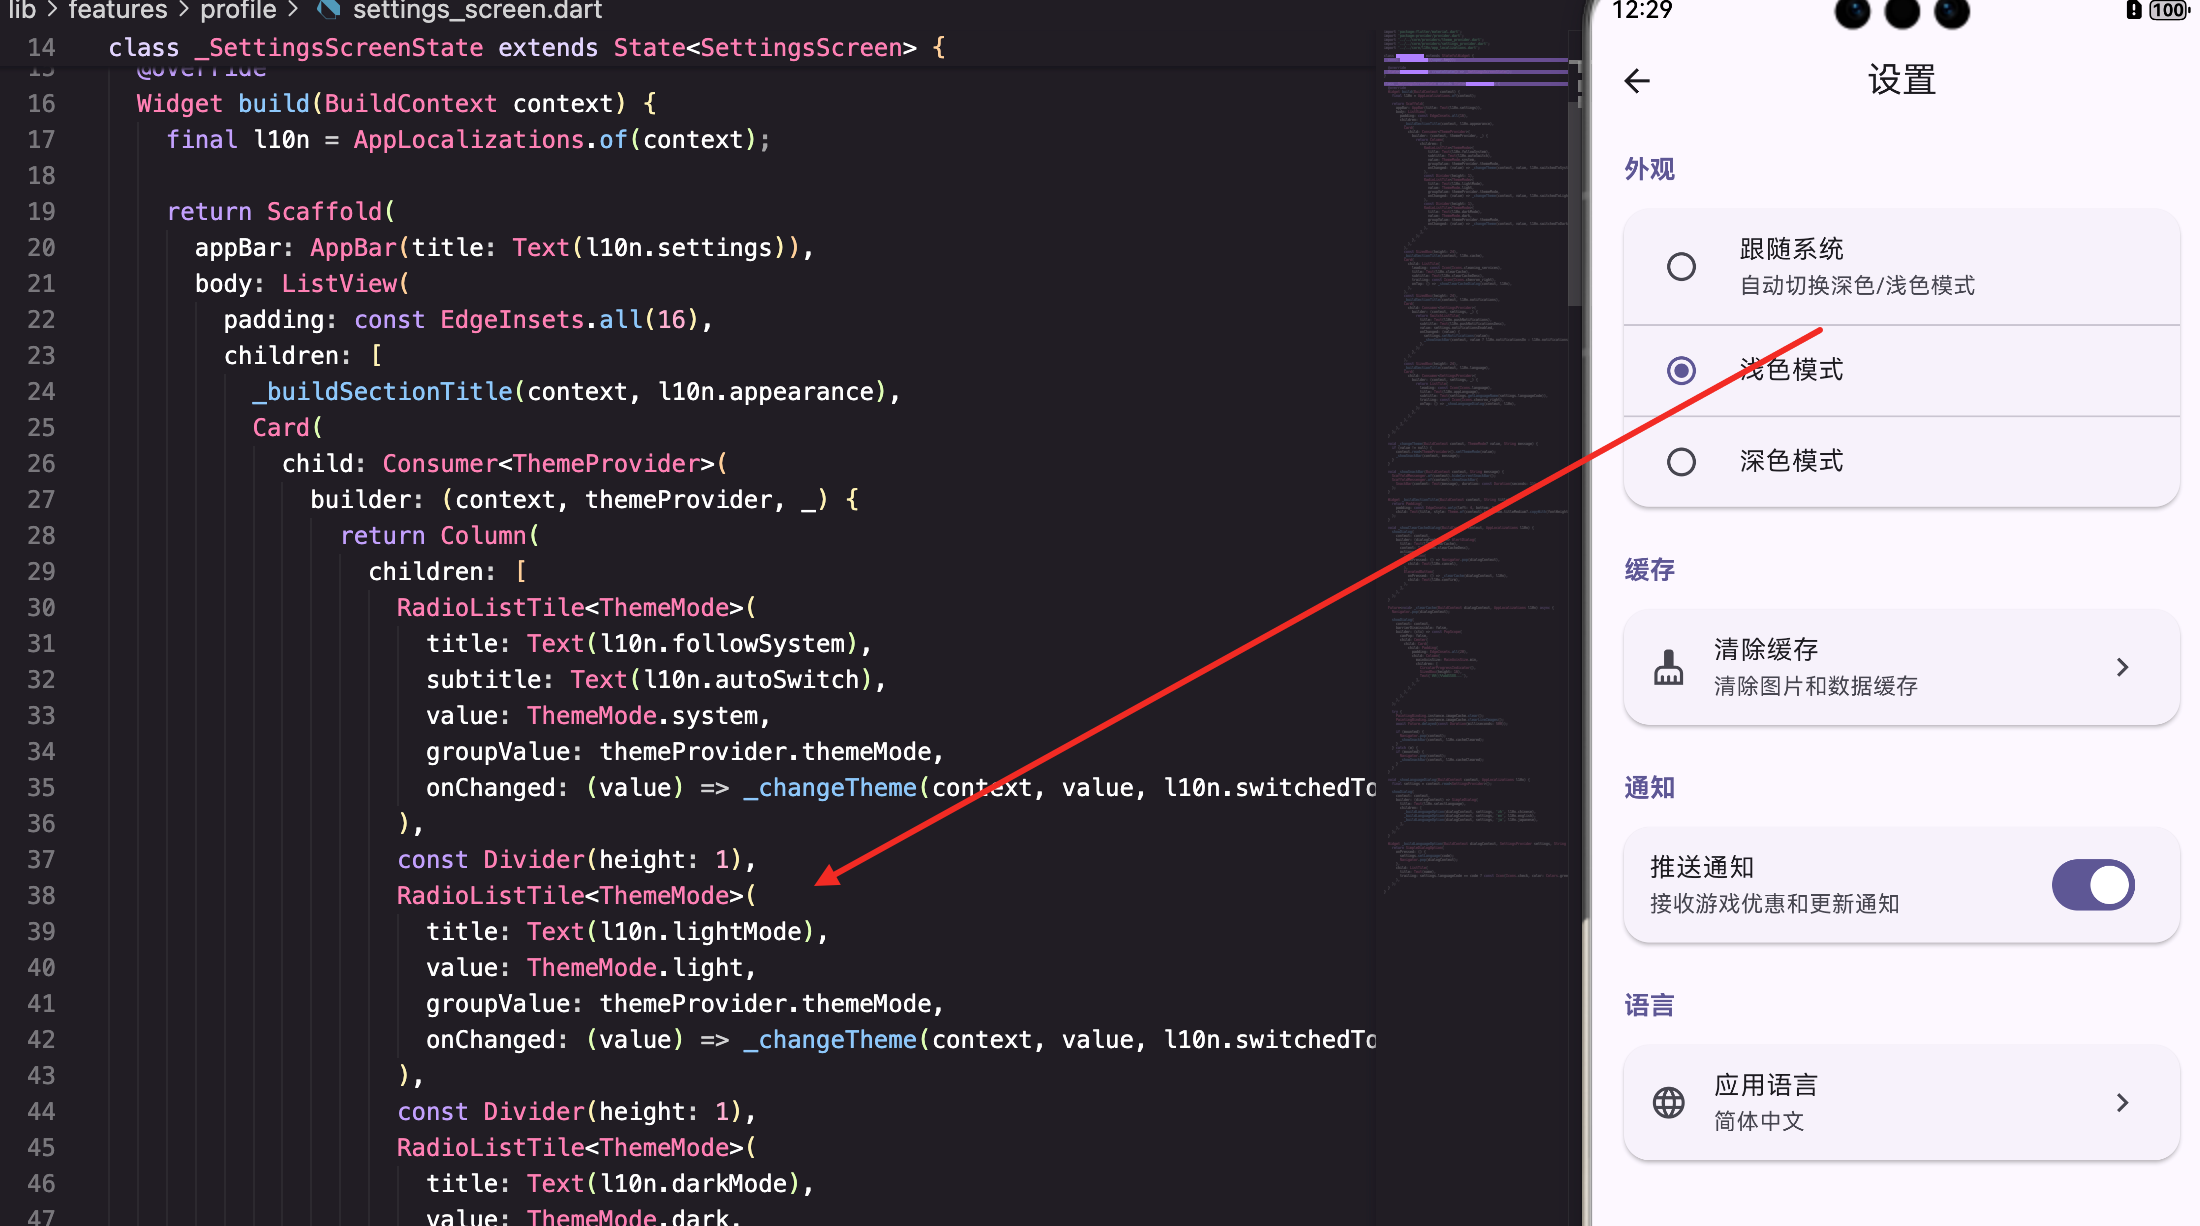
主题切换
主题设置用RadioListTile实现:
dart
          Card(
            child: Consumer<ThemeProvider>(
              builder: (context, themeProvider, _) {
                return Column(
                  children: [
                    RadioListTile<ThemeMode>(
                      title: Text(l10n.followSystem),
                      subtitle: Text(l10n.autoSwitch),
                      value: ThemeMode.system,
                      groupValue: themeProvider.themeMode,
                      onChanged: (value) => _changeTheme(context, value, l10n.switchedToSystem),
                    ),
                    const Divider(height: 1),
                    RadioListTile<ThemeMode>(
                      title: Text(l10n.lightMode),
                      value: ThemeMode.light,
                      groupValue: themeProvider.themeMode,
                      onChanged: (value) => _changeTheme(context, value, l10n.switchedToLight),
                    ),
                    const Divider(height: 1),
                    RadioListTile<ThemeMode>(
                      title: Text(l10n.darkMode),
                      value: ThemeMode.dark,
                      groupValue: themeProvider.themeMode,
                      onChanged: (value) => _changeTheme(context, value, l10n.switchedToDark),
                    ),
                  ],
                );
              },
            ),
          ),
使用RadioListTile让用户选择主题模式。
支持跟随系统、浅色、深色三种模式。
缓存清理
缓存清理用ListTile实现:
dart
          Card(
            child: ListTile(
              leading: const Icon(Icons.cleaning_services),
              title: Text(l10n.clearCache),
              subtitle: Text(l10n.clearCacheDesc),
              trailing: const Icon(Icons.chevron_right),
              onTap: () => _showClearCacheDialog(context, l10n),
            ),
          ),
点击时显示确认对话框。
_showClearCacheDialog方法显示确认对话框:
dart
  void _showClearCacheDialog(BuildContext context, AppLocalizations l10n) {
    showDialog(
      context: context,
      builder: (_) => AlertDialog(
        title: Text(l10n.clearCache),
        content: Text(l10n.clearCacheConfirm),
        actions: [
          TextButton(
            onPressed: () => Navigator.pop(context),
            child: Text(l10n.cancel),
          ),
          ElevatedButton(
            onPressed: () {
              // 清理缓存逻辑
              Navigator.pop(context);
              _showSnackBar(context, l10n.cacheCleared);
            },
            child: Text(l10n.confirm),
          ),
        ],
      ),
    );
  }
显示确认对话框,用户确认后清理缓存。
通知设置
通知设置用SwitchListTile实现:
dart
          Card(
            child: Consumer<SettingsProvider>(
              builder: (context, settings, _) {
                return SwitchListTile(
                  title: Text(l10n.pushNotifications),
                  subtitle: Text(l10n.pushNotificationsDesc),
                  value: settings.notificationsEnabled,
                  onChanged: (value) {
                    settings.setNotifications(value);
                    _showSnackBar(context, value ? l10n.notificationsOn : l10n.notificationsOff);
                  },
                );
              },
            ),
          ),
使用SwitchListTile让用户开启/关闭通知。
语言选择
语言选择用ListTile实现:
dart
          Card(
            child: Consumer<SettingsProvider>(
              builder: (context, settings, _) {
                return ListTile(
                  leading: const Icon(Icons.language),
                  title: Text(l10n.appLanguage),
                  subtitle: Text(settings.getLanguageName(settings.languageCode)),
                  trailing: const Icon(Icons.chevron_right),
                  onTap: () => _showLanguageDialog(context, l10n),
                );
              },
            ),
          ),
点击时显示语言选择对话框。
_showLanguageDialog方法显示语言选择对话框:
dart
  void _showLanguageDialog(BuildContext context, AppLocalizations l10n) {
    showDialog(
      context: context,
      builder: (_) => AlertDialog(
        title: Text(l10n.selectLanguage),
        content: Column(
          mainAxisSize: MainAxisSize.min,
          children: [
            _buildLanguageOption(context, 'zh', '中文'),
            _buildLanguageOption(context, 'en', 'English'),
            _buildLanguageOption(context, 'es', 'Español'),
            _buildLanguageOption(context, 'fr', 'Français'),
          ],
        ),
      ),
    );
  }
显示多个语言选项供用户选择。
总结
这篇文章我们实现了一个完整的设置页面。涉及到的知识点包括:
- 主题管理 - 使用ThemeProvider管理主题
- 设置管理 - 使用SettingsProvider管理设置
- 对话框 - 使用AlertDialog显示确认和选择
- 开关控件 - 使用SwitchListTile管理布尔设置
- 单选控件 - 使用RadioListTile管理单选设置
- 国际化 - 支持多语言显示
设置页面展示了如何构建一个完整的设置系统 。通过合理的UI设计和完善的功能,我们能为用户提供一个灵活的自定义体验。
欢迎加入开源鸿蒙跨平台社区:https://openharmonycrossplatform.csdn.net