一、下载和环境配置
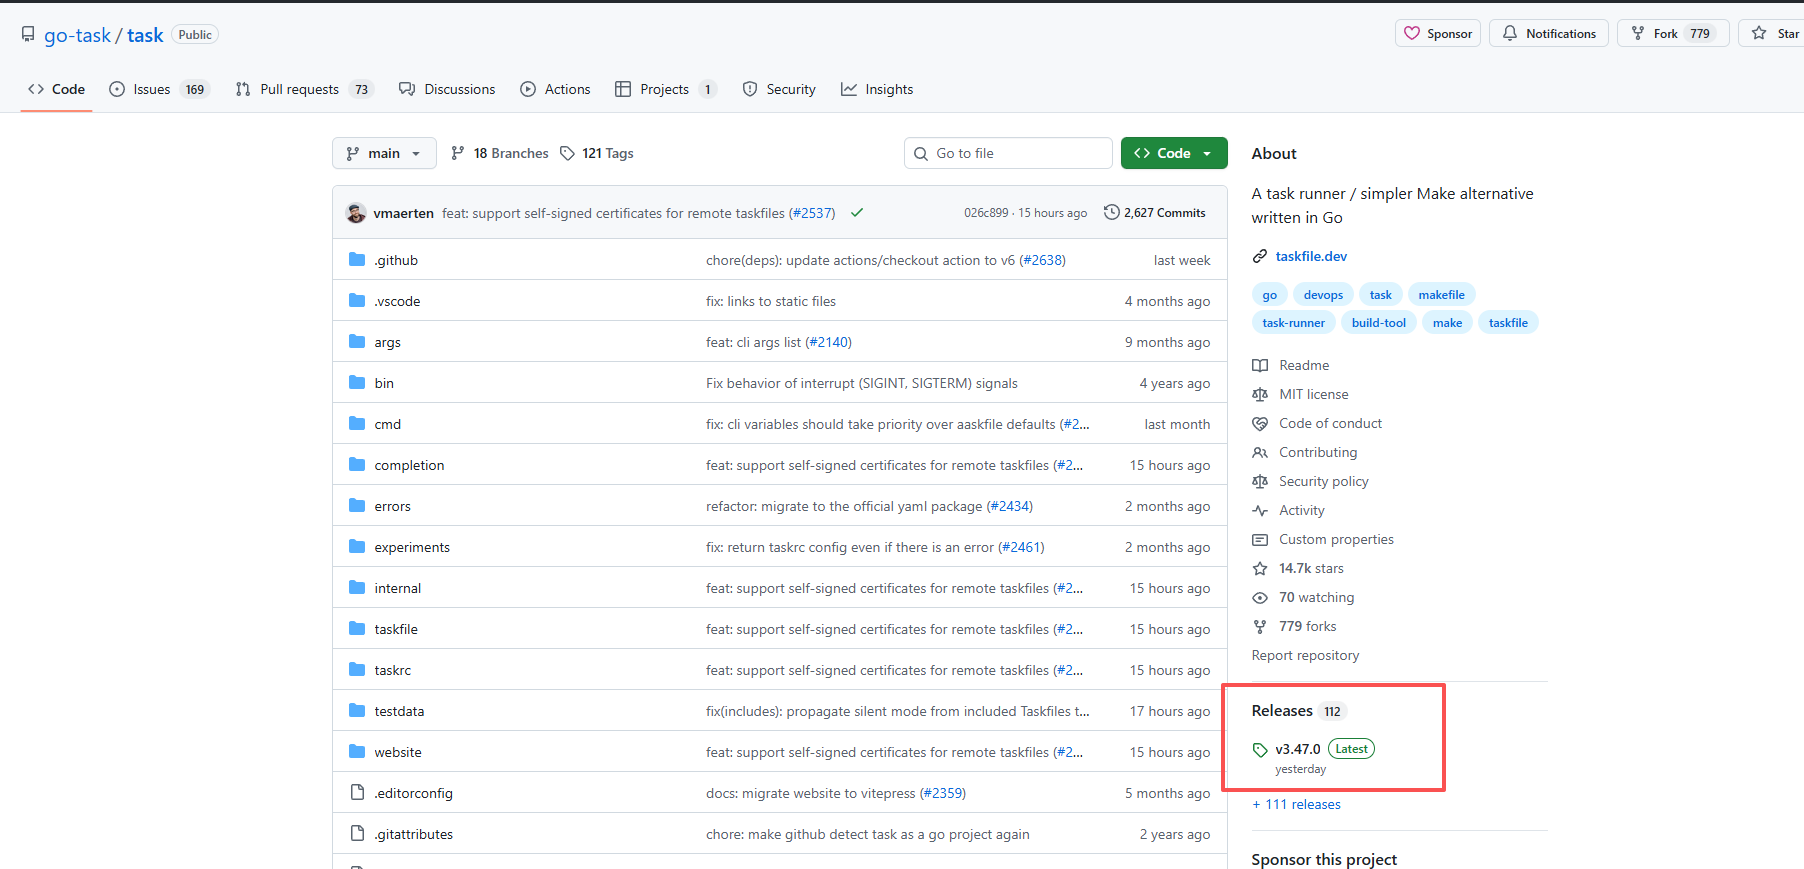
下载
https://github.com/go-task/task
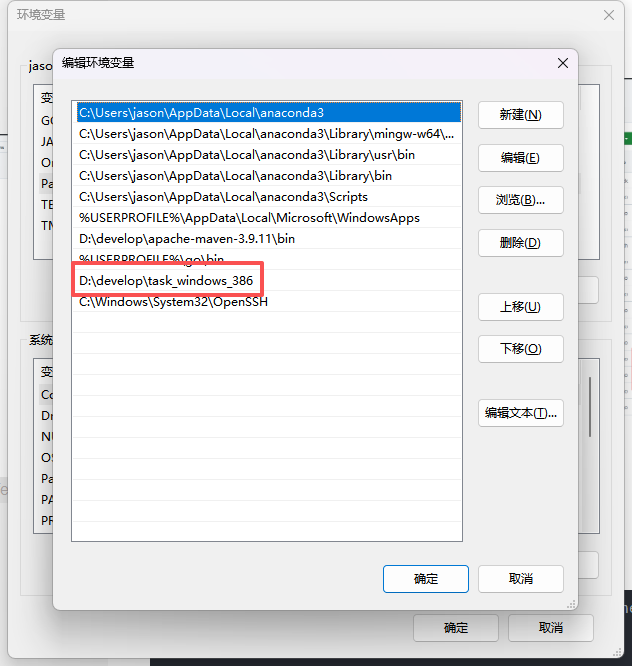
环境配置
主要是在系统path中增加task的目录
二、初始化task文件
b
task --init这个目录下就会生成一个Taskfile.yml,接下来我们就写补充我们自己的

三、编写补充自己的内容
先看代码
b
# yaml-language-server: $schema=https://taskfile.dev/schema.json
version: '3'
vars:
GREETING: Hello, world!
SSH_CMD: "C:\\Windows\\System32\\OpenSSH\\ssh.exe"
SCP_CMD: "C:\\Windows\\System32\\OpenSSH\\scp.exe"
SERVER_DEPLOY_DIR: /home/zeng
JAR_FILE: eureka-server-1.0-SNAPSHOT.jar
tasks:
default:
desc: Print a greeting message
cmds:
- echo "{{.GREETING}}"
silent: true
build:
desc: Build the project
cmds:
- echo "Building the project..."
- mvn clean compile
- echo "Build complete."
package:
desc: Package the project
cmds:
- echo "Packaging the project..."
- mvn package -DskipTests
- echo "Package complete."
start:
desc: Start the application,本地运行
deps:
- package #确保先打包
cmds:
- echo "Starting the application..."
- java -jar ./target/eureka-server-1.0-SNAPSHOT.jar
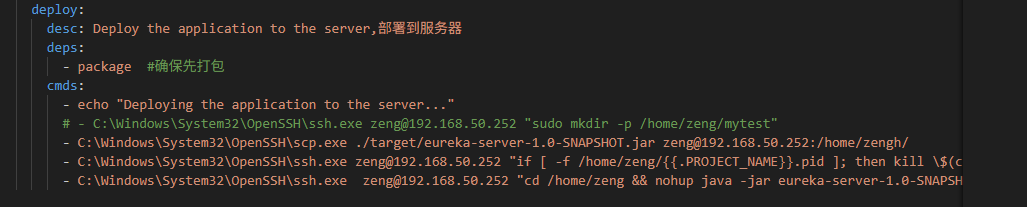
deploy:
desc: Deploy the application to the server,部署到服务器
deps:
- package #确保先打包
cmds:
- echo "Deploying the application to the server..."
# - C:\Windows\System32\OpenSSH\ssh.exe zeng@192.168.50.252 "sudo mkdir -p /home/zeng/mytest"
- C:\Windows\System32\OpenSSH\scp.exe ./target/eureka-server-1.0-SNAPSHOT.jar zeng@192.168.50.252:/home/zengh/
- C:\Windows\System32\OpenSSH\ssh.exe zeng@192.168.50.252 "if [ -f /home/zeng/{{.PROJECT_NAME}}.pid ]; then kill \$(cat {{.SERVER_DEPLOY_DIR}}/{{.PROJECT_NAME}}.pid) || true; rm -f {{.SERVER_DEPLOY_DIR}}/{{.PROJECT_NAME}}.pid; fi"
- C:\Windows\System32\OpenSSH\ssh.exe zeng@192.168.50.252 "cd /home/zeng && nohup java -jar eureka-server-1.0-SNAPSHOT.jar > logs/mytest.log 2>&1 & echo \$! > mytest.pid"
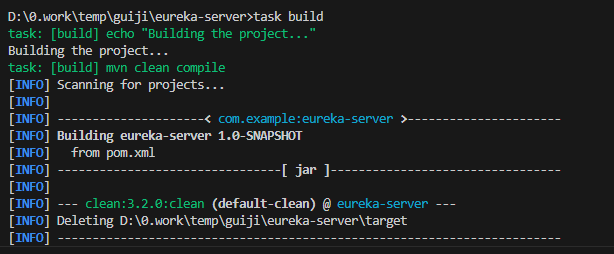
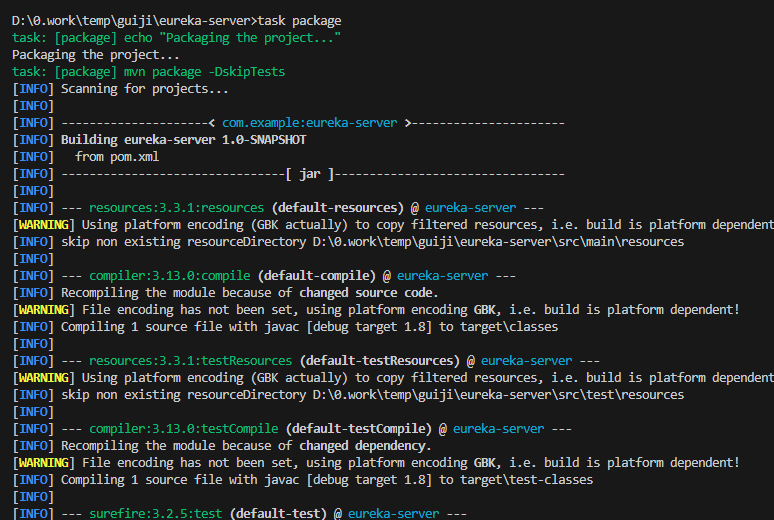
再看执行,结合3张图片,想必你已经看懂了。
可以定义多个task
task的名字可以自己定义,
执行的时候用task 名字来执行

四、先要取消服务器密码登录
因为ssh是需要输入密码的,我们是希望不需要中间人为干预,使用密钥认证
第一步:
b
ssh-keygen -t rsa -b 2048
#一路回车就好
生成两个文件:
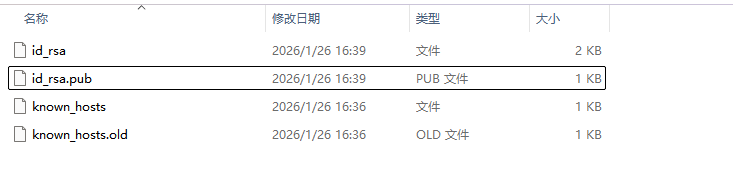
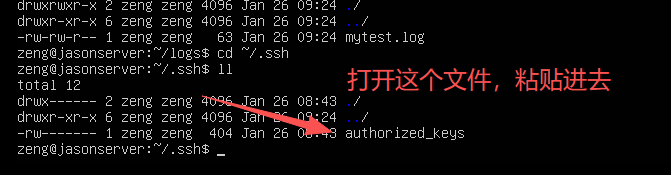
把其中的id_rsa.pub公钥。复制里面的内容到服务器的~/.ssh/authorized_keys文件中:
方法1:执行
bssh-copy-id 用户名@服务器地址
方法2:直接写字板打开复制粘贴
五、仔细分析这里的任务
有基础的,我就不一句一句解释了。