Spring Cloud 微服务系统搭建:核心组件 + 实战项目,一步到位

🌸你好呀!我是 lbb小魔仙
🌟 感谢陪伴~ 小白博主在线求友
🌿 跟着小白学Linux/Java/Python
📖 专栏汇总:
《Linux》专栏 | 《Java》专栏 | 《Python》专栏

- [Spring Cloud 微服务系统搭建:核心组件 + 实战项目,一步到位](#Spring Cloud 微服务系统搭建:核心组件 + 实战项目,一步到位)
- [一、引言:微服务与 Spring Cloud 的价值](#一、引言:微服务与 Spring Cloud 的价值)
- 二、核心组件详解
-
- [2.1 服务注册与发现:Nacos](#2.1 服务注册与发现:Nacos)
- [2.2 客户端负载均衡:LoadBalancer](#2.2 客户端负载均衡:LoadBalancer)
- [2.3 声明式 HTTP 调用:OpenFeign](#2.3 声明式 HTTP 调用:OpenFeign)
- [2.4 熔断限流:Sentinel](#2.4 熔断限流:Sentinel)
- [2.5 API 网关:Gateway](#2.5 API 网关:Gateway)
- [2.6 配置中心:Nacos 配置管理](#2.6 配置中心:Nacos 配置管理)
- [2.7 分布式链路追踪:Sleuth + Zipkin](#2.7 分布式链路追踪:Sleuth + Zipkin)
- 三、实战项目搭建
-
- [3.1 环境准备](#3.1 环境准备)
- [3.2 服务注册中心:Nacos 启动](#3.2 服务注册中心:Nacos 启动)
- [3.3 user-service(用户服务)搭建](#3.3 user-service(用户服务)搭建)
-
- [3.3.1 依赖配置(pom.xml)](#3.3.1 依赖配置(pom.xml))
- [3.3.2 配置文件](#3.3.2 配置文件)
- [3.3.3 核心代码](#3.3.3 核心代码)
- [3.4 order-service(订单服务)搭建](#3.4 order-service(订单服务)搭建)
-
- [3.4.1 依赖配置(pom.xml)](#3.4.1 依赖配置(pom.xml))
- [3.4.2 配置文件](#3.4.2 配置文件)
- [3.4.3 核心代码](#3.4.3 核心代码)
- [3.5 gateway(API 网关)搭建](#3.5 gateway(API 网关)搭建)
-
- [3.5.1 依赖配置(pom.xml)](#3.5.1 依赖配置(pom.xml))
- [3.5.2 配置文件](#3.5.2 配置文件)
- [3.5.3 启动类](#3.5.3 启动类)
- 四、系统调用流程图
- 五、部署与验证建议
-
- [5.1 本地启动顺序](#5.1 本地启动顺序)
- [5.2 接口测试方法](#5.2 接口测试方法)
- 六、结语
-
- [6.1 搭建关键点总结](#6.1 搭建关键点总结)
- [6.2 后续优化方向](#6.2 后续优化方向)
对于具备 Java 和 Spring Boot 基础的开发者而言,从单体架构转向微服务架构是技术进阶的重要方向。Spring Cloud 作为微服务生态的主流解决方案,提供了一套完整的组件体系,助力开发者快速搭建稳定、可扩展的微服务系统。本文将从核心组件解析入手,结合 Spring Boot 3.x + Spring Cloud 2022.x 版本,手把手带你搭建实战项目,实现微服务系统的快速落地。
论文投稿:
2026年第二届人工智能与计算智能国际学术会议
大会官网:www.icaici.org
大会时间:2026年2月6-8日
大会地点:中国-郑州-郑东新区城际酒店

一、引言:微服务与 Spring Cloud 的价值
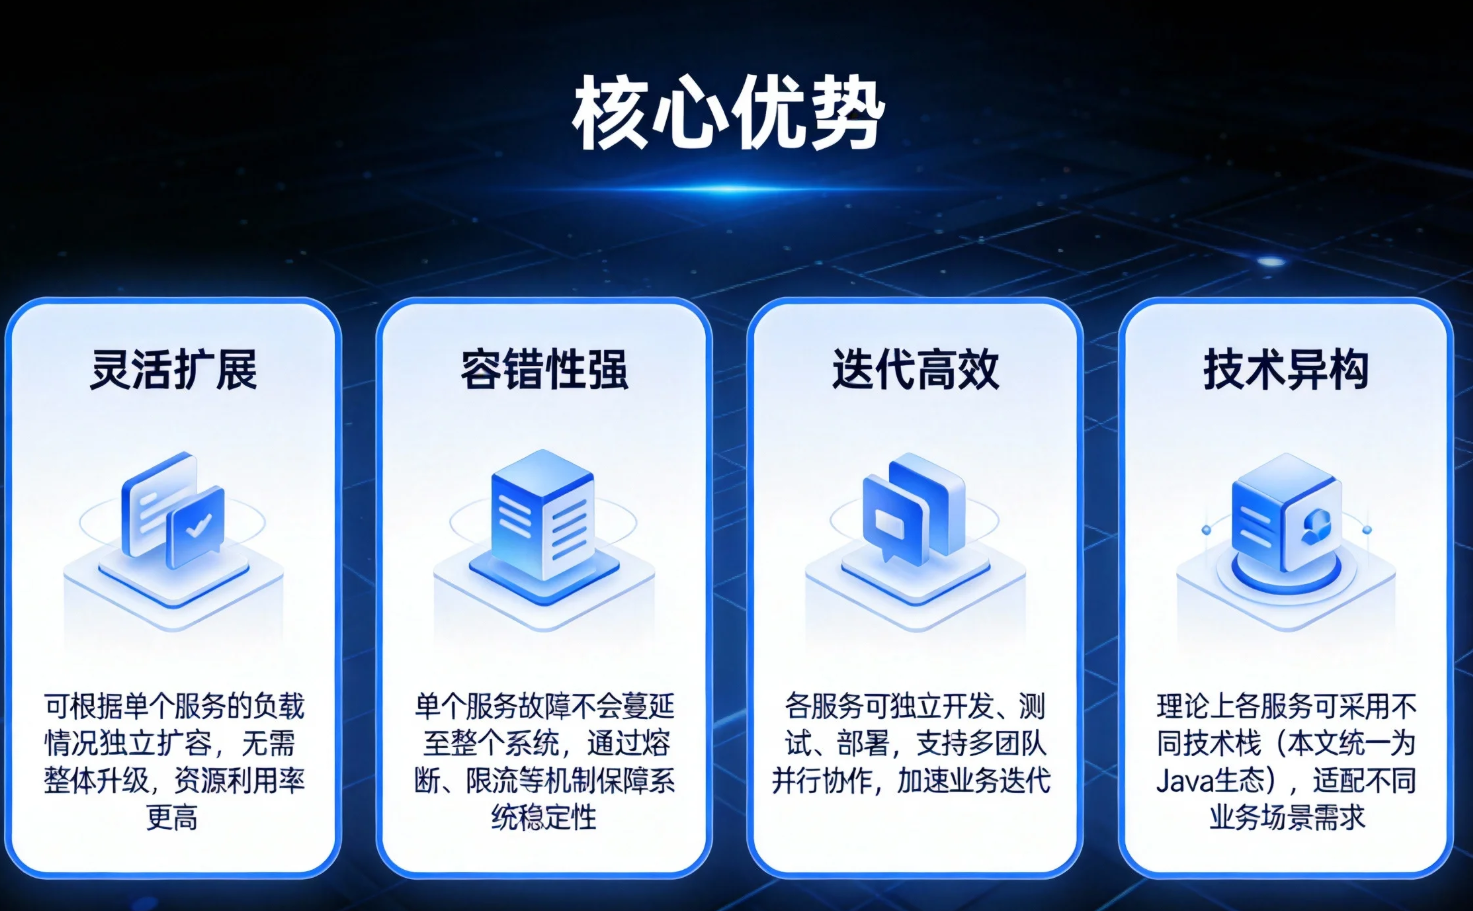
单体架构在业务初期具备开发快、部署简单的优势,但随着业务迭代,会逐渐暴露出代码臃肿、扩展受限、容错率低等问题。微服务架构通过将应用拆分为多个独立的、可独立部署的服务单元,每个服务聚焦特定业务领域,实现了"高内聚、低耦合"的设计目标,其核心优势包括:
-
灵活扩展:可根据单个服务的负载情况独立扩容,无需整体升级,资源利用率更高;
-
容错性强:单个服务故障不会蔓延至整个系统,通过熔断、限流等机制保障系统稳定性;
-
迭代高效:各服务可独立开发、测试、部署,支持多团队并行协作,加速业务迭代;
-
技术异构:理论上各服务可采用不同技术栈(本文统一为 Java 生态),适配不同业务场景需求。
Spring Cloud 并非单一框架,而是一套微服务工具集,基于 Spring Boot 实现了服务注册发现、负载均衡、熔断限流、网关路由等核心能力的封装与集成。它解决了微服务架构中的"分布式协作"问题,让开发者无需关注底层通信细节,专注于业务逻辑开发,实现微服务系统的快速搭建与落地。
二、核心组件详解
Spring Cloud 2022.x 版本适配 Spring Boot 3.x,对部分组件进行了迭代升级(如移除 Ribbon,推荐使用 LoadBalancer)。以下依次解析核心组件的功能与集成方式:
2.1 服务注册与发现:Nacos
服务注册与发现是微服务的基础,用于解决"服务在哪里"的问题。Nacos 是阿里开源的组件,兼具服务注册中心和配置中心功能,相比 Eureka 具备更丰富的特性(如动态配置、服务健康检查、集群管理),是当前主流选择。
核心功能:服务注册(服务启动时将自身信息注册到 Nacos)、服务发现(客户端从 Nacos 获取服务列表)、服务健康检查(定期检测服务状态,剔除故障服务)。
集成方式:
- 引入依赖(Maven):
xml
<dependency>
    <groupId>com.alibaba.cloud</groupId>
    <artifactId>spring-cloud-starter-alibaba-nacos-discovery</artifactId>
</dependency>- 配置 application.yml:
yaml
spring:
  application:
    name: user-service # 服务名称,必须唯一
  cloud:
    nacos:
      discovery:
        server-addr: localhost:8848 # Nacos 服务地址
        username: nacos # Nacos 用户名
password: nacos # Nacos 密码- 在启动类添加注解
@EnableDiscoveryClient(Spring Cloud 2022.x 可省略,自动生效)。
2.2 客户端负载均衡:LoadBalancer
当服务部署多个实例时,客户端需要通过负载均衡算法选择一个实例发起请求,实现流量分发与故障转移。Spring Cloud LoadBalancer 是官方推荐的负载均衡组件,替代了过时的 Ribbon。
核心功能:从服务注册中心获取服务实例列表,通过轮询、随机等算法选择实例,支持自定义负载均衡策略。
集成方式:
- 引入依赖(通常与 OpenFeign 一起引入,无需额外配置):
xml
<dependency>
    <groupId>org.springframework.cloud</groupId>
    <artifactId>spring-cloud-starter-loadbalancer</artifactId>
</dependency>
默认采用轮询策略,如需自定义策略,可通过配置类实现 ReactorLoadBalancer 接口。
2.3 声明式 HTTP 调用:OpenFeign
微服务间需要通过 HTTP 通信,OpenFeign 提供了声明式接口编程方式,无需手动编写 RestTemplate 代码,简化服务间调用流程,同时集成了 LoadBalancer 实现负载均衡。
核心功能:接口注解驱动、请求参数自动封装、负载均衡集成、异常处理适配。
集成方式:
- 引入依赖:
xml
<dependency>
    <groupId>org.springframework.cloud</groupId>
    <artifactId>spring-cloud-starter-openfeign</artifactId>
</dependency>-
启动类添加注解
@EnableFeignClients; -
定义 Feign 接口(示例见实战项目部分)。
2.4 熔断限流:Sentinel
微服务调用链路中,若某个服务故障,可能引发雪崩效应。Sentinel 是阿里开源的熔断限流组件,相比 Hystrix 具备更强大的流量控制、熔断降级、系统保护能力,且提供可视化控制台。
核心功能:流量控制(QPS/并发数限制)、熔断降级(服务故障时快速失败)、热点参数限流、系统自适应保护。
集成方式:
- 引入依赖:
xml
<dependency>
    <groupId>com.alibaba.cloud</groupId>
    <artifactId>spring-cloud-starter-alibaba-sentinel</artifactId>
</dependency>- 配置 application.yml:
yaml
spring:
  cloud:
    sentinel:
      transport:
        dashboard: localhost:8080 # Sentinel 控制台地址
port: 8719 # 客户端与控制台通信端口- 在需要保护的接口或 Feign 方法上添加注解
@SentinelResource,定义熔断降级逻辑。
2.5 API 网关:Gateway
API 网关是微服务的"入口门户",统一接收客户端请求,实现路由转发、权限校验、限流熔断、日志监控等功能,解决了客户端与服务间的复杂通信问题。Gateway 基于 Spring WebFlux 实现,支持异步非阻塞,性能优于传统的 Zuul。
核心功能:路由转发(将请求转发至对应服务)、过滤器(前置/后置处理请求)、限流熔断(集成 Sentinel/LoadBalancer)、路径重写。
集成方式:
- 引入依赖(排除 Spring MVC,避免冲突):
xml
<dependency>
<groupId>org.springframework.cloud</groupId>
<artifactId>spring-cloud-starter-gateway</artifactId>
</dependency>
<dependency>
<groupId>com.alibaba.cloud</groupId>
<artifactId>spring-cloud-starter-alibaba-nacos-discovery</artifactId>
</dependency>- 配置路由规则(见实战项目部分)。
2.6 配置中心:Nacos 配置管理
微服务数量增多后,配置文件分散在各服务中,维护成本高。Nacos 配置中心可实现配置的集中管理、动态刷新,无需重启服务即可更新配置。
核心功能:集中存储配置、动态刷新配置、配置分组/环境隔离(如 dev/prod)。
集成方式:
- 引入依赖:
xml
<dependency>
    <groupId>com.alibaba.cloud</groupId>
    <artifactId>spring-cloud-starter-alibaba-nacos-config</artifactId>
</dependency>- 创建 bootstrap.yml(优先级高于 application.yml,用于加载 Nacos 配置):
yaml
spring:
  application:
    name: user-service
  cloud:
    nacos:
      config:
        server-addr: localhost:8848
        file-extension: yaml # 配置文件格式
        group: DEFAULT_GROUP # 配置分组
namespace: # 命名空间,用于环境隔离- 在 Nacos 控制台创建对应配置文件(名称格式: s p r i n g . a p p l i c a t i o n . n a m e − {spring.application.name}- spring.application.name−{profile}.${file-extension}),并在代码中通过
@Value或@ConfigurationProperties注入配置,添加@RefreshScope实现动态刷新。
2.7 分布式链路追踪:Sleuth + Zipkin
微服务调用链路复杂,当出现问题时难以定位根源。Sleuth 用于生成链路追踪日志,为每个请求分配唯一 Trace ID 和 Span ID,标记调用链路;Zipkin 用于收集、分析追踪日志,提供可视化链路图。
核心功能:链路追踪(记录请求流转路径)、耗时统计(各服务调用耗时)、异常定位(关联异常日志与链路)。
集成方式:
- 引入依赖(Sleuth 与 Zipkin 合并依赖):
xml
<dependency>
    <groupId>org.springframework.cloud</groupId>
    <artifactId>spring-cloud-sleuth-zipkin</artifactId>
</dependency>
<dependency>
    <groupId>org.springframework.cloud</groupId>
    <artifactId>spring-cloud-starter-sleuth</artifactId>
</dependency>- 配置 application.yml:
yaml
spring:
  sleuth:
    sampler:
      probability: 1.0 # 采样率,1.0 表示全量采样(生产环境可适当降低)
  zipkin:
    base-url: http://localhost:9411 # Zipkin 服务地址
三、实战项目搭建
本项目基于 Spring Boot 3.2.2 + Spring Cloud 2022.0.4,构建包含 user-service(用户服务)、order-service(订单服务)、gateway(API 网关)的最小可行系统,集成 Nacos、OpenFeign、Sentinel、Sleuth+Zipkin 组件。
3.1 环境准备
-
JDK 17+(Spring Boot 3.x 最低要求);
-
Maven 3.6+;
-
Nacos 2.3.0(下载地址:https://github.com/alibaba/nacos/releases);
-
Zipkin 服务器(通过 Docker 启动:
docker run -d -p 9411:9411 openzipkin/zipkin); -
Sentinel 控制台(下载地址:https://github.com/alibaba/Sentinel/releases,启动命令:
java -jar sentinel-dashboard-1.8.6.jar)。
3.2 服务注册中心:Nacos 启动
-
解压 Nacos,进入 bin 目录,Windows 启动
startup.cmd -m standalone(单机模式),Linux/Mac 启动sh startup.sh -m standalone; -
访问 Nacos 控制台:
http://localhost:8848/nacos,用户名/密码均为 nacos,登录后即可管理服务与配置。
3.3 user-service(用户服务)搭建
3.3.1 依赖配置(pom.xml)
xml
<parent>
<groupId>org.springframework.boot</groupId>
<artifactId>spring-boot-starter-parent</artifactId>
<version>3.2.2</version>
<relativePath/>
</parent>
<dependencies>
<!-- Spring Web -->
<dependency>
<groupId>org.springframework.boot</groupId>
<artifactId>spring-boot-starter-web</artifactId>
</dependency>
<!-- Nacos 服务发现 -->
<dependency>
<groupId>com.alibaba.cloud</groupId>
<artifactId>spring-cloud-starter-alibaba-nacos-discovery</artifactId>
<version>2022.0.0.0-RC2</version>
</dependency>
<!-- Nacos 配置管理 -->
<dependency>
<groupId>com.alibaba.cloud</groupId>
<artifactId>spring-cloud-starter-alibaba-nacos-config</artifactId>
<version>2022.0.0.0-RC2</version>
</dependency>
<!-- Sentinel 熔断限流 -->
<dependency>
<groupId>com.alibaba.cloud</groupId>
<artifactId>spring-cloud-starter-alibaba-sentinel</artifactId>
<version>2022.0.0.0-RC2</version>
</dependency>
<!-- 链路追踪 -->
<dependency>
<groupId>org.springframework.cloud</groupId>
<artifactId>spring-cloud-sleuth-zipkin</artifactId>
<version>4.0.4</version>
</dependency>
<dependency>
<groupId>org.springframework.cloud</groupId>
<artifactId>spring-cloud-starter-sleuth</artifactId>
<version>4.0.4</version>
</dependency>
</dependencies>3.3.2 配置文件
bootstrap.yml:
yaml
spring:
  application:
    name: user-service
  cloud:
    nacos:
      config:
        server-addr: localhost:8848
        file-extension: yaml
        group: DEFAULT_GROUP
      discovery:
        server-addr: localhost:8848
        username: nacos
        password: nacos
    sentinel:
      transport:
        dashboard: localhost:8080
        port: 8719
  sleuth:
    sampler:
      probability: 1.0
  zipkin:
    base-url: http://localhost:9411

server:
  port: 8081 # 用户服务端口
3.3.3 核心代码
启动类 UserServiceApplication.java:
java
package com.example.userservice;

import org.springframework.boot.SpringApplication;
import org.springframework.boot.autoconfigure.SpringBootApplication;
import org.springframework.cloud.client.discovery.EnableDiscoveryClient;
import org.springframework.cloud.context.config.annotation.RefreshScope;

@SpringBootApplication
@EnableDiscoveryClient // 服务注册与发现(可省略)
@RefreshScope // 动态刷新配置
public class UserServiceApplication {
    public static void main(String[] args) {
        SpringApplication.run(UserServiceApplication.class, args);
    }
}
实体类 User.java:
java
package com.example.userservice.entity;

import lombok.Data;

@Data
public class User {
    private Long id;
    private String username;
    private String phone;
}
控制器 UserController.java:
java
package com.example.userservice.controller;

import com.alibaba.csp.sentinel.annotation.SentinelResource;
import com.example.userservice.entity.User;
import org.springframework.web.bind.annotation.GetMapping;
import org.springframework.web.bind.annotation.PathVariable;
import org.springframework.web.bind.annotation.RequestMapping;
import org.springframework.web.bind.annotation.RestController;

@RestController
@RequestMapping("/user")
public class UserController {

    //  Sentinel 保护接口,降级方法为 fallback
    @SentinelResource(value = "getUserById", fallback = "getUserFallback")
    @GetMapping("/{id}")
    public User getUserById(@PathVariable Long id) {
        // 模拟数据库查询
        User user = new User();
        user.setId(id);
        user.setUsername("zhangsan");
        user.setPhone("13800138000");
        return user;
    }

    // 降级 fallback 方法(参数、返回值需与原方法一致)
    public User getUserFallback(Long id) {
        User user = new User();
        user.setId(id);
        user.setUsername("默认用户(服务降级)");
        user.setPhone("未知");
        return user;
    }
}
3.4 order-service(订单服务)搭建
3.4.1 依赖配置(pom.xml)
在 user-service 依赖基础上,新增 OpenFeign 依赖:
xml
<!-- OpenFeign 声明式调用 -->
<dependency>
    <groupId>org.springframework.cloud</groupId>
    <artifactId>spring-cloud-starter-openfeign</artifactId>
    <version>4.0.4</version>
</dependency>
<!-- LoadBalancer 负载均衡 -->
<dependency>
    <groupId>org.springframework.cloud</groupId>
    <artifactId>spring-cloud-starter-loadbalancer</artifactId>
    <version>4.0.4</version>
</dependency>
3.4.2 配置文件
bootstrap.yml:
yaml
spring:
  application:
    name: order-service
  cloud:
    nacos:
      config:
        server-addr: localhost:8848
        file-extension: yaml
        group: DEFAULT_GROUP
      discovery:
        server-addr: localhost:8848
        username: nacos
        password: nacos
    sentinel:
      transport:
        dashboard: localhost:8080
        port: 8720 # 与 user-service 端口区分
  sleuth:
    sampler:
      probability: 1.0
  zipkin:
    base-url: http://localhost:9411

server:
  port: 8082 # 订单服务端口
3.4.3 核心代码
启动类 OrderServiceApplication.java:
java
package com.example.orderservice;

import org.springframework.boot.SpringApplication;
import org.springframework.boot.autoconfigure.SpringBootApplication;
import org.springframework.cloud.client.discovery.EnableDiscoveryClient;
import org.springframework.cloud.openfeign.EnableFeignClients;
import org.springframework.cloud.context.config.annotation.RefreshScope;

@SpringBootApplication
@EnableDiscoveryClient
@EnableFeignClients // 开启 OpenFeign
@RefreshScope
public class OrderServiceApplication {
    public static void main(String[] args) {
        SpringApplication.run(OrderServiceApplication.class, args);
    }
}
Feign 接口(调用 user-service)UserFeignClient.java:
java
package com.example.orderservice.feign;

import com.example.orderservice.entity.User;
import org.springframework.cloud.openfeign.FeignClient;
import org.springframework.web.bind.annotation.GetMapping;
import org.springframework.web.bind.annotation.PathVariable;

// 指向要调用的服务名称
@FeignClient(name = "user-service")
public interface UserFeignClient {

    // 与 user-service 的接口路径、方法一致
    @GetMapping("/user/{id}")
    User getUserById(@PathVariable Long id);
}
实体类 Order.java 和 User.java(User 与 user-service 一致,可通过公共模块抽取,此处简化):
java
// Order.java
package com.example.orderservice.entity;

import lombok.Data;

@Data
public class Order {
    private Long id;
    private Long userId;
    private String orderNo;
    private User user; // 关联用户信息
}
控制器 OrderController.java:
java
package com.example.orderservice.controller;

import com.alibaba.csp.sentinel.annotation.SentinelResource;
import com.example.orderservice.entity.Order;
import com.example.orderservice.entity.User;
import com.example.orderservice.feign.UserFeignClient;
import jakarta.annotation.Resource;
import org.springframework.web.bind.annotation.GetMapping;
import org.springframework.web.bind.annotation.PathVariable;
import org.springframework.web.bind.annotation.RequestMapping;
import org.springframework.web.bind.annotation.RestController;

@RestController
@RequestMapping("/order")
public class OrderController {

    @Resource
    private UserFeignClient userFeignClient;

    @SentinelResource(value = "getOrderById", fallback = "getOrderFallback")
    @GetMapping("/{id}")
    public Order getOrderById(@PathVariable Long id) {
        // 模拟查询订单
        Order order = new Order();
        order.setId(id);
        order.setUserId(1L);
        order.setOrderNo("ORDER2024001");
        // 调用 user-service 获取用户信息
        User user = userFeignClient.getUserById(order.getUserId());
        order.setUser(user);
        return order;
    }

    // 降级方法
    public Order getOrderFallback(Long id) {
        Order order = new Order();
        order.setId(id);
        order.setOrderNo("默认订单(服务降级)");
        return order;
    }
}
3.5 gateway(API 网关)搭建
3.5.1 依赖配置(pom.xml)
xml
<parent>
<groupId>org.springframework.boot</groupId>
<artifactId>spring-boot-starter-parent</artifactId>
<version>3.2.2</version>
<relativePath/>
</parent>
<dependencies>
<!-- Gateway -->
<dependency>
<groupId>org.springframework.cloud</groupId>
<artifactId>spring-cloud-starter-gateway</artifactId>
<version>4.0.4</version>
</dependency>
<!-- Nacos 服务发现 -->
<dependency>
<groupId>com.alibaba.cloud</groupId>
<artifactId>spring-cloud-starter-alibaba-nacos-discovery</artifactId>
<version>2022.0.0.0-RC2</version>
</dependency>
<!-- LoadBalancer 负载均衡 -->
<dependency>
<groupId>org.springframework.cloud</groupId>
<artifactId>spring-cloud-starter-loadbalancer</artifactId>
<version>4.0.4</version>
</dependency>
<!-- 链路追踪 -->
<dependency>
<groupId>org.springframework.cloud</groupId>
<artifactId>spring-cloud-sleuth-zipkin</artifactId>
<version>4.0.4</version>
</dependency>
<dependency>
<groupId>org.springframework.cloud</groupId>
<artifactId>spring-cloud-starter-sleuth</artifactId>
<version>4.0.4</version>
</dependency>
</dependencies>3.5.2 配置文件
application.yml:
yaml
spring:
  application:
    name: gateway
  cloud:
    nacos:
      discovery:
        server-addr: localhost:8848
        username: nacos
        password: nacos
    gateway:
      routes: # 路由规则配置
        - id: user-service-route # 路由ID,唯一
          uri: lb://user-service # 目标服务名称(lb 表示负载均衡)
          predicates: # 路由断言(匹配路径)
            - Path=/api/user/** filters: # 过滤器(路径重写)
            - RewritePath=/api/user/(?<segment>.*), /user/$\{segment}
        - id: order-service-route
          uri: lb://order-service
          predicates:
            - Path=/api/order/**
          filters:
            - RewritePath=/api/order/(?<segment>.*), /order/$\{segment}
  sleuth:
    sampler:
      probability: 1.0
  zipkin:
    base-url: http://localhost:9411

server:
  port: 8083 # 网关端口
3.5.3 启动类
GatewayApplication.java:
java
package com.example.gateway;

import org.springframework.boot.SpringApplication;
import org.springframework.boot.autoconfigure.SpringBootApplication;
import org.springframework.cloud.client.discovery.EnableDiscoveryClient;

@SpringBootApplication
@EnableDiscoveryClient
public class GatewayApplication {
    public static void main(String[] args) {
        SpringApplication.run(GatewayApplication.class, args);
    }
}
四、系统调用流程图
以下使用 Mermaid 语法绘制客户端请求流转全链路图,清晰展示从客户端发起请求到服务响应的完整过程:
发起请求:/api/order/1
路由匹配:order-service
返回 order-service 实例列表
负载均衡选择实例
调用 user-service(Feign)
路由匹配:user-service
返回 user-service 实例列表
负载均衡选择实例
查询用户信息并返回
转发响应给 order-service
组装订单+用户信息
响应结果给客户端
监控/配置熔断限流
监控/配置熔断限流
收集链路追踪日志
收集链路追踪日志
收集链路追踪日志
收集链路追踪日志
提供动态配置
提供动态配置
提供动态配置
客户端
Gateway 网关
Nacos 服务注册中心
order-service
user-service
Sentinel 控制台
Zipkin 服务器
Nacos 配置中心
流程图说明:
-
客户端通过网关统一入口发起请求,网关根据路径匹配路由规则;
-
网关从 Nacos 获取目标服务的实例列表,通过 LoadBalancer 选择一个实例;
-
订单服务调用用户服务时,通过 Feign 发起请求,同样经过网关路由与负载均衡;
-
Sentinel 控制台实时监控服务调用状态,配置熔断限流规则;
-
Zipkin 收集全链路追踪日志,用于问题定位与耗时分析;
-
Nacos 同时提供服务注册发现与动态配置能力,支撑服务集群部署。
五、部署与验证建议
5.1 本地启动顺序
微服务启动需遵循"依赖优先"原则,正确顺序如下:
-
启动 Nacos 服务注册中心与配置中心;
-
启动 Zipkin 服务器(链路追踪);
-
启动 Sentinel 控制台(熔断限流);
-
启动 user-service(被调用服务);
-
启动 order-service(调用方服务);
-
启动 gateway(网关服务)。
启动后可访问 Nacos 控制台(http://localhost:8848/nacos),在"服务管理-服务列表"中查看所有服务是否注册成功。
5.2 接口测试方法
使用 Postman 或浏览器发起请求,验证各服务功能与链路连通性:
-
测试用户服务直接调用 :
http://localhost:8081/user/1,返回用户信息即正常; -
测试订单服务直接调用 :
http://localhost:8082/order/1,返回包含用户信息的订单即正常(说明 Feign 调用成功); -
测试网关路由调用:
-
通过网关调用用户服务:
http://localhost:8083/api/user/1; -
通过网关调用订单服务:
http://localhost:8083/api/order/1; -
返回结果与直接调用一致,说明网关路由生效。
-
-
测试熔断限流:
-
停止 user-service,调用
http://localhost:8083/api/order/1,返回降级信息即熔断生效; -
在 Sentinel 控制台配置 order-service 的
getOrderById接口限流规则(如 QPS=5),高频调用接口,超过阈值后返回降级信息。
-
-
测试链路追踪 :访问
http://localhost:9411(Zipkin 控制台),点击"Find Traces",可查看请求的完整链路、各服务耗时等信息。
六、结语
6.1 搭建关键点总结
本文基于 Spring Boot 3.x + Spring Cloud 2022.x 版本,完成了微服务最小可行系统的搭建,核心关键点包括:
-
组件选型适配:选用 Nacos 替代 Eureka/Config,Sentinel 替代 Hystrix,LoadBalancer 替代 Ribbon,契合 Spring Cloud 最新技术栈;
-
依赖版本统一:Spring Cloud 与 Spring Boot 版本需严格对应(如 2022.x 对应 3.x),避免兼容性问题;
-
链路连通性:确保服务注册、网关路由、Feign 调用、熔断限流、链路追踪各环节连通,形成完整闭环;
-
配置优先级:Nacos 配置需通过 bootstrap.yml 加载,确保配置优先于服务启动。
6.2 后续优化方向
本文搭建的系统为基础版本,实际生产环境需进一步优化,主要方向包括:
-
容器化部署:使用 Docker 封装服务,通过 Docker Compose 或 Kubernetes(K8s)实现服务编排、弹性伸缩、滚动部署,提升部署效率与可靠性;
-
服务网格(Service Mesh):对于大规模微服务集群,可引入 Istio 等服务网格组件,将流量控制、熔断限流、链路追踪等功能从服务代码中剥离,实现"非侵入式"治理;
-
安全加固:集成 Spring Security OAuth2/OIDC 实现服务间认证授权,网关层增加接口签名、防刷、限流等安全策略;
-
监控告警:集成 Prometheus + Grafana 实现服务指标监控(如 CPU、内存、接口耗时),配置告警规则,及时发现系统异常;
-
分布式事务:引入 Seata 等组件,解决微服务间事务一致性问题(如订单创建与库存扣减的原子性);
-
配置优化:Nacos 配置按环境(dev/test/prod)划分命名空间,敏感配置加密存储,提升配置管理安全性与规范性。
Spring Cloud 生态持续迭代,开发者需紧跟技术趋势,结合业务场景选择合适的组件与方案,构建稳定、高效、可扩展的微服务系统。后续可基于本文项目,逐步集成更多组件,实现生产级微服务架构的落地。
📕个人领域 :Linux/C++/java/AI
🚀 个人主页 :有点流鼻涕 · CSDN
💬 座右铭 : "向光而行,沐光而生。"
