提示:文章写完后,目录可以自动生成,如何生成可参考右边的帮助文档
[一、修改 Makefile,添加编译器](#一、修改 Makefile,添加编译器)
[二、修改busybox 中文字符支持功能](#二、修改busybox 中文字符支持功能)
[三、配置 busybox](#三、配置 busybox)
[四、编译编译 busybox](#四、编译编译 busybox)
前言
上一期我们简单介绍了如何构建根文件系统,以及介绍了一下BusyBox软件的用处,这期博客开始我们正式使用BusyBox软件构建根文件系统。,这一期博客我们先修改BusyBox软件源码进行编译来构建根文件系统。
一、修改 Makefile ,添加编译器
同 Uboot 和 Linux 移植一样,打开 busybox 的顶层 Makefile,添加 ARCH 和 CROSS_COMPILE
的值,如下所示:
164 CROSS_COMPILE ?= /usr/local/arm/gcc-linaro-4.9.4-2017.01-x86_64_arm-linux-gnueabihf/bin/arm-linux-gnueabihf-


......

190 ARCH ?= arm
在上述代码中 CORSS_COMPILE 使用了绝对路径!主要是为了防止编译出错。
二、修改busybox****中文字符支持功能
如果直接编译 busybox 的话,在使用 SecureCRT 的时候中文字符是显示不正常的,中文字符可能会显示为"?",比如你的中文目录,中文文件都可能会显示为"?"。
所以我们需要修改 busybox 源码,取消 busybox 对中文显示的限制。
打开文件 busybox1.29.0/libbb/printable_string.c,找到函数 printable_string,缩减后的函数内容如下:
12 const char* FAST_FUNC printable_string(uni_stat_t *stats, const char *str)
13 {
14     char *dst;
15     const char *s;
16
17     s = str;
18     while (1) {
19         unsigned char c = *s;
20         if (c == '\0') {
21             // 省略中间代码
28         }
29         if (c < ' ')
30             break;
31         if (c >= 0x7f)
32             break;
33         s++;
34     }
35
36 #if ENABLE_UNICODE_SUPPORT
37     dst = unicode_conv_to_printable(stats, str);
38 #else
39     char *d = dst = xstrdup(str);
40     while (1) {
41         unsigned char c = *d;
42         if (c == '\0')
43             break;
44         if (c < ' ' || c >= 0x7f)
45             *d = '?';
46         d++;
47     }
48     // 省略中间代码
55 #endif
56
57     return auto_string(dst);
58 }
第 31 和 32 行,当字符大于 0X7F 以后就跳出去了。
第 45 和 46 行,如果支持 UNICODE 码的话,当字符大于 0X7F 就直接输出'?'。
所以我们需要对这 4 行代码进行修改,修改以后如下所示:
const char* FAST_FUNC printable_string(uni_stat_t *stats, const char *str)
{
	char *dst;
	const char *s;

	s = str;
	while (1) {
		unsigned char c = *s;
		if (c == '\0') {
			/* 99+% of inputs do not need conversion */
			if (stats) {
				stats->byte_count = (s - str);
				stats->unicode_count = (s - str);
				stats->unicode_width = (s - str);
			}
			return str;
		}
		if (c < ' ')
			break;
		//注释下列两行代码
		// if (c >= 0x7f)
		// 	break;
		s++;
	}

#if ENABLE_UNICODE_SUPPORT
	dst = unicode_conv_to_printable(stats, str);
#else
	{
		char *d = dst = xstrdup(str);
		while (1) {
			unsigned char c = *d;
			if (c == '\0')
				break;
			//修改代码
			// if (c < ' ' || c >= 0x7f)
			if (c < ' ')
				*d = '?';
			d++;
		}
		if (stats) {
			stats->byte_count = (d - dst);
			stats->unicode_count = (d - dst);
			stats->unicode_width = (d - dst);
		}
	}
#endif
	return auto_string(dst);
}
主要就是禁止字符大于 0X7F 以后 break 和输出'?'。
接着打开文件 busybox-1.29.0/libbb/unicode.c,找到如下内容:
1003 static char* FAST_FUNC unicode_conv_to_printable2(uni_stat_t *stats, const char *src, unsigned width, int flags)
1004 {
1005     char *dst;
1006     unsigned dst_len;
1007     unsigned uni_count;
1008     unsigned uni_width;
1009
1010     if (unicode_status != UNICODE_ON) {
1011         char *d;
1012         if (flags & UNI_FLAG_PAD) {
1013             d = dst = xmalloc(width + 1);
1022             *d++ = (c >= ' ' && c < 0x7f) ? c : '?';
1023             src++;
1024         }
1025         *d = '\0';
1026     } else {
1027         d = dst = xstrndup(src, width);
1028         while (*d) {
1029             unsigned char c = *d;
1030             if (c < ' ' || c >= 0x7f)
1031                 *d = '?';
1032             d++;
1033         }
1034     }
1040     return dst;
1041 }
...
1130     return dst;
1131 }
第 1022 行,当字符大于 0X7F 以后,*d++就为'?'。
第 1030 和 1031 行,当字符大于 0X7F 以后,*d 也为'?'。
修改上述代码,从1022行代码开始修改后如下所示:
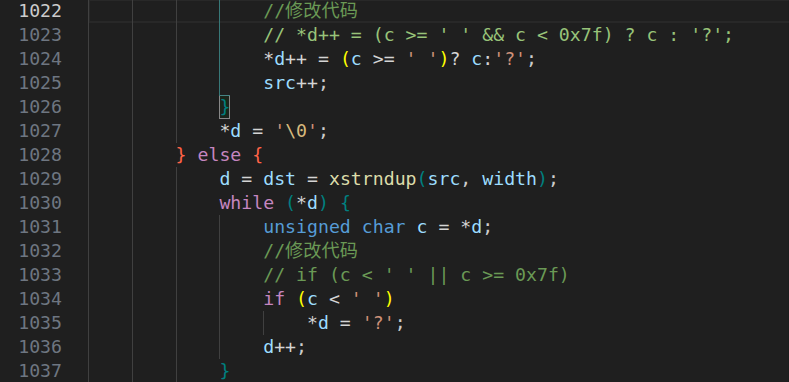
修改的作用主要是禁止字符大于 0X7F 的时候设置为'?'。busybox 中文字符支持跟代码修改有关的就改好了,最后还需要配置 busybox来使能 unicode 码,这个稍后我们配置 busybox 的时候在设置。
三、配置****busybox
我们编译 Uboot、Linux kernel 时,我们要先对 busybox 进行默认的配置,同样编译**busybox时,也需要进行配置,**有以下几种配置选项:
①、defconfig,缺省配置,也就是默认配置选项。
②、allyesconfig,全选配置,也就是选中 busybox 的所有功能。
③、allnoconfig,最小配置。
我们一般使用默认配置即可,输入以下命令来配置busybox:
make defconfigbusybox 也支持图形化配置,通过图形化配置我们可以进一步选择自己想要的功能,输入如下命令打开图形化配置界面:
make menuconfig打开如下图所示:
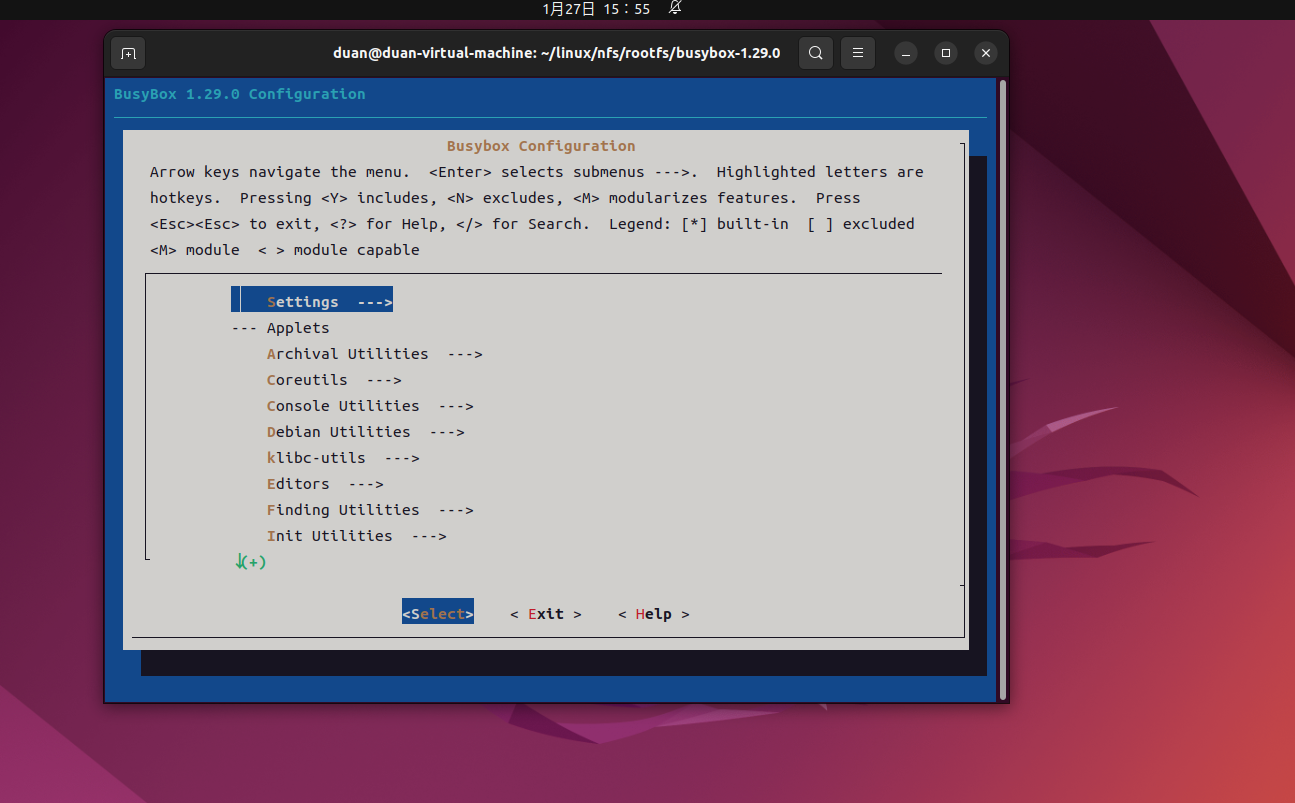
配置路径如下:
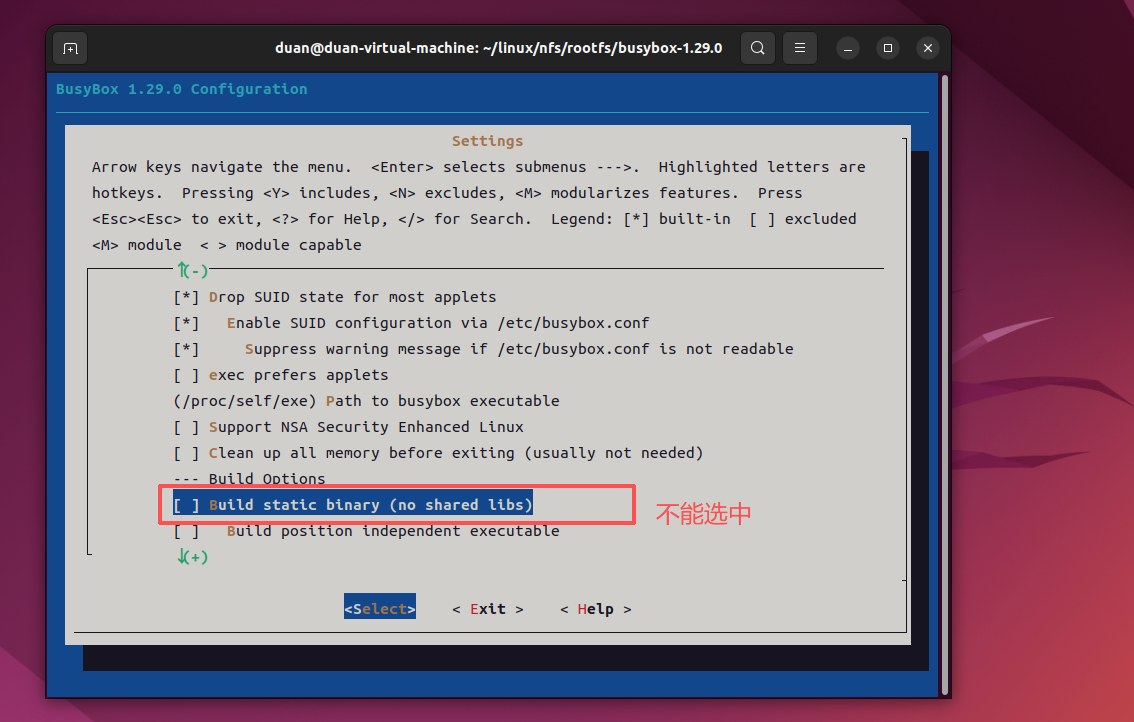
Location:
    -> Settings
        -> Build static binary (no shared libs)
选项"Build static binary (no shared libs)"用来决定是静态编译 busybox 还是动态编译,静态编译的话就不需要库文件,但是编译出来的库会很大。动态编译的话要求根文件系统中有库文件,但是编译出来的 busybox 会小很多。这里我们不能采用静态编译!因为采用静态编译的话 DNS 会出问题!无法进行域名解析,配置如下如图所示:
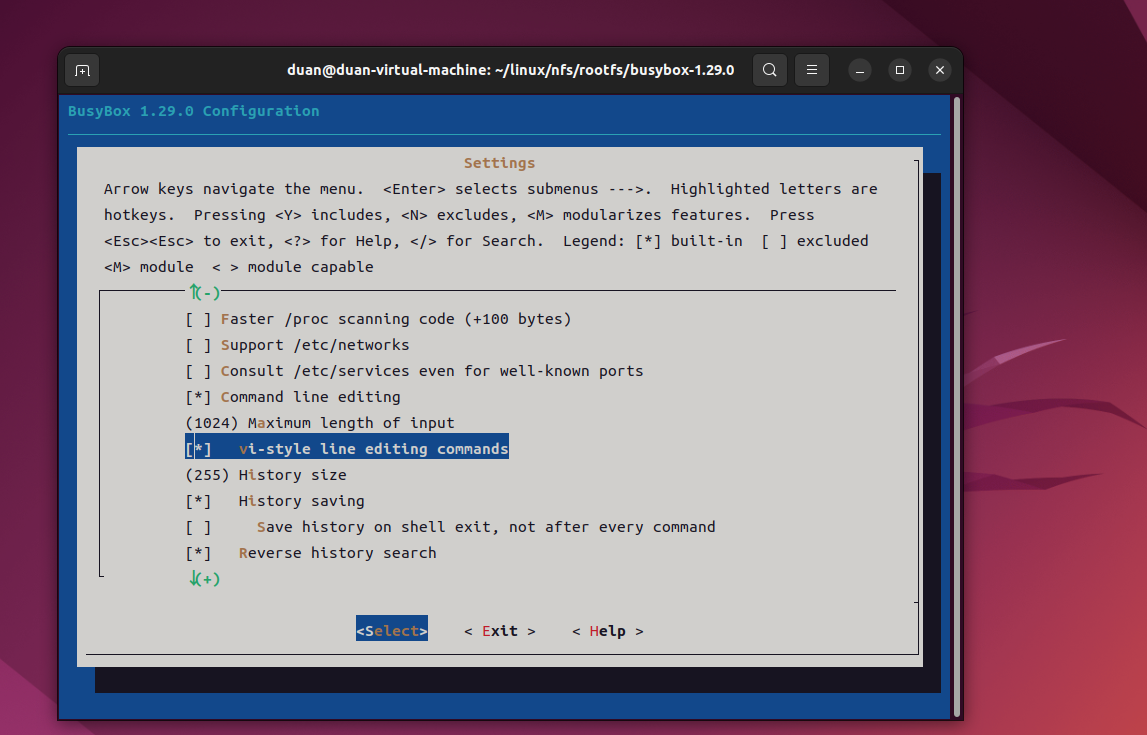
继续配置如下路径配置项:
Location:
-> Settings
-> vi-style line editing commands
选中按Y,也就是代表会把这个功能相应的代码编译进去,结果如下图:
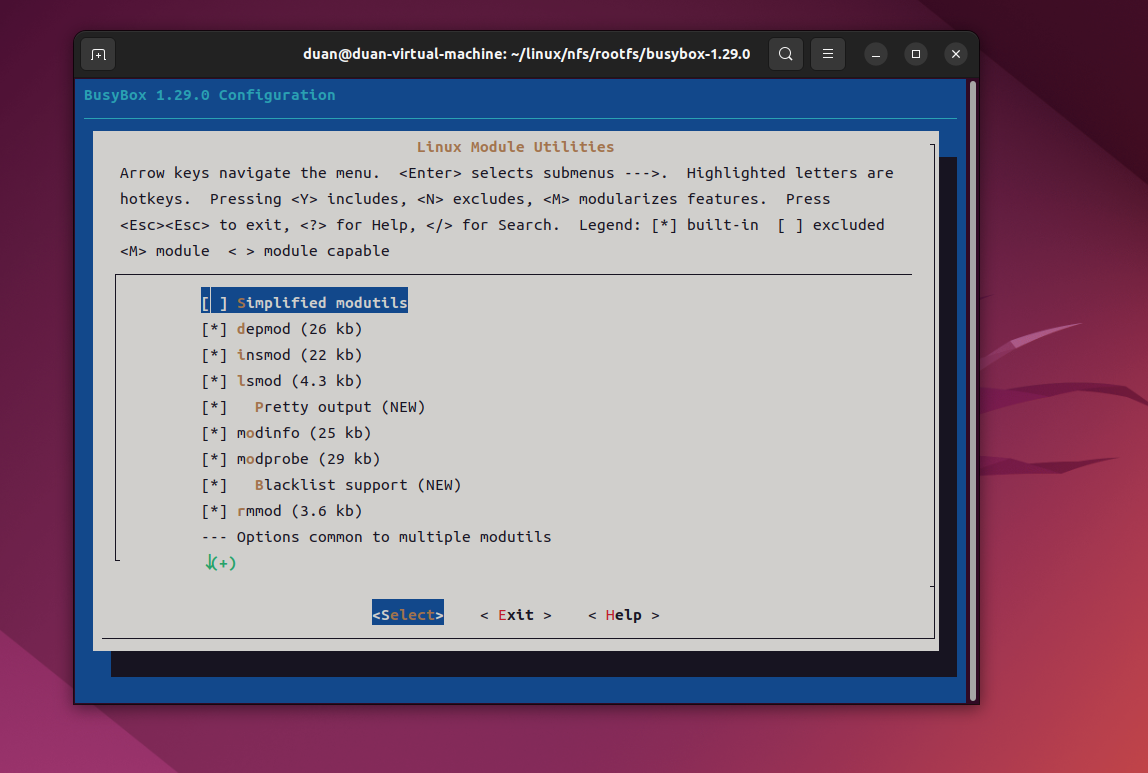
继续配置如下路径配置项:
Location:
-> Linux Module Utilities
-> Simplified modutils
默认会选中" Simplified modutils ",这里我们要取消勾选(按N键),结果如下图:
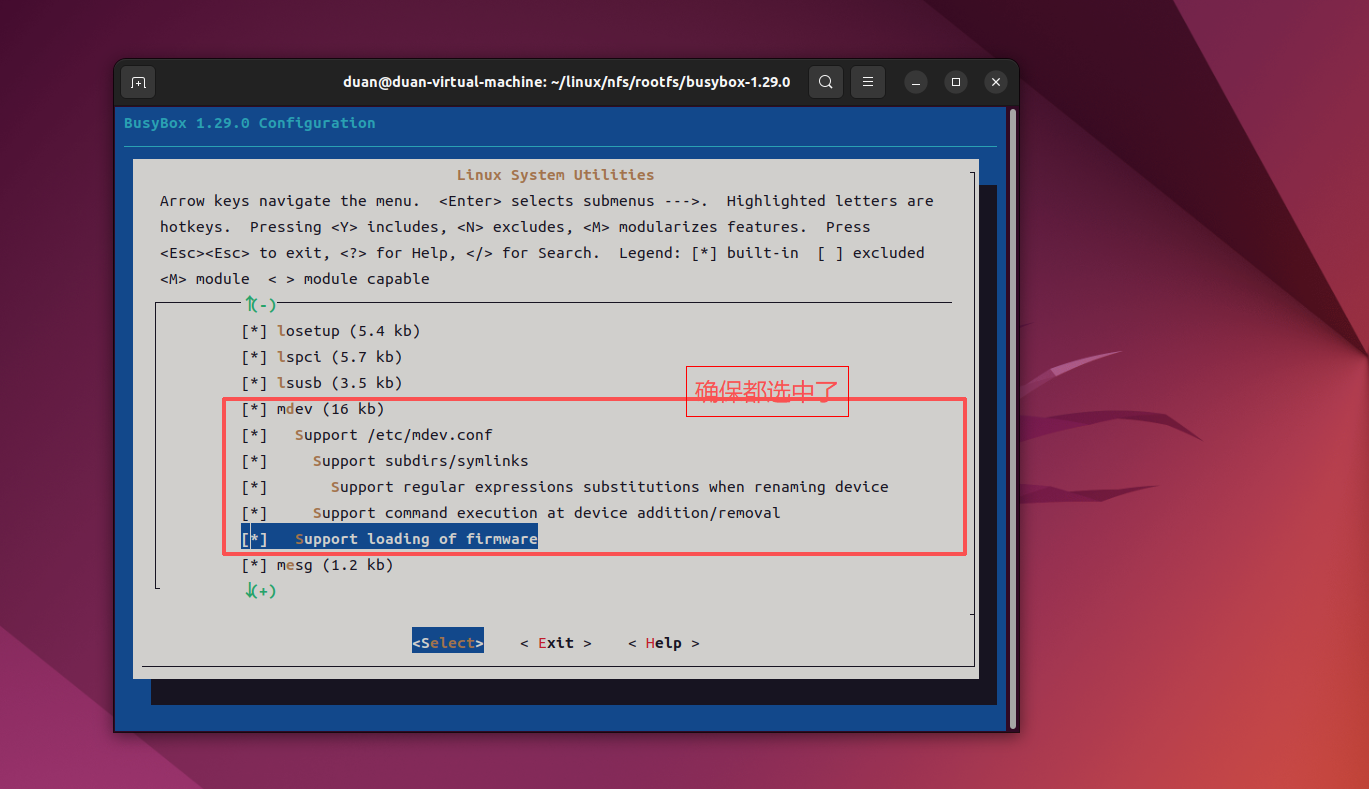
继续配置如下路径配置项:
Location:
-> Linux System Utilities
 -> mdev (16 kb) //确保下面的全部选中,默认都是选中的
结果如下图所示:
最后就是使能 busybox 的 unicode 编码以支持中文,配置路径如下:
Location:
 -> Settings
 -> Support Unicode //选中
-> Check $LC_ALL, $LC_CTYPE and $LANG environment variables //选中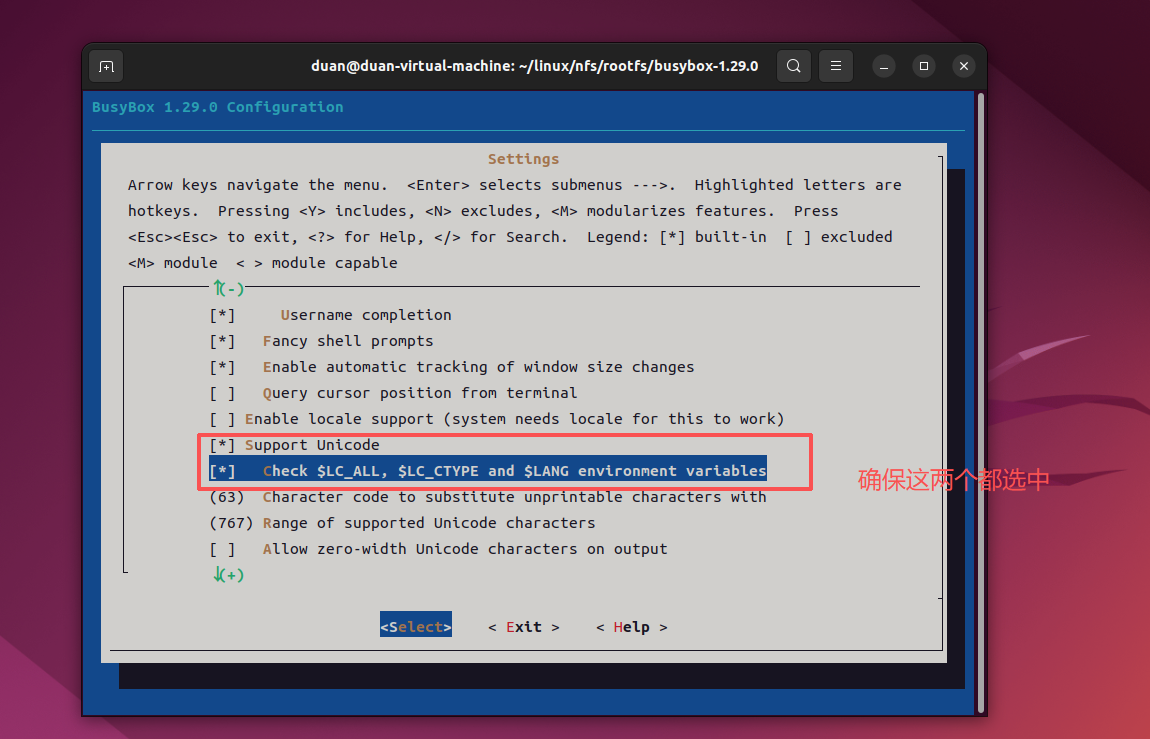
busybox 的配置就到此结束了,大家也可以根据自己的实际需求选择配置其他的选项。
四、编译编译 busybox
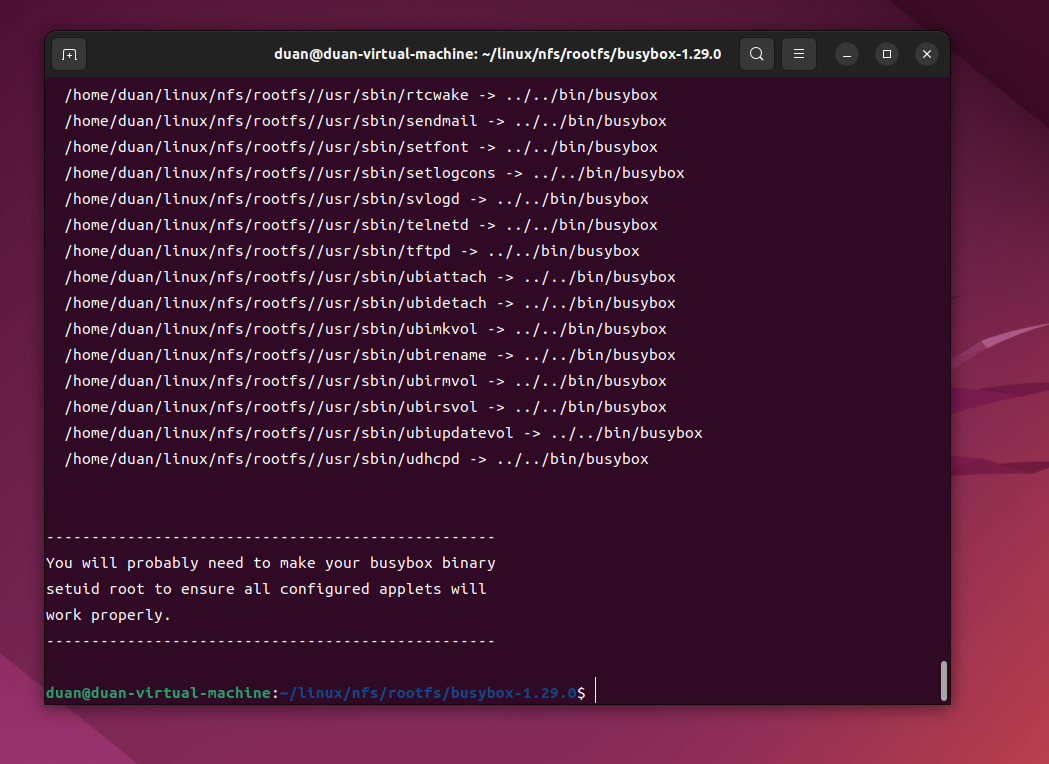
配置好 busybox 以后就可以编译了,我们可以指定编译结果的存放目录,我们肯定要将编译结果存放到前面创建的 rootfs 目录中,输入如下命令:
make
make install CONFIG_PREFIX=/home/duan/linux/nfs/rootfs
COFIG_PREFIX 指 定 编 译 结 果 的 存 放 目 录,编译完如下图所示:
编译完成以后会在 busybox 的所有工具和文件就会被安装到 rootfs 目录中,rootfs 目录内容
如下图所示:

从上图中 可以看出, rootfs 目录下有 bin 、 sbin 和 usr 这三个目录,以及 linuxrc 这个文件。前面说过 Linux 内核 init 进程最后会查找用户空间的 init 程序,找到以后就会运行这个用户空间的 init 程序,从而切换到用户态。如果 bootargs 设置 init=/linuxrc ,那么 linuxrc 就是可以作为用户空间的 init 程序,所以用户态空间的 init 程序是 busybox 来生成的。 busybox 的工作就完成了,但是此时的根文件系统还不能使用,还需要一些其他的文件,下一期我们将会进一步完善 。
总结
这一期博客我们完成了修改BusyBox软件源码,并进行了配置,最好完成了编译。
但是此时的根文件系统还不能使用,还需要一些其他的文件,下一期我们将会进一步完善。