IoC
IoC中文意思为控制反转。Spring是包含了众多工具方法的容器。
容器就是可以存纳的东西。像HashMap、List、数组就是一个容器,存储的数据
如何理解IoC控制反转
引入:
看下面的代码:
java
public class Main {
    public static void main(String[] args) {
        House house = new House(2);
        house.reside();
    }
}
public class House {
    private Frame frame;
    public House(int size) {
         this.frame = new Frame(size);
        System.out.println("框架建造初始化完成,建造房子");
    }
    public void reside(){
        System.out.println("房子建造完成");
    }
}
public class Frame {
    private Rebar rebar;
    public Frame(int size) {
        this.rebar = new Rebar(size);
        System.out.println("钢筋初始化完成,建造框架");
    }
}
public class Rebar {
    private int size;
    public Rebar(int size) {
        System.out.println("初始化钢筋");
    }
}
对于创建一个House对象,需要依赖多个类,如果采用上面的代码方式,当最"底层的"类(Rebar)进行调整(添加属性等)就会影响其他类。谁需要使用这个类,谁就来控制这个类对象的使用(eg: Frame类需要Rebar类,创建了Rebar对象,并可以调用其方法;当Rebar对象用完了也就被GC了),这样导致耦合性很高。
现在对代码进行调整:
java
public class Main {
    public static void main(String[] args) {
        //IoC容器
        Rebar rebar = new Rebar(2);
        Frame frame = new Frame(rebar);
        House house = new House(frame);

        house.reside();
    }
}
public class House {
    private Frame frame;

    public House(Frame frame) {
        this.frame = frame;
        System.out.println("初始化房子");
    }
    public void reside(){
        System.out.println("使用房子");
    }
}
public class Frame {
    private Rebar rebar;

    public Frame(Rebar rebar) {
        this.rebar = rebar;
        System.out.println("初始化框架");
    }
}
public class Rebar {
    private int property;

    public Rebar(int property) {
        this.property = property;
        System.out.println("初始化钢筋");
    }
}
这代码相比于原版代码,并没有对象的控制权给了需要使用它的类,而是统一放在了一个地方(上面代码就是main方法中new的操作)。这就是控制反转。
在Spring中用IoC容器用来帮我们管理一些资源(对象等)。
优点:1、资源集中管理:需要的时候直接从IoC容器中取。2、降低耦合性:在创建实例的时候不需要了解其细节,降低使用资源双方的依赖程度。
DI依赖注入
java
public class Frame {
    private Rebar rebar;

    public Frame(Rebar rebar) {
        this.rebar = rebar;
        System.out.println("初始化框架");
    }
}
这代码中在构造方法中传入Rebar对象就是依赖注入。
在Spring中,依赖注入就是从IoC容器中取出需要(依赖)的资源(对象等)。
实现IoC
类注解
Spring创建对象,并交给Spring进行管理
java
@SpringBootApplication
public class SpringIoCApplication {
	public static void main(String[] args) {
		ApplicationContext context = //context就相当于IoC容器
				SpringApplication.run(SpringIoCApplication.class, args);
		//从IoC容器中获取UserController对象
		//1、通过类获取
		UserController bean = context.getBean(UserController.class);
		System.out.println(bean);
		//Bean的命名规则:小驼峰(默认规则)
		//修改可以在类注解中换名。eg:@Controller("UserControllerReName")
		System.out.println(Introspector.decapitalize("UserController"));//userController
		System.out.println(Introspector.decapitalize("USerController"));//USerController
		System.out.println(Introspector.decapitalize("USErController"));//USerController
		//2、通过名称获取
		UserController bean1 = (UserController)context.getBean("userController");
		System.out.println(bean1);
		//3、通过名称+类获取
		UserController bean2 = context.getBean("userController",UserController.class);
		System.out.println(bean2);
		//bean、bean1、bean2拿的同一个对象
	}
}| 注解 | 说明 |
|---|---|
| @Controller | 一般表现层(接收前端发送的请求,对请求进行处理,并响应数据)使用。 |
| @Service | 一般业务逻辑层(处理具体的业务逻辑)使用 |
| @Repository | 一般数据持久层(负责数据访问操作,包括数据的CRUD)使用 |
| @Configuration | 一般配置类使用 |
| @Component | 使用广泛...... |
当添加了这些类注解,也就告诉了Spring,把这个类对象交个Spring管理,存放在容器中。在默认情况下会在Spring容器启动时提前创建实例(即"饿汉式初始化")
类注解存在两个问题:
1、使用第三方类,没有办法添加类注解
2、一个类,需要多个对象的时候
方法注解: @Bean
开发者自己创建对象,交给Spring进行管理
应用场景(解决类注解存在的问题):
1、第三方类
java
@Configuration
public class BeanConfiguration {
    @Bean
    public DefaultShutdownHook defaultShutdownHook(){
        return new DefaultShutdownHook();
    }
}
java
BeanConfiguration bean3 = context.getBean(BeanConfiguration.class);
System.out.println(bean3);
2、同一个类,需要多个对象
java
@Bean
public UserInfo userInfo1(){
    return new UserInfo("zhangsan",20);
}
@Bean
public UserInfo userInfo2(){
    return new UserInfo("lisi",18);
}
java
UserInfo user1 = context.getBean("userInfo1",UserInfo.class);
System.out.println(user1);
UserInfo user2 = context.getBean("userInfo2",UserInfo.class);
System.out.println(user2);
/*
打印
UserInfo(name=zhangsan, age=20)
UserInfo(name=lisi, age=18)
*/getBean不能用纯类名的方式获取对象,会抛出NoUniqueBeanDefinitionException异常。Bean名称为方法名(默认规则),修改方式eg:@Bean(name = "u2")或多个名字都可以的eg:@Bean(name = {"u2", "userInfo2"})
Spring的扫描路径
启动类xxxApplication在那个包下就只扫描这个包下的代码。也可以通过@ComponentScan(basePackages = {"xxx.xx.xx" , "xxx.xx.xx",......})进行修改,也可以扫描第三方库。
实现DI
有三种方式
属性注入
java
@SpringBootApplication
public class SpringIoCApplication {
	public static void main(String[] args) {
		ApplicationContext context = //context就相当于IoC容器
				SpringApplication.run(SpringIoCApplication.class, args);
		UserController bean = context.getBean(UserController.class);
		bean.doController();
	}
}
java
@Controller
public class UserController {
    private UserService userService;
    public void doController(){
        userService.doService();
    }
}
java
@Service
public class UserService {
    public void doService(){
        System.out.println("do service...");
    }
}发现userService.doService();报NullPointerException空指针异常。说明并没有进行赋值。需要加注解@Autowired:
java
@Autowired
private UserService userService;
将UserService对象从IoC容器中取出来并进行赋值。
注意:属性不能是final修饰的。
构造方法注入
1、当只有一个构造方法时:
java
@Controller
public class UserController {
    private UserService userService;
	//构造方法
    public UserController(UserService userService) {
        System.out.println("执行有参构造方法");
        this.userService = userService;
    }
    public void doController(){
        userService.doService();
    }
}从Spring容器中找到UserService对象,并进行传参赋值。
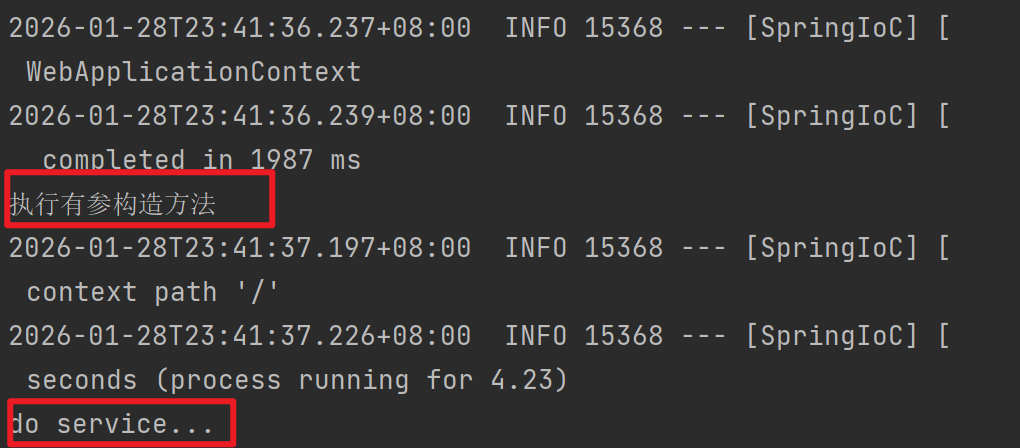
走这一个构造方法
2、当有无参构造方法时:
java
@Controller
public class UserController {
    private UserService userService;

    public UserController() {
        System.out.println("执行无参构造方法");
    }

    public UserController(UserService userService) {
        System.out.println("执行有参构造方法");
        this.userService = userService;
    }
    public void doController(){
        userService.doService();
    }
}
说明默认执行的无参构造方法
可以通过添加注解@Autowired来指定执行那个构造方法
java
public UserController() {
    System.out.println("执行无参构造方法");
}
@Autowired
public UserController(UserService userService) {
    System.out.println("执行有参构造方法");
    this.userService = userService;
}
3、当有多个构造方法的时候:
java
@Controller
public class UserController {
    private UserService userService;
    private UserRepository userRepository;

    public UserController(UserService userService) {
        this.userService = userService;
    }

    public UserController(UserService userService, UserRepository userRepository) {
        this.userService = userService;
        this.userRepository = userRepository;
    }
    public void doController(){
        userService.doService();
        userRepository.doRepository();
    }
}
当没有无参构造方法,且有多个有参构造方法时,运行错误。
需要添加注解@Autowired来指定执行那个构造方法 或者 添加无参构造方法来执行。
java
    private UserService userService;
    private UserRepository userRepository;
    @Autowired
    public UserController(UserService userService) {
        this.userService = userService;
    }
    public UserController(UserService userService, UserRepository userRepository) {
        this.userService = userService;
        this.userRepository = userRepository;
    }
    public void doController(){
        userService.doService();
        userRepository.doRepository();
    }
也报错,因为userRepository没有注入。
java
    private UserService userService;
    private UserRepository userRepository;

    public UserController(UserService userService) {
        this.userService = userService;
    }
    @Autowired
    public UserController(UserService userService, UserRepository userRepository) {
        this.userService = userService;
        this.userRepository = userRepository;
    }
    public void doController(){
        userService.doService();
        userRepository.doRepository();
    }
这样才执行成功
Setter注入
java
@Controller
public class UserController {
    private UserService userService;
    private UserRepository userRepository;

    @Autowired
    public void setUserService(UserService userService) {
        System.out.println("setUserService...");
        this.userService = userService;
    }
    @Autowired
    public void setUserRepository(UserRepository userRepository) {
        System.out.println("setUserRepository...");
        this.userRepository = userRepository;
    }
    public void doController(){
        userService.doService();
        userRepository.doRepository();
    }
}
set方法可以会被多次调用,注入对象可能发生改变,不能注入final修饰的属性。
容器中类有多个对象
java
@SpringBootApplication
public class SpringIoCApplication {
	public static void main(String[] args) {
		ApplicationContext context = //context就相当于IoC容器
				SpringApplication.run(SpringIoCApplication.class, args);
		UserService bean = context.getBean(UserService.class);
		bean.doService();
	}
}
java
@Service
public class UserService {
    @Autowired
    private UserInfo userInfo;
    public void doService(){
        System.out.println("do service...");
    }
}
java
@Configuration
public class BeanConfiguration {
    @Bean
    public DefaultShutdownHook defaultShutdownHook(){
        return new DefaultShutdownHook();
    }
    @Bean
    public UserInfo userInfo1(){
        return new UserInfo("zhangsan",20);
    }
    @Bean(name = {"u2", "userInfo2"})
    public UserInfo userInfo2(){
        return new UserInfo("lisi",18);
    }
}
发现程序出错,不知道注入哪一个。
有三种解决方式:
1、添加@Primary注解
java
@Configuration
public class BeanConfiguration {
    @Bean
    public DefaultShutdownHook defaultShutdownHook(){
        return new DefaultShutdownHook();
    }
    @Bean
    @Primary
    public UserInfo userInfo1(){
        return new UserInfo("zhangsan",20);
    }
    @Bean(name = {"u2", "userInfo2"})
    public UserInfo userInfo2(){
        return new UserInfo("lisi",18);
    }
}2、添加@Qualifier注解
java
@Service
public class UserService {
    @Autowired
    @Qualifier("u2")
    private UserInfo userInfo;
    public void doService(){
        System.out.println("do service...");
    }
}3、添加@Resource注解
java
@Service
public class UserService {
    @Autowired
    @Resource(name = "u2")
    private UserInfo userInfo;
    public void doService(){
        System.out.println("do service...");
    }
}
@Autowird 与 @Resource的区别:
1、@Autowired 是spring框架提供的注解,而@Resource是JDK提供的注解
2、@Autowired 默认是按照类型注入,而@Resource是按照名称注入的。@Resource 支持更多的参数设置。
AOP
待续......