引言
在当今的软件开发生态中,多线程编程已成为高性能应用不可或缺的核心技术。本项目将分享一个智能无人机防空平台的构建过程,从基础版本(V1)迭代至功能完善版本(V2),实现无人机动态生成、自主移动、雷达扫描入侵者、入侵者动态生成与移动等核心功能。
项目结构
系统模块划分:
智能无人机仿真平台
├── 用户界面层 (UI Layer)
│ ├── DroneUI - 主窗口和UI初始化
│ └── DroneListener - 用户交互处理
├── 业务逻辑层 (Business Layer)
│ ├── 无人机管理 (Drone)
│ ├── 入侵者管理 (Intruder)
│ └── 线程控制 (DroneThread)
└── 数据层 (Data Layer)
└── 共享数据容器 (ArrayList)
面向对象设计:
| 模块名称 | 核心类 | 功能描述 |
|---|---|---|
| UI 界面模块 | DroneUI | 主窗口容器,负责界面布局(按钮面板) |
| 无人机核心模块 | Drone | 封装无人机属性(坐标、速度、雷达范围等)与行为(绘制、移动) |
| 入侵者模块 | Intruder | 封装入侵者属性(坐标、速度、生命值等)与行为(绘制、移动) |
| 事件监听模块 | DroneListener | 监听按钮点击事件,动态生成无人机 / 入侵者对象并加入共享集合 |
| 创建多线程模块 | DroneThread | 独立线程,负责循环刷新界面、绘制对象、处理移动逻辑与雷达扫描检测 |
模块交互逻辑:
- 用户通过 DroneUI 的按钮触发事件;
- DroneListener 捕获事件,生成无人机 / 入侵者对象,存入共享集合(droneList/intruderList);
- DroneThread 线程循环读取共享集合,调用对象的 draw和 move方法;
- 雷达扫描逻辑在 DroneThread 中实现,通过像素颜色检测入侵者。
项目具体实现
1.V1版本 基础运动模拟:
V1 版本是项目的基础框架,主要实现固定无人机的多线程绘制与自主移动,为 V2 的功能扩展奠定基础。
1.1 主界面类 DroneUI(V1)
package Dronev1;

import javax.swing.*;
import java.awt.*;

public class DroneUI extends JFrame {
    public DroneUI() {
        setTitle("Intelligent UAV Platform");
        setSize(800, 800);
        setDefaultCloseOperation(EXIT_ON_CLOSE);
        setLocationRelativeTo(null);
        setVisible(true);

        Graphics g = this.getGraphics();
        DroneThread dt = new DroneThread(g);
        dt.start();  // 启动无人机线程
    }

    @Override
    public void paint(Graphics g) {
        super.paint(g);
    }

    public static void main(String[] args) {
        new DroneUI();
    }
}设计思路:
- 1.继承 JFrame 作为主窗口,设置窗口基本属性(标题、大小、关闭方式);
- 2.调用
this.getGraphics()获取绘图对象,传递给线程用于绘制;- 3.重写
paint方法,确保窗口刷新时不会出现绘图错乱;- 4.启动 DroneThread 线程。
1.2 多线程绘制类 DroneThread(V1)
package Dronev1;

import java.awt.*;
import java.awt.image.BufferedImage;

public class DroneThread extends Thread {
    Graphics g;
    int x = 400, y = 400;
    int speedx = 2, speedy = 2;

    int x1 = 100, y1 = 100;
    int speedx1 = 1, speedy1 = 1;

    // 设置无人机初始位置
    public void setPoint(int x, int y) {
        this.x = x;
        this.y = y;
    }

    public DroneThread(Graphics g) {
        this.g = g;
    }

    @Override
    public void run() {
        for (int i = 0; ; i++) {
            // 双缓冲技术
            BufferedImage image = new BufferedImage(800, 800, 2);
            Graphics bg = image.getGraphics();
            bg.setColor(Color.WHITE);
            bg.fillRect(0, 0, 800, 800);

            // 绘制两个无人机
            drawDrone(bg, x, y, speedx, speedy);
            drawDrone(bg, x1, y1, speedx1, speedy1);

            // 将缓冲图像绘制到屏幕
            g.drawImage(image, 0, 0, null);

            try {
                Thread.sleep(10);  // 控制帧率
            } catch (InterruptedException e) {
                throw new RuntimeException(e);
            }

            // 碰撞检测和速度反转
            if (x > 600 || x < 0) {
                speedx = -speedx;
            }
            if (y > 600 || y < 0) {
                speedy = -speedy;
            }
            x += speedx;
            y += speedy;

            if (x1 > 600 || x1 < 0) {
                speedx1 = -speedx1;
            }
            if (y1 > 600 || y1 < 0) {
                speedy1 = -speedy1;
            }
            x1 += speedx1;
            y1 += speedy1;
        }
    }

    // 绘制单个无人机
    public void drawDrone(Graphics bg, int x, int y, int speedx, int speedy) {
        // 外层蓝色半透明圆 - 雷达范围
        Color color1 = new Color(58, 35, 237, 60);
        bg.setColor(color1);
        bg.fillOval(x, y, 200, 200);

        // 中层绿色圆 - 机身
        Color color2 = new Color(39, 212, 9);
        bg.setColor(color2);
        bg.fillOval(x + 70, y + 70, 60, 60);

        // 内层红色圆 - 核心
        Color color3 = new Color(237, 41, 41);
        bg.setColor(color3);
        bg.fillOval(x + 85, y + 85, 30, 30);
    }
}设计思路:
1.继承 Thread 类:直接重写
run方法,简化多线程实现。(但只适合单一任务场景);2.双缓冲技术: 创建
BufferedImage作为缓冲画布,先将所有元素绘制到缓冲中,再一次性渲染到主界面,解决直接绘图导致的闪烁问题;3.无限循环:
while(true)实现持续动画效果,模拟实时系统;4.绘制逻辑:无人机分为三层(雷达 + 机身 + 状态),通过不同颜色和透明度区分,提升视觉效果;
5.移动逻辑:边界检测,超出则反向速度(
speedx = -speedx),实现反弹效果;6.线程休眠:
Thread.sleep(10)控制帧率,感觉上更丝滑。
1.3 V1版本运行展示
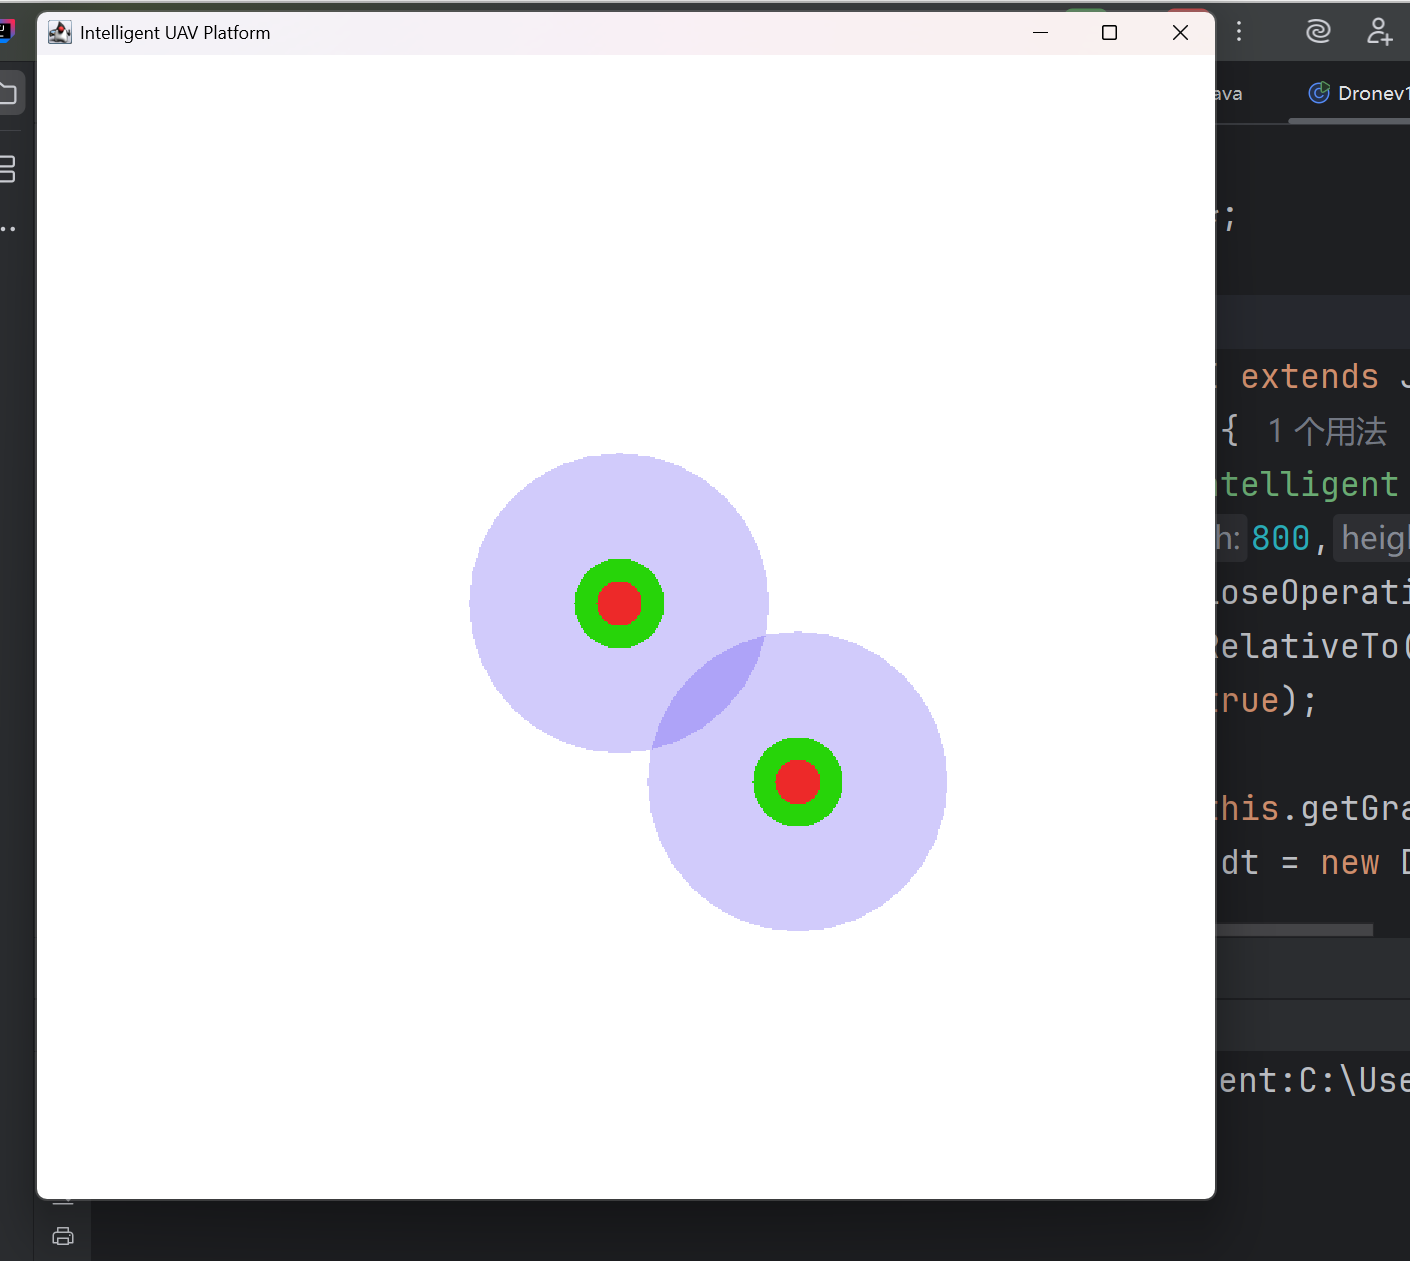

1.4 V1版本的局限性
这只是一个初步的框架,但我们可以从该框架的局限性发掘后续开发的方向,为V2+版本提供思路:
- 1.无人机数量固定,无法动态添加;
- 2.无入侵者交互逻辑;
- 3.无用户交互按钮,功能单一;
- 4.数据未封装,坐标、速度等直接定义在线程中,扩展性差。
因此我们来到:
2.V2版本 面向对象与多线程协同:
V2 版本针对 V1 的局限性进行升级,新增动态生成、入侵者、雷达扫描、线程间共享资源等功能下面进行分模块分析。
2.1 无人机对象封装(Drone)
package Dronev2;

import java.awt.*;

public class Drone {
    // 属性封装
    int x, y, speedx, speedy, size;
    int state;
    int stateSize;
    int scanSize;

    // 构造方法 - 初始化无人机状态
    public Drone(int x, int y, int speedx, int speedy, int state) {
        this.x = x;
        this.y = y;
        this.state = state;
        this.stateSize = 15;
        this.scanSize = 100;  // 雷达扫描范围
        this.speedx = speedx;
        this.speedy = speedy;
        this.size = 30;  // 机身大小
    }

    // 绘制方法 - 负责无人机的视觉表现
    public void drawDrone(Graphics bg) {
        // 雷达范围 - 半透明绿色
        Color color1 = new Color(27, 235, 125, 60);
        bg.setColor(color1);
        bg.fillOval(x, y, scanSize, scanSize);

        // 机身 - 紫色
        Color color2 = new Color(94, 20, 223);
        bg.setColor(color2);
        bg.fillOval(x + 35, y + 35, size, size);

        // 核心 - 红色
        Color color3 = new Color(237, 41, 41);
        bg.setColor(color3);
        bg.fillOval(x + 42, y + 42, stateSize, stateSize);
    }

    // 移动方法 - 更新位置并处理边界碰撞
    public void moveDrone() {
        // 在指定区域内移动
        if (x > 900 || x < 200) {
            speedx = -speedx;
        }
        if (y > 675 || y < 175) {
            speedy = -speedy;
        }
        x += speedx;
        y += speedy;
    }
}
设计思路:
1.将无人机的属性(坐标、速度、雷达范围等)和行为(绘制、移动)封装在类中,实现面向对象封装原则。
2.
drawDrone()负责绘制,moveDrone()负责移动,实现单一职责原则。3.限定在防守区(200≤x≤900,175≤y≤675),与后续 UI 中的红色矩形区域对应,确保无人机在指定区域内活动。
2.2 入侵者对象封装(Intruder)
package Dronev2;

import java.awt.*;

public class Intruder {
    int x, y, speedx, speedy, size;
    int HP;  // 生命值

    public Intruder(int x, int y, int speedx, int speedy, int size, int HP) {
        this.x = x;
        this.y = y;
        this.speedx = speedx;
        this.speedy = speedy;
        this.size = size;
        this.HP = 100;  // 初始生命值
    }

    public void drawIntruder(Graphics g) {
        if (HP <= 0) {
            return;  // 生命值为0时不绘制
        }
        g.setColor(Color.BLACK);
        g.fillOval(x, y, size, size);
        g.setColor(Color.RED);
        g.drawOval(x - 1, y - 1, size + 2, size + 2);
        g.drawString("HP:" + HP, x, y - size);  // 显示生命值
    }

    public void moveIntruder() {
        if (HP <= 0) {
            return;  // 死亡的单位不移动
        }
        if (x > 1200 - size || x < 0) {
            speedx = -speedx;
        }
        if (y > 950 - size || y < 0) {
            speedy = -speedy;
        }
        x += speedx;
        y += speedy;
    }
}
设计思路:
- 1.与无人机类似,保持相关属性(坐标、速度)和相关行为(绘制、移动)的一致性,便于后续扩展和维护;
- 2.新增生命值机制,HP 属性能够为攻击功能扩展进行预留,绘制和移动方法中添加 HP 判断,实现 "消灭" 逻辑;
- 3.Intruders的黑色机身 + 红色边框,视觉上与无人机区分,添加 HP 生命值显示,提升交互体验;
- 4.增大其移动边界,以更大区域为移动范围,大于无人机的防守区,模拟 "入侵" 场景。
2.3 平台主"战场"(DroneUI)
package Dronev2;

import javax.swing.*;
import java.awt.*;
import java.util.ArrayList;

public class DroneUI extends JFrame {

    // 共享数据容器 - 关键的多线程通信机制
    ArrayList<Drone> droneList = new ArrayList<>();
    ArrayList<Intruder> intruderList = new ArrayList<>();

    public DroneUI() {
        setTitle("Intelligent UAV Platform");
        setSize(1200, 1000);
        setDefaultCloseOperation(EXIT_ON_CLOSE);
        setLocationRelativeTo(null);
        setVisible(true);

        // 控制面板和按钮
        JButton btn1 = new JButton("Drones Production");
        JButton btn2 = new JButton("Intruder Production");

        JPanel panel = new JPanel();
        panel.setBackground(Color.LIGHT_GRAY);
        panel.add(btn1);
        panel.add(btn2);
        add(panel, BorderLayout.SOUTH);

        Graphics g = this.getGraphics();

        // 创建无人机线程
        DroneThread dt = new DroneThread(g);
        // 创建事件监听器
        DroneListener dl = new DroneListener();

        // 注册事件监听
        btn1.addActionListener(dl);
        btn2.addActionListener(dl);

        // 关键步骤:建立共享内存通信
        dl.droneList = droneList;       // 监听器可以添加无人机
        dt.droneList = droneList;       // 渲染线程可以读取无人机
        dl.intruderList = intruderList; // 监听器可以添加入侵者
        dt.intruderList = intruderList; // 渲染线程可以读取入侵者

        dt.start();  // 启动渲染线程
    }

    @Override
    public void paint(Graphics g) {
        super.paint(g);
    }

    public static void main(String[] args) {
        new DroneUI();
    }
}
设计思路:
- 1.使用 BorderLayout 将按钮面板放在South,主区域用于绘图,布局清晰;
- 2.
droneList和intruderList在 UI 中创建,确保全局唯一,然后传递给监听器和线程,实现数据共享;- 3.将绘图对象和共享集合传递给 DroneThread 后启动线程,确保线程拥有所有必要资源;
- 4.重写 paint 方法:调用
super.paint(g)确保窗口拖拽后绘图正常刷新。
2.4 事件监听(DroneListener)
package Dronev2;

import java.awt.event.ActionEvent;
import java.awt.event.ActionListener;
import java.util.ArrayList;
import java.util.Random;

public class DroneListener implements ActionListener {

    ArrayList<Intruder> intruderList;
    ArrayList<Drone> droneList = new ArrayList<>();
    Random random = new Random();

    @Override
    public void actionPerformed(ActionEvent e) {

        if (e.getActionCommand().equals("Drones Production")) {
            // 生成无人机 - 随机位置和速度
            int x = random.nextInt(700) + 200;  // 200-900范围内
            int y = random.nextInt(500) + 175;  // 175-675范围内
            int speedx = random.nextInt(5) - 2; // -2到2之间
            int speedy = random.nextInt(5) - 2;

            Drone drone = new Drone(x, y, speedx, speedy, 0);
            droneList.add(drone);

        } else if (e.getActionCommand().equals("Intruder Production")) {
            // 生成入侵者 - 避免在防守区域生成
            int x = random.nextInt(1150);
            int y = random.nextInt(905);
            while (true) {
                if (x < 200 || x > 1000 || y < 175 || y > 775) {
                    break;  // 在防守区域外才停止
                }
                x = random.nextInt(1150);
                y = random.nextInt(905);
            }
            int speedx = random.nextInt(5) - 2;
            int speedy = random.nextInt(5) - 2;

            Intruder intruder = new Intruder(x, y, speedx, speedy, 45, 100);
            intruderList.add(intruder);
        }
    }
}
设计思路:
1.线程中重要的资源共享 :
droneList和intruderList用于存储对象,与 DroneUI、DroneThread 共享,实现线程间数据传递(核心通信方式);2.使用
Random类创建随机位置和速度:
- 无人机坐标:限定在防守区内(200≤x≤900,175≤y≤675),确保初始位置正确;
- 入侵者坐标:通过
while(true)循环强制生成在防守区外,模拟 "入侵" 初始状态;- 速度:
random.nextInt(5)-2生成 - 2~2 的随机数,实现无人机和入侵者的随机方向移动,提升仿真效果;3.对象创建:点击按钮时创建对象并加入集合,DroneThread 线程会实时读取集合并绘制,实现 "动态生成" 功能。
4.实现 ActionListener 接口:处理按钮点击事件,分离 UI 与业务逻辑,符合单一职责原则;
2.5 核心线程(DroneThread)
package Dronev2;

import java.awt.*;
import java.awt.image.BufferedImage;
import java.util.ArrayList;

public class DroneThread extends Thread {

    ArrayList<Drone> droneList;
    ArrayList<Intruder> intruderList;
    Graphics g;

    public DroneThread(Graphics g) {
        this.g = g;
    }

    @Override
    public void run() {
        while (true) {
            // 创建双缓冲图像
            BufferedImage image = new BufferedImage(1200, 950, 2);
            Graphics bg = image.getGraphics();
            bg.setColor(Color.WHITE);
            bg.fillRect(0, 0, 1200, 950);

            // 绘制防守区域边界
            bg.setColor(Color.RED);
            bg.drawRect(200, 175, 800, 600);

            // 遍历并绘制所有无人机
            for (int j = 0; j < droneList.size(); j++) {
                droneList.get(j).drawDrone(bg);
                droneList.get(j).moveDrone();
            }

            // 遍历并绘制所有入侵者
            for (int j = 0; j < intruderList.size(); j++) {
                intruderList.get(j).drawIntruder(bg);
                intruderList.get(j).moveIntruder();
            }

            // 雷达扫描检测 - 颜色识别机制
            if (droneList.size() > 0) {
                Drone drone = droneList.get(0);  // 假设第一个无人机有雷达
                for (int i = drone.x; i < drone.x + drone.scanSize; i++) {
                    for (int j = drone.y; j < drone.y + drone.scanSize; j++) {
                        int colorNum = image.getRGB(i, j);
                        Color color = new Color(colorNum);
                        // 灰度值小于10认为是入侵者(黑色)
                        if ((color.getRed() + color.getGreen() + color.getBlue()) / 3 < 10) {
                            System.out.println("发现入侵者~");
                        }
                    }
                }
            }

            g.drawImage(image, 0, 0, null);

            try {
                Thread.sleep(10);  // 控制渲染频率
            } catch (InterruptedException e) {
                throw new RuntimeException(e);
            }
        }
    }
}
设计思路:
- 1.继承 Thread 类核心线程,负责所有绘制和逻辑处理。使所有对象在一个线程中顺序绘制
- 2.添加场景绘制,红色矩形作为防守区,区分无人机活动范围和入侵者入侵范围;
- 3.通过循环遍历共享集合,调用每个对象的
draw和move方法,实现多无人机、多入侵者的同时绘制和移动;- 4.雷达扫描逻辑:
- 取第一个无人机作为扫描主体(可扩展为所有无人机);
- 遍历雷达范围的像素,通过计算灰度值判断是否存在入侵者(黑色入侵者灰度值 < 10);
- 添加像素越界判断;
- 5.帧率控制的调整,
Thread.sleep(10)比 V1 的 1ms 更合理,动画流畅度变好;
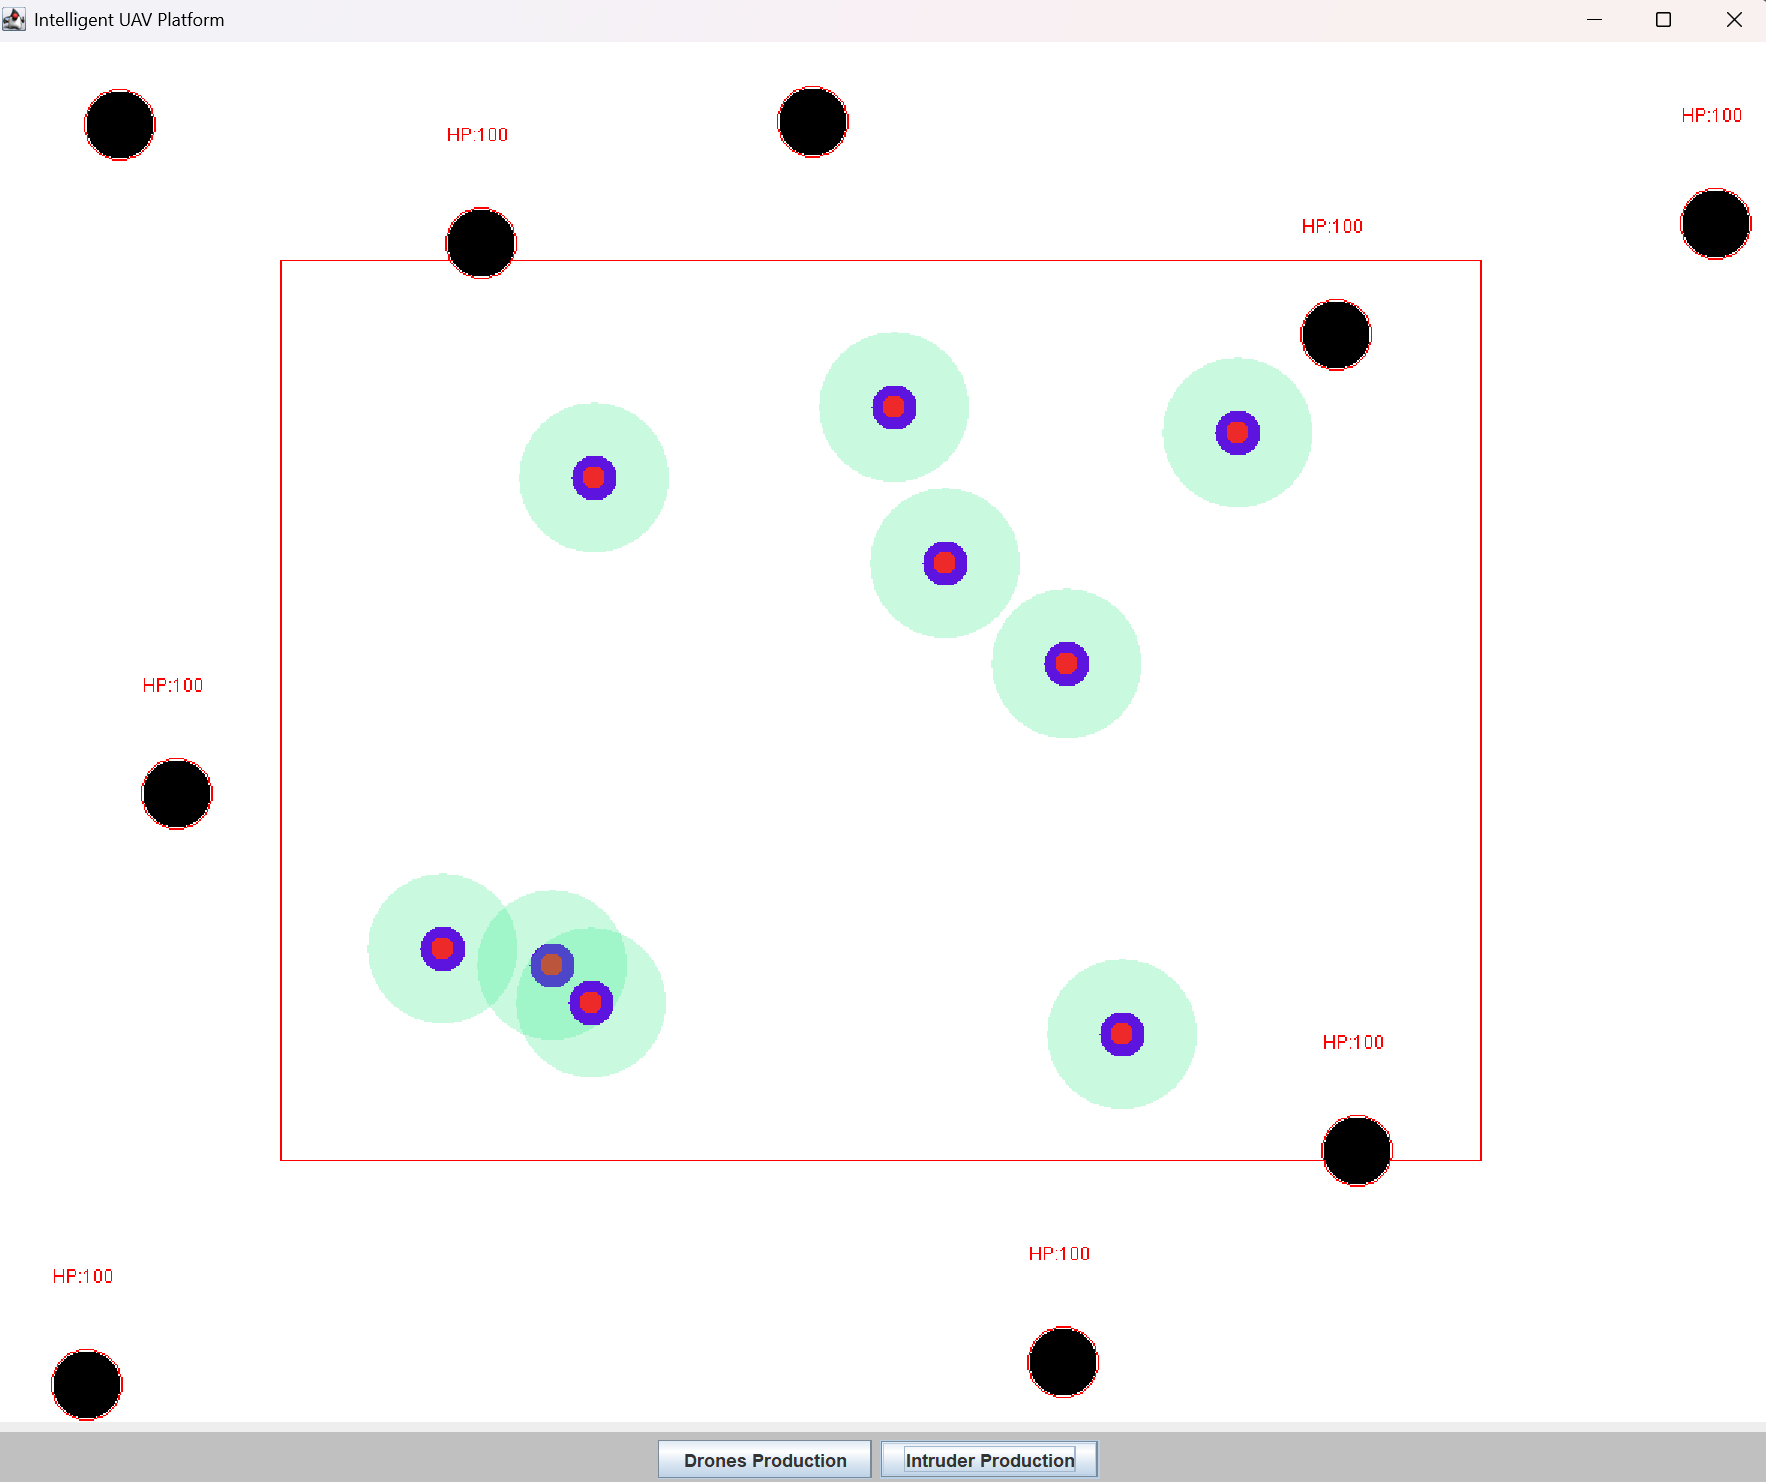
2.6 V2版本运行展示
无人机V2版本运行展示
项目涉及关键知识点
1.面向对象编程
核心思想:封装、类与对象
- 封装:Drone 和 Intruder 类将属性(x、y、speedx 等)和行为(draw、move)封装在一起,对外仅暴露必要方法,隐藏内部实现细节。例如,Drone 的
moveDrone方法封装了边界检测和坐标更新逻辑,外部无需关心具体实现,只需调用方法即可。- 类与对象:Drone 和 Intruder 是 类,通过构造方法
new Drone(x,y,speedx,speedy,0)创建 对象实例,每个对象拥有独立的属性,实现多无人机、多入侵者的并行存在。- 代码复用:两个类的结构对称,绘制和移动方法的逻辑相似,复用性强。
2. 多线程同步与资源共享
2.1 实现方式:继承 Thread 类
- 线程创建:DroneThread 继承 Thread,重写
run方法,run方法中的代码是线程的执行逻辑。- 线程启动:通过
dt.start()启动线程,JVM 会调用run方法。- 线程生命周期:创建(new DroneThread (g))→ 就绪(start ())→ 运行(CPU 调度)→ 阻塞(sleep ())→ 死亡(循环结束)。
2.2 线程间通信:共享集合
- 核心机制:DroneUI、DroneListener、DroneThread 共享**
droneList** 和**intruderList**,UI 线程(监听器)添加对象,DroneThread 线程读取和处理对象,实现数据传递。- 数据一致性:共享集合是线程间通信的关键,但同时需注意线程安全问题
3.双缓冲技术
为什么需要双缓冲?
- 因为如果直接绘制到屏幕上会导致对象持续闪烁
- 底层绘制逻辑是:清屏 -> 绘制对象1 -> 绘制对象2...
- 这会导致用户会看到中间状态
因此我们可以通过双缓冲技术解决:
// 双缓冲解决:
// 1. 在内存中创建图像缓冲区
BufferedImage image = new BufferedImage(width, height, type);
// 2. 在缓冲区中完成所有绘制
Graphics bg = image.getGraphics();
// 3. 一次性将缓冲区内容绘制到屏幕
g.drawImage(image, 0, 0, null);
4.像素级颜色检测算法
雷达扫描原理:
//检测周围是否有入侵者(颜色不同)
            if (droneList.size()>0){
                Drone drone = droneList.get(0);
                for (int i = drone.x; i < drone.x+drone.scanSize; i++) {
                    for (int j = drone.y; j < drone.y+drone.scanSize; j++) {
                        int colorNum = image.getRGB(i, j);
                        Color color = new Color(colorNum);
                        //灰度值小于100,认为是入侵者
                        if ((color.getRed() + color.getGreen() + color.getBlue()) / 3 < 10) {
                            System.out.println("发现入侵者~");
                        }
                    }
                }
灰度值计算:通过
(R+G+B)/3将彩色像素转换为灰度值,黑色(入侵者)的灰度值接近 0,白色(背景)的灰度值接近 255,以此区分目标。
5.边界检测与随机数生成
- 边界检测:通过条件判断(
x>900||x<200)限制对象移动范围,避免超出屏幕或指定区域,实现 "反弹" 效果。- 随机数生成:使用
Random类生成坐标和速度,random.nextInt(700)+200生成 200~900 的随机数,random.nextInt(5)-2生成 - 2~2 的随机数,实现对象的随机位置和随机方向移动。
项目开发阻碍
1.绘图闪烁问题:
一开始我们直接使用g.fillOval绘制到屏幕时,会出现闪烁现象。
原因是每次绘制前未清空背景,或绘制顺序混乱,导致上一帧图像未完全清除就绘制新帧。
1.1解决办法:
引入双缓冲技术:
- 创建
BufferedImage作为缓冲画布; - 将所有元素(背景、无人机、入侵者、防守区)绘制到缓冲画布;
- 一次性将缓冲画布绘制到主界面(
g.drawImage(image, 0, 0, null)); - 每次循环前用白色背景清空缓冲画布(
bg.fillRect(0, 0, 1200, 950))。
2.点击按钮后对象未生成:
当我们点击 "Drones Production" 按钮后,无人机未在界面上显示。
排查发现原因是监听器的droneList与线程的droneList不是同一个,我自己在监听器内创建了一个新的List而不是线程的那个。
2.1 解决办法:
( 确保共享集合的传递正确,DroneUI 中必须将同一个droneList实例赋值给监听器和线程):
// 正确:传递同一个集合实例
dl.droneList=droneList;
dt.droneList=droneList;
dl.intruderList=intruderList;
dt.intruderList=intruderList;
3.有无人机/入侵者出现卡顿静止:
当快速多次点击"Drones Production"或"Intruder Production"时,有个别drones或者intruders会出现静止卡顿。
排查发现原因是速度生成算法存在缺陷
// DroneListener中的速度生成逻辑
int speedx = random.nextInt(5) - 2; // -2到2之间
int speedy = random.nextInt(5) - 2;

// 问题1:可能产生0值
// random.nextInt(5)可能返回0,1,2,3,4
// 减去2后:-2,-1,0,1,2
// 当结果为0时,无人机/入侵者将静止不动
3.1 解决办法:
(加入循环确保速度非0)
 int x= random.nextInt(700)+200;
            int y= random.nextInt(500)+175;
//            int speedx= random.nextInt(5)-2;//-2~2
//            int speedy= random.nextInt(5)-2;

            int speedx;
            do {
                speedx = random.nextInt(5) - 2;
            } while (speedx == 0);  // 确保速度非零

            int speedy;
            do {
                speedy = random.nextInt(5) - 2;
            } while (speedy == 0);
项目总结
本项目通过 V1 到 V2 的迭代,实现了一个功能完善的智能无人机仿真平台,核心成果包括:
- 掌握 Java 多线程编程:继承 Thread 类实现多任务,理解线程生命周期和线程间通信;
- 深化面向对象思想:封装类与对象,实现代码复用和扩展;
- 熟悉 Swing GUI 开发:窗口布局、图形绘制、双缓冲技术;
- 实现核心业务逻辑:动态生成对象、边界检测、雷达扫描。
项目的核心设计思路是 "模块化 + 共享数据",将 UI、逻辑、绘制分离,通过共享集合实现线程间通信,结构清晰,易于维护,适合 Java 初学者学习和扩展。
后续改进方向
- 线程安全优化:使用
synchronized同步代码块,解决并发修改问题; - 无人机攻击功能:雷达扫描到入侵者后,实现攻击逻辑(入侵者 HP 减少,HP≤0 时从集合中移除);
- 入侵者 AI 优化:入侵者检测到无人机后,实现躲避逻辑(改变速度方向);
- UI 优化:
- 显示无人机和入侵者数量;
- 显示无人机雷达扫描范围的动态效果;
- 添加暂停 / 继续按钮,控制仿真过程;
- 数据持久化:使用文件或数据库保存仿真数据(如无人机数量、入侵者被消灭数量);
- 雷达扫描优化:替换像素检测为坐标碰撞检测(计算无人机雷达范围与入侵者的距离),提升性能;
- 多线程实现方式优化:将 DroneThread 改为实现 Runnable 接口,提高代码灵活性(避免单继承限制);
- 添加音效和动画:入侵者被攻击时播放音效,无人机状态变化时显示动画效果。
- ..........................................
- ..........................................
结语
本项目通过智能无人机仿真平台这一生动案例,完整展示了多线程编程在实际项目中的应用。从V1的基础运动模拟到V2的完整交互系统,我不仅学习了技术实现,更重要的是掌握了系统思维 和工程化方法。