系列内容:OpenCV概述与环境配置,OpenCV基础知识和绘制图形,图像的算数与位运算,图像视频的加载和显示,图像基本变换,滤波器,形态学,图像轮廓,图像直方图,车辆统计项目,特征检测和匹配,图像查找和拼接,虚拟计算器项目,信用卡识别项目,图像的分割与修复,人脸检测与车牌识别,目标追踪,答题卡识别判卷与文档ocr扫描识别,光流估计
(一)答题卡识别判卷
项目思路:
- 1.图片预处理
- 2.透视变换,把答题卡的视角拉正
- 3.找到每个圆圈的轮廓
- 4.通过计算非零值来判断是否答题正确
代码:
python
import cv2
import numpy as np
import matplotlib.pyplot as plt
#封装显示图片的函数
def cv_show(name,img):
    cv2.imshow(name, img)
    cv2.waitKey(0)
    cv2.destroyAllWindows()
img=cv2.imread('./paper.png')
cv_show('img',img)

#变成黑白图片
gray=cv2.cvtColor(img,cv2.COLOR_BGR2GRAY)

#去掉一些噪点
blurred=cv2.GaussianBlur(gray,(5,5),0)
cv_show('blurred',blurred)

#边缘检测
edged=cv2.Canny(blurred,75,200)
cv_show('edged',edged)

#检测轮廓
cnts=cv2.findContours(edged.copy(),cv2.RETR_EXTERNAL,cv2.CHAIN_APPROX_SIMPLE)[1]
#画轮廓会修改被画轮廓的图
contours_img=img.copy()
cv2.drawContours(contours_img,cnts,-1,(0,0,255),3)
cv_show('contours_img',contours_img)

#确保拿到的轮廓是答题卡的轮廓
if len(cnts)>0:
    #根据轮廓面积对轮廓进行排序
    cnts=sorted(cnts,key=cv2.contourArea,reverse=True)

    #遍历每一个轮廓
    for c in cnts:
        #计算周长
        perimeter=cv2.arcLength(c,True)
        #得到近似的轮廓
        approx=cv2.approxPolyDP(c,0.02*perimeter,True)
        #近似完了,应该只剩下四个角的坐标
        # print(c)
        # print(approx)
        if len(approx)==4:
            #保存approx
            docCnt=approx
            #找到答题卡近似轮廓,直接退出
            break


docCnt

a=np.array([[[131, 205]],

       [[119, 616]],

       [[447, 613]],

       [[430, 207]]])


#进行透视变换
#透视变换要找到变换矩阵
#变换矩阵要求原图的四个点的点坐标和变换之后的四个点坐标
#现在已经找到了原图的四个点的坐标,需要找到变换后四个点的坐标
#先对获取到的4个角点坐标按照一定的顺序排序(顺时针或逆时针)
#排序功能是一个独立功能,可以封装成一个函数
def order_points(pts):
    #创建全是0的矩阵,来接收等下找出来的四个角的坐标
    rect=np.zeros((4,2),dtype='float32')
    s=pts.sum(axis=1)
    #左上x+y最小,右下x+y最大
    rect[0]=pts[np.argmin(s)]
    rect[2]=pts[np.argmax(s)]

    #右上角x-y最小,左下角x-y最大
    diff=np.diff(pts,axis=1)
    rect[1]=pts[np.argmin(diff)]
    rect[3]=pts[np.argmax(diff)]
    return rect

#把透视变换功能封装成一个函数
def four_point_transform(image,pts):
    #对输入的四个坐标排序
    rect=order_points(pts)
    (tl,tr,br,bl)=rect

    #空间中两点的距离
    widthA=np.sqrt((br[0]-bl[0])**2+(br[1]-bl[1])**2)
    widthB=np.sqrt((tr[0]-tl[0])**2+(tr[1]-tl[1])**2)
    max_width=max(int(widthA),int(widthB))

    heightA=np.sqrt((tr[0]-br[0])**2+(tr[1]-br[1])**2)
    heightB=np.sqrt((tl[0]-bl[0])**2+(tl[1]-bl[1])**2)
    max_height=max(int(heightA),int(heightB))
    #构造变换之后的对应坐标位置
    dst=np.array([
        [0,0],
        [max_width-1,0],
        [max_width-1,max_height-1],
        [0,max_height-1]
    ],dtype='float32')

    #计算变换矩阵
    M=cv2.getPerspectiveTransform(rect,dst)
    #透视变换
    warped=cv2.warpPerspective(image,M,(max_width,max_height))
    return warped

#进行透视变换
warped=four_point_transform(gray,docCnt.reshape(4,2))
cv_show('warped',warped)
print(warped.shape)

#二值化
thresh=cv2.threshold(warped,0,255,cv2.THRESH_BINARY_INV|cv2.THRESH_OTSU)[1]
cv_show('thresh',thresh)

#找到每一个圆圈的轮廓
cnts=cv2.findContours(thresh,cv2.RETR_EXTERNAL,cv2.CHAIN_APPROX_SIMPLE)[1]
thresh_contours=thresh.copy()
cv2.drawContours(thresh_contours,cnts,-1,255,3)
cv_show('thresh_contours',thresh_contours)

plt.imshow(thresh_contours,cmap='gray')


#遍历所有的轮廓,找到特定的宽高和特定比例的轮廓,即圆圈的轮廓
question_cnts=[]
for c in cnts:
    #找到轮廓的外接矩形
    (x,y,w,h)=cv2.boundingRect(c)
    #计算宽高比
    ar=w/float(h)

    #根据实际的情况指定标准
    if w>20 and h>20 and 0.9<=ar<=1.1:
        question_cnts.append(c)


len(question_cnts)

#轮廓排序封装函数
def sort_contours(cnts,method='left-to-right'):
    reverse=False
    #排序的时候,取x轴数据,i=0,取y轴数据i=1
    i=0
    if method=='right-to-left' or method=='bottom-to-top':
        reverse=True
    #按y轴坐标排序
    if method=='top-to-bottom' or method=='bottom-to-top':
        i=1
    #计算每个轮廓的外接矩形
    bounding_boxes=[cv2.boundingRect(c) for c in cnts]
    (cnts,bounding_boxes)=zip(*sorted(zip(cnts,bounding_boxes),key=lambda b:b[1][i],reverse=reverse))
    return cnts,bounding_boxes


#按照从上到下的顺序对question_cnts排序
question_cnts=sort_contours(question_cnts,method='top-to-bottom')[0]

#正确答案
ANSWER_KEY={0:1,1:4,2:0,3:3,4:1}
correct=0
for (q,i) in enumerate(np.arange(0,25,5)):
    print(q,i)
    #每次取出五个轮廓,再按x坐标从小到大排序
    cnts=sort_contours(question_cnts[i:i+5])[0]
    #遍历每一个结果
    bubbled=None
    for (j,c) in enumerate(cnts):
        #使用掩膜,即mask
        mask=np.zeros(thresh.shape,dtype='uint8')
        cv2.drawContours(mask,[c],-1,255,-1)
        # cv_show('mask',mask)
        #计算非零个数
        #先做与运算
        mask=cv2.bitwise_and(thresh,thresh,mask=mask)
        # cv_show('mask',mask)
        #计算非零个数,选中的选项,非零个数多,没选中的选项,非零个数少
        total=cv2.countNonZero(mask)

        if bubbled is None or total>bubbled[0]:
            bubbled=(total,j)

    color=(0,0,255)
    k=ANSWER_KEY[q]
    #判断是否做题正确
    if k==bubbled[1]:
        correct+=1
        color=(0,255,0)

    #绘图
    cv2.drawContours(warped,[cnts[k]],-1,color,3)

#计算分数
score=(correct/5.0)*100
print(f'score:{score:.2f}%')
cv2.putText(warped,str(score)+'%',(10,30),cv2.FONT_HERSHEY_SIMPLEX,0.9,(0,0,255),2)
cv_show('result',warped)
运行结果:
答题卡原图,如图18.1所示:
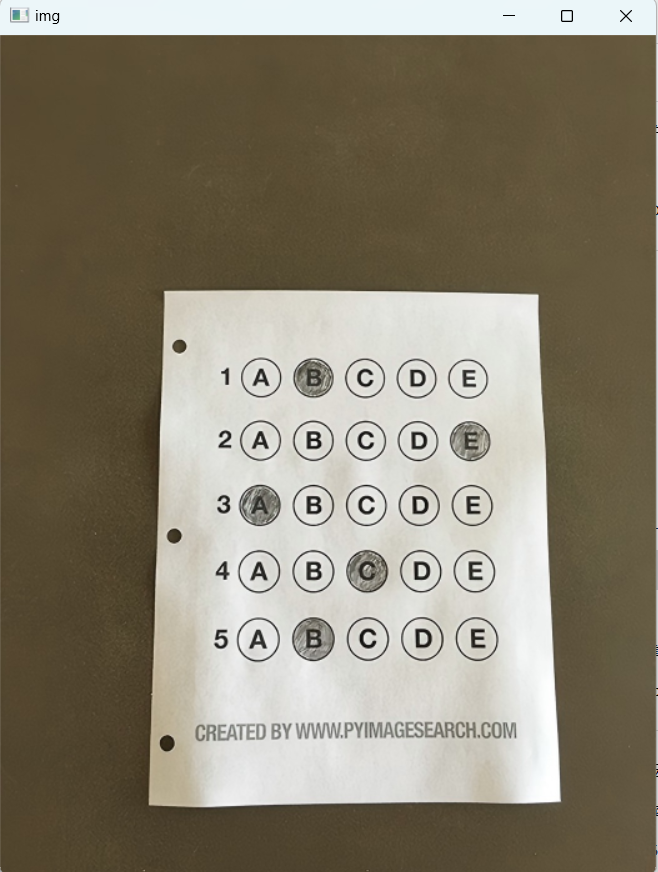 18.1-答题卡原图
答题卡原图去噪点,如图18.2所示:
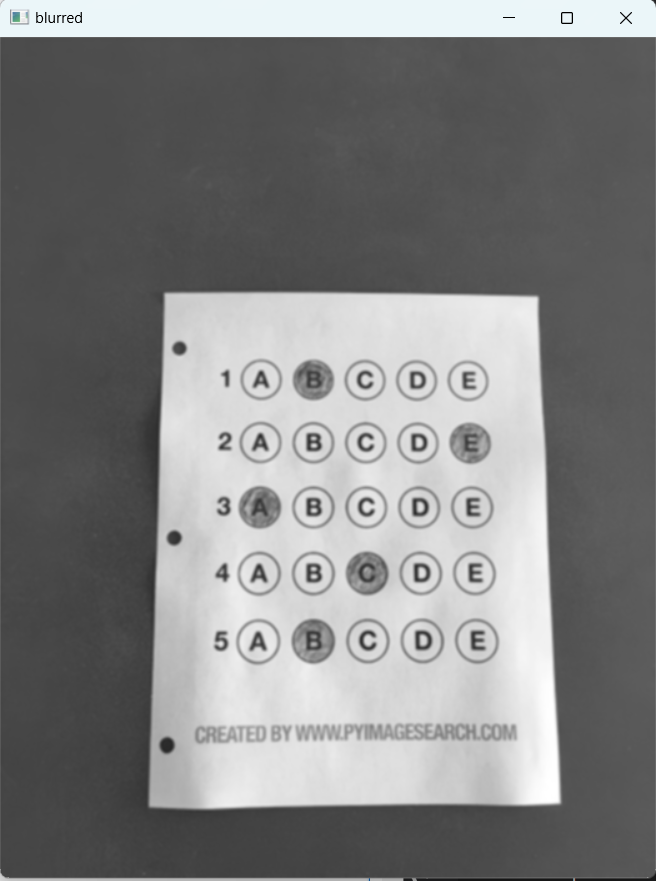 18.2-答题卡原图去噪点
答题卡边缘检测,如图18.3所示:
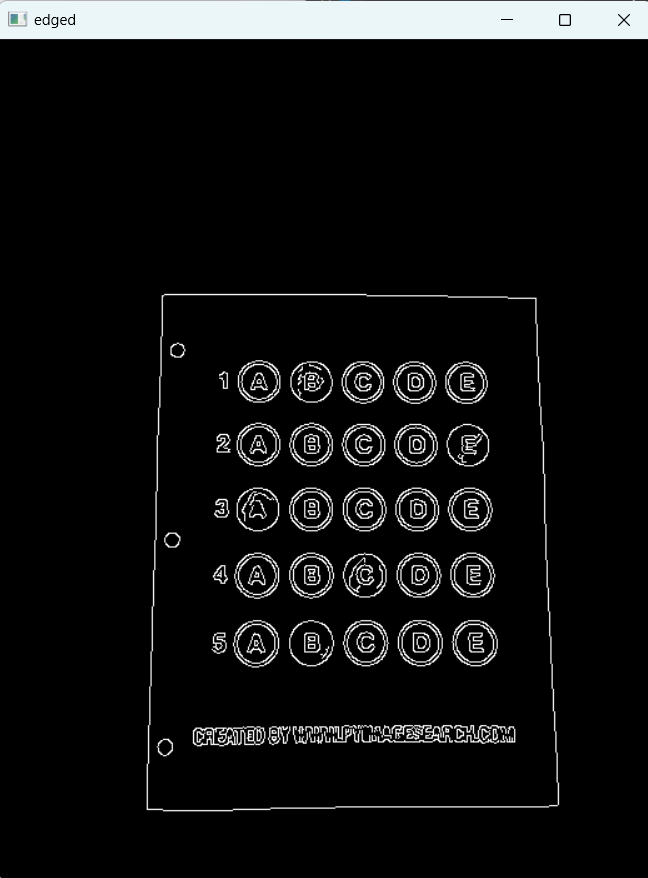 18.3-答题卡边缘检测
答题卡边缘绘制,如图18.4所示:
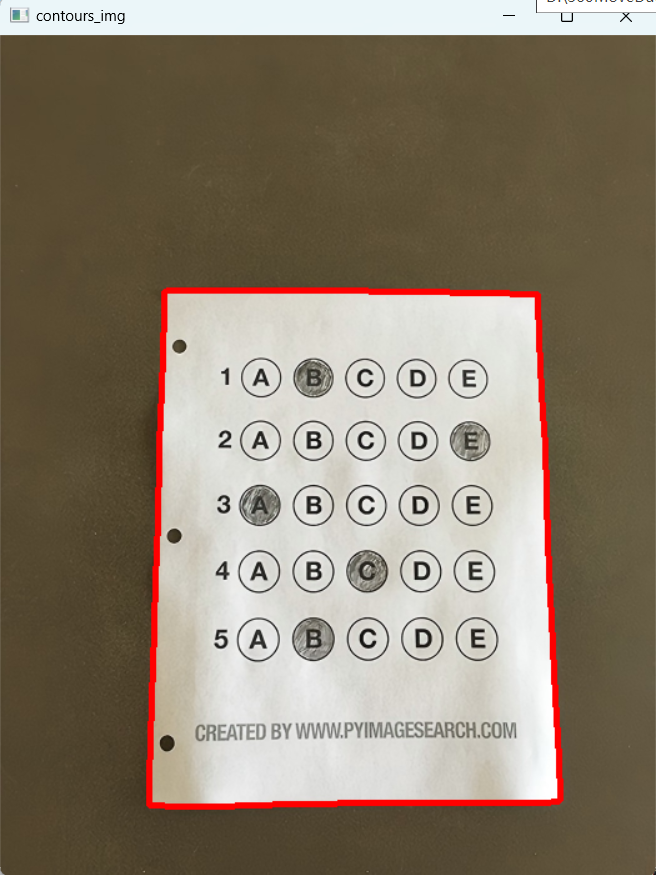 18.4-答题卡边缘绘制
答题卡透视变换,如图18.5所示:
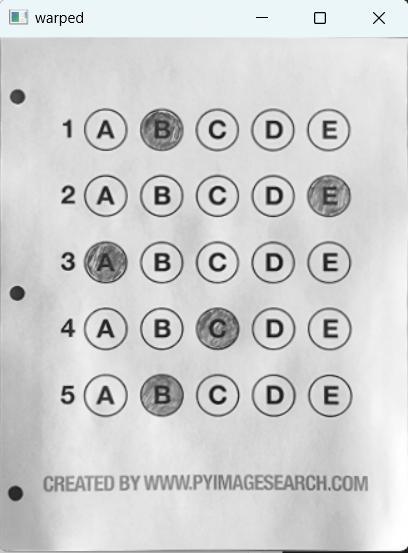 18.5-题卡透视变换
答题卡透视变换后二值化,如图18.6所示:
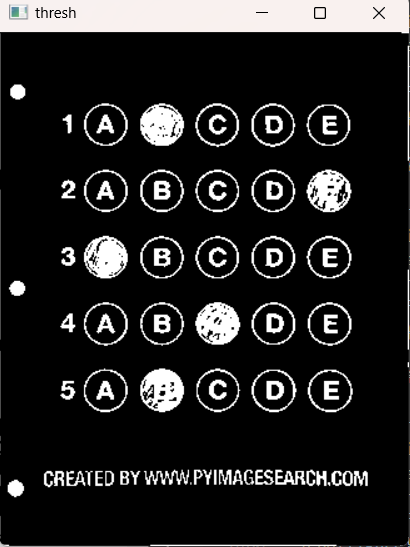 18.6-答题卡透视变换后二值化
答题卡二值化后找到圆圈轮廓,如图18.7所示:
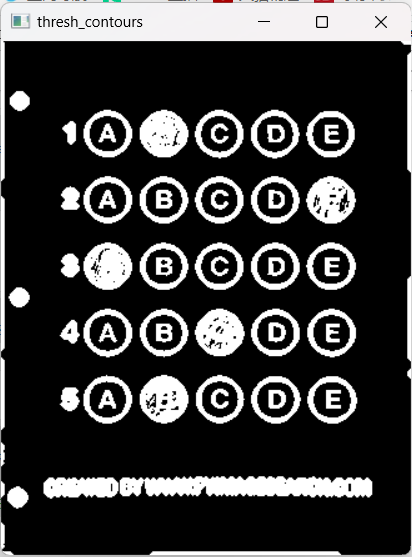 18.7-答题卡二值化后找到圆圈轮廓
得到matplotlib图以确定圆圈的大小,如图18.8所示:
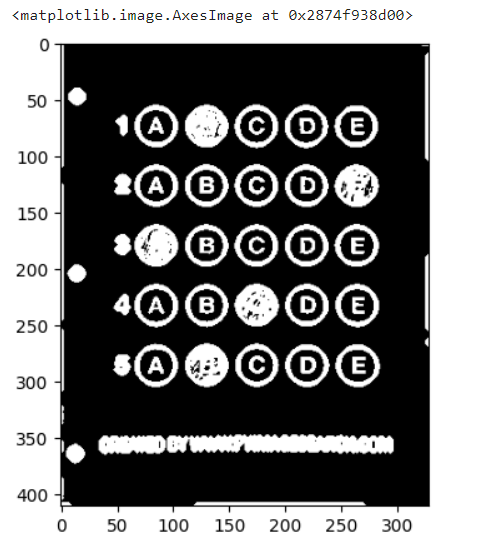 18.8-得到matplotlib图以确定圆圈的大小
对答案得到最终结果分数,如图18.9所示:
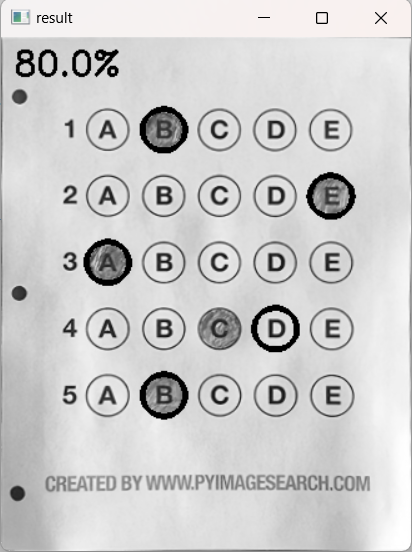 18。9-对答案得到最终结果分数
(二)文档ocr扫描识别
思路:
- 1.图片预处理
- 2.透视变换,视角拉正
- 3.tesseract进行识别
python
import cv2
import numpy as np
import matplotlib.pyplot as plt
import pytesseract
from PIL import Image
#封装显示图片的函数
def cv_show(name,img):
    cv2.imshow(name, img)
    cv2.waitKey(0)
    cv2.destroyAllWindows()
#读取图片
image=cv2.imread('./paper01.png')
#计算比例,限定高度500
image.shape
ratio=image.shape[0]/500.0
orig=image.copy()

#对图片进行统一的resize
#封装resize功能
def resize(image,width=None,height=None,inter=cv2.INTER_AREA):
    dim=None
    (h,w)=image.shape[:2]
    if width is None and height is None:
        return image
    #指定了resiaze的height
    if width is None:
        r=height/float(h)
        dim=(int(w*r),height)
    #指定了resize的width
    else:
        r=width/float(w)
        dim=(width,int(h*r))
    resized=cv2.resize(image,dim,interpolation=inter)
    return resized

#对图片进行resize
image=resize(orig,height=500)

image.shape

#图片预处理
#灰度化处理
gray=cv2.cvtColor(image,cv2.COLOR_BGR2GRAY)
#高斯平滑
gray=cv2.GaussianBlur(gray,(5,5),0)
#边缘检测
edged=cv2.Canny(gray,75,200)

cv_show('edged',edged)

#轮廓检测
cnts=cv2.findContours(edged.copy(),cv2.RETR_LIST,cv2.CHAIN_APPROX_SIMPLE)[1]
#按照面积排序
cnts=sorted(cnts,key=cv2.contourArea,reverse=True)
# cnts


image_contours=cv2.drawContours(image.copy(),cnts,-1,(0,0,255),2)
cv_show('image_contours',image_contours)

#遍历轮廓找到最大的轮廓
for c in cnts:
    #计算轮廓周长
    perimeter=cv2.arcLength(c,True)
    #多边形逼近
    approx=cv2.approxPolyDP(c,0.02*perimeter,True)

    if len(approx)==4:
        screen_cnt=approx
        break

image_contours=cv2.drawContours(image.copy(),[screen_cnt],-1,(0,0,255),2)
cv_show('image_contours',image_contours)


#进行透视变换
#透视变换要找到变换矩阵
#变换矩阵要求原图的四个点的点坐标和变换之后的四个点坐标
#现在已经找到了原图的四个点的坐标,需要找到变换后四个点的坐标
#先对获取到的4个角点坐标按照一定的顺序排序(顺时针或逆时针)
#排序功能是一个独立功能,可以封装成一个函数
def order_points(pts):
    #创建全是0的矩阵,来接收等下找出来的四个角的坐标
    rect=np.zeros((4,2),dtype='float32')
    s=pts.sum(axis=1)
    #左上x+y最小,右下x+y最大
    rect[0]=pts[np.argmin(s)]
    rect[2]=pts[np.argmax(s)]

    #右上角x-y最小,左下角x-y最大
    diff=np.diff(pts,axis=1)
    rect[1]=pts[np.argmin(diff)]
    rect[3]=pts[np.argmax(diff)]
    return rect

#把透视变换功能封装成一个函数
def four_point_transform(image,pts):
    #对输入的四个坐标排序
    rect=order_points(pts)
    (tl,tr,br,bl)=rect

    #空间中两点的距离
    widthA=np.sqrt((br[0]-bl[0])**2+(br[1]-bl[1])**2)
    widthB=np.sqrt((tr[0]-tl[0])**2+(tr[1]-tl[1])**2)
    max_width=max(int(widthA),int(widthB))

    heightA=np.sqrt((tr[0]-br[0])**2+(tr[1]-br[1])**2)
    heightB=np.sqrt((tl[0]-bl[0])**2+(tl[1]-bl[1])**2)
    max_height=max(int(heightA),int(heightB))
    #构造变换之后的对应坐标位置
    dst=np.array([
        [0,0],
        [max_width-1,0],
        [max_width-1,max_height-1],
        [0,max_height-1]
    ],dtype='float32')

    #计算变换矩阵
    M=cv2.getPerspectiveTransform(rect,dst)
    #透视变换
    warped=cv2.warpPerspective(image,M,(max_width,max_height))
    return warped


warped=four_point_transform(orig,screen_cnt.reshape(4,2)*ratio)
warped.shape

cv_show('warped',warped)


#二值处理
warped=cv2.cvtColor(warped,cv2.COLOR_BGR2GRAY)
ref=cv2.threshold(warped,100,255,cv2.THRESH_BINARY)[1]
cv_show('ref',ref)

#把处理好的图片写入图片文件
cv2.imwrite('./scan.jpg',ref)

#pytesseract要求的image不是openCV读进来的image,而是pillow这个包,即PIL,按照pip install pillow
text=pytesseract.image_to_string(Image.open('./scan.jpg'))
print(text)
运行结果:
小票原图,如图18.10所示:
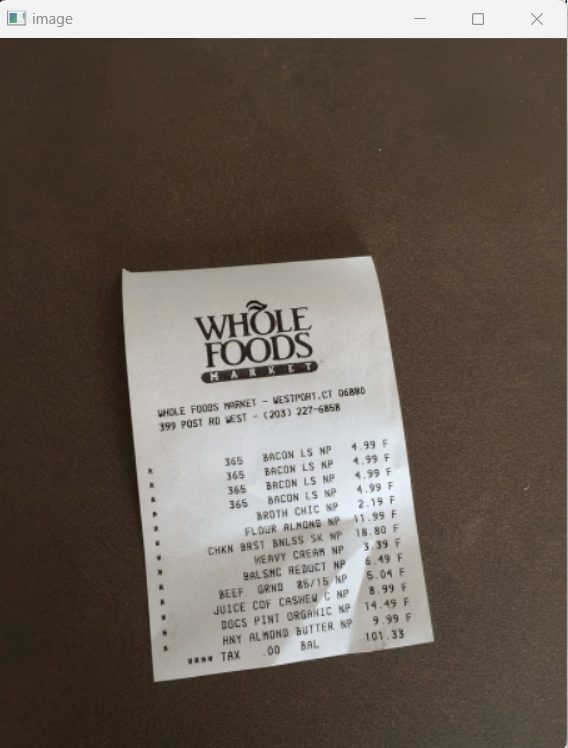 18.10-小票原图
边缘检测结果,如图18.11所示:
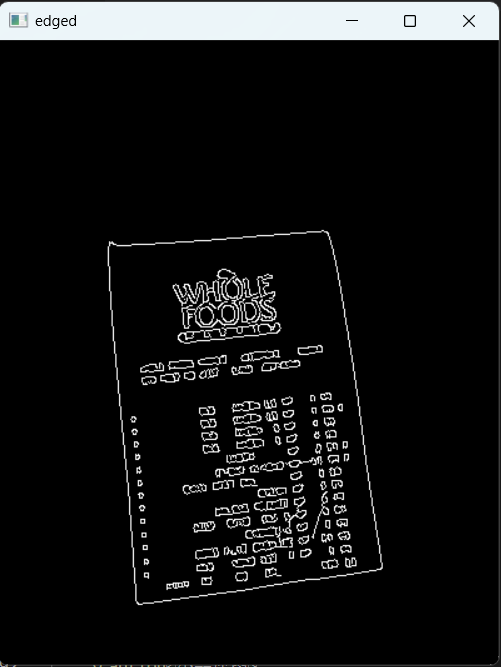 18.11-边缘检测结果
轮廓检测结果,如图18.12所示:
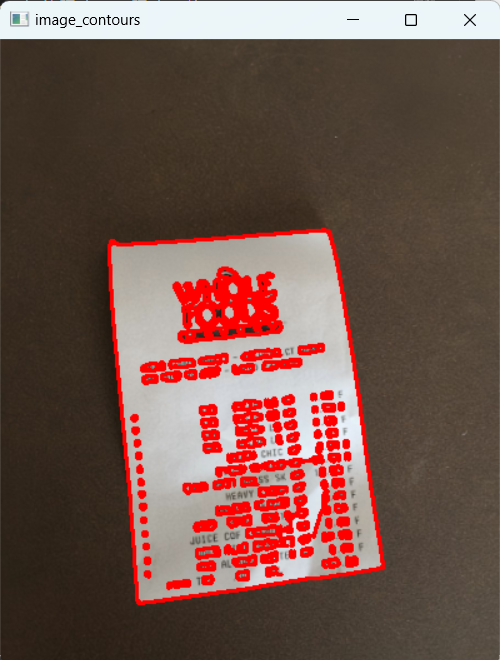 18.12-轮廓检测结果
多边形逼近结果,如图18.13所示:
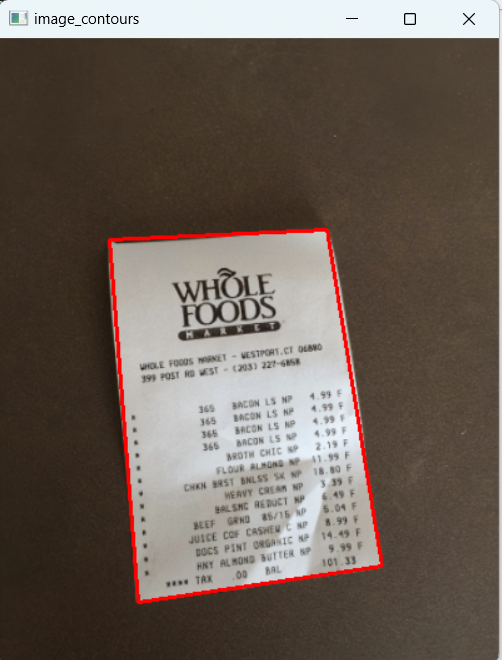 18.13-多边形逼近结果
透视变换结果,如图18.14所示:
 18.14-透视变换结果
二值化处理结果,如图18.15所示:
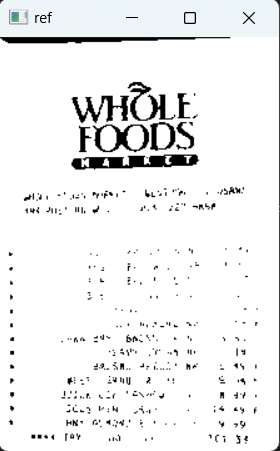 18.15-二值化处理结果
最终读出的文本(无高清图,只读出标题):
python
WHOLE

FOODS

Lt g