一、Flask 基础简介
1.1 什么是 Flask?
Flask 是一个用 Python 编写的轻量级 Web 应用框架,属于"微框架"(Micro Framework)类型。它由 Armin Ronacher 开发,于 2010 年首次发布,目前由 Pallets 组织维护。适合快速开发 Web 应用和 API。
1.2 核心特点
| 特点 | 说明 |
|---|---|
| 🎯 轻量级 | 核心代码简洁,无强制依赖 |
| 🔌 可扩展 | 通过扩展插件增强功能 |
| 📚 易学习 | API 简单直观,文档完善 |
| 🚀 快速开发 | 几分钟即可搭建 Web 应用 |
| 🌐 灵活自由 | 不强制项目结构和设计模式 |
1.3 适用场景
- ✅ 小型到中型 Web 应用
- ✅ RESTful API 服务
- ✅ 快速原型开发
- ✅ 微服务架构
- ✅ 内部工具和后台系统
Flask 的主要作用(用途)
1). 构建 Web 应用程序
- 作用说明:Flask 可以接收 HTTP 请求(如用户访问网页、提交表单),处理业务逻辑,并返回 HTML 页面、JSON 数据或其他响应内容。
- 典型场景 :
- 公司内部管理系统(如员工考勤、任务分配)
- 博客、个人网站、小型电商页面
- 数据可视化仪表盘(结合前端图表库)
✅ 举例:你用 Flask 写一个天气查询网站,用户输入城市名,后端调用天气 API,再将结果渲染成网页返回。
2). 开发 RESTful API / 后端服务
- 作用说明:Flask 非常适合构建提供数据接口的后端服务,供前端(如 Vue、React)或移动端(iOS/Android)调用。
- 优势 :轻量、启动快、结构清晰,配合
jsonify可轻松返回 JSON。 - 典型场景 :
- 移动 App 的后端接口
- 微服务架构中的独立服务模块
- 第三方系统集成(如支付回调、Webhook 接收)
✅ 举例:一个待办事项(Todo)App,前端通过
GET /api/todos获取任务列表,POST /api/todos添加新任务------这些接口都由 Flask 提供。
3). 快速原型开发与 MVP 验证
- 作用说明:由于 Flask 上手快、代码简洁,非常适合在产品早期快速搭建最小可行产品(MVP),验证想法。
- 优势:无需复杂配置,几行代码就能跑起一个可交互的服务。
- 典型场景 :
- 创业团队快速验证商业模式
- 学术项目或课程设计
- 自动化脚本的 Web 化(如定时任务控制面板)
✅ 举例:你想做一个"每日一句"推送服务,用 Flask 写个接口,每天返回一句名言,5 分钟就能上线测试。
4). 作为自动化/工具类服务的 Web 接口
- 作用说明:将原本命令行或脚本化的任务,通过 Flask 暴露为 Web 接口,便于远程触发或集成。
- 典型场景 :
- 文件批量处理服务(上传 → 处理 → 下载)
- 定时任务管理(通过 Web 界面启停爬虫)
- 系统监控告警接口
✅ 举例:公司有一个数据清洗脚本,原本需手动运行。现在用 Flask 包装成
/run-cleaning接口,运维人员点一下按钮即可触发。
5). 教学与学习 Web 开发原理
- 作用说明:Flask 代码透明、结构清晰,是学习 Web 开发底层机制(如请求-响应周期、路由、会话)的理想工具。
- 对比 Django:Django 是"全栈框架",自带 ORM、Admin、用户系统等;而 Flask 让你从零开始理解每个组件的作用。
✅ 适合学生、转行者、Python 爱好者入门 Web 开发。
1.4 技术栈组成
Python 3.8+ → Flask 2.0+ → Jinja2(模板) → Werkzeug(WSGI工具)
                    ↓
        SQLAlchemy(数据库) + Flask-Login(认证) + 其他扩展
二、核心功能介绍
2.1 核心组件

| 组件 | 作用 |
|---|---|
| Werkzeug | 处理底层 HTTP 协议(请求解析、响应生成、WSGI 兼容) |
| Jinja2 | 模板引擎,用于动态生成 HTML 页面(支持变量、循环、继承等) |
| 路由系统 | 将 URL 映射到 Python 函数(如 @app.route('/user/<id>')) |
| 扩展生态 | 通过插件支持数据库(Flask-SQLAlchemy)、登录(Flask-Login)、表单(Flask-WTF)等 |
2.2 常用扩展插件
| 扩展名称 | 功能 | 安装命令 |
|---|---|---|
| Flask-SQLAlchemy | 数据库 ORM | pip install flask-sqlalchemy |
| Flask-Login | 用户会话管理 | pip install flask-login |
| Flask-Migrate | 数据库迁移 | pip install flask-migrate |
| Flask-WTF | 表单处理 | pip install flask-wtf |
| Flask-RESTful | REST API | pip install flask-restful |
| Flask-CORS | 跨域支持 | pip install flask-cors |
| Flask-JWT-Extended | JWT 认证 | pip install flask-jwt-extended |
三、零基础入门教程
3.1 环境准备
步骤 1:安装或者打开 Python编辑器
bash
# 推荐 Python 3.8+ 版本
# 下载地址:https://www.python.org/downloads/
python --version  # 验证安装
步骤 2:创建虚拟环境(推荐)
bash
# Windows
python -m venv venv
venv\Scripts\activate
# macOS/Linux
python3 -m venv venv
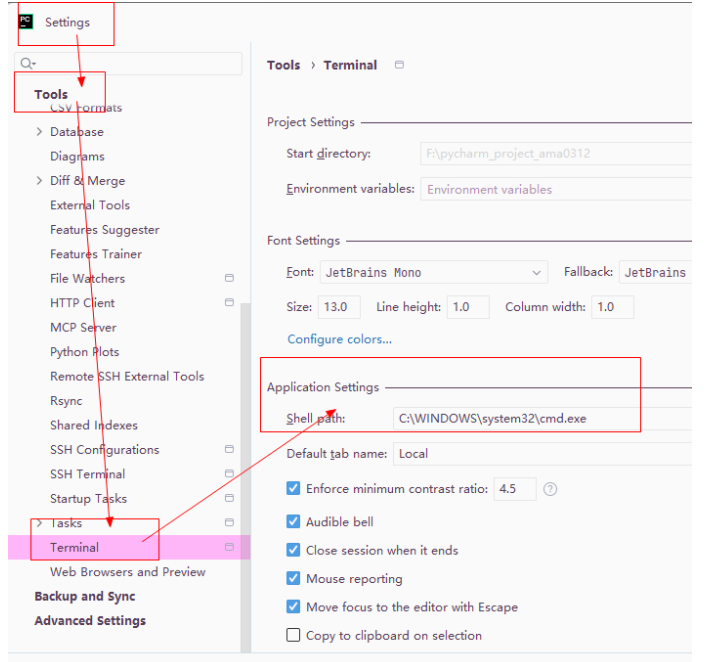
source venv/bin/activate1)、power shell →terminal:
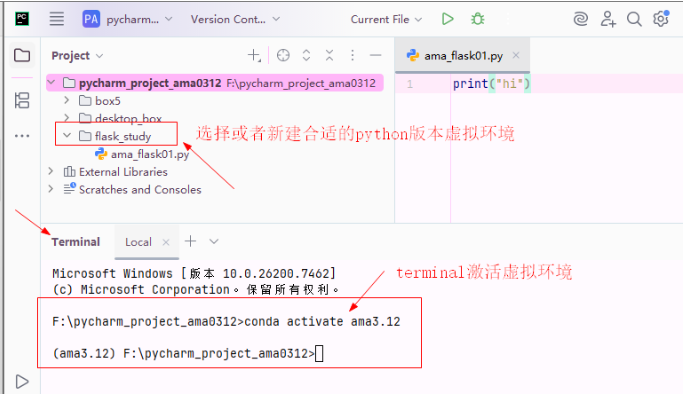
 2)、创建项目,基于python3.12版本
步骤 3:安装 Flask
1)pip install flask(方法一)
bash
pip install flask -i https://pypi.tuna.tsinghua.edu.cn/simple

# 验证安装
python -c "import flask; print(f'Flask版本:{flask.__version__}')"
2) conda install flask(方法二)
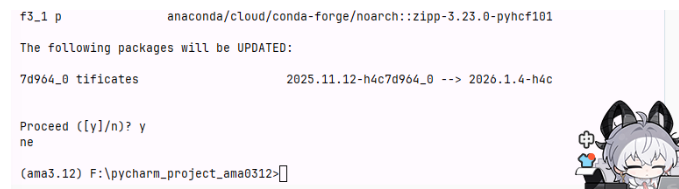
3)导出当前激活环境的完整依赖(包括 conda + pip 包)
conda env export > environment.yml或者:pip freeze > requirements.txt

3.2 第一个 Flask 应用(5 行代码)
创建 app.py 文件:
python
from flask import Flask
app = Flask(__name__)#创建了flask一个对象
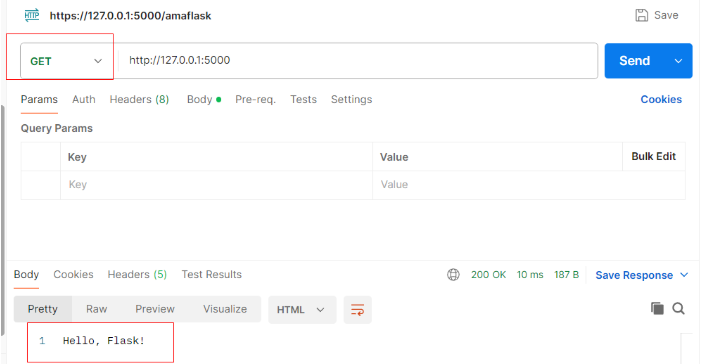
@app.route('/')
def hello():
return 'Hello, Flask!'
if __name__ == '__main__':
app.run(debug=True)运行应用
bash
python app.py访问 http://127.0.0.1:5000/ 即可看到页面
3.3 路由(Routing)详解
✅ 完整 Flask 代码(含详细注释)
python
# ==================== 导入模块 ====================
from flask import Flask, redirect, url_for, request, jsonify, render_template
# ==================== 创建应用实例 ====================
# __name__ 表示当前模块名称,Flask 用它来确定应用根目录
app = Flask(__name__)
# ==================== 1. 基本路由 ====================
# 当用户访问 http://127.0.0.1:5000/ 时,执行 index 函数
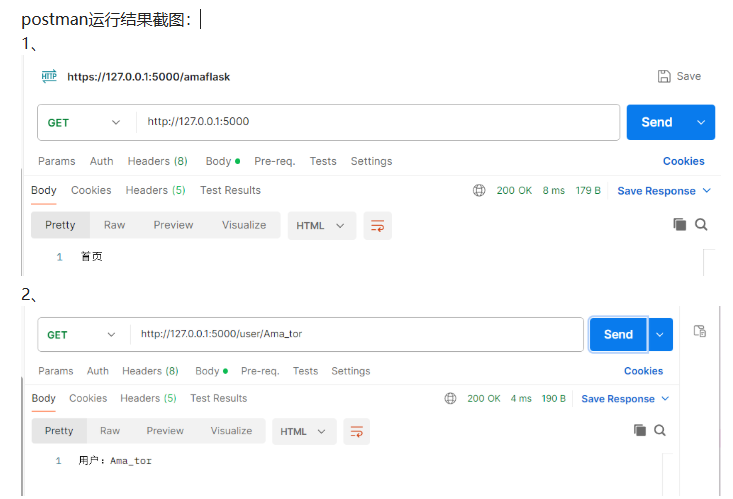
@app.route('/')
def index():
"""首页路由 - 返回简单字符串"""
return '首页'
# ==================== 2. 动态路由(变量规则) ====================
# <username> 是 URL 中的变量,可以是任意字符串
# 访问 http://127.0.0.1:5000/user/zhangsan → 显示 "用户:zhangsan"
@app.route('/user/<username>')
def show_user(username):
"""动态路由 - 捕获 URL 中的字符串参数"""
return f'用户:{username}'
# ==================== 3. 带类型的动态路由 ====================
# <int:post_id> 限制参数必须是整数,自动转换类型
# 访问 http://127.0.0.1:5000/post/123 → 显示 "文章 ID: 123"
# 访问 http://127.0.0.1:5000/post/abc → 会返回 404 错误
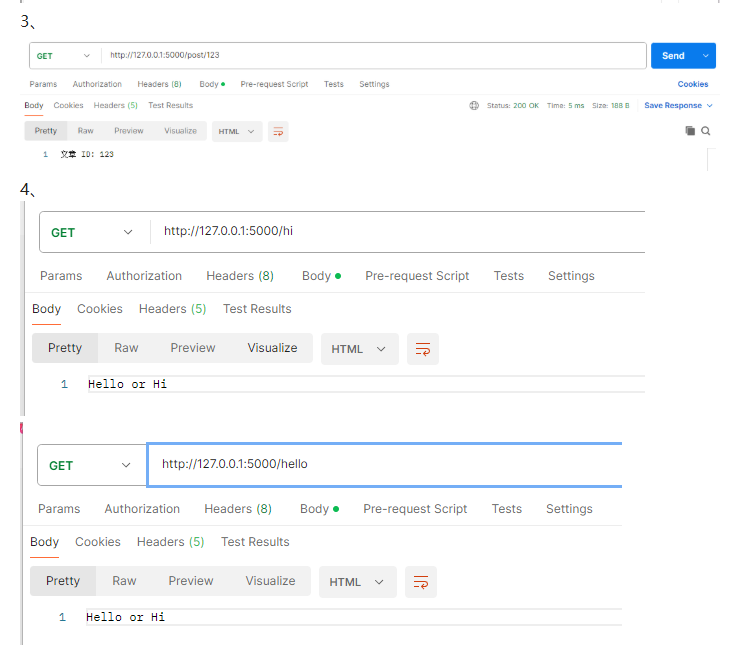
@app.route('/post/<int:post_id>')
def show_post(post_id):
"""类型转换路由 - 只接受整数参数"""
return f'文章 ID: {post_id}'
# ==================== 4. 多个路由装饰器 ====================
# 同一个函数可以响应多个不同的 URL
# 访问 /hello 或 /hi 都会执行这个函数
@app.route('/hello')
@app.route('/hi')
def hello_hi():
"""多路由绑定 - 一个函数响应多个 URL"""
return 'Hello or Hi'
# ==================== 5. 重定向 ====================
# url_for('index') 自动生成 index 函数的 URL(即 '/')
# redirect() 将用户重定向到另一个页面
# 访问 http://127.0.0.1:5000/old → 自动跳转到首页
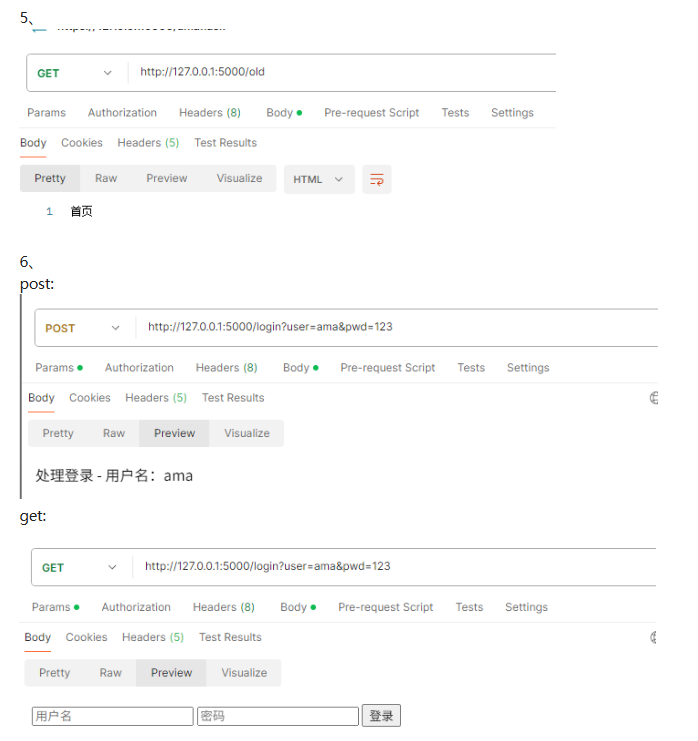
@app.route('/old')
def old_page():
"""重定向路由 - 将旧 URL 跳转到新 URL"""
return redirect(url_for('index'))
# ==================== 6. 指定 HTTP 方法 ====================
# methods 参数指定该路由接受的 HTTP 请求方法
# GET: 浏览器访问页面时默认使用
# POST: 表单提交时使用
@app.route('/login', methods=['GET', 'POST'])
def login():
"""多方法路由 - 根据请求方法执行不同逻辑"""
if request.method == 'POST':
# 处理表单提交的数据
username = request.form.get('username')
password = request.form.get('password')
return f'处理登录 - 用户名:{username}'
# GET 请求时显示登录表单
return '''
<form method="POST">
<input type="text" name="username" placeholder="用户名">
<input type="password" name="password" placeholder="密码">
<button type="submit">登录</button>
</form>
'''
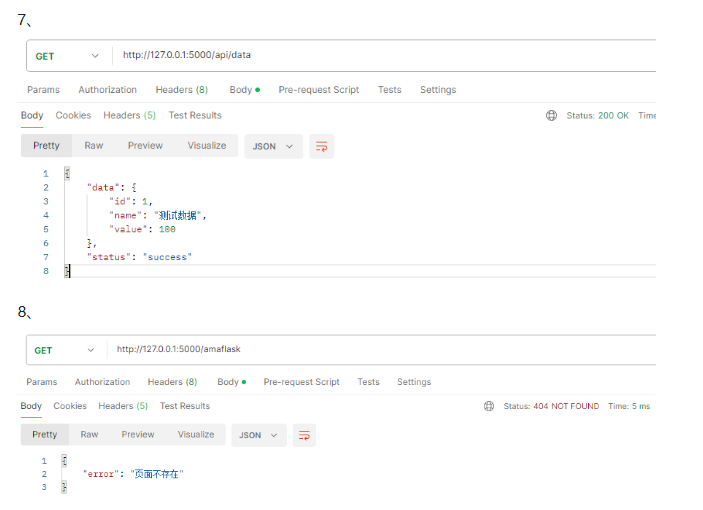
# =========== 7. 返回 JSON 数据(API 常用) =============
# 用于构建 RESTful API,返回 JSON 格式数据
@app.route('/api/data')
def get_data():
"""API 路由 - 返回 JSON 数据"""
return jsonify({
'status': 'success',
'data': {
'id': 1,
'name': '测试数据',
'value': 100
}
})
# ==================== 8. 错误处理 ====================
# 当用户访问不存在的页面时,触发 404 错误处理
@app.errorhandler(404)
def page_not_found(e):
"""404 错误处理 - 自定义页面不存在时的响应"""
return jsonify({'error': '页面不存在'}), 404
# 服务器内部错误处理
@app.errorhandler(500)
def internal_error(e):
"""500 错误处理 - 自定义服务器错误时的响应"""
return jsonify({'error': '服务器内部错误'}), 500
# ==================== 9. 启动服务器 ====================
# 只有直接运行此文件时才启动服务器(被导入时不启动)
# debug=True 开启调试模式:代码修改自动重启 + 详细错误信息
if __name__ == '__main__':
"""应用启动入口"""
app.run(
debug=True, # 调试模式(生产环境设为 False)
host='0.0.0.0', # 监听所有网络接口(本地测试可用 127.0.0.1)
port=5000 # 端口号(默认 5000)
)📋 代码功能对照表
| 功能 | URL 示例 | 说明 |
|---|---|---|
| 基本路由 | / |
返回固定字符串 |
| 动态路由 | /user/zhangsan |
捕获字符串参数 |
| 类型路由 | /post/123 |
只接受整数参数 |
| 多路由 | /hello 或 /hi |
一个函数响应多个 URL |
| 重定向 | /old |
自动跳转到首页 |
| 表单处理 | /login |
GET 显示表单,POST 处理数据 |
| API 接口 | /api/data |
返回 JSON 数据 |
| 错误处理 | 任意不存在页面 | 自定义 404/500 响应 |
🚀 运行方法
bash
# 1. 保存文件为 app.py
# 2. 在终端运行
python app.py

# 3. 访问测试
http://127.0.0.1:5000/           # 首页
http://127.0.0.1:5000/user/张三   # 动态路由
http://127.0.0.1:5000/post/456   # 类型路由
http://127.0.0.1:5000/login      # 登录表单
http://127.0.0.1:5000/api/data   # JSON 数据
⚠️ 注意事项
| 问题 | 解决方案 |
|---|---|
request 未定义 |
从 flask 导入 request |
__name__ 格式错误 |
确保是双下划线 __name__ |
| 端口被占用 | 修改 port=5001 等其他端口 |
| 生产环境 | 设置 debug=False,使用 Gunicorn 部署 |
postman运行结果截图:
9、服务器内部错误
"服务器内部错误"通常指的是 HTTP 500 Internal Server Error,这是 Flask 应用运行时出错的常见提示。
🔍 Flask 中 500 错误的常见原因
1️⃣ 代码逻辑错误(最常见)
python
# 例如:变量未定义、类型错误、属性错误等
user = request.form.get('user')
print(user.upper())  # 如果 user 是 None,会报 AttributeError
2️⃣ 模板文件找不到
python
return render_template('login.html') # 如果 templates/login.html 不存在,会 500 错误3️⃣ 视图函数没有 return
python
@app.route('/login')
def login():
    user = request.args.get('user')
    # 忘记 return 了!会导致 500 错误
4️⃣ 表单字段名不匹配 + 没有做空值判断
python
# 前端 name="username",后端取 'user'
user = request.form.get('user')  # 得到 None
if len(user) > 0:  # TypeError: object of type 'NoneType' has no len()
    ...
5️⃣ 调试模式未开启,看不到具体错误
python
app.run(debug=True) # 开启后才能看到详细错误堆栈✅ 排查步骤
第 1 步:开启 debug 模式
python
if __name__ == '__main__':
    app.run(debug=True)  # 这样出错时会显示详细 traceback
第 2 步:查看控制台/终端的错误信息
Flask 会在运行控制台输出详细的错误堆栈,类似:
Traceback (most recent call last):
  File "v2.py", line 15, in login
    ...
TypeError: 'NoneType' object is not subscriptable
第 3 步:检查视图函数是否有 return
确保每个分支都有返回值:
python
@app.route('/login', methods=['GET', 'POST'])
def login():
    if request.method == 'POST':
        user = request.form.get('user')
        return f'登录成功:{user}'

    return '<form>...</form>'  # GET 请求也要 return
第 4 步:检查模板路径
如果使用 render_template,确保文件结构正确:
项目文件夹/
├── v2.py
└── templates/
    └── login.html
3.4 模板渲染(Jinja2)
项目结构
my_flask_app/
├── app.py
├── templates/          # 模板文件夹
│   ├── base.html
│   ├── index.html
│   └── user.html
└── static/             # 静态文件
    ├── css/
    ├── js/
    └── images/
模板文件示例
这个示例实现了一个带有基础布局、继承机制和静态资源加载的博客/用户展示系统。
1. app.py (主程序入口)
负责路由逻辑、数据模拟和模板渲染。
python
from flask import Flask, render_template, url_for, abort

app = Flask(__name__)

# 模拟数据库数据
users = [
    {'id': 1, 'username': '张三', 'bio': 'Python 爱好者,喜欢 Flask'},
    {'id': 2, 'username': '李四', 'bio': '前端开发工程师,精通 Vue'},
    {'id': 3, 'username': '王五', 'bio': '数据科学家,专注于 AI'},
]

@app.route('/')
def index():
    """首页:展示用户列表"""
    return render_template('index.html', users=users, title='首页')

@app.route('/user/<int:user_id>')
def user_profile(user_id):
    """用户详情页:展示特定用户信息"""
    # 查找用户,如果没找到则返回 404
    user = next((u for u in users if u['id'] == user_id), None)

    if user is None:
        abort(404)

    return render_template('user.html', user=user, title=f'{user["username"]}的主页')

# 错误处理页面
@app.errorhandler(404)
def page_not_found(e):
    return render_template('base.html', title='404 错误', error_msg='哎呀,页面找不到了!'), 404

if __name__ == '__main__':
    app.run(debug=True)
2. templates/base.html (基础模板)
这是所有页面的"骨架"。其他页面通过 {% extends %} 继承它,实现导航栏和页脚的统一。
html
<!DOCTYPE html>
<html lang="zh-CN">
<head>
<meta charset="UTF-8">
<meta name="viewport" content="width=device-width, initial-scale=1.0">
<title>{{ title }} - Flask 示例</title>
<!-- 引入静态 CSS 文件 -->
<!-- url_for('static', ...) 会自动生成 /static/css/style.css 路径 -->
<link rel="stylesheet" href="{{ url_for('static', filename='css/style.css') }}">
</head>
<body>
<!-- 导航栏 -->
<nav class="navbar">
<div class="container">
<a href="{{ url_for('index') }}" class="logo">MyFlaskApp</a>
<ul class="nav-links">
<li><a href="{{ url_for('index') }}">首页</a></li>
<li><a href="#">关于</a></li>
<li><a href="#">联系</a></li>
</ul>
</div>
</nav>
<!-- 主要内容区域 -->
<!-- 子模板将在这里注入内容 -->
<main class="container">
{% if error_msg %}
<div class="alert alert-error">{{ error_msg }}</div>
{% else %}
{% block content %}{% endblock %}
{% endif %}
</main>
<!-- 页脚 -->
<footer>
<div class="container">
<p>© 2026 MyFlaskApp. Built with Flask & Jinja2.</p>
</div>
</footer>
<!-- 引入静态 JS 文件 -->
<script src="{{ url_for('static', filename='js/main.js') }}"></script>
</body>
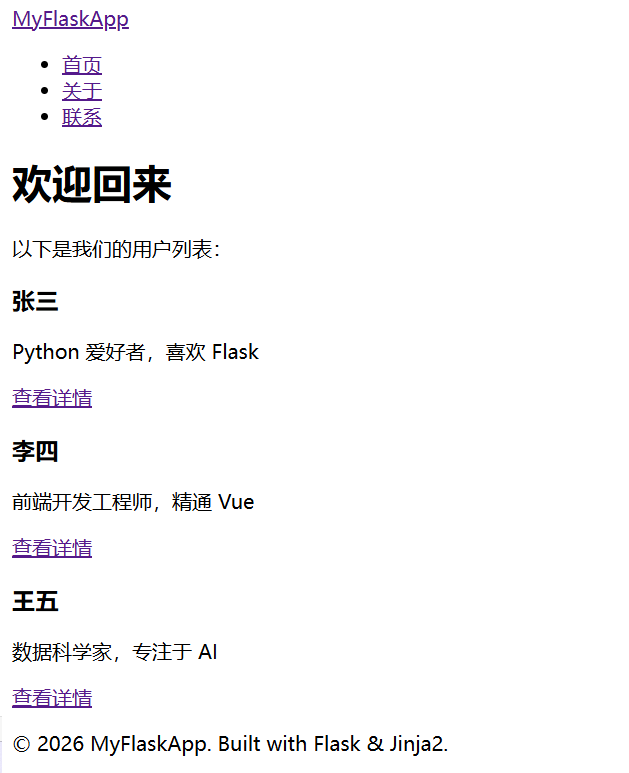
</html>3. templates/index.html (首页模板)
继承自 base.html,展示用户列表。
html
{% extends 'base.html' %}
<!-- 重写 title 块 -->
{% block title %}{{ title }}{% endblock %}
<!-- 重写 content 块,填入具体内容 -->
{% block content %}
<div class="page-header">
<h1>欢迎回来</h1>
<p>以下是我们的用户列表:</p>
</div>
<div class="user-grid">
{% for user in users %}
<div class="user-card">
<h3>{{ user.username }}</h3>
<p class="bio">{{ user.bio }}</p>
<!-- 动态生成用户详情页链接 -->
<a href="{{ url_for('user_profile', user_id=user.id) }}" class="btn">查看详情</a>
</div>
{% else %}
<p>暂无用户数据。</p>
{% endfor %}
</div>
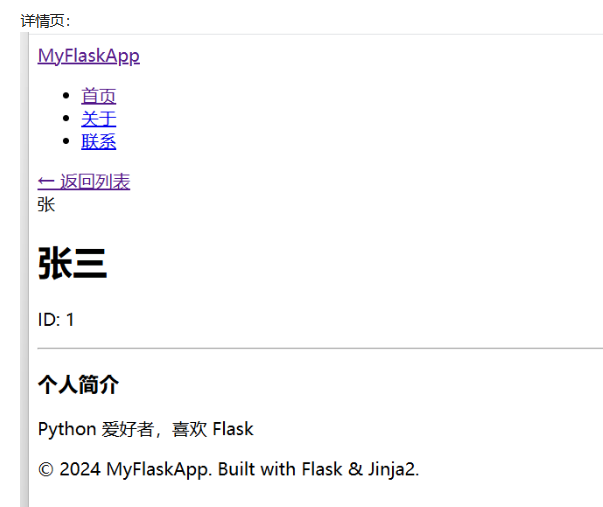
{% endblock %}4. templates/user.html (用户详情页模板)
继承自 base.html,展示单个用户的详细信息。
html
{% extends 'base.html' %}
{% block content %}
<div class="profile-container">
<a href="{{ url_for('index') }}" class="back-link">← 返回列表</a>
<div class="profile-card">
<!-- 这里可以使用静态图片,假设 images 文件夹下有 avatar.png -->
<div class="avatar-placeholder">
{{ user.username[0] }}
</div>
<h1>{{ user.username }}</h1>
<p class="user-id">ID: {{ user.id }}</p>
<hr>
<div class="bio-section">
<h3>个人简介</h3>
<p>{{ user.bio }}</p>
</div>
</div>
</div>
{% endblock %}5. static/css/style.css (样式文件)
让页面看起来更美观。
css
/* 全局重置 */
* {
    margin: 0;
    padding: 0;
    box-sizing: border-box;
}

body {
    font-family: 'Segoe UI', Tahoma, Geneva, Verdana, sans-serif;
    line-height: 1.6;
    background-color: #f4f4f9;
    color: #333;
    display: flex;
    flex-direction: column;
    min-height: 100vh;
}

.container {
    width: 90%;
    max-width: 1000px;
    margin: 0 auto;
    padding: 0 20px;
}

/* 导航栏 */
.navbar {
    background-color: #2c3e50;
    color: white;
    padding: 1rem 0;
    margin-bottom: 2rem;
}

.navbar .container {
    display: flex;
    justify-content: space-between;
    align-items: center;
}

.logo {
    color: white;
    text-decoration: none;
    font-size: 1.5rem;
    font-weight: bold;
}

.nav-links {
    list-style: none;
    display: flex;
    gap: 20px;
}

.nav-links a {
    color: #ecf0f1;
    text-decoration: none;
}

.nav-links a:hover {
    text-decoration: underline;
}

/* 主要内容 */
main {
    flex: 1; /* 让 footer 沉底 */
    padding: 20px 0;
}

.page-header {
    margin-bottom: 2rem;
}

/* 用户卡片网格 */
.user-grid {
    display: grid;
    grid-template-columns: repeat(auto-fill, minmax(250px, 1fr));
    gap: 20px;
}

.user-card {
    background: white;
    padding: 20px;
    border-radius: 8px;
    box-shadow: 0 2px 5px rgba(0,0,0,0.1);
    text-align: center;
}

.user-card h3 {
    margin-bottom: 10px;
    color: #2c3e50;
}

.bio {
    color: #7f8c8d;
    font-size: 0.9rem;
    margin-bottom: 15px;
}

.btn {
    display: inline-block;
    background: #3498db;
    color: white;
    padding: 8px 15px;
    text-decoration: none;
    border-radius: 4px;
    transition: background 0.3s;
}

.btn:hover {
    background: #2980b9;
}

/* 详情页样式 */
.profile-container {
    background: white;
    padding: 30px;
    border-radius: 8px;
    box-shadow: 0 2px 10px rgba(0,0,0,0.1);
}

.back-link {
    display: inline-block;
    margin-bottom: 20px;
    color: #7f8c8d;
    text-decoration: none;
}

.avatar-placeholder {
    width: 80px;
    height: 80px;
    background: #2c3e50;
    color: white;
    border-radius: 50%;
    display: flex;
    align-items: center;
    justify-content: center;
    font-size: 2rem;
    margin: 0 auto 20px;
}

.profile-card {
    text-align: center;
}

.alert-error {
    background: #ffebee;
    color: #c62828;
    padding: 15px;
    border-radius: 4px;
    text-align: center;
}

/* 页脚 */
footer {
    background: #2c3e50;
    color: #bdc3c7;
    text-align: center;
    padding: 1.5rem 0;
    margin-top: auto;
}
6. static/js/main.js (脚本文件)
简单的交互脚本,用于验证页面是否加载成功。
javascript
document.addEventListener('DOMContentLoaded', function() {
    console.log('Flask 应用已加载!');
    console.log('当前页面标题:', document.title);

    // 简单的交互:给所有按钮添加点击效果
    const buttons = document.querySelectorAll('.btn');
    buttons.forEach(btn => {
        btn.addEventListener('click', function() {
            console.log('用户点击了查看按钮');
        });
    });
});
7. static/images/ (图片文件夹)
注意:这是一个文件夹,不需要代码文件。
你可以随便放一张图片进去,例如 avatar.png,然后在 user.html 中通过 <img src="{``{ url_for('static', filename='images/avatar.png') }}" alt="头像"> 来使用它。目前代码中使用的是 CSS 生成的圆形头像占位符,所以即使文件夹是空的,程序也能正常运行。
run ▶ app.py
访问浏览器 :
打开 http://127.0.0.1:5000/ 即可看到效果。点击用户卡片可以进入详情页,体验模板继承和动态路由的功能。