一.Thymeleaf的定义
Thymeleaf 是一个跟 Velocity、FreeMarker 类似的模板引擎,它可以完全替代 JSP 。
从代码层次上讲:Thymeleaf是一个java类库,它是一个xml/xhtml/html5的模板引擎,可以作为mvc的web应用的view层。
Thymeleaf的主要作用是把model中的数据渲染到html中,因此其语法主要是如何解析model中的数据。
我们把HTML页面放在classpath:/templates/,thymeleaf就能自动渲染。
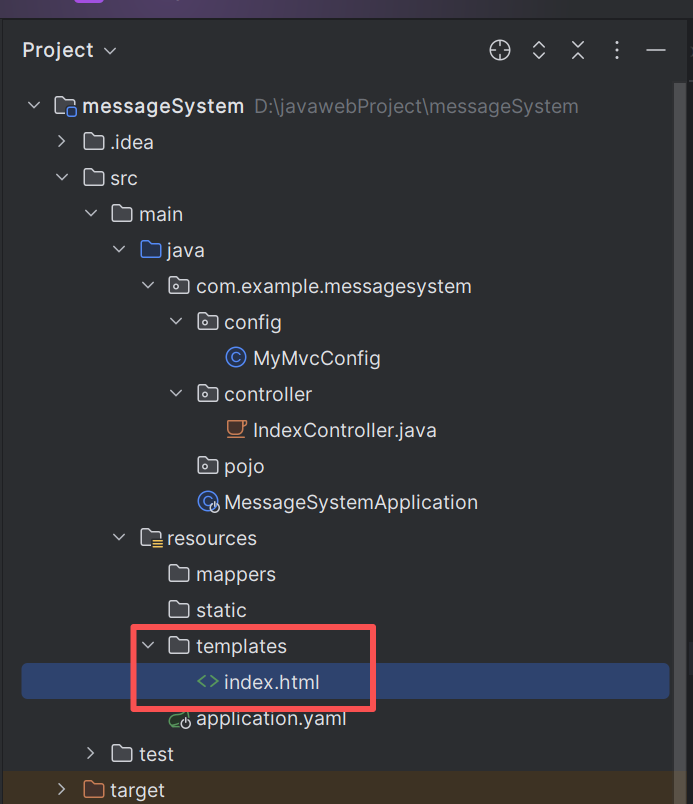
在开启thymleaf学习之前需要设置thymleaf全局配置
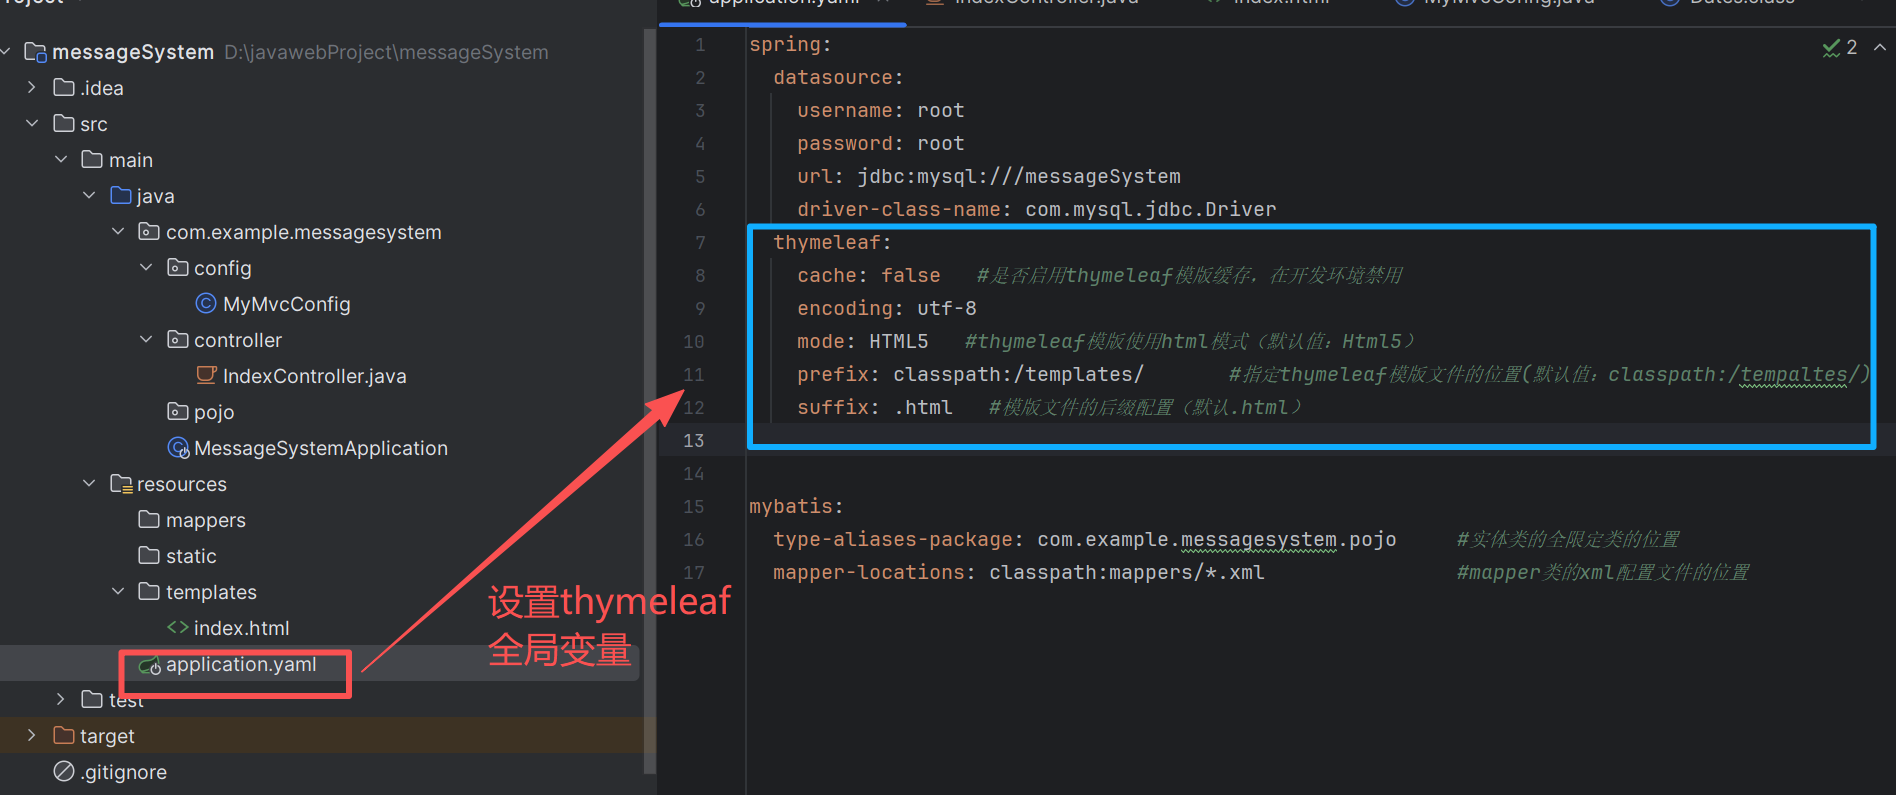
  thymeleaf:
    cache: false   #是否启用thymeleaf模版缓存,在开发环境禁用
    encoding: utf-8
    mode: HTML5   #thymeleaf模版使用html模式(默认值:Html5)
    prefix: classpath:/templates/       #指定thymeleaf模版文件的位置(默认值:classpath:/tempaltes/)
    suffix: .html   #模版文件的后缀配置(默认.html)
二.Thymeleaf语法
Thymeleaf 的语法是基于 HTML 标签属性的形式,使用 th: 前缀表示 Thymeleaf 特定的属性。基本语法形式包括:
**1.HTML 命名空间声明:**在 HTML 文档中声明 Thymeleaf 的命名空间,这是使用 Thymeleaf 标签的前提条件。
**2.基本标签属性:**Thymeleaf 提供了一系列标准标签,用于处理各种常见的模板需求。
3.表达式语法:Thymeleaf 支持多种表达式类型,包括变量表达式、消息表达式、链接 URL 表达式和片段表达式。
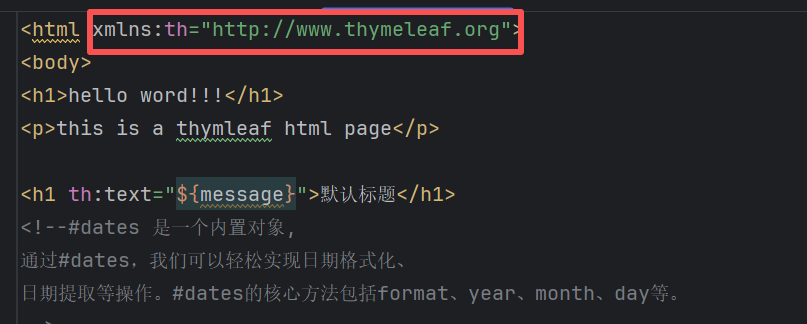
2.1 thymeleaf命名空间声明
在使用Thymeleaf时页面首先要引入名称空间:xmlns:th="http://www.thymeleaf.org"
2.2 基本标签的属性
Thymeleaf 的功能主要通过 th:* 属性来实现,它们会替换掉 HTML 原生属性的值。
常用的标签属性如下:
| 属性 | 作用 | 示例 |
|---|---|---|
th:text |
设置元素的文本内容,会转义 HTML 标签,防止 XSS 攻击。 | <p th:text="${note}">静态文本</p> |
th:utext |
设置元素的文本内容,但不转义 HTML 标签,会渲染为 HTML。需谨慎使用。 | <p th:utext="${htmlContent}"></p> |
th:value |
设置 input 等表单元素的 value 属性。 |
<input type="text" th:value="${user.name}"> |
th:href |
设置超链接的 href 属性,通常与 @{} 配合。 |
<a th:href="@{/news/detail(id=${news.id})}">详情</a> |
th:src |
设置图片等资源的 src 属性。 |
<img th:src="@{/images/logo.png}" alt="Logo"> |
th:action |
设置表单的 action 提交地址。 |
<form th:action="@{/user/update}" th:object="${user}"> |
th:each |
循环遍历列表或数组,渲染多个元素。 | <tr th:each="product : ${products}"> <td th:text="${product.name}"> |
th:if |
条件判断,当表达式结果为真时渲染该元素。 | <div th:if="${user.isAdmin()}"> 管理员面板 </div> |
th:unless |
与 th:if 相反,条件为假时渲染。 |
<p th:unless="${loggedIn}">请先登录</p> |
th:switch / th:case |
多条件分支语句。 | <div th:switch="${user.role}"> <p th:case="'admin'">管理员</p> </div> |
th:object |
指定一个对象,用于在其内部配合 *{...} 使用。 |
<form th:object="${blogger}"> <input th:value="*{pass}" /> </form> |
案例:
在controller中绑定数据:
@Controller
public class ThController {
    @RequestMapping("/success")
    public String success(Model model){
        //1.绑定一个字符串
        model.addAttribute("msg","this is a <b>String</b>");
        model.addAttribute("msgUtext","this is a <b>String</b>");

        //2.绑定一个pojo对象--先去创建一个Emp  ,属性name,age
        Emp emp=new Emp("张三",20);
        model.addAttribute("emp",emp);

        //3.绑定一个list
        List list=new ArrayList();
        list.add(emp);
        list.add(new Emp("李四",20));
        list.add(new Emp("王五",20));
        model.addAttribute("emps",list);

        //4.绑定一个map
        Map<String,Object> map=new HashMap<>();
        map.put("Boss",new Emp("boss",30));
        model.addAttribute("map",map);

        //前缀:classpath:/templates/ success  后缀.html
        return "success";
    }
}
1. 内容设置标签
th:text:用于设置标签的文本内容
<p th:text="${msg}">默认文本</p>
th:utext :与 th:text 类似,但不会对 HTML 特殊字符进行转义。
<p th:utext="${msgUtext}">默认文本</p>
th:value 设置 input 等表单元素的 value 属性。
<input type="text" th:value="${user.name}">
案例测试:
<!DOCTYPE html>
<html lang="en" xmlns:th="http://www.thymeleaf.org">
<head>
    <meta charset="UTF-8">
    <title>Title</title>
</head>
<body>
<h1>this is success.html</h1>

<!--th:text 设置当前元素的文本内容,常用,优先级不高-->
<p th:text="${msg}"></p>
<p th:utext="${msgUtext}"></p>

<!--th:value 设置当前元素的value值,常用,优先级仅比th:text高-->
姓名:<input type="text" th:value="${emp.name}" />
年龄:<input type="text" th:value="${emp.age}" /
</body>
</html>
2.条件标签
th:if:根据条件为真时,决定显示或隐藏内容
<!--th:if 条件判断,类似的有th:switch,th:case,优先级仅次于th:each,-->
<p th:text="{map.Boss.name}" th:if="{map.Boss.age gt 20}"></p>
其中关系运算:
gt:great than(大于)
ge:great equal(大于等于)
eq:equal(等于)
lt:less than(小于)
le:less equal(小于等于)
ne:not equal(不等于)
th:unless :与 th:if 相反,当条件为假时显示内容。
<div th:unless="${isAdmin}">普通用户功能</div>
th:switch 和 th:case:实现多条件分支。
<div th:switch="${21}">
<div th:case="16">我今年16岁</div>
<div th:case="17">我今年17岁</div>
<div th:case="18">我今年18岁</div>
<div th:case="*">我年年18岁</div>
</div>
案例测试:
<!DOCTYPE html>
<html lang="en" xmlns:th="http://www.thymeleaf.org">
<head>
    <meta charset="UTF-8">
    <title>Title</title>
</head>
<body>
<h1>this is success.html</h1>

<!--th:if 条件判断 条件为真,显示-->
<p th:text="${map.Boss.name}" th:if="${map.Boss.age gt 20}"></p>

<!--th:if 条件判断 条件为假,显示-->
<p th:text="${map.Boss.name}" th:unless="${map.Boss.age lt 20}"></p>

<!--th:switch 多条件选择-->
<div th:switch="${21}">
    <div th:case="16">我今年16岁</div>
    <div th:case="17">我今年17岁</div>
    <div th:case="18">我今年18岁</div>
    <div th:case="*">我年年18岁</div>
</div>
</body>
</html>
3. 循环标签
Thymeleaf使用th:each来实现循环遍历。
语法:
th:each="e,eState : ${emps}"
其中e为循环的每一项,eState是下标属性(可省略),eState属性包括:
index:列表状态的下标,从0开始;
count:列表当前迭代序号,从1开始;
size:列表状态,列表数据条数;
current:列表状态,当前数据对象
even:列表状态,是否为奇数,boolean类型
odd:列表状态,是否为偶数,boolean类型
first:列表状态,是否为第一条,boolean类型
last:列表状态,是否为最后一条,boolean类型
Controller页面代码:后端传回数据 model.addAttribute("emps", list);
@Controller
public class ThController {
    @RequestMapping("/success")
    public String success(Model model){

        //2.绑定一个pojo对象--先去创建一个Emp  ,属性name,age
        Emp emp=new Emp("张三",20);

        //3.绑定一个list
        List list=new ArrayList();
        list.add(emp);
        list.add(new Emp("李四",20));
        list.add(new Emp("王五",20));
        model.addAttribute("emps",list);

        //4.绑定一个map
        Map<String,Object> map=new HashMap<>();
        map.put("Boss",new Emp("boss",30));
        model.addAttribute("map",map);

        //前缀:classpath:/templates/ success  后缀.html
        return "success";
    }
}
success.html页面如下
<h3>需求:输出emp信息</h3>
<table border="1" cellspacing="0">
    <tr>
        <th>姓名</th>
        <th>年龄</th>
    </tr>
    <tr th:each="emp, iterStat:${emps}">
        <td th:text="${emp.name}"></td>
        <td th:text="${emp.age}"></td>
    </tr>
</table>

<h3>需求:输出用户信息,声明状态对象</h3>
<table border="1" cellspacing="0">
    <tr>
        <td>当前迭代索引</td>
        <td>当前迭代序号</td>
        <td>姓名</td>
        <td>年龄</td>
    </tr>
    <tr th:each="emp, iter:${emps}">
        <td th:text="${iter.index}"></td>
        <td th:text="${iter.count}"></td>

        <td th:text="${emp.name}"></td>
        <td th:text="${emp.age}"></td>
    </tr>
</table>
4.表单标签
th:action:设置表单提交的 URL。
<form th:action="@{/submit}" method="post">
th:method:设置表单提交的方法。
<form th:method="post">
th:object+ th:field 来构建表单,其中th:object="${user}" 指定绑定对象,使用 th:field="*{usrname}"用于绑定表单字段到模型对象的属性,它会自动生成对应的 name 和 value,复选框还会根据布尔值自动决定是否选中。
th:field="*{username}" 会自动生成 name="username" 和 value="..."
<!-- 表单开始:绑定 User 对象,提交地址为 /submitForm-->
<form th:action="@{/submitForm}" th:object="${user}" method="post">
    <table border="1">
        <tr>
            <td>用户名:</td>
            <td>
                <input type="text" th:field="*{username}" />
            </td>
        </tr>
        <tr>
            <td>密码:</td>
            <td>
                <input type="password" th:field="*{password}" />
            </td>
        </tr>
   </table>
</form>
案例:
实体类 :首先定义一个简单的用户实体 User,用于承载表单数据:
package com.example.thymeleafdemo.pojo;
import lombok.Data;
import org.springframework.stereotype.Component;

@Data
@Component
public class User {
    private String username;
    private String password;
    private String email;
    private Integer age;
    private boolean acceptTerms;   // 是否同意条款

    // 必须提供无参构造方法(Thymeleaf 绑定需要)
    public User() {}

}
后端 Controller
编写控制器,包含两个方法:
-
GET /register:展示注册表单,并将一个空的User对象传给模板用于绑定。 -
POST /register:处理表单提交,接收绑定了数据的User对象,并做简单校验。package com.example.thymeleafdemo.controller;
import com.example.thymeleafdemo.pojo.User;
import org.springframework.stereotype.Controller;
import org.springframework.ui.Model;
import org.springframework.web.bind.annotation.GetMapping;
import org.springframework.web.bind.annotation.ModelAttribute;
import org.springframework.web.bind.annotation.PostMapping;
import javax.servlet.http.HttpServletRequest;//GET /register:展示注册表单,并将一个空的 User 对象传给模板用于绑定。
//POST /register:处理表单提交,接收绑定了数据的 User 对象,并做简单校验。
@Controller
public class RegisterController {
// 显示注册表单
@GetMapping("/register")
public String showForm(Model model) {
// 必须传入一个表单支持对象,用于 th:object 绑定
model.addAttribute("user", new User());
return "register"; // 对应 register.html 模板
}// 处理表单提交 @PostMapping("/submitForm") public String submitForm(@ModelAttribute User user, Model model, HttpServletRequest request) { // 这里可以添加业务逻辑,比如保存到数据库 // 简单校验示例:如果用户名为空则返回错误 System.out.println(user.getUsername()); System.out.println(user.getPassword()); System.out.println("request "+request.getParameter("username")); if (user.getUsername() == null || user.getUsername().isEmpty()) { model.addAttribute("error", "用户名不能为空!"); return "register"; } // 成功后将用户数据回显到结果页面(或重定向到成功页) model.addAttribute("user", user); return "register-success"; }}
前端表单页面(register.html)
在
src/main/resources/templates/register.html中编写 Thymeleaf 表单。关键点:
使用
th:object="${user}"指定表单绑定的后端对象。使用
th:field="*{属性名}"自动绑定输入控件的name、value,并支持回显。使用
th:action指定提交地址
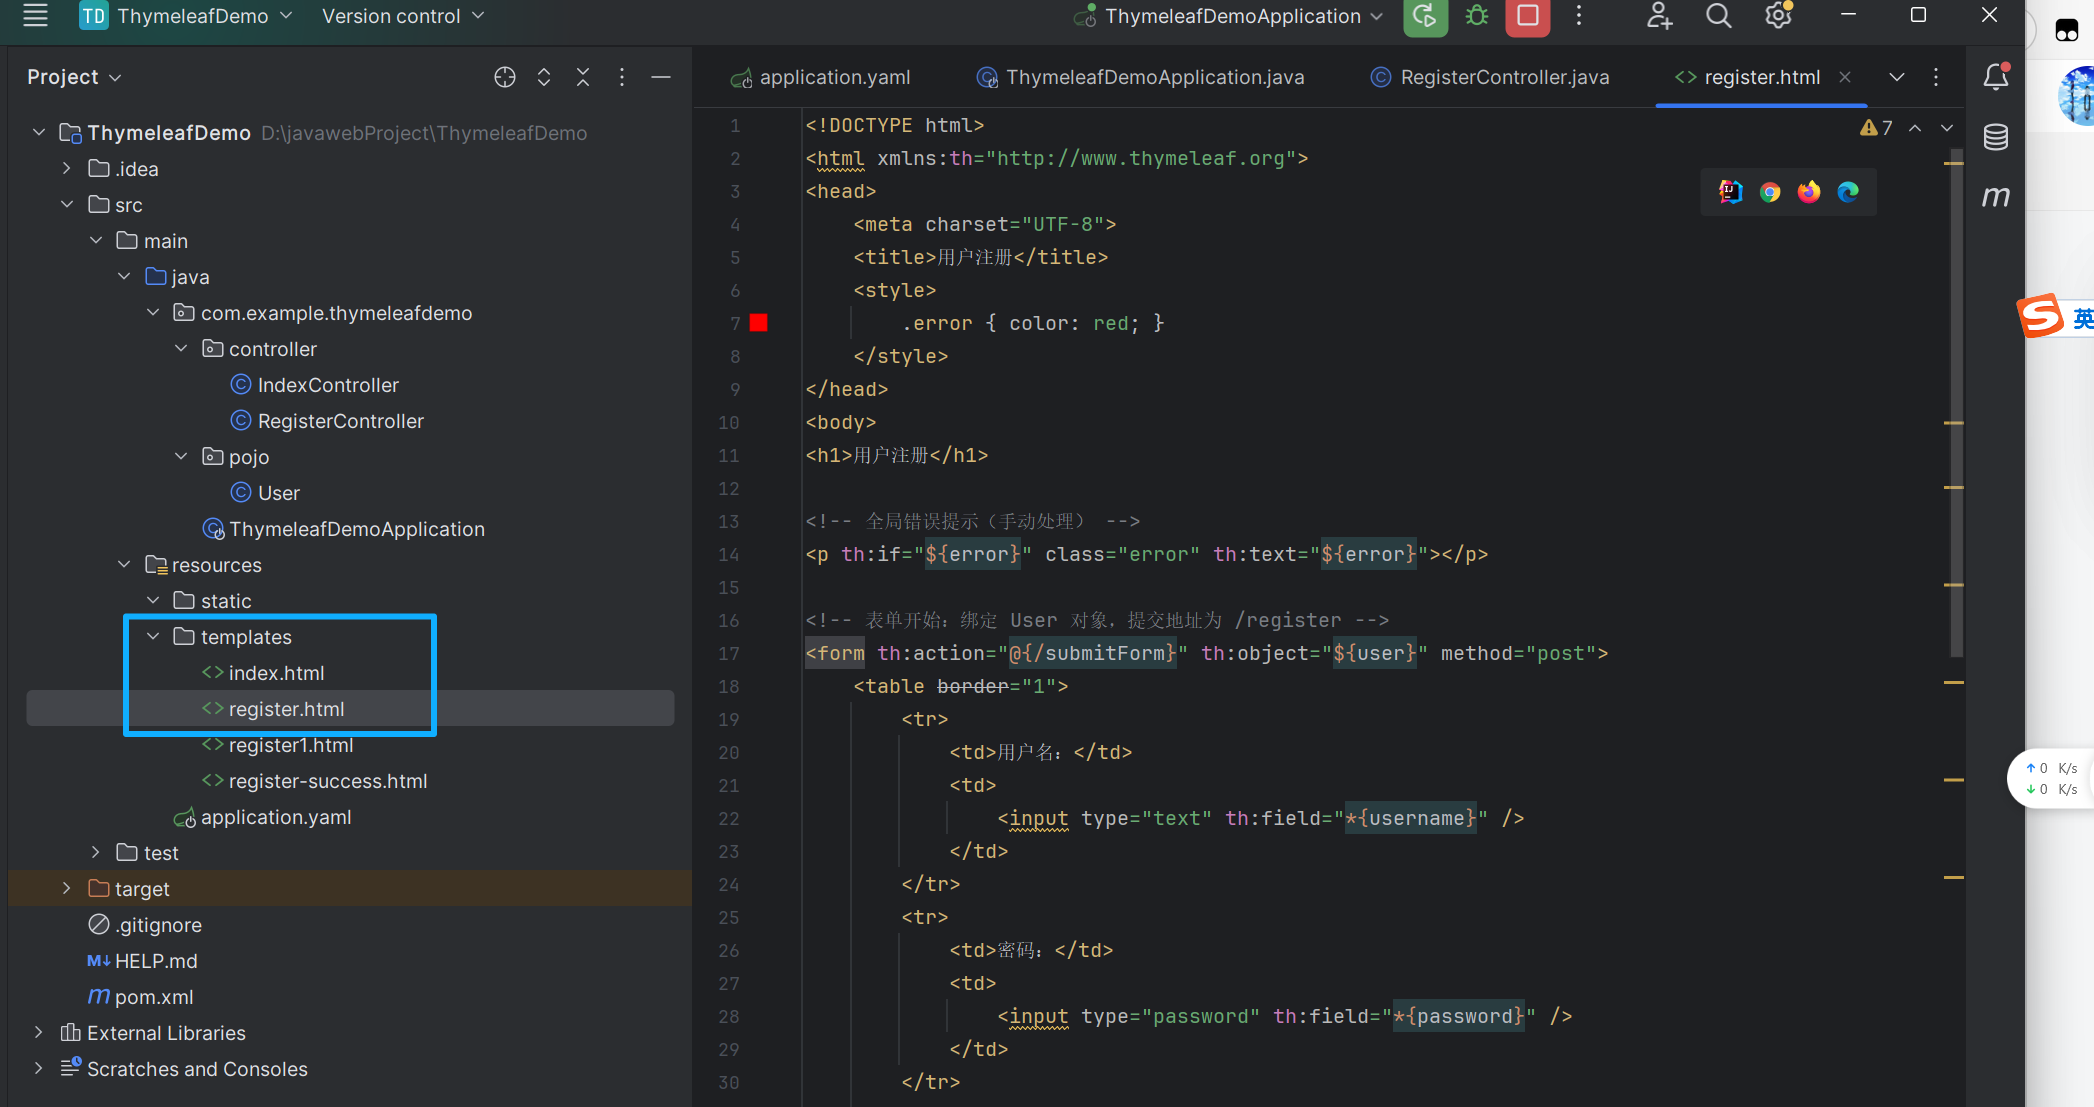
代码如下
<!DOCTYPE html>
<html xmlns:th="http://www.thymeleaf.org">
<head>
    <meta charset="UTF-8">
    <title>用户注册</title>
    <style>
        .error { color: red; }
    </style>
</head>
<body>
<h1>用户注册</h1>

<!-- 全局错误提示(手动处理) -->
<p th:if="${error}" class="error" th:text="${error}"></p>

<!-- 表单开始:绑定 User 对象,提交地址为 /register -->
<form th:action="@{/submitForm}" th:object="${user}" method="post">
    <table border="1">
        <tr>
            <td>用户名:</td>
            <td>
                <input type="text" th:field="*{username}" />
            </td>
        </tr>
        <tr>
            <td>密码:</td>
            <td>
                <input type="password" th:field="*{password}" />
            </td>
        </tr>
        <tr>
            <td>邮箱:</td>
            <td>
                <input type="text" th:field="*{email}" />
            </td>
        </tr>
        <tr>
            <td>年龄:</td>
            <td>
                <input type="number" th:field="*{age}" />
            </td>
        </tr>
        <tr>
            <td>同意条款:</td>
            <td>
                <input type="checkbox" th:field="*{acceptTerms}"/>
            </td>
        </tr>
        <tr>
            <td colspan="2">
                <button type="submit">注册</button>
            </td>
        </tr>
    </table>
</form>
</body>
</html>关键点说明:
th:field="*{username}"会渲染为<input type="text" name="username" value="..." />,其中value会根据user对象的属性自动填充(如果对象中有值)。
成功页面(register-success.html)
简单的成功展示页面,回显用户输入的数据:
<!DOCTYPE html>
<html xmlns:th="http://www.thymeleaf.org">
<head>
    <meta charset="UTF-8">
    <title>注册成功</title>
</head>
<body>
    <h1>注册成功!</h1>
    <p th:text="'欢迎您,' + ${user.username} + '!'">欢迎信息</p>
    <p>您的邮箱:<span th:text="${user.email}">邮箱</span></p>
    <p>您的年龄:<span th:text="${user.age}">年龄</span></p>
    <p>同意条款:<span th:text="${user.acceptTerms} ? '是' : '否'">是否同意</span></p>
    <a th:href="@{/register}">返回注册</a>
</body>
</html>
运行测试
-
启动 Spring Boot 应用。
-
访问
http://localhost:8080/register,可以看到一个空表单。
4.1.1 扩展:后端获取表单参数的方式
在 Spring MVC 中,接收表单参数主要有三种方式。
1. 使用 @ModelAttribute 绑定到对象(推荐),这种方式最简洁,会自动将请求参数映射到 Java 对象的同名属性。
前端代码
<form th:action="@{/submitForm}" th:object="${user}" method="post">
    <input type="text" th:field="*{username}" />
    <input type="password" th:field="*{password}" />
    <input type="email" th:field="*{email}" />
    <input type="number" th:field="*{age}" />
    <input type="checkbox" th:field="*{acceptTerms}" />
    <button type="submit">注册</button>
</form>
渲染后的 HTML 大致如下(假设 user 对象有值):
<input type="text" name="username" value="张三" />
<input type="password" name="password" value="" />
<input type="email" name="email" value="zhangsan@example.com" />
<input type="number" name="age" value="25" />
<input type="checkbox" name="acceptTerms" value="true" checked="checked" />
后端代码(使用@ModelAttribute User )
import org.springframework.stereotype.Controller;
import org.springframework.web.bind.annotation.PostMapping;
import org.springframework.web.bind.annotation.ModelAttribute;

@Controller
public class FormController {

    @PostMapping("/submitForm")
    public String handleSubmit(@ModelAttribute User user) {
        // 此时 user 对象已经自动填充了表单提交的数据
        System.out.println(user.getUsername());
        System.out.println(user.getPassword());
        System.out.println(user.getEmail());
        System.out.println(user.getAge());
        System.out.println(user.isAcceptTerms());
        // 后续处理,例如保存到数据库
        return "success"; // 返回成功页面
    }
}
要求:
User类必须有无参构造方法。属性必须有 setter 方法(或使用 Lombok
@Data)。表单字段名必须与
User的属性名一致。
2. 使用 @RequestParam 单独接收每个参数
如果不想绑定对象,可以逐个发送参数,逐个接受参数。
如果你希望完全控制表单字段的 name,可以直接在 HTML 中写死 name 属性,并用 Thymeleaf 表达式设置 value(用于回显)。这种方式对后端三种接收方式都有效。
前端代码
<!DOCTYPE html>
<html lang="en" xmlns:th="http://www.thymeleaf.org">
<head>
    <meta charset="UTF-8">
    <title>test</title>
</head>
<body>
<!--${user?.username}的作用-->
<!--当 user 对象不为 null 时,正常返回 user.username 的值。-->
<!--当 user 对象为 null 时,不会抛出异常,而是直接返回 null(在 Thymeleaf 中渲染为空字符串-->
<form th:action="@{/handleSubmit}" method="post">
    用户名:<input type="text" name="username" th:value="${user?.username}" /><br>
    密码:<input type="password" name="password" th:value="${user?.password}" /><br>
    邮件:<input type="text" name="email" th:value="${user?.email}" /><br>
    年龄:<input type="number" name="age" th:value="${user?.age}" /><br>
    同意告知<input type="checkbox" name="acceptTerms" th:checked="${user?.acceptTerms}" value="true" /><br>
    <button type="submit">注册</button>
</form>
</body>
</html>
特点:
每个输入控件都有明确的
name属性。使用
th:value和th:checked实现数据回显(${user?.acceptTerms}是安全访问,避免 user 为空时报错)。${user?.username}的作用
当 user 对象不为 null 时,正常返回 user.username 的值。
当 user 对象为 null 时,不会抛出异常,而是直接返回 null(在 Thymeleaf 中渲染为空字符串)
后端无论用
@ModelAttribute、@RequestParam还是HttpServletRequest,都能通过name拿到参数。
后端代码
使用 @RequestParam 单独接收每个参数
package com.example.thymeleafdemo.controller;

import org.springframework.stereotype.Controller;
import org.springframework.web.bind.annotation.PostMapping;
import org.springframework.web.bind.annotation.RequestParam;

@Controller
public class TestController {
    @PostMapping("/handleSubmit")
    public String handleSubmit(
            @RequestParam String username,
            @RequestParam String password,
            @RequestParam String email,
            @RequestParam(required = false) Integer age,
            @RequestParam(value = "acceptTerms", required = false) String acceptTerms) {

        boolean termsAccepted = "on".equals(acceptTerms); // 复选框选中时传值 "on"
        // 处理业务...
        return "success";
    }
}
3.使用HttpServletRequest 手动获取
前端代码
参考上面两种前端代码都可以。
后端代码
@PostMapping("/submitForm")
public String handleSubmit(HttpServletRequest request) {
    String username = request.getParameter("username");
    String password = request.getParameter("password");
    String email = request.getParameter("email");
    String ageStr = request.getParameter("age");
    String terms = request.getParameter("acceptTerms");
    // 处理...
    return "success";
}
5. URL 标签
//其中@{静态文件夹下(static/)的内容}
th:href:设置超链接的 URL
<a th:href="@{/user/profile}">用户资料</a>th:src:设置图像、脚本等资源的 URL。
<img th:src="@{/images/logo.png}" />6.片段标签
th:fragment :Thymeleaf 的片段标签(Fragment)是实现页面布局复用的核心特性。通过片段,你可以将公共部分(如页眉、页脚、侧边栏)抽取到单独的文件中,然后在多个页面中引用,实现"一次编写,多处使用"。
片段是 Thymeleaf 模板中的一个代码块,可以是一个完整的 <div>、一段 HTML,甚至是整个页面。通过 th:fragment 属性定义,然后通过 th:insert、th:replace 等属性在其他模板中引用。
案例:复用页眉和页脚
首先定义公共片段文件templates/layout.html
<!DOCTYPE html>
<html xmlns:th="http://www.thymeleaf.org">
<head th:fragment="head(title)">
<meta charset="UTF-8">
<title th:text="${title}">默认标题</title>
<link rel="stylesheet" th:href="@{/css/style.css}">
</head>
<body>
<!-- 页眉 -->
<header th:fragment="header">
<h1>我的网站</h1>
<nav>
<a th:href="@{/}">首页</a>
<a th:href="@{/products}">产品</a>
<a th:href="@{/about}">关于</a>
</nav>
</header>
<!-- 页脚 -->
<footer th:fragment="footer">
<p>© 2023 我的网站</p>
</footer>
</body>
</html>在其他页面中使用片段**(使用th:replace)**
用片段替换当前标签,即当前标签被片段的代码完全取代
首页 index.html:
<!DOCTYPE html>
<html xmlns:th="http://www.thymeleaf.org">
<head th:replace="~{fragments/layout :: head('首页')}"></head>
<body>
    <!-- 插入页眉  替换名为layout.html文件中的内容, ;;header则是layout.html文件的header标签    部分 -->
    <div th:replace="~{layout :: header}"></div>

    <!-- 页面主要内容 -->
    <main>
        <h2>欢迎来到首页!</h2>
        <p>这里是主要内容...</p>
    </main>

    <!-- 插入页脚 -->
    <div th:replace="~{layout :: footer}"></div>
</body>
</html>
产品页 products.html
<!DOCTYPE html>
<html xmlns:th="http://www.thymeleaf.org">
<head th:replace="~{layout :: head('产品列表')}"></head>
<body>
    <div th:replace="~{layout :: header}"></div>
    <main>
        <h2>产品列表</h2>
        <ul>
            <li th:each="p : ${products}" th:text="${p.name}">产品名</li>
        </ul>
    </main>
    <div th:replace="~{layout :: footer}"></div>
</body>
</html>在其他页面中使用片段(使用th:insert)
将片段插入到当前标签的内部(作为子元素),保留当前标签
<div th:insert="~{模板名 :: 片段名}"></div>
~{...}是片段表达式,可以省略,但推荐保留以明确语义。模板名是相对于templates目录的路径,不带后缀(如fragments/common对应fragments/common.html)。
th:replace和th:insert区别示例
假设有片段:<div th:fragment="copy">© 2023</div>
引用方式对比:
<!-- 使用 th:insert -->
<footer th:insert="~{fragments/common :: copy}"></footer>
<!-- 结果:<footer><div>© 2023</div></footer> -->
<!-- 使用 th:replace -->
<footer th:replace="~{fragments/common :: copy}"></footer>
<!-- 结果:<div>© 2023</div> (footer 标签被替换) -->7. 其他标签:
参考:Thymeleaf语法总结 - 技术小白丁 - 博客园
全网最全Thymeleaf 学习全套教程(附实操案例)_thymeleaf教程-CSDN博客
总结:
-
th:insert:保留宿主标签,片段作为其内容插入。 -
th:replace:宿主标签被片段完全替代。
三.Thymeleaf 表达式语法
${...}变量表达式,Variable Expressions
@{...}链接表达式,Link URL Expressions
#{...}消息表达式,Message Expressions
~{...}代码块表达式,Fragment Expressions
*{...}选择变量表达式,Selection Variable Expressions
详细解释参考下一篇文章:
扩展:结合 Spring Validation 进行后端校验
在 Spring Boot 项目中,结合 Spring Validation 进行后端校验,并与 Thymeleaf 前端模板无缝集成,是非常常见的做法。下面通过一个完整的用户注册案例,详细讲解前端和后端的编写方法。
1. 添加依赖
首先确保项目中包含了 Spring Validation 的依赖(Spring Boot 2.3+ 之后需要单独引入,之前版本默认包含)。
Maven (pom.xml):
<dependency>
    <groupId>org.springframework.boot</groupId>
    <artifactId>spring-boot-starter-validation</artifactId>
</dependency>
<dependency>
    <groupId>org.springframework.boot</groupId>
    <artifactId>spring-boot-starter-thymeleaf</artifactId>
</dependency>
<dependency>
    <groupId>org.springframework.boot</groupId>
    <artifactId>spring-boot-starter-web</artifactId>
</dependency>
2. 创建带校验注解的实体类
在实体类属性上使用 Bean Validation 注解(如 @NotBlank、@Size、@Email、@Min、@Max、@AssertTrue 等)。
import javax.validation.constraints.*;

public class User {

    @NotBlank(message = "用户名不能为空")
    @Size(min = 2, max = 20, message = "用户名长度必须在2-20之间")
    private String username;

    @NotBlank(message = "密码不能为空")
    @Size(min = 6, message = "密码至少6位")
    private String password;

    @NotBlank(message = "邮箱不能为空")
    @Email(message = "邮箱格式不正确")
    private String email;

    @NotNull(message = "年龄不能为空")
    @Min(value = 1, message = "年龄必须大于0")
    @Max(value = 150, message = "年龄不能超过150")
    private Integer age;

    @AssertTrue(message = "必须同意条款才能注册")
    private boolean acceptTerms;

    // 必须提供无参构造方法
    public User() {}

    // getter 和 setter 方法(此处省略,实际请使用 Lombok 或手动生成)
}
注意 :
@NotNull用于Integer类型,因为年龄是包装类,可以区分未填写的情况。@AssertTrue用于布尔字段,要求必须为true才通过校验。
3. 编写 Controller
控制器包含两个方法:
-
GET /register:显示表单,并传入一个空的User对象(用于th:object绑定)。 -
POST /register:处理表单提交,使用@Valid启用校验,并用BindingResult捕获错误。import org.springframework.stereotype.Controller;
import org.springframework.ui.Model;
import org.springframework.validation.BindingResult;
import org.springframework.web.bind.annotation.*;import javax.validation.Valid;
@Controller
public class RegisterController {// 显示注册表单 @GetMapping("/register") public String showForm(Model model) { model.addAttribute("user", new User()); return "register"; } // 处理表单提交 @PostMapping("/register") public String submitForm(@Valid @ModelAttribute("user") User user, BindingResult bindingResult, Model model) { // 如果有校验错误,返回表单页面,错误信息会自动通过 th:errors 显示 if (bindingResult.hasErrors()) { // 可以添加一些额外的错误信息到 model(可选) return "register"; } // 校验通过,处理业务逻辑(如保存用户) // 这里简单将用户信息传到成功页面 model.addAttribute("user", user); return "register-success"; }}
关键点:
@Valid告诉 Spring 对User对象进行校验。
BindingResult必须紧跟在被校验的参数之后,否则 Spring 会抛出异常。方法参数中的
@ModelAttribute("user")与前端th:object="${user}"对应。如果
bindingResult.hasErrors()为true,直接返回表单视图,此时 Thymeleaf 会自动将错误信息与字段关联。
4.编写 Thymeleaf 模板(register.html)
模板文件放在 src/main/resources/templates/register.html。
<!DOCTYPE html>
<html xmlns:th="http://www.thymeleaf.org">
<head>
    <meta charset="UTF-8">
    <title>用户注册</title>
    <style>
        .error { color: red; }
        .error-message { font-size: 0.9em; margin-left: 10px; }
    </style>
</head>
<body>
<h1>用户注册</h1>

<!-- 全局错误提示(可选项) -->
<div th:if="${#fields.hasErrors('global')}" th:each="err : ${#fields.errors('global')}" th:text="${err}" class="error"></div>

<!-- 表单开始:绑定 User 对象,提交地址为 /register -->
<form th:action="@{/register}" th:object="${user}" method="post">
    <table>
        <tr>
            <td>用户名:</td>
            <td>
                <input type="text" th:field="*{username}" />
                <!-- 显示字段错误 -->
                <span th:if="${#fields.hasErrors('username')}" th:errors="*{username}" class="error error-message">错误信息</span>
            </td>
        </tr>
        <tr>
            <td>密码:</td>
            <td>
                <input type="password" th:field="*{password}" />
                <span th:if="${#fields.hasErrors('password')}" th:errors="*{password}" class="error error-message">错误信息</span>
            </td>
        </tr>
        <tr>
            <td>邮箱:</td>
            <td>
                <input type="email" th:field="*{email}" />
                <span th:if="${#fields.hasErrors('email')}" th:errors="*{email}" class="error error-message">错误信息</span>
            </td>
        </tr>
        <tr>
            <td>年龄:</td>
            <td>
                <input type="number" th:field="*{age}" />
                <span th:if="${#fields.hasErrors('age')}" th:errors="*{age}" class="error error-message">错误信息</span>
            </td>
        </tr>
        <tr>
            <td>同意条款:</td>
            <td>
                <input type="checkbox" th:field="*{acceptTerms}" />
                <span th:if="${#fields.hasErrors('acceptTerms')}" th:errors="*{acceptTerms}" class="error error-message">错误信息</span>
            </td>
        </tr>
        <tr>
            <td colspan="2">
                <button type="submit">注册</button>
            </td>
        </tr>
    </table>
</form>
</body>
</html>模板要点:
使用
th:object="${user}"绑定表单对象。每个输入控件使用
th:field="*{属性名}",它会自动生成name属性、value属性(回显用户提交的值),并为复选框设置checked状态。错误显示:
th:errors="*{username}"会输出该字段对应的错误消息(如果有多个错误,默认只显示第一个)。
th:if="${#fields.hasErrors('username')}"用于判断字段是否有错误,可以控制错误标签的显示。如果想遍历所有错误,可以使用
th:each结合#fields.errors('username')。全局错误(非字段错误)可以通过
#fields.hasErrors('global')和#fields.errors('global')显示。
注意 :当表单提交后,如果校验失败,返回的
register视图中,user对象已经包含了用户提交的值(因为@ModelAttribute会将请求参数绑定到user对象),所以页面上的输入框会自动回填用户刚才填写的内容,无需额外处理。
5. 成功页面(register-success.html)
一个简单的成功页面,回显用户信息(可选)
<!DOCTYPE html>
<html xmlns:th="http://www.thymeleaf.org">
<head>
    <meta charset="UTF-8">
    <title>注册成功</title>
</head>
<body>
<h1>注册成功!</h1>
<p th:text="'欢迎,' + ${user.username} + '!'">欢迎信息</p>
<p>邮箱:<span th:text="${user.email}">邮箱</span></p>
<p>年龄:<span th:text="${user.age}">年龄</span></p>
<p>同意条款:<span th:text="${user.acceptTerms} ? '是' : '否'">是否同意</span></p>
<a th:href="@{/register}">返回注册</a>
</body>
</html>
6. 运行测试
启动 Spring Boot 应用。
访问
http://localhost:8080/register,看到一个空白表单。不填写任何内容直接点击"注册",页面会重新加载,并在每个字段旁边显示对应的错误消息。
填写错误信息(如年龄为 0、邮箱格式错误等),提交后也会显示相应错误。
填写正确的数据后提交,跳转到成功页面。
7. 补充说明
1. 复选框的校验
对于复选框,
@AssertTrue要求该字段必须为true。在 Thymeleaf 中,th:field="*{acceptTerms}"会自动将复选框的value设为true,选中时提交的值就是true,未选中时该字段不会被提交。Spring 会将缺失的字段视为false,从而触发@AssertTrue错误。2. 自定义错误消息
校验注解中的
message属性支持国际化。可以在resources下添加messages.properties文件,定义如Size.user.username=用户名长度必须在{min}到{max}之间,然后在注解中使用message="{Size.user.username}"。3. 分组校验
如果同一个实体在不同场景下有不同校验规则,可以使用校验分组(Groups),但这已超出基础范围,可按需学习。
4. 前后端双重校验
前端也可以添加 JavaScript 校验提升用户体验,但后端校验是安全底线,必须保留。