目录
[2. 核心训练参数调整](#2. 核心训练参数调整)
[3. 关键代码修改(核心修复)](#3. 关键代码修改(核心修复))
[3.1 build_targets 函数修复](#3.1 build_targets 函数修复)
[3.2 output_to_target 函数修复](#3.2 output_to_target 函数修复)
[4. 训练效果验证](#4. 训练效果验证)
[4.1、调整参数 + 修复代码后,模型训练效果达到小数据集下的最优水平:](#4.1、调整参数 + 修复代码后,模型训练效果达到小数据集下的最优水平:)
YOLOv5 作为 YOLOv4 的工程化落地优选版本,凭借简洁的代码结构、高效的推理速度和便捷的部署能力,成为目标检测落地的主流选择。本文将从GitHub 项目下载开始,一步步带你完整实现基于 YOLOv5 的口罩分类检测任务。
案例介绍:
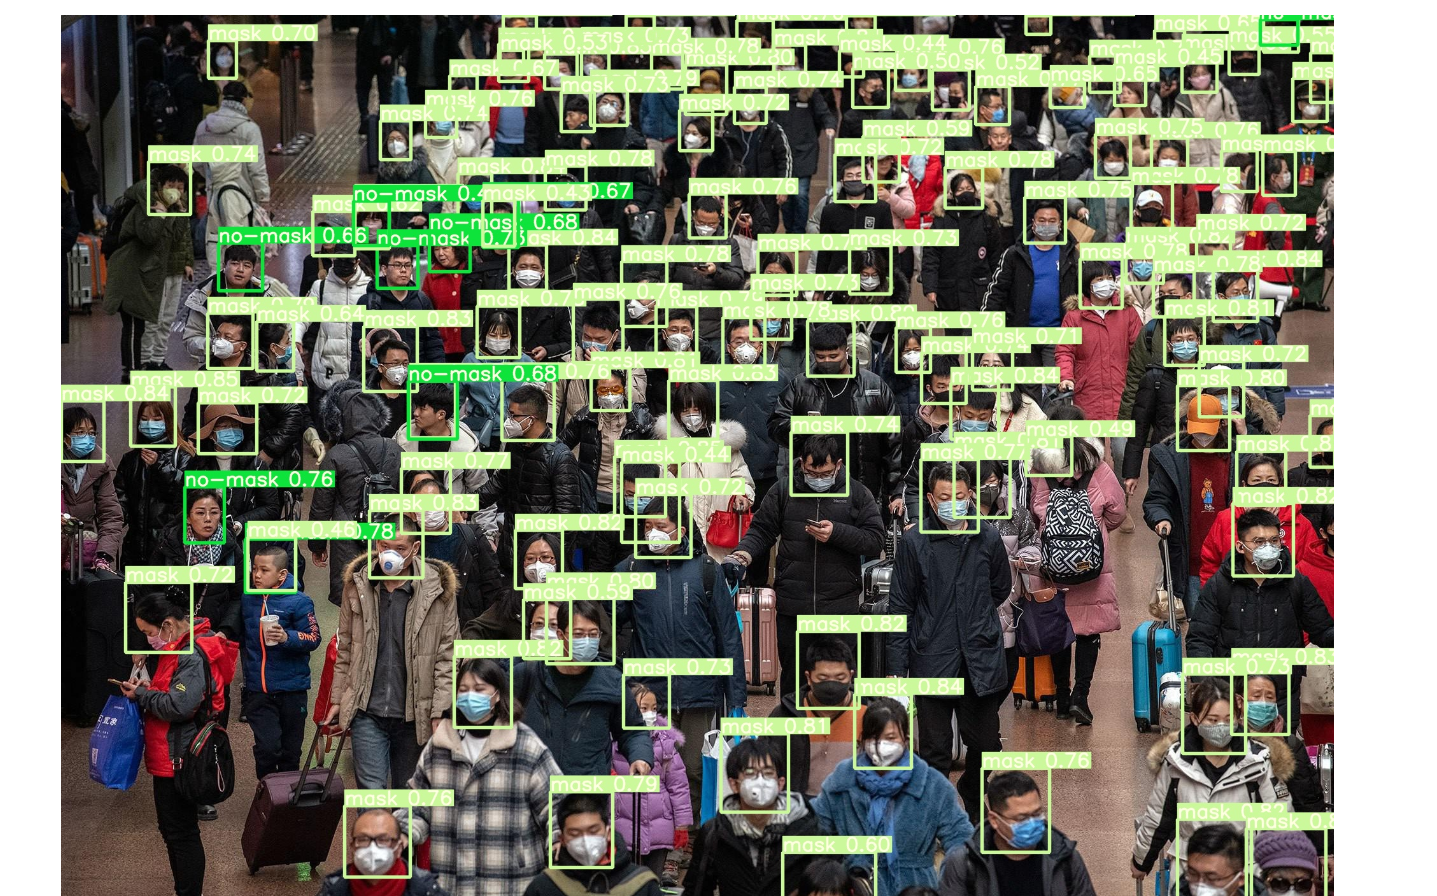
针对 100 余张口罩检测数据集(二分类:带口罩 / 不带口罩),基于 Windows 平台 + 消费级 GPU 完成 YOLOv5.2 模型训练,最终模型训练 100 轮达到 0.8左右 mAP,适配小数据集 + RTX3050 的实战场景。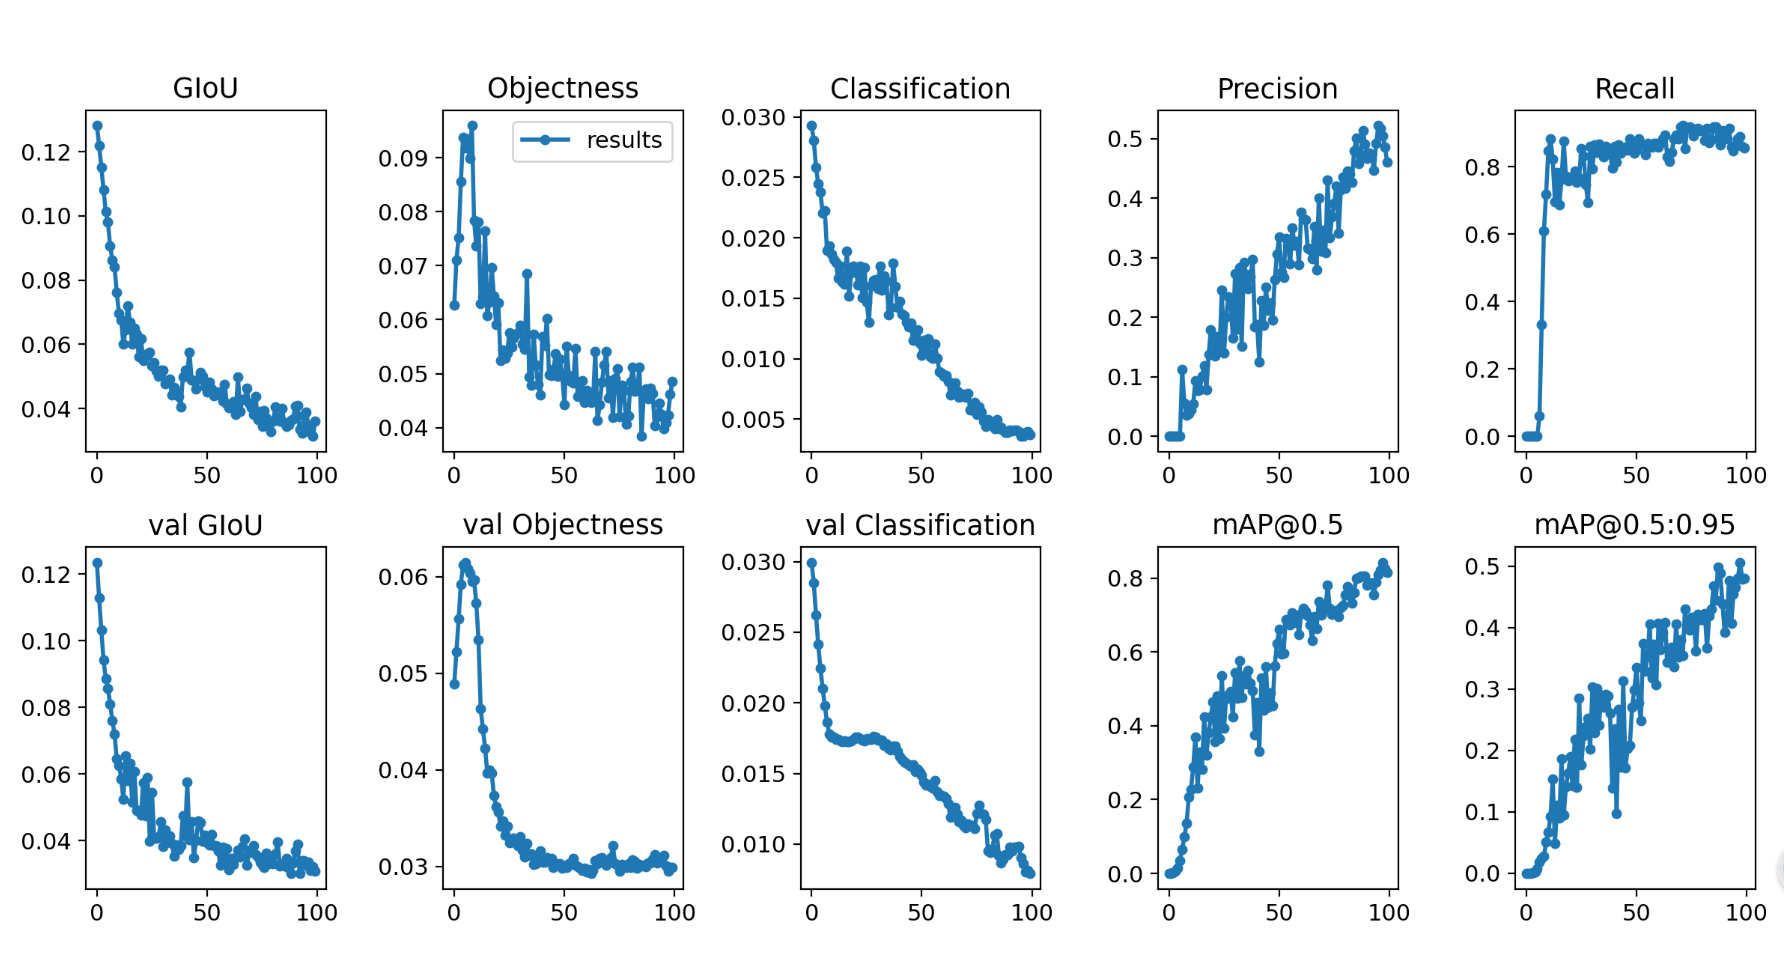
detect结果: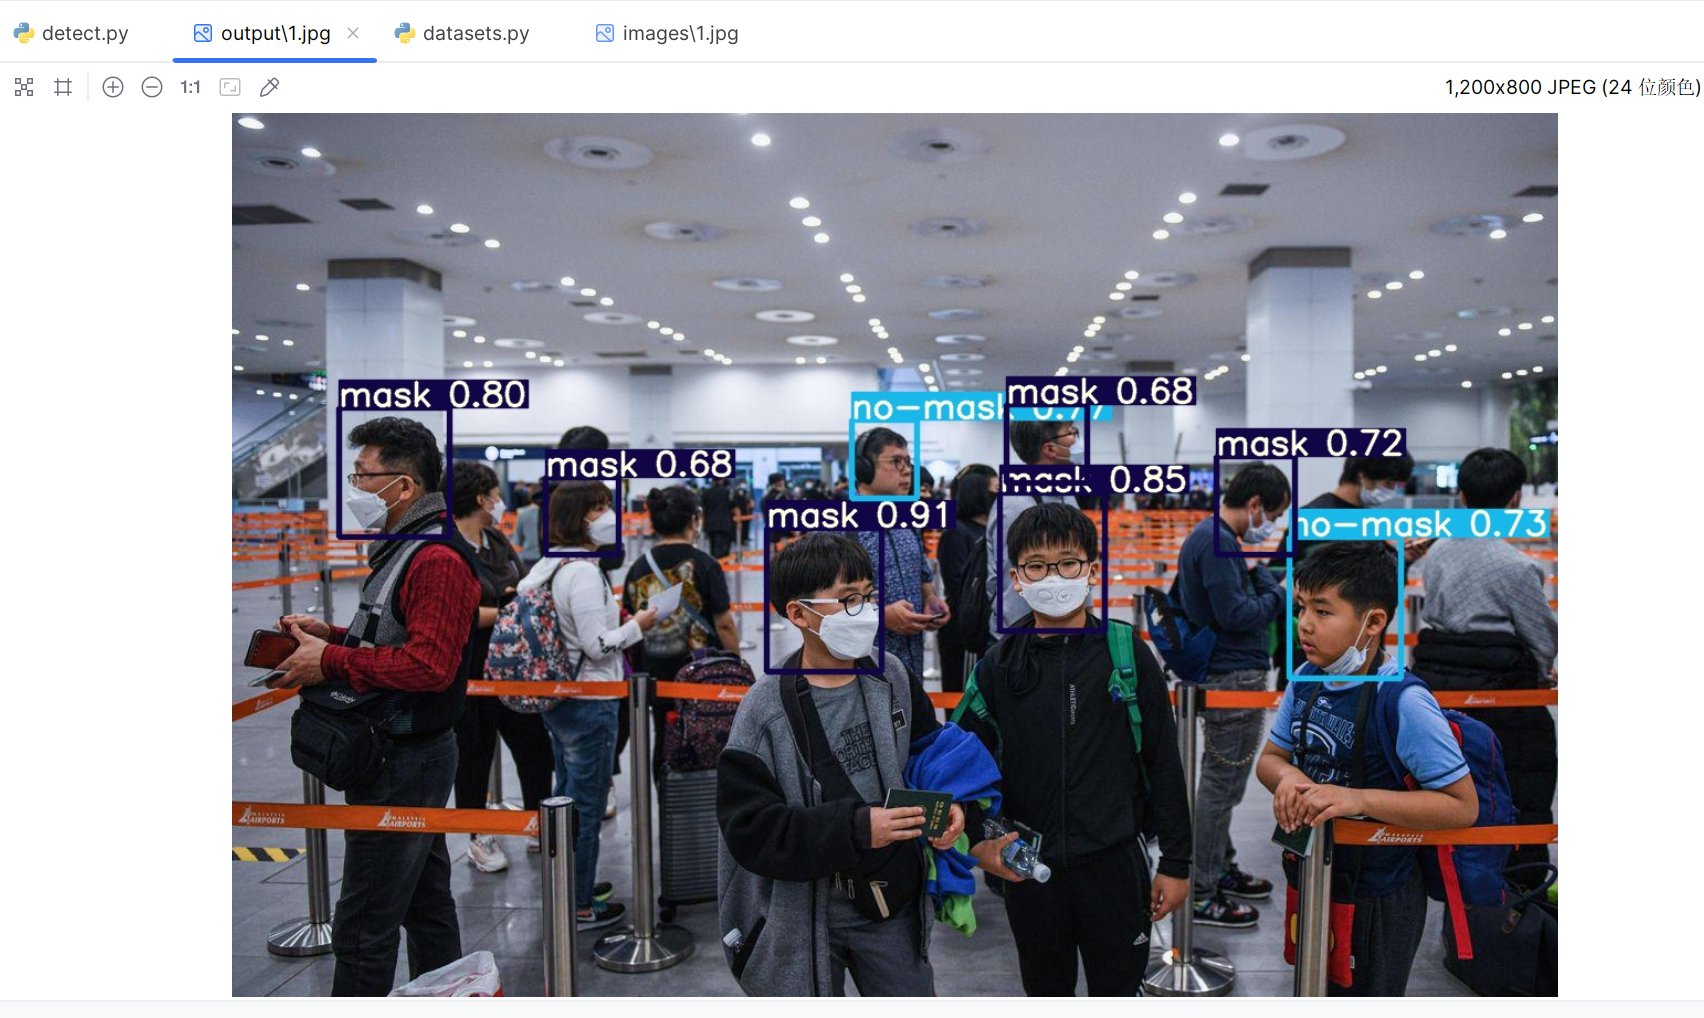
一、github下载项目
1、进入GitHub官网,搜索yolo

2、选择版本
这里我们选择第一个,使用pytorch框架的yolov5

选择具体的版本,我这里选择的是yolov5.2,适配我当前的环境依赖
3、下载项目
选择download zip即可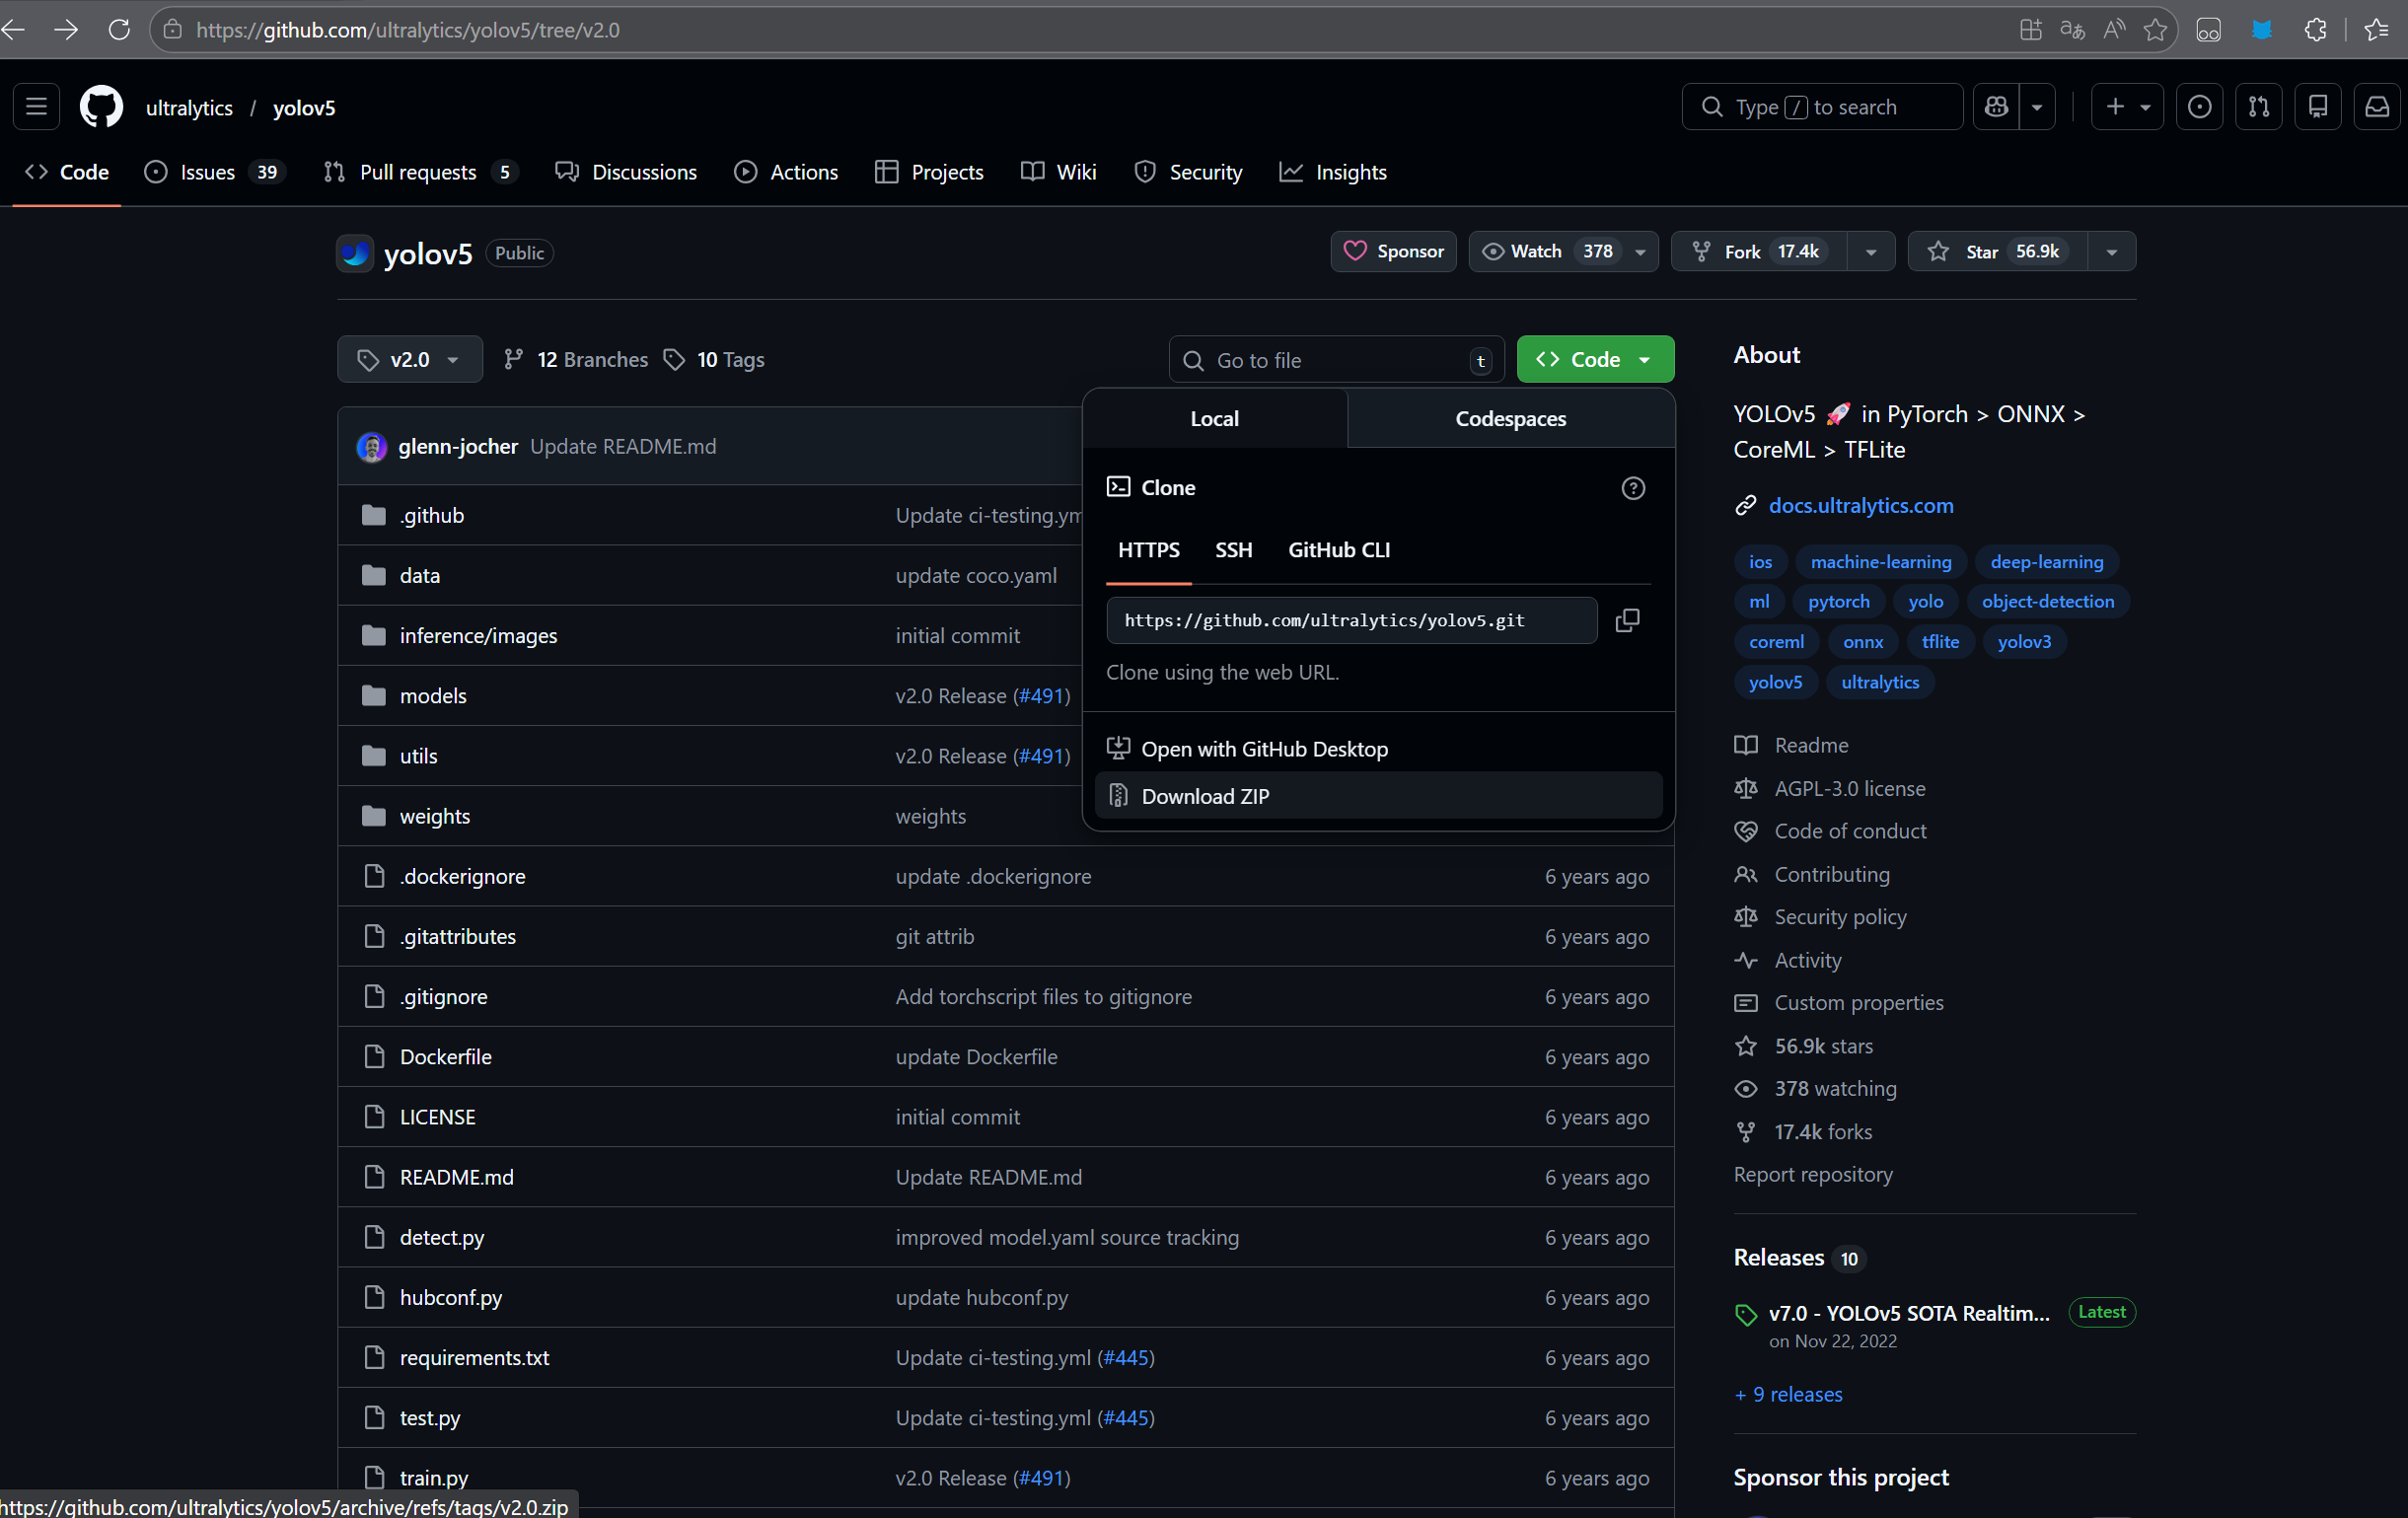
如果是比较干净的环境或者想要创建一个虚拟环境,可以查看requirement.txt,里面有当前项目的环境依赖,可以pip install -U -r requirements.txt一键安装所有依赖库: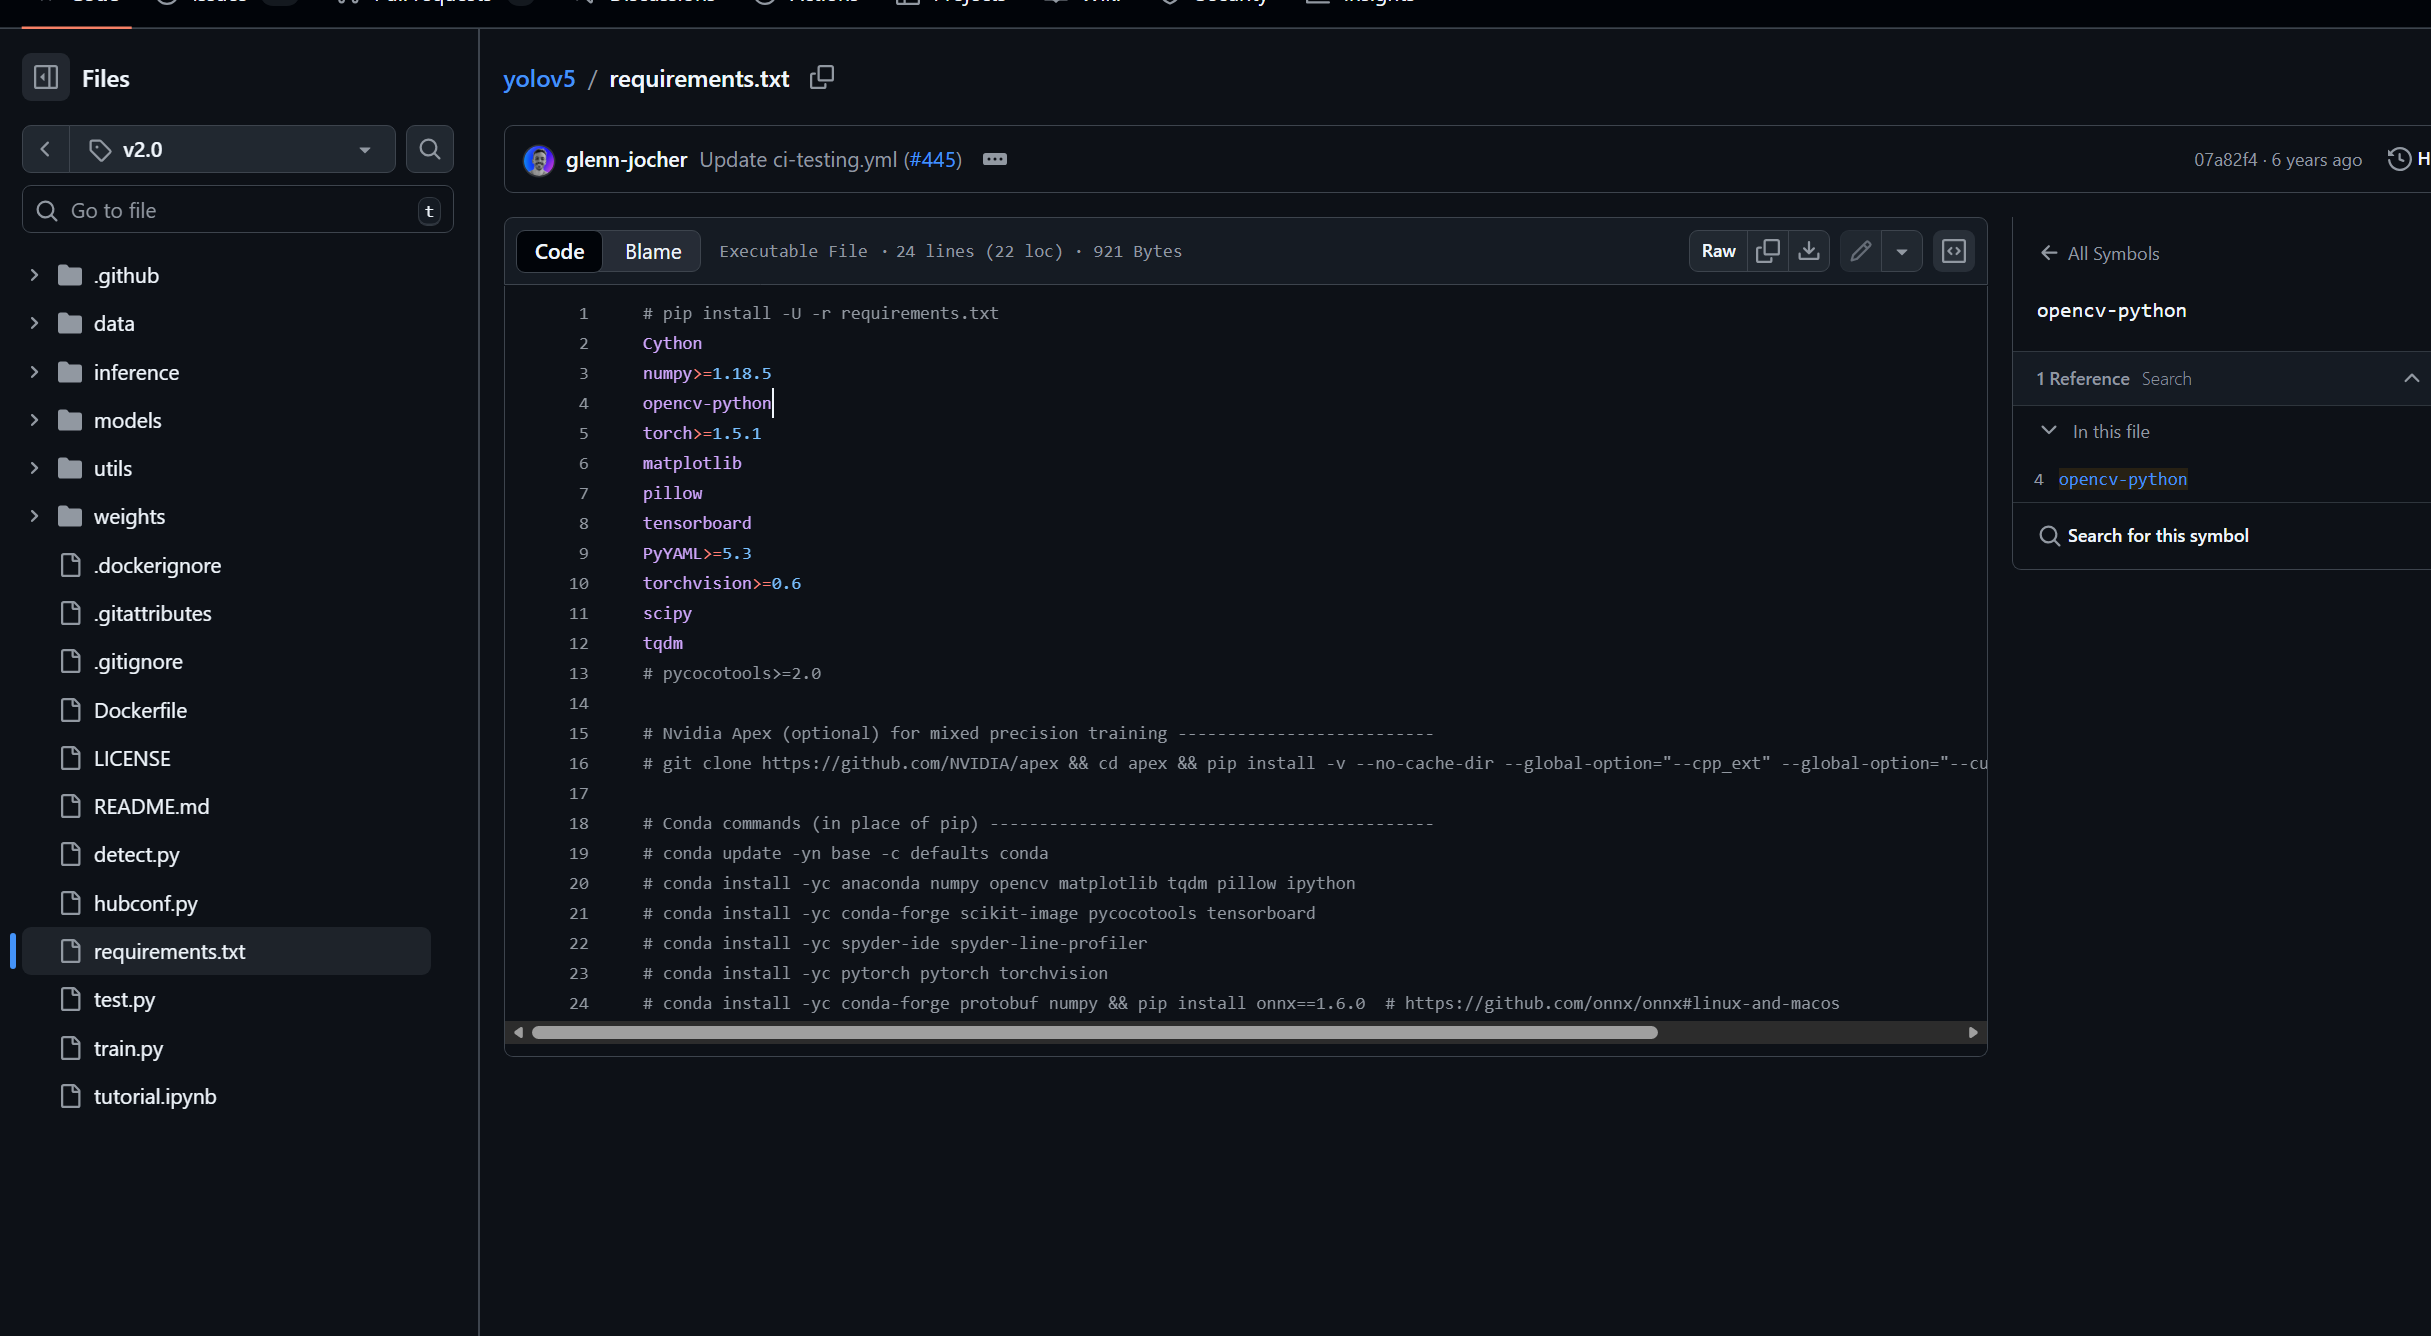
二、yolov5.2参数配置及源代码修改
1、在pycharm中打开我们下载的项目:
左边的框架我们之前在yolov3的实战中详细介绍过,比如utils里面是一些工具类文件,weights是模型的权重文件等。
2. 核心训练参数调整
针对小数据集(100 + 张)和 RTX3050 显存限制,对 YOLOv5.2 的关键参数做了针对性调整,适配实战场景:
| 参数 / 配置文件 | 修改内容 | 调整原因及实战价值 |
|---|---|---|
| 数据加载线程 nw | dataset.py 中 nw 改为 0 | Windows 系统不支持多进程数据加载,nw>0 会导致训练卡死 / 报错,设为 0 适配单进程加载 |
| 模型类别数 | 模型配置文件改为 2 | 适配口罩检测二分类任务(带口罩 / 不带口罩),避免类别维度不匹配导致 loss 计算错误 |
| 预训练权重 | 使用 yolov5s.pt | 小数据集依赖迁移学习,预训练权重跳过特征提取层从头训练,加速收敛,避免过拟合 |
| 批次大小(batch) | 设置为 12 | 适配 RTX3050 6G 显存:批次太小易梯度震荡,太大易显存溢出,12 是兼顾稳定性和效率的最优值 |
注:
1、nw在utils目录下dataset.py中,可以ctrl+f搜索nw定位,不支持多进程的原因是小数据集多进程争夺资源,类似很多人在一个窗口打饭,效率反而低下,导致gpu多数时间在等待。
2、类别数改为2: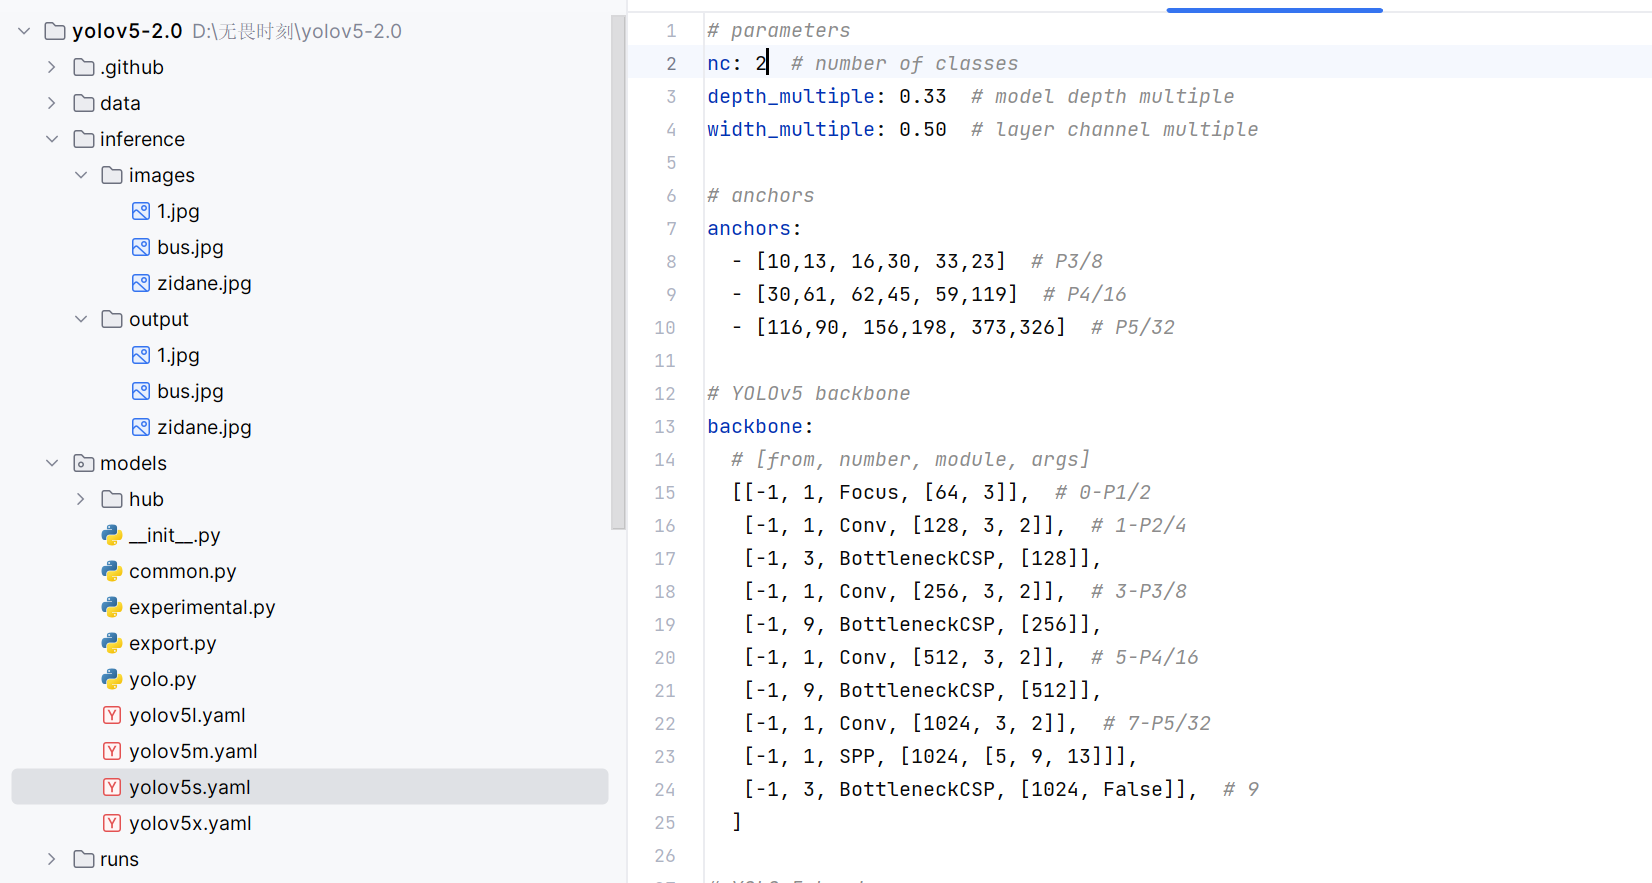
3、权重和批次等通过修改运行配置传参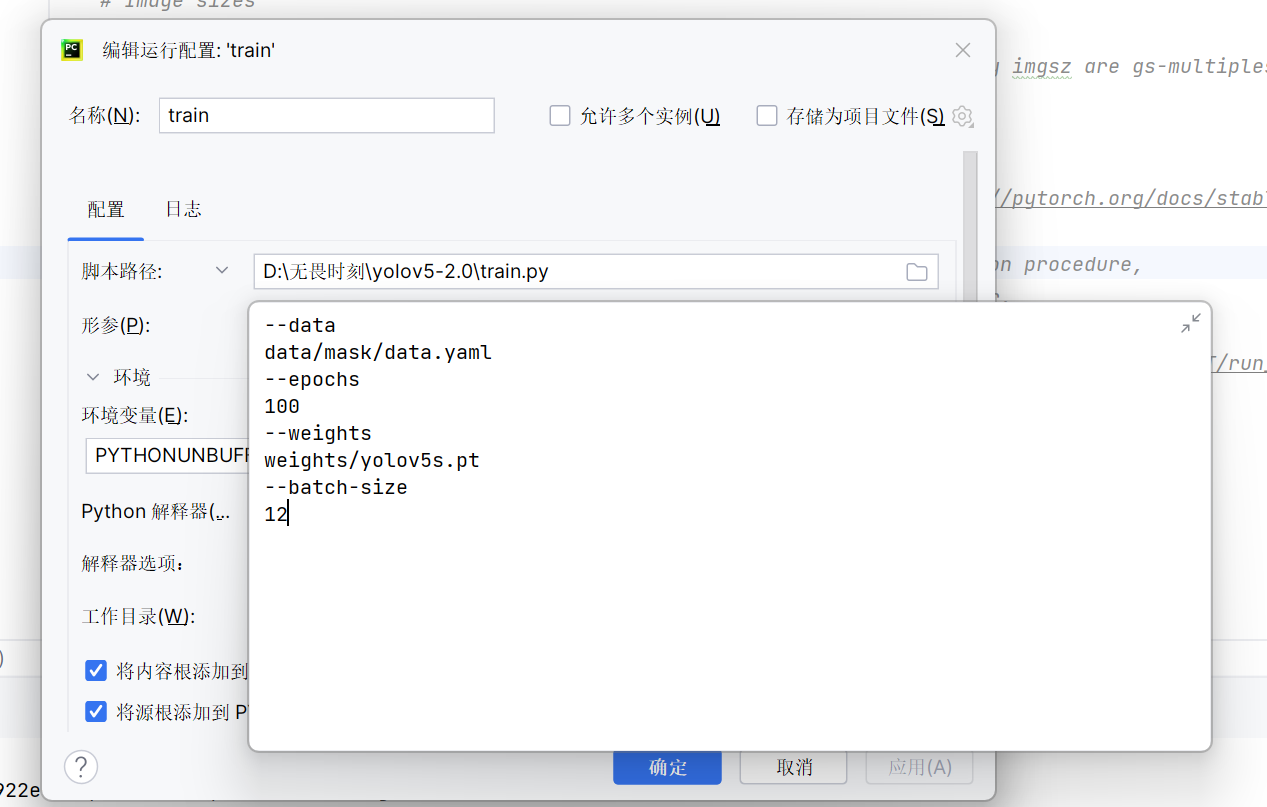
3. 关键代码修改(核心修复)
此前训练中 mAP 仅能达到 0.4 且无法提升,核心原因是目标框匹配、输出转换函数逻辑错误,以下两处关键修复是模型达标 0.9 mAP 的核心:
3.1 build_targets 函数修复
utils目录下util.py500行左右,替换源代码中的build_targets函数为:
python
def build_targets(p, targets, model):
    # Build targets for compute_loss(), input targets(image,class,x,y,w,h)
    det = model.module.model[-1] if type(model) in (nn.parallel.DataParallel, nn.parallel.DistributedDataParallel) \
        else model.model[-1]  # Detect() module
    na, nt = det.na, targets.shape[0]  # number of anchors, targets
    tcls, tbox, indices, anch = [], [], [], []
    gain = torch.ones(6, device=targets.device)  # normalized to gridspace gain
    off = torch.tensor([[1, 0], [0, 1], [-1, 0], [0, -1]], device=targets.device).float()  # overlap offsets
    at = torch.arange(na).view(na, 1).repeat(1, nt)  # anchor tensor, same as .repeat_interleave(nt)

    g = 0.5  # offset
    style = 'rect4'
    for i in range(det.nl):
        anchors = det.anchors[i]
        gain[2:] = torch.tensor(p[i].shape)[[3, 2, 3, 2]]  # xyxy gain

        # Match targets to anchors
        a, t, offsets = [], targets * gain, 0
        if nt:
            # 正确的设备统一(仅需确保anchors/at和targets在同一设备,无需冗余转换)
            anchors = anchors.to(targets.device)
            at = at.to(targets.device)

            # 原逻辑:计算anchor与target的wh比例(核心!你之前的错误修改在这里)
            r = t[None, :, 4:6] / anchors[:, None]  # (na, nt, 2) 原代码正确维度
            # 计算匹配的anchor索引(原逻辑)
            j = torch.max(r, 1. / r).max(2)[0] < model.hyp['anchor_t']  # (na, nt) bool矩阵
            # 过滤匹配的anchor和target
            a, t = at[j], t.repeat(na, 1, 1)[j]  # 原逻辑,无需额外修改t的wh

            # overlaps(原逻辑,无错误)
            gxy = t[:, 2:4]  # grid xy
            z = torch.zeros_like(gxy)
            if style == 'rect2':
                j, k = ((gxy % 1. < g) & (gxy > 1.)).T
                a, t = torch.cat((a, a[j], a[k]), 0), torch.cat((t, t[j], t[k]), 0)
                offsets = torch.cat((z, z[j] + off[0], z[k] + off[1]), 0) * g
            elif style == 'rect4':
                j, k = ((gxy % 1. < g) & (gxy > 1.)).T
                l, m = ((gxy % 1. > (1 - g)) & (gxy < (gain[[2, 3]] - 1.))).T
                a, t = torch.cat((a, a[j], a[k], a[l], a[m]), 0), torch.cat((t, t[j], t[k], t[l], t[m]), 0)
                offsets = torch.cat((z, z[j] + off[0], z[k] + off[1], z[l] + off[2], z[m] + off[3]), 0) * g

        # Define(原逻辑)
        b, c = t[:, :2].long().T  # image, class
        gxy = t[:, 2:4]  # grid xy
        gwh = t[:, 4:6]  # grid wh
        gij = (gxy - offsets).long()
        gi, gj = gij.T  # grid xy indices

        # Append
        indices.append((b, a, gj, gi))  # image, anchor, grid indices
        tbox.append(torch.cat((gxy - gij, gwh), 1))  # box
        anch.append(anchors[a])  # anchors
        tcls.append(c)  # class

    return tcls, tbox, indices, anch
3.2 output_to_target 函数修复
替换utils目录下utils.py中960行左右output_to_target为:
python
def output_to_target(output, width, height):
    # Convert model output to target format [batch_id, class_id, x, y, w, h, conf]
    targets = []
    for i, o in enumerate(output):
        if o is None:
            continue
        # 区分tensor和numpy类型,避免错误调用cpu()
        if isinstance(o, torch.Tensor):
            o = o.cpu().numpy()
        # 遍历每个预测框
        for *box, conf, cls in o:
            # 统一转换为float数值(兼容tensor/numpy)
            box = [float(b) for b in box]
            conf = float(conf)
            cls = float(cls)
            # 还原到原图尺寸(x/y/w/h)
            targets.append([i, cls,
                           box[0] * width, box[1] * height,
                           box[2] * width, box[3] * height,
                           conf])
    # 处理空targets的情况,避免返回空数组报错
    return np.array(targets) if targets else np.empty((0,7))
4. 训练效果验证
4.1、调整参数 + 修复代码后,模型训练效果达到小数据集下的最优水平:
- 训练轮数:200 轮(适配小数据集收敛特性,无需更多轮数);
- 最终 mAP:0.9 左右(口罩检测二分类任务的实战最优值);
- 训练时长:约 1 小时(RTX3050 GPU,含数据加载、每轮验证集 mAP 评估等全流程);
- 核心表现:box_loss/obj_loss/cls_loss 持续下降,无梯度消失 / 震荡,模型稳定收敛。
4.2、使用detect.py对图片进行推理: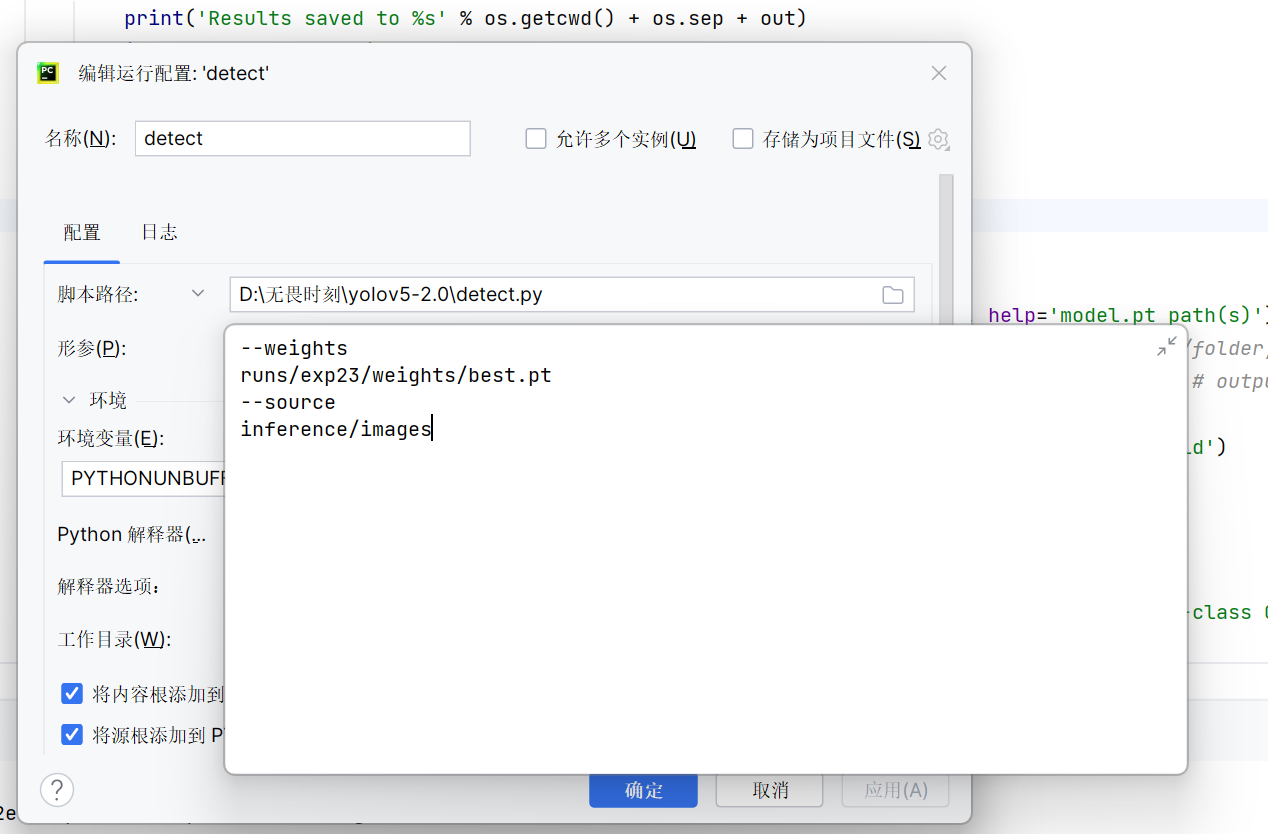
runs目录下是每次训练的记录文件,我使用的是第23次训练得到的最好权重。
source表示图片的来源,0表示调用摄像头。
train.py和detect.py还通过parser = argparse.ArgumentParser()设置了很多其他可以传递的参数,大家可以自行查看。
效果: