文章目录
- [1. 线程的制作方法](#1. 线程的制作方法)
-
- [1.1 继承Thread类创建线程](#1.1 继承Thread类创建线程)
- 1.2实现Runnable接口创建线程
- [1.3 通过Callable和FutureTask创建线程](#1.3 通过Callable和FutureTask创建线程)
- [1.4 通过线程池创建线程](#1.4 通过线程池创建线程)
- [2. 线程的生命周期](#2. 线程的生命周期)
-
- [2.1 线程的六种状态](#2.1 线程的六种状态)
- [2.2 WAITING和TIMED_WAITING的区别](#2.2 WAITING和TIMED_WAITING的区别)
- [3. 线程核心方法区别](#3. 线程核心方法区别)
-
- [3.1 sleep和wait区别](#3.1 sleep和wait区别)
- [3.2 run()方法和start()方法的区别](#3.2 run()方法和start()方法的区别)
- [3.3 notify()和notifyAll()的区别](#3.3 notify()和notifyAll()的区别)
- [4. 线程编排技术](#4. 线程编排技术)
- [5. 线程顺序执行的实现方法](#5. 线程顺序执行的实现方法)
-
- [5.1 使用join方法](#5.1 使用join方法)
- [5.2 使用CountDownLatch](#5.2 使用CountDownLatch)
- [5.3 使用CyclicBarrier](#5.3 使用CyclicBarrier)
- [5.4 使用Semaphore](#5.4 使用Semaphore)
- [5.5 使用线程池](#5.5 使用线程池)
- [5.6 使用CompletableFuture](#5.6 使用CompletableFuture)
1. 线程的制作方法
在Java种,共有4种方法创建线程
1.1 继承Thread类创建线程
java
class TaskTread extends  Thread {
    private String taskName;

    public TaskTread(String taskName) {
        this.taskName = taskName;
    }

    @Override
    public void run() {
        System.out.println("执行任务" + taskName);
        try {
            Thread.sleep(100);
            System.out.println("正在执行任务" + taskName);
        } catch (InterruptedException e) {
            e.printStackTrace();
        }
        System.out.println("完成任务" + taskName);
    }
}
    public class  ThreadExample{
        public static void main(String[] args) {
            TaskTread task = new TaskTread("taskTread");
            task.start();
        }
    }
1.2实现Runnable接口创建线程
java
class TaskRunnable implements  Runnable {
  private String taskName;

  public TaskRunnable(String taskName) {
      this.taskName = taskName;
  }

  @Override
  public void run() {
      System.out.println("执行任务" + taskName);
      try {
          Thread.sleep(100);
          System.out.println("正在执行任务" + taskName);
      } catch (InterruptedException e) {
          e.printStackTrace();
      }
      System.out.println("完成任务" + taskName);
  }
}
  public class  RunnableExample {
      public static void main(String[] args) {
          Thread thread=new Thread(new TaskRunnable("task1"));
          thread.start();
      }
  }
1.3 通过Callable和FutureTask创建线程
Callable 的优势在于:
- 有返回值:可以指定返回数据的类型(泛型)。
- 能抛出异常:允许直接抛出受检异常。
由于 Thread 类的构造函数只接受 Runnable,不直接接受 Callable,所以我们需要 FutureTask 作为中介
java
import java.util.concurrent.Callable;
import java.util.concurrent.ExecutionException;
import java.util.concurrent.FutureTask;

public class CallableExample {
    public static void main(String[] args) throws ExecutionException, InterruptedException {
        Callable callable = () -> {
            System.out.println("正在执行Callable任务...");
            Thread.sleep(3000);
            return "Callable任务执行完成!";
        };
        FutureTask futureTask = new FutureTask(callable);
        Thread thread = new Thread(futureTask);
        thread.start();
        System.out.println("主线程继续执行...");
        System.out.println("Callable任务的结果: " + futureTask.get());

    }
}-
Future 接口:异步结果的管理者
Future 并不是结果本身,它是一个协议,提供了检查任务状态和获取结果的方法。
-
FutureTask 是 Future 接口的一个具体实现类。
特性:它同时实现了 Runnable 和 Future。这意味着它既能被 Thread 执行,又能作为提货单存结果。
1.4 通过线程池创建线程
java
import java.util.concurrent.*;

public class ThreadPoolExample{
    public static void main(String[] args) throws ExecutionException, InterruptedException {
        ExecutorService executorService = Executors.newFixedThreadPool(5);
        Callable callable=()->{
            System.out.println("线程池执行任务");
            Thread.sleep(3000);
            return "任务完成";
        };
        System.out.println("提交任务");
        Future future=executorService.submit(callable);
        System.out.println("执行其他任务");
        System.out.println("获取结果"+future.get());
        executorService.shutdown();
    }

}四种创造线程的方式归根结底都是基于继承Thread 类和实现Runnable来实现的。2. 线程的生命周期
2.1 线程的六种状态
- NEW(新建):新建了一个线程对象- 在new Thread() 之后,调用 start() 之前。
- RUNNABLE(可运行):正在运行或等待 CPU 分配时间片-在调用了 start()。在 Java 中,就绪和运行统称为 RUNNABLE。
- BLOCKED(阻塞):等待获取监视器锁-试图进入 synchronized 代码块但锁被别人拿着。
- WATING(等待):无限期等待另一个线程执行特定操作-调用了 wait()、join() 或 LockSupport.park()。
- TIMED_WAITING(计时等待):在指定时间内等待超过后可自行返回-调用了 sleep(ms)、wait(ms) 或 join(ms)。
- TERMINATED (终止): 线程已经执行完毕-run() 方法执行结束,或者由于异常退出了。
2.2 WAITING和TIMED_WAITING的区别
-
WAITING (无限期等待)
线程进入这个状态后,它会释放 CPU 资源。它在等待一个特定的信号。
进入方式:调用 object.wait()。
退出方式:只有另一个线程执行了同一个对象的 object.notify() 或 object.notifyAll(),这个线程才有机会从等待队列转移到同步队列,去竞争锁,最后回到 RUNNABLE 状态。
风险:如果没人通知,该线程会产生死锁或导致内存泄漏。
-
TIMED_WAITING (计时等待)
这是一种更"安全"的等待方式,因为它给等待设置了底线。
进入方式:调用 Thread.sleep(3000) 或 object.wait(3000)。
退出方式:
时间到:3 秒钟一过,操作系统自动把它唤醒。
被提前叫醒:在 3 秒内,如果有人调了 notify(),它也会醒。
应用场景:网络请求超时控制、定期任务执行。
3. 线程核心方法区别
3.1 sleep和wait区别
-
所属类不同:
sleep 是 Thread 类的静态方法。
wait 是 Object 类的方法(意味着任何 Java 对象都有这个功能)。
-
对"锁"的处理不同:
sleep 很自私:它在 TIMED_WAITING 期间,不会释放锁。它抱着锁睡觉,别人进不来。
wait 很无私:它在进入 WAITING 时,会释放自己拿的锁。它把位置让出来,让别的线程先干活,自己去旁边等着。
-
使用环境不同:
wait 必须放在 synchronized 代码块里,否则会报 IllegalMonitorStateException。
sleep 随处可用。
3.2 run()方法和start()方法的区别
start()方法是启动线程的入口,而run()方法是在当前主线程执行。
java
public  class startVsRun{
    public static void main(String[] args) {
        Thread t1 = new Thread(() -> {
            System.out.println("当前线程: " + Thread.currentThread().getName());
        });

        t1.start();

        t1.run();

    }
}
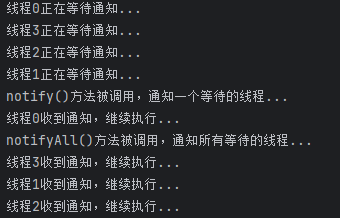
3.3 notify()和notifyAll()的区别
- 唤醒范围不同:
notify():只唤醒一个处于wait状态的线程
notifyAll():唤醒所有处于wait状态的线程 - 优缺点
notify()唤醒一个线程可能出现该线程无法工作的风险
notifyAll()唤醒所有线程降低风险
当调用 notifyAll() 时,所有线程都会被唤醒去抢同一把锁。但最终只有一个线程能抢到,其他没抢到的线程又要重新回到阻塞状态。这会带来瞬间的 CPU 压力。
java
public  class NotifyExample {
    private static final Object lock = new Object();
    public static void main(String[] args) throws InterruptedException {
        for (int i = 0; i <=3 ; i++) {
            final int taskId = i;
            new Thread(()->{
                synchronized (lock) {
                    try{
                        System.out.println("线程"+taskId+"正在等待通知...");
                        lock.wait();
                        System.out.println("线程"+taskId+"收到通知,继续执行...");
                    }catch (InterruptedException e){
                        e.printStackTrace();
                    }
                }
            }).start();
        }
        Thread.sleep(3000);
        synchronized (lock) {
            System.out.println("notify()方法被调用,通知一个等待的线程...");
            lock.notify();
        }
        Thread.sleep(3000);
        synchronized (lock) {
            System.out.println("notifyAll()方法被调用,通知所有等待的线程...");
            lock.notifyAll();
        }

    }

}
4. 线程编排技术
在 FutureTask 例子中,有一个很尴尬的问题:主线程必须调用 get() 并在那里阻塞死等。
CompletableFuture 引入了** 回调(Callback)**机制
-
不用等:任务做完了,它会自动触发下一步,主线程可以去忙别的。
-
链式操作:支持"流水线"作业(先干 A,A 完了自动干 B,B 完了干 C)。
-
异常处理:可以像 try-catch 一样优雅地处理异步过程中的报错。
java
import java.util.concurrent.CompletableFuture;

public class CFDemo {
    public static void main(String[] args) throws Exception {
        // 1. 提交一个异步任务(洗菜)
        CompletableFuture<String> cookPlan = CompletableFuture.supplyAsync(() -> {
            System.out.println(Thread.currentThread().getName() + ":正在洗菜...");
            try { Thread.sleep(2000); } catch (InterruptedException e) {}
            return "干净的蔬菜";
        });

        // 2. 链式处理:洗完菜后自动"炒菜"(thenApply 相当于加工)
        CompletableFuture<String> result = cookPlan.thenApply(vegetable -> {
            System.out.println(Thread.currentThread().getName() + ":正在炒" + vegetable);
            return "热腾腾的炒菜";
        });

        // 3. 最终回调:菜好了自动"摆盘"(thenAccept 消费结果)
        result.thenAccept(dish -> {
            System.out.println(Thread.currentThread().getName() + ":大功告成,把 " + dish + " 端上桌!");
        });

        System.out.println("主线程:菜好了喊我...");

        // 防止主线程立刻结束
        Thread.sleep(5000);
    }
}
5. 线程顺序执行的实现方法
5.1 使用join方法
join() 方法的作用是让当前线程等待目标线程执行完成后再继续执行。这就像是在接力比赛中,下一个选手必须等到上一个选手把棒子传到手里。
java
Thread t1 = new Thread(() -> System.out.println("T1 执行"));
Thread t2 = new Thread(() -> {
try {
System.out.println("T2 等待 T1 结束");
t1.join(); // 等待 t1 结束
System.out.println("T2 继续执行");
} catch (InterruptedException e) {
e.printStackTrace();
}
System.out.println("T2 执行");
});
t2.start();
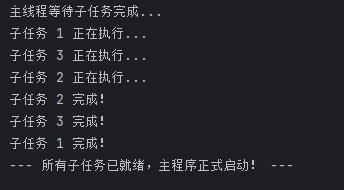
t1.start();5.2 使用CountDownLatch
核心思想: "一个(或多个)线程等待其他线程完成某件事。" 就像是旅游团的导游,必须在点名确认所有游客(其他线程)都上了大巴之后,才能通知司机开车(主线程继续往下走)。
CountDownLatch 维护了一个内部计数器,主要通过两个核心方法来控制流程:
- countDown():计数器减 1(通常由"前置任务"线程调用)。
- await():阻塞当前线程,直到计数器变为 0(通常由"主控"或"后续任务"线程调用)。
java
import java.util.concurrent.CountDownLatch;

public class LatchDemo {
   public static void main(String[] args) throws InterruptedException {
       // 1. 初始化计数器为 3
       CountDownLatch latch = new CountDownLatch(3);

       for (int i = 1; i <= 3; i++) {
           final int id = i;
           new Thread(() -> {
               try {
                   System.out.println("子任务 " + id + " 正在执行...");
                   Thread.sleep(1000); // 模拟耗时操作
                   System.out.println("子任务 " + id + " 完成!");
               } catch (InterruptedException e) {
                   e.printStackTrace();
               } finally {
                   // 2. 关键:每个线程完成后,计数器减 1
                   latch.countDown();
               }
           }).start();
       }

       System.out.println("主线程等待子任务完成...");
       // 3. 关键:主线程在这里阻塞,直到计数器归零
       latch.await();

       System.out.println("--- 所有子任务已就绪,主程序正式启动! ---");
   }
}
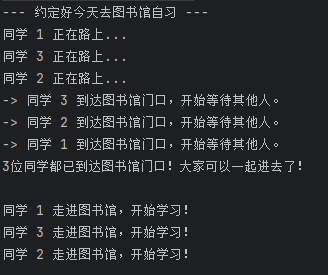
5.3 使用CyclicBarrier
核心思想: "一组线程互相等待,直到所有人都到达同一个进度节点,大家再一起往下走。" 就像是几个同学约好去图书馆自习,规定必须等所有人都在图书馆门口集合完毕,才能一起进去。先到的人只能在门口等后到的人。
java
import java.util.concurrent.*;

public class CyclicBarrierDemo {

    public static void main(String[] args) {
        // 定义参与的线程数量(同学的数量)
        int numberOfFriends = 3;

        // 1. 初始化 CyclicBarrier
        // 参数1:parties,表示需要等待的线程数量
        // 参数2:barrierAction,当所有线程都到达栅栏时,优先执行的汇总任务
        CyclicBarrier barrier = new CyclicBarrier(numberOfFriends, () -> {
            System.out.println("3位同学都已到达图书馆门口!大家可以一起进去了!\n");
        });

        // 创建一个线程池来模拟同学们
        ExecutorService executor = Executors.newFixedThreadPool(numberOfFriends);

        System.out.println("--- 约定好今天去图书馆自习 ---");

        // 派发 3 个同学任务
        for (int i = 1; i <= numberOfFriends; i++) {
            final int friendId = i;

            executor.submit(() -> {
                try {
                    System.out.println("同学 " + friendId + " 正在路上...");
                    // 模拟每个同学路上的耗时不同 (0到2秒之间)
                    Thread.sleep((long) (Math.random() * 2000));

                    System.out.println("-> 同学 " + friendId + " 到达图书馆门口,开始等待其他人。");

                    // 2. 关键点:调用 await()
                    // 线程运行到这里会被阻塞,直到 3 个线程都调用了 await()
                    barrier.await();

                    // 3. 跨过栅栏后继续执行的代码
                    System.out.println("同学 " + friendId + " 走进图书馆,开始学习!");

                } catch (InterruptedException | BrokenBarrierException e) {
                    e.printStackTrace();
                }
            });
        }

        // 关闭线程池
        executor.shutdown();
    }
}
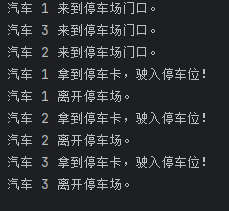
5.4 使用Semaphore
Semaphore可以控制同时访问资源的线程数量
java
public class SemaphoreDemo {

    public static void main(String[] args) {
        // 1. 初始化 Semaphore,发放 1个"停车许可证"
        Semaphore semaphore = new Semaphore(1);

        // 模拟 3 辆汽车同时来停车场,每辆车需要一个许可证才能进入
        int carCount = 3;
        ExecutorService executor = Executors.newFixedThreadPool(carCount);

        for (int i = 1; i <= carCount; i++) {
            final int carId = i;
            executor.submit(() -> {
                try {
                    System.out.println(" 汽车 " + carId + " 来到停车场门口。");

                    // 2. 尝试获取许可证 (如果没有空位,线程会在这里阻塞等待)
                    semaphore.acquire();

                    System.out.println(" 汽车 " + carId + " 拿到停车卡,驶入停车位!");

                    // 模拟停车时长 (1到3秒随机)
                    Thread.sleep((long) (Math.random() * 2000 + 1000));

                    System.out.println(" 汽车 " + carId + " 离开停车场。");

                } catch (InterruptedException e) {
                    e.printStackTrace();
                } finally {
                    // 3. 归还许可证 (关键!必须在 finally 里释放,防止异常导致死锁)
                    semaphore.release();
                }
            });
        }

        executor.shutdown();
    }
}
5.5 使用线程池
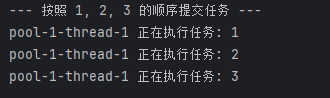
线程池内部使用队列存储任务,任务按照提交顺序执行。创建只有一个线程的线程池可以保证任务按照顺序执行。
java
public class SingleThreadOrderDemo {
    public static void main(String[] args) {
        // 创建一个单线程的线程池
        ExecutorService singleExecutor = Executors.newSingleThreadExecutor();

        System.out.println("--- 按照 1, 2, 3 的顺序提交任务 ---");
        for (int i = 1; i <= 3; i++) {
            final int taskId = i;
            singleExecutor.execute(() -> {
                System.out.println(Thread.currentThread().getName() + " 正在执行任务: " + taskId);
                try {
                    Thread.sleep(1000); // 模拟耗时
                } catch (InterruptedException e) {
                    e.printStackTrace();
                }
            });
        }
        singleExecutor.shutdown();
    }
}
5.6 使用CompletableFuture
模拟场景:用户画像聚合查询
我们需要并发获取以下四个数据:
User Info(基本信息)
Order Count(订单数量)
Member Points(会员积分)
Latest Log(最近登录日志)
java
public class MultiTaskDemo {
    public static void main(String[] args) {
        // 1. 自定义线程池
        ExecutorService executor = Executors.newFixedThreadPool(4);

        long start = System.currentTimeMillis();

        // 2. 开启 4 个并发任务
        CompletableFuture<String> task1 = CompletableFuture.supplyAsync(() -> {
            simulateDelay(500); // 模拟查询基本信息
            return "用户:张三";
        }, executor);

        CompletableFuture<Integer> task2 = CompletableFuture.supplyAsync(() -> {
            simulateDelay(300); // 模拟查询订单数
            return 15;
        }, executor);

        CompletableFuture<Integer> task3 = CompletableFuture.supplyAsync(() -> {
            simulateDelay(600); // 模拟查询积分
            return 2000;
        }, executor);

        CompletableFuture<String> task4 = CompletableFuture.supplyAsync(() -> {
            simulateDelay(400); // 模拟查询日志
            return "2026-03-16 登录成功";
        }, executor);

        // 3. 使用 allOf 等待所有任务完成
        // allOf 的作用是:只有括号里所有任务都结束了,它才会触发后面的 thenRun。
        CompletableFuture<Void> allTasks = CompletableFuture.allOf(task1, task2, task3, task4);

        // 4. 当所有任务完成后,聚合结果
        allTasks.thenRun(() -> {
            try {
                // 此时用 join() 或 get() 是不会阻塞的,因为任务已经全完了
                String userInfo = task1.join();
                int orders = task2.join();
                int points = task3.join();
                String log = task4.join();

                System.out.println("---- 聚合结果 ----");
                System.out.println(userInfo + " | 订单数:" + orders + " | 积分:" + points + " | 日志:" + log);
                System.out.println("总耗时: " + (System.currentTimeMillis() - start) + " ms");
            } catch (Exception e) {
                e.printStackTrace();
            }
        }).join(); // 这里 join 是为了让主线程等回调执行完

        executor.shutdown();
    }

    private static void simulateDelay(int ms) {
        try { TimeUnit.MILLISECONDS.sleep(ms); } catch (InterruptedException e) {}
    }
}