前言
随着人工智能技术的快速发展,越来越多的网站开始集成AI功能来提升用户体验。本文将详细介绍如何为基于Spring Boot的博客系统整合一个功能完善的AI对话机器人,让读者能够基于文章内容与AI进行交互,获取更深入的理解和解答。
效果预览
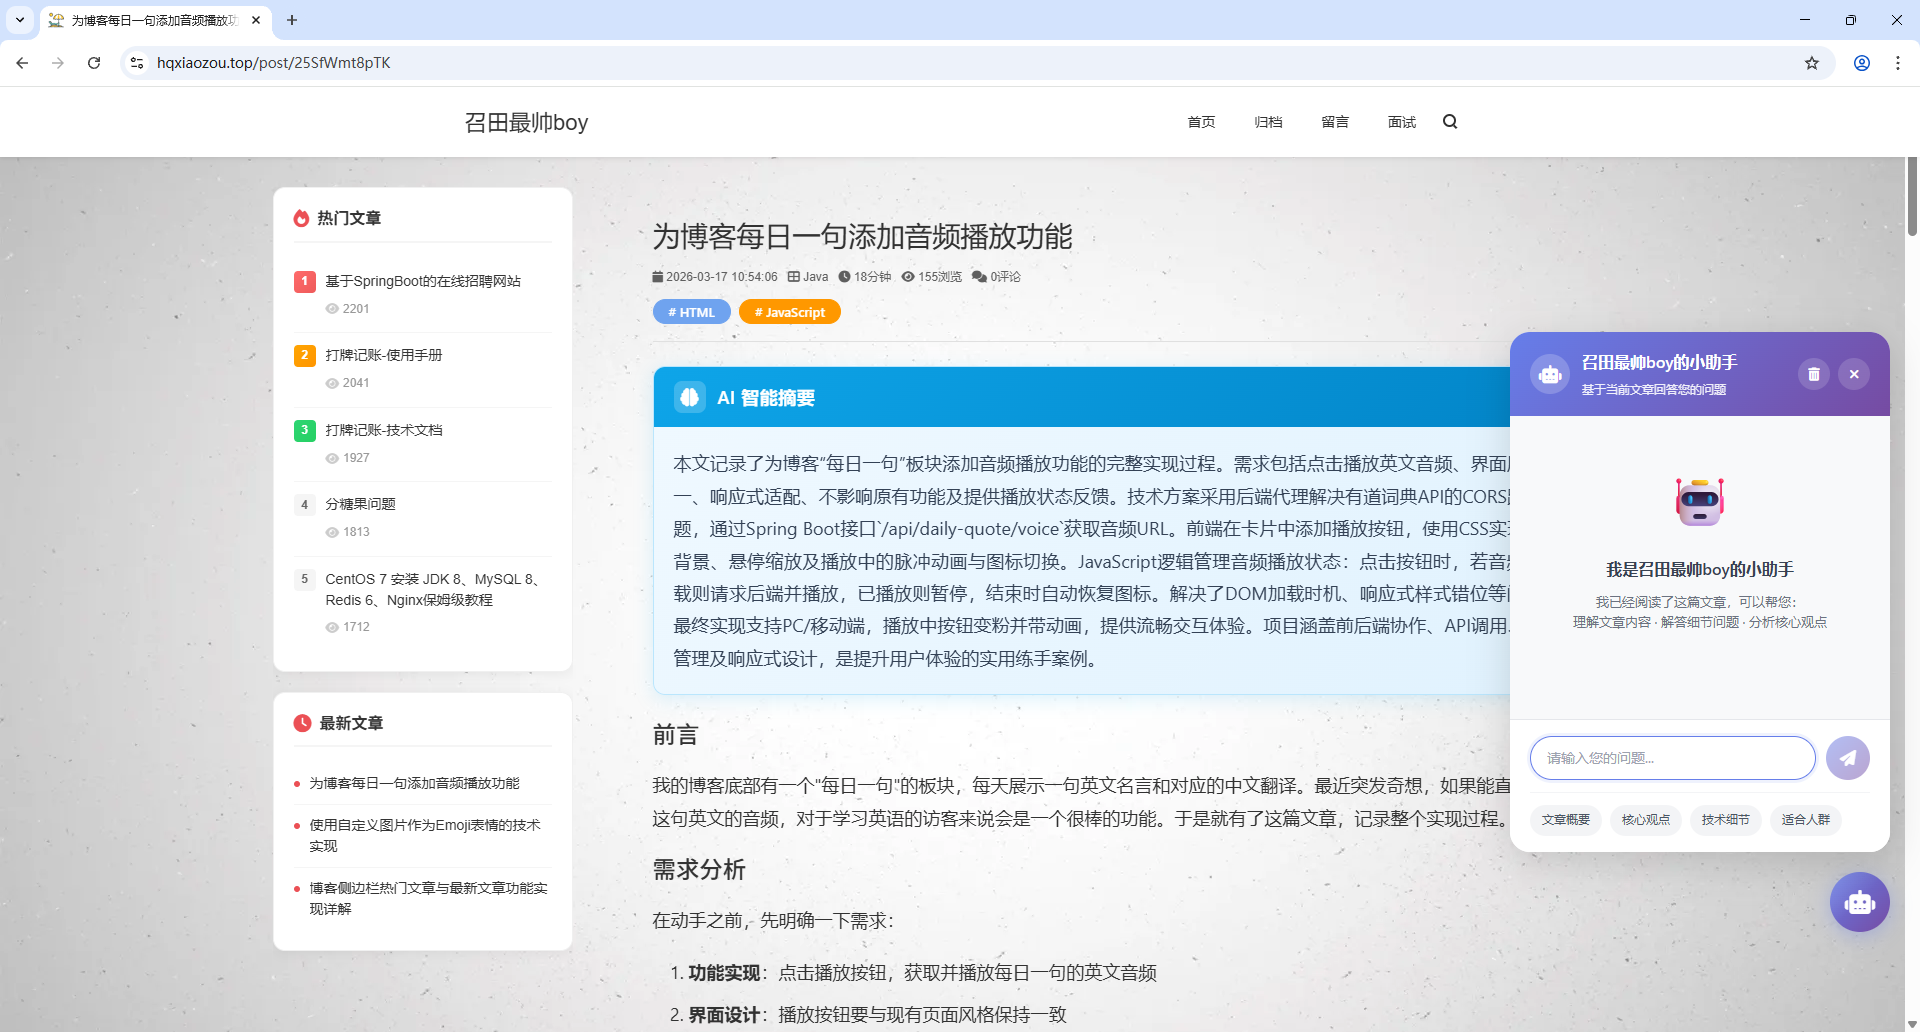
一、需求分析
在动手实现之前,我们需要明确AI对话机器人的核心功能需求:
- 文章上下文理解:机器人需要能够获取当前文章的内容作为回答问题的上下文依据
- 自然语言交互:支持用户以自然语言提问,AI基于文章内容给出准确回答
- 对话历史管理:保留对话记录,支持查看历史消息
- 响应式设计:适配不同屏幕尺寸,不影响文章阅读体验
- Markdown渲染支持:AI回复支持Markdown格式,提升可读性
- 打字机效果:AI回复采用打字机效果,增强交互感
二、技术架构
2.1 整体架构
┌─────────────────────────────────────────────────────────┐
│                      前端 (Thymeleaf)                     │
│  ┌─────────────┐    ┌─────────────┐    ┌─────────────┐  │
│  │  对话UI组件  │    │ Markdown渲染 │    │ 本地存储    │  │
│  └─────────────┘    └─────────────┘    └─────────────┘  │
└─────────────────────────────────────────────────────────┘
                           │
                           ▼
┌─────────────────────────────────────────────────────────┐
│                   后端 (Spring Boot)                     │
│  ┌─────────────┐    ┌─────────────┐    ┌─────────────┐  │
│  │ AI对话服务   │    │ 文章服务    │    │ API控制器   │  │
│  └─────────────┘    └─────────────┘    └─────────────┘  │
└─────────────────────────────────────────────────────────┘
                           │
                           ▼
┌─────────────────────────────────────────────────────────┐
│                   AI服务 (OpenAI API)                    │
└─────────────────────────────────────────────────────────┘
2.2 核心技术栈
- 前端:HTML5 + CSS3 + JavaScript (原生)
- Markdown解析:Marked.js
- 后端:Spring Boot + Thymeleaf
- AI服务:OpenAI兼容API(支持多种模型)
- 数据存储:LocalStorage(前端)+ 内存缓存(后端)
三、前端实现
3.1 UI组件设计
AI对话机器人采用浮动按钮 + 弹窗的设计模式:
html
<div class="ai-chat-widget" id="aiChatWidget">
    <!-- 对话入口按钮 -->
    <button class="ai-chat-toggle" id="aiChatToggle">
        <div class="ai-chat-toggle-inner"></div>
        <i class="fas fa-robot"></i>
        <span class="ai-chat-badge" id="aiChatBadge">0</span>
    </button>

    <!-- 对话窗口 -->
    <div class="ai-chat-window" id="aiChatWindow">
        <!-- 窗口头部、消息区域、输入区域 -->
    </div>
</div>
3.2 关键CSS样式
css
/* 浮动按钮样式 */
.ai-chat-toggle {
    width: 60px;
    height: 60px;
    border-radius: 50%;
    background: linear-gradient(135deg, #667eea 0%, #764ba2 100%);
    position: fixed;
    bottom: 100px;
    right: 30px;
    box-shadow: 0 4px 20px rgba(102, 126, 234, 0.4);
    transition: all 0.3s ease;
}

/* 未读消息红点 */
.ai-chat-badge {
    position: absolute;
    top: -4px;
    right: -4px;
    width: 20px;
    height: 20px;
    background: #ff4757;
    border-radius: 50%;
    animation: badge-pulse 2s infinite;
}

/* 对话窗口 */
.ai-chat-window {
    position: absolute;
    bottom: 80px;
    right: 0;
    width: 380px;
    height: 520px;
    background: white;
    border-radius: 20px;
    box-shadow: 0 10px 40px rgba(0, 0, 0, 0.15);
}
3.3 Markdown渲染实现
为了支持AI回复的Markdown格式,我们引入Marked.js库:
javascript
// 配置Marked.js解析器
marked.setOptions({
    breaks: true,        // 支持GitHub风格的换行
    gfm: true,           // 启用GitHub风格的Markdown
    headerIds: false,    // 不生成标题ID
    smartLists: true,    // 智能列表
    smartypants: true    // 智能标点
});

// Markdown转HTML
function markdownToHtml(markdown) {
    return marked.parse(markdown);
}
3.4 打字机效果实现
打字机效果增强了交互体验,让用户感受到AI正在"思考":
javascript
function renderMessageWithTyping(message) {
    // 创建消息元素
    var messageContentDiv = document.createElement('div');
    messageContentDiv.className = 'ai-chat-message-content typing';

    // 打字机效果
    var text = message.content;
    var index = 0;
    var speed = 15; // 毫秒/字符

    function typeWriter() {
        if (index < text.length) {
            messageContentDiv.textContent += text.charAt(index);
            index++;
            setTimeout(typeWriter, speed);
        } else {
            // 打字完成,渲染Markdown
            messageContentDiv.classList.remove('typing');
            messageContentDiv.classList.add('markdown-body');
            messageContentDiv.innerHTML = markdownToHtml(text);
        }
    }

    typeWriter();
}
四、后端实现
4.1 服务层设计
java
@Service
public class AiChatServiceImpl implements AiChatService {

    @Value("${ai.chat.api-key}")
    private String apiKey;

    @Value("${ai.chat.api-url}")
    private String apiUrl;

    @Value("${ai.chat.model}")
    private String model;

    @Override
    public String chat(Integer articleId, String articleTitle,
                      String articleContent, String question,
                      List<Map<String, String>> history) {
        // 构建系统提示词
        String systemPrompt = buildSystemPrompt(articleTitle, articleContent);

        // 调用AI API
        return callAiApi(systemPrompt, question, history);
    }

    private String buildSystemPrompt(String title, String content) {
        return "你是一个专业的文章助手,基于提供的文章内容回答用户的问题。\n\n" +
               "文章标题:" + title + "\n\n" +
               "文章内容:\n" + content;
    }
}
4.2 API接口
java
@PostMapping(value = "/api/ai-chat", produces = "application/json;charset=UTF-8")
@ResponseBody
public Map<String, Object> aiChat(@RequestBody Map<String, Object> requestBody) {
    // 解析请求参数
    Integer articleId = (Integer) requestBody.get("articleId");
    String articleContent = (String) requestBody.get("articleContent");
    String question = (String) requestBody.get("question");
    List<Map<String, String>> history = (List<Map<String, String>>) requestBody.get("history");

    // 调用AI服务
    String answer = aiChatService.chat(articleId, articleTitle,
                                       plainText, question, history);

    // 返回结果
    result.put("success", true);
    result.put("answer", answer);
    return result;
}
五、配置说明
在 application.yaml 中添加AI对话配置:
yaml
ai:
  chat:
    enabled: true
    api-key: "your-api-key"
    api-url: "https://api.openai.com/v1/chat/completions"
    model: "gpt-3.5-turbo"
    max-tokens: 1000
    temperature: 0.7
    timeout: 30000
六、功能亮点
6.1 智能上下文理解
AI机器人能够:
- 自动提取文章正文内容
- 基于文章内容回答相关问题
- 支持多轮对话,保持上下文连贯
6.2 完善的交互体验
- 快捷问题:提供常用问题的快捷按钮
- 本地存储:对话历史保存在浏览器本地
- 未读提示:红点显示用户发起的对话数
- 响应式设计:完美适配移动端和桌面端
6.3 与Thymeleaf无缝集成
所有Markdown处理都在前端完成,避免了与Thymeleaf服务端渲染的冲突,确保模板语法正常工作。
七、遇到的问题与解决方案
7.1 返回顶部按钮冲突
问题:AI对话窗口打开时,返回顶部按钮仍然显示。
解决 :使用全局标志 window.aiChatWidgetOpen 控制返回顶部按钮的显示/隐藏。
7.2 Markdown与打字机效果的协调
问题:打字机效果逐字显示时无法渲染Markdown。
解决:打字过程中显示纯文本,完成后转换为Markdown渲染。
7.3 红点被截断
问题 :未读消息红点被按钮的 overflow: hidden 截断。
解决 :将光泽效果移到内部容器,移除按钮的 overflow: hidden。
八、总结
通过本次整合,我们为博客系统添加了一个功能完善、体验优秀的AI对话机器人。主要实现的功能包括:
- ✅ 基于文章内容的智能问答
- ✅ Markdown格式渲染支持
- ✅ 打字机效果增强交互感
- ✅ 对话历史本地存储
- ✅ 响应式设计适配多端
- ✅ 与Thymeleaf模板无缝集成
这个AI对话机器人不仅提升了读者的阅读体验,也为博客增添了现代化的交互功能。未来可以考虑扩展更多功能,如语音输入、多语言支持等。
参考资料
本文记录了将AI对话机器人整合到Spring Boot博客系统的完整过程,包括前端UI实现、后端服务开发、Markdown渲染、打字机效果等核心功能。