目录
[3.2. 使用string的命令](#3.2. 使用string的命令)
[3.4.4. 测试spop](#3.4.4. 测试spop)
[3.5.4.测试hkeys 和 hvals](#3.5.4.测试hkeys 和 hvals)
[3.6. 使用zset的命令](#3.6. 使用zset的命令)
一.安装Redis
sudo apt install -y redis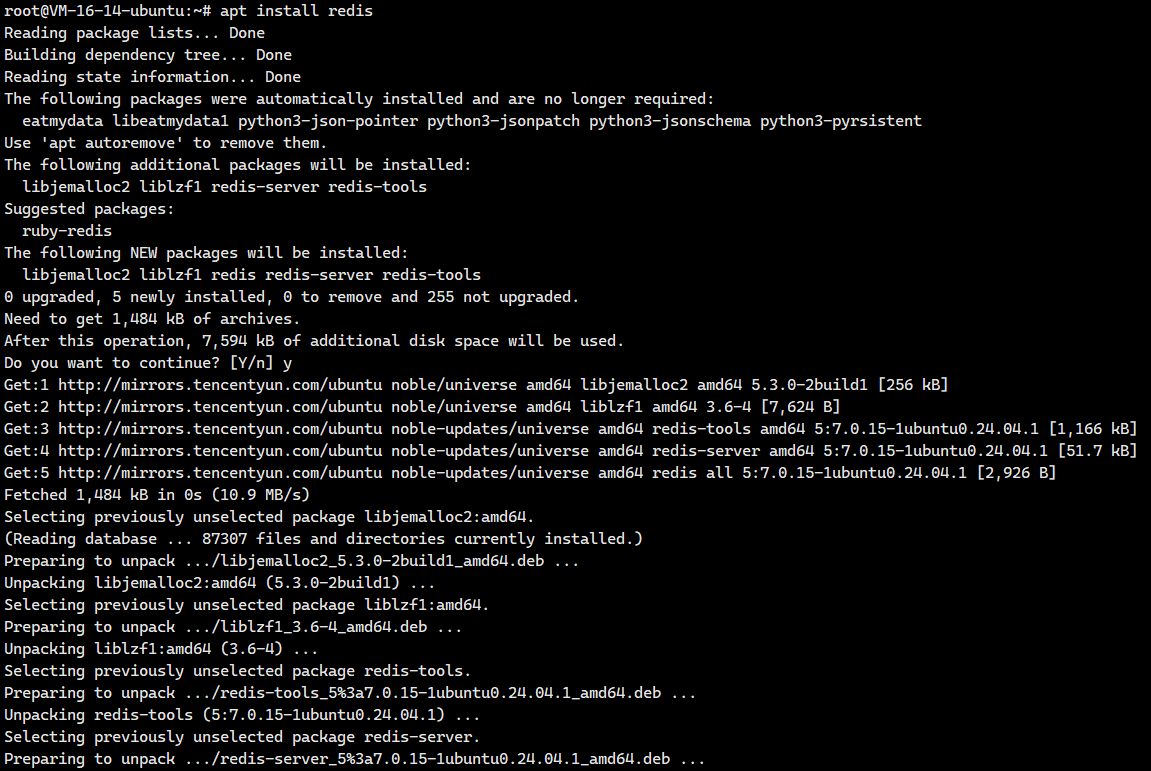
netstat -anp | grep redis
Redis默认端口是6379。这里还是有一点问题。

大家注意到了吗?127.0.0.1可是本地回环IP啊,Redis绑定的IP地址可是本地回环IP啊,这怎么可以。
我们需要去修改一下Redis的配置文件,把这个绑定的IP地址修改为0.0.0.0
sudo vim /etc/redis/redis.conf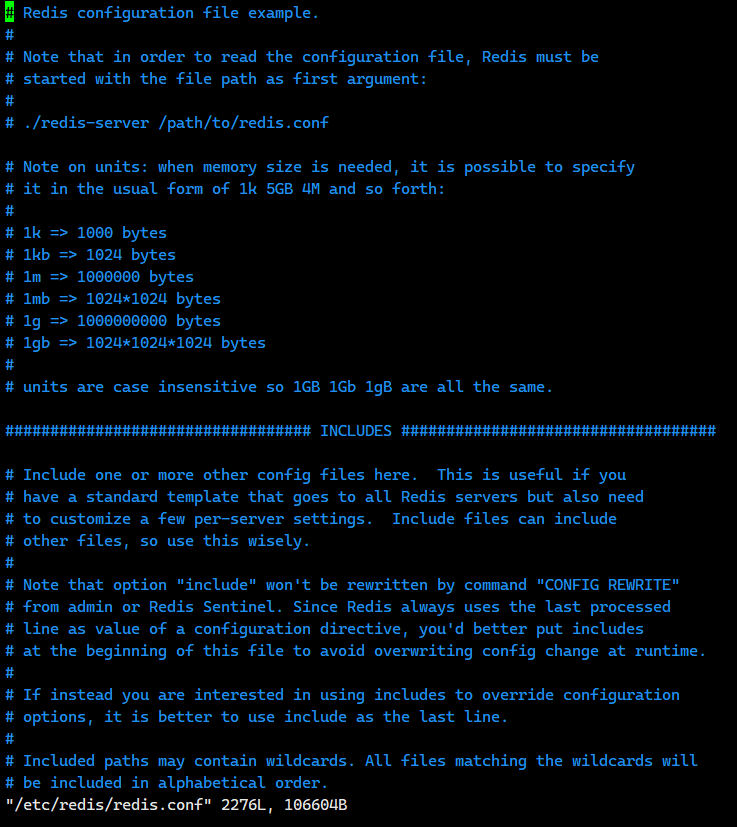
我们往里面找到下面这一行
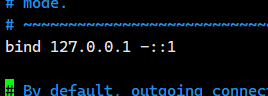
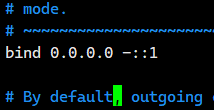
把上面那个给我修改成下面这个
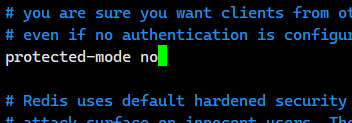
除了上面这个绑定IP地址需要改之外,我们还需要修改下面这个
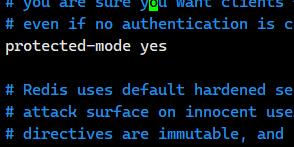
我们把yes给修改成no
有人就好奇,我们的redis有必要配置密码吗?
没有必要,虽然我们的Redis没有密码,但是因为我们的数据不值钱,就可以说是非常安全的,所以我们不配置密码的。
接下来我们需要重启redis服务器
service redis-server restart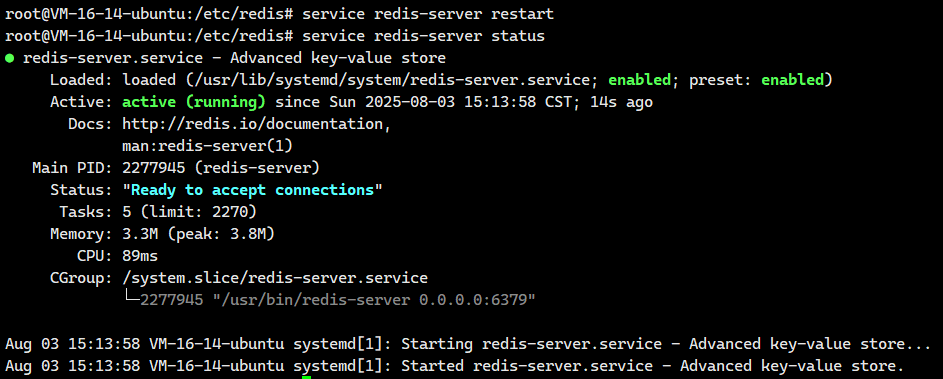
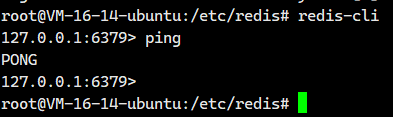
接下来我们可以redis自带的客户端redis-cil登陆一下我们的redis。
redis-cli
到这一步,我们的redis就算是安装完成了。
那我们怎么退出呢?
直接ctl+d就能退出
注意:redis里面的中文显示异常问题
我们在redis里面使用中文,可能会出现下面这个情况
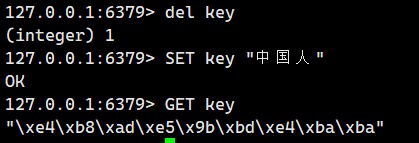
我们看到上面这些\xe4啥的,正是 Redis 存储的原始 UTF-8 编码字节(假设数据是用 UTF-8 存储的)在默认 redis-cli(不带 --raw)下的转义表示形式。使用 redis-cli --raw 并确保终端是 UTF-8 环境,就能直接看到这些字节对应的汉字(如 "关羽"、"张飞"、"赵云"、"黄忠" 等,具体取决于实际存储的值)。如果终端编码不对,--raw 输出也会是乱码。
这是因为Redis 在内部存储数据时,采用的是二进制安全(binary safe) 的方式。这意味着:
-
无编码感知: Redis 服务器本身不感知也不处理任何特定的字符编码(如 UTF-8, GBK 等)。它只是将客户端发送过来的数据视为原始的字节序列进行存储和返回。
-
客户端责任: 因此,将服务器返回的二进制字节序列正确解码回人类可读的字符(如汉字),是客户端应用程序的责任。客户端需要知道存储时使用的编码,并在读取时使用相同的编码进行解码。
-
redis-cli --raw的作用: 默认情况下,redis-cli会对非 ASCII 字符(如中文)进行转义,输出\xHH形式的十六进制表示(如您示例中的输出)。使用redis-cli --raw选项会指示redis-cli不进行这种转义处理,而是尝试直接将接收到的原始字节序列输出到终端。 -
终端编码匹配:
redis-cli --raw能否正确显示汉字,还取决于运行redis-cli的终端或控制台环境的字符编码设置 。如果终端的编码(例如 UTF-8)与数据实际存储的编码一致,--raw就能正确渲染出汉字。如果不一致,即使使用了--raw,仍然可能显示乱码。
总结关键点:
-
Redis (Server): 存/取二进制字节串。不管编码。
-
客户端: 发送时编码数据为字节串;接收时解码字节串回字符。必须知道正确的编码。
-
redis-cli --raw: 禁用转义,直接输出原始字节串。显示是否正确取决于终端编码是否匹配数据编码。
这个时候我们需要退出redis客户端,加上选项--raw选项来重新登陆redis客户端
redis-cli --raw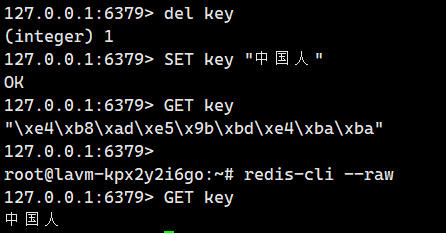
二.安装Redis-plus-plus
这种操作方式不是我们日常开发中主要的形式~~
更多的时候, 是使用 redis 的 api , 来实现定制化的 redis 客户端程序, 进一步操作 redis 服务器.
通过用程序来操作 redis ~~
以前学习 MySQL 的时候~ 也会涉及到, 关于使用程序来操作 MySQL 服务器
- C++: MySQL 原生 API
- Java: JDBC & MyBatis
redis 提供的命令行客户端 / 第三方的图形化客户端 ,他们本质上都属于是 "通用的客户端程序"
相比之下, 我们在工作中更希望使用到的是 "专用的" "定制化" 的客户端程序~~
是否前面学习的这些 redis 命令, 没有价值了呢??
当然不是的 ! !
redis 命令相当于使用代码来执行~~
首先我们必须先安装cmake和g++
sudo apt update
sudo apt install cmake
sudo apt install g++
官网:GitHub - sewenew/redis-plus-plus: Redis client written in C++
安装hiredis依赖
redis-plus-plus 是基于hiredis 实现的,hiredis 是⼀个C语⾔实现的redis客⼾端,因此需要先安装hiredis.。
由于 redis-plus-plus 是基于 hiredis ,因此您应该先安装 hiredis 。hiredis 的最低版本要求为 v0.12.1。
sudo apt install -y libhiredis-devredis-plus-plus本体则用使用编译安装。如果是编译安装,则使用ubuntu安装比使用centos安装更简单。redis-plus-plus 是使用 CMAKE 构建的。 CMAKE是生成makefile的工具。我们得先安装CMAKE。
安装redis-plus-plus本体
好了,我们接下来来安装redis-plus-plus本体
git clone https://github.com/sewenew/redis-plus-plus.git接下来我们将
mkdir build && cd build && cmake -DCMAKE_INSTALL_PREFIX=/usr .. && make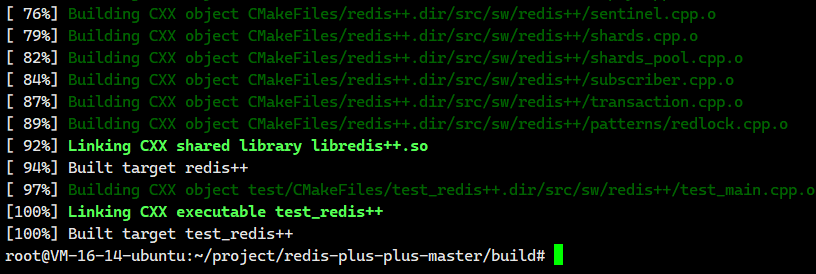

这里就多了一些库啊!!

.a和.so都是当前编译的目录下,后续写代码的时候不一定能找到这里的库,所以我更推荐大家把这些库拷贝到系统目录里。不过这个我们不需要自己使用cp命令啥的去拷贝,我们直接执行下面这个命令就能进行拷贝到系统目录里面
sudo make install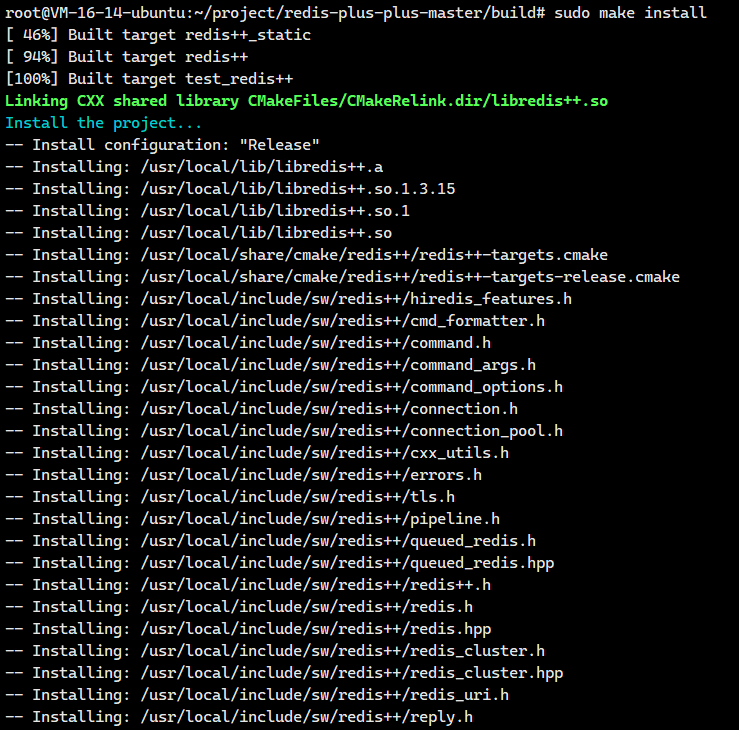
这就把那些库拷贝到系统目录里面的。
这就安装完了,总的来说,就下面这些问题
好,现在就算是安装完成了,这个目录也没有存在的意义了,可以删除了。
测试redis-plus-plus
我们先看看我们的端口号

接下来我们将使用redis-plus-plus来连接一下我们的redis服务器。
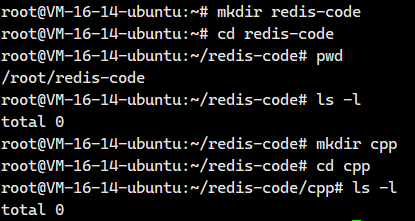
编程.cc文件
接下来我们就来创建一下文件

把下面这个内容填进去
cpp
#include <iostream>
#include <vector>
#include <string>
#include <unordered_map>
#include <sw/redis++/redis++.h>

using std::cout;
using std::endl;
using std::vector;
using std::string;
using std::unordered_map;

int main() {
    // 创建 Redis 对象的时候, 需要在构造函数中, 指定 redis 服务器的地址和端口.
    sw::redis::Redis redis("tcp://127.0.0.1:6379");
    // 调用 ping 方法, 让客户端给服务器发了一个 PING, 然后服务器就会返回一个 PONG. 就通过 返回值 获取到.
    string result = redis.ping();
    std::cout << result << std::endl;
    return 0;
}
编写makefile
编写makefile的时候,需要引入库文件
- redis++自己的静态库
- hiredis的静态库
- 线程库
关键就是需要知道这些库的路径在哪里?
我们可以一个一个来找
-
寻找redis++自己的静态库
find /usr/ -name "libredis*"

这找到了!!!就是/usr/local/lib/libredis++.a
- 寻找hiredis的静态库
cpp
find /usr/ -name "libhiredis*"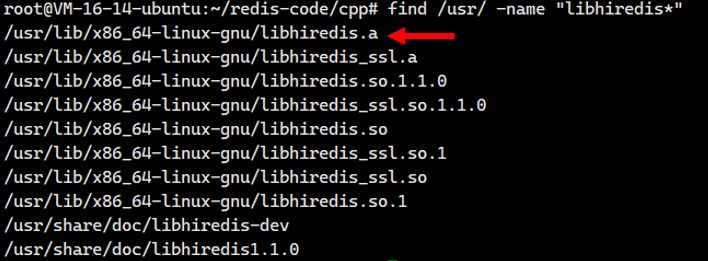
找到了就是/usr/lib/x86_64-linux-gnu/libhiredis.a
- 线程库
这个都是我们的老朋友了,我们直接加一个-pthread即可
接下来我们写一下makefile,把下面这个填进去
cpp
hello:hello.cc
	g++ -std=c++17 -o $@ $^ /usr/local/lib/libredis++.a /usr/lib/x86_64-linux-gnu/libhiredis.a -pthread
.PHONY:clean
clean:
	rm hello
我们运行一下

这个PONG就是redis服务器返回的。
好,我们这个就是没有一点问题的!!!
现在就算是彻底安装成功了。
至于更多API,大家可以去:redis-plus-plus/src/sw/redis++/redis.h at master · sewenew/redis-plus-plus · GitHub
如果那个访问不了的话,也可以去:src/sw/redis++/redis.h · peixinchen/redis-plus-plus - Gitee.com
- 寻找头文件
我们得知道这个redis-plus-plus的头文件在哪里
ls -l /usr/local/include/sw/redis++/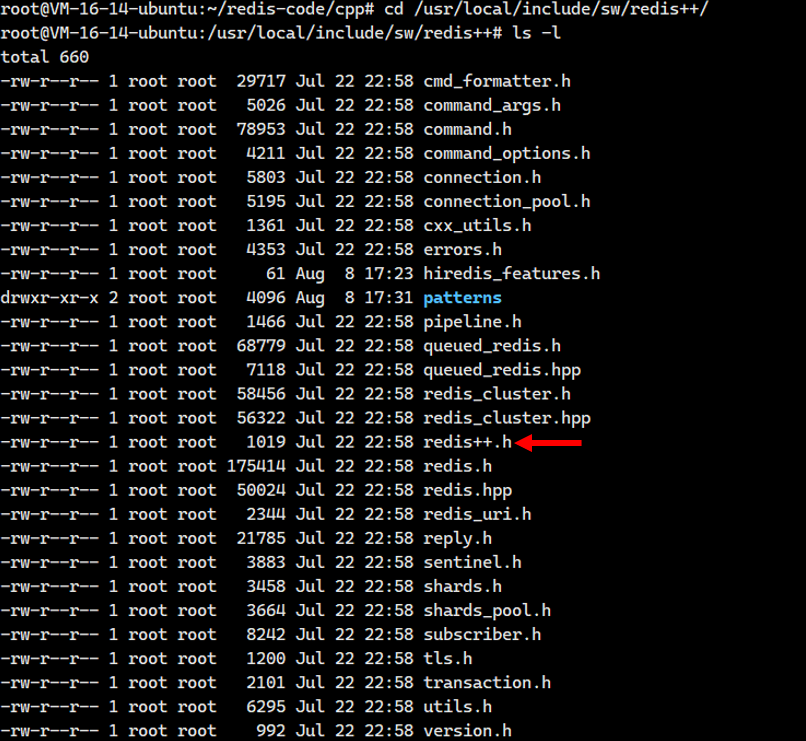
这个redis++.h就是我们的核心头文件。
如果大家找不到在哪里,其实是可以使用find命令来查找
find /usr/ -name "redis++*"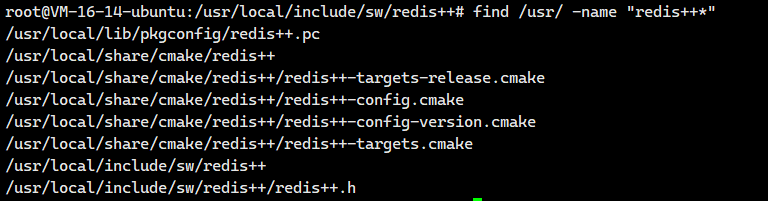
由于/usr/local/include/是系统目录,所以我们在代码里面直接按照下面这样子写即可
#include<sw/redis++/redis++.h>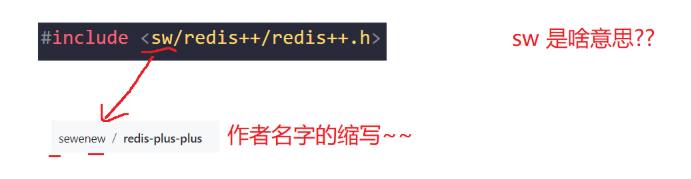
-
寻找静态库文件
find /usr/ -name "libredis*"
这也找到了!!!
三.使用Redis-plus-plus
3.1.使用通用命令
我们接下来将好好的讲解一下,如何使用redis-plus-plus去执行我们之前介绍的通用命令
- get/set
- exists
- del
- keys
- expire/ttl
- type
接下来我们将创建一个test.cc,makefile
makefile的内容都是一样的,我在这里先给你们列出来,后面我就不说了
makefile(如果安装在/usr/local)
cpp
test:test.cc
	g++ -std=c++17 -o $@ $^ /usr/local/lib/libredis++.a /usr/lib/x86_64-linux-gnu/libhiredis.a -pthread
.PHONY:clean
clean:
	rm test
makefile(如果安装在/usr)------我们这里就是安装在/usr里面的
统一一下编译命令,由于我们强制安装在这个/usr目录里面,那么我们就不需要去指定库的位置和头文件的位置
cpp
test : test.cc
	g++ -std=c++17 $^ -o $@ -lhiredis -lredis++
.PHONY : clean
clean :
	rm -rf test
3.1.1.测试get/set
test.cc(第一版)
cpp
#include <iostream>
#include <string>
#include <sw/redis++/redis++.h>
using namespace std;
// get 和 set
void test1(sw::redis::Redis& redis) {
std::cout << "get 和 set 的使用" << std::endl;
// 清空一下数据库, 避免之前残留的数据有干扰.
redis.flushall();//注意这里删除了所有东西
// 使用 set 设置 key
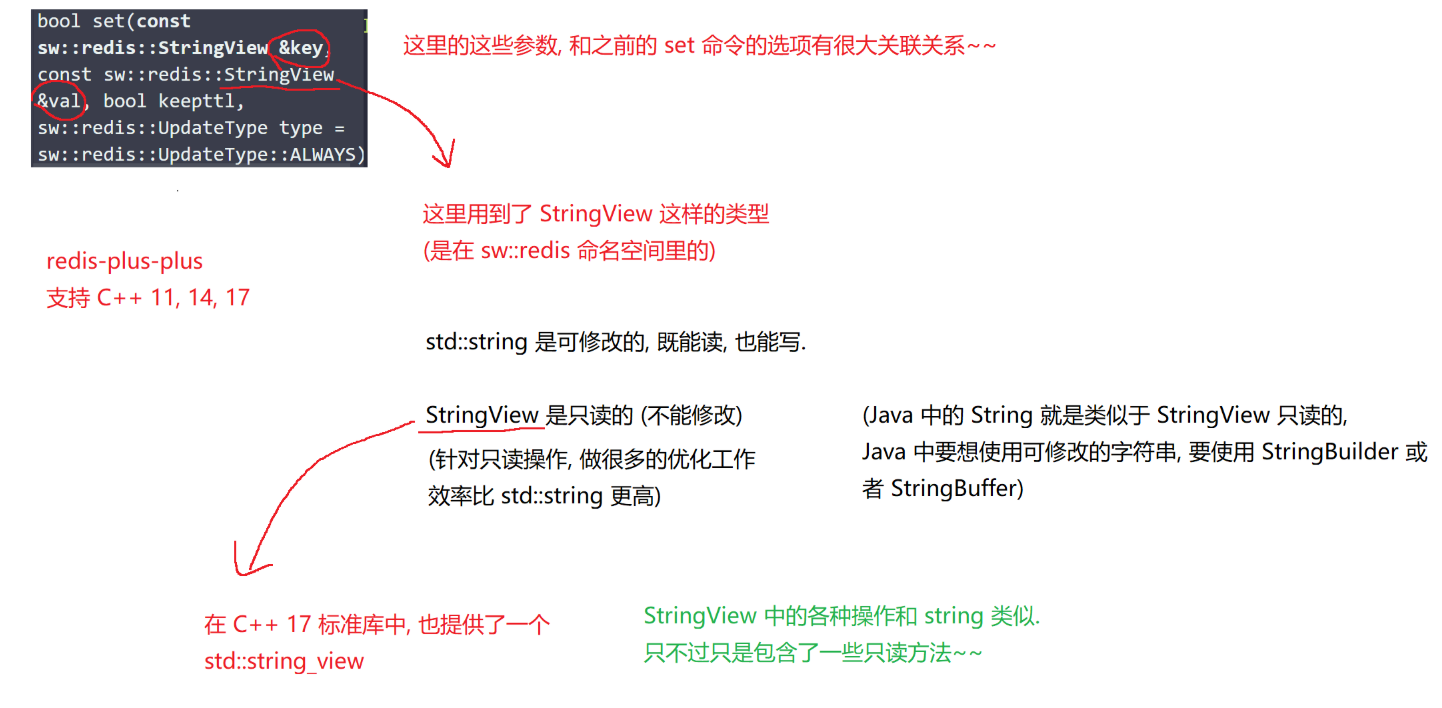
//这个和之前的set命令的选项有很大的关联关系
redis.set("key1", "111");
redis.set("key2", "222");
redis.set("key3", "333");
// 使用 get 获取到 key1 对应的 value
auto value1 = redis.get("key1");
std::cout << "value1=" << value1 << std::endl;
auto value2 = redis.get("key2");
std::cout << "value2=" << value2 << std::endl;
auto value3 = redis.get("key3");
std::cout << "value3=" << value3 << std::endl;
auto value4 = redis.get("key4");
std::cout << "value4=" << value4 << std::endl;
}
int main() {
// 创建 Redis 对象的时候, 需要在构造函数中, 指定 redis 服务器的地址和端口.
sw::redis::Redis redis("tcp://127.0.0.1:6379");
test1(redis);
return 0;
}一编译,我们就发现报错了
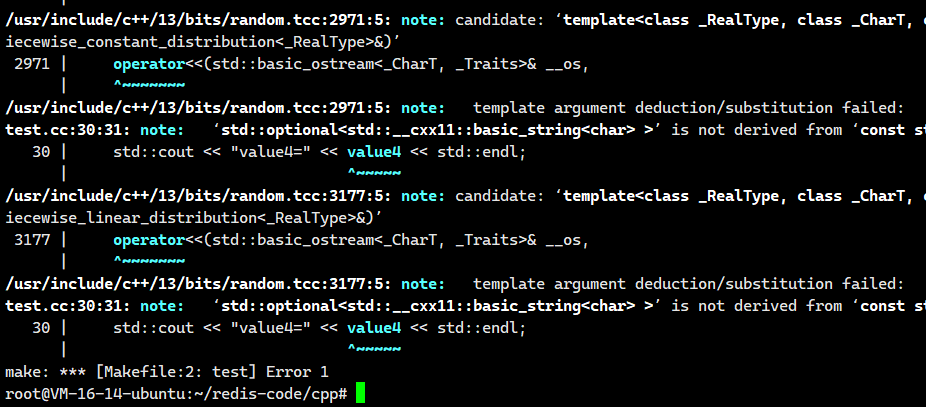
这个是因为说明我们上面value1,value2,value3,value4不支持使用<<运算符。
此处不需要给这个 optional 搞一个 << 的重载, 没必要. 只需要把 optional 里面包含的元素给取出来就可以了~~ (optional 可以当做只包含一个元素的容器)
实际上我们只需将value1,value2,value3,value4全部换成下面这样子即可
- value1.value()
- value2.value()
- value3.value()
- value4.value()
test.cc(第二版)
cpp
#include <iostream>
#include <string>
#include <sw/redis++/redis++.h>
using namespace std;

// get 和 set
void test1(sw::redis::Redis& redis) {
    std::cout << "get 和 set 的使用" << std::endl;

    // 清空一下数据库, 避免之前残留的数据有干扰.
    redis.flushall();//注意这里删除了所有东西

    // 使用 set 设置 key
    //这个和之前的set命令的选项有很大的关联关系
    redis.set("key1", "111");
    redis.set("key2", "222");
    redis.set("key3", "333");

    // 使用 get 获取到 key1 对应的 value
    auto value1 = redis.get("key1");
    std::cout << "value1=" << value1.value() << std::endl;

    auto value2 = redis.get("key2");
    std::cout << "value2=" << value2.value() << std::endl;

    auto value3 = redis.get("key3");
    std::cout << "value3=" << value3.value() << std::endl;

    auto value4 = redis.get("key4");
    std::cout << "value4=" << value4.value() << std::endl;
}

int main() {
    // 创建 Redis 对象的时候, 需要在构造函数中, 指定 redis 服务器的地址和端口.
    sw::redis::Redis redis("tcp://127.0.0.1:6379");
    test1(redis);
    return 0;
}
编译运行一下:
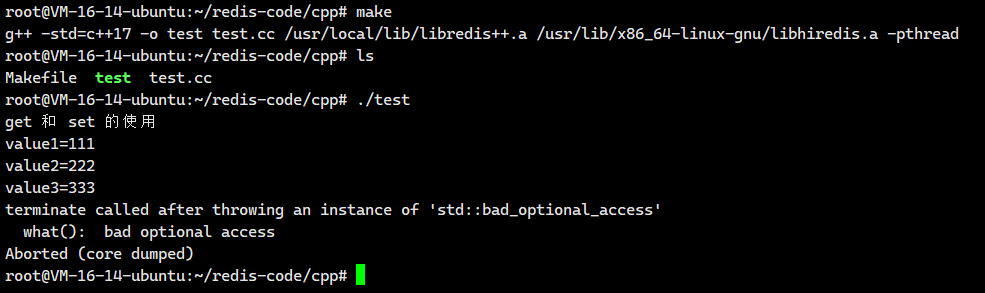
我们发现还是有一点小问题的。
key4是不存在的,我们得到的value4是一个optional的非法状态,我们不能对其进行取值操作,这是未定义的行为,就会抛出异常。
为了避免这个清空,我们需要进行条件判断
test.cc(最终版本)
cpp
#include <iostream>
#include <string>
#include <sw/redis++/redis++.h>
using namespace std;

// get 和 set
void test1(sw::redis::Redis& redis) {
    std::cout << "get 和 set 的使用" << std::endl;

    // 清空一下数据库, 避免之前残留的数据有干扰.
    redis.flushall();

    // 使用 set 设置 key
    redis.set("key1", "111");
    redis.set("key2", "222");
    redis.set("key3", "333");

    // 使用 get 获取到 key 对应的 value
    auto value1 = redis.get("key1");
    // optional 可以隐式转成 bool 类型, 可以直接在 if 中判定. 如果是无效元素, 就是返回 false
    if (value1) {
        std::cout << "value1=" << value1.value() << std::endl;
    }

    auto value2 = redis.get("key2");
    if (value2) {
        std::cout << "value2=" << value2.value() << std::endl;
    }

    auto value3 = redis.get("key3");
    if (value3) {
        std::cout << "value3=" << value3.value() << std::endl;
    }

    auto value4 = redis.get("key4");
    if (value4) {
        std::cout << "value4=" << value4.value() << std::endl;
    }
}

int main() {
    // 创建 Redis 对象的时候, 需要在构造函数中, 指定 redis 服务器的地址和端口.
    sw::redis::Redis redis("tcp://127.0.0.1:6379");
    test1(redis);
    return 0;
}
我们编译运行一下:
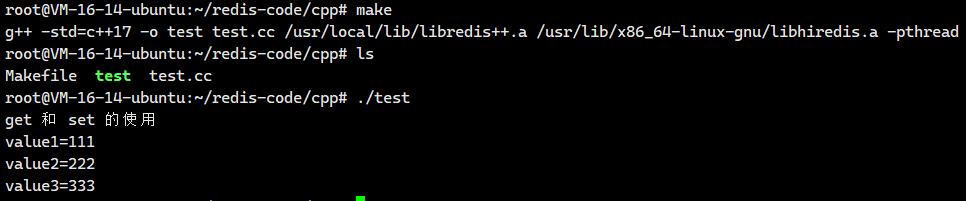
现在就没有问题了
3.1.2.测试exists
这个很简单,我们直接看代码
test.cc
cpp
#include <iostream>
#include <string>
#include <sw/redis++/redis++.h>
using namespace std;

//exist
void test2(sw::redis::Redis& redis) {
    std::cout << "exists" << std::endl;

    redis.flushall();

    redis.set("key", "111");
    redis.set("key3", "111");

    auto ret = redis.exists("key");
    std::cout << ret << std::endl;

    ret = redis.exists("key2");
    std::cout << ret << std::endl;

    //一次性测试多个key
    ret = redis.exists({"key", "key2", "key3"});
    std::cout << ret << std::endl;
}

int main() {
    // 创建 Redis 对象的时候, 需要在构造函数中, 指定 redis 服务器的地址和端口.
    sw::redis::Redis redis("tcp://127.0.0.1:6379");
    test2(redis);
    return 0;
}
编译运行结果如下:

3.1.3.测试del
这个很简单
test.cc
cpp
#include <iostream>
#include <string>
#include <sw/redis++/redis++.h>
using namespace std;

void test3(sw::redis::Redis& redis) {
    std::cout << "del" << std::endl;
    // 清除库非常必要的!
    redis.flushall();

    redis.set("key", "111");
    redis.set("key2", "111");

    // redis.del("key");

    auto ret = redis.del({"key", "key2", "key3"});
    std::cout << ret << std::endl;

    ret = redis.exists({"key", "key2"});
    std::cout << ret << std::endl;
}

int main() {
    // 创建 Redis 对象的时候, 需要在构造函数中, 指定 redis 服务器的地址和端口.
    sw::redis::Redis redis("tcp://127.0.0.1:6379");
    test3(redis);
    return 0;
}
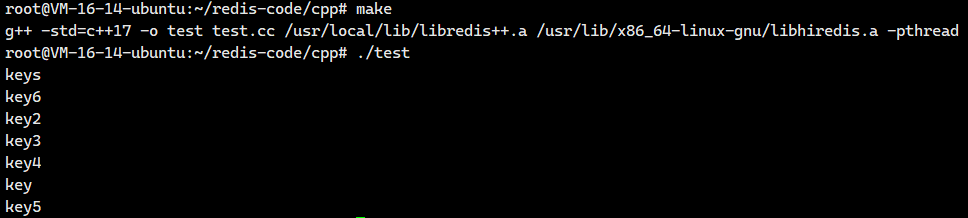
3.1.4.测试keys
这里可是返回多个值
test.cc
cpp
#include <iostream>
#include <string>
#include <sw/redis++/redis++.h>
using namespace std;

template<typename T>
inline void printContainer(const T& container) {
    for (const auto& elem : container) {
        std::cout << elem << std::endl;
    }
}

void test4(sw::redis::Redis& redis) {
    std::cout << "keys" << std::endl;
    redis.flushall();

    redis.set("key", "111");
    redis.set("key2", "222");
    redis.set("key3", "333");
    redis.set("key4", "444");
    redis.set("key5", "555");
    redis.set("key6", "666");

    // keys 的第二个参数, 是一个 "插入迭代器". 咱们需要先准备好一个保存结果的容器.
    // 接下来再创建一个插入迭代器指向容器的位置. 就可以把 keys 获取到的结果依次通过刚才的插入迭代器插入到容器的指定位置中了.
    vector<string> result;
    auto it = std::back_inserter(result);
    redis.keys("*", it);
    printContainer(result);
}

int main() {
    // 创建 Redis 对象的时候, 需要在构造函数中, 指定 redis 服务器的地址和端口.
    sw::redis::Redis redis("tcp://127.0.0.1:6379");
    test4(redis);
    return 0;
}
我们这里需要讲解一下STL中的五种迭代器的类型
- 输入迭代器
- 输出迭代器
- 前向迭代器
- 双向迭代器
- 随机访问迭代器
3.1.5.测试expire/ttl
cpp
#include <iostream>
#include <string>
#include <thread>
#include<chrono>
#include <sw/redis++/redis++.h>
using namespace std;


void test5(sw::redis::Redis& redis) {
    using namespace std::chrono_literals;

    std::cout << "expire and ttl" << std::endl;
    redis.flushall();

    redis.set("key", "111");
    // 10s => std::chrono::seconds(10)
    redis.expire("key", 10s);//设置了过期时间

    std::this_thread::sleep_for(1s);
    auto time = redis.ttl("key");//查看过期时间
    std::cout << time << std::endl;

    std::this_thread::sleep_for(1s);
    time = redis.ttl("key");//查看过期时间
    std::cout << time << std::endl;

    std::this_thread::sleep_for(8s);
    time = redis.ttl("key");//查看过期时间
    std::cout << time << std::endl;
}

int main() {
    // 创建 Redis 对象的时候, 需要在构造函数中, 指定 redis 服务器的地址和端口.
    sw::redis::Redis redis("tcp://127.0.0.1:6379");
    test5(redis);
    return 0;
}
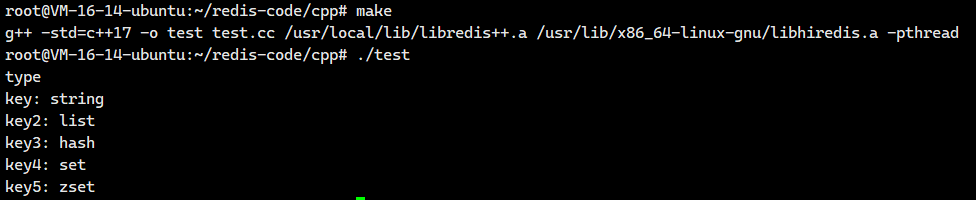
3.1.6.测试type
cpp
#include <iostream>
#include <string>
#include <thread>
#include<chrono>
#include <sw/redis++/redis++.h>
using namespace std;


void test6(sw::redis::Redis& redis) {
    std::cout << "type" << std::endl;
    redis.flushall();

    redis.set("key", "111");
    string result = redis.type("key");
    std::cout << "key: " << result << std::endl;

    redis.lpush("key2", "111");
    result = redis.type("key2");
    std::cout << "key2: " << result << std::endl;

    redis.hset("key3", "aaa", "111");
    result = redis.type("key3");
    std::cout << "key3: " << result << std::endl;

    redis.sadd("key4", "aaa");
    result = redis.type("key4");
    std::cout << "key4: " << result << std::endl;

    redis.zadd("key5", "吕布", 99);
    result = redis.type("key5");
    std::cout << "key5: " << result << std::endl;
}


int main() {
    // 创建 Redis 对象的时候, 需要在构造函数中, 指定 redis 服务器的地址和端口.
    sw::redis::Redis redis("tcp://127.0.0.1:6379");
    test6(redis);
    return 0;
}
怎么样?学到现在,是不是和我们之前学习的命令是一模一样的。
3.2. 使用string的命令
接下来我们还是沿用上面的makefile
makefile的内容都是一样的,我在这里先给你们列出来,后面我就不说了
makefile
cpp
test:test.cc
	g++ -std=c++17 -o $@ $^ /usr/local/lib/libredis++.a /usr/lib/x86_64-linux-gnu/libhiredis.a -pthread
.PHONY:clean
clean:
	rm test
3.2.1.测试get/set
test.cc(普通版本)
cpp
#include <iostream>
#include <string>
#include <thread>
#include<chrono>
#include <sw/redis++/redis++.h>
using namespace std;
using sw::redis::Redis;


void test1(Redis& redis) {
    std::cout << "get 和 set" << std::endl;
    redis.flushall();

    redis.set("key", "111");
    auto value = redis.get("key");
    if (value) {
        std::cout << "value: " << value.value() << std::endl;
    }

    redis.set("key", "222");
    value = redis.get("key");
    if (value) {
        std::cout << "value: " << value.value() << std::endl;
    }
}


int main() {
    // 创建 Redis 对象的时候, 需要在构造函数中, 指定 redis 服务器的地址和端口.
    Redis redis("tcp://127.0.0.1:6379");
    test1(redis);
    return 0;
}
test.cc(测试带有超时时间的)
cpp
#include <iostream>
#include <string>
#include <thread>
#include<chrono>
#include <sw/redis++/redis++.h>
using namespace std;
using sw::redis::Redis;

void test2(Redis& redis) {
    std::cout << "set 带有超时时间" << std::endl;
    redis.flushall();

    redis.set("key", "111", 10s);

    std::this_thread::sleep_for(3s);
    long long time = redis.ttl("key");
    std::cout << "time: " << time << std::endl;

    std::this_thread::sleep_for(7s);
    time = redis.ttl("key");
    std::cout << "time: " << time << std::endl;
}


int main() {
    // 创建 Redis 对象的时候, 需要在构造函数中, 指定 redis 服务器的地址和端口.
    Redis redis("tcp://127.0.0.1:6379");
    test2(redis);
    return 0;
}
测试NX,XX(第一版)
cpp
#include <iostream>
#include <string>
#include <thread>
#include<chrono>
#include <sw/redis++/redis++.h>
using namespace std;
using sw::redis::Redis;

void test3(Redis& redis) {
    std::cout << "set NX 和 XX" << std::endl;
    redis.flushall();

    // set 的重载版本中, 没有单独提供 NX 和 XX 的版本, 必须搭配过期时间的版本来使用.
    redis.set("key", "111", 0s, sw::redis::UpdateType::NOT_EXIST);//相当于带NX选项的SET
    auto value = redis.get("key");
    if (value) {
        std::cout << "value: " << value.value() << std::endl;
    } else {
        std::cout << "key 不存在!" << std::endl;
    }

    redis.set("key", "222", 0s, sw::redis::UpdateType::EXIST);//相当于带XX选项的SET
    value = redis.get("key");
    if (value) {
        std::cout << "value: " << value.value() << std::endl;
    } else {
        std::cout << "key 不存在!" << std::endl;
    }
}


int main() {
    // 创建 Redis 对象的时候, 需要在构造函数中, 指定 redis 服务器的地址和端口.
    Redis redis("tcp://127.0.0.1:6379");
    test3(redis);
    return 0;
}
完全没有什么问题。
这样子其实还是看不太出来,我们可以调换一下NX和XX的位置
测试NX,XX(第二版)
cpp
#include <iostream>
#include <string>
#include <thread>
#include<chrono>
#include <sw/redis++/redis++.h>
using namespace std;
using sw::redis::Redis;

void test3(Redis& redis) {
    std::cout << "set NX 和 XX" << std::endl;
    redis.flushall();

    // set 的重载版本中, 没有单独提供 NX 和 XX 的版本, 必须搭配过期时间的版本来使用.
    redis.set("key", "111", 0s, sw::redis::UpdateType::EXIST);//相当于带XX选项的SET
    auto value = redis.get("key");
    if (value) {
        std::cout << "value: " << value.value() << std::endl;
    } else {
        std::cout << "key 不存在!" << std::endl;
    }

    redis.set("key", "222", 0s, sw::redis::UpdateType::NOT_EXIST);//相当于带NX选项的SET
    value = redis.get("key");
    if (value) {
        std::cout << "value: " << value.value() << std::endl;
    } else {
        std::cout << "key 不存在!" << std::endl;
    }
}


int main() {
    // 创建 Redis 对象的时候, 需要在构造函数中, 指定 redis 服务器的地址和端口.
    Redis redis("tcp://127.0.0.1:6379");
    test3(redis);
    return 0;
}
怎么样?这样子就很明白了吧!!
3.2.2.测试mset/mget
test.cc(测试mset)
cpp
#include <iostream>
#include <string>
#include <thread>
#include<chrono>
#include <sw/redis++/redis++.h>
using namespace std;
using sw::redis::Redis;

void test4(Redis& redis) {
    std::cout << "mset" << std::endl;

    redis.flushall();

    // 第一种写法, 使用初始化列表描述多个键值对
    // redis.mset({ std::make_pair("key1", "111"), std::make_pair("key2", "222"), std::make_pair("key3", "333") });

    // 第二种写法, 可以把多个键值对提前组织到容器中. 以迭代器的形式告诉 mset
    vector<std::pair<string, string>> keys = {
        {"key1", "111"},
        {"key2", "222"},
        {"key3", "333"}
    };
    redis.mset(keys.begin(), keys.end());

    auto value = redis.get("key1");
    if (value) {
        std::cout << "value: " << value.value() << std::endl;
    }

    value = redis.get("key2");
    if (value) {
        std::cout << "value: " << value.value() << std::endl;
    }

    value = redis.get("key3");
    if (value) {
        std::cout << "value: " << value.value() << std::endl;
    }
}


int main() {
    // 创建 Redis 对象的时候, 需要在构造函数中, 指定 redis 服务器的地址和端口.
    Redis redis("tcp://127.0.0.1:6379");
    test4(redis);
    return 0;
}
test.cc(测试mget)
cpp
#include <iostream>
#include <string>
#include <thread>
#include<chrono>
#include <sw/redis++/redis++.h>
using namespace std;
using sw::redis::Redis;

template<typename T>
inline void printContainerOptional(const T& container) {
    for (const auto& elem : container) {
        // 此处预期 elem 是一个 optional 类型的元素, 打印之前, 先判定一下, 看是否有效
        if (elem) {
            std::cout << elem.value() << std::endl;
        } else {
            std::cout << "元素无效" << std::endl;
        }
    }
}

void test5(Redis& redis) {
    std::cout << "mget" << std::endl;
    redis.flushall();

    vector<std::pair<string, string>> keys = {
        {"key1", "111"},
        {"key2", "222"},
        {"key3", "333"}
    };
    redis.mset(keys.begin(), keys.end());

    vector<sw::redis::OptionalString> result;
    auto it = std::back_inserter(result);
    redis.mget({"key1", "key2", "key3", "key4"}, it);

    printContainerOptional(result);
}


int main() {
    // 创建 Redis 对象的时候, 需要在构造函数中, 指定 redis 服务器的地址和端口.
    Redis redis("tcp://127.0.0.1:6379");
    test5(redis);
    return 0;
}
3.2.3.测试getrange/setrange
cpp
#include <iostream>
#include <string>
#include <thread>
#include<chrono>
#include <sw/redis++/redis++.h>
using namespace std;
using sw::redis::Redis;

void test6(Redis& redis) {
    std::cout << "getrange 和 setrange" << std::endl;
    redis.flushall();

    redis.set("key", "abcdefghijk");

    // 使用getrange获取子字符串:从索引2开始到索引5结束(包含两端)
    // Redis字符串索引从0开始,2->'c', 5->'f',结果应为"cdef"
    string result = redis.getrange("key", 2, 5);
    std::cout << "result: " << result << std::endl;  // 预期输出:cdef

    // 使用setrange修改字符串:从索引2开始覆盖写入"xyz"
    // 原始值:abcdefghijk
    // 修改后:abxyzfghijk(索引2位置开始替换3个字符)
    redis.setrange("key", 2, "xyz");

    // 获取修改后的完整值
    auto value = redis.get("key");
    // 使用.value()安全访问optional值(需确保值存在)
    std::cout << "value: " << value.value() << std::endl;  // 预期输出:abxyzfghijk
}


int main() {
    // 创建 Redis 对象的时候, 需要在构造函数中, 指定 redis 服务器的地址和端口.
    Redis redis("tcp://127.0.0.1:6379");
    test6(redis);
    return 0;
}
3.2.4.测试incr和decr
cpp
#include <iostream>
#include <string>
#include <thread>
#include<chrono>
#include <sw/redis++/redis++.h>
using namespace std;
using sw::redis::Redis;

void test7(Redis& redis) {
    std::cout << "incr 和 decr" << std::endl;
    redis.flushall();

    redis.set("key", "100");

    long long result = redis.incr("key");
    std::cout << "result: " << result << std::endl;

    auto value = redis.get("key");
    std::cout << "value: " << value.value() << std::endl;

    result = redis.decr("key");
    std::cout << "result: " << result << std::endl;

    value = redis.get("key");
    std::cout << "value: " << value.value() << std::endl;
}


int main() {
    // 创建 Redis 对象的时候, 需要在构造函数中, 指定 redis 服务器的地址和端口.
    Redis redis("tcp://127.0.0.1:6379");
    test7(redis);
    return 0;
}
3.3.使用list的命令
3.3.1.测试lpush和lrange
cpp
#include <iostream>
#include <string>
#include <thread>
#include<chrono>
#include <sw/redis++/redis++.h>
using namespace std;
using sw::redis::Redis;

template<typename T>
inline void printContainer(const T& container) {
    for (const auto& elem : container) {
        std::cout << elem << std::endl;
    }
}

void test1(Redis& redis) {
    std::cout << "lpush 和 lrange" << std::endl;
    redis.flushall();

    // 插入单个元素
    redis.lpush("key", "111");

    // 插入一组元素, 基于初始化列表
    redis.lpush("key", {"222", "333", "444"});

    // 插入一组元素, 基于迭代器
    vector<string> values = {"555", "666", "777"};
    redis.lpush("key", values.begin(), values.end());

    // lrange 获取到列表中的元素
    vector<string> results;
    auto it = std::back_inserter(results);
    redis.lrange("key", 0, -1, it);

    printContainer(results);
}


int main() {
    // 创建 Redis 对象的时候, 需要在构造函数中, 指定 redis 服务器的地址和端口.
    Redis redis("tcp://127.0.0.1:6379");
    test1(redis);
    return 0;
}
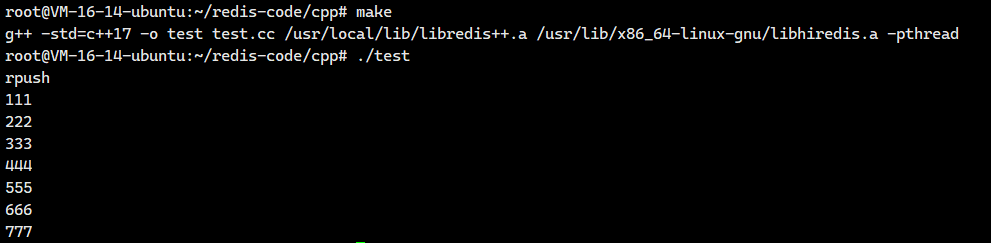
3.3.2.测试rpush和lrange
cpp
#include <iostream>
#include <string>
#include <thread>
#include<chrono>
#include <sw/redis++/redis++.h>
using namespace std;
using sw::redis::Redis;

template<typename T>
inline void printContainer(const T& container) {
    for (const auto& elem : container) {
        std::cout << elem << std::endl;
    }
}

void test2(Redis& redis) {
    std::cout << "rpush" << std::endl;
    redis.flushall();

    // 插入单个元素
    redis.rpush("key", "111");

    // 插入多个元素, 基于初始化列表
    redis.rpush("key", {"222", "333", "444"});

    // 插入多个元素, 基于容器
    vector<string> values = {"555", "666", "777"};
    redis.rpush("key", values.begin(), values.end());

    // 使用 lrange 获取元素
    vector<string> results;
    auto it = std::back_inserter(results);
    redis.lrange("key", 0, -1, it);

    printContainer(results);
}


int main() {
    // 创建 Redis 对象的时候, 需要在构造函数中, 指定 redis 服务器的地址和端口.
    Redis redis("tcp://127.0.0.1:6379");
    test2(redis);
    return 0;
}
3.3.3.测试lpop和rpop
cpp
#include <iostream>
#include <string>
#include <thread>
#include<chrono>
#include <sw/redis++/redis++.h>
using namespace std;
using sw::redis::Redis;

void test3(Redis& redis) {
    std::cout << "lpop 和 rpop" << std::endl;
    redis.flushall();

    // 构造一个 list
    redis.rpush("key", {"1", "2", "3", "4"});

    auto result = redis.lpop("key");
    if (result) {
        std::cout << "lpop: " << result.value() << std::endl;
    }

    result = redis.rpop("key");
    if (result) {
        std::cout << "rpop: " << result.value() << std::endl;
    }
}


int main() {
    // 创建 Redis 对象的时候, 需要在构造函数中, 指定 redis 服务器的地址和端口.
    Redis redis("tcp://127.0.0.1:6379");
    test3(redis);
    return 0;
}
3.3.4.测试blpop
cpp
#include <iostream>
#include <string>
#include <thread>
#include<chrono>
#include <sw/redis++/redis++.h>
using namespace std;
using sw::redis::Redis;

void test4(Redis& redis) {
    using namespace std::chrono_literals;
    std::cout << "blpop" << std::endl;
    redis.flushall();

    auto result = redis.blpop({"key", "key2", "key3"}, 10s);
    if (result) {
        std::cout << "key:" << result->first << std::endl;
        std::cout << "elem:" << result->second << std::endl;
    } else {
        std::cout << "result 无效!" << std::endl;
    }
}

int main() {
    // 创建 Redis 对象的时候, 需要在构造函数中, 指定 redis 服务器的地址和端口.
    Redis redis("tcp://127.0.0.1:6379");
    test4(redis);
    return 0;
}
等待10秒之后

3.3.5.测试llen
cpp
#include <iostream>
#include <string>
#include <thread>
#include<chrono>
#include <sw/redis++/redis++.h>
using namespace std;
using sw::redis::Redis;

void test5(Redis& redis) {
    std::cout << "llen" << std::endl;
    redis.flushall();

    redis.lpush("key", {"111", "222", "333", "444"});
    long long len = redis.llen("key");
    std::cout << "len: " << len << std::endl;
}

int main() {
    // 创建 Redis 对象的时候, 需要在构造函数中, 指定 redis 服务器的地址和端口.
    Redis redis("tcp://127.0.0.1:6379");
    test5(redis);
    return 0;
}
3.4.使用set的命令
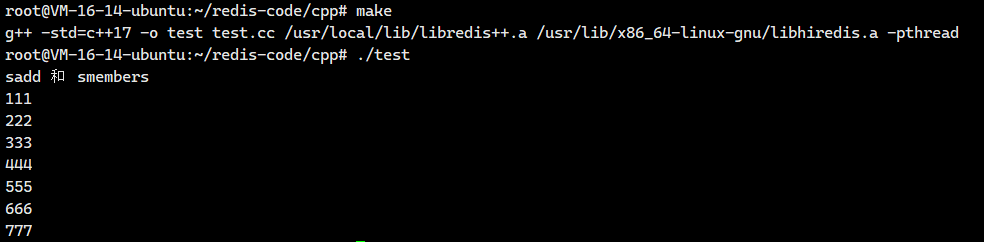
3.4.1.测试sadd,smembers
cpp
#include <iostream>
#include <string>
#include <thread>
#include<chrono>
#include <sw/redis++/redis++.h>
#include<set>
using namespace std;
using sw::redis::Redis;

template<typename T>
inline void printContainer(const T& container) {
    for (const auto& elem : container) {
        std::cout << elem << std::endl;
    }
}

void test1(Redis& redis) {
    std::cout << "sadd 和 smembers" << std::endl;
    redis.flushall();

    // 一次添加一个元素
    redis.sadd("key", "111");

    // 一次添加多个元素(使用初始化列表)
    redis.sadd("key", {"222", "333", "444"});

    // 一次添加多个元素(使用迭代器)
    set<string> elems = {"555", "666", "777"};
    redis.sadd("key", elems.begin(), elems.end());

    // 获取到上述元素
    // 此处用来保存 smembers 的结果, 使用 set 可能更合适.
    vector<string> result;
    // auto it = std::back_inserter(result);
    // 由于此处 set 里的元素顺序是固定的. 指定一个 result.end() 或者 result.begin() 或者其他位置的迭代器, 都无所谓~~
    auto it = std::inserter(result, result.end());
    redis.smembers("key", it);

    printContainer(result);
}

int main() {
    // 创建 Redis 对象的时候, 需要在构造函数中, 指定 redis 服务器的地址和端口.
    Redis redis("tcp://127.0.0.1:6379");
    test1(redis);
    return 0;
}
3.4.2.测试sismember
cpp
#include <iostream>
#include <string>
#include <thread>
#include<chrono>
#include <sw/redis++/redis++.h>
#include<set>
using namespace std;
using sw::redis::Redis;

void test2(Redis& redis) {
    std::cout << "sismember" << std::endl;
    redis.flushall();

    redis.sadd("key", {"111", "222", "333", "444"});

    bool result = redis.sismember("key", "222");
    std::cout << "222: " << result << std::endl;

    result = redis.sismember("key", "555");
    std::cout << "555: " << result << std::endl;
}

int main() {
    // 创建 Redis 对象的时候, 需要在构造函数中, 指定 redis 服务器的地址和端口.
    Redis redis("tcp://127.0.0.1:6379");
    test2(redis);
    return 0;
}
3.4.3.测试scard
cpp
#include <iostream>
#include <string>
#include <thread>
#include<chrono>
#include <sw/redis++/redis++.h>
#include<set>
using namespace std;
using sw::redis::Redis;

void test3(Redis& redis) {
    std::cout << "scard" << std::endl;
    redis.flushall();

    redis.sadd("key", {"111", "222", "333"});
    long long result = redis.scard("key");
    std::cout << "result: " << result << std::endl;
}

int main() {
    // 创建 Redis 对象的时候, 需要在构造函数中, 指定 redis 服务器的地址和端口.
    Redis redis("tcp://127.0.0.1:6379");
    test3(redis);
    return 0;
}
3.4.4. 测试spop
cpp
#include <iostream>
#include <string>
#include <thread>
#include<chrono>
#include <sw/redis++/redis++.h>
#include<set>
using namespace std;
using sw::redis::Redis;

void test4(Redis& redis) {
    std::cout << "spop" << std::endl;
    redis.flushall();

    redis.sadd("key", {"111", "222", "333", "444"});
    auto result = redis.spop("key");
    if (result) {
        std::cout << "result: " << result.value() << std::endl;
    } else {
        std::cout << "result 无效!" << std::endl;
    }
}

int main() {
    // 创建 Redis 对象的时候, 需要在构造函数中, 指定 redis 服务器的地址和端口.
    Redis redis("tcp://127.0.0.1:6379");
    test4(redis);
    return 0;
}
3.4.5.测试sinter(交集)
cpp
#include <iostream>
#include <string>
#include <thread>
#include<chrono>
#include <sw/redis++/redis++.h>
#include<set>
using namespace std;
using sw::redis::Redis;

template<typename T>
inline void printContainer(const T& container) {
    for (const auto& elem : container) {
        std::cout << elem << std::endl;
    }
}

void test5(Redis& redis) {
    std::cout << "sinter" << std::endl;
    redis.flushall();

    redis.sadd("key1", {"111", "222", "333"});
    redis.sadd("key2", {"111", "222", "444"});

    set<string> result;
    auto it = std::inserter(result, result.end());
    redis.sinter({"key1", "key2"}, it);

    printContainer(result);
}


int main() {
    // 创建 Redis 对象的时候, 需要在构造函数中, 指定 redis 服务器的地址和端口.
    Redis redis("tcp://127.0.0.1:6379");
    test5(redis);
    return 0;
}
3.4.6.测试sinterstore(存储交集)
cpp
#include <iostream>
#include <string>
#include <thread>
#include<chrono>
#include <sw/redis++/redis++.h>
#include<set>
using namespace std;
using sw::redis::Redis;

template<typename T>
inline void printContainer(const T& container) {
    for (const auto& elem : container) {
        std::cout << elem << std::endl;
    }
}

void test6(Redis& redis) {
    std::cout << "sinterstore" << std::endl;
    redis.flushall();

    redis.sadd("key1", {"111", "222", "333"});
    redis.sadd("key2", {"111", "222", "444"});

    long long len = redis.sinterstore("key3", {"key1", "key2"});
    std::cout << "len: " << len << std::endl;

    set<string> result;
    auto it = std::inserter(result, result.end());
    redis.smembers("key3", it);

    printContainer(result);
}


int main() {
    // 创建 Redis 对象的时候, 需要在构造函数中, 指定 redis 服务器的地址和端口.
    Redis redis("tcp://127.0.0.1:6379");
    test6(redis);
    return 0;
}
3.5.使用hash的命令
3.5.1.测试hset和hget
cpp
#include <iostream>
#include <string>
#include <thread>
#include<chrono>
#include <sw/redis++/redis++.h>
#include<set>
using namespace std;
using sw::redis::Redis;


void test1(Redis& redis) {
    std::cout << "hset 和 hget" << std::endl;
    redis.flushall();

    redis.hset("key", "f1", "111");
    redis.hset("key", std::make_pair("f2", "222"));
    // hset 能够一次性插入多个 field-value 对!!
    redis.hset("key", {
        std::make_pair("f3", "333"),
        std::make_pair("f4", "444")
    });

    vector<std::pair<string, string>> fields = {
        std::make_pair("f5", "555"),
        std::make_pair("f6", "666")
    };
    redis.hset("key", fields.begin(), fields.end());

    auto result = redis.hget("key", "f3");
    if (result) {
        std::cout << "result: " << result.value() << std::endl;
    } else {
        std::cout << "result 无效!" << std::endl;
    }
}


int main() {
    // 创建 Redis 对象的时候, 需要在构造函数中, 指定 redis 服务器的地址和端口.
    Redis redis("tcp://127.0.0.1:6379");
    test1(redis);
    return 0;
}
3.5.2.测试hexists
cpp
#include <iostream>
#include <string>
#include <thread>
#include<chrono>
#include <sw/redis++/redis++.h>
#include<set>
using namespace std;
using sw::redis::Redis;


void test2(Redis& redis) {
    std::cout << "hexits" << std::endl;
    redis.flushall();

    redis.hset("key", "f1", "111");
    redis.hset("key", "f2", "222");
    redis.hset("key", "f3", "333");

    bool result = redis.hexists("key", "f1");
    std::cout << "f1: " << result << std::endl;

    result = redis.hexists("key", "f4");
    std::cout << "f4: " << result << std::endl;
}


int main() {
    // 创建 Redis 对象的时候, 需要在构造函数中, 指定 redis 服务器的地址和端口.
    Redis redis("tcp://127.0.0.1:6379");
    test2(redis);
    return 0;
}
3.5.3.测试hdel
cpp
#include <iostream>
#include <string>
#include <thread>
#include<chrono>
#include <sw/redis++/redis++.h>
#include<set>
using namespace std;
using sw::redis::Redis;

void test3(Redis& redis) {
    std::cout << "hdel" << std::endl;
    redis.flushall();

    redis.hset("key", "f1", "111");
    redis.hset("key", "f2", "222");
    redis.hset("key", "f3", "333");

    long long result = redis.hdel("key", "f1");
    std::cout << "result: " << result << std::endl;

    long long len = redis.hlen("key");
    std::cout << "len: " << len << std::endl;

    result = redis.hdel("key", {"f2", "f3"});
    std::cout << "result: " << result << std::endl;

    len = redis.hlen("key");
    std::cout << "len: " << len << std::endl;
}

int main() {
    // 创建 Redis 对象的时候, 需要在构造函数中, 指定 redis 服务器的地址和端口.
    Redis redis("tcp://127.0.0.1:6379");
    test3(redis);
    return 0;
}
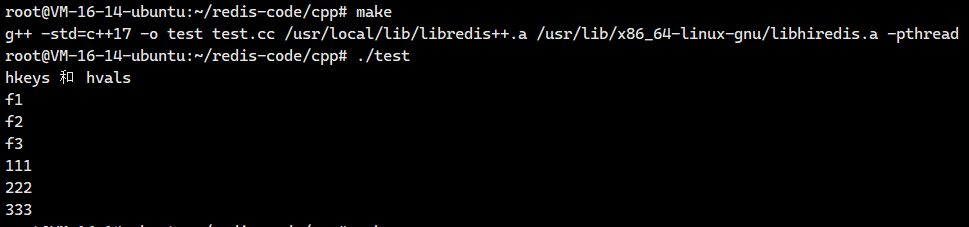
3.5.4.测试hkeys 和 hvals
cpp
#include <iostream>
#include <string>
#include <thread>
#include<chrono>
#include <sw/redis++/redis++.h>
#include<set>
using namespace std;
using sw::redis::Redis;

template<typename T>
inline void printContainer(const T& container) {
    for (const auto& elem : container) {
        std::cout << elem << std::endl;
    }
}

void test4(Redis& redis) {
    std::cout << "hkeys 和 hvals" << std::endl;
    redis.flushall();

    redis.hset("key", "f1", "111");
    redis.hset("key", "f2", "222");
    redis.hset("key", "f3", "333");

    vector<string> fields;
    auto itFields = std::back_inserter(fields);
    redis.hkeys("key", itFields);
    printContainer(fields);

    vector<string> values;
    auto itValues = std::back_inserter(values);
    redis.hvals("key", itValues);
    printContainer(values);
}

int main() {
    // 创建 Redis 对象的时候, 需要在构造函数中, 指定 redis 服务器的地址和端口.
    Redis redis("tcp://127.0.0.1:6379");
    test4(redis);
    return 0;
}
3.5.5.测试hmset和hmget
cpp
#include <iostream>
#include <string>
#include <thread>
#include<chrono>
#include <sw/redis++/redis++.h>
#include<set>
using namespace std;
using sw::redis::Redis;

template<typename T>
inline void printContainer(const T& container) {
    for (const auto& elem : container) {
        std::cout << elem << std::endl;
    }
}

void test5(Redis& redis) {
    std::cout << "hmget 和 hmset" << std::endl;
    redis.flushall();

    redis.hmset("key", {
        std::make_pair("f1", "111"),
        std::make_pair("f2", "222"),
        std::make_pair("f3", "333")
    });

    vector<std::pair<string, string>> pairs = {
        std::make_pair("f4", "444"),
        std::make_pair("f5", "555"),
        std::make_pair("f6", "666")
    };
    redis.hmset("key", pairs.begin(), pairs.end());

    vector<string> values;
    auto it = std::back_inserter(values);
    redis.hmget("key", {"f1", "f2", "f3"}, it);
    printContainer(values);
}

int main() {
    // 创建 Redis 对象的时候, 需要在构造函数中, 指定 redis 服务器的地址和端口.
    Redis redis("tcp://127.0.0.1:6379");
    test5(redis);
    return 0;
}
3.6. 使用zset的命令
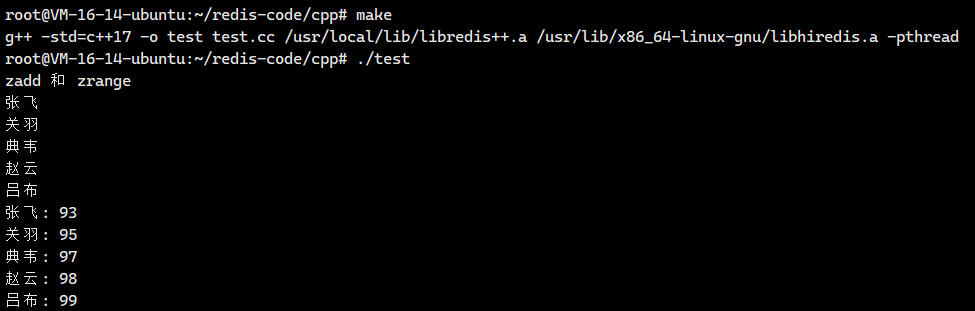
3.6.1.测试zadd和zrange
cpp
#include <iostream>
#include <string>
#include <thread>
#include<chrono>
#include <sw/redis++/redis++.h>
#include<set>
using namespace std;
using sw::redis::Redis;

template<typename T>
inline void printContainer(const T& container) {
    for (const auto& elem : container) {
        std::cout << elem << std::endl;
    }
}

template<typename T>
inline void printContainerPair(const T& container) {
    for (auto& elem : container) {
        // 此处预期 elem 是一个 std::pair
        std::cout << elem.first << ": " << elem.second << std::endl;
    }
}

void test1(Redis& redis) {
    std::cout << "zadd 和 zrange" << std::endl;
    redis.flushall();

    redis.zadd("key", "吕布", 99);
    redis.zadd("key", {
        std::make_pair("赵云", 98),
        std::make_pair("典韦", 97)
    });
    vector<std::pair<string, double>> members = {
        std::make_pair("关羽", 95),
        std::make_pair("张飞", 93)
    };
    redis.zadd("key", members.begin(), members.end());

    // zrange 支持两种主要的风格:
    // 1. 只查询 member, 不带 score
    // 2. 查询 member 同时带 score
    // 关键就是看插入迭代器指向的容器的类型.
    // 指向的容器只是包含一个 string, 就是只查询 member
    // 指向的容器包含的是一个 pair, 里面有 string 和 double, 就是查询 member 同时带有 score
    vector<string> memberResults;
    auto it = std::back_inserter(memberResults);
    redis.zrange("key", 0, -1, it);
    printContainer(memberResults);

    vector<std::pair<string, double>> membersWithScore;
    auto it2 = std::back_inserter(membersWithScore);
    redis.zrange("key", 0, -1, it2);
    printContainerPair(membersWithScore);
}

int main() {
    // 创建 Redis 对象的时候, 需要在构造函数中, 指定 redis 服务器的地址和端口.
    Redis redis("tcp://127.0.0.1:6379");
    test1(redis);
    return 0;
}
3.6.2.测试zcard
cpp
#include <iostream>
#include <string>
#include <thread>
#include<chrono>
#include <sw/redis++/redis++.h>
#include<set>
using namespace std;
using sw::redis::Redis;

void test2(Redis& redis) {
    std::cout << "zcard" << std::endl;
    redis.flushall();

    redis.zadd("key", "zhangsan", 90);
    redis.zadd("key", "lisi", 91);
    redis.zadd("key", "wangwu", 92);
    redis.zadd("key", "zhaoliu", 93);

    long long result = redis.zcard("key");
    std::cout << "result: " << result << std::endl;
}

int main() {
    // 创建 Redis 对象的时候, 需要在构造函数中, 指定 redis 服务器的地址和端口.
    Redis redis("tcp://127.0.0.1:6379");
    test2(redis);
    return 0;
}
3.6.3.测试zrem
cpp
#include <iostream>
#include <string>
#include <thread>
#include<chrono>
#include <sw/redis++/redis++.h>
#include<set>
using namespace std;
using sw::redis::Redis;

void test3(Redis& redis) {
    std::cout << "zrem" << std::endl;
    redis.flushall();

    redis.zadd("key", "zhangsan", 90);
    redis.zadd("key", "lisi", 91);
    redis.zadd("key", "wangwu", 92);
    redis.zadd("key", "zhaoliu", 93);

    redis.zrem("key", "zhangsan");

    long long result = redis.zcard("key");
    std::cout << "result: " << result << std::endl;
}

int main() {
    // 创建 Redis 对象的时候, 需要在构造函数中, 指定 redis 服务器的地址和端口.
    Redis redis("tcp://127.0.0.1:6379");
    test3(redis);
    return 0;
}
3.6.4.测试zscore
cpp
#include <iostream>
#include <string>
#include <thread>
#include<chrono>
#include <sw/redis++/redis++.h>
#include<set>
using namespace std;
using sw::redis::Redis;

void test4(Redis& redis) {
    std::cout << "zscore" << std::endl;
    redis.flushall();

    redis.zadd("key", "zhangsan", 90);
    redis.zadd("key", "lisi", 91);
    redis.zadd("key", "wangwu", 92);
    redis.zadd("key", "zhaoliu", 93);

    auto score = redis.zscore("key", "zhangsan");
    if (score) {
        std::cout << "score: " << score.value() << std::endl;
    } else {
        std::cout << "score 无效" << std::endl;
    }
}

int main() {
    // 创建 Redis 对象的时候, 需要在构造函数中, 指定 redis 服务器的地址和端口.
    Redis redis("tcp://127.0.0.1:6379");
    test4(redis);
    return 0;
}
3.6.5.测试zrank
cpp
#include <thread>
#include<chrono>
#include <sw/redis++/redis++.h>
#include<set>
using namespace std;
using sw::redis::Redis;

void test5(Redis& redis) {
    std::cout << "zrank" << std::endl;
    redis.flushall();

    redis.zadd("key", "zhangsan", 90);
    redis.zadd("key", "lisi", 91);
    redis.zadd("key", "wangwu", 92);
    redis.zadd("key", "zhaoliu", 93);

    auto rank = redis.zrank("key", "zhaoliu");
    if (rank) {
        std::cout << "rank: " << rank.value() << std::endl;
    } else {
        std::cout << "rank 无效" << std::endl;
    }
}


int main() {
    // 创建 Redis 对象的时候, 需要在构造函数中, 指定 redis 服务器的地址和端口.
    Redis redis("tcp://127.0.0.1:6379");
    test5(redis);
    return 0;
}
3.7.访问集群
只需要使⽤ RedisCluster 类代替 Redis 类即可.
构造⽅法中填⼊集群中的任意节点地址.
RedisCluster 提供了和 Redis 类⼀样的接⼝,基本都和Redis原⽣命令⼀致
cpp
 #include <sw/redis++/redis++.h>
 #include <cstdio>
 #include <string>
 #include <vector>

 using std::string;
 using sw::redis::RedisCluster;
 using sw::redis::OptionalString;

int main() {
    RedisCluster cluster("tcp://127.0.0.1:6379");
     cluster.set("k1", "111");
     auto value = cluster.get("k1");
     printf("value: %s\n", value->c_str());
     return 0;
 }