更多精彩内容请访问:别催小唐敲代码
第一章:FastAPI 简介与环境搭建
1.1 什么是 FastAPI?
FastAPI 是一个现代、高性能的 Python Web 框架,用于构建 API。它基于以下核心技术:
| 特性 | 说明 |
|---|---|
| Python 3.7+ | 使用 Python 类型提示 |
| Starlette | 底层 Web 框架,提供高性能异步支持 |
| Pydantic | 数据验证和序列化 |
| OpenAPI | 自动生成 API 文档 |
1.2 FastAPI 的优势
✅ 高性能 —— 与 NodeJS、Go 相当(归功于 Starlette 和 Pydantic)
✅ 开发速度快 —— 功能开发速度提升约 200%~300%
✅ 更少的 Bug —— 约减少 40% 的人为错误
✅ 直觉化 —— 强大的编辑器支持,自动补全无处不在
✅ 简单易学 —— 文档完善,学习曲线平缓
✅ 自动文档 —— 自带 Swagger UI 和 ReDoc
✅ 基于标准 —— 完全兼容 OpenAPI 和 JSON Schema
1.3 环境搭建
1.3.1 安装 Python
确保 Python 版本 >= 3.7:
python --version
# Python 3.10.x (推荐 3.10+)
1.3.2 创建虚拟环境
# 创建项目目录
mkdir fastapi-learning
cd fastapi-learning
# 创建虚拟环境
python -m venv venv
# 激活虚拟环境
# Windows:
venv\Scripts\activate
# macOS/Linux:
source venv/bin/activate1.3.3 安装 FastAPI 及依赖
# 安装 FastAPI(包含所有可选依赖)
pip install "fastapi[all]"
# 或者分别安装(生产环境推荐)
pip install fastapi
pip install "uvicorn[standard]" # ASGI 服务器1.3.4 验证安装
pip list | grep fastapi
pip list | grep uvicorn
第二章:第一个 FastAPI 应用
2.1 Hello World
创建文件 main.py:
from fastapi import FastAPI
# 创建 FastAPI 实例
app = FastAPI()
# 定义路由
@app.get("/")
def read_root():
return {"message": "Hello, FastAPI!"}
@app.get("/hello/{name}")
def say_hello(name: str):
return {"message": f"Hello, {name}!"}2.2 运行应用
# 基础运行
uvicorn main:app --reload
# 参数说明:
# main —— 文件名 main.py
# app —— FastAPI 实例变量名
# --reload —— 代码修改后自动重启(开发模式)
# 自定义端口和主机
uvicorn main:app --reload --host 0.0.0.0 --port 8000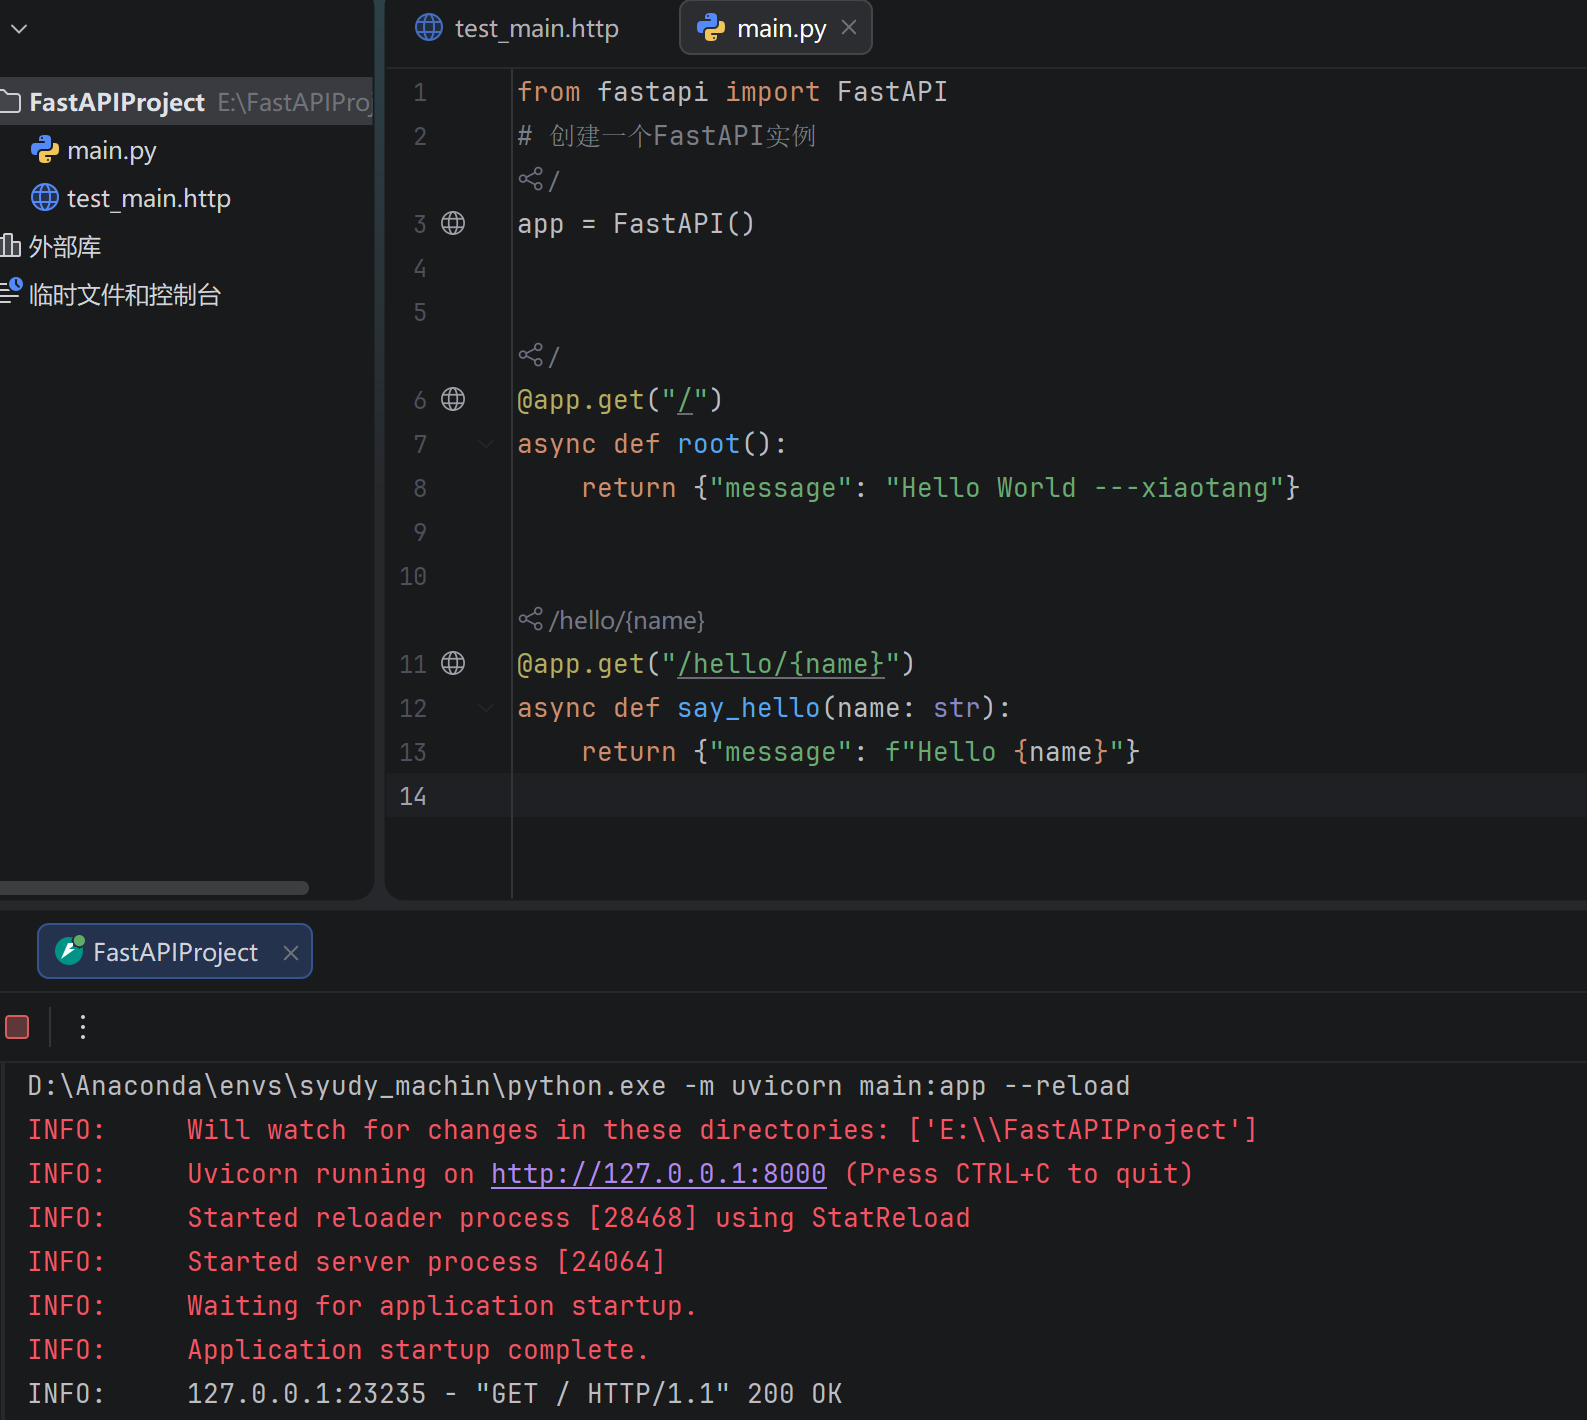
2.3 自动交互式文档
启动后访问以下地址:
| 文档类型 | 地址 | 说明 |
|---|---|---|
| Swagger UI | http://127.0.0.1:8000/docs | 可交互的 API 文档 |
| ReDoc | http://127.0.0.1:8000/redoc | 另一种风格的文档 |
| OpenAPI JSON | http://127.0.0.1:8000/openapi.json | 原始 OpenAPI schema |
2.4 FastAPI 实例配置
app = FastAPI(
    title="我的学习项目 API",
    description="这是一个 FastAPI 学习项目的 API 文档",
    version="1.0.0",
    docs_url="/docs",          # Swagger 文档路径,设为 None 可禁用
    redoc_url="/redoc",        # ReDoc 文档路径
    openapi_url="/openapi.json" # OpenAPI schema 路径
)
2.5 异步支持
FastAPI 同时支持同步和异步函数:
# 同步写法
@app.get("/sync")
def sync_endpoint():
return {"type": "sync"}
# 异步写法
@app.get("/async")
async def async_endpoint():
return {"type": "async"}💡 何时使用 async?
如果函数内部需要
await异步操作(如异步数据库查询、异步 HTTP 请求),使用async def如果函数内部都是同步操作(如普通计算、同步数据库操作),使用
defFastAPI 会自动在线程池中运行同步函数,不会阻塞
第三章:路径参数与查询参数
3.1 路径参数(Path Parameters)
# 从 fastapi 框架中导入 FastAPI 核心类 和 Path 路径参数验证工具
from fastapi import FastAPI, Path
# 创建 FastAPI 应用实例,整个项目的核心对象
app = FastAPI()
# ====================== 1. 基础路径参数示例 ======================
# 定义 GET 请求接口,路径为 /users/{user_id}
# {user_id} 是路径参数,会被自动提取并传入函数
@app.get("/users/{user_id}")
def get_user(user_id: int):
"""
基础路径参数接口
- 自动类型校验:user_id 必须是整数
- 访问示例:http://127.0.0.1:8000/users/123
"""
# 返回 JSON 格式数据,包含接收到的用户ID
return {"user_id": user_id}
# ====================== 2. 带验证的路径参数示例 ======================
# 定义 GET 请求接口,路径为 /items/{item_id}
@app.get("/items/{item_id}")
def get_item(
# 使用 Path() 对路径参数进行 校验 + 文档描述
item_id: int = Path(
..., # ... 表示该参数是【必填项】,不可省略
title="物品ID", # OpenAPI 文档中显示的参数标题
description="要查询的物品的唯一标识", # 参数详细描述,自动生成接口文档
ge=1, # ge = greater than or equal:参数必须 ≥ 1
le=10000 # le = less than or equal:参数必须 ≤ 10000
)
):
"""
带数据验证的路径参数接口
- 自动校验:item_id 必须是 1~10000 之间的整数
- 访问示例:http://127.0.0.1:8000/items/666
- 非法访问(如 0、10001、字符串)会直接返回错误提示
"""
# 返回校验通过后的物品ID
return {"item_id": item_id}3.2 路径参数的类型
# 字符串类型(默认)
@app.get("/users/{username}")
def get_user_by_name(username: str):
return {"username": username}
# 整数类型
@app.get("/items/{item_id}")
def get_item(item_id: int):
return {"item_id": item_id}
# 浮点数类型
@app.get("/scores/{score}")
def get_score(score: float):
return {"score": score}
# UUID 类型
from uuid import UUID
@app.get("/tokens/{token}")
def get_token(token: UUID):
return {"token": token}3.3 路径参数的顺序很重要
# ⚠️ 固定路径必须在动态路径之前
@app.get("/users/me") # 先定义固定路径
def get_current_user():
return {"user": "current user"}
@app.get("/users/{user_id}") # 后定义动态路径
def get_user(user_id: int):
return {"user_id": user_id}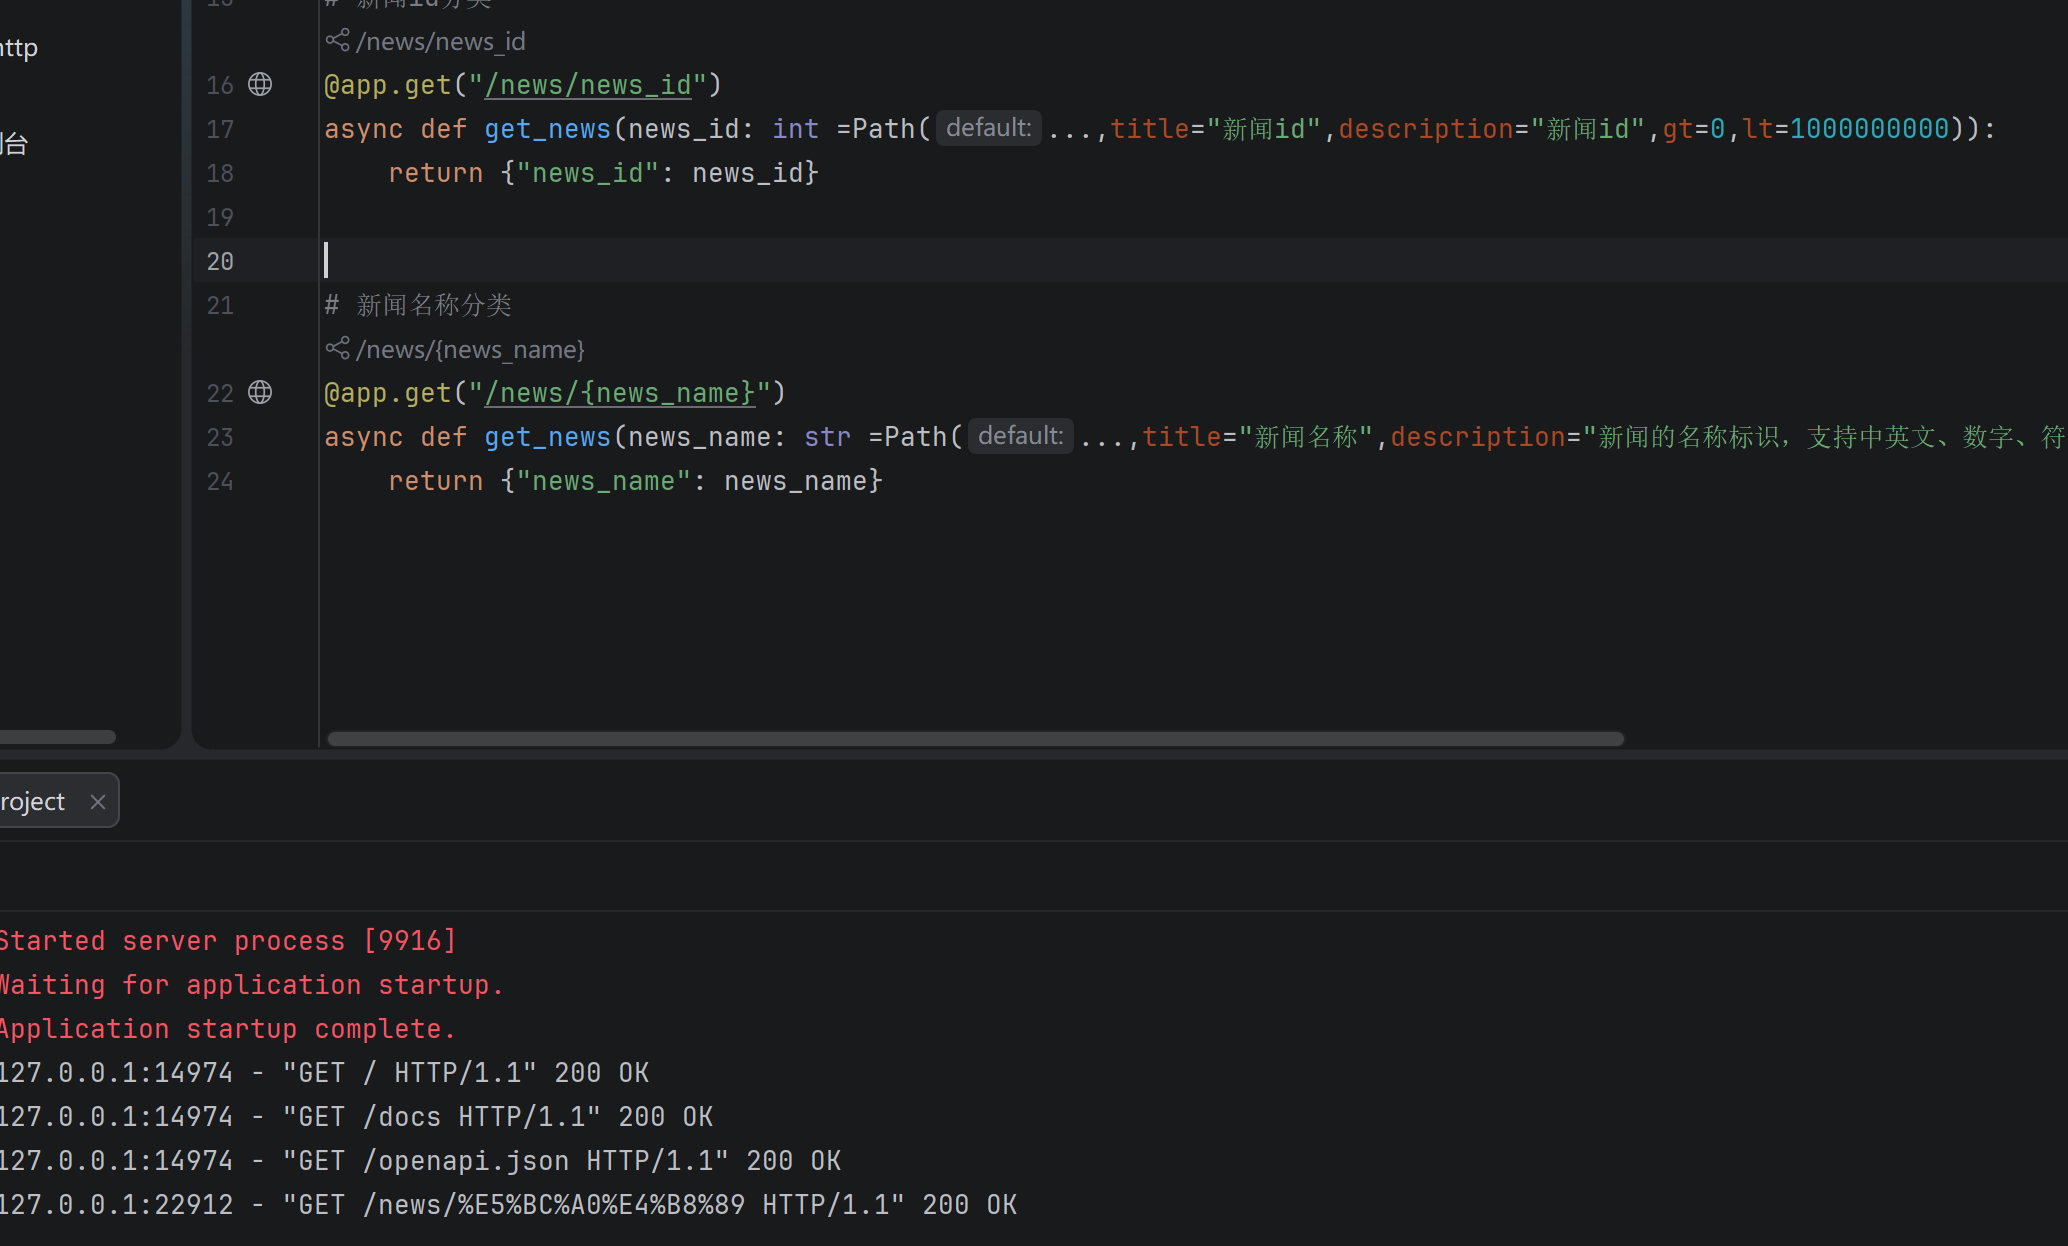
3.4 预定义值(枚举)
from enum import Enum
class ModelName(str, Enum):
alexnet = "alexnet"
resnet = "resnet"
lenet = "lenet"
@app.get("/models/{model_name}")
def get_model(model_name: ModelName):
if model_name == ModelName.alexnet:
return {"model_name": model_name, "message": "Deep Learning FTW!"}
if model_name == ModelName.resnet:
return {"model_name": model_name, "message": "LeCNN all the images"}
return {"model_name": model_name, "message": "Have some residuals"}3.5 查询参数(Query Parameters)
# 从 fastapi 导入 FastAPI 核心和 Query 查询参数验证工具
from fastapi import FastAPI, Query
# 导入类型定义:Optional(可选参数)、List(列表参数)
from typing import Optional, List
# 创建 FastAPI 应用实例
app = FastAPI()
# ====================== 1. 基础查询参数 ======================
# 查询参数:跟在 URL ? 后面的参数,如 /items?skip=0&limit=10
# 函数里的参数会自动被识别为查询参数
@app.get("/items")
def list_items(skip: int = 0, limit: int = 10):
"""
基础查询参数接口
- skip: 分页起始位置,默认值 0
- limit: 每页条数,默认值 10
- 请求示例: GET /items?skip=0&limit=10
"""
return {"skip": skip, "limit": limit}
# ====================== 2. 可选查询参数 ======================
# Optional[str] 表示参数是字符串类型,可以不传(值为 None)
@app.get("/search")
def search(q: Optional[str] = None):
"""
可选查询参数接口
- q: 搜索关键词,可传可不传
- 不传参数: GET /search
- 传参数: GET /search?q=测试
"""
# 判断是否传入关键词
if q:
return {"results": f"搜索: {q}"}
# 未传关键词时返回默认提示
return {"results": "无搜索关键词"}
# ====================== 3. 带验证的查询参数 ======================
# 使用 Query() 对参数做:必填、长度、正则、标题、描述等校验
@app.get("/items/search")
def search_items(
# 必传的搜索关键词,带严格验证
q: str = Query(
..., # ... 表示必填,必须传该参数
min_length=2, # 关键词最小长度 2 个字符
max_length=50, # 关键词最大长度 50 个字符
pattern="^[a-zA-Z0-9\u4e00-\u9fa5]+$", # 替换regex为pattern,正则规则不变
title="搜索关键词", # 接口文档里显示的参数标题
description="用于搜索物品的关键词" # 接口文档里的参数描述
),
# 非必填页码,默认 1,最小值 1
page: int = Query(default=1, ge=1, description="页码"),
# 非必填每页条数,默认10,范围 1-100
size: int = Query(default=10, ge=1, le=100, description="每页数量"),
):
"""
带数据验证的查询参数接口
- 所有验证不通过会直接返回友好错误
- 请求示例: GET /items/search?q=手机&page=1&size=10
"""
return {"q": q, "page": page, "size": size}
# ====================== 4. 列表查询参数 ======================
# 接收多个同名参数,如 ?tags=python&tags=fastapi
@app.get("/filter")
def filter_items(tags: List[str] = Query(default=[])):
"""
列表类型查询参数
- 可以接收多个相同名称的参数
- 请求示例: GET /filter?tags=python&tags=fastapi&tags=AI
"""
return {"tags": tags}3.6 路径参数 + 查询参数混合使用
@app.get("/users/{user_id}/items")
def get_user_items(
    user_id: int = Path(..., ge=1),
    category: Optional[str] = None,
    skip: int = 0,
    limit: int = 10
):
    """
    请求示例: GET /users/1/items?category=electronics&skip=0&limit=5
    """
    return {
        "user_id": user_id,
        "category": category,
        "skip": skip,
        "limit": limit
    }
3.7 参数验证速查
| 验证参数 | 适用类型 | 说明 |
|---|---|---|
gt |
数值 | 大于 |
ge |
数值 | 大于等于 |
lt |
数值 | 小于 |
le |
数值 | 小于等于 |
min_length |
字符串 | 最小长度 |
max_length |
字符串 | 最大长度 |
regex / pattern |
字符串 | 正则表达式 |
... (Ellipsis) |
所有 | 标记为必填 |
第四章:请求体与 Pydantic 模型
4.1 什么是 Pydantic?
Pydantic 是一个数据验证库,FastAPI 用它来:
-
定义请求/响应数据结构
-
自动验证数据类型
-
自动转换数据类型
-
生成 JSON Schema(用于 API 文档)
4.2 基础模型定义
# 导入 FastAPI 核心
from fastapi import FastAPI
# 导入 Pydantic 的基模型(用来定义数据结构)、字段验证、邮箱格式验证
from pydantic import BaseModel, Field, EmailStr
# 导入可选类型、列表类型
from typing import Optional, List
# 导入时间类型
from datetime import datetime
# 创建 FastAPI 应用实例
app = FastAPI()
# ====================== 定义数据模型 ======================
# 继承 BaseModel,这是 Pydantic 定义数据格式的方式
# 作用:自动校验请求体的字段类型、必填/选填、格式是否正确
class Item(BaseModel):
# 必填字段:物品名称,必须是字符串
name: str
# 可选字段:描述,不传就是 None
description: Optional[str] = None
# 必填字段:价格,必须是浮点数
price: float
# 可选字段:税率,不传就是 None
tax: Optional[float] = None
# ====================== 使用模型作为请求体 ======================
# POST 接口:用来创建物品
@app.post("/items")
def create_item(item: Item): # item: Item 表示接收一个 Item 格式的 JSON 请求体
"""
请求体示例(前端传给后端的 JSON):
{
"name": "iPhone 15",
"description": "最新款苹果手机",
"price": 7999.0,
"tax": 0.1
}
"""
# 把 Pydantic 模型 转成 普通字典
item_dict = item.dict()
# 如果传了 tax(税率不为空)
if item.tax:
# 计算含税总价 = 原价 + 原价 * 税率
price_with_tax = item.price + item.price * item.tax
# 把含税价格追加到字典里
item_dict.update({"price_with_tax": price_with_tax})
# 返回最终结果
return item_dict4.3 Field 验证器
from pydantic import BaseModel, Field
class Item(BaseModel):
name: str = Field(
..., # 必填
min_length=1,
max_length=100,
examples=["iPhone 15"] # 文档示例
)
description: Optional[str] = Field(
default=None,
max_length=500,
title="物品描述",
description="对物品的详细描述"
)
price: float = Field(
...,
gt=0, # 大于0
description="物品价格,必须大于0"
)
quantity: int = Field(
default=1,
ge=0, # 大于等于0
le=9999
)
tags: List[str] = Field(default=[])4.4 嵌套模型
from pydantic import BaseModel, HttpUrl
from typing import Optional, List, Set
class Image(BaseModel):
url: HttpUrl # 自动验证 URL 格式
name: str
width: Optional[int] = None
height: Optional[int] = None
class Category(BaseModel):
name: str
description: Optional[str] = None
class Item(BaseModel):
name: str
price: float
category: Category # 嵌套单个模型
images: Optional[List[Image]] = None # 嵌套模型列表
tags: Set[str] = set() # 集合类型,自动去重
# 请求体示例:
# {
# "name": "MacBook Pro",
# "price": 14999.0,
# "category": {
# "name": "电子产品",
# "description": "笔记本电脑"
# },
# "images": [
# {"url": "https://example.com/img1.jpg", "name": "正面图"},
# {"url": "https://example.com/img2.jpg", "name": "侧面图"}
# ],
# "tags": ["laptop", "apple", "laptop"] # 自动去重为 {"laptop", "apple"}
# }
@app.post("/items")
def create_item(item: Item):
return item4.5 自定义验证器
Python
from pydantic import BaseModel, validator, root_validator

class User(BaseModel):
    username: str
    email: str
    password: str
    password_confirm: str
    age: int

    # 字段级验证器
    @validator("username")
    def username_must_be_alphanumeric(cls, v):
        if not v.isalnum():
            raise ValueError("用户名只能包含字母和数字")
        if len(v) < 3:
            raise ValueError("用户名长度至少为3")
        return v

    @validator("email")
    def email_must_be_valid(cls, v):
        if "@" not in v:
            raise ValueError("邮箱格式不正确")
        return v.lower()  # 转为小写

    @validator("age")
    def age_must_be_valid(cls, v):
        if v < 0 or v > 150:
            raise ValueError("年龄必须在0到150之间")
        return v

    # 模型级验证器(可以访问多个字段)
    @root_validator
    def passwords_must_match(cls, values):
        password = values.get("password")
        password_confirm = values.get("password_confirm")
        if password != password_confirm:
            raise ValueError("两次密码输入不一致")
        return values

@app.post("/users/register")
def register(user: User):
    return {"username": user.username, "email": user.email}
4.6 请求体 + 路径参数 + 查询参数
Python
@app.put("/items/{item_id}")
def update_item(
    item_id: int = Path(..., ge=1),         # 路径参数
    q: Optional[str] = None,                 # 查询参数
    item: Item = ...,                         # 请求体(Body)
):
    result = {"item_id": item_id, **item.dict()}
    if q:
        result.update({"q": q})
    return result
4.7 多个请求体参数
Python
from fastapi import Body

class Item(BaseModel):
    name: str
    price: float

class User(BaseModel):
    username: str
    email: str

@app.put("/items/{item_id}")
def update_item(
    item_id: int,
    item: Item,
    user: User,
    importance: int = Body(..., ge=1, le=5)  # 单独的 Body 参数
):
    """
    请求体示例:
    {
        "item": {
            "name": "Foo",
            "price": 50.5
        },
        "user": {
            "username": "john",
            "email": "john@example.com"
        },
        "importance": 5
    }
    """
    return {
        "item_id": item_id,
        "item": item,
        "user": user,
        "importance": importance
    }
4.8 模型配置(Config)
Python
class Item(BaseModel):
    name: str
    price: float
    description: Optional[str] = None

    class Config:
        # JSON Schema 示例
        json_schema_extra = {
            "examples": [
                {
                    "name": "iPhone 15",
                    "price": 7999.0,
                    "description": "最新款苹果手机"
                }
            ]
        }

        # 允许使用 ORM 模型
        from_attributes = True  # Pydantic v2 (旧版用 orm_mode = True)
📝 笔记区域
第五章:响应模型与状态码
5.1 响应模型(response_model)
Python
from fastapi import FastAPI
from pydantic import BaseModel, EmailStr
from typing import Optional, List

app = FastAPI()

# 输入模型(包含密码)
class UserCreate(BaseModel):
    username: str
    email: str
    password: str

# 输出模型(不包含密码!)
class UserResponse(BaseModel):
    id: int
    username: str
    email: str

    class Config:
        from_attributes = True

# 模拟数据库
fake_db = []
user_id_counter = 0

@app.post("/users", response_model=UserResponse)
def create_user(user: UserCreate):
    """
    虽然接收了密码,但响应中不会返回密码
    response_model 确保了数据安全
    """
    global user_id_counter
    user_id_counter += 1
    new_user = {
        "id": user_id_counter,
        "username": user.username,
        "email": user.email,
        "password": user.password  # 存储但不返回
    }
    fake_db.append(new_user)
    return new_user  # FastAPI 会根据 response_model 自动过滤字段

@app.get("/users", response_model=List[UserResponse])
def list_users():
    return fake_db
5.2 响应模型的高级配置
Python
# 排除未设置的字段
@app.get("/items/{item_id}", response_model=Item, response_model_exclude_unset=True)
def get_item(item_id: int):
    return items[item_id]

# 包含/排除特定字段
@app.get(
    "/items/{item_id}/summary",
    response_model=Item,
    response_model_include={"name", "price"},     # 只包含这些字段
    # response_model_exclude={"description"},      # 或排除这些字段
)
def get_item_summary(item_id: int):
    return items[item_id]
5.3 HTTP 状态码
Python
from fastapi import FastAPI, status

app = FastAPI()

# 使用 status 模块(推荐,有自动补全)
@app.post("/items", status_code=status.HTTP_201_CREATED)
def create_item(item: Item):
    return item

@app.delete("/items/{item_id}", status_code=status.HTTP_204_NO_CONTENT)
def delete_item(item_id: int):
    return None  # 204 不返回内容
5.4 常用状态码速查
Python
"""
status.HTTP_200_OK              # 请求成功(默认)
status.HTTP_201_CREATED         # 创建成功
status.HTTP_204_NO_CONTENT      # 删除成功,无返回内容
status.HTTP_400_BAD_REQUEST     # 客户端请求错误
status.HTTP_401_UNAUTHORIZED    # 未认证
status.HTTP_403_FORBIDDEN       # 无权限
status.HTTP_404_NOT_FOUND       # 资源不存在
status.HTTP_422_UNPROCESSABLE_ENTITY  # 验证错误(FastAPI 默认)
status.HTTP_500_INTERNAL_SERVER_ERROR # 服务器内部错误
"""
5.5 多种响应类型
Python
from fastapi.responses import JSONResponse, HTMLResponse, PlainTextResponse, RedirectResponse

@app.get("/html", response_class=HTMLResponse)
def get_html():
    return """
    <html>
        <body><h1>Hello HTML!</h1></body>
    </html>
    """

@app.get("/text", response_class=PlainTextResponse)
def get_text():
    return "Hello, Plain Text!"

@app.get("/redirect")
def redirect():
    return RedirectResponse(url="/docs")

@app.get("/custom-json")
def custom_json():
    return JSONResponse(
        content={"message": "自定义响应"},
        status_code=200,
        headers={"X-Custom-Header": "custom-value"}
    )
📝 笔记区域
第六章:表单与文件上传
6.1 安装依赖
Bash
pip install python-multipart6.2 表单数据
Python
from fastapi import FastAPI, Form

app = FastAPI()

@app.post("/login")
def login(
    username: str = Form(...),
    password: str = Form(...)
):
    """
    接收 application/x-www-form-urlencoded 数据
    不能同时使用 Form 和 Body(JSON)
    """
    return {"username": username}
6.3 文件上传
Python
from fastapi import FastAPI, File, UploadFile
from typing import List

app = FastAPI()

# 方式1:bytes(小文件,全部读入内存)
@app.post("/files")
def upload_file(file: bytes = File(...)):
    return {"file_size": len(file)}

# 方式2:UploadFile(推荐,支持大文件)
@app.post("/uploadfile")
async def upload_file(file: UploadFile):
    """
    UploadFile 属性:
    - file.filename    文件名
    - file.content_type 文件类型(如 image/png)
    - file.size        文件大小

    UploadFile 方法:
    - await file.read()    读取文件内容
    - await file.write()   写入内容
    - await file.seek(0)   移动到文件开头
    - await file.close()   关闭文件
    """
    contents = await file.read()

    # 保存文件
    with open(f"uploads/{file.filename}", "wb") as f:
        f.write(contents)

    return {
        "filename": file.filename,
        "content_type": file.content_type,
        "size": len(contents)
    }

# 多文件上传
@app.post("/upload-multiple")
async def upload_multiple_files(files: List[UploadFile]):
    results = []
    for file in files:
        contents = await file.read()
        results.append({
            "filename": file.filename,
            "size": len(contents)
        })
    return {"files": results}

# 表单 + 文件混合
@app.post("/items-with-image")
async def create_item_with_image(
    name: str = Form(...),
    price: float = Form(...),
    image: UploadFile = File(...)
):
    return {
        "name": name,
        "price": price,
        "image_filename": image.filename
    }
📝 笔记区域
第七章:依赖注入系统
7.1 什么是依赖注入?
依赖注入是 FastAPI 最强大的特性之一,它允许你:
-
复用共享逻辑
-
共享数据库连接
-
实现认证和授权
-
减少代码重复
7.2 函数依赖
Python
from fastapi import FastAPI, Depends, Query
from typing import Optional

app = FastAPI()

# 定义依赖函数
def common_parameters(
    skip: int = Query(default=0, ge=0),
    limit: int = Query(default=10, ge=1, le=100),
    q: Optional[str] = None
):
    return {"skip": skip, "limit": limit, "q": q}

# 在多个路由中复用
@app.get("/items")
def list_items(commons: dict = Depends(common_parameters)):
    return {"endpoint": "items", **commons}

@app.get("/users")
def list_users(commons: dict = Depends(common_parameters)):
    return {"endpoint": "users", **commons}
7.3 类依赖
Python
class CommonQueryParams:
    def __init__(
        self,
        skip: int = Query(default=0, ge=0),
        limit: int = Query(default=10, ge=1, le=100),
        q: Optional[str] = None
    ):
        self.skip = skip
        self.limit = limit
        self.q = q

@app.get("/items")
def list_items(commons: CommonQueryParams = Depends(CommonQueryParams)):
    # 简写: commons: CommonQueryParams = Depends()
    return {"skip": commons.skip, "limit": commons.limit, "q": commons.q}
7.4 依赖链(嵌套依赖)
Python
def get_db():
    """获取数据库连接"""
    db = SessionLocal()
    try:
        yield db  # yield 表示这是一个生成器依赖,finally 块会在请求结束后执行
    finally:
        db.close()

def get_current_user(
    token: str = Depends(get_token),  # 先获取 token
    db: Session = Depends(get_db)     # 再获取数据库连接
):
    """获取当前用户(依赖 token 和 db)"""
    user = db.query(User).filter(User.token == token).first()
    if not user:
        raise HTTPException(status_code=401, detail="无效的认证")
    return user

def get_current_active_user(
    current_user: User = Depends(get_current_user)  # 依赖 get_current_user
):
    """获取当前活跃用户"""
    if not current_user.is_active:
        raise HTTPException(status_code=400, detail="用户已被禁用")
    return current_user

@app.get("/users/me")
def read_current_user(user: User = Depends(get_current_active_user)):
    return user
7.5 全局依赖
Python
# 为所有路由添加依赖
app = FastAPI(dependencies=[Depends(verify_token)])

# 或者为特定路由组添加依赖
from fastapi import APIRouter

router = APIRouter(
    prefix="/admin",
    dependencies=[Depends(verify_admin)]
)
7.6 yield 依赖(资源管理)
Python
async def get_db():
    """使用 yield 管理数据库会话生命周期"""
    db = SessionLocal()
    try:
        yield db                # 请求处理期间
    finally:
        db.close()              # 请求结束后清理

async def get_redis():
    """Redis 连接管理"""
    redis = await aioredis.create_redis_pool("redis://localhost")
    try:
        yield redis
    finally:
        redis.close()
        await redis.wait_closed()
📝 笔记区域
第八章:中间件与 CORS
8.1 中间件概念
中间件是在每个请求处理之前 和每个响应返回之后执行的代码。
text
客户端请求 → 中间件(前) → 路由处理 → 中间件(后) → 客户端响应8.2 自定义中间件
Python
import time
from fastapi import FastAPI, Request

app = FastAPI()

@app.middleware("http")
async def add_process_time_header(request: Request, call_next):
    """记录请求处理时间的中间件"""
    start_time = time.time()

    # 处理请求
    response = await call_next(request)

    # 处理响应
    process_time = time.time() - start_time
    response.headers["X-Process-Time"] = str(process_time)

    return response

@app.middleware("http")
async def log_requests(request: Request, call_next):
    """请求日志中间件"""
    print(f"📨 {request.method} {request.url}")
    print(f"   Client: {request.client.host}")

    response = await call_next(request)

    print(f"📬 Status: {response.status_code}")
    return response
8.3 CORS(跨域资源共享)
Python
from fastapi.middleware.cors import CORSMiddleware

app = FastAPI()

# 允许的前端域名
origins = [
    "http://localhost:3000",      # React 开发服务器
    "http://localhost:5173",      # Vite 开发服务器
    "https://your-frontend.com",  # 生产环境前端域名
]

app.add_middleware(
    CORSMiddleware,
    allow_origins=origins,          # 允许的源
    # allow_origins=["*"],          # 允许所有源(开发时可以用)
    allow_credentials=True,         # 允许发送 Cookie
    allow_methods=["*"],            # 允许所有 HTTP 方法
    allow_headers=["*"],            # 允许所有请求头
    expose_headers=["X-Custom-Header"],  # 允许前端访问的响应头
    max_age=600,                    # 预检请求缓存时间(秒)
)
8.4 信任的代理中间件
Python
from fastapi.middleware.trustedhost import TrustedHostMiddleware

app.add_middleware(
    TrustedHostMiddleware,
    allowed_hosts=["example.com", "*.example.com"]
)
8.5 GZip 压缩中间件
Python
from fastapi.middleware.gzip import GZipMiddleware

app.add_middleware(
    GZipMiddleware,
    minimum_size=1000  # 最小压缩大小(字节)
)
📝 笔记区域
第九章:数据库集成(SQLAlchemy)
9.1 安装依赖
Bash
pip install sqlalchemy
pip install aiosqlite     # 异步 SQLite 支持(学习用)

# 生产环境可选
pip install pymysql       # MySQL
pip install psycopg2      # PostgreSQL
pip install asyncpg       # 异步 PostgreSQL
9.2 项目结构
text
project/
├── main.py
├── database.py       # 数据库配置
├── models.py         # SQLAlchemy 模型
├── schemas.py        # Pydantic 模型
├── crud.py           # 数据库操作
└── routers/
    └── users.py
9.3 数据库配置(database.py)
Python
from sqlalchemy import create_engine
from sqlalchemy.ext.declarative import declarative_base
from sqlalchemy.orm import sessionmaker

# SQLite(学习/开发)
SQLALCHEMY_DATABASE_URL = "sqlite:///./app.db"

# MySQL
# SQLALCHEMY_DATABASE_URL = "mysql+pymysql://user:password@localhost:3306/dbname"

# PostgreSQL
# SQLALCHEMY_DATABASE_URL = "postgresql://user:password@localhost:5432/dbname"

engine = create_engine(
    SQLALCHEMY_DATABASE_URL,
    connect_args={"check_same_thread": False}  # SQLite 专用参数
)

SessionLocal = sessionmaker(autocommit=False, autoflush=False, bind=engine)

Base = declarative_base()

# 依赖函数:获取数据库会话
def get_db():
    db = SessionLocal()
    try:
        yield db
    finally:
        db.close()
9.4 SQLAlchemy 模型(models.py)
Python
from sqlalchemy import Column, Integer, String, Float, Boolean, DateTime, ForeignKey, Text
from sqlalchemy.orm import relationship
from sqlalchemy.sql import func
from database import Base

class User(Base):
    __tablename__ = "users"

    id = Column(Integer, primary_key=True, index=True, autoincrement=True)
    username = Column(String(50), unique=True, index=True, nullable=False)
    email = Column(String(100), unique=True, index=True, nullable=False)
    hashed_password = Column(String(128), nullable=False)
    is_active = Column(Boolean, default=True)
    created_at = Column(DateTime(timezone=True), server_default=func.now())
    updated_at = Column(DateTime(timezone=True), onupdate=func.now())

    # 关系
    items = relationship("Item", back_populates="owner")


class Item(Base):
    __tablename__ = "items"

    id = Column(Integer, primary_key=True, index=True, autoincrement=True)
    title = Column(String(100), index=True, nullable=False)
    description = Column(Text, nullable=True)
    price = Column(Float, nullable=False)
    owner_id = Column(Integer, ForeignKey("users.id"))
    created_at = Column(DateTime(timezone=True), server_default=func.now())

    # 关系
    owner = relationship("User", back_populates="items")
9.5 Pydantic 模型(schemas.py)
Python
from pydantic import BaseModel, EmailStr, Field
from typing import Optional, List
from datetime import datetime

# ===== Item Schemas =====
class ItemBase(BaseModel):
    title: str = Field(..., min_length=1, max_length=100)
    description: Optional[str] = None
    price: float = Field(..., gt=0)

class ItemCreate(ItemBase):
    """创建物品时的请求体"""
    pass

class ItemUpdate(BaseModel):
    """更新物品时的请求体(所有字段可选)"""
    title: Optional[str] = Field(None, min_length=1, max_length=100)
    description: Optional[str] = None
    price: Optional[float] = Field(None, gt=0)

class ItemResponse(ItemBase):
    """返回物品信息"""
    id: int
    owner_id: int
    created_at: datetime

    class Config:
        from_attributes = True


# ===== User Schemas =====
class UserBase(BaseModel):
    username: str = Field(..., min_length=3, max_length=50)
    email: str

class UserCreate(UserBase):
    """注册时的请求体"""
    password: str = Field(..., min_length=6)

class UserResponse(UserBase):
    """返回用户信息(不含密码)"""
    id: int
    is_active: bool
    created_at: datetime
    items: List[ItemResponse] = []

    class Config:
        from_attributes = True
9.6 CRUD 操作(crud.py)
Python
from sqlalchemy.orm import Session
from typing import Optional, List
import models
import schemas

# ===== User CRUD =====
def get_user(db: Session, user_id: int) -> Optional[models.User]:
    return db.query(models.User).filter(models.User.id == user_id).first()

def get_user_by_email(db: Session, email: str) -> Optional[models.User]:
    return db.query(models.User).filter(models.User.email == email).first()

def get_user_by_username(db: Session, username: str) -> Optional[models.User]:
    return db.query(models.User).filter(models.User.username == username).first()

def get_users(db: Session, skip: int = 0, limit: int = 100) -> List[models.User]:
    return db.query(models.User).offset(skip).limit(limit).all()

def create_user(db: Session, user: schemas.UserCreate) -> models.User:
    # 实际项目中应该对密码进行哈希处理
    fake_hashed_password = user.password + "_hashed"
    db_user = models.User(
        username=user.username,
        email=user.email,
        hashed_password=fake_hashed_password
    )
    db.add(db_user)
    db.commit()
    db.refresh(db_user)
    return db_user

# ===== Item CRUD =====
def get_items(db: Session, skip: int = 0, limit: int = 100) -> List[models.Item]:
    return db.query(models.Item).offset(skip).limit(limit).all()

def create_user_item(
    db: Session, item: schemas.ItemCreate, user_id: int
) -> models.Item:
    db_item = models.Item(**item.dict(), owner_id=user_id)
    db.add(db_item)
    db.commit()
    db.refresh(db_item)
    return db_item

def update_item(
    db: Session, item_id: int, item: schemas.ItemUpdate
) -> Optional[models.Item]:
    db_item = db.query(models.Item).filter(models.Item.id == item_id).first()
    if not db_item:
        return None

    # 只更新提供了的字段
    update_data = item.dict(exclude_unset=True)
    for key, value in update_data.items():
        setattr(db_item, key, value)

    db.commit()
    db.refresh(db_item)
    return db_item

def delete_item(db: Session, item_id: int) -> bool:
    db_item = db.query(models.Item).filter(models.Item.id == item_id).first()
    if not db_item:
        return False
    db.delete(db_item)
    db.commit()
    return True
9.7 主应用(main.py)
Python
from fastapi import FastAPI, Depends, HTTPException, status
from sqlalchemy.orm import Session
from typing import List

import models
import schemas
import crud
from database import engine, get_db

# 创建数据表
models.Base.metadata.create_all(bind=engine)

app = FastAPI(title="FastAPI + SQLAlchemy 示例")

# ===== User Routes =====
@app.post("/users", response_model=schemas.UserResponse, status_code=status.HTTP_201_CREATED)
def create_user(user: schemas.UserCreate, db: Session = Depends(get_db)):
    # 检查邮箱是否已注册
    db_user = crud.get_user_by_email(db, email=user.email)
    if db_user:
        raise HTTPException(status_code=400, detail="邮箱已被注册")

    # 检查用户名是否已存在
    db_user = crud.get_user_by_username(db, username=user.username)
    if db_user:
        raise HTTPException(status_code=400, detail="用户名已存在")

    return crud.create_user(db=db, user=user)

@app.get("/users", response_model=List[schemas.UserResponse])
def list_users(skip: int = 0, limit: int = 100, db: Session = Depends(get_db)):
    return crud.get_users(db, skip=skip, limit=limit)

@app.get("/users/{user_id}", response_model=schemas.UserResponse)
def get_user(user_id: int, db: Session = Depends(get_db)):
    db_user = crud.get_user(db, user_id=user_id)
    if db_user is None:
        raise HTTPException(status_code=404, detail="用户不存在")
    return db_user

# ===== Item Routes =====
@app.post(
    "/users/{user_id}/items",
    response_model=schemas.ItemResponse,
    status_code=status.HTTP_201_CREATED
)
def create_item_for_user(
    user_id: int,
    item: schemas.ItemCreate,
    db: Session = Depends(get_db)
):
    db_user = crud.get_user(db, user_id=user_id)
    if not db_user:
        raise HTTPException(status_code=404, detail="用户不存在")
    return crud.create_user_item(db=db, item=item, user_id=user_id)

@app.get("/items", response_model=List[schemas.ItemResponse])
def list_items(skip: int = 0, limit: int = 100, db: Session = Depends(get_db)):
    return crud.get_items(db, skip=skip, limit=limit)

@app.put("/items/{item_id}", response_model=schemas.ItemResponse)
def update_item(item_id: int, item: schemas.ItemUpdate, db: Session = Depends(get_db)):
    db_item = crud.update_item(db, item_id=item_id, item=item)
    if not db_item:
        raise HTTPException(status_code=404, detail="物品不存在")
    return db_item

@app.delete("/items/{item_id}", status_code=status.HTTP_204_NO_CONTENT)
def delete_item(item_id: int, db: Session = Depends(get_db)):
    success = crud.delete_item(db, item_id=item_id)
    if not success:
        raise HTTPException(status_code=404, detail="物品不存在")
📝 笔记区域
第十章:用户认证与授权(JWT)
10.1 安装依赖
Bash
pip install python-jose[cryptography]   # JWT 处理
pip install passlib[bcrypt]              # 密码哈希
pip install python-multipart            # 表单支持
10.2 密码哈希工具
Python
# security.py
from passlib.context import CryptContext
from jose import JWTError, jwt
from datetime import datetime, timedelta
from typing import Optional

# 配置
SECRET_KEY = "your-super-secret-key-change-this-in-production"  # 生产环境用环境变量
ALGORITHM = "HS256"
ACCESS_TOKEN_EXPIRE_MINUTES = 30

# 密码哈希
pwd_context = CryptContext(schemes=["bcrypt"], deprecated="auto")

def verify_password(plain_password: str, hashed_password: str) -> bool:
    """验证密码"""
    return pwd_context.verify(plain_password, hashed_password)

def get_password_hash(password: str) -> str:
    """生成密码哈希"""
    return pwd_context.hash(password)

def create_access_token(data: dict, expires_delta: Optional[timedelta] = None) -> str:
    """创建 JWT Token"""
    to_encode = data.copy()
    if expires_delta:
        expire = datetime.utcnow() + expires_delta
    else:
        expire = datetime.utcnow() + timedelta(minutes=ACCESS_TOKEN_EXPIRE_MINUTES)
    to_encode.update({"exp": expire})
    encoded_jwt = jwt.encode(to_encode, SECRET_KEY, algorithm=ALGORITHM)
    return encoded_jwt

def decode_access_token(token: str) -> Optional[dict]:
    """解码 JWT Token"""
    try:
        payload = jwt.decode(token, SECRET_KEY, algorithms=[ALGORITHM])
        return payload
    except JWTError:
        return None
10.3 认证模型
Python
# schemas.py(在已有基础上添加)
class Token(BaseModel):
    access_token: str
    token_type: str

class TokenData(BaseModel):
    username: Optional[str] = None
10.4 认证依赖
Python
# auth.py
from fastapi import Depends, HTTPException, status
from fastapi.security import OAuth2PasswordBearer, OAuth2PasswordRequestForm
from sqlalchemy.orm import Session
from database import get_db
from security import verify_password, decode_access_token
import crud

# OAuth2 密码流
oauth2_scheme = OAuth2PasswordBearer(tokenUrl="token")

def get_current_user(
    token: str = Depends(oauth2_scheme),
    db: Session = Depends(get_db)
):
    """获取当前认证用户"""
    credentials_exception = HTTPException(
        status_code=status.HTTP_401_UNAUTHORIZED,
        detail="无法验证凭据",
        headers={"WWW-Authenticate": "Bearer"},
    )

    payload = decode_access_token(token)
    if payload is None:
        raise credentials_exception

    username: str = payload.get("sub")
    if username is None:
        raise credentials_exception

    user = crud.get_user_by_username(db, username=username)
    if user is None:
        raise credentials_exception

    return user

def get_current_active_user(
    current_user = Depends(get_current_user)
):
    """获取当前活跃用户"""
    if not current_user.is_active:
        raise HTTPException(status_code=400, detail="用户已被禁用")
    return current_user
10.5 认证路由
Python
# main.py
from fastapi.security import OAuth2PasswordRequestForm
from security import verify_password, get_password_hash, create_access_token
from auth import get_current_user, get_current_active_user

@app.post("/token", response_model=schemas.Token)
def login(
    form_data: OAuth2PasswordRequestForm = Depends(),
    db: Session = Depends(get_db)
):
    """
    登录获取 Token

    使用 OAuth2 密码流:
    - username: 用户名
    - password: 密码
    """
    user = crud.get_user_by_username(db, username=form_data.username)
    if not user or not verify_password(form_data.password, user.hashed_password):
        raise HTTPException(
            status_code=status.HTTP_401_UNAUTHORIZED,
            detail="用户名或密码错误",
            headers={"WWW-Authenticate": "Bearer"},
        )

    access_token = create_access_token(data={"sub": user.username})
    return {"access_token": access_token, "token_type": "bearer"}

@app.get("/users/me", response_model=schemas.UserResponse)
def read_users_me(current_user = Depends(get_current_active_user)):
    """获取当前登录用户信息(需要认证)"""
    return current_user

@app.get("/users/me/items", response_model=List[schemas.ItemResponse])
def read_own_items(current_user = Depends(get_current_active_user)):
    """获取当前用户的物品列表(需要认证)"""
    return current_user.items
10.6 认证流程图
text
1. 用户注册
   POST /users  { username, email, password }
   → 密码哈希后存储

2. 用户登录
   POST /token  { username, password }
   → 验证密码
   → 生成 JWT Token
   → 返回 { access_token, token_type }

3. 访问受保护资源
   GET /users/me
   Headers: Authorization: Bearer <token>
   → 解码 Token
   → 查找用户
   → 返回用户信息
📝 笔记区域
第十一章:异常处理
11.1 HTTPException
Python
from fastapi import FastAPI, HTTPException, status

app = FastAPI()

items = {"foo": "The Foo Wrestlers"}

@app.get("/items/{item_id}")
def read_item(item_id: str):
    if item_id not in items:
        raise HTTPException(
            status_code=status.HTTP_404_NOT_FOUND,
            detail="物品不存在",
            headers={"X-Error": "Item not found"},  # 自定义响应头
        )
    return {"item": items[item_id]}
11.2 自定义异常类
Python
# exceptions.py

class AppException(Exception):
    """应用基础异常"""
    def __init__(self, status_code: int, detail: str, error_code: str = None):
        self.status_code = status_code
        self.detail = detail
        self.error_code = error_code

class NotFoundException(AppException):
    def __init__(self, resource: str = "资源"):
        super().__init__(
            status_code=404,
            detail=f"{resource}不存在",
            error_code="NOT_FOUND"
        )

class DuplicateException(AppException):
    def __init__(self, field: str = "记录"):
        super().__init__(
            status_code=409,
            detail=f"{field}已存在",
            error_code="DUPLICATE"
        )

class ForbiddenException(AppException):
    def __init__(self):
        super().__init__(
            status_code=403,
            detail="无权限访问",
            error_code="FORBIDDEN"
        )
11.3 全局异常处理器
Python
from fastapi import FastAPI, Request
from fastapi.responses import JSONResponse
from fastapi.exceptions import RequestValidationError
from starlette.exceptions import HTTPException as StarletteHTTPException

app = FastAPI()

# 处理自定义异常
@app.exception_handler(AppException)
async def app_exception_handler(request: Request, exc: AppException):
    return JSONResponse(
        status_code=exc.status_code,
        content={
            "success": False,
            "error_code": exc.error_code,
            "message": exc.detail,
            "path": str(request.url)
        }
    )

# 处理 HTTP 异常
@app.exception_handler(StarletteHTTPException)
async def http_exception_handler(request: Request, exc: StarletteHTTPException):
    return JSONResponse(
        status_code=exc.status_code,
        content={
            "success": False,
            "error_code": "HTTP_ERROR",
            "message": exc.detail,
            "path": str(request.url)
        }
    )

# 处理请求验证异常(参数/请求体验证失败)
@app.exception_handler(RequestValidationError)
async def validation_exception_handler(request: Request, exc: RequestValidationError):
    errors = []
    for error in exc.errors():
        errors.append({
            "field": " -> ".join(str(loc) for loc in error["loc"]),
            "message": error["msg"],
            "type": error["type"]
        })

    return JSONResponse(
        status_code=422,
        content={
            "success": False,
            "error_code": "VALIDATION_ERROR",
            "message": "请求参数验证失败",
            "errors": errors,
            "path": str(request.url)
        }
    )

# 处理未预期的异常
@app.exception_handler(Exception)
async def global_exception_handler(request: Request, exc: Exception):
    return JSONResponse(
        status_code=500,
        content={
            "success": False,
            "error_code": "INTERNAL_ERROR",
            "message": "服务器内部错误",
            "path": str(request.url)
        }
    )
11.4 统一响应格式
Python
# response.py
from pydantic import BaseModel
from typing import Optional, Any, Generic, TypeVar
from pydantic.generics import GenericModel

T = TypeVar("T")

class ResponseModel(GenericModel, Generic[T]):
    success: bool = True
    message: str = "操作成功"
    data: Optional[T] = None

# 使用
@app.get("/items/{item_id}", response_model=ResponseModel[schemas.ItemResponse])
def get_item(item_id: int, db: Session = Depends(get_db)):
    item = crud.get_item(db, item_id)
    if not item:
        raise NotFoundException("物品")
    return ResponseModel(data=item)
📝 笔记区域
第十二章:后台任务
12.1 BackgroundTasks
Python
from fastapi import FastAPI, BackgroundTasks

app = FastAPI()

def write_log(message: str):
    """后台写日志"""
    with open("log.txt", "a") as f:
        f.write(f"{message}\n")

def send_email(email: str, subject: str, body: str):
    """模拟发送邮件(耗时操作)"""
    import time
    time.sleep(3)  # 模拟耗时
    print(f"📧 邮件已发送到 {email}: {subject}")

@app.post("/send-notification/{email}")
async def send_notification(
    email: str,
    background_tasks: BackgroundTasks
):
    # 添加后台任务(不会阻塞响应)
    background_tasks.add_task(send_email, email, "欢迎", "感谢注册!")
    background_tasks.add_task(write_log, f"通知已发送到 {email}")

    # 立即返回响应
    return {"message": "通知正在后台发送中"}
12.2 在依赖注入中使用后台任务
Python
def write_audit_log(
    background_tasks: BackgroundTasks,
    q: Optional[str] = None
):
    if q:
        background_tasks.add_task(write_log, f"查询参数: {q}")

@app.post("/items")
def create_item(
    item: Item,
    background_tasks: BackgroundTasks,
    log_dep = Depends(write_audit_log)
):
    background_tasks.add_task(write_log, f"物品创建: {item.name}")
    return item
⚠️ 注意 :
BackgroundTasks适合轻量级后台任务。对于复杂的后台任务(如定时任务、长时间运行的任务),建议使用 Celery 等专业任务队列。
📝 笔记区域
第十三章:WebSocket
13.1 基础 WebSocket
Python
from fastapi import FastAPI, WebSocket, WebSocketDisconnect

app = FastAPI()

@app.websocket("/ws")
async def websocket_endpoint(ws: WebSocket):
    await ws.accept()
    try:
        while True:
            data = await ws.receive_text()
            await ws.send_text(f"你发送的消息: {data}")
    except WebSocketDisconnect:
        print("客户端断开连接")
13.2 WebSocket 连接管理器(聊天室)
Python
from fastapi import FastAPI, WebSocket, WebSocketDisconnect
from typing import List

app = FastAPI()

class ConnectionManager:
    """WebSocket 连接管理器"""

    def __init__(self):
        self.active_connections: List[WebSocket] = []

    async def connect(self, websocket: WebSocket):
        await websocket.accept()
        self.active_connections.append(websocket)

    def disconnect(self, websocket: WebSocket):
        self.active_connections.remove(websocket)

    async def send_personal_message(self, message: str, websocket: WebSocket):
        await websocket.send_text(message)

    async def broadcast(self, message: str):
        """向所有连接的客户端广播消息"""
        for connection in self.active_connections:
            await connection.send_text(message)

manager = ConnectionManager()

@app.websocket("/ws/{client_id}")
async def websocket_endpoint(websocket: WebSocket, client_id: int):
    await manager.connect(websocket)
    await manager.broadcast(f"🟢 用户 #{client_id} 加入了聊天室")

    try:
        while True:
            data = await websocket.receive_text()
            await manager.broadcast(f"用户 #{client_id}: {data}")
    except WebSocketDisconnect:
        manager.disconnect(websocket)
        await manager.broadcast(f"🔴 用户 #{client_id} 离开了聊天室")
13.3 前端测试页面
Python
from fastapi.responses import HTMLResponse

@app.get("/chat")
async def get_chat_page():
    return HTMLResponse("""
    <!DOCTYPE html>
    <html>
    <head><title>聊天室</title></head>
    <body>
        <h1>WebSocket 聊天室</h1>
        <input type="text" id="clientId" placeholder="输入你的ID" />
        <button οnclick="connect()">连接</button>
        <hr>
        <input type="text" id="messageText" placeholder="输入消息" />
        <button οnclick="sendMessage()">发送</button>
        <ul id="messages"></ul>

        <script>
            var ws;
            function connect() {
                var clientId = document.getElementById("clientId").value;
                ws = new WebSocket(`ws://localhost:8000/ws/${clientId}`);
                ws.onmessage = function(event) {
                    var messages = document.getElementById("messages");
                    var li = document.createElement("li");
                    li.textContent = event.data;
                    messages.appendChild(li);
                };
            }
            function sendMessage() {
                var input = document.getElementById("messageText");
                ws.send(input.value);
                input.value = "";
            }
        </script>
    </body>
    </html>
    """)
📝 笔记区域
第十四章:测试
14.1 安装依赖
Bash
pip install pytest
pip install httpx  # FastAPI 推荐的异步 HTTP 客户端
14.2 使用 TestClient
Python
# test_main.py
from fastapi.testclient import TestClient
from main import app

client = TestClient(app)

# ===== 基础测试 =====
def test_read_root():
    response = client.get("/")
    assert response.status_code == 200
    assert response.json() == {"message": "Hello, FastAPI!"}

def test_read_item():
    response = client.get("/items/1")
    assert response.status_code == 200
    data = response.json()
    assert data["item_id"] == 1

def test_read_item_not_found():
    response = client.get("/items/9999")
    assert response.status_code == 404

# ===== POST 测试 =====
def test_create_item():
    response = client.post(
        "/items",
        json={
            "name": "Test Item",
            "price": 99.9,
            "description": "A test item"
        }
    )
    assert response.status_code == 201
    data = response.json()
    assert data["name"] == "Test Item"
    assert data["price"] == 99.9

# ===== 验证错误测试 =====
def test_create_item_invalid():
    response = client.post(
        "/items",
        json={
            "name": "",       # 空名称
            "price": -10      # 负数价格
        }
    )
    assert response.status_code == 422  # 验证错误

# ===== 认证测试 =====
def test_login():
    response = client.post(
        "/token",
        data={"username": "testuser", "password": "testpass"}
    )
    assert response.status_code == 200
    data = response.json()
    assert "access_token" in data
    return data["access_token"]

def test_protected_route():
    # 先登录获取 token
    token = test_login()

    # 使用 token 访问受保护路由
    response = client.get(
        "/users/me",
        headers={"Authorization": f"Bearer {token}"}
    )
    assert response.status_code == 200

def test_protected_route_without_token():
    response = client.get("/users/me")
    assert response.status_code == 401
14.3 使用测试数据库
Python
# test_config.py
import pytest
from fastapi.testclient import TestClient
from sqlalchemy import create_engine
from sqlalchemy.orm import sessionmaker

from main import app
from database import Base, get_db

# 使用内存 SQLite 作为测试数据库
SQLALCHEMY_DATABASE_URL = "sqlite:///./test.db"
engine = create_engine(
    SQLALCHEMY_DATABASE_URL,
    connect_args={"check_same_thread": False}
)
TestingSessionLocal = sessionmaker(autocommit=False, autoflush=False, bind=engine)

# 覆盖数据库依赖
def override_get_db():
    try:
        db = TestingSessionLocal()
        yield db
    finally:
        db.close()

app.dependency_overrides[get_db] = override_get_db

# Pytest fixtures
@pytest.fixture(autouse=True)
def setup_database():
    """每个测试前创建表,测试后删除"""
    Base.metadata.create_all(bind=engine)
    yield
    Base.metadata.drop_all(bind=engine)

@pytest.fixture
def client():
    return TestClient(app)

# 使用 fixture
def test_create_user(client):
    response = client.post(
        "/users",
        json={
            "username": "testuser",
            "email": "test@example.com",
            "password": "password123"
        }
    )
    assert response.status_code == 201
    data = response.json()
    assert data["username"] == "testuser"
    assert "password" not in data  # 确保不返回密码
14.4 运行测试
Bash
# 运行所有测试
pytest

# 运行并显示详细信息
pytest -v

# 运行特定文件
pytest test_main.py

# 运行特定测试
pytest test_main.py::test_create_item

# 显示 print 输出
pytest -s

# 生成覆盖率报告
pip install pytest-cov
pytest --cov=. --cov-report=html
📝 笔记区域
第十五章:项目结构与部署
15.1 推荐项目结构
text
my_project/
├── app/
│   ├── __init__.py
│   ├── main.py                 # FastAPI 应用入口
│   ├── config.py               # 配置管理
│   ├── database.py             # 数据库配置
│   ├── dependencies.py         # 公共依赖
│   ├── exceptions.py           # 自定义异常
│   │
│   ├── models/                 # SQLAlchemy 模型
│   │   ├── __init__.py
│   │   ├── user.py
│   │   └── item.py
│   │
│   ├── schemas/                # Pydantic 模型
│   │   ├── __init__.py
│   │   ├── user.py
│   │   └── item.py
│   │
│   ├── routers/                # 路由模块
│   │   ├── __init__.py
│   │   ├── auth.py
│   │   ├── users.py
│   │   └── items.py
│   │
│   ├── services/               # 业务逻辑层
│   │   ├── __init__.py
│   │   ├── user_service.py
│   │   └── item_service.py
│   │
│   ├── crud/                   # 数据库操作层
│   │   ├── __init__.py
│   │   ├── user.py
│   │   └── item.py
│   │
│   └── utils/                  # 工具函数
│       ├── __init__.py
│       ├── security.py
│       └── email.py
│
├── tests/                      # 测试
│   ├── __init__.py
│   ├── conftest.py
│   ├── test_users.py
│   └── test_items.py
│
├── alembic/                    # 数据库迁移
│   ├── versions/
│   └── env.py
│
├── .env                        # 环境变量
├── .gitignore
├── alembic.ini
├── requirements.txt
├── Dockerfile
├── docker-compose.yml
└── README.md
15.2 配置管理(config.py)
Python
from pydantic_settings import BaseSettings
from typing import Optional

class Settings(BaseSettings):
    # 应用配置
    APP_NAME: str = "My FastAPI App"
    DEBUG: bool = False
    VERSION: str = "1.0.0"

    # 数据库配置
    DATABASE_URL: str = "sqlite:///./app.db"

    # JWT 配置
    SECRET_KEY: str = "your-secret-key"
    ALGORITHM: str = "HS256"
    ACCESS_TOKEN_EXPIRE_MINUTES: int = 30

    # CORS
    ALLOWED_ORIGINS: list = ["http://localhost:3000"]

    # Redis
    REDIS_URL: Optional[str] = None

    class Config:
        env_file = ".env"

settings = Settings()
15.3 路由模块化(routers/users.py)
Python
from fastapi import APIRouter, Depends, HTTPException, status
from sqlalchemy.orm import Session
from typing import List

from app.database import get_db
from app.schemas import user as user_schemas
from app.crud import user as user_crud
from app.dependencies import get_current_active_user

router = APIRouter(
    prefix="/users",
    tags=["用户管理"],           # API 文档中的标签分组
    responses={404: {"description": "Not found"}},
)

@router.get("/", response_model=List[user_schemas.UserResponse])
def list_users(
    skip: int = 0,
    limit: int = 100,
    db: Session = Depends(get_db)
):
    """获取用户列表"""
    return user_crud.get_users(db, skip=skip, limit=limit)

@router.get("/me", response_model=user_schemas.UserResponse)
def read_users_me(current_user = Depends(get_current_active_user)):
    """获取当前用户信息"""
    return current_user

@router.get("/{user_id}", response_model=user_schemas.UserResponse)
def get_user(user_id: int, db: Session = Depends(get_db)):
    """获取指定用户信息"""
    user = user_crud.get_user(db, user_id)
    if not user:
        raise HTTPException(status_code=404, detail="用户不存在")
    return user
15.4 主应用注册路由(main.py)
Python
from fastapi import FastAPI
from fastapi.middleware.cors import CORSMiddleware
from app.config import settings
from app.database import engine
from app.models import user, item
from app.routers import auth, users, items

# 创建表
user.Base.metadata.create_all(bind=engine)
item.Base.metadata.create_all(bind=engine)

app = FastAPI(
    title=settings.APP_NAME,
    version=settings.VERSION,
    description="FastAPI 学习项目"
)

# 中间件
app.add_middleware(
    CORSMiddleware,
    allow_origins=settings.ALLOWED_ORIGINS,
    allow_credentials=True,
    allow_methods=["*"],
    allow_headers=["*"],
)

# 注册路由
app.include_router(auth.router)
app.include_router(users.router)
app.include_router(items.router)

# 健康检查
@app.get("/health")
def health_check():
    return {"status": "healthy"}
15.5 Docker 部署
Dockerfile
Dockerfile
FROM python:3.11-slim

WORKDIR /app

# 安装依赖
COPY requirements.txt .
RUN pip install --no-cache-dir -r requirements.txt

# 复制代码
COPY . .

# 暴露端口
EXPOSE 8000

# 启动命令
CMD ["uvicorn", "app.main:app", "--host", "0.0.0.0", "--port", "8000"]
docker-compose.yml
YAML
version: "3.8"

services:
  api:
    build: .
    ports:
      - "8000:8000"
    environment:
      - DATABASE_URL=postgresql://postgres:password@db:5432/myapp
      - SECRET_KEY=your-production-secret-key
      - DEBUG=false
    depends_on:
      - db
    restart: always

  db:
    image: postgres:15
    environment:
      - POSTGRES_USER=postgres
      - POSTGRES_PASSWORD=password
      - POSTGRES_DB=myapp
    volumes:
      - postgres_data:/var/lib/postgresql/data
    ports:
      - "5432:5432"

volumes:
  postgres_data:
15.6 Alembic 数据库迁移
Bash
# 安装
pip install alembic

# 初始化
alembic init alembic

# 编辑 alembic/env.py,配置数据库连接和模型

# 生成迁移
alembic revision --autogenerate -m "initial migration"

# 执行迁移
alembic upgrade head

# 回滚
alembic downgrade -1
15.7 生产环境运行
Bash
# 使用 Gunicorn + Uvicorn workers(生产推荐)
pip install gunicorn

gunicorn app.main:app \
    --workers 4 \
    --worker-class uvicorn.workers.UvicornWorker \
    --bind 0.0.0.0:8000 \
    --access-logfile - \
    --error-logfile -
15.8 requirements.txt
txt
fastapi==0.104.1
uvicorn[standard]==0.24.0
sqlalchemy==2.0.23
pydantic[email]==2.5.2
pydantic-settings==2.1.0
python-jose[cryptography]==3.3.0
passlib[bcrypt]==1.7.4
python-multipart==0.0.6
alembic==1.13.0
pytest==7.4.3
httpx==0.25.2
📝 笔记区域
附录:常用速查表
A. HTTP 方法装饰器
| 装饰器 | HTTP 方法 | 用途 |
|---|---|---|
@app.get() |
GET | 获取资源 |
@app.post() |
POST | 创建资源 |
@app.put() |
PUT | 完整更新资源 |
@app.patch() |
PATCH | 部分更新资源 |
@app.delete() |
DELETE | 删除资源 |
@app.options() |
OPTIONS | 获取通信选项 |
@app.head() |
HEAD | 获取响应头 |
B. 参数类型速查
| 参数位置 | 使用方式 | 示例 |
|---|---|---|
| 路径参数 | Path() |
/users/{user_id} |
| 查询参数 | Query() |
/items?skip=0&limit=10 |
| 请求体 | Body() / Pydantic Model |
JSON body |
| 请求头 | Header() |
Authorization: Bearer ... |
| Cookie | Cookie() |
session_id=abc123 |
| 表单 | Form() |
form-data |
| 文件 | File() / UploadFile |
文件上传 |
C. Header 和 Cookie 参数
Python
from fastapi import Header, Cookie

@app.get("/items")
def read_items(
    user_agent: str = Header(None),           # 请求头
    x_custom_header: str = Header(None),      # 自定义请求头(自动转换 x-custom-header)
    session_id: str = Cookie(None),           # Cookie
):
    return {
        "User-Agent": user_agent,
        "X-Custom-Header": x_custom_header,
        "session_id": session_id
    }
D. 常用 Pydantic 类型
Python
from pydantic import (
    BaseModel,
    Field,
    EmailStr,       # 需要 pip install pydantic[email]
    HttpUrl,
    IPvAnyAddress,
    constr,         # 受约束的字符串
    conint,         # 受约束的整数
    confloat,       # 受约束的浮点数
)
from typing import Optional, List, Set, Dict, Tuple
from datetime import datetime, date, time
from uuid import UUID
from enum import Enum
E. 生命周期事件
Python
from contextlib import asynccontextmanager

@asynccontextmanager
async def lifespan(app: FastAPI):
    # 启动时执行
    print("🚀 应用启动")
    # 初始化数据库连接池、加载模型等
    yield
    # 关闭时执行
    print("🛑 应用关闭")
    # 关闭数据库连接池、清理资源等

app = FastAPI(lifespan=lifespan)
F. 静态文件服务
Python
from fastapi.staticfiles import StaticFiles

# 挂载静态文件目录
app.mount("/static", StaticFiles(directory="static"), name="static")

# 访问: http://localhost:8000/static/image.png
G. 模板渲染(Jinja2)
Python
from fastapi.templating import Jinja2Templates
from fastapi import Request

templates = Jinja2Templates(directory="templates")

@app.get("/page", response_class=HTMLResponse)
def read_page(request: Request):
    return templates.TemplateResponse(
        "index.html",
        {"request": request, "title": "我的页面"}
    )
📖 学习路线建议
text
第1周: 第1-4章(基础入门)
  → 理解路由、参数、请求体

第2周: 第5-8章(进阶特性)
  → 响应模型、文件上传、依赖注入、中间件

第3周: 第9-11章(实战必备)
  → 数据库、认证、异常处理

第4周: 第12-15章(项目完善)
  → 后台任务、WebSocket、测试、部署

实战项目建议:
  1. 📝 Todo 应用 API
  2. 📚 博客系统 API
  3. 🛒 简易电商 API
  4. 💬 实时聊天应用