1、安装Docker
bash
详见:https://mp.weixin.qq.com/s/CrjQTLJM0YbJ9SC4GIfKsg2、安装nanobot
bash
详见:https://github.com/HKUDS/nanobot克隆仓库:
bash
# 如果没有安装git,请先安装

# 方式1:未使用代理下载
git clone https://github.com/HKUDS/nanobot

# 方式2:使用代理下载
# 详见:https://mp.weixin.qq.com/s/XTbT3wKp_W2fiK7pGpo7Qg
git clone https://gh-proxy.com/https://github.com/HKUDS/nanobot
切换目录:
bash
cd nanobot查看docker-compose.yml文件:
bash
详见:https://github.com/HKUDS/nanobot/blob/main/docker-compose.yml
bash
x-common-config: &common-config
  build:
    context: .
    dockerfile: Dockerfile
  volumes:
    - ~/.nanobot:/root/.nanobot
services:
  nanobot-gateway:
    container_name: nanobot-gateway
    <<: *common-config
    command: ["gateway"]
    restart: unless-stopped
    ports:
      - 18790:18790
    deploy:
      resources:
        limits:
          cpus: '1'
          memory: 1G
        reservations:
          cpus: '0.25'
          memory: 256M

  nanobot-cli:
    <<: *common-config
    profiles:
      - cli
    command: ["status"]
    stdin_open: true
    tty: true
备份docker-compose.yml文件:
bash
cp docker-compose.yml docker-compose.yml-bak修改docker-compose.yml文件:
bash
# 修改数据卷:
sed -i 's#~/.nanobot#./data#g' docker-compose.yml
查看Dockerfile文件:
bash
详见:https://github.com/HKUDS/nanobot/blob/main/Dockerfile
bash
FROM ghcr.io/astral-sh/uv:python3.12-bookworm-slim

# Install Node.js 20 for the WhatsApp bridge
RUN apt-get update && \
    apt-get install -y --no-install-recommends curl ca-certificates gnupg git openssh-client && \
    mkdir -p /etc/apt/keyrings && \
    curl -fsSL https://deb.nodesource.com/gpgkey/nodesource-repo.gpg.key | gpg --dearmor -o /etc/apt/keyrings/nodesource.gpg && \
    echo "deb [signed-by=/etc/apt/keyrings/nodesource.gpg] https://deb.nodesource.com/node_20.x nodistro main" > /etc/apt/sources.list.d/nodesource.list && \
    apt-get update && \
    apt-get install -y --no-install-recommends nodejs && \
    apt-get purge -y gnupg && \
    apt-get autoremove -y && \
    rm -rf /var/lib/apt/lists/*

WORKDIR /app

# Install Python dependencies first (cached layer)
COPY pyproject.toml README.md LICENSE ./
RUN mkdir -p nanobot bridge && touch nanobot/__init__.py && \
    uv pip install --system --no-cache . && \
    rm -rf nanobot bridge

# Copy the full source and install
COPY nanobot/ nanobot/
COPY bridge/ bridge/
RUN uv pip install --system --no-cache .

# Build the WhatsApp bridge
RUN git config --global url."https://github.com/".insteadOf "ssh://git@github.com/"

WORKDIR /app/bridge
RUN npm install && npm run build
WORKDIR /app

# Create config directory
RUN mkdir -p /root/.nanobot

# Gateway default port
EXPOSE 18790

ENTRYPOINT ["nanobot"]
CMD ["status"]
备份Dockerfile文件:
bash
cp Dockerfile Dockerfile-bak修改Dockerfile文件:
bash
# 修改python镜像源:
# 详见:https://mirrors.nju.edu.cn/
FROM ghcr.nju.edu.cn/astral-sh/uv:python3.12-bookworm-slim

ENV APT_MIRROR=mirrors.aliyun.com
ENV NODEJS_URL=https://mirrors.aliyun.com/nodejs-release/v20.19.2/node-v20.19.2-linux-x64.tar.gz
ENV PIP_INDEX_URL=https://mirrors.aliyun.com/pypi/simple/
ENV NPM_REGISTRY=https://registry.npmmirror.com

# Install Node.js 20 for the WhatsApp bridge
# 修改debian镜像源:
# 详见:https://developer.aliyun.com/mirror/debian
# 详见:https://mirrors.tencent.com/help/debian.html
RUN sed -i "s/deb.debian.org/${APT_MIRROR}/g" /etc/apt/sources.list.d/debian.sources && \
    apt-get update && \
    apt-get install -y --no-install-recommends curl ca-certificates gnupg git openssh-client && \
    curl -fsSL ${NODEJS_URL} | \
    tar -xz -C /usr/local --strip-components=1 && \
    apt-get autoremove -y && \
    rm -rf /var/lib/apt/lists/*

WORKDIR /app

# Install Python dependencies first (cached layer)
COPY pyproject.toml README.md LICENSE ./

# 修改pypi镜像源:
# 详见:https://developer.aliyun.com/mirror/pypi
RUN pip config set global.index-url ${PIP_INDEX_URL} && \
    mkdir -p nanobot bridge && touch nanobot/__init__.py && \
    uv pip install --index-url ${PIP_INDEX_URL} --system --no-cache . && \
    rm -rf nanobot bridge

# Copy the full source and install
COPY nanobot/ nanobot/
COPY bridge/ bridge/

# 修改pypi镜像源:
# 详见:https://developer.aliyun.com/mirror/pypi
RUN uv pip install --index-url ${PIP_INDEX_URL} --system --no-cache .

# Build the WhatsApp bridge
RUN git config --global url."https://github.com/".insteadOf "ssh://git@github.com/"

WORKDIR /app/bridge

# 修改npm镜像源:
# 详见:https://developer.aliyun.com/mirror/NPM
RUN npm config set registry ${NPM_REGISTRY} && \
    npm install && npm run build
WORKDIR /app

# Create config directory
RUN mkdir -p /root/.nanobot

# Gateway default port
EXPOSE 18790

ENTRYPOINT ["nanobot"]
CMD ["status"]
创建并启动容器:
bash
"首次安装"
# 1、执行命令
docker-compose run --rm nanobot-cli onboard
# 2、添加API keys
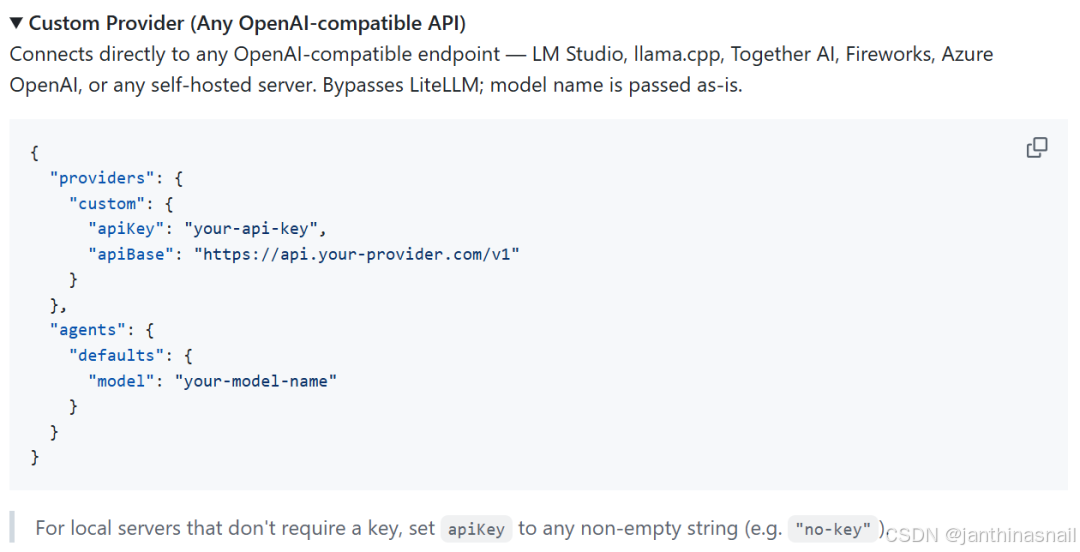
# 当前使用"Cloudflare的AI Gateway代理Google AI Studio"
# 详见:https://mp.weixin.qq.com/s/Xg7W7KJs6IpvXxPCoMWtXw
修改"./data/config.json"文件的部分内容,示例如下:
{
"providers": {
"custom": {
"apiBase": "https://gateway.ai.cloudflare.com/v1/{填写ACCOUNT_ID}/gemini/compat",
"apiKey": "{填写API_KEY}"
}
},
"agents": {
"defaults": {
"provider": "custom",
"model": "google-ai-studio/gemini-2.5-flash"
}
}
}
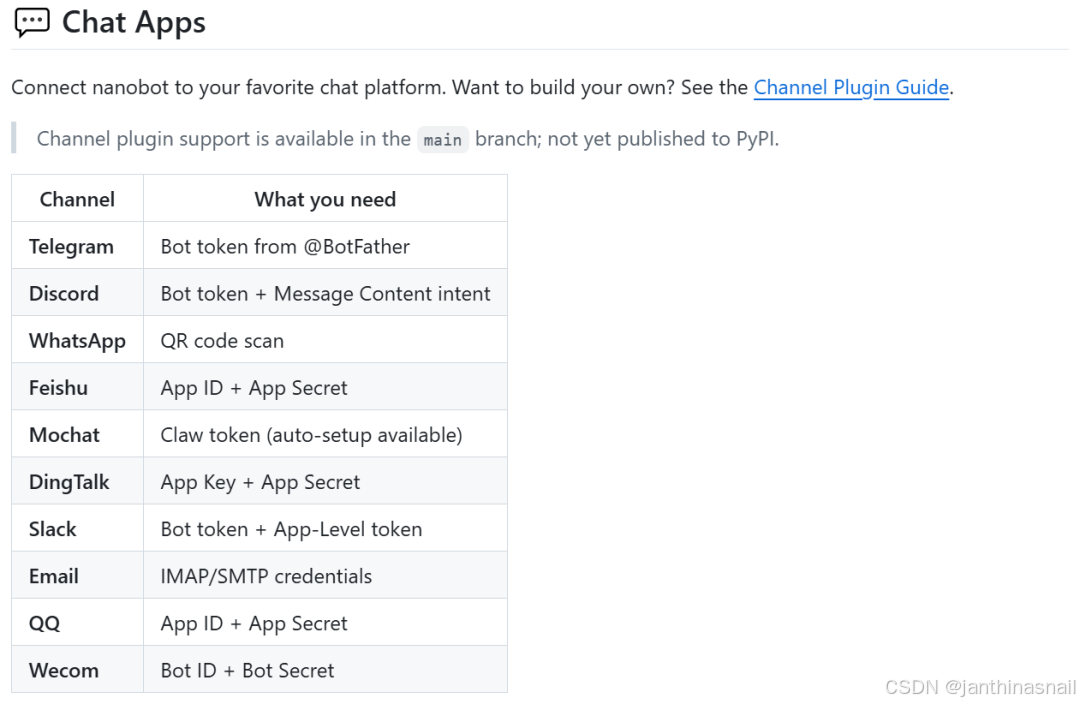
# 3、配置Channel
# 详见:https://github.com/HKUDS/nanobot#-chat-apps
修改"./data/config.json"文件的部分内容,以飞书为例(当前暂未配置):
{
"channels": {
"feishu": {
"enabled": true,
"appId": "cli_xxx",
"appSecret": "xxx",
"encryptKey": "",
"verificationToken": "",
"allowFrom": ["ou_YOUR_OPEN_ID"],
"groupPolicy": "mention"
}
}
}
bash
"创建并启动容器"

# 执行命令:
docker compose up -d nanobot-gateway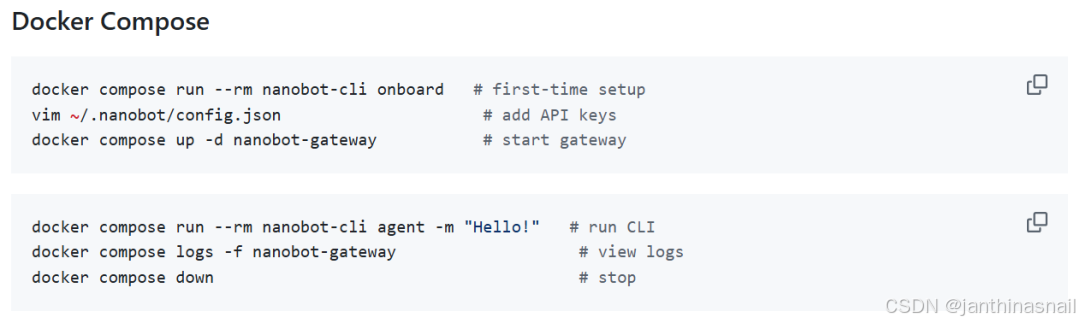
查看容器列表:
docker ps进入容器:
bash
# 方式1:

# 进入容器:
docker exec -it nanobot-gateway bash

# 执行命令:
nanobot agent

# 退出cli交互、退出容器:
exit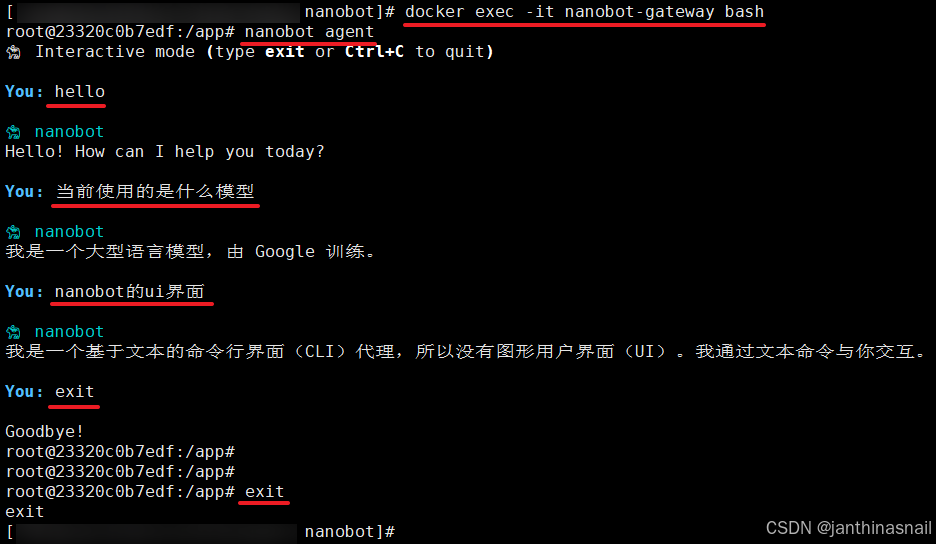
bash
# 方式1:

# 进入容器:
docker exec -it nanobot-gateway bash

# 执行命令:
nanobot agent

# 退出cli交互、退出容器:
exit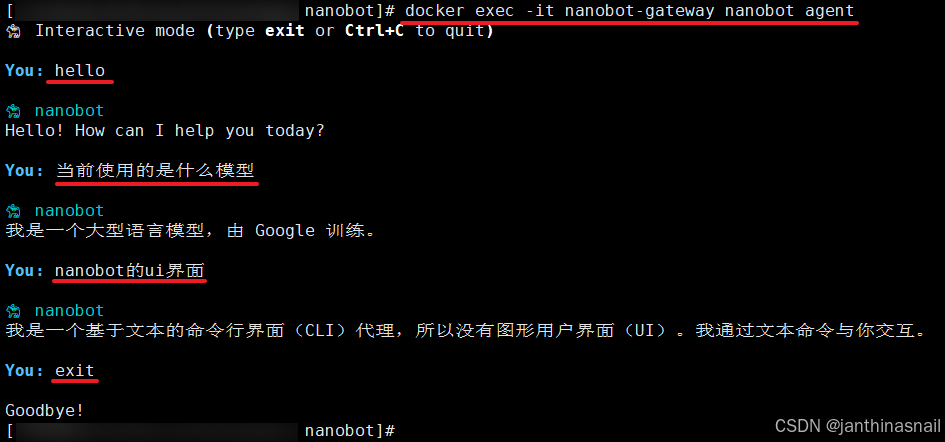
停止并销毁容器:
bash
docker-compose down删除目录:
bash
rm -rf ./data删除镜像:
bash
docker rmi nanobot-nanobot-cli nanobot-nanobot-gateway删除所有未使用的构建缓存(Build Cache):
bash
docker builder prune3、详见
bash
https://github.com/HKUDS/nanobot
https://mp.weixin.qq.com/s/7d-baWyFDVoPS7Z67yBaBw