0. 前言
最近采购了meta quest 3,现已完成了在so101单臂上的遥操作,这个机械臂的结构比较简单,接口完善,也有 python_sdk包,整体没有什么困难的地方,而我最终目标是遥操自研机械臂,可能没有相关的适配,这个可能还是个问题。
之前用的是telegrip项目中的VR_monitor项目遥操机械臂,结构还是比较明晰的,不过需要进一步调试,在社区中发现宇树也有XR遥操的相关项目,在仿真中和真实中都可以遥操,所以来试试他们的遥操系统。
1. 配置环境
1.1 基础环境
bash
# 创建 conda 基础环境
# (base) unitree@Host:~$
conda create -n tv python=3.10 pinocchio=3.1.0 numpy=1.26.4 -c conda-forge
conda activate tv
# 克隆本仓库(tv)
git clone https://github.com/unitreerobotics/xr_teleoperate.git
cd xr_teleoperate
# 浅克隆子模块
git submodule update --init --depth 1
# 安装 televuer 模块
cd teleop/televuer
pip install -e .
# 生成 televuer 模块所需的证书文件
openssl req -x509 -nodes -days 365 -newkey rsa:2048 -keyout key.pem -out cert.pem
# 安装 dex-retargeting 模块
cd ../robot_control/dex-retargeting/
pip install -e .
# 安装本仓库所需的其他依赖库
cd ../../../
(tv) unitree@Host:~/xr_teleoperate$ pip install -r requirements.txt
1.2 unitree_sdk2_python
这是和上面的 xr_teleoperate 同级的目录里:
bash
# 安装 unitree_sdk2_python 库,该库负责开发设备与机器人之间的通信控制功能
(tv) unitree@Host:~$ git clone https://github.com/unitreerobotics/unitree_sdk2_python.git
(tv) unitree@Host:~$ cd unitree_sdk2_python
(tv) unitree@Host:~/unitree_sdk2_python$ pip install -e .
2. 仿真部署
2.1 安装 unitree_sim_isaaclab
该项目基于Isaac Lab 搭建宇树(Unitree)机器人在不同任务下的仿真场景,方便进行数据采集、数据回放、数据生成以及模型验证。可以与xr_teleoperate代码配合进行数据集的采集。该项目采用了与真实机器人一样的DDS通信,以提高代码的通用性和使用的简易性。
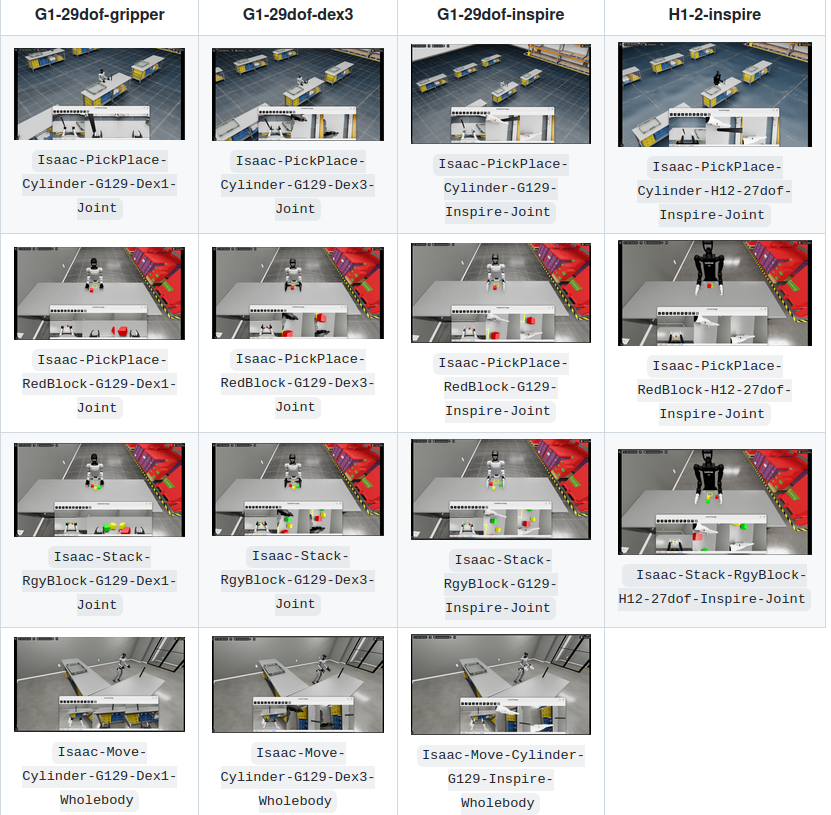
目前该项目使用了带有不同执行器的Unitree G1/H1-2机器人,并且搭建了不同任务的仿真场景,具体任务场景名称与图示如下表,其中任务名称中带有 Wholebody的任务可以进行移动操作:
该项目需要安装Isaac Sim 4.5.0/Isaac Sim 5.0.0以及Isaac Lab,具体安装可参考官方教程。或者按照下面流程进行安装。
bash
# isaacsim安装目录:/home/strawberry/LT/isaacsim
export ISAACSIM_PATH="${HOME}/LT/isaacsim"
export ISAACSIM_PYTHON_EXE="${ISAACSIM_PATH}/python.sh"
由于已经安装过了isaac sim 4.5.0 和 isaaclab,这里创建一下环境:
bash
cd IsaacLab

ln -s ${HOME}/LT/isaacsim/ _isaac_sim

./isaaclab.sh --conda unitree_sim_env

conda activate  unitree_sim_env

./isaaclab.sh --install
安装 unitree_sdk2_python:
bash
git clone https://github.com/unitreerobotics/unitree_sdk2_python

cd unitree_sdk2_python

pip3 install -e .
bash
cd ..
git clone https://github.com/unitreerobotics/unitree_sim_isaaclab.git
cd unitree_sim_isaaclab
pip install -r requirements.txt这里直接构建docker:
bash
sudo docker pull nvidia/cuda:12.2.0-runtime-ubuntu22.04
git clone https://github.com/unitreerobotics/unitree_sim_isaaclab.git

cd   unitree_sim_isaaclab
sudo docker build   --build-arg http_proxy=http://127.0.0.1:7890   --build-arg https_proxy=http://127.0.0.1:7890   -t unitree-sim:latest -f Dockerfile .
# 如果不需要使用代理请填写
# sudo docker build -t unitree-sim:latest -f Dockerfile .
# 如果有网络问题你可以尝试使用 --network host 选项来构建 Docker 镜像,使其使用宿主机的网络设置
sudo docker build --network host --build-arg http_proxy=http://127.0.0.1:7890 --build-arg https_proxy=http://127.0.0.1:7890 -t unitree-sim:latest -f Dockerfile .
strawberry@strawberry-E500-G9-WS760T:~/zzy/project/unitree/unitree_sim_isaaclab$ sudo docker build --network host --build-arg http_proxy=http://127.0.0.1:7890 --build-arg https_proxy=http://127.0.0.1:7890 -t unitree-sim:latest -f Dockerfile .
+ Building 2078.7s (28/28) FINISHED docker:default
=> internal load build definition from Dockerfile 0.0s
=> => transferring dockerfile: 4.60kB 0.0s
=> internal load metadata for docker.io/nvidia/cuda:12.2.0-runtime-ubun 0.0s
=> internal load .dockerignore 0.0s
=> => transferring context: 2B 0.0s
=> CACHED builder 1/15 FROM docker.io/nvidia/cuda:12.2.0-runtime-ubunt 0.0s
=> internal load build context 0.0s
=> => transferring context: 175.83kB 0.0s
=> runtime 2/9 RUN apt-get update && apt-get install -y --no-install- 389.0s
=> builder 2/15 RUN sed -i 's|http://archive.ubuntu.com/ubuntu/\|http:/ 0.1s
=> builder 3/15 RUN apt-get update && apt-get install -y --no-instal 545.8s
=> builder 4/15 RUN wget https://repo.anaconda.com/miniconda/Minicond 11.2s
=> builder 5/15 RUN conda tos accept --override-channels --channel ht 10.9s
=> builder 6/15 RUN conda install -y -c conda-forge "libgcc-ng>=12" 130.7s
=> builder 7/15 RUN pip install --upgrade pip && pip install tor 198.6s
=> builder 8/15 RUN pip install "isaacsimall,extscache==5.0.0" --e 448.4s
=> builder 9/15 RUN mkdir -p /home/code 1.1s
=> builder 10/15 WORKDIR /home/code 0.0s
=> builder 11/15 COPY ./IsaacLab /home/code/IsaacLab 0.2s
=> builder 12/15 RUN cd /home/code/IsaacLab && chmod +x ./isaacla 298.2s
=> builder 13/15 RUN git clone https://github.com/eclipse-cyclonedds/c 32.1s
=> builder 14/15 RUN git clone https://github.com/unitreerobotics/unit 12.5s
=> builder 15/15 RUN git clone https://github.com/unitreerobotics/unit 43.9s
=> runtime 3/9 COPY --from=builder /home/code/IsaacLab /home/code/Isaac 0.1s
=> runtime 4/9 COPY --from=builder /home/code/unitree_sdk2_python /home 0.0s
=> runtime 5/9 COPY --from=builder /cyclonedds /cyclonedds 0.1s
=> runtime 6/9 COPY --from=builder /opt/conda /opt/conda 214.1s
=> runtime 7/9 COPY --from=builder /home/code/unitree_sim_isaaclab /hom 6.6s
=> runtime 8/9 RUN echo 'source /opt/conda/etc/profile.d/conda.sh' >> ~ 0.5s
=> runtime 9/9 WORKDIR /home/code 0.5s
=> exporting to image 101.1s
=> => exporting layers 101.1s
=> => writing image sha256:5217b6914919150f0fd1698fd192d85a6fc7f9a7a6a90e 0.0s
=> => naming to docker.io/library/unitree-sim:latest 0.0s

进入docker:
bash
xhost +local:docker

sudo docker run --gpus all -it --rm   --network host   -e NVIDIA_VISIBLE_DEVICES=all   -e NVIDIA_DRIVER_CAPABILITIES=compute,utility,video,graphics,display   -e LD_LIBRARY_PATH=/usr/local/nvidia/lib:/usr/local/nvidia/lib64:$LD_LIBRARY_PATH   -e DISPLAY=$DISPLAY   -e VK_ICD_FILENAMES=/etc/vulkan/icd.d/nvidia_icd.json   -v /etc/vulkan/icd.d:/etc/vulkan/icd.d:ro   -v /usr/share/vulkan/icd.d:/usr/share/vulkan/icd.d:ro   -v /tmp/.X11-unix:/tmp/.X11-unix:rw   -v /home/unitree/newDisk/unitree_sim_isaaclab_usds:/home/code/isaacsim_assets   unitree-isaacsim-env /bin/bash

#其中 -v /home/unitree/newDisk/unitree_sim_isaaclab_usds:/home/code/isaacsim_assets 是把宿主机中的unitree_sim_isaaclab_usds目录映射到docker容器的isaacsim_assets中,方便进行数据的共享,请根据自己情况修改。

sudo docker run --gpus all -it --rm --network host -e NVIDIA_VISIBLE_DEVICES=all -e NVIDIA_DRIVER_CAPABILITIES=compute,utility,video,graphics,display -e LD_LIBRARY_PATH=/usr/local/nvidia/lib:/usr/local/nvidia/lib64:$LD_LIBRARY_PATH -e DISPLAY=$DISPLAY -e VK_ICD_FILENAMES=/etc/vulkan/icd.d/nvidia_icd.json -v /etc/vulkan/icd.d:/etc/vulkan/icd.d:ro -v /usr/share/vulkan/icd.d:/usr/share/vulkan/icd.d:ro -v /tmp/.X11-unix:/tmp/.X11-unix:rw -v /home/strawberry/zzy/project/unitree/unitree_sim_isaaclab/unitree_sim_isaaclab_usds:/home/code/isaacsim_assets unitree-sim:latest /bin/bash
解决错误:
bash
strawberry@strawberry-E500-G9-WS760T:~/LT/IsaacLab/unitree_sim_isaaclab$ sudo docker run --gpus all -it --rm --network host -e NVIDIA_VISIBLE_DEVICES=all -e NVIDIA_DRIVER_CAPABILITIES=compute,utility,video,graphics,display -e LD_LIBRARY_PATH=/usr/local/nvidia/lib:/usr/local/nvidia/lib64:$LD_LIBRARY_PATH -e DISPLAY=$DISPLAY -e VK_ICD_FILENAMES=/etc/vulkan/icd.d/nvidia_icd.json -v /etc/vulkan/icd.d:/etc/vulkan/icd.d:ro -v /usr/share/vulkan/icd.d:/usr/share/vulkan/icd.d:ro -v /tmp/.X11-unix:/tmp/.X11-unix:rw -v /home/strawberry/zzy/project/unitree/unitree_sim_isaaclab/unitree_sim_isaaclab_usds:/home/code/isaacsim_assets unitree-sim:latest /bin/bash
docker: Error response from daemon: could not select device driver "" with capabilities: [[gpu]]

Run 'docker run --help' for more information

strawberry@strawberry-E500-G9-WS760T:~/LT/IsaacLab/unitree_sim_isaaclab$ sudo docker run --rm --gpus all nvidia/cuda:12.2.0-runtime-ubuntu22.04 nvidia-smi
docker: Error response from daemon: could not select device driver "" with capabilities: [[gpu]]

Run 'docker run --help' for more information

strawberry@strawberry-E500-G9-WS760T:~/LT/IsaacLab/unitree_sim_isaaclab$ sudo systemctl status docker
● docker.service - Docker Application Container Engine
     Loaded: loaded (/lib/systemd/system/docker.service; enabled; vendor preset: enabled)
     Active: active (running) since Wed 2025-10-15 16:00:46 CST; 2 weeks 0 days ago
TriggeredBy: ● docker.socket
       Docs: https://docs.docker.com
   Main PID: 1789 (dockerd)
      Tasks: 40
     Memory: 25.8G
     CGroup: /system.slice/docker.service
             └─1789 /usr/bin/dockerd -H fd:// --containerd=/run/containerd/containerd.sock

10月 29 20:33:16 strawberry-E500-G9-WS760T dockerd[1789]: time="2025-10-29T20:33:16.021168882+08:>
10月 29 20:33:31 strawberry-E500-G9-WS760T dockerd[1789]: time="2025-10-29T20:33:31.021587866+08:>
10月 29 20:33:31 strawberry-E500-G9-WS760T dockerd[1789]: time="2025-10-29T20:33:31.021660962+08:>
10月 29 20:33:31 strawberry-E500-G9-WS760T dockerd[1789]: time="2025-10-29T20:33:31.024282234+08:>
10月 29 20:36:54 strawberry-E500-G9-WS760T dockerd[1789]: time="2025-10-29T20:36:54.734058068+08:>
10月 29 20:37:49 strawberry-E500-G9-WS760T dockerd[1789]: time="2025-10-29T20:37:49.800599640+08:>
10月 29 20:39:18 strawberry-E500-G9-WS760T dockerd[1789]: time="2025-10-29T20:39:18.573945870+08:>
10月 29 20:39:50 strawberry-E500-G9-WS760T dockerd[1789]: time="2025-10-29T20:39:50.400387751+08:>
10月 29 20:40:33 strawberry-E500-G9-WS760T dockerd[1789]: time="2025-10-29T20:40:33.633168461+08:>
10月 29 20:40:46 strawberry-E500-G9-WS760T dockerd[1789]: time="2025-10-29T20:40:46.562337160+08:>

strawberry@strawberry-E500-G9-WS760T:~/LT/IsaacLab/unitree_sim_isaaclab$ nvidia-ctk --version
nvidia-ctk:未找到命令

strawberry@strawberry-E500-G9-WS760T:~/LT/IsaacLab/unitree_sim_isaaclab$ sudo apt-get update
命中:1 http://mirrors.tuna.tsinghua.edu.cn/ros/ubuntu focal InRelease
获取:2 http://mirrors.tuna.tsinghua.edu.cn/ros2/ubuntu focal InRelease [4,685 B]
命中:3 https://mirrors.aliyun.com/ubuntu focal InRelease
命中:4 https://mirrors.aliyun.com/ubuntu focal-security InRelease
命中:5 https://mirrors.aliyun.com/ubuntu focal-updates InRelease
命中:6 https://mirrors.aliyun.com/ubuntu focal-backports InRelease
命中:8 https://packages.microsoft.com/repos/edge stable InRelease
命中:9 http://repo.ros2.org/ubuntu/main focal InRelease
忽略:10 http://robotpkg.openrobots.org/packages/debian/pub focal InRelease
命中:11 http://packages.ros.org/ros2/ubuntu focal InRelease
命中:7 https://developer.download.nvidia.cn/compute/cuda/repos/ubuntu2204/x86_64  InRelease
命中:12 https://deb.nodesource.com/node_22.x nodistro InRelease
命中:13 http://robotpkg.openrobots.org/packages/debian/pub focal Release
已下载 4,685 B,耗时 1秒 (3,322 B/s)
正在读取软件包列表... 完成
strawberry@strawberry-E500-G9-WS760T:~/LT/IsaacLab/unitree_sim_isaaclab$ sudo apt-get install -y nvidia-container-toolkit
正在读取软件包列表... 完成
正在分析软件包的依赖关系树
正在读取状态信息... 完成
下列软件包是自动安装的并且现在不需要了:
  bridge-utils gyp libc-ares2 libjs-inherits libjs-is-typedarray libjs-psl
  libjs-typedarray-to-buffer libuv1-dev node-abbrev node-ajv node-ansi node-ansi-align
  node-ansi-regex node-ansi-styles node-ansistyles node-aproba node-archy node-are-we-there-yet
  node-asap node-asn1 node-assert-plus node-asynckit node-aws-sign2 node-aws4
  node-balanced-match node-bcrypt-pbkdf node-bl node-bluebird node-boxen node-brace-expansion
  node-builtin-modules node-builtins node-cacache node-call-limit node-camelcase node-caseless
  node-chalk node-chownr node-ci-info node-cli-boxes node-cliui node-clone node-co
  node-color-convert node-color-name node-colors node-columnify node-combined-stream
  node-concat-map node-concat-stream node-config-chain node-configstore
  node-console-control-strings node-copy-concurrently node-core-util-is node-cross-spawn
  node-crypto-random-string node-cyclist node-dashdash node-debug node-decamelize
  node-decompress-response node-deep-extend node-defaults node-define-properties
  node-delayed-stream node-delegates node-detect-indent node-detect-newline node-dot-prop
  node-duplexer3 node-duplexify node-ecc-jsbn node-editor node-encoding node-end-of-stream
  node-err-code node-errno node-es6-promise node-escape-string-regexp node-execa node-extend
  node-extsprintf node-fast-deep-equal node-find-up node-flush-write-stream node-forever-agent
  node-form-data node-from2 node-fs-vacuum node-fs-write-stream-atomic node-fs.realpath
  node-function-bind node-gauge node-genfun node-get-caller-file node-get-stream node-getpass
  node-glob node-got node-graceful-fs node-har-schema node-har-validator node-has-flag
  node-has-symbol-support-x node-has-to-string-tag-x node-has-unicode node-hosted-git-info
  node-http-signature node-iconv-lite node-iferr node-import-lazy node-imurmurhash node-inflight
  node-inherits node-ini node-invert-kv node-ip node-ip-regex node-is-npm node-is-obj
  node-is-object node-is-path-inside node-is-plain-obj node-is-retry-allowed node-is-stream
  node-is-typedarray node-isarray node-isexe node-isstream node-isurl node-jsbn
  node-json-parse-better-errors node-json-schema node-json-schema-traverse
  node-json-stable-stringify node-json-stringify-safe node-jsonify node-jsonparse
  node-jsonstream node-jsprim node-latest-version node-lazy-property node-lcid node-libnpx
  node-locate-path node-lockfile node-lodash node-lodash-packages node-lowercase-keys
  node-lru-cache node-make-dir node-mem node-mime node-mime-types node-mimic-fn
  node-mimic-response node-minimatch node-minimist node-mississippi node-mkdirp
  node-move-concurrently node-ms node-mute-stream node-nopt node-normalize-package-data
  node-npm-bundled node-npm-package-arg node-npm-run-path node-npmlog node-number-is-nan
  node-oauth-sign node-object-assign node-once node-opener node-os-locale node-os-tmpdir
  node-osenv node-p-cancelable node-p-finally node-p-is-promise node-p-limit node-p-locate
  node-p-timeout node-package-json node-parallel-transform node-path-exists
  node-path-is-absolute node-path-is-inside node-performance-now node-pify node-prepend-http
  node-process-nextick-args node-promise-inflight node-promise-retry node-promzard
  node-proto-list node-prr node-pseudomap node-psl node-pump node-pumpify node-punycode node-qs
  node-qw node-rc node-read node-read-package-json node-readable-stream node-registry-auth-token
  node-registry-url node-request node-require-directory node-require-main-filename node-resolve
  node-resolve-from node-retry node-rimraf node-run-queue node-safe-buffer node-semver
  node-semver-diff node-set-blocking node-sha node-shebang-command node-shebang-regex
  node-signal-exit node-slash node-slide node-sorted-object node-spdx-correct
  node-spdx-exceptions node-spdx-expression-parse node-spdx-license-ids node-sshpk node-ssri
  node-stream-each node-stream-iterate node-stream-shift node-strict-uri-encode
  node-string-decoder node-string-width node-strip-ansi node-strip-eof node-strip-json-comments
  node-supports-color node-tar node-term-size node-text-table node-through node-through2
  node-timed-out node-tough-cookie node-tunnel-agent node-tweetnacl node-typedarray
  node-typedarray-to-buffer node-uid-number node-unique-filename node-unique-string node-unpipe
  node-uri-js node-url-parse-lax node-url-to-options node-util-deprecate node-uuid
  node-validate-npm-package-license node-validate-npm-package-name node-verror node-wcwidth.js
  node-which node-which-module node-wide-align node-widest-line node-wrap-ansi node-wrappy
  node-write-file-atomic node-xdg-basedir node-xtend node-y18n node-yallist node-yargs
  node-yargs-parser ubuntu-fan
使用'sudo apt autoremove'来卸载它(它们)。
将会同时安装下列软件:
  libnvidia-container-tools libnvidia-container1 nvidia-container-toolkit-base
下列【新】软件包将被安装:
  libnvidia-container-tools libnvidia-container1 nvidia-container-toolkit
  nvidia-container-toolkit-base
升级了 0 个软件包,新安装了 4 个软件包,要卸载 0 个软件包,有 14 个软件包未被升级。
需要下载 7,621 kB 的归档。
解压缩后会消耗 33.6 MB 的额外空间。
获取:1 https://developer.download.nvidia.cn/compute/cuda/repos/ubuntu2204/x86_64  libnvidia-container1 1.18.0-1 [926 kB]
获取:2 https://developer.download.nvidia.cn/compute/cuda/repos/ubuntu2204/x86_64  libnvidia-container-tools 1.18.0-1 [22.2 kB]
获取:3 https://developer.download.nvidia.cn/compute/cuda/repos/ubuntu2204/x86_64  nvidia-container-toolkit-base 1.18.0-1 [5,373 kB]
获取:4 https://developer.download.nvidia.cn/compute/cuda/repos/ubuntu2204/x86_64  nvidia-container-toolkit 1.18.0-1 [1,300 kB]
已下载 7,621 kB,耗时 1秒 (6,673 kB/s)
正在选中未选择的软件包 libnvidia-container1:amd64。
(正在读取数据库 ... 系统当前共安装有 323656 个文件和目录。)
准备解压 .../libnvidia-container1_1.18.0-1_amd64.deb  ...
正在解压 libnvidia-container1:amd64 (1.18.0-1) ...
正在选中未选择的软件包 libnvidia-container-tools。
准备解压 .../libnvidia-container-tools_1.18.0-1_amd64.deb  ...
正在解压 libnvidia-container-tools (1.18.0-1) ...
正在选中未选择的软件包 nvidia-container-toolkit-base。
准备解压 .../nvidia-container-toolkit-base_1.18.0-1_amd64.deb  ...
正在解压 nvidia-container-toolkit-base (1.18.0-1) ...
正在选中未选择的软件包 nvidia-container-toolkit。
准备解压 .../nvidia-container-toolkit_1.18.0-1_amd64.deb  ...
正在解压 nvidia-container-toolkit (1.18.0-1) ...
正在设置 nvidia-container-toolkit-base (1.18.0-1) ...
Created symlink /etc/systemd/system/multi-user.target.wants/nvidia-cdi-refresh.path → /etc/systemd/system/nvidia-cdi-refresh.path.
Created symlink /etc/systemd/system/multi-user.target.wants/nvidia-cdi-refresh.service → /etc/systemd/system/nvidia-cdi-refresh.service.
Regenerating NVIDIA CDI specification...
正在设置 libnvidia-container1:amd64 (1.18.0-1) ...
正在设置 libnvidia-container-tools (1.18.0-1) ...
正在设置 nvidia-container-toolkit (1.18.0-1) ...
正在处理用于 libc-bin (2.31-0ubuntu9.18) 的触发器 ...
strawberry@strawberry-E500-G9-WS760T:~/LT/IsaacLab/unitree_sim_isaaclab$ nvidia-ctk --version
NVIDIA Container Toolkit CLI version 1.18.0
commit: f8daa5e26de9fd7eb79259040b6dd5a52060048c

strawberry@strawberry-E500-G9-WS760T:~/LT/IsaacLab/unitree_sim_isaaclab$ sudo nvidia-ctk runtime configure --runtime=docker
INFO[0000] Loading config from /etc/docker/daemon.json
INFO[0000] Wrote updated config to /etc/docker/daemon.json
INFO[0000] It is recommended that docker daemon be restarted.
strawberry@strawberry-E500-G9-WS760T:~/LT/IsaacLab/unitree_sim_isaaclab$ sudo systemctl restart docker
strawberry@strawberry-E500-G9-WS760T:~/LT/IsaacLab/unitree_sim_isaaclab$ sudo docker run --rm --gpus all nvidia/cuda:12.2.0-runtime-ubuntu22.04 nvidia-smi

==========
== CUDA ==
==========

CUDA Version 12.2.0

Container image Copyright (c) 2016-2023, NVIDIA CORPORATION & AFFILIATES. All rights reserved.

This container image and its contents are governed by the NVIDIA Deep Learning Container License.
By pulling and using the container, you accept the terms and conditions of this license:
https://developer.nvidia.com/ngc/nvidia-deep-learning-container-license

A copy of this license is made available in this container at /NGC-DL-CONTAINER-LICENSE for your convenience.

Wed Oct 29 12:48:42 2025
+---------------------------------------------------------------------------------------+
| NVIDIA-SMI 535.183.01             Driver Version: 535.183.01   CUDA Version: 12.2     |
|-----------------------------------------+----------------------+----------------------+
| GPU  Name                 Persistence-M | Bus-Id        Disp.A | Volatile Uncorr. ECC |
| Fan  Temp   Perf          Pwr:Usage/Cap |         Memory-Usage | GPU-Util  Compute M. |
|                                         |                      |               MIG M. |
|=========================================+======================+======================|
|   0  NVIDIA RTX A6000               Off | 00000000:01:00.0  On |                  Off |
| 30%   40C    P5              64W / 300W |    979MiB / 49140MiB |      1%      Default |
|                                         |                      |                  N/A |
+-----------------------------------------+----------------------+----------------------+
|   1  NVIDIA RTX A6000               Off | 00000000:05:00.0 Off |                  Off |
| 30%   34C    P8              19W / 300W |     10MiB / 49140MiB |      0%      Default |
|                                         |                      |                  N/A |
+-----------------------------------------+----------------------+----------------------+

+---------------------------------------------------------------------------------------+
| Processes:                                                                            |
|  GPU   GI   CI        PID   Type   Process name                            GPU Memory |
|        ID   ID                                                             Usage      |
|=======================================================================================|
+---------------------------------------------------------------------------------------+
进入docker成功:
遥操作:
bash
python sim_main.py --device cpu --enable_cameras --task Isaac-PickPlace-Cylinder-G129-Dex1-Joint --enable_dex1_dds --robot_type g129--task: 任务名称,对应上表中的任务名称
--enable_dex1_dds/--enable_dex3_dds: 分别代表启用二指夹爪/三指灵巧手的dds
--robot_type: 机器人类型,目前有29自由度的unitree g1(g129),27自由度的H1-2
--headless: 不启动Sim窗口下运行,如果使用Docker环境进行运行请添加此参数
注意: 如需要控制机器人移动,请参考send_commands_8bit.py 或者 send_commands_keyboard.py 发布控制命令,也可以直接使用。但是请注意只有带有Wholebody标识的才是移动型任务,才能控制机器人移动。
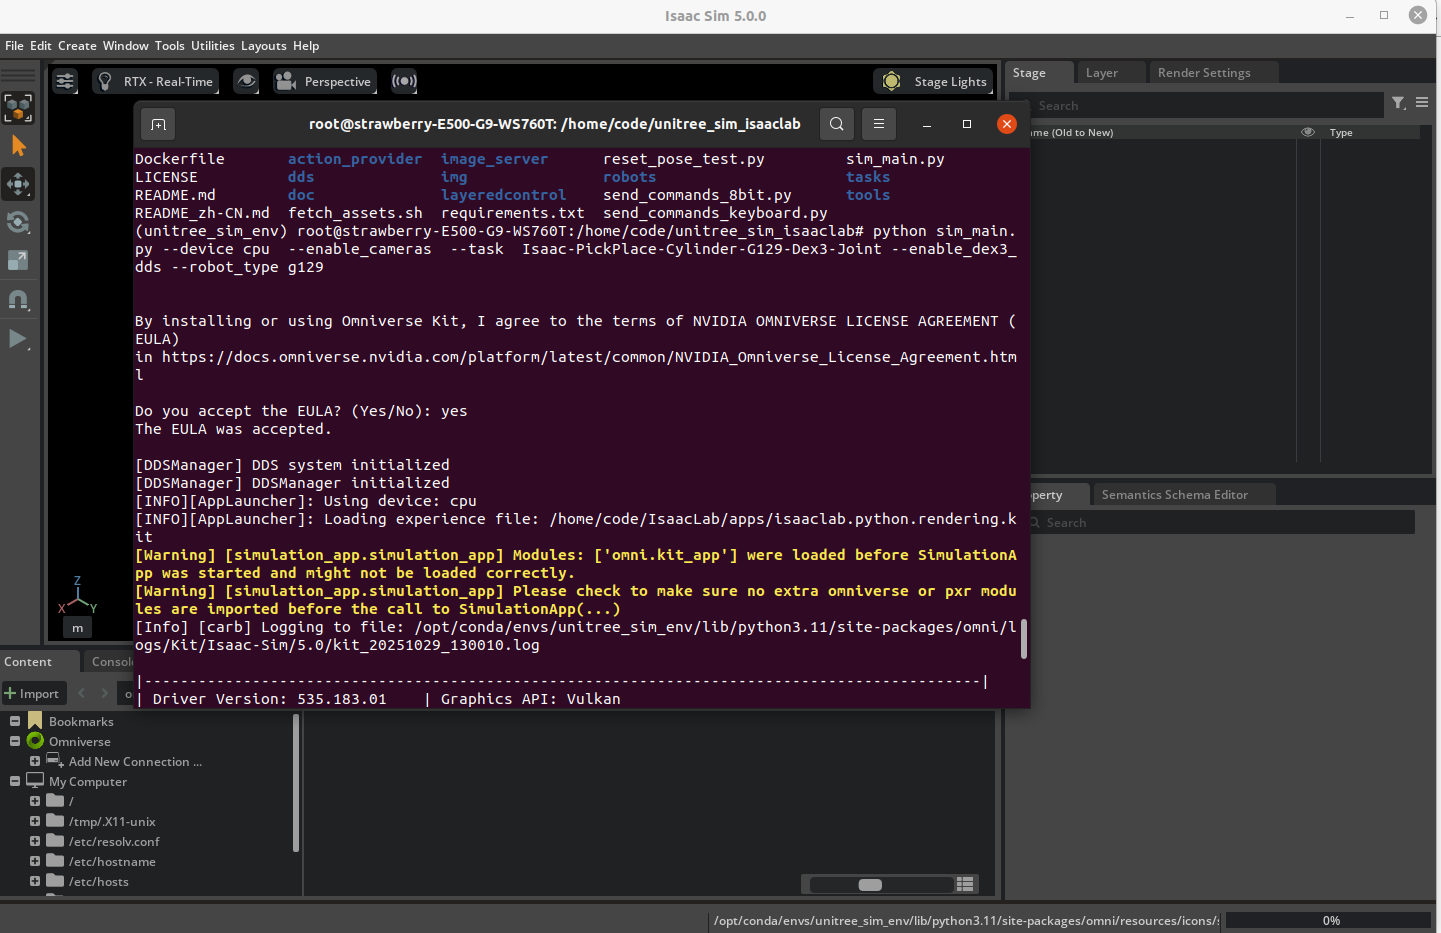 显示有报错:
bash
[MultiImageWriter] Shared memory initialized: isaac_multi_image_shm
Setting process group: 963
============================================================
robot control system started
Task: Isaac-PickPlace-Cylinder-G129-Dex3-Joint
Action source: dds
============================================================
[INFO]: Parsing configuration from: <class 'tasks.g1_tasks.pick_place_cylinder_g1_29dof_dex3.pickplace_cylinder_g1_29dof_dex3_joint_env_cfg.PickPlaceG129DEX3JointEnvCfg'>

create environment...
Setting seed: 42
[INFO]: Base environment:
	Environment device    : cpu
	Environment seed      : 42
	Physics step-size     : 0.005
	Rendering step-size   : 0.01
	Environment step-size : 0.01
[INFO]: Time taken for scene creation : 2.621509 seconds

Failed to create environment: USD file not found at path at: '/home/code/unitree_sim_isaaclab/assets/objects/PackingTable/PackingTable.usd'.
Performing final cleanup...
Current main process PID: 963
Found related processes: ['963', '1384']
Terminating child process: 1384
2025-10-29T13:03:28Z [10,447ms] [Error] [gpu.foundation.plugin] make sure to wait for cmdlist completion using get[Gpu/Cpu]Revision or waitUntilRevisionDone before calling cmdBegin again. DbgInfo: actualSemaphore: 7 expectedSemaphore: 6
2025-10-29T13:03:28Z [10,447ms] [Error] [gpu.foundation.plugin] make sure to wait for cmdlist completion using get[Gpu/Cpu]Revision or waitUntilRevisionDone before calling cmdBegin again. DbgInfo: actualSemaphore: 7 expectedSemaphore: 6
Force killing process: 1384
2025-10-29T13:03:31Z [13,401ms] [Warning] [usdrt.hydra.fabric_scene_delegate.plugin] using high frequency span with attrs is disabled
/opt/conda/envs/unitree_sim_env/lib/python3.11/multiprocessing/resource_tracker.py:254: UserWarning: resource_tracker: There appear to be 1 leaked shared_memory objects to clean up at shutdown
  warnings.warn('resource_tracker: There appear to be %d '
主要原因再与资产文件缺失或路径不匹配:USD 文件"PackingTable.usd"未放置在容器内预期路径下。
bash
# 在主机中的unitree_sim_isaaclab中运行一下代码下载assets
sudo apt update

sudo apt install git-lfs

. fetch_assets.sh

# assets目录
/home/strawberry/zzy/project/unitree/unitree_sim_isaaclab/assets

# 把主机的assets目录映射到镜像里
sudo docker run --gpus all -it --rm --network host -e NVIDIA_VISIBLE_DEVICES=all -e NVIDIA_DRIVER_CAPABILITIES=compute,utility,video,graphics,display -e LD_LIBRARY_PATH=/usr/local/nvidia/lib:/usr/local/nvidia/lib64:$LD_LIBRARY_PATH -e DISPLAY=$DISPLAY -e VK_ICD_FILENAMES=/etc/vulkan/icd.d/nvidia_icd.json -v /etc/vulkan/icd.d:/etc/vulkan/icd.d:ro -v /usr/share/vulkan/icd.d:/usr/share/vulkan/icd.d:ro -v /tmp/.X11-unix:/tmp/.X11-unix:rw -v /home/strawberry/zzy/project/unitree/unitree_sim_isaaclab/assets:/home/code/unitree_sim_isaaclab/assets unitree-sim:latest /bin/bash

# 再运行
python sim_main.py --device cpu --enable_cameras --task Isaac-PickPlace-Cylinder-G129-Dex1-Joint --enable_dex1_dds --robot_type g129注意,如果要暂停容器 :
先按 Ctrl+P,再按 Ctrl+Q 。
这会让容器在后台继续运行,你的会话退出但容器不关。之后你可以用:
bash
docker ps          # 查看还在运行的容器
docker attach NAMES   # 重新进入
如果想要退出某个docker,可以参考如下过程:
bash
strawberry@strawberry-E500-G9-WS760T:~$ docker ps -a
CONTAINER ID   IMAGE                COMMAND                   CREATED        STATUS                    PORTS     NAMES
b1aea70fda06   unitree-sim:latest   "/opt/nvidia/nvidia_..."   14 hours ago   Up 14 hours                         keen_mestorf
cbd8648f759d   hello-world          "/hello"                  15 hours ago   Exited (0) 15 hours ago             festive_murdock
a9175723212e   hello-world          "/hello"                  3 months ago   Exited (0) 3 months ago             ecstatic_solomon
strawberry@strawberry-E500-G9-WS760T:~$ docker stop keen_mestorf
keen_mestorf
strawberry@strawberry-E500-G9-WS760T:~$ docker ps -a
CONTAINER ID   IMAGE         COMMAND    CREATED        STATUS                    PORTS     NAMES
cbd8648f759d   hello-world   "/hello"   15 hours ago   Exited (0) 15 hours ago             festive_murdock
a9175723212e   hello-world   "/hello"   3 months ago   Exited (0) 3 months ago             ecstatic_solomon
如果有的docker内的进程卡住无法退出,也可以直接参考上面直接退出docker。
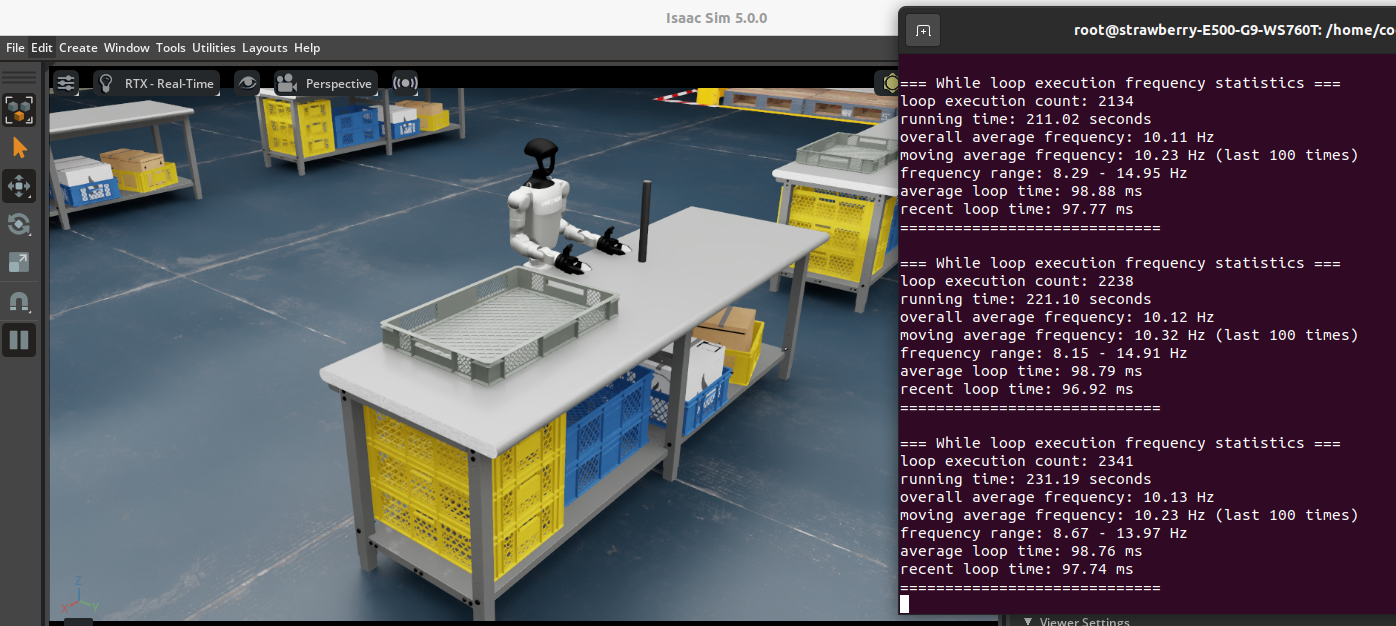 OK,场景启动成功。
后续启动过程:
bash
strawberry@strawberry-E500-G9-WS760T:~$ docker ps
CONTAINER ID IMAGE COMMAND CREATED STATUS PORTS NAMES
f5c675e90e61 unitree-sim:latest "/opt/nvidia/nvidia_..." About a minute ago Up About a minute quizzical_kilby
strawberry@strawberry-E500-G9-WS760T:~$ docker attach quizzical_kilby
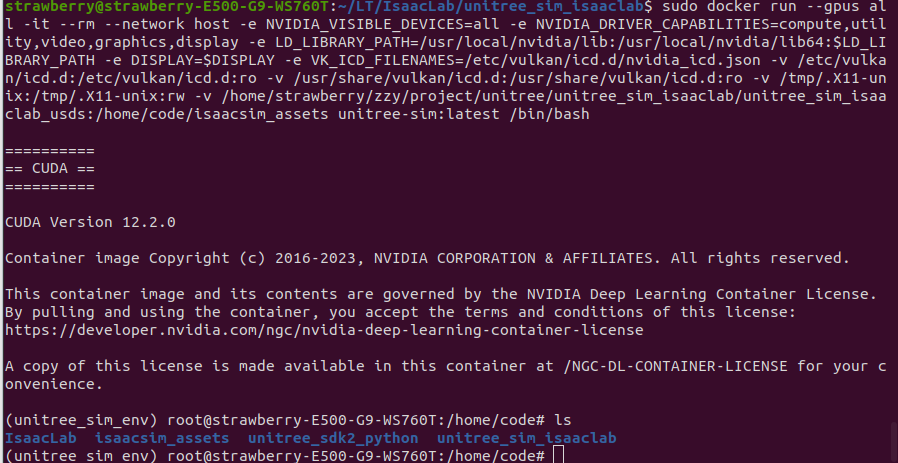
(unitree_sim_env) root@strawberry-E500-G9-WS760T:/home/code# ls
IsaacLab unitree_sdk2_python unitree_sim_isaaclab
(unitree_sim_env) root@strawberry-E500-G9-WS760T:/home/code# cd unitree_sim_isaaclab/
(unitree_sim_env) root@strawberry-E500-G9-WS760T:/home/code/unitree_sim_isaaclab# ls
Dockerfile README_zh-CN.md dds image_server requirements.txt send_commands_8bit.py tasks
LICENSE action_provider doc img reset_pose_test.py send_commands_keyboard.py tools
README.md assets fetch_assets.sh layeredcontrol robots sim_main.py启动命令:
bash
# 查看运行的docker
docker ps

# 重新进入docker
docker attach NAMES

# 进入unitree_sim_isaaclab
cd unitree_sim_isaaclab

# 启动遥操场景
python sim_main.py --device cpu --enable_cameras --task Isaac-PickPlace-Cylinder-G129-Dex1-Joint --enable_dex1_dds --robot_type g129 --headless这里发现一个问题,我想ctrl+c退出isaacsim的进程时,整个isaacsim会无法退出,终止信号一直发出去没作用,是不是因为是docker里运行的代码,没有添加--headless ,所以修改了上面启动遥操的场景。
当isaacsim卡住无法退出:
bash
# 新建一个终端进入docker
docker exec -it NAMES /bin/bash

(unitree_sim_env) root@strawberry-E500-G9-WS760T:/home/code# ps -ef --forest
UID          PID    PPID  C STIME TTY          TIME CMD
root        1150       0  0 08:42 pts/1    00:00:00 /bin/bash
root        1168    1150  0 08:43 pts/1    00:00:00  \_ ps -ef --forest
root           1       0  0 07:06 pts/0    00:00:00 /bin/bash
root          51       1 99 07:16 pts/0    10:20:16 python sim_main.py --device cpu --enable_cameras --task Isaac-Pic
root         584      51  0 07:18 pts/0    00:00:00  \_ /opt/conda/envs/unitree_sim_env/bin/python -c from multiproce
root         586      51  0 07:18 pts/0    00:00:00  \_ [python] <defunct>
(unitree_sim_env) root@strawberry-E500-G9-WS760T:/home/code# kill -9 51
(unitree_sim_env) root@strawberry-E500-G9-WS760T:/home/code# ps -ef --forest
UID          PID    PPID  C STIME TTY          TIME CMD
root        1150       0  0 08:42 pts/1    00:00:00 /bin/bash
root        1169    1150  0 08:43 pts/1    00:00:00  \_ ps -ef --forest
root           1       0  0 07:06 pts/0    00:00:00 /bin/bash

# 退出成功,原来的终端也正常了,后续直接在终端中ctrl+c就能成功退出了
2.2 启动遥操场景
以下是 xr_teleportion 仓库 程序的启动参数说明:
 根据上述参数说明以及仿真环境配置,假设选择手势跟踪来控制 G1(29 DoF) + Dex1 灵巧手设备,同时开启仿真模式和数据录制模式。则启动命令如下所示:
bash
# 主机新建一个终端
(tv) unitree@Host:~$ cd ~/xr_teleoperate/teleop/
(tv) unitree@Host:~/xr_teleoperate/teleop/$ python teleop_hand_and_arm.py --xr-mode=hand --arm=G1_29 --ee=dex1 --sim --record
# 实际上,由于一些参数存在默认值,该命令也可简化为:
(tv) unitree@Host:~/xr_teleoperate/teleop/$ python teleop_hand_and_arm.py --ee=dex1 --sim --record
运行成功:
bash
(tv) strawberry@strawberry-E500-G9-WS760T:~/zzy/project/unitree/xr_teleoperate/teleop$ python teleop_hand_and_arm.py --xr-mode=hand --arm=G1_29 --ee=dex1 --sim --record
16:00:41:826081 INFO     args: Namespace(frequency=30.0, xr_mode='hand', arm='G1_29', ee='dex1', motion=False,     teleop_hand_and_arm.py:96
                         headless=False, sim=True, affinity=False, ipc=False, record=True,
                         task_dir='./utils/data/', task_name='pick cube', task_desc='e.g. pick the red cube on the
                         table.')
16:00:41:827386 INFO     Image client has started, waiting to receive data...                                            image_client.py:134
Serving file:///home/strawberry/zzy/project/unitree/xr_teleoperate/teleop at /static
Visit: https://vuer.ai?grid=False
16:00:44:251344 INFO     Initialize G1_29_ArmController...                                                                   robot_arm.py:63
16:00:44:594336 WARNING  [G1_29_ArmController] Waiting to subscribe dds...                                                  robot_arm.py:105
16:00:44:594550 INFO     [G1_29_ArmController] Subscribe dds ok.                                                            robot_arm.py:106
16:00:44:621617 INFO     Lock all joints except two arms...                                                                 robot_arm.py:117

16:00:44:621819 INFO     Lock OK!                                                                                           robot_arm.py:137

16:00:44:622378 INFO     Initialize G1_29_ArmController OK!                                                                 robot_arm.py:145

16:00:44:622897 INFO     Initialize Dex1_1_Gripper_Controller...                                                   robot_hand_unitree.py:260
16:00:45:039564 WARNING  [Dex1_1_Gripper_Controller] Waiting to subscribe dds...                                   robot_hand_unitree.py:299
16:00:45:039621 INFO     [Dex1_1_Gripper_Controller] Subscribe dds ok.                                             robot_hand_unitree.py:300
16:00:45:039937 INFO     Initialize Dex1_1_Gripper_Controller OK!                                                  robot_hand_unitree.py:307

16:00:45:241771 INFO     [SimStateSubscriber] Started subscribing to rt/sim_state                                     sim_state_topic.py:165
16:00:45:241865 INFO     ==> EpisodeWriter initializing...                                                              episode_writer.py:18

16:00:45:241899 INFO     ==> RerunLogger initializing...                                                                episode_writer.py:33

[2025-10-30T08:00:45Z INFO  winit::platform_impl::linux::x11::window] Guessed window scale factor: 1
[2025-10-30T08:00:45Z WARN  wgpu_hal::vulkan::instance] Unable to find extension: VK_EXT_swapchain_colorspace
[2025-10-30T08:00:45Z WARN  wgpu_hal::gles::egl] No config found!
[2025-10-30T08:00:45Z WARN  wgpu_hal::gles::egl] EGL says it can present to the window but not natively
16:00:45:455205 INFO     ==> RerunLogger initializing ok.                                                               episode_writer.py:35

16:00:45:455458 INFO     ==> task_dir directory already exist, now self.episode_id is:0                                 episode_writer.py:43

16:00:45:455715 INFO     ==> EpisodeWriter initialized successfully.                                                    episode_writer.py:57

16:00:45:455741 INFO     Please enter the start signal (enter 'r' to start the subsequent program)                teleop_hand_and_arm.py:258
[2025-10-30T08:00:45Z WARN  wgpu_hal::gles::adapter] Max vertex attribute stride unknown. Assuming it is 2048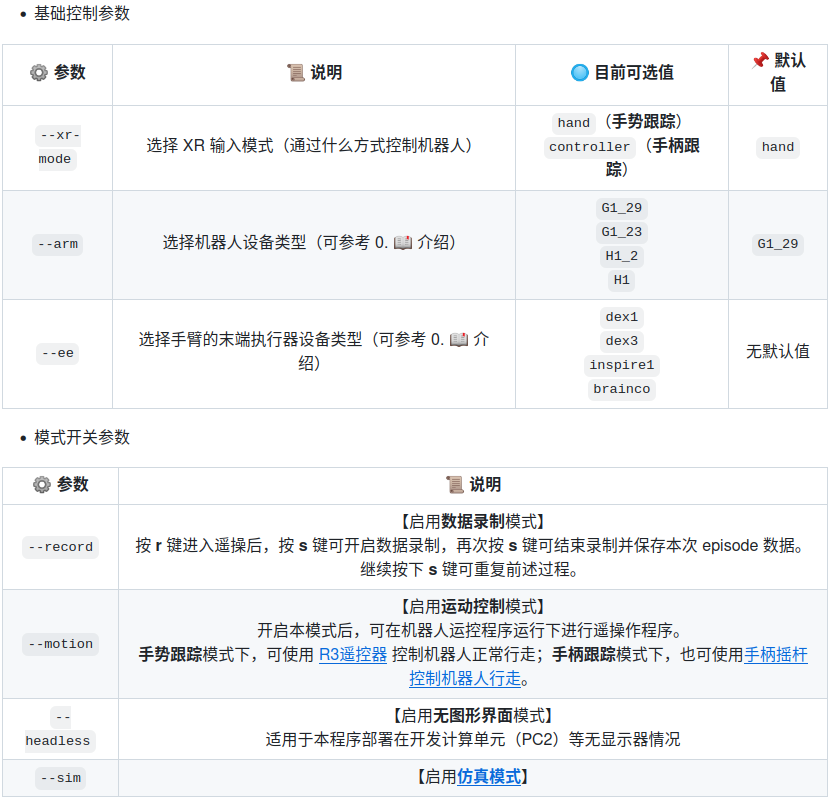
[2025-10-30T08:00:45Z WARN wgpu_hal::gles::adapter] Max vertex attribute stride unknown. Assuming it is 2048但是rerun里没有画面,只有记录的关节变化line图 ,官方代码里把color(rerun中显示图像)注释掉了,但是我还是测试了一下docker中isaacsim摄像头的图像能否顺利发到主机:
经过两个调试脚本:
- unitree_sim_isaaclab/debug_camera.py 在docker端启动遥操后运行
bash
(unitree_sim_env) root@strawberry-E500-G9-WS760T:/home/code/unitree_sim_isaaclab# python debug_camera.py
============================================================
摄像头数据流诊断工具
============================================================

[1] 检查共享内存状态...
[MultiImageReader] Shared memory opened: isaac_multi_image_shm
✓ 共享内存连接成功

[2] 尝试读取图像数据...
  第 1 次尝试: ✓ 成功读取 3 个摄像头
    - head: shape=(480, 640, 3), dtype=uint8
    - left: shape=(480, 640, 3), dtype=uint8
    - right: shape=(480, 640, 3), dtype=uint8
  第 2 次尝试: ✓ 成功读取 3 个摄像头
    - head: shape=(480, 640, 3), dtype=uint8
    - left: shape=(480, 640, 3), dtype=uint8
    - right: shape=(480, 640, 3), dtype=uint8
  第 3 次尝试: ✓ 成功读取 3 个摄像头
    - head: shape=(480, 640, 3), dtype=uint8
    - left: shape=(480, 640, 3), dtype=uint8
    - right: shape=(480, 640, 3), dtype=uint8
  第 4 次尝试: ✓ 成功读取 3 个摄像头
    - head: shape=(480, 640, 3), dtype=uint8
    - left: shape=(480, 640, 3), dtype=uint8
    - right: shape=(480, 640, 3), dtype=uint8
  第 5 次尝试: ✓ 成功读取 3 个摄像头
    - head: shape=(480, 640, 3), dtype=uint8
    - left: shape=(480, 640, 3), dtype=uint8
    - right: shape=(480, 640, 3), dtype=uint8
  第 6 次尝试: ✓ 成功读取 3 个摄像头
    - head: shape=(480, 640, 3), dtype=uint8
    - left: shape=(480, 640, 3), dtype=uint8
    - right: shape=(480, 640, 3), dtype=uint8
  第 7 次尝试: ✓ 成功读取 3 个摄像头
    - head: shape=(480, 640, 3), dtype=uint8
    - left: shape=(480, 640, 3), dtype=uint8
    - right: shape=(480, 640, 3), dtype=uint8
  第 8 次尝试: ✓ 成功读取 3 个摄像头
    - head: shape=(480, 640, 3), dtype=uint8
    - left: shape=(480, 640, 3), dtype=uint8
    - right: shape=(480, 640, 3), dtype=uint8
  第 9 次尝试: ✓ 成功读取 3 个摄像头
    - head: shape=(480, 640, 3), dtype=uint8
    - left: shape=(480, 640, 3), dtype=uint8
    - right: shape=(480, 640, 3), dtype=uint8
  第 10 次尝试: ✓ 成功读取 3 个摄像头
    - head: shape=(480, 640, 3), dtype=uint8
    - left: shape=(480, 640, 3), dtype=uint8
    - right: shape=(480, 640, 3), dtype=uint8

[3] 读取统计:
  成功: 10/10
  失败: 0/10

✓ 摄像头数据流正常

[4] 检查ZMQ服务器端口...
  ✓ ZMQ端口5555已监听

============================================================
[MultiImageReader] Shared memory closed: isaac_multi_image_shm- xr_teleoperate/teleop/debug_client.py 在主机端tv环境中运行
bash
(tv) strawberry@strawberry-E500-G9-WS760T:~/zzy/project/unitree/xr_teleoperate/teleop$ python debug_client.py
============================================================
图像客户端网络诊断工具
============================================================

[1] 尝试连接到 127.0.0.1:5555...
  ✓ ZMQ连接已建立

[2] 等待接收图像数据...
  尝试 1/10... ✓ 收到图像: (480, 1920, 3)
  尝试 2/10... ✓ 收到图像: (480, 1920, 3)
  尝试 3/10... ✓ 收到图像: (480, 1920, 3)
  尝试 4/10... ✓ 收到图像: (480, 1920, 3)
  尝试 5/10... ✓ 收到图像: (480, 1920, 3)
  尝试 6/10... ✓ 收到图像: (480, 1920, 3)
  尝试 7/10... ✓ 收到图像: (480, 1920, 3)
  尝试 8/10... ✓ 收到图像: (480, 1920, 3)
  尝试 9/10... ✓ 收到图像: (480, 1920, 3)
  尝试 10/10... ✓ 收到图像: (480, 1920, 3)

[3] 接收统计:
  成功接收: 10/10

✓ 图像接收正常

============================================================!在这里插入图片描述(https://i-blog.csdnimg.cn/direct/029a6ee943cb45ab81e7a44631e65a1e.png
再次运行:
bash
python teleop_hand_and_arm.py --xr-mode=hand --arm=G1_29 --ee=dex1 --sim --record最后,在终端中按下 r 键 后,正式开启遥操作程序。此时,会显示出record image画面,您可以远程控制机器人的手臂(和灵巧手)。
在遥操过程中,按 s 键可开启数据录制 ,再次按 s 键可结束录制并保存数据(该过程可重复)
但是官方显示的record image只有头摄的画面,而且比较小,以下是官方的画面:
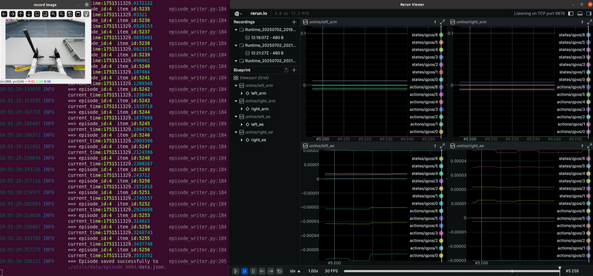
经过我对代码的修改:
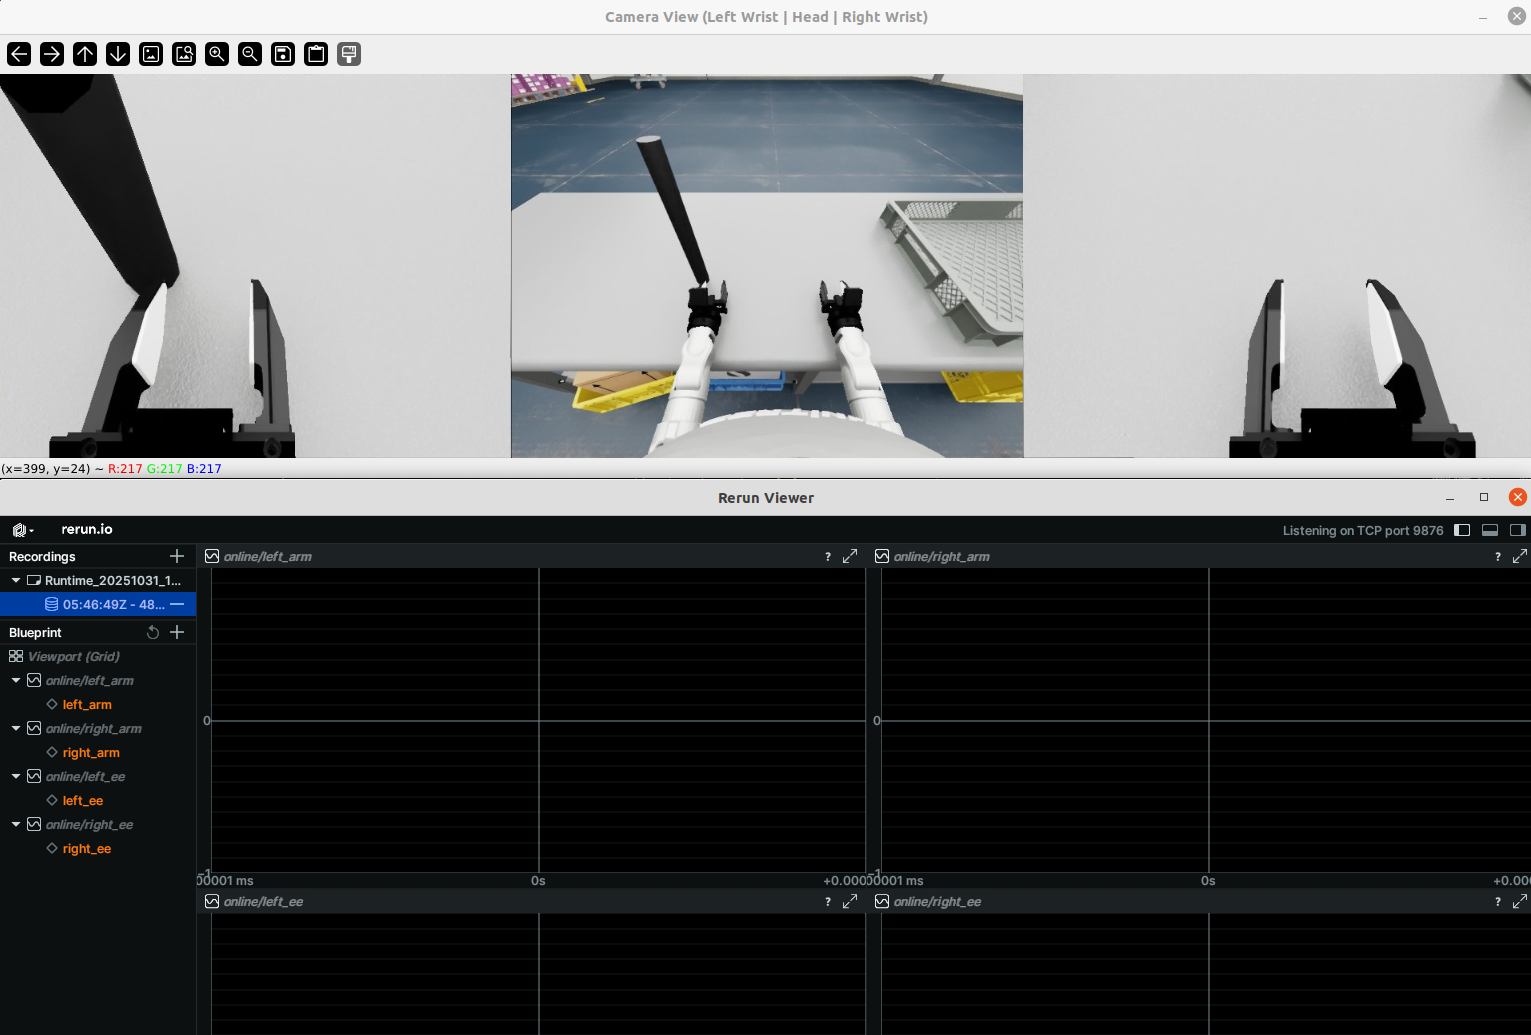 三个相机都会显示画面并放大。
bash
Docker容器 (IsaacSim) ✓
    ↓
共享内存 ✓ (10/10 成功)
    ↓
ZMQ传输 ✓ (端口5555监听)
    ↓
主机接收 ✓ (10/10 图像接收)
    ↓
Teleop共享内存 ✓
    ↓
Rerun记录
2.3 开始遥操
bash
python teleop_hand_and_arm.py --xr-mode=hand --arm=G1_29 --ee=dex1 --sim --record程序正常启动后,执行以下步骤:
-
戴上您的 XR 头显设备(比如 apple vision pro 或 meta quest3等)
-
连接对应的 WiFi 热点
-
打开浏览器应用(比如 Safari 或 PICO Browser),输入并访问网址:https://192.168.123.2:8012?ws=wss://192.168.123.2:8012
注意1:此 IP 地址应与您的 主机 IP 地址匹配。该地址可以使用 ifconfig 等类似命令查询。
注意2:此时可能弹出下图所示的警告信息。请点击Advanced按钮后,继续点击 Proceed to ip (unsafe) 按钮,使用非安全方式继续登录服务器。